Home > Others, Programming > An Exhaustive Guide on Creating Responsive Website Using HTML5 & CSS3

An Exhaustive Guide on Creating Responsive Website Using HTML5 & CSS3

exhaustive-1

Over the recent years, it has been observed that people are preferring mobile phones over desktop computers for browsing the Internet. Building a website that looks perfect and functions appropriately on multiple hand-held gadgets has become the most-trusted method of gaining an edge over your competitors. It is responsive design which plays a vital role in creation of sites that can be accessed smoothly on a variety of devices with different screen sizes and resolutions.

HTML5 and CSS3 have emerged as two of the most applauded web technologies for creating responsive designs that can easily adapt to contemporary mobile browsers and devices. While on the one hand, HTML5 is used for writing the structure of web design, CSS3, on the other hand it offers you the convenience of styling the created web design.

Creating a basic Responsive Website skeleton using HTML5 and CSS3

Well, there are two methods of creating a responsive design. I’ve explained both the methods below:

Method No.1- Using your own coding technique

As the very first method, you can create a responsive design using your own code as shown below:

Output:

As per the above method, you can simply specify the height and width of the device that will be used for viewing the web pages incorporated within the website.

Method No.2- Using Bootstrap framework

As a much better approach compared to the one discussed above, you can create a responsive design using an existing CSS framework like Bootstrap. You can start by writing a basic HTML5 Markup using CSS3 framework as shown below:

Output:
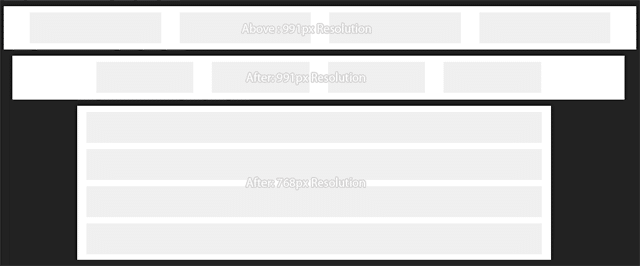
exhaustive-2

As an attempt to make your website design accessible across mobile devices with different screens and resolutions, you need to add the viewport meta tag. This will define how the website design will be displayed on a particular device.

If you observe the above code carefully, you’ll find that the width has been defined to “device-width” which is equivalent to the device’s width. Also, the value of initial scale has been set to “1” for adding a touch-zooming effect to the web page. On proceeding ahead in the code snippet, you’ll find that each page comprises of three basic elements viz:
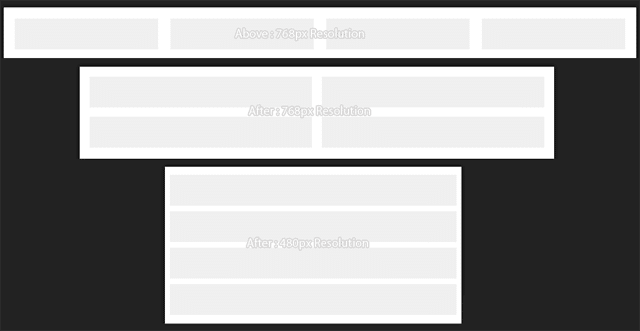
,

and

. The main title of the website page and a separate paragraph has been defined in the custom header area.

Then, there is the tag which includes the main page’s structure. Also, it contains a container

along with .jumbotron class. Here, it is interesting to note that “Jumbotron” is a Bootstrap feature which offers you the flexibility of increasing the size of page heading and adding the desired amount of margin for the effective display of web page content. After this, we have the

tag which includes pre-defined Bootstrap grid classes such as “.col-md-3” and “.row”. Both these classes allow you to arrange the web page content in a grid layout. Last, but definitely not the least, there is a footer tag which includes a paragraph containing vital copyright information.

With the addition of viewport meta tag, your page content will be displayed 1:1. That means, an image with a total size of 350px displayed on a screen with 350px width would occupy the entire screen width.

Creating the head using CSS files

The responsive website that we are going to create will comprise of four different CSS files which have been explained as below:

  • css– As the first CSS file, reset.css will be used for resetting styling of all the HTML elements, thereby allowing you to build your own unique styling without having you to worry about the differences in display pertaining to multiple browsers.
  • css– Next inline is the style.css file which contains all the styling associated with the responsive design under focus. As per your will, you may also opt for diving style.css file into two parts while separating the basic layout styling from the remaining portion of the stylesheet.
  • css– Looking at the preview of the responsive website and clicking on one of the small images available within the main content section, you’ll notice a larger version of the image being displayed towards the top of the web page. The script that’s used for achieving this is called Lightbox2. So, you can opt for downloading Lightbox2 and including the CSS file called lightbox.css.
  • Google WebFonts– As the fourth and last stylesheet, Google WebFonts allows you to use the fonts namely Roboto.

Do note that using multiple CSS and Javascript files increases the count of HTTP requests which in a way results in longer page loading time. So, if you know that you won’t be changing the CSS code again, then it is recommended to combine all CSS and Javascript files into a single file. Unlike this, if you feel that you’ll be changing any of your CSS and/or JS files, it is advised not to go for combining the files using a manual approach as it would making things complicated and highly confusing.

As a bonus tip, you can always opt for a minifier script called minify.js which can automatically combine, minify and cache all the CSS and Javascript files into a single file.

Adding the required scripts

Now that you’re done with including the CSS Fies, it’s time to add the required scripts. The very first script that will be included is Modernizr.js which is basically a feature detection library for HTML5 and CSS3. Next, there is Respond.js which is a script that activates responsive design for Internet Explorer and a range of other web browsers which don’t support CSS Media Queries. Then there is the Prefix Free script which will automatically create all the required prefixes and allow you to write the unprefixed CSS properties. Lastly, there is a script called SlideJS which is used for including “jquery.slides.min.js” into the “js” folder.

The moderated jQuery file will now look like this:

<!DOCTYPE HTML>

Responsive website with HTML5

Building the website structure

HTML5 comes equipped with new elements which allow you to create well structured and easy-to-access web pages. Here’s a look at the critical sectioning elements available in HTML5:

  • section- this element defines a specific part of website along with its related content. Never use this element for pure styling purpose.
  • article- it defines an independent piece of content which makes complete sense
  • header- it defines a header for the website section or document
  • footer- this is used for defining footer of the respective website section or document
  • nav- this defines the set of navigation links that determine the main website navigation
  • aside- it defines the website section that contains secondary content. Here, you need to remember that in case ‘aside’ is added within the article, then the content should be related to the specific article. On the contrary, if ‘aside’ is incorporated outside the article, then the content should be related to the entire website.

So, all the above listed HTML5 sectioning elements must include a heading. By doing so, you can easily create a new section within the HTML5 outline which works as the best match for ensuring excellent search engine optimization of the website. You can use the Outliner tool for creating an accurate HTML5 Outline. Failure to use section within the document would destroy the basic purpose of the HTML5 structured document. Hence, it is recommended to add headings for each section specified within the HTML code, followed by hiding them using CSS. Never hide the headings using display:none as it would remove them from the outline as well. Instead use a CSS property clip for hide them for preventing the website content from getting banned by popular search engines.

That’s it!

Conclusion

If you’re the one who’s been impressed by HTML5 and CSS3 web technologies lately and are planning to build your next responsive website using the same, then I’m sure the above post would serve as your handy guide.

Author Bio:

Samuel Dawson is a well renowned professional & working as Senior Front-End Developer in Designs2html Ltd, a world famous psd to html conversion service company. Apart from this Samuel has efficiently done in-depth research in the field of web development.

The post An Exhaustive Guide on Creating Responsive Website Using HTML5 & CSS3 appeared first on Web Design Blog | Magazine for Designers.

Categories: Others, Programming Tags:
  1. No comments yet.
  1. No trackbacks yet.
You must be logged in to post a comment.