Archive

Archive for September, 2015

Interview with Sam King about Designing Rizon App

September 10th, 2015 No comments
sam-king-rizon-app-featured

The phrase “golden hour” holds special meaning in photography. This is a period at both dawn & dusk where the sunlight is strong and casts very wide shadows. Photographers love to shoot during golden hour because photos feel more dynamic. But how do you know the exact boundaries for golden hour?

Well Sam King asked this same question which drove him to find an answer through app development. Rizon App is a clock that calculates the exact timeframe of golden hour in your timezone.

I got Sam to answer a few questions about his journey building Rizon and his overall skillset as a designer.

Sam King Rizon interview portrait

Q: Can you share a little about your history and the type of work you do? How did you get into this field?

I spent most of my teens messing about with cameras and Photoshop. I ended up shooting for a few magazines. I thought that would be what I would do for my career—but I started to pick up more of an interest in design.

I freelanced as a designer for a couple of years building websites for local companies, sometimes shooting photos and doing branding work for them too. That’s where I really learned how to communicate with business folks and how to be more professional.

From there I got my first full-time job as an in-house web designer at a startup which was the first time I’d worked in a team of other designers. I told myself I would go into the job like a sponge and just absorb all the knowledge they had to share. I think it paid off.

I feel like my grasp of design, especially good design, was developed in that role.

Now I’m in a very similar role: a designer at a startup mainly working on the web. I also have a couple of side projects like an iOS app I spent the last 2 years designing and re-designing.

Q: Do you think your skills in photography help to influence your design work?

Certainly. While the skills are different, there’s a few things that cross over.

There’s things like colour and composition that really help, but they’re the obvious ones. In photography, especially in the type of photography I started with(action sports), it helps to visually see into the future. What I mean by that is I often had to visualize where the rider would be at the point I’d need to take the photo so I could set up lights and figure out the best composition. I use that skill every day in design—visualizing where certain elements will go and how they work with other elements.

Q: What sort of things do you look for in a high-quality interface design?

For me, the main question is: “what is the one thing I need to do with this interface?”

If there are too many competing actions, it’s often a sign that the interface, or product, needs more focus. Another big thing for me is consistency throughout the whole interface—a solid hierarchy and structure helps to combat the issues with inconsistencies.

Q: Let’s talk a little about Rizon. What does it do and how did the idea for this app come about?

So the “ah-ha” moment happened in a book shop in New York. I saw a printed calendar hanging on the end of a bookshelf that detailed when the sun set and rose for New York.

That made me think how annoying it is to find Golden Hour(the period of light just after sunrise, and just before sunset which is perfect for taking photos outside). It changes so much over the course of the year and depending on where you are, it may not even be an hour as the name suggests. Sometimes it’s much shorter, and sometimes much longer.

A lot of the apps I found that already did this were way too complicated with numbers and symbols all over the place, or were just not very pleasing to look at. And this was before the simplification that iOS 7 bought to the App Store.

On the flight back to London I sketched out a few ideas for a very basic app that just listed the times and sent you reminders. Over the next year or so on evenings and weekends I developed the idea further, trying to find a way of showing the overall light for the day and making the whole thing a little more interactive.

Q: How much planning & attention was paid to Rizon’s UI/UX before launching in the App Store?

There were a few sketches, many prototypes, and a few different versions before I ever got it ready for development. I got in touch with an awesome developer, Malolan, and over the last 4 months we got it ready for the App Store.

We opened up a Beta using TestFlight and invited the photography and design community to try it out while we worked on polishing the features. They were really valuable in terms of getting feedback about things they found difficult or weird. A few of the things you see in Rizon are a direct result of this feedback.

I think if we just went straight to the App Store we’d have a lot of annoyed customers right now!

Q: What was the process like for creating the Rizon landing page? Was there any particular style or goal in mind?

When I started designing Rizon I hadn’t really envisioned the actual amount of work involved in creating an app. The landing page was almost an afterthought. As we were getting closer the beta launch, it dawned on me that we actually needed a way to get people to sign up to this thing.

With Rizon being a photographers’ tool I knew it needed to communicate that, so nice photos were a must. I staged a few photographs of my phone with Rizon on the screen surrounded by some things photographers would instantly recognize—rolls of film, lenses, and cameras.

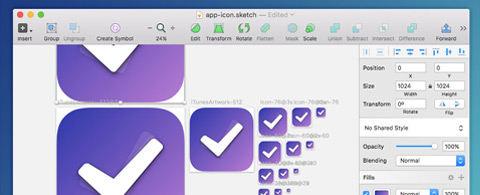
I also used the App Icon as a key element at the top of the page as that’s what people will recognize on the app store.

Overall it needed to echo the simplicity of Rizon, use the colours of the interface, and the main action needed to be clear.

Q: Was it difficult collaborating with a developer located in a completely different country? How did you manage a consistent workflow to get the project completed?

Obviously the time difference kind of sucks but we use it to our advantage. We use Slack as our main communication and it’s worked out great so far. We have channels for specific topics like #reminders or #animation so communication is pretty focused.

We also used Git to manage passing code around which I was already comfortable with. Before this project I hadn’t touched Obj-C. But doing it this way gave me the confidence that I wasn’t going to break something and I could always revert my changes if I did.

The actual workflow went something like this: I would work on some design stuff in the evening, at which point Malolan is probably at work, but available to answer any quick questions I might have. He usually gets home around the time I head to bed so he would then develop the designs in the evening while I slept. I’d wake up and normally there would be a new build for me to try out, so I’d put it on my device and play around with it for the day. The cycle would then continue like that.

I’m still amazed that we got something out in 4 months of evenings and weekends with just the two of us working on it. A true testament to Malolan and the awesome developer he is.

Q: Do you have any plans for big updates or companion apps related to Rizon?

Definitely big updates to Rizon. The users that have given feedback so far have given us some great ideas.

The hard part is going to balance the simplicity of what Rizon is today, and the mess that it could become if we chase too many features. Right now Rizon does a few things, but does them well. We want to stick to that philosophy.

Q: Who are some of your favorite designers and/or what are some of your favorite designs(apps or otherwise)?

My favourite designers are designers I know personally. Pretty much every designer I’ve ever had the pleasure of working with in a team. The design celebs though are probably: Erik Spiekermann for creating my favourite font, FF Meta Serif; and Massimo Vignelli just because.

Favourite apps right now would be Monument Valley, Darkroom, and Reporter.

Q: If you had any advice for fresh young designers, what would it be?

If you’re truly passionate about design, find a more experienced designer to learn from. There’s infinite value in a great mentor­—especially if you absorb everything they already know. Why would you do it the hard way and figure it all out by yourself? Chances are someone’s already had the same problem, and they likely have great advice so listen to them.

If you want to check out Rizon you can find it in the app store for iPhone, iPad, or iPod Touch.

Read More at Interview with Sam King about Designing Rizon App

Categories: Designing, Others Tags:

8 Simple Rules for Polished Video Tutorials

September 10th, 2015 No comments
00-featured-youtube-recording-tutorials

Video on the web is an ever-growing medium, shaping the way we learn things every day.

Not sure how to use the newest Photoshop tools? Go to YouTube. Want to learn how to improve your portfolio website? Check out a course at Lynda.

Video tutorials are an excellent way to not only learn new skills, but to share your knowledge with a worldwide audience. Unfortunately no matter how in-demand your content, a poorly-produced video tutorial will likely be abandoned within the first thirty seconds.

On the flip-side if you can put together a high quality video tutorial, you can use it to build your brand, gain quality traffic and leads, as well as share your skills. Here are eight simple tips you can use to make sure your video tutorial is everything it should be.

1. Keep it focused and to the point.

There are no set rules for how long your video should be, since every topic varies in complexity.

I will say, however, that you should strive to keep it as short as possible given the content you must present.

Too many tutorials suffer from the producer’s tendency to stretch it out in order to make it feel more substantial. Unfortunately viewers don’t have the time to sit through an overly long tutorial padded with fluff.

They want to press play and learn exactly what the title promised they would learn in as little time as possible.

Don’t use seven words when four will do, and ALWAYS remain on-topic.

2. Write a script or outline.

While it may be tempting(and easy) to just wing your tutorial, once you fire up the mic and recording software you’ll probably wish you were better prepared. Trust me, I’ve made this mistake myself and a few bad takes can really kill your confidence for the rest of the shoot.

I recommend either writing out a full script word-for word, or (if you’re quicker on your feet) an outline of steps.

A script is great if you don’t trust yourself to remember everything you want to say through the process, but the drawback is it can often sound like you’re reading. That’s not necessarily a deal-breaker for the listener, but anything that sounds stiff is more likely to be tuned out.

Personally, I like to write an outline. I plan out every step and add any points I want to make into a bulleted list. I can then look at it as I go and get the prompts I need to include everything that’s important while sounding natural and conversational.

3. Always use voiceover.

I cannot tell you how annoyed I get when I find what seems like the exact tutorial I need, only to find blaring techno music playing in place of a helpful voiceover. I attribute this to pure laziness on the part of the producer – and the result is usually a hard-to-follow mess of a video.

All good tutorials can benefit from a little voice guidance no matter how visual the subject matter. And as my dad says: “anything worth doing is worth doing right.”

4. Voice quality matters.

While we’re on the subject of voiceovers, you’ll want to make sure the quality of your voice is worth listening to.

If you’re like most people, you probably cringe at the sound of your own voice. Don’t worry – that doesn’t mean other people will. But there are several things you can do to make your voice sound its best:

  • Warm up your voice with vocal exercises. Tongue twisters will help your enunciation and humming will improve your tonality.
  • Watch your posture. Sitting up straight will allow you to breathe properly and give your voice more strength and clarity.
  • Slow down. Speak slowly and with purpose.
  • Stay hydrated. Taking regular sips of water will help your mouth from becoming dry, which can lead to annoying mouth sounds, such as smacking (you can edit out the parts where you take sips in post-production)

If you really don’t like the sound of your own voice and you have a budget to work with, you always have the option of hiring a professional voiceover artist. If you choose to go this route I would recommend recording the video with your own voice, following your script or outline, and instructing the pro to simply record an alternate track swapping out his or her voice for your own.

5. Audio/Visual quality matters.

Other than top-notch quality content, the best video tutorials also have primo picture and sound quality.

Make sure your video looks its best by recording in the correct aspect ratio. 16:9 is the current widescreen standard. Anything else will result in black bars along the top and bottom or left and right sides of the viewport.

Also be sure to use a screen capture software program that doesn’t impose a watermark.

As far as sound quality goes, you should make a minimal investment in a decent USB microphone. I personally use the Rode Podcaster, but it is fairly expensive at over $200. The Blue Snowball is a good choice and costs less than $50.

You could go even cheaper with a headset mic if your budget is really tight. Just avoid using your computer’s built in mic if you can, as it will definitely make your video sound amateurish.

Record in a quiet room with as many soft surfaces as possible. In general carpet is much better than a hardwood floor in terms of sound quality, as there is something there to “dampen” the sound. Close the windows and turn off the A/C to make the room dead silent.

When you’re finished you can run some audio filters over the audio to make it sound as clean as possible.

6. Move your mouse purposefully.

If your tutorial is focused on your computer screen, keep your mouse movements to an absolute minimum. Use it only to complete the necessary steps, and when you aren’t actively using it for a specific purpose, it should remain still.

A hectic, fidgety mouse will only distract and annoy your viewers. Sit on your hands if you have to.

7. Edit with a critical eye.

Once you’ve completed your video shoot, you will want to trim out the fat.

Are there parts where you were waiting for a program to fire up? Did you trip up your words and need to record do-over? Cut it out!

Most screen capture software allows you the option of a timeline based editor, so make use of it to keep the runtime down and the content rich.

8. Don’t forget the text.

Your finished video is perfect. But a well-phrased title gets people to actually click the play button.

Make sure your title is succinct and says exactly what the viewer should expect to learn. Avoid the temptation to get too cute or abstract with your title, as it could cost you valuable clicks.

You will also want to write a detailed & thoughtful description of the video. This is not only to hook potential viewers, but for the search engines as well. You want to be found by as broad an audience as possible, and if there are no written words, search engines won’t know what your video’s about.

In certain cases you might even want to write out a full text transcription, particularly if the video will live on your own website. You’ll see some SEO benefits of having everything written out in text, and it’s especially beneficial if you happen to have any hearing-impaired viewers.

Final Thoughts

Producing high quality video tutorials isn’t all that difficult if you know what the ingredients are. It’s only a bit more effort to pull off than a lesser quality video. Knowing that it will be floating around cyberspace (with your name attached to it) forever, why not make it really sparkle?

Read More at 8 Simple Rules for Polished Video Tutorials

Categories: Designing, Others Tags:

Prepare an iOS-Ready App Icon in Sketch with AEIconizer

September 10th, 2015 No comments
00-aeiconizer-plugin-sketch

Sketch App makes it very easy to make a properly sized artboard for iOS icons. It also offers an exceptional export feature for those icons that need to be exported for retina.

But like any software, Sketch does have its flaws. In this case there’s no native way to replicate your icon design into the sizes required by Apple.

This process requires a plugin called AEIconizer & I’ll be showing you how to use it.

Installing Sketch Plugins

I’ve written at length about how to open the Sketch plugin folder and copy downloaded add-ons into it. But I actually find it much easier to use the Sketch Toolbox for plugin management.

Shahruz Shaukat created this Mac App as a way to search for and install Sketch Plugins in mere seconds, which is delightfully simple and highly convenient if you’re always looking for new ways to improve your workflow.

So download the Sketch Toolbox and do a search for AEIconizer, then click “install”.

Installing Sketch Toolbox and AEIconizer

Creating an iOS Artboard

Once in Sketch press “A” artboard and select the largest iOS icon artboard there is (as of this writing it would be the 180 – iPhone 6 Plus artboard).

It doesn’t really matter what size you’re designing but it helps to stay consistent.

In fact, your artboard can be any random size you like, only that is must be square.

Using AEIconizer to Breed iOS-Ready Copies

You don’t need to be finished with your icon design to use AEIconizer because it always leaves your original artboard untouched. But always make sure that you run AEIconizer (control+shift+I) on the original artboard.

If you make changes to your original design simply run the keyboard shortcut again and let AEIconizer update your artboards accordingly.

Making Copies with AEIconizer

When you’re done, simply export all the artboards!

Definitely the quickest & easiest method for automating your iOS icon design process. If you’re new to Sketch it might take some time to acclimate but AEIconizer is more than worth learning.

Read More at Prepare an iOS-Ready App Icon in Sketch with AEIconizer

Categories: Designing, Others Tags:

Adobe Reveals New Creative Cloud Mobile Apps

September 10th, 2015 No comments
00-featured-adobe-presentation

Apple hosted a large special release event on September 9th in San Francisco. This included revelations of a new iPad Pro, new WatchOS, along with details about the iPhone 6S.

But interestingly enough this also included a brief presentation by Adobe’s Director of Mobile Design Eric Snowden. He demonstrated a few of Adobe’s new mobile applications that may revolutionize the way Creative Cloud designers do their work.

One such product is Adobe Comp CC which is a wireframing & layout design tool. It’s made for the iPad and it’s meant to connect seamlessly into Adobe’s preexisting workflow.

This means anything you design in Adobe Comp can be shared & edited inside Photoshop, Illustrator or InDesign. The idea is to keep people working on-the-go. Comp CC is meant to be a quick editing platform where designers can make changes, start a new project, or push small updates before moving back to the desktop.

Similarly the presentation included demos of Adobe Photoshop Sketch along with a new mobile image editing app named Photoshop Fix.

It seems these are still very new programs that are still working their way into the Adobe marketplace.

More details will be released at Adobe’s MAX Conference in early October. Curious creatives should keep their eyes & ears open for any news about these applications, their benefits to the creative workflow, and their potential release for Android devices down the road.

Read More at Adobe Reveals New Creative Cloud Mobile Apps

Categories: Designing, Others Tags:

What Apple Pencil means for designers

September 10th, 2015 No comments

Yesterday’s Apple keynote introduced changes to a range of Apple devices, but only one new product was announced: the Apple Pencil, a stylus designed for use with the iPad Pro.

Much has been made of the fact that Steve Jobs dismissed styluses back in 2007: “Who wants a stylus? You have to get em’, put em’ away. You lose them. Yeuch.” However, Jobs was speaking at the launch of the original iPhone, a 3.5? device that wouldn’t have benefitted from a stylus at all. Yesterday’s announcement went hand-in-glove with the announcement of the 12.9? iPad Pro, a touch screen large enough to enable real creative work.

What we’re used to seeing in Apple keynote presentations are games, what we saw yesterday were dual announcements by large software manufacturers who target businesses: Microsoft demoed new versions of Office, designed for iOS9; Adobe demoed their latest mobile CC offshoot, Photoshop Fix. Neither the Apple Pencil, nor the iPad Pro, are aimed at the domestic market; both products are intended as professional tools.

The Apple Pencil detects pressure, and the angle at which it’s applied, as well as its position on screen to within a single pixel. It’s a great step forward for creating on a mobile device. As convenient as fingers are, a stylus acts like a lever, allowing you to make the kind of gestures that are impossible to achieve with a single digit. Compare finger painting with Jackson Pollock.

Of course, the Apple Pencil isn’t particularly innovative. Adobe already have a solution, as do Wacom, and Sensu, and a number of others. So to an extent Apple is playing catch-up. But Apple don’t innovate, they never have. Apple are rarely first to market, but their products are usually well refined solutions. Apple is a great barometer of change in the industry — they usually jump on the right bandwagon at the right time.

Apple Pencil, and all styluses, have an uphill battle against far more refined tools. Craft Design Technology’s Brush Pen for example, makes marks that no stylus I’ve tested has come close to matching. The challenge for stylus makers over the next few years will be to match quality to convenience. No one will get it 100% right, so the answer for designers (budget permitting) is probably to purchase a range of styluses in order to have as much flexibility available as possible.

We’ll have to wait until November to try out the Apple Pencil, but its arrival may herald more expressive, more diverse design trends in the coming years.

LAST DAY: 250 Awesome Vintage Logos, Labels and Badges – only $10!

Source

Categories: Designing, Others Tags:

The Importance of Context-Shifting in UX Patterns

September 10th, 2015 No comments

Have you ever had a day at work where you were constantly put towards a new task as you were ramping up on the current one? It feels jarring at best, and completely frustrating and time-wasting at worst. In recent years, employers at big companies have begun to consider the cost of context-shifting—the time spent re-adjusting your brain to a different task adds up, causes frustration in employees, and thus: loses money. It follows that User Experience on a website works the same way.

Any time a new user visits your website, they do so with trepidation. It’s the reason that all sites begin to use the same patterns over time. For example, people tend to know how a radio button group works. You’re giving your users an interaction they already understand. But a lot of big sites don’t consider that by changing the placement of elements in the UI completely upon interaction, you’re also asking your user to readjust to this new view. This lack of context is an anti-pattern: we’re not gracefully showing the user what changed and why.

The associations of space, time and placement can help an interaction seem more fluid and intuitive. It needn’t be over-the-top. Think of clean, minimal UI designs. They can be easy to navigate and look very elegant, but it doesn’t mean they are easier to make.

Let’s give these placement changing interactions a name: context-shifting UX. Then we’ll attempt to demystify with some examples and techniques.

Before we dive into solutions, it’s important to note that any one of these can be overdone. Our brains (and subsequently, most living things) have evolved to especially take note of something in motion. This evolutionary trait is in place to keep us safe and alert, however, the part of your brain that kicks up adrenaline instinctual for survival is the part triggered when something unexpected moves. Animation is fantastic! The web is a static, droll, box without it. But when it comes to UX animation, subtlety is key.

The power of most of the techniques we’ll cover are in combining them. Throughout the article I’ll illustrate this with complimentary approaches such as the Pen below. It’s recommended to see the full demo.

See the Pen map 30 by Sarah Drasner (@sdras) on CodePen.

Revealing

Imagine a modal that reveals itself on click. Anything we pop onto the screen without warning has the potential to cause unease. Modals are powerful because they have a commanding and attention-grabbing state, but are often disliked, in part because they can be so jarring.

If we can reveal the modal in a more nuanced way, say by expanding, scaling, or flipping it, we suddenly create the opportunity to guide our users from one state to another. We’ll get just as much attention as a jarring modal, or perhaps even more so, because our brains have evolved to detect movement.

Revealing states (think of a modal as a “state”) are particularly useful because we can play some slight-of-hand tricks that make everything seem very fast. We can lazy-load the hidden state after the rest of the page is done, but keep it dormant and paused, so that it can easily come when called by a trigger such as a button or even a scroll event. This has the potential to make this technique feel seamless and intuitive. I’m not the only person who’s considering UX and revealing states in animation, check out this great article from Val Head on A List Apart, too.

Morphing

A visually obvious transition technique is morphing. If you need to get from one state to another, the simplest thing you can do to relax that transition is to morph one shape into another. It can be quite a lovely effect!

UI flourishes that use concepts like transformicons have become popular because they are elegant, informative, and enjoyable.

Both SVG and CSS are good options for these kind of UI animations. I’ve found, from working with both, that each have their strength and weaknesses. CSS easily tweens round to square and back again with border-radius. It can also handle large quantities of scale transforms gracefully, while SVG, beyond a few multitudes, will appear pixelated before recovering. However, SVG is built for drawing. It is well suited for complex shapes. You can tween path or even shape data with JavaScript, previously with SMIL (no longer recommended because of discontinued support), and soon CSS with some new SVG Styling Properties in working draft with the W3C. Snap.svg is well-known for tweening path data with similar numbers of points gracefully, and GSAP offers similar capabilities with their Attr plugin. You can also make an SVG look like it’s drawing itself for morphing effects by animating the stroke-dashoffset, as you see in the demo when the close button disappears.


Morphing and revealing, when orchestrated in tandem can create informative and intuitive UX patterns, demonstrated in the Pen above.

The combination of effects mean that the user interface can come when called.


Rather than moving through popping modals or multiple screens, the map marker morphs into the information the user needs, the inputs move out of the way for the user to write in their email, and the submit state tells you immediately that something is loading.

Everything is already on the page waiting to be activated.

Isolation

People do not keep steady focus on your UI no matter how clean your UX. Eyes move around in a phenomenon called Saccade, creating a three dimensional mental map of a scene, yet focusing on points of interest. If you consider that your site ideally siphons a wide user base into smaller sections depending on their interest, narrowing the scope of what they are scanning is helpful.

Here, we illustrate how once the user decides their relative path of interest, the design shifts to guide them, giving them less area to scan and making it more clear where their attention should lay (see full pen here):

See the Pen map 30 by Sarah Drasner (@sdras) on CodePen.

Style

Any of these techniques need to be married with the appropriate style. I’ve written before on how to accomplish appropriate style and branding communication within a motion design language. The morphing/revealing Pen I showed earlier has a sine/single curve easing. Compare this to the bouncy easing in this Pen:

See the Pen map 30 by Sarah Drasner (@sdras) on CodePen.

The bouncing easing gives things a more more expressive and elastic tone. Both the above example and the map example complement the palette and type of design. The motion language in context-shifting has to be married with the rest of the design. If it didn’t, it would seem out of place. Imagine the bouncy feeling in the slick map design—it would be weird. We’ve used different context-shifting techniques in each example to support the site’s branding.

The style can also change the way that the context-shifting action is registered in our brains. This gooey menu by Lucas Bebber is a more memorable and unique way to register where items are going and where they have gone than other ways of accomplishing the same beginning and end states. Being memorable for creativity and style is always a good thing. Lucas’ series of Pens demonstrating this relatively simple technique have a combined view count of almost 320,000!

The relative style of easing can be used the same way you might think of a color palette. Most company use accent colors sparingly to balance a complete color palette and call attention to certain key points:

accents in palette and ease
We can apply the same accent logic we know from creating palettes to creating a site’s eases (images made with Adobe Color CC, and GreenSock’s ease visualizer)

Let’s say all of the easings on your site are more linear, and something you trying to attention to snaps or bounces onto the screen. That makes it stand out in significance. In the earlier demo, the only bounce ease I used was on the check, upon confirmation of success.

tl.fromTo(check, 0.2, {
    scale: 0,
    rotation: -30
  }, {
    scale: 1,
    rotation: 0, 
    transformOrigin: "50% 50%",
    // ease out with back ease which has a single exaggerated bounce
    ease: Back.easeOut
    // begin according to a relative label
  }, "done+=7.1");

This is only one example of this kind of logic in the whole interaction.

Drag and Drop

You learn more by doing. It’s an old adage, but an accurate one. Let’s use this old wisdom and apply it to our UX patterns with context-shifting in mind.

Rather than simply selecting an item and having it transition before the viewer’s eyes, interconnectivity between states of a UI can be reinforced very strongly when the user themselves are the ones that carry the action forward. Consider these very well done Drag and Drop Interactions by Mary Lou (Manoela Ilic) on Codrops.


She shows a plethora of ways this can be accomplished by the user for a variety of use-cases, each time, the interface quickly comes to greet the user, enforcing a fluidity of movement from one juxtaposition to another.

The drawers come out, and are put away when the user has finished their selection. It would be difficult to move any piece into a separate compartment without the user remembering that they have placed it there—much harder than if it had collapsed or simply vanished of it’s own accord.

Placement

You may find that you’re not as excited about animation as I am. Facilitation of seamless context-shifting can be still achieved without animation, but instead, with more calculated placement of objects. The clearest course is simply to place elements near one another. Here’s an example of this in terms of collapsing navigation.

This is has the potential to be much more complex than it sounds. With dozens or more links and interactions on a page, keeping the next state close to previous transition requires prior planning, and could mean design reorganization.

Any good UX user flow will consider the relative trajectory of a user navigating the site. This kind of organization should be something that is built on something like a Story Map where this is already taken into account. A placement-only implementation of context-shifting is least recommended, because it is less malleable as pieces of the UI become more like puzzle pieces, and because of their lack of fluidity, the placement of elements becomes more brittle.

Subtle Queues

Shifting from one view to another is not the only important context-shifting behavior. Some symbolize something that has happened and will happen. Small examples of this are:

  • A dropdown selection changing other contexts on the page
  • A loading state
  • A button being pushed
  • A login being rejected
  • A form being submitted but not having gone through yet
  • Something saving

When these type of changes occur, it might not make sense to have a grand change, but still signify that the state of the page has changed or is in the process of transitioning- creating a context in and of itself. Considering the techniques we spoke about earlier, we might ask ourselves:

  • Are we captivating the viewer during the transitional state, or is it simply a small means to arrive at the end state?
  • Will this transitional state be reused for other instances? Does it need to be designed to be flexible enough for multiple placements and failure conditions?
  • Does the movement need to express the activity? An example of this would be the user saving something that’s not complete yet, in which case an anthropomorphization of “wait” would help communicate this.

Asking questions like this before the design is implemented helps us discern how to communicate wordlessly with our audience.


Again, these techniques are stronger when combined. By writing this article I am not suggesting people only use what I outlined. Quite the contrary, context-shifting is a fundamental piece of intuitive interface design, and we’ve only hit the tip of the iceberg. The purpose of detailing each is to provide people a jumping-off point so that they feel they can experiment. User Interface designs become boring when they are redundant. There is a lot of space between humdrum hide and show and a confusing popup zooming around the screen. There is space for invention, where thoughtful design meets interactivity.


The Importance of Context-Shifting in UX Patterns is a post from CSS-Tricks

Categories: Designing, Others Tags:

Sponsor: An Event Apart

September 10th, 2015 No comments

Set yourself apart. Get better at what you do today and find out how you’ll be doing your job in a year or two. An Event Apart—three days of design, code, and content for people who make websites—is where ideas like responsive design and mobile first were launched, and where this year’s attendees are already learning how grid layout, CSS shapes, and other advanced techniques will fundamentally change…well, everything. Don’t miss it!??

Direct Link to ArticlePermalink


Sponsor: An Event Apart is a post from CSS-Tricks

Categories: Designing, Others Tags:

Office Hours, Now With Themed Sessions

September 10th, 2015 No comments

Our brand new Office Hours has been going great! We’ve gotten to meet some of you and help you out of some problems.

We’ve learned, though, that many of you just like to listen, talk shop, and don’t necessarily have a problem you need help with right this second. So, we’re going to start having a theme for our sessions. You can still ask any question you want, but during any question-free time, the session leader will show off and teach stuff around that theme.

For example: On September 16th my own session will be around build tools. I have my eye on an open source project that we could fork and add some nice stuff to. On September 18th, Val Head (!) will be web animation themed session. The September 14th session with Lara Schenck will be themed for WordPress. Pretty cool eh?

We’d love to have you at an upcoming Office Hours session! You just need to be a member of The Lodge.


Office Hours, Now With Themed Sessions is a post from CSS-Tricks

Categories: Designing, Others Tags:

The State of Front End Tooling

September 10th, 2015 No comments

Ashley Nolan gathered data on the the tools we’re using these days as front end folk. Spoilers: Sass, Gulp, jQuery. But there’s a lot of interesting and somewhat surprising data to explore in here.

Direct Link to ArticlePermalink


The State of Front End Tooling is a post from CSS-Tricks

Categories: Designing, Others Tags:

33 Powerful Blue Startup Websites for Design Inspiration

September 10th, 2015 No comments
25-san-francisco-beer-week-website.jpg

Modern startup design trends have come a long way since their initial inception in the early-to-mid 2000s. The field of web design itself has adopted a new paradigm with CSS3 properties, advanced JavaScript support, and loads of free open source code. It’s easier now than ever before to launch a captivating startup with free resources found online.

If you have an idea for a company or product then don’t wait around! Prototyping & wireframing should be the first step before launching a new site. The problem is that you may not even know where to begin regarding which page elements to include, what style of layout, or how to handle responsive design. Thus I’ve collected a series of powerful startup layouts for design inspiration. Base some of your ideas off these concepts and see what else you can come up with.

Realtii

Read more…

Categories: Designing, Others Tags: