Is Your Computer Stable?
Over the last twenty years, I’ve probably built around a hundred computers. It’s not very difficult, and in fact, it’s gotten a whole lot easier over the years as computers become more highly integrated. Consider what it would take to build something very modern like the Scooter Computer:
- Apply a dab of thermal compound to top of case.
- Place motherboard in case.
- Screw motherboard into case.
- Insert SSD stick.
- Insert RAM stick.
- Screw case closed.
- Plug in external power.
- Boot.
Bam done.
It’s stupid easy. My six year old son and I have built Lego kits that were way more complex than this. Even a traditional desktop build is only a few more steps: insert CPU, install heatsink, route cables. And a server build is merely a few additional steps, maybe with some 1U or 2U space constraints. Scooter, desktop, or server, if you’ve built one computer, you’ve basically built them all.
Everyone breathes a sigh of relief when their newly built computer boots up for the first time, no matter how many times they’ve done it before. But booting is only the beginning of the story. Yeah, it boots, great. Color me unimpressed. What we really need to know is whether that computer is stable.
Although commodity computer parts are more reliable every year, and vendors test their parts plenty before they ship them, there’s no guarantee all those parts will work reliably together, in your particular environment, under your particular workload. And there’s always the possibility, however slim, of getting very, very unlucky with subtly broken components.
Because we’re rational scientists, we test stuff in our native environment, and collect data to prove our computer is stable. Right? So after we boot, we test.
Memory
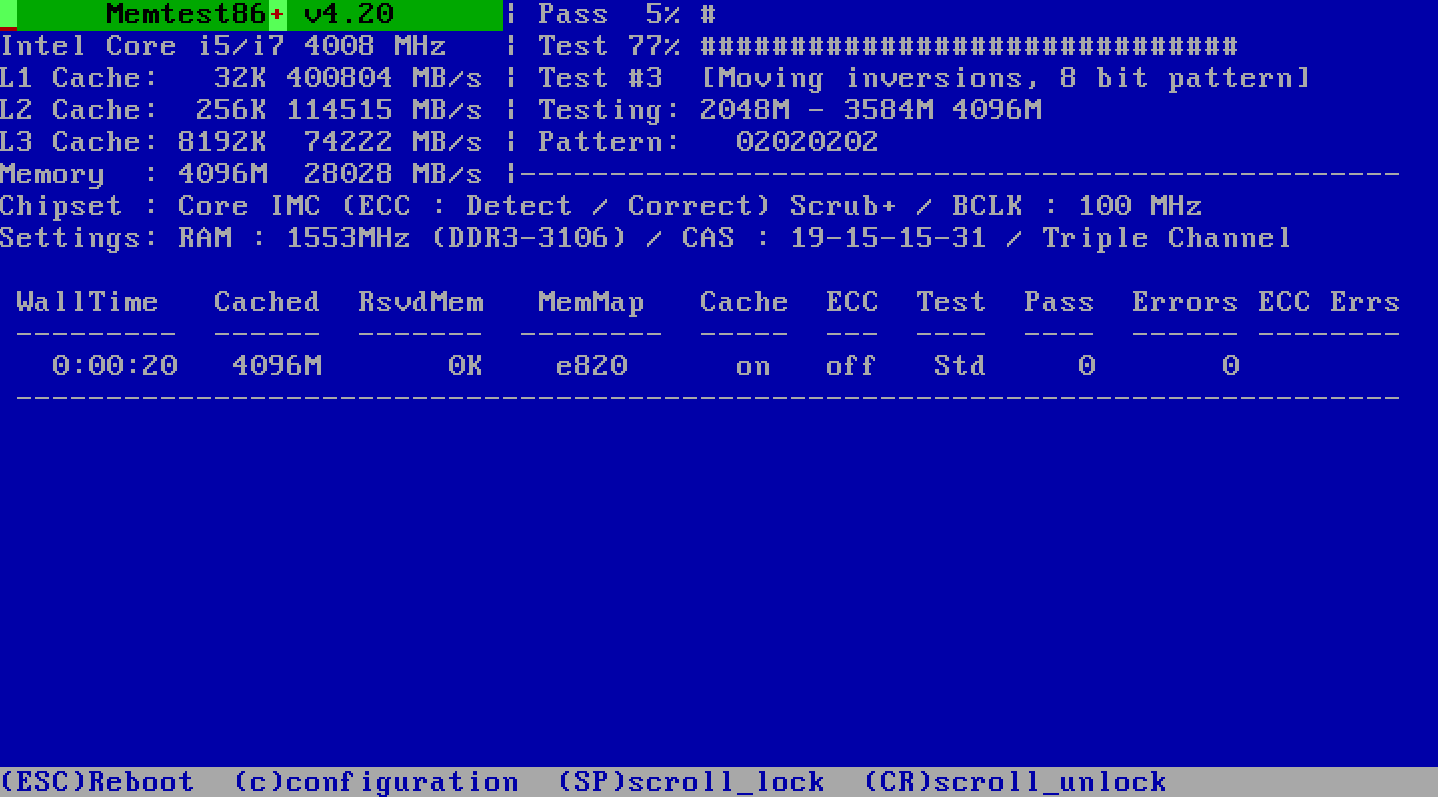
I like to start with memory tests, since those require bootable media and work the same on all x86 computers, even before you have an operating system. Memtest86 is the granddaddy of all memory testers. I’m not totally clear what caused the split between that and Memtest86+, but all of them work similarly. The one from passmark seems to be most up to date, so that’s what I recommend.
Download the version of your choice, write it to a bootable USB drive, plug it into your newly built computer, boot and let it work its magic. It’s all automatic. Just boot it up and watch it go.
(If your computer supports UEFI boot you’ll get the newest version 6.x, otherwise you’ll see version 4.2 as above.)
I recommend one complete pass of memtest86 at minimum, but if you want to be extra careful, let it run overnight. Also, if you have a lot of memory, memtest can take a while! For our servers with 128GB it took about three hours, and I expect that time scales linearly with the amount of memory.
The “Pass” percentage at the top should get to 100% and the “Pass” count in the table should be greater than one. If you get any errors at all, anything whatsoever other than a clean 100% pass, your computer is not stable. Time to start removing RAM sticks and figure out which one is bad.
OS
All subsequent tests will require an operating system, and one basic iron clad test of stability for any computer is whether it can install an operating system. Pick your free OS of choice, and begin a default install. I recommend Ubuntu Server LTS x64 since it assumes less about your video hardware. Download the ISO and write it to a bootable USB drive. Then boot it.
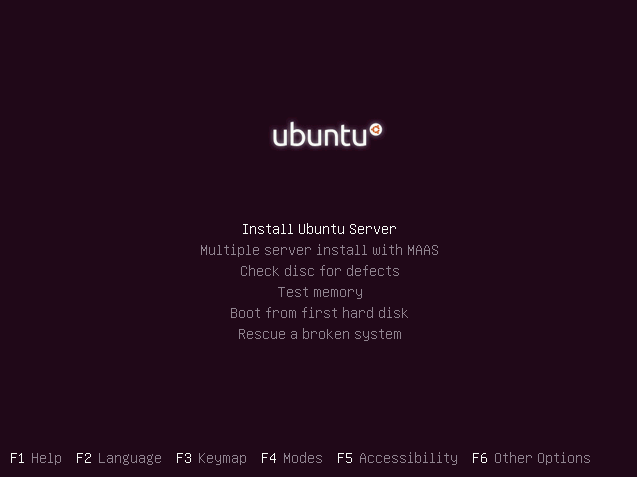
(Hey look it has a memory test option! How convenient!)
- Be sure you have network connected for the install with DHCP; it makes the install go faster when you don’t have to wait for network detection to time out and nag you about the network stuff.
- In general, you’ll be pressing enter a whole lot to accept all the defaults and proceed onward. I know, I know, we’re installing Linux, but believe it or not, they’ve gotten the install bit down by now.
- About all you should be prompted for is the username and password of the default account. I recommend
jeffandpassword, because I am one of the world’s preeminent computer security experts. - If you are installing from USB and get nagged about a missing CD, remove and reinsert the USB drive. No, I don’t know why either, but it works.
If anything weird happens during your Ubuntu Server install that prevents it from finalizing the install and booting into Ubuntu Server … your computer is not stable. I know it doesn’t sound like much, but this is a decent test as it exercises the whole system.
We’ll need an OS installed for the next tests, anyway. I’m assuming you’ve installed Ubuntu, but any Linux distribution should work similarly.
CPU
Next up, let’s make sure the brains of the operation are in order: the CPU. To be honest, if you’ve gotten this far, past the RAM and OS test, the odds of you having a completely broken CPU are fairly low. But we need to be sure, and the best way to do that is to call upon our old friend, Marin Mersenne.

In mathematics, a Mersenne prime is a prime number that is one less than a power of two. That is, it is a prime number that can be written in the form Mn = 2n ? 1 for some integer n. They are named after Marin Mersenne, a French Minim friar, who studied them in the early 17th century. The first four Mersenne primes are 3, 7, 31, and 127.
I’ve been using Prime95 and MPrime – tools that attempt to rip through as many giant numbers as fast as possible to determine if they are prime – for the last 15 years. Here’s how to download and install mprime on that fresh new Ubuntu Server system you just booted up.
mkdir mprime
cd mprime
wget ftp://mersenne.org/gimps/p95v287.linux64.tar.gz
tar xzvf p95v287.linux64.tar.gz
rm p95v287.linux64.tar.gz
(You may need to replace the version number in the above command with the current latest from the mersenne.org download page, but as of this writing, that’s the latest.)
Now you have a copy of mprime in your user directory. Start it by typing ./mprime
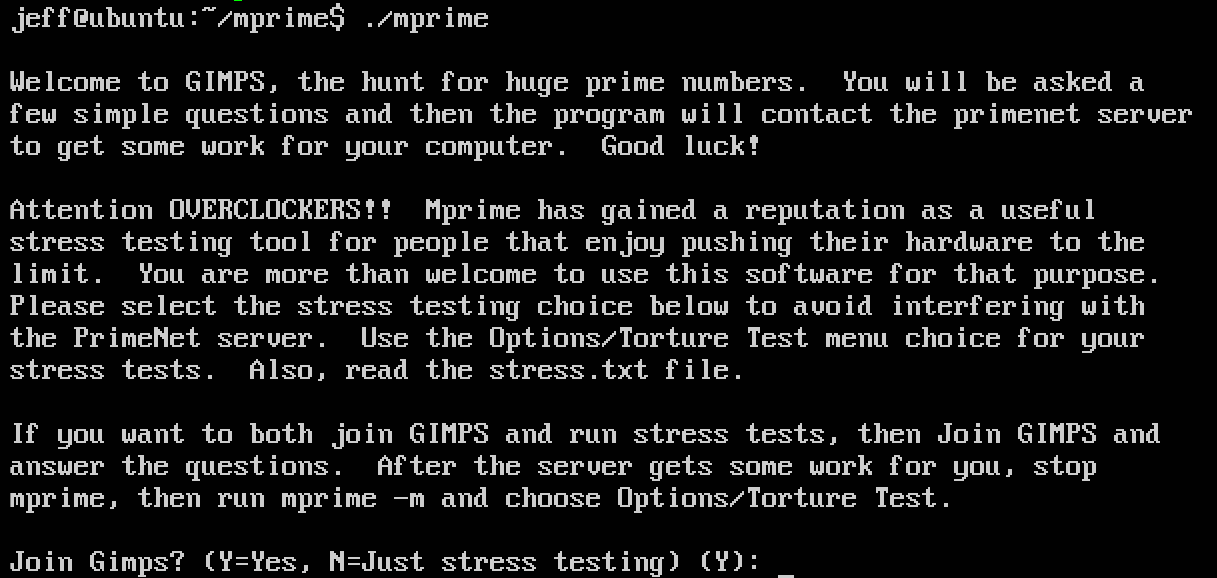
Just passing through, thanks. Answer N to the GIMPS prompt.
Next you’ll be prompted for the number of torture test threads to run. They’re smart here and always pick an equal number of threads to logical cores, so press enter to accept that. You want a full CPU test on all cores. Next, select the test type.
- Small FFTs (maximum heat and FPU stress, data fits in L2 cache, RAM not tested much).
- In-place large FFTs (maximum power consumption, some RAM tested).
- Blend (tests some of everything, lots of RAM tested).
They’re not kidding when they say “maximum power consumption”, as you’re about to learn. Select 2. Then select Y to begin the torture and watch your CPU squirm in pain.
Accept the answers above? (Y):
[Main thread Feb 14 05:48] Starting workers.
[Worker #2 Feb 14 05:48] Worker starting
[Worker #3 Feb 14 05:48] Worker starting
[Worker #3 Feb 14 05:48] Setting affinity to run worker on logical CPU #2
[Worker #4 Feb 14 05:48] Worker starting
[Worker #2 Feb 14 05:48] Setting affinity to run worker on logical CPU #3
[Worker #1 Feb 14 05:48] Worker starting
[Worker #1 Feb 14 05:48] Setting affinity to run worker on logical CPU #1
[Worker #4 Feb 14 05:48] Setting affinity to run worker on logical CPU #4
[Worker #2 Feb 14 05:48] Beginning a continuous self-test on your computer.
[Worker #4 Feb 14 05:48] Test 1, 44000 Lucas-Lehmer iterations of M7471105 using FMA3 FFT length 384K, Pass1=256, Pass2=1536.
Now’s the time to break out your Kill-a-Watt or similar power consumption meter, if you have it, so you can measure the maximum CPU power draw. On most systems, unless you have an absolute beast of a gaming video card installed, the CPU is the single device that will pull the most heat and power in your system. This is full tilt, every core of your CPU burning as many cycles as possible.
I suggest running the i7z utility from another console session so you can monitor core temperatures and speeds while mprime is running its torture test.
sudo apt-get install i7z
sudo i7z
Let mprime run overnight in maximum heat torture test mode. The Mersenne calculations are meticulously checked, so if there are any mistakes the whole process will halt with an error at the console. And if mprime halts, ever … your computer is not stable.
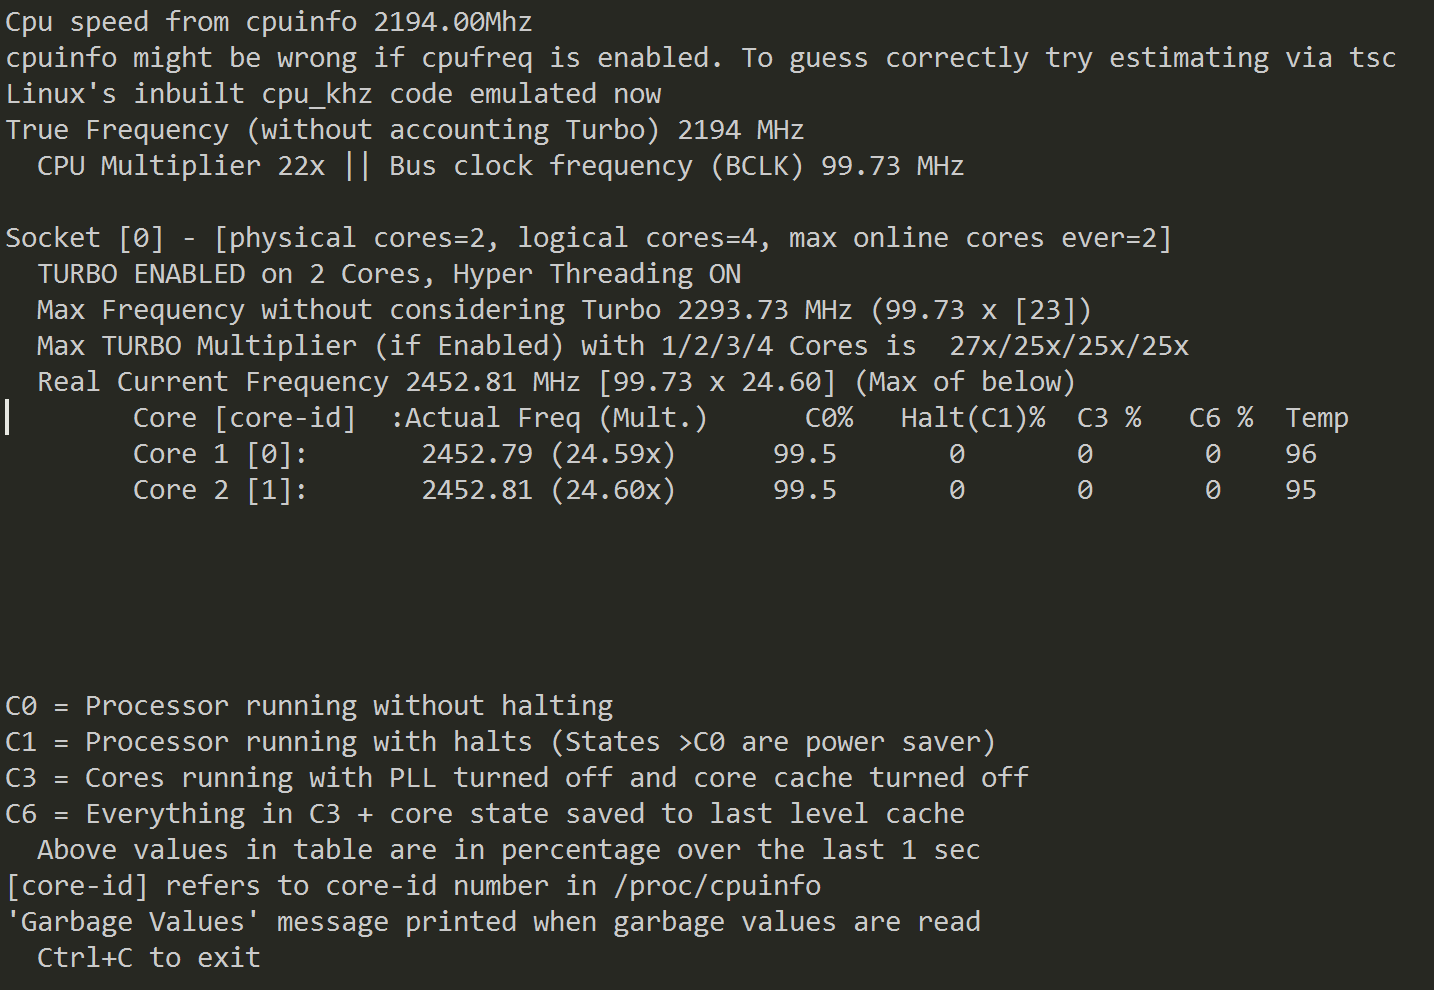
Watch those CPU temperatures! In addition to absolute CPU temperatures, you’ll also want to keep an eye on total heat dissipation in the system. The system fans (if any) should spin up, and the whole system should be kept at reasonable temperatures through this ordeal, or else you’re going to have a sick, overheating computer one day.
The bad news is that it’s extremely rare to have any kind of practical, real world workload remotely resembling the stress that Mersenne lays on your CPU. The good news is that if your system can survive the onslaught of Mersenne overnight, believe me, it’s definitely ready for anything you can conceivably throw at it.
Disk
Disks are probably the easiest items to replace in most systems – and the ones most likely to fail over time. We know the disk can’t be totally broken since we just installed an OS on the thing, but let’s be sure.
Start with a bad blocks test for the whole drive.
sudo badblocks -sv /dev/sda
This exercises the full extent of the disk (in safe read only fashion). Needless to say, any errors here should prompt serious concern for that drive.
Checking blocks 0 to 125034839
Checking for bad blocks (read-only test): done
Pass completed, 0 bad blocks found. (0/0/0 errors)
Let’s check the SMART readings for the drive next.
sudo apt-get install smartmontools
smartctl -i /dev/sda
That will let you know if the drive supports SMART. Let’s enable it, if so:
smartctl -s on /dev/sda
Now we can run some SMART tests. But first check how long the tests on offer will take:
smartctl -c /dev/sda
Run the long test if you have the time, or the short test if you don’t:
smartctl -t long /dev/sda
It’s done asynchronously, so after the time elapses, show the SMART test report and ensure you got a pass:
=== START OF READ SMART DATA SECTION ===
SMART Self-test log structure revision number 1
Num  Test_Description    Status                  Remaining  LifeTime(hours)  LBA_of_first_error
# 1  Extended offline    Completed without error       00%       100         -
Next, run a simple disk benchmark to see if you’re getting roughly the performance you expect from the drive or array:
dd bs=1M count=512 if=/dev/zero of=test conv=fdatasync
hdparm -Tt /dev/sda
For a system with a basic SSD you should see results at least this good, and perhaps considerably better:
536870912 bytes (537 MB) copied, 1.52775 s, 351 MB/s
Timing cached reads:   11434 MB in  2.00 seconds = 5720.61 MB/sec
Timing buffered disk reads:  760 MB in  3.00 seconds = 253.09 MB/sec
Finally, let’s try a more intensive test with bonnie++, a disk benchmark:
sudo apt-get install bonnie++
bonnie++ -f
We don’t care too much about the resulting benchmark numbers here, what we’re looking for is to pass without errors. And if you get errors during any of the above … your computer is not stable.
(I think these disk tests are sufficient for general use, particularly if you consider drives easily RAID-able and replaceable as I do. However, if you want to test your drives more exhaustively, a good resource is the FreeNAS “how to burn in hard drives” topic.)
Network
I don’t have a lot of experience with network hardware failure, to be honest. But I do believe in the cult of bandwidth, and that’s one thing we can check.
You’ll need two machines for an iperf test, which makes it more complex. Here’s the server, let’s say it’s at 10.0.0.1:
sudo apt-get install iperf
iperf -s
and here’s the client, which will connect to the server and record how fast it can transmit data between the two:
sudo apt-get install iperf
iperf -c 10.0.0.1

------------------------------------------------------------
Client connecting to 10.0.0.1, TCP port 5001
TCP window size: 23.5 KByte (default)
------------------------------------------------------------
[  3] local 10.0.0.2 port 43220 connected with 10.0.0.1 port 5001
[ ID] Interval       Transfer     Bandwidth
[  3]  0.0-10.0 sec  1.09 GBytes    933 Mbits/sec
As a point of reference, you should expect to see roughly 120 megabytes/sec (aka 960 megabits) of real world throughput on a single gigabit ethernet connection. If you’re lucky enough to have a 10 gigabit connection, well, good luck reaching that meteoric 1.2 Gigabyte/sec theoretical throughput maximum.
Video Card
I’m not covering this, because very few of the computers I build these days need more than the stuff built into the CPU to handle video. Which is getting surprisingly decent, at last.
You’re a gamer, right? So you’ll probably want to boot into Windows and try something like furmark. And you should test, because GPUs – particularly gaming GPUs versus the on-die built in stuff – are rather cutting edge bits of kit and burn through a lot of watts.
If you have recommendations for gaming class video card stability testing, share them in the comments.
OK, Maybe It’s Stable
This is the regimen I use on the machines I build and touch. And it’s worked well for me. I’ve identified faulty CPUs (once), faulty RAM, faulty disks, and insufficient case airflow early on so that I could deal with them in the lab, before they became liabilities in the field. Doesn’t mean they won’t fail eventually, but I did all I could to make sure my babies can live long and prosper.
Who knows, with a bit of luck maybe you’ll end up like the guy whose netware server had sixteen years of uptime before it was decommissioned.
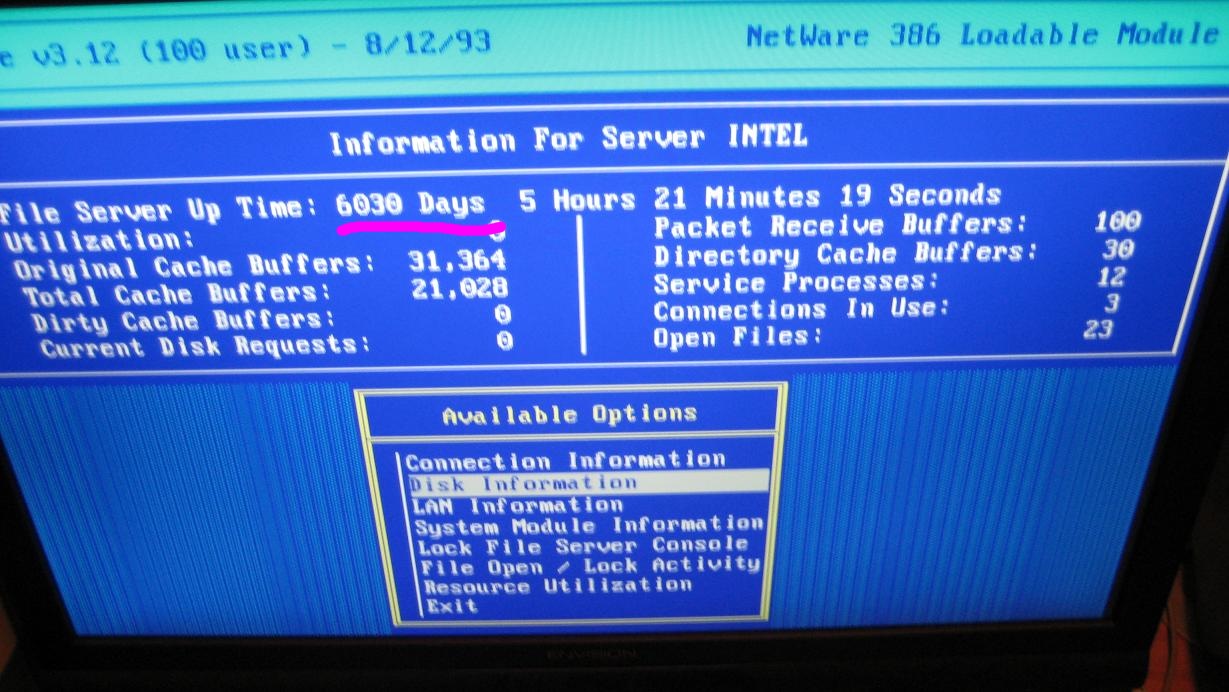
These tests are just a starting point. What techniques do you use to ensure the computers you build are stable? How would you improve on these stability tests based on your real world experience?
| [advertisement] At Stack Overflow, we help developers learn, share, and grow. Whether you’re looking for your next dream job or looking to build out your team, we’ve got your back. |
