Archive

Archive for March, 2016

Seven Amazing Neon Dreamscapes Made on Mobile Phones

March 2nd, 2016 No comments

Using mobile phones, these artists are bringing highly unusual weather to the cities of the world. Neon blue clouds and purple fog have descended on urban centers in these seven luminescent dreamscapes. While you might think that these effects require sophisticated skills in one of the powerful pixel editors, such as Photoshop, we are about to surprise you. Read on.

The artists below all used the free mobile photo editor, PicsArt, to create double exposures that combine clouds with pictures of skylines. Though they’re using the same simple features, each artist used a unique approach to putting their creative stamp on this psychedelic trend.

If you also have a creative itch to scratch, check out their excellent images and draw inspiration from their various techniques.

Now for the goods. Hop aboard a purple cloud and set course for neon paradise.

1. Miami in the Clouds

1_picsart_dreamscapes_032016_picsart_dreamscapes_032016_picsart_dreamscapes_032016

By keeping the clouds low, this artist created a perspective like we’re descending from the sky and breaching the clouds to see a vibrant city sprawling below.

2. A Radioactive Glow

2_picsart_dreamscapes_032016_picsart_dreamscapes_032016_picsart_dreamscapes_032016

Increasing the contrast to accentuate bright patches of concentrated light can make a city look like it’s so radioactive that it’s glowing.

3. Mist Rising from the Streets

3_picsart_dreamscapes_032016_picsart_dreamscapes_032016_picsart_dreamscapes_032016

Playing with different cloud formations and how they fit over a shot can yield surprises. The clouds in this edit look more like steam rising from the streets.

4. Light Painting with Time-Lapse

4_picsart_dreamscapes_032016_picsart_dreamscapes_032016_picsart_dreamscapes_032016

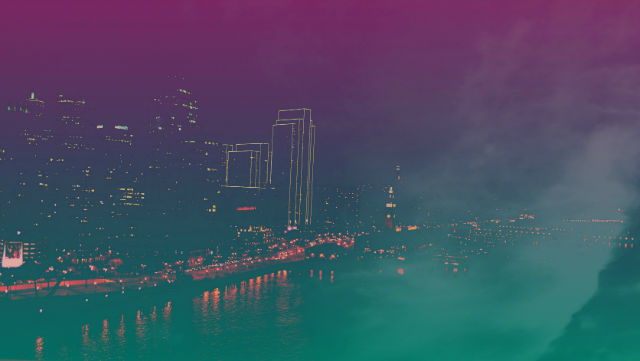
The ribbons of light created by cars in a time-lapse are ideal for breaking up space in your images and cutting bright lines through the thick-colored mist.

5. A Neon Sunset

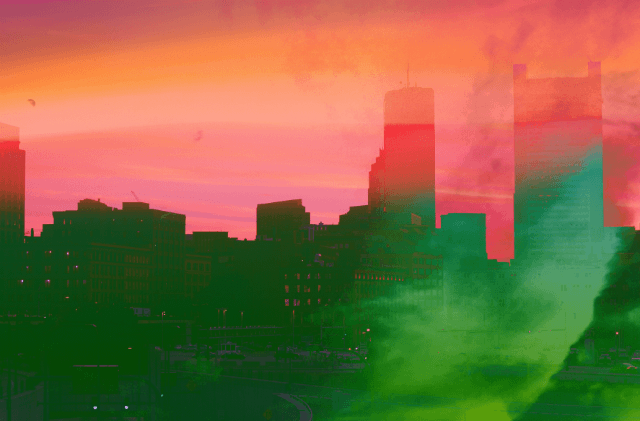
5_picsart_dreamscapes_032016_picsart_dreamscapes_032016_picsart_dreamscapes_032016

This artist used the colors that were already in the original shot. Here the orange sunset transitions perfectly between the purple on the bottom and the blue on top.

6. Lights in a Color Storm

6_picsart_dreamscapes_032016_picsart_dreamscapes_032016_picsart_dreamscapes_032016

There’s a simple reason nighttime photos look amazing in neon weather… city lights! Bonus points for reflections in a nearby body of water.

7. Warhol Weather

7_picsart_dreamscapes_032016_picsart_dreamscapes_032016_picsart_dreamscapes_032016

This image shows how harsh contrasts in brightness and color tone can add a scrappy pop art veneer to any dreamscape.

Want to make a dreamscape of your own? The PicsArt app is free on iOS, Android, and Windows, and there’s even an easy-to-follow PicsArt tutorial to walk you through the steps. Give it a go and send a gust of glowing neon weather blowing through your hometown.

This post was provided by PicsArt, a mobile photo editing app that provides people with a canvas for creating, collaborating, and exploring. With a full creative suite for photo editing, PicsArt makes it easy to create beautiful images, no matter where you are.
(dpe)

Categories: Others Tags:

Server-Side Rendering With React, Node And Express

March 2nd, 2016 No comments

Web applications are everywhere. There is no official definition, but we’ve made the distinction: web applications are highly interactive, dynamic and performant, while websites are informational and less transient. This very rough categorization provides us with a starting point, from which to apply development and design patterns.

Server-Side Rendering With React, Node And Express

These patterns are often established through a different look at the mainstream techniques, a paradigm shift, convergence with an external concept, or just a better implementation. Universal web applications are one such pattern.

The post Server-Side Rendering With React, Node And Express appeared first on Smashing Magazine.

Categories: Others Tags:

Stripe Payment Gateway For WooCommerce is Now Free

March 1st, 2016 No comments
woocommerce-wdl

WooCommerce has recently announced that its Stripe payment gateway extension is now a free product.

So far, the Stripe payment gateway was a paid addon for WooCommerce, the popular eCommerce plugin for WordPress sites. Its pricing began from $79 for a single site license, and went up to $199 for 25 sites.

However, going forward, the Stripe payment gateway will be free for all WooCommerce users. It means you can incorporate Stripe as a payment mechanism on your WooCommerce websites without having to spend any extra money.

woocommerce-wdl

This news comes shortly after Stripe announced its plans of going beyond US markets, allowing entrepreneurs around the world to use Stripe to setup businesses that are truly global in nature. Obviously, Automattic is counting on this strategy and looking to project WooCommerce as a viable eCommerce solution for entrepreneurs who might be keen on setting up online businesses anytime soon.

As of now, Stripe is not available in most parts of the world, albeit it is in private beta in certain countries such as Mexico, Switzerland and Singapore.

Automattic have not commented as regards their plans of offering free payment gateways for any other payment solutions vis a vis WooCommerce.

What do you think of this move by WooCommerce team? Share your views in the comments below!

Download the Stripe payment gateway addon for WooCommerce here.

Read More at Stripe Payment Gateway For WooCommerce is Now Free

Categories: Designing, Others Tags:

An Interview with Libby Nicholaou on Creative Residency

March 1st, 2016 No comments

I met Libby years ago from running into her at conferences. She was with Typekit and would be at the conference bringing their their super cool “pop up library” full of typographic books. She’s still at Adobe now, but running the Adobe Creative Resident program.

The program is now entering it’s second year. What’s it all about? Let’s find out.

Headers are me, the rest is Libby.

This is an opportunity to have the freedom to fully commit to being a visual artist for a year, right?

For Adobe Creative Residents, the program is about committing to a personal passion project, whether as a visual artist or as a designer, and putting so much creativity and energy into it that it changes your career. The intention is for the year a person is a resident to be the beginning of something bigger that will grow in the years to follow.

Sounds like an amazing opportunity to go big on creating and potentially change your life. What was the first year like?

The first year has been an incredible journey. We are fortunate to have Kelli Anderson and Becky Simpson as our first ever residents.

They came in with great projects and a willingness to challenge themselves to grow their practice. Both of their projects have progressed in different positive ways. Kelli has succeeded in producing a series of functional paper pop-up objects and gained the attention of museums and design institutions. Becky has fully prepared herself to launch her own line of lifestyle products and is in conversation with notable stores to carry them.

Who is the perfect person for this program? What do you mean by “whose work elevates the role of visual content in our culture”?

The perfect person for the Residency is someone who likes to be challenged, enjoys engaging with the community, and thinks big. They are willing to try new things, be resourceful and create work that sets a higher bar for quality in the art and design communities.

That phrase you quote from our site is intended to express one of Adobe’s goals for the Residency. We want residents to make work that pushes beyond the status quo and reminds people that design and art are more than decoration but actual important parts of our world.

I made a working camera that pops up out of a book. Video of how that works + purchase link: https://t.co/d61lm51jWT pic.twitter.com/HRIA5zh4rU

— kellianderson (@kellianderson) November 24, 2015

What’s it like to be our Creative Resident? Current resident @beckymsimps shows her work: https://t.co/F9pMj76O5h pic.twitter.com/j9pzH2wWtc

— Adobe Creative Cloud (@creativecloud) February 29, 2016

It’s called a “residency”, but you don’t actually have to move, right?

That’s right. The program resembles aspects of a traditional residency but also has characteristics of a fellowship. Since most people who will be residents already have a nice studio to work in, it didn’t makes sense to geographically uproot them for a year. It’s a big enough commitment to put all other work on hold during the program. We wanted to allow people to retain their creature comforts.

What motivates you to work on a program like this?

I’m motivated by the opportunity to empower creative people to succeed. When I worked in an art gallery, I always enjoyed when artists sold their work, got invited to a big fair or were offered a big commission. But I often felt like there was more we could be doing to ensure the artists lived well off their artwork. With the residency, I’m proud to lead a program that not only considers financial needs of creative people but also training and experience that will equip them to have a fruitful career.

There is a long history of benefactors in artistic endeavors. Is that essentially Adobe’s role in this?

Adobe’s role in the Residency is focused on a holistic perspective of the design industry. As a design based company we are interested in contributing to the positive future of design and empowering creative people to have more opportunities to build a vibrant career.


Chris: I’m timed this dreadfully poorly in that applications for this next round of Adobe Creative Residents closed at the end of February. But! Even if this was out, say, last week, I don’t think this is the kind of thing you want to rush. If you’re a designer or artist and this appeals to you (It certainly appeals to me, in a slightly different parallel universe anyway), keep this on your radar and take the year to prepare yourself to on being a great applicant.


An Interview with Libby Nicholaou on Creative Residency is a post from CSS-Tricks

Categories: Designing, Others Tags:

How to avoid common UX traps

March 1st, 2016 No comments

How many times have you been on a website, only to leave frustrated and annoyed at the experience you received during your visit? Believe it or not, this is a fairly common occurrence, especially when websites ignore good UX practices.

If you’re involved in any aspect of a website build, it’s imperative that you avoid common UX problems, if you want to stay in your users’ good books. Let’s take a look at the 4 most common UX traps that designers fall into, and how to avoid them…

Forms

Forms are necessary for gathering information about users, clients, and customers. You can’t get around using them, but they shouldn’t be unbearable to fill out. Forms should have very few questions as to what information a website is looking for. One of the biggest problems of online forms is when there are no instructions.

Formatting

When asking someone for specific information, emphasize what it is you are looking for. If you require a special format for something, such as a date, time, or any other formatted information, it should come with an example. Nothing is more annoying than filling out a form, only to receive an error message when you’re finished.

Placeholder text

It’s nice when a designer goes a little above and beyond and gives you a hint at the type of information they are looking for, by providing placeholder text in the form field. While this is extremely convenient, there have been several times when I have encountered placeholder text that doesn’t go away when you start typing in the form field. This is a huge point of frustration for any user, because they have to stop typing, select everything, and delete it, starting all over again. They also might select the unnecessary type and delete that, causing an interruption in their thought process while filling out the form. Whenever using placeholder text to hint at the type of information you are looking for, make sure it goes away when someone selects that input field.

Error messages

There’s nothing more frustrating than trying to do something on a website, only to receive an error message, without enough information, or any at all. If a website user encounters an error, there should be an explanation of what is incorrect and how to fix it. For example, if you log into a site with a username and password, if you make a mistake with one, you should be told which. With so many logins to websites out there, it’s easy to accumulate multiple variations of usernames and passwords. There are some cases when I have had to modify my usual username and password combination, because it didn’t meet the requirements of a website’s registration, such as 2 capital letters, or a number, letter, and punctuation or symbol.

Other examples would include: if passwords don’t match, during the registration process, show an error message before submitting. Another example might be if a username is already taken, show that before someone submits their registration.

No one likes having to redo something, especially after receiving poor instructions. You’ll have a lot higher engagement if you make it easy for users to provide you with the correct information the first time.

Large, fixed navigational headers

I’m not sure how this became popular, but I’ve seen it a lot, on many sites around the web. The issue with such a large header and all of those navigational elements is when you scroll down the page, it blocks a lot of content. This is especially frustrating when there are parts you need to get to, or when the content would otherwise fill the height of the browser, but part of it is concealed by navigation.

Especially On Mobile

What’s even worse is that sometimes, when a site is brought down to mobile size, the large header is still kept in place. This is a bad experience all around, because space is already limited on smartphone screens. It doesn’t need to be taken up by a nav menu that could otherwise be hidden. If there are certain nav elements that need to stay visible, turn those into small icons, or place them somewhere out of the way.

Low contrast

My eyes are good, but I am not a fan of trying to visually discern charcoal text or icons on a black background. No one should have to go through that. Contrast is key, especially in web design.

Text

Any text should be easily read, with enough weight to make it easy to read. 100 weight fonts have virtually no place on the web (except in a few special cases). Using a super thin font on a smartphone is simply asking for trouble. There has to be enough visual contrast there for your eyes to make out the letterforms.

Color

For all elements of a website, there should be plenty of easily discernable contrast between colors. Any and all text should have a high rate of contrast from its background. That goes for any links, navigational elements or icons, too. It shouldn’t be difficult to find what you are looking for.

Calls to actions

Just like other links and navigational elements, your call to action elements should display a high level of contrast. If you want a website visitor to take action, make it prominent, easy to read, and load and clear. Far too many times you’ll see a call to action with a button that doesn’t stand out enough from the background. Sometimes, it’s not a button at all, and it’s just a simple text link surrounded by white space.

Touch targets on mobile

I see this on a lot of mobile sites and it is one of the most frustrating elements to deal with. If you have a button or a link to click, give it enough space so that users don’t accidentally hit the wrong thing. On a smartphone, make sure that any buttons or links are far enough away from the edge or the corner of their screen, so they can be easily tapped.

Many times, a button placed too close to any of the 4 corners of a screen is too difficult to tap precisely. If you have larger fingers, the smartphone may not register your action at all. This causes the user to have to tap several times to get the feature to work. Space for these elements is extremely important.

Conclusion

These common UX problems can be easily avoided with a little extra work and forethought. If you want your website visitors to use and enjoy your site, it is important to make the process easy and fluid. Avoiding having your users repeat actions and processes over again cuts down on frustration and provides the user experience everyone expects from a well-designed site.

Featured image, UX design image via Shutterstock.

HUMONGOUS Font Bundle (30 Fonts with Extended License) – only 29!

Source

Categories: Designing, Others Tags:

20 Super Clean Fonts Perfect for Minimal Style Design

March 1st, 2016 No comments
fonts_19

Finding the right typeface or font for a design can be a tricky process. So it’s good to have a nice selection of fonts at your disposal. With this article, we’re tying to help you out with that and give you some typographic enjoyment. Here are 20 free fonts that are super clean and would be great to use in your next minimal style design.

Walkway

Yanone Kaffeesatz

fonts

St Transmission – 200 Thin

fonts

Jalane Light

fonts

Colaborate

fonts

Engel Light

fonts

Sansation

Free Fonts

Vegur

Free Fonts

Titilium

fonts

Anivers

fonts

Delicious

fonts

Museo Sans

fonts

Mentone

Free Fonts

Aurulent Sans

fonts

Junction

fonts

Existence Light

fonts

Fontin Sans

fonts

ComfortaA

fonts

Quicksand

Free Fonts

BonevoCF

fonts

Read More at 20 Super Clean Fonts Perfect for Minimal Style Design

Categories: Designing, Others Tags:

Perfectly Responsive Typographic Headlines with CSS and JavaScript

March 1st, 2016 No comments

When charging ahead with all of your new strategies for responsive web design don’t forget the one of most important parts – the typographic headlines. Stay ahead of most web designers by paying close attention to how the headlines are playing out on the page at different sizes. That means being very intentional about the sizing and line breaks for type. Here are some current options for creating large headlines at all sizes – some old-school and less versatile and others that will give you a delicious looking result at every size.

1. Use an Image – Not Recommended

You really could do quite a bit with just an image with a width of 100% and a height that is left on auto, or set to auto. The problem is that this takes away control from people who land on your site to copy or highlight the text, makes it hard for accessibility or people with vision issues to access your text, and makes that text less accessible for search engines as well.

It’s your headline! You want Google and other search engines to see how much of a emphasis you’re putting on that text with a

tag wrapped around real text – not an image.

2. Use Media Queries – (@media in conjunction with em and rem for font-size.)

Media queries with em and rem suffer from the text-size not really being 100% fluid. Most designers I see are using the media-queries method, and it does have it’s drawbacks. If you do this though, you have to write a media query for every size if you want the text to adapt to the browser, but in between you don’t have an incremental change.

/** For instance here is the way many web designers are currently making their headlines responsive **/

h1 {font-size: 37px;}
@media screen and (min-width: 768px and max-width: 1080px) {

h1 {font-size: 29px}

}

@media screen and (min-width: 500px) and (max-width: 768px) {

h1 {font-size: 21px}

}
}

@media screen and (max-width: 500px) {

h1 {font-size: 19px}

}
}
But what about a better way? One that doesn’t require you to write a new media query for every size?

3. Use CSS Viewport Units – (vw, vh, vmax, and vmin)

For a little less control than the Javascript options, but only utilizing new CSS conventions, these are awesome. For IE 10+, Firefox 19+, Chrome 34+, Safari 7+, Android 4.4+, iOS 6+, (in other words, most modern browsers) this CSS version can really do the trick;

h1 { font-size: 36px; /* Some in between fallback that isn't horrible */; font-size: 5.4vw;}

Some of the features of these Javascript plugins aren’t there, but for most newer browsers this gets the job done. If you have headlines that you’re generally keeping on one line though this is perfect without the weight of the Javascript. But what about justifying the text so it goes to the edge of the container and evens out on each line? It is a headline after all.

That’s where Javascript comes in, and these JS plugins can do some of the math for you.

4. BigText – JS Plugin

Here’s one of the simpler JS Plugins by Zach Leat. As you can see in this JS Fiddle it allows you to quickly implement something like CSS Viewport units but with justification as well. For BigText you need to add divs around each line and wrap them in all in a div with an id=”bigtext”.

Of course each of these; BigText, FitText, and SlabText will require you to load the JS wherever you’re loading your JS on the site. Each of these you should load before anything that would hide the elements you’re trying to resize like sliders or other JS files of that nature.

3. FitText – JS Plugin

According to the authors of FitText, Paravel; “If your text is resizing poorly you can tweak up/down something in the Javascript file called “The Compressor” which works a little like a guitar amp. The default is `1`. FitText now allows you to specify two optional pixel values: `minFontSize` and `maxFontSize`.” FitText is great for situations when you want to preserve hierarchy between your lines. Make sure your container has a width so that FitText can work, so that it knows what to size the text to.

4. SlabText – JS Plugin

This is a lot of designers’ favorite, because of the amount control possible, and the very sleek features. Once again, with the SlabText JS plugin, you can wrap up certain groups of words to make sure those words all stay on one line and the text is justified to any size and is ideal for longer headlines. Sara Soueidan created a nice CodePen to demonstrate the excellence of this, so you can see it in action.

You can include it, or download it from GitHub at this location:

http://freqdec.github.io/slabText/js/jquery.slabtext.min.js

And activate like this:
$("h1").slabText({
// Don't slabtext the headers if the viewport is under 380px
"viewportBreakpoint":380
});

Check out a more in-depth post about how to implement this, and try it out now and see how easy it could be.

Headlines need love on the web and don’t always get the attention they deserve even know they set the visual tone for so many sites. If you pay attention to them and give them a bit of love with one of these methods, it’s just one more way you can set your website designs apart from other sites.

The Author

Tim Brown is a web designer and marketer for SEO Minneapolis and who is particularly passionate about typography as it relates to User Interface design, and wrote the resources “How to be a Conversion Optimization Genius” and the article “Persuasive Typography, What Font is The Most Trustworthy.

(dpe)

Categories: Others Tags:

Infinite Scrolling, Pagination Or “Load More” Buttons? Usability Findings In eCommerce

March 1st, 2016 No comments

What is the best product-loading schema for an e-commerce website: pagination, a “Load more” button or infinite scrolling? At Baymard Institute, we’ve conducted several year-long large-scale usability studies of more than 50+ leading e-commerce websites. We tested (among other things) these three design patterns for loading products, both on desktop and mobile.

Infitite Scrolling, Pagination and Load More Buttons

Pagination is still the most popular way to load new items on a website because it ships by default in almost every single e-commerce platform. However, our usability test sessions found “Load more” buttons combined with lazy-loading to be a superior implementation, resulting in a more seamless user experience. We found that infinite scrolling can be downright harmful to usability — in particular, for search results and on mobile. However, it’s not black and white, because the performance of each method varies according to the context of the page.

The post Infinite Scrolling, Pagination Or “Load More” Buttons? Usability Findings In eCommerce appeared first on Smashing Magazine.

Categories: Others Tags: