HTTP Security Headers: How to Secure Your Website
Recently, we’ve introduced you to the online tool Securityheaders.io, which allows you to check a webserver’s safety. You can find your own server’s weaknesses fast and easily. Additionally, you receive plenty of good professional articles on the topic. With all of this support, it is rather easy to neutralize the most significant vulnerabilities and implement another layer of safety. In today’s article, I’ll explain how to set the primary HTTP security headers to allow you to make your server safer.
In Advance: Scanning Servers and Determining the Original State
Use the online tool securityheaders.io to scan your domain. You are likely to see red, as this is the color presented to you when your server is potentially unsafe. That’s not a big deal, as an estimated 80% of all web servers are not secure.
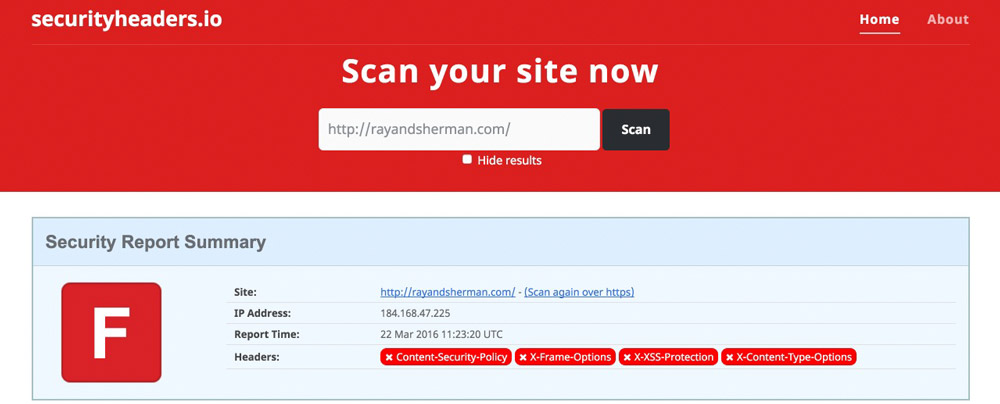
The scan has created results that are the most common ones. For websites with an HTTPS certificate, there are two additional aspects.
In this article, we want to close the security gaps that the scan informed us about. Furthermore, we want to analyze if all of the results make sense and whether they should be implemented or not.
We’ll Talk About the Following HTTP Security Headers in This Article
- X-Frame-Options
- X-XSS-Protection
- X-Content-Type-Options
- Strict-Transport-Security (Nur HTTPS-Websites)
What Are HTTP Security Headers?
Every time a browser requests a page from a server, the server replies with the delivery of the page and sends an HTTP response header. These headers can carry metadata like character sets, cache control, and error codes. However, you can also make the response headers send settings that are relevant for the security, and tell the browsers how to react. For example, a strict transport security header would tell the browser only to communicate via HTTPS. In total, there are six different security headers. We’ll tell you which headers you should use, and which ones you should stay away from in this article.
Important: All Mentioned HTTP Security Headers Belong Into the .htaccess File in the Website’s Root Index.
In general, there are three ways to place the headers. For one, using the configuration file of the Apache web server (httpd.conf), then, via PHP directly within the website that you want to protect, and finally, via the server control file .htaccess. I will talk about all three methods. As always, one click on the graphic opens the Gist at GitHub, where the code can be downloaded.
1 – The X-Frame-Options Header
The X-Frame-Options header is supposed to protect your website from being carried out in a frame. Professional content thieves like to create websites that take content from other sites. This content is dragged into the third-party website using a frame most of the time. The thief’s finished site will look as if the material stems from their own website. To prevent this, use an X-Frame-Options header. It is very effective at preventing the execution in a frame.
Browser Support: IE 8+, Chrome 4.1+, Firefox 3.6.9+, Opera 10.5+, Safari 4+
The Disadvantage of This Header: The website can not be executed as a frame anymore. This also includes the “responsive layouts” of the web developer toolbars by Google Chrome and Firefox, as well as the website “Am I Responsive”. Thus, the header should only be placed when the website is not in development stage anymore.
2 – The X-XSS-Protection Header
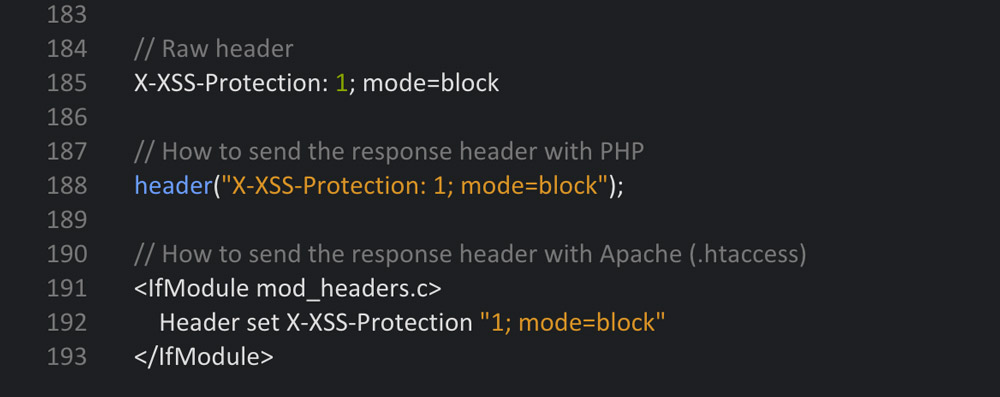
The X-XSS-Protection header was developed to call up and activate the cross-site scripting (XSS) protection filters in modern browsers. This header should be used in any case.
There are three different setting options: 0 to deactivate the filter, 1 to activate (the browser tries to purge and display the defective page) and 1; mode=block activates the filter (the defective page will be blocked).
Browser Support: Internet Explorer 8+, Chrome, and Safari
3 – The X-Content-Type-Options Header
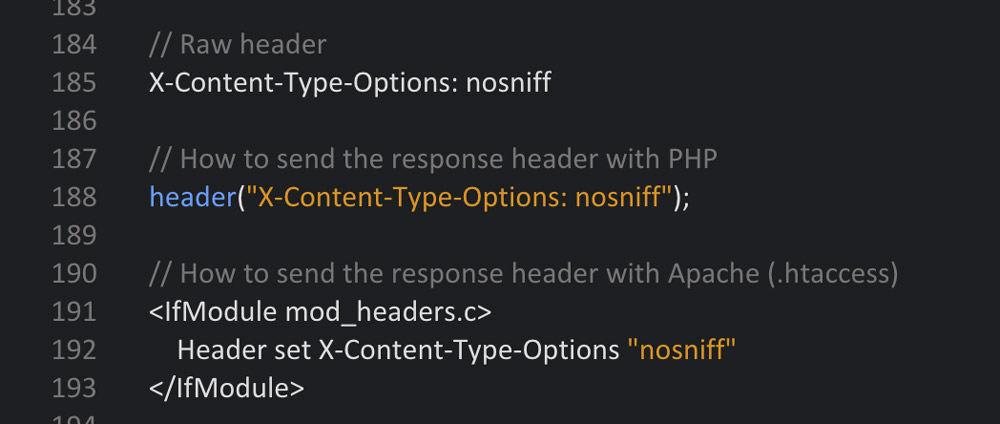
This header protects you from attacks with wrong MIME types. When the MIME type is not correct, the browser rejects the loading of styles and scripts. In this header, the setting can only be named NOSNIFF. Once the header is set, only styles and scripts with a correct MIME type will be loaded. The following MIME types will be regarded as correct:
Styles
- text/css
Scripts
- application/ecmascript
- application/javascript
- application/x-javascript
- text/ecmascript
- text/javascript
- text/jscript
- text/x-javascript
- text/vbs
- text/vbscript
Browser Support: Internet Explorer and Google Chrome
4 – The Strict Transport Security Header (Only for HTTPS Websites)
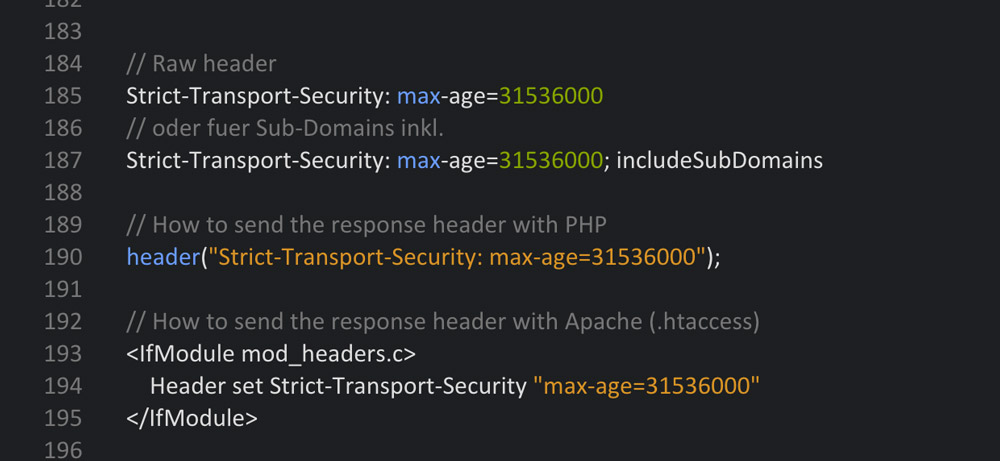
The Strict-Transport-Security header tells the browser to only access the website via a safe HTTPS connection. This assures that no unsafe connection that could potentially be attacked is created. In addition to that, this HTTP response header prevents users from accessing the page if the server’s TLS certificate is not trustworthy.
Set-Up Options:
- max-age – The amount of seconds within which the browser forces the secure connection.
- includeSubDomains – Tells the browser that the safe connection should also be forced for subdomains.
Browser Support: IE 11+, Chrome 4+, Firefox 4+, Opera 12+, Safari 7+.
You should use all of the HTTP security headers that we’ve dealt with up to this point. When your website is only distributed via HTTP, you don’t need the last header. However, I strongly recommend setting the upper three.
When all mentioned headers were placed correctly, the next securityheaders scan should result in a solid B. That’s a practical value.
The Content Security Policy Header
The Content-Security-Policy header is to be enjoyed with caution, as it can directly influence or even jam your website if it’s not noted meticulously. WordPress users will also have rather significant problems in the site’s admin area as the header affects that as well. Thus, I can’t give a general recommendation to use it.
The Content Security Policy (CSP) was developed as protection from Cross-Site Scripting (XSS) and other code injection attacks. The idea behind the header is, that a so-called whitelist, in which all permitted resources are noted is created. Content sources or types that are not explicitly allowed will not be loaded and processed by the browser. If the CSP is not active, the browser loads all files and distributes them, regardless of the source potentially being harmful. With an active CSP, only the permitted files are loaded, all others are not.
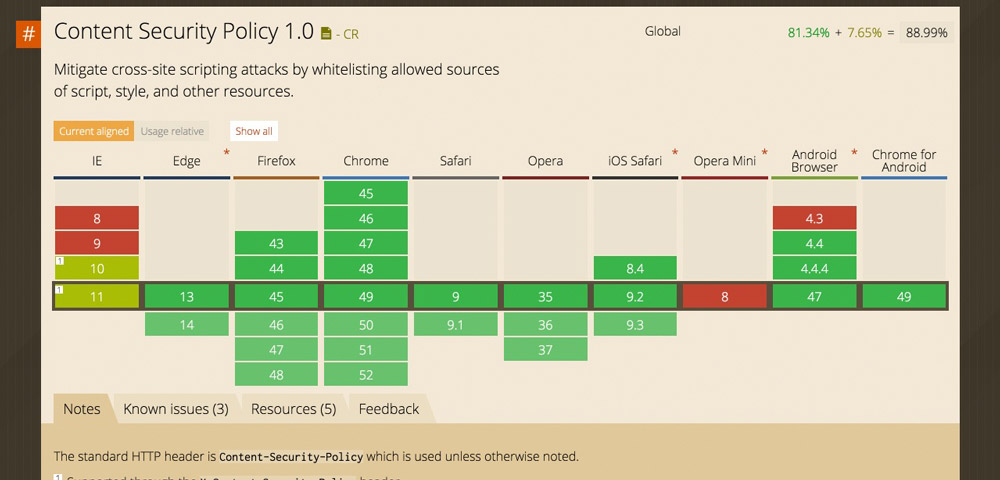
All modern browsers support the Content Security Policy.
This response header’s options are very extensive; too extensive for this article. However, if you want to go more in-depth on the Content Security Policy header, I recommend the CSP reference:
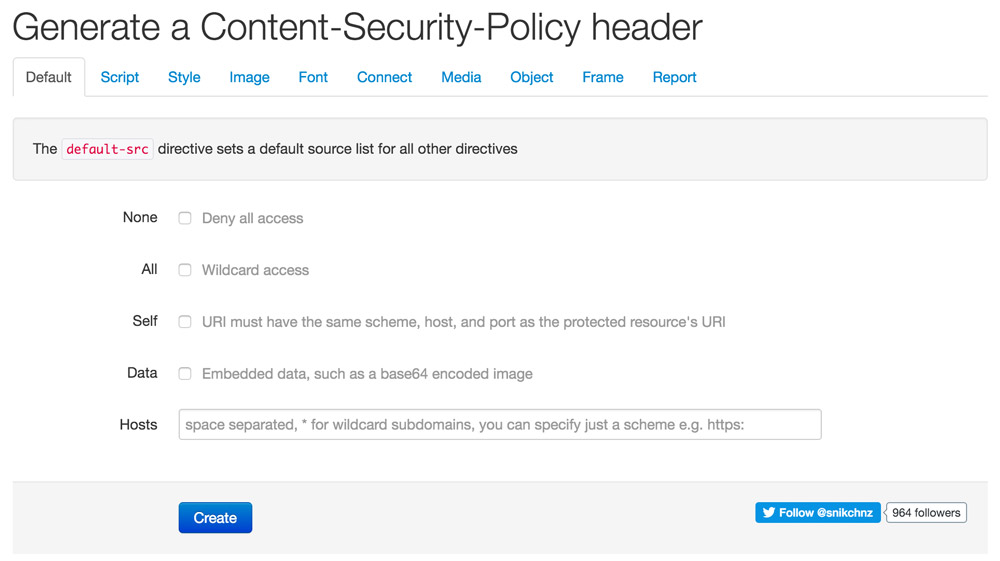
Content Security Policy Generator
For you to be able to create the partially very long code snippets for the correct function of a website comfortably, there’s a good online generator. It leads you through the settings via tabs and lets you adjust the policy over and over until it finally works.
For the sake of completeness, the Public Key Pins Header should be mentioned. This one can also be used without worries, but it appears to be only doable for server pros.
Conclusion
We’ve talked about the most important HTTP security headers, and we can use them easily by copying the respective code snippets into the server control file .htacess. Even if you are not an expert, you can reach a B in the securityheaders.io scan and do a lot for your website’s security this way. However, only real professionals can achieve an A or A+. When using WordPress, it is very tedious to implement the CSP, as the admin area requires its own CSP to prevent problems. In the latter case, setting the CSP doesn’t make much sense anyway.
(dpe)

