Home > Designing, Others > CSS Modules and React

CSS Modules and React

In this final post of our series on CSS Modules, I’ll be taking a look at how to make a static React site with the thanks of Webpack. This static site will have two templates: a homepage and an about page with a couple of React components to explain how it works in practice.

Article Series

Part 1: What are CSS Modules and why do we need them?
Part 2: How to get started with CSS Modules
Part 3: React + CSS Modules = ? (You are here!)

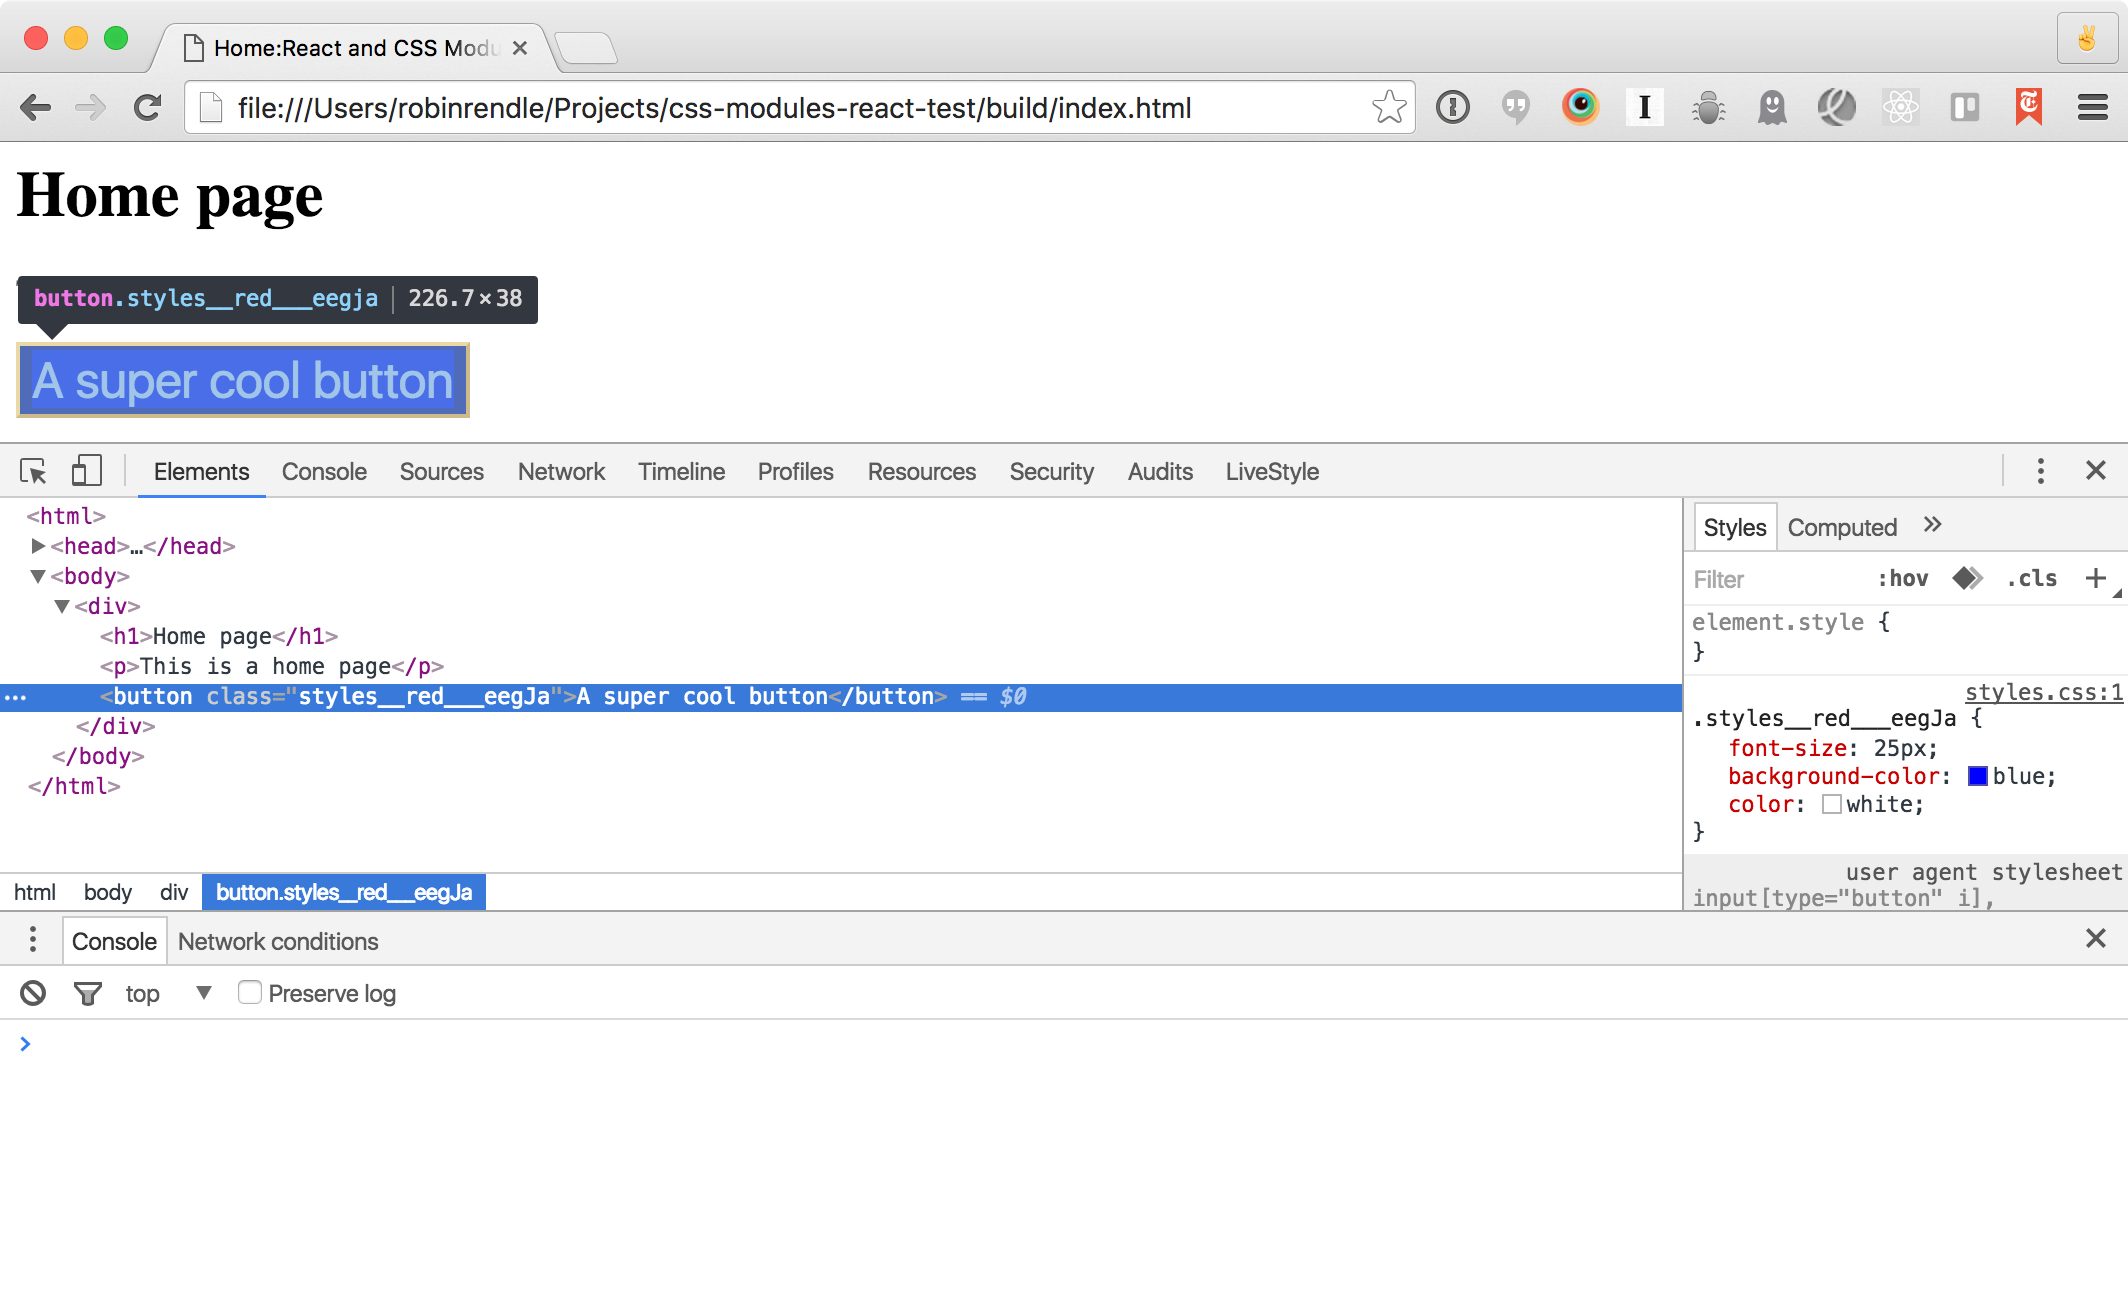
In the previous post we set up a quick project with Webpack that showed how dependencies can be imported into a file and how a build process can be used to make a unique class name that is generated in both CSS and HTML. The following example relies heavily on that tutorial so it’s definitely worth working through those previous examples first. Also this post assumes that you’re familiar with the basics of React.

In the previous demo, there were problems with the codebase when we concluded. We depended on JavaScript to render our markup and it wasn’t entirely clear how we should structure a project. In this post we’ll be looking at a more realistic example whereby we try to make a few components with our new Webpack knowledge.

To catch up, you can check out the css-modules-react repo I’ve made which is just a demo project that gets us up to where the last demo left off. From there you can continue with the tutorial below.

Webpack’s Static Site Generator

To generate static markup we’ll need to install a plugin for Webpack that helps us generate static markup:

npm i -D static-site-generator-webpack-plugin

Now we need to add our plugin into `webpack.config.js` and add our routes. Routes would be like / for the homepage or /about for the about page. Routes tell the plugin which static files to create.

var StaticSiteGeneratorPlugin = require('static-site-generator-webpack-plugin');
var locals = {
  routes: [
    '/',
  ]
};

Since we want to deliver static markup, and we’d prefer to avoid server side code at this point, we can use our StaticSiteGeneratorPlugin. As the docs for this plugin mentions, it provides:

a series of paths to be rendered, and a matching set of index.html files will be rendered in your output directory by executing your own custom, webpack-compiled render function.

If that sounds spooky hard, not to worry! Still in our `webpack.config.js`, we can now update our module.exports object:

module.exports = {
  entry:  {
    'main': './src/',
  },
  output: {
    path: 'build',
    filename: 'bundle.js',
    libraryTarget: 'umd' // this is super important
  },
  ...
}

We set the libraryTarget because that’s a requirement for nodejs and the static site plugin to work properly. We also add a path so that everything will be generated into our `/build` directory.

Still inside our `webpack.config.js` file we need to add the StaticSiteGeneratorPlugin at the bottom, like so, passing in the routes we want to generate:

plugins: [
  new ExtractTextPlugin('styles.css'),
  new StaticSiteGeneratorPlugin('main', locals.routes),
]

Our complete `webpack.config.js` should now look like this:

var ExtractTextPlugin = require('extract-text-webpack-plugin');
var StaticSiteGeneratorPlugin = require('static-site-generator-webpack-plugin')
var locals = {
  routes: [
    '/',
  ]
}

module.exports = {
  entry: './src',
  output: {
    path: 'build',
    filename: 'bundle.js',
    libraryTarget: 'umd' // this is super important
  },
  module: {
    loaders: [
      {
        test: /.js$/,
        loader: 'babel',
        include: __dirname + '/src',
      },
      {
        test: /.css$/,
        loader: ExtractTextPlugin.extract('css?modules&importLoaders=1&localIdentName=[name]__[local]___[hash:base64:5]'),
        include: __dirname + '/src'
      }
    ],
  },
  plugins: [
    new StaticSiteGeneratorPlugin('main', locals.routes),
    new ExtractTextPlugin("styles.css"),
  ]
};

In our empty `src/index.js` file we can add the following:

// Exported static site renderer:
module.exports = function render(locals, callback) {
  callback(null, '<html>Hello!</html>');
};

For now we just want to print Hello! onto the homepage of our site. Eventually we’ll grow that up into a more realistic site.

In our `package.json`, which we discussed in the previous tutorial, we already have the basic command, webpack, which we can run with:

npm start

And if we check out our build directory then we should find an index.html file with our content. Sweet! We can confirm that the Static Site plugin is working. Now to test that this all works we can head back into our webpack.config.js and update our routes:

var locals = {
  routes: [
    '/',
    '/about'
  ]
};

By rerunning our npm start command, we’ve made a new file: `build/about/index.html`. However, this will have “Hello!” just like `build/index.html` because we’re sending the same content to both files. To fix that we’ll need to use a router, but first we’ll need to get React set up.

Before we do that we should move our routes into a separate file just to keep things nice and tidy. So in `./data.js` we can write:

module.exports = {
  routes: [
    '/',
    '/about'
  ]
}

Then we’ll require that data in `webpack.config.js` and remove our locals variable:

var data = require('./data.js');

Further down that file we’ll update our StaticSiteGeneratorPlugin:

plugins: [
  new ExtractTextPlugin('styles.css'),
  new StaticSiteGeneratorPlugin('main', data.routes, data),
]

Installing React

We want to make lots of little bundles of HTML and CSS that we can then bundle into a template (like an About or Homepage). This can be done with react, and react-dom, which we’ll need to install:

npm i -D react react-dom babel-preset-react

Then we’ll need to update our `.babelrc` file:

{
  "presets": ["es2016", "react"]
}

Now in a new folder, `/src/templates`, we’ll need to make a `Main.js` file. This will be where all our markup resides and it’ll be where all the shared assets for our templates will live (like everything in the and our site’s

:

import React from 'react'
import Head from './Head'

export default class Main extends React.Component {
  render() {
    return (
      <html>
        <Head title='React and CSS Modules' />
        <body>
          {/* This is where our content for various pages will go */}
        </body>
      </html>
    )
  }
}

There are two things to note here: First, if you’re unfamiliar with the JSX syntax that React uses, then it’s helpful to know that the text inside the body element is a comment. You also might have noticed that odd element—that’s not a standard HTML element—it’s a React component and what we’re doing here is passing it data via its title attribute. Although, it’s not an attribute it’s what’s known in the React world as props.

Now we need to make a `src/components/Head.js` file, too:

import React from 'react'

export default class Head extends React.Component {
  render() {
    return (
      <head>
        <title>{this.props.title}</title>
      </head>
    )
  }
}

We could put all that code from `Head.js` into `Main.js`, but it’s helpful to break our code up into smaller pieces: if we want a footer then we would make a new component with `src/components/Footer.js` and then import that into our `Main.js` file.

Now, in `src/index.js`, we can replace everything with our new React code:

import React from 'react'
import ReactDOMServer from 'react-dom/server'
import Main from './templates/Main.js'

module.exports = function render(locals, callback) {
  var html = ReactDOMServer.renderToStaticMarkup(React.createElement(Main, locals))
  callback(null, '<!DOCTYPE html>' + html)
}

What this does is import all our markup from `Main.js` (which will subsequently import the Head React component) and then it’ll render all of this with React DOM. If we run npm start once more and check out `build/index.html` at this stage then we’ll find that React has added our `Main.js` React component, along with the Head component, and then it renders it all into static markup.

But that content is still being generated for both our About page and our Homepage. Let’s bring in our router to fix this.

Setting up our Router

We need to deliver certain bits of code to certain routes: on the About page we need content for the About page, and likewise on a Homepage, Blog or any other page we might want to have. In other words we need a bit of software to boss the content around: a router. And for this we can let react-router do all the heavy lifting for us.

Before we begin it’s worth noting that in this tutorial we’ll be using version 2.0 of React Router and there are a bevy of changes since the previous version.

First we need to install it, because React Router doesn’t come bundled with React by default so we’ll have to hop into the command line:

npm i -D react-router

In the `/src` directory we can then make a `routes.js` file and add the following:

import React from 'react'
import {Route, Redirect} from 'react-router'
import Main from './templates/Main.js'
import Home from './templates/Home.js'
import About from './templates/About.js'

module.exports = (
  // Router code will go here
)

We want multiple pages: one for the homepage and another for the About page so we can quickly go ahead and make a `src/templates/About.js` file:

import React from 'react'
import Head from '../components/Head'

export default class About extends React.Component {
  render() {
    return (
      <div>
        <h1>About page</h1>
        <p>This is an about page</p>
      </div>
    )
  }
}

And a `src/templates/Home.js` file:

import React from 'react'
import Head from '../components/Head'

export default class Home extends React.Component {
  render() {
    return (
      <div>
        <h1>Home page</h1>
        <p>This is a home page</p>
      </div>
    )
  }
}

Now we can return to `routes.js` and inside module.exports:

<Route component={Main}>
  <Route path='/' component={Home}/>
  <Route path='/about' component={About}/>
</Route>

Our `src/templates/Main.js` file contains all of the surrounding markup (like the ). The `Home.js` and `About.js` React components can then be placed inside the element of `Main.js`.

Next we need a `src/router.js` file. This will effectively replace `src/index.js` so you can go ahead and delete that file and write the following in router.js:

import React from 'react'
import ReactDOM from 'react-dom'
import ReactDOMServer from 'react-dom/server'
import {Router, RouterContext, match, createMemoryHistory} from 'react-router'
import routes from './routes'
import Main from './templates/Main'

module.exports = function(locals, callback){
  const history = createMemoryHistory();
  const location = history.createLocation(locals.path);

  return match({
    routes: Routes,
    location: location
  }, function(error, redirectLocation, renderProps) {
    var html = ReactDOMServer.renderToStaticMarkup(
      <RouterContext {...renderProps} />
    );
    return callback(null, html);
  })
}

If you’re unfamiliar with what’s going on here then it’s best to take a look at Brad Westfall’s intro to React Router.

Because we’ve removed our `index.js` file and replaced it with our router we need to return to our webpack.config.js and fix the value for the entry key:

module.exports = {
  entry: './src/router',
  // other stuff...
}

And finally we just need to head over to `src/templates/Main.js`:

export default class Main extends React.Component {
  render() {
    return (
      <html>
        <Head title='React and CSS Modules' />
        <body>
          {this.props.children}
        </body>
      </html>
    )
  }
}

{this.props.children} is where all our code from the other templates will be placed. So now we can npm start once more and we should see two files being generated: `build/index.html` and `build/about/index.html`, each with their own respective content.

Reimplementing CSS Modules

Since the

Categories: Designing, Others Tags:
  1. No comments yet.
  1. No trackbacks yet.
You must be logged in to post a comment.