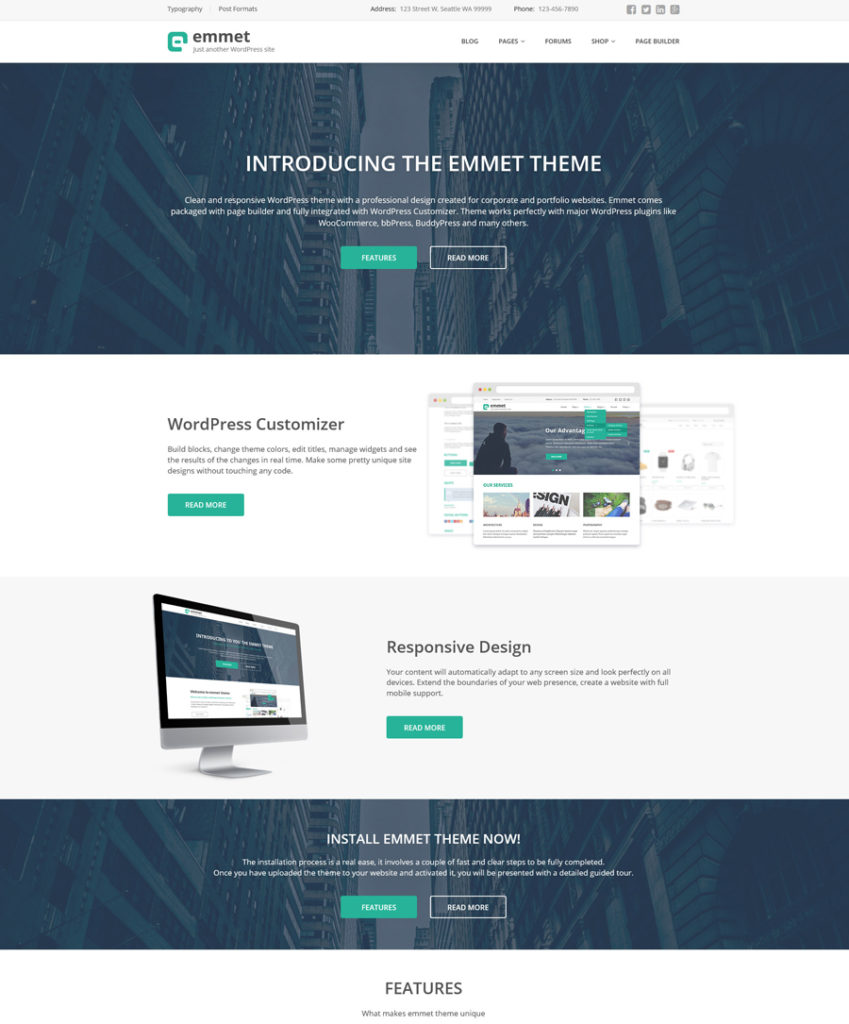
With Wix’s newest release, the Wix Pro Gallery, compromising on web image quality is now a thing of the past. Wix makes it easy for everyone to create a stunning website with all the tools they need. Designers can build beautiful sites complete with full online store integration, booking system, invoicing and more. And with this leading advanced image tool for web, you can now showcase images on your website in the highest quality online.
Sharp, Clear and High Quality Images for Web
Your web images should be displayed in the highest quality. The Wix Pro Gallery gives you full control over sharpness settings, letting you decide on the amount, radius and threshold of what you upload. They’re your images and you get the final say over what they’ll look like.
Showcase Everything in One Place – Images, Video and Text
The Wix Pro Gallery is about more than just your images. It’s a great way to organize all of your content from images to videos and text. What makes it different to other galleries? Simple – you can upload in the highest quality online without compromising on speed or performance. There are 6 simple, stunning pre-set layouts you can choose from, a built-in hover over effect (you can add your own color overlays and choose your opacity), as well as looping and auto-play tools.
Secure. Mobile-Optimized. Stunning.
Right-click protection is a must in modern website building and with the Wix Pro Gallery, your images are 100% secure. Plus, once you upload, they’ll automatically be mobile optimized. No matter what device your visitors are using, they’ll see your images in the same stunning high quality you uploaded them in. They can also show appreciation for their favorites love by clicking the heart button.
Showcase images on your website without compromising on quality. Try the Wix Pro Gallery for yourself.
This is the question you are likely to be pondering, setting out for website development services. With all the possible benefits and desired functionality in mind, you definitely want your website to provide the greatest ROI possible. Take a closer look at the website development cost structure to make sure nothing slips your mind.
One-time expenses to take into account
Preliminary stage or ordering the meal
However invisible it may seem, precise requirement specification (including project cost and time estimation) is the first cost point. Yet only on paper, the website already needs investments. The more in detail you agree on the website’s functionality and look-and-feel from the very beginning, the fewer reworks will be needed once the solution is ready.
Website design or plating the dish
Website design prices vary based on the required components and supplied media content. For sure, re-using a template is a more cost-effective option than a custom design, but finding a template that will support your brand identity is not so easy.
In general, the website will need universal elements (such as buttons and icons) and content-specific parts. As for the latter, by providing your own multimedia content you cut down on the cost of creation or buying licensed stock images. Still, don’t overlook the need to additionally invest into integrating you multimedia into the overall website design.
Targeting mobile users, you may be considering a responsive design to guarantee convenient interaction with the website across a range of screens. Note that it’s necessary to cover the expenses for every screen size you’d like the website to be compatible with.
Website development or cooking the main course
Development costs depend on a website’s size and capabilities. What’s the number of pages: 10 or 210? Do you need custom functionality? And what about integration with the CRM, ERP, databases, mobile apps, etc.?
Apart from the number of pages, their content matters. Large multi-page websites, complex from the user perspective, can have simpler structure than smaller solutions with a bunch of custom elements. More advanced functionality without doubt costs more. Enhancing your business and enriching user experience, the following features will simultaneously raise the development total cost:
admin features (membership, user management, database reports)
social media support (Facebook, Google+, Twitter), etc.
How about a money-saving tip? Getting started, define the functionality you need and split it into three groups:
must-haves for today
must-haves for tomorrow and
nice-to-have features
The website is supposed to get the job done. Period. Trendy features will let the website look cool and similar to the popular ones, as well as make set-up costs skyrocket. Planning growth and focusing on the current needs, you’ll stay on budget. Besides, consult with the service provider on the changes in requirements: perhaps, there’s a more cost-effective option to implement a desired idea.
Website redesign or a dinner with your own ingredients
Looking for these tempting minimum redevelopment costs, ensure you don’t get into a mousetrap. Apart from adding new functionality, quality website redesign implies preserving the assets you already have. This means redesign should embrace accurate content migration, keeping your SEO-equity, enhancing performance and scalability.
According to our internal research, content migration may take up to 50% of the overall development costs. Why so? You may choose a new CMS or go for content reformatting due to the prior use of WYSIWYG editors and multimedia that is highly dependent on the website’s layout.
Getting licenses or buying ready-made meals
Once you go for a CMS-based website (e.g. the one on Episerver CMS), the initial payment is extended with license fees. However, the use of powerful CMS systems helps to save money by reducing the development efforts required for complex websites.
What is more, license fees are not only about CMSs, some of the features, such as mailing or payment services based on specific software, are not always free.
Testing or tasting
One more cost point is website testing. For sure, developers involved in the website delivery will do some testing before the solution release. However, as the owner, you are interested in a website that is not only bug-free, but also convenient to the user and secure from intrusion. Then set your alarm clock for the testing time.
Usability testing will show whether the visitor finds your website convenient. Therefore it should be carried out before the solution launch. Ideally, the testing group’s members should be close to your target audience, even though this may increase the cost. Overall, be prepared for two-three rounds of usability testing to get a really user-friendly website.
Penetration testing is to be taken regularly, say, once a year, so as to reinforce existing security controls against a possible intrusion. The testing fees range depending on the time and amount of parameters tested.
On the whole, it’s not a good idea to get usability and penetration testing done by your website developers. Why not? Due to the lack of:
(a) Look from outside
As for usability testing, a person engaged in website design and development will not look at your website from the user perspective without bias, just due to having more knowledge, experience and desire to understand your website.
Penetration testers not engrossed in the website development, will not only use the latest tools, but also look more thoroughly for weak points and vulnerabilities.
(b) Specific expertise
The test results’ quality depends on the testers’ competencies. For usability testing that includes skills to make good tests and elaborate recommendations concerning usability issues. Penetration testing requires experience in defining the intruder model, vulnerabilities detection, visual demonstration of the possible damage and more.
Finally, before the solution is rolled out to the market, you will also need acceptance testing to be sure the website complies with your business requirements provided earlier in the preliminary stage.
Other cost factors or sprinkling the seasoning
Needless to say that delivery deadlines and solution complexity (both in terms of the design and functionality) will affect the total website cost. But there’re some other hidden factors to consider:
Internal team time lags
Make sure your team, involved in collaboration with the developers, reviews and gives feedback quickly. Otherwise, you’ll face additional costs just to cover the extra time spent on ineffective communication. In addition, try to focus on the truly valuable parameters, as nitpicking results in higher costs with almost invisible changes from a website visitor perspective.
Blurred project concept
Many companies provide a definite number of website design patterns, say two or three, as they allocate particular time for the planning stage. The customer’s ever-changing requirements lead to extra creative research and reworks, which results in higher delivery costs. Therefore, to save money, come up with a realistic concept of the future website and stick to it.
Regular costs to keep in mind
A website is not a one-off buy. To enjoy it up and running, you’ll have to make regular payments, either for merely staying online, or for updates to improve the website performance and remain competitive.
The former includes regular payments for the domain name and hosting just to reserve a place for your website in the Net, as well as fees for SEO to ensure your target customer can quickly pick up your website out of many. Unless you are savvy enough to engage in on-site content improvement, link building, keyword research, and optimization, chose a quality service provider to regularly, say, annually, carry out SEO website audit and optimization for you.
The latter, payments for maintenance, cover the bug fixing and updates to adjust to the changing environment, like a new browser launch, or the need for additional functionality to enhance UX and security level. Growing along with your business, the website will also require scalability and performance optimization to handle the soaring number of visitors and data amount.
Overall, to stay healthy, a websites needs money injections on an ongoing basis, which are likely to keep increasing. The larger your website becomes, the more data and visitors it processes, the more resources it requires to be active. Still, this money is just the necessary amount of fuel to keep your online vehicle moving.
Turnkey solution vs a cook-it-yourself approach
Let’s face it. Full cycle website development done by a tried and tested service provider will cost two-three times more than bringing together website parts delivered by small standalone companies. However, as a reward for extra payments you’ll get:
Worries off: no need to fit together the solution parts by yourself
Guarantee: confidence in the end solution quality
Consistency: for instance, the design won’t damage performance or search engine visibility
Valuable details in focus: as with content migration, no loss of users, traffic, URLs
Collaboration: your involvement in the development process to get the best-fit website
Thought-out processes: quick move through the development stages
Overall, despite the reduced initial costs, the construct-it-yourself approach will require from you sufficient IT industry knowledge. Otherwise, you can end up with spending more on reworks than on actual full-cycle development from the start.
Bringing it all together
Planning a website development budget, make sure it covers not only one-time costs, but also the hidden and regular expenses. For sure, you’ll be constantly enticed by the low-cost offerings, but stay skeptical.
In the end it’s up to you to decide whether to cook at home, get a snack in a fast-food cafe nearby, or dine in a Michelin-starred restaurant. However, not every diner will serve both quality and sophisticated dish, and amateurs won’t get the difference until they suffer indigestion.
By Vadzim Belski, Head of Web Development Department at ScienceSoft
Did you know that by the time a teen in the US reaches 16 years of age, they are spending less than seven hours a week in nature, and these trends are worldwide. Parents are as concerned about their children not having time outdoors as they are about bullying, obesity and education. But they are unsure about what to do.
Parents have increased concerns for their children’s safety. They are less willing to let their children play outdoors without direct supervision. As a result, children spend most of their free time in organized sports, music and arts activities. This results in less time for unstructured play than in previous generations. Richard Louv, writer and nature-time advocate, describes this condition as a “nature deficit disorder.”
This is the second article in a three-part series about using the WP API to achieve something I’m calling “Remote Control WordPress”, a lifestyle where you’d manage network settings on a “control” install, and have other “client” installs pull their settings from the control. The advantage of this is that you could then manage the settings for many WordPress installs all in one place. The first article laid out how to register network settings as a custom endpoint in the WP API, but stopped short of demonstrating how to grab those settings when they are protected by a permissions callback, which they should be. This article picks up that thread, demonstrating how to pass OAuth credentials to the WP API.
OAuth is tricky. In learning the process, I was initially in disbelief as to the quantity and complexity of the steps involved. If you’re like me, reading the spec is a pretty uninspiring place to start. The OAuth1 plugin docs are excellent, but the details are hard to appreciate without having seen the whole process. I’m hoping to provide you with a working example that you can refactor or break as desired, allowing you to see the different steps come to life. Given that, you can go back and appreciate the finer points in the docs and spec.
What You’ll Need for This Article
In the first article, I explained that we’d need two WordPress installs to pull this off:
The control install
A client install
So far, we’ve only made use of the control install, but in this article we’ll use both.
We’ll also need a handful of plugins, which I’ll specify as they’re needed.
Like all the articles in this series, I’m running the twentysixteen theme, though this shouldn’t really matter.
Preparing the Control
In the first article, we installed the WP REST API V2 plugin on the control install. While that plugin is still necessary, check out /wp-json, which returns metadata about the API. If you ctrl+f for oauth, you’ll get no results.
The Oauth1 plugin has not yet been activated on the control install.
OAuth? More like NO AUTH, amirite?
Ahem. Therefore, now would be a fine time to install and network activate the OAuth1 plugin on the control, and try that url again. Voila:
The Oauth1 plugin has been activated on the control install.
Perfect. The control can handle OAuth requests now.
One of the other things the OAuth1 plugin does is allow you to register applications, which is exactly what our client installs are. In wp-admin, check out /wp-admin/users.php?page=rest-oauth1-apps and register your client install. The details that you fill in are not at all important – seriously, they can just be gibberish – but the resulting consumer_secret and consumer_key are critical. You’ll need them in a moment.
The wp-admin UI for the Oauth1 plugin.
If it feels like we’re piling plugins on top of plugins, I feel your pain (I’ve written about this feeling elsewhere, if you’re interested). Unfortunately, that’s just going to get worse, so hold your nose and get ready for more dependencies!
Preparing the Client
Now we’ll switch to the client install, which is the first time we’ve done so thus far in the series. My client install happens to be my local MAMP. Just a reminder, indeed the whole purpose of this article: In production, you might have many, many client installs. In real life I have like 30, but for this demo I’m just using my local MAMP.
Grab my CSS-Tricks WP API Client plugin from GitHub and network activate it. It ships with a shortcode for demonstrating oauth requests: [css_tricks_wp_api_client meta_key='site_name']. Add that shortcode to the content of a page. In that example, I’m asking for the value of the setting whose meta_key is site_name. You can supply any network option name there.
The admin UI for our shortcode.
You can browse that shortcode on the front-end if you like, but don’t get your hopes up:
Time to fill in the blanks.
This is the type of thing where you download a plugin from GitHub, but then you have to hardcode in some of your own values. Take note of the main plugin file, where you’re prompted to fill in the blanks. The first is a url for our network_settings endpoint, which we established in the first article in this series. The other four are for OAuth.
It’s worth pausing to restate why we need OAuth at all. You may recall from the first article in this series, that this is due to the permission_callback, which only allows requests from credentialed users. That’s why we need to provide an OAuth header with our request, and we have that in place so that all of our network settings are not sitting out there for anyone to query.
Therefore, it’s time to build some OAuth creds. If you’re like me, this is the part you found bewildering; this is why you’re here. I can’t say it any plainer: Get ready to jump through a bunch of hoops in order to OAuth.
Postman Delivers
Providing an OAuth header is a complicated process, made worse by the fact that there are a number of ways to go about it.
You could use WP-CLI. I haven’t tried this tutorial myself, but it looks promising.
You could write a bunch of code and make a really cool interface that works right in the web browser. That gist is what allowed me to get a grasp on what OAuth is all about.
You could use an HTTP client like Postman. I was introduced to using Postman as a way to build OAuth creds via this great tutorial.
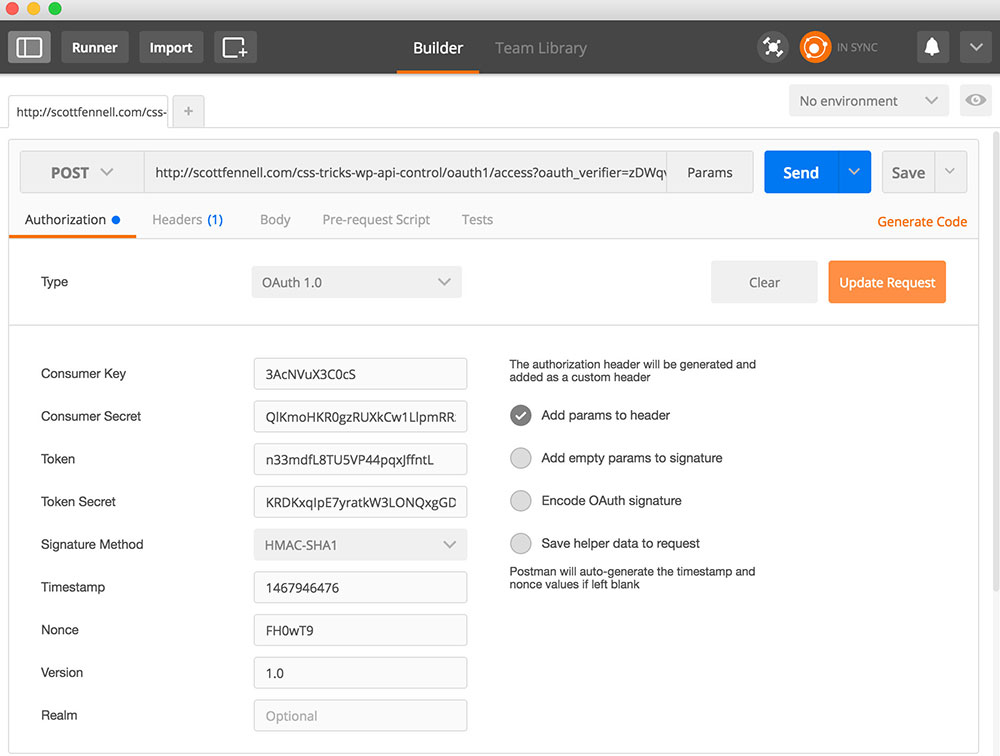
We’re going to do number three (I’m mostly just re-hashing part of that tutorial) because it seems to be the simplest method, so download and install Postman on your machine. Once Postman is installed, we’re going to make an HTTP request to the control install, as follows:
The first http request from Postman to the control install.
There are three parameters there you’ll need to fill in. The rest are generated by Postman, which is in fact much of the value in using Postman for this exercise. The three values you need to worry about are:
The URL. Visit /wp-json on the control install and ctrl+F for “request”. You’ll find a url similar to http://example.com/oauth1/request. Copy, paste, unslash, good to go.
The consumer key. You generated this on the control install earlier in the tutorial, at /wp-admin/users.php?page=rest-oauth1-apps. In that UI, it’s called the “client key”, as opposed to the “consumer key”, but those two terms are synonymous here.
The consumer secret. Same as step two, only it’s called a “client secret” in wp-admin, as opposed to a “consumer secret”.
Postman will reply with what are called “temporary credentials”, which you’ll need to copy from the console. Mine look like this:
The “temporary credentials” are actually just a query string which you’ll tack on to a special URL. Similar to before, browse wp-json, but this time find the authorize URL. You’ll prepend this (and a question mark) to the query string from Postman, which should leave you with the following URL:
You’ll never guess what we’re going to do with this URL. Enter it in some weird HTTP app? Not at the moment. Pass it through some bizarre encryption function? No sir. Chant it in front of a mirror thirteen times? Not necessary for our use case. Just fire up a web browser and visit it. I think you’ll be delighted:
The UI, on the control install, for authorizing your client installs.
If you’re not currently logged in to the control install, you’ll first be prompted to do so.
Once you click authorize, you’ll get a token.
We authorized the client installs and got a token.
If you were browse your user profile in wp-admin on the control install, you’d now see a list of the apps you’ve approved, along with a UI for revoking them:
This user has authorized the client installs.
Take the token back to Postman and make the following request:
The final Postman request.
There are five parameters that you’ll need to supply.
The URL. At wp-json, look for the access URL, and add the token we just got as a URL variable for oauth_verifier. In other words, your URL would look something like this:
How am I arriving at oauth_verifier for the URL variable? I really have no idea. I lucked out and saw it in the Token Exchange section of the tutorial I mentioned earlier. That just seems to be the thing to do. Maybe there are multiple ways of achieving this step. I don’t see anything about adding this value as a URL variable per se in the docs section on token exchange. However, I did find that it also seems to work fine if you pass the oauth_verifier in the body of your request. Whatever?
The consumer key. You got this in wp-admin when you registered your app. It’s the same value you used here in the previous Postman call.
The consumer secret. Again, you got this in wp-admin when you registered your app. Like the consumer key, it’s the same value you used here in the previous Postman call.
The token. This is a temporary credential found in the response from the previous Postman call.
The token secret. This is also a temporary credential in the response from the previous Postman call.
Postman will respond with your oauth_token and oauth_token_secret. Congrats! We now have everything we need in order to make OAuth’d HTTP requests!
Back to the Client Install
In the previous section, we gathered a ton of different tokens, secrets, keys, all kinds of weird stuff like that. It’s time to put those values to work. Crack open the main plugin file for my CSS-Tricks WP API Client plugin and hardcode as indicated in the source code.
A lot of work, yes, but we made it! Load the front end again and see the resulting JSON:
Sweet victory.
It worked! We have just retrieved a setting, in this case site_name, from the control install.
Sure, it Works in Practice, but Does it Work in Theory?
Normally my learning style is to have some context and theory before diving into an example. OAuth isn’t like that. It’s just too weird. That’s why I’ve walked through an example without providing any theory. When it comes to OAuth, the theory-to-practice ratio is way out of whack. I think most of us here can read an article in the codex and end up with a general idea of what we’re doing and why. It doesn’t work that way with OAuth. Not for me, at least.
But I’ll tell you what I’ll do. Allow me to map a few sections of my plugin code to their corresponding treatment in the OAuth1 docs, so you can use your own critical thinking when implementing OAuth.
Crack open my OAuth class and give it a read. It’s heavily commented. The class expects one argument, the meta_key for the option we’re querying for, and reveals one public function, get_response(), for making OAuth’d HTTP requests. The constructor calls a whole bevy of functions in order to convert your secrets and tokens into an auth header, which I’ll dig into now.
The Signature Key
The docs instruct us to build a signature key by taking the consumer secret and the token secret, URL-encoding each, then concatenating them with & into a string. That’s exactly what my function does. This value will be used later to create the OAuth signature itself.
The Headers (The First Time)
We can set most of the OAuth headers at this point, and in fact we’ll need to in order to perform subsequent steps. Here’s my code building the headers. The astute reader will note that this function gets called again later, once we have the signature. I’ll revisit this in a moment. For now though, we’re ready to build the base string.
The Base String
The base string is a concatenation of every part of the request, including the HTTP method, all of the OAuth headers other than the signature, and any variables we’re passing along. Here’s my code doing so. Like the signature key, we’ll use the base string in a moment to create the signature.
The Signature
We create the signature by combining and hashing the base string and the signature key. My code also runs it through base64_encode(), which is required, but PHP’s hashing function does not do so automatically.
I gave you a working example, and I showed you how I arrived at this example, but I feel bad. I really didn’t explain what most of this crap is. Tokens, signatures, keys – honestly I can barely keep track of it all. If you really feel the need to know how this works, I’m not going to be able to do a better job of explaining it than the spec does. I’ve lost interest in my own tutorial at this point! It’s … um … beyond the scope of this tutorial. Good luck to you.
What’s Next?
In the first article, we added network settings to the WP API. In this article, we demonstrated how to retrieve them. In the third and final article, we’ll explore my abstraction layer so we’re not repeating this whole process in all of our feature plugins, and we’ll write a small feature plugin as an example of how to use that abstraction.
No doubt user experience (UX) is a soul of a website. It is something that gives reason to online visitors to revisit the website. If a website fails to offer great UX, then you can say that all the efforts behind its creation gone into the vain. A website is beyond look and feel; it
Today, we’ll start a new, small series of articles, specifically for those that want to start with blogging. There are many things to keep in mind, and often, novices don’t know about them. That’s why we’ll shed light on blogging for beginners and make our way to an own blog step by step.
Which Platform Should You Choose?
Novice bloggers often face the problem that they don’t really know which platform suits their needs. Let’s take the three most popular platforms as an example: Blogger, WordPress.com, and WordPress.org. The solutions Blogger.com, and WordPress.com are free, making them look like a good choice for beginners at first.
However, free solutions also come with a bunch of disadvantages for those that don’t want to toy around but take blogging seriously. More on that later.
Blogger.com is Google’s free blogging platform. As soon as you own a Google account, you can sign up for Blogger in no time and get your blog started. Afterward, confirm your profile, choose the right language if you didn’t do that already, and click “Continue to Blogger.” In the next window, all you need to do is click the button “New Blog” to start a – well – blog.
You will then be asked to choose a blog name, as well as the blog address, which is a subdomain of Blogger.com.
Example: mytestblogiscool.blogspot.com.
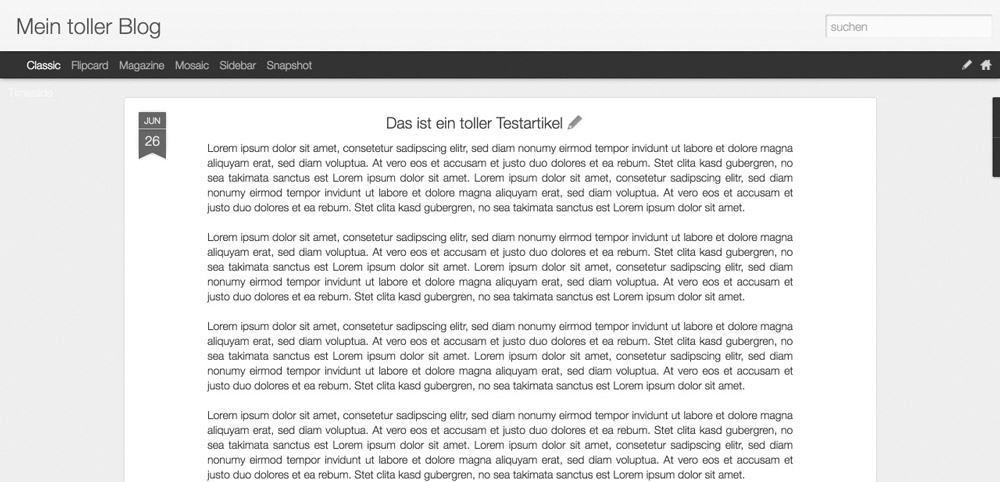
Now, you get to pick one of seven designs for your blog. Then, all it takes is a click on “Create Blog”, and you’re done. With my settings, a post will look like this:
A blog with a post at Blogger.com
Blogger.com: My Verdict
Blogger.com is designed in a very rudimentary way. There are barely any simple ways to influence the design, but that’s exactly what would be substantial. The user-friendliness is high, but the visual result is nowhere near satisfying. Conclusion: Nice to play around with, but fully unsuitable for more or less serious blogging.
WordPress is also available in a hosted version called WordPress.com. Here, you can also set up a blog in no time. After registering an account at WordPress.com, you create a new blog in only five steps.
First, choose a category that fits your blog (health, wellness, and so on), then go in-depth and make a more specific choice on the blog’s topics. Subsequently, define how your landing page will be structured. The selection of a theme, which is the actual design, will have to be made, depending on the landing page structure you picked before.
It’s always possible to switch the theme when you don’t like it anymore.
Now, you get to choose a domain. There are two options: you could use a free subdomain by WordPress, or create your own domain which starts at 18 Euro a year.
After creating the domain, you can choose between the provided plans. The plan without any additions and very few customization options is free. When picking a proper plan, depending on how feature-rich you like it, you easily end up paying 25 Euro each month. That’s a lot – too much, even!
Publishing a post is done very easily and fast. The interface is as clean as you can imagine.
The result already looks a lot better than the one from its rival Blogger.
WordPress.com: My Verdict
WordPress.com is a good pick to practice blogging and getting started. However, it’s not suited for those that don’t only want to write a post for their colleagues every couple of weeks. You barely have any influence, you can’t tune or adjust the theme, and you’re not able to install plugins to extend the functionality. To put it short, either you pay for more options or choose something else.
When you want to take blogging seriously, it’s tough to get around using a paid solution.
This is the “actual” WordPress. The version that started taking over the entire world. The software is free as well. However, it requires storage space on the internet. Thus, to use WordPress, you’ll need to rent either a web hosting package or a server.
Then, WordPress can be installed within that storage space, which is simple. Most web hosts also provide an auto-installer. This allows you to quickly install WordPress within a few minutes.
A decent web hosting package is available starting at only about five Euro a month. You should make sure that you get an SSD memory disk instead of an HDD, and that the new PHP version 7 can be used. Both speeds up your blog. This type of web hosting also comes with at least one domain address.
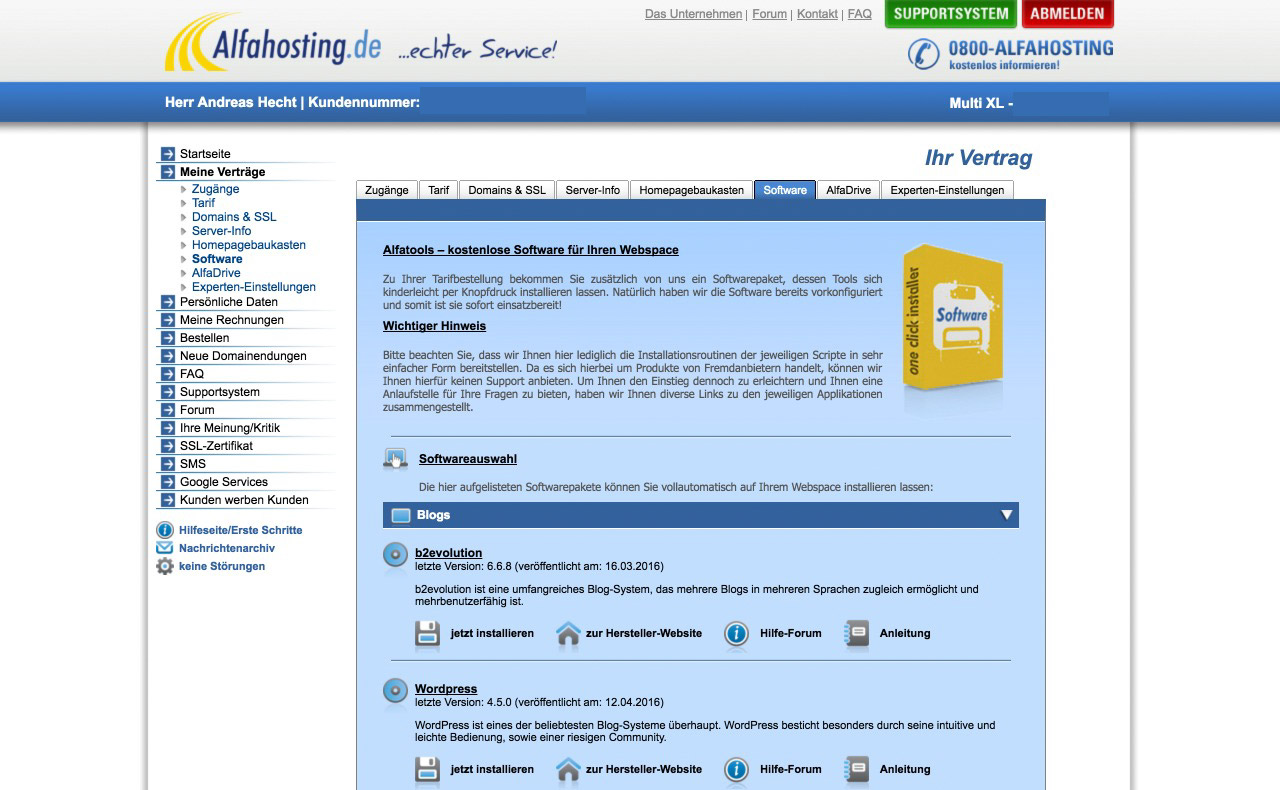
I’ve made good experiences with the host Alfahosting.de from Germany. Their prices are moderate, and they offer a ticket support that helps within 20 minutes most of the time.
If you want to take blogging serious, choose WordPress.org and a web hosting package. For the money spent, you’ll receive lots of advantages.
Search themes directly within WordPress and install them in two clicks.
Get to choose your design from almost 4.000 free themes.
Install professional, paid themes.
Pick any function extension you need from 45,000 free plugins.
Customize your WordPress infinitely, until you’re satisfied.
Gain full control over every aspect of your website.
Any feature you could think of is only one plugin installation away.
Thus, I strongly recommend you install WordPress. The community is huge; you’ll always get advice when needed. There’re at least one tutorial and plugin for every problem.
You’ve chosen your favorite web host. That’s great. Now, when ordering your hosting package, you’ll be asked for the domain. The domain is a imperative thing, as it’s basically your blog’s address. For example, Noupe’s domain is noupe.com. Displaying “www” is activated as well. Thus, the complete domain is called www.noupe.com. This is what characterizes a good domain:
A good domain should be as short and memorable as possible
It should have the topic or the name of the brand in its title. When writing about health, this should be evident from the domain.
Your optimal domain should only contain a hyphen when it’s necessary.
Find Your Niche
Before making a choice, think about what niche you want to be in. What do you want to write about, what’s your topic? This will be a determining factor for your domain. Keep in mind that a different topic might not fit your existing domain, so choose a topic that you can write about for years, as you have enough knowledge on it to continuously create articles about it.
Once you’ve done that, you’ll have an excellent starting point for a domain. When your chosen domain is still available, order your web hosting package, as it includes a free domain.
Conclusion
Now, you can call yourself the proud owner of web space and domain, meaning you can install WordPress. With Alfahosting, this can be done easily via the installer:
Installing WP on my deprecated Web Space over at Alfahosting.
Next, you need to choose a theme and install the core set of useful plugins. But more on that in the second part of our series.
By the way: Alfahosting is the example as that’s my host. This makes screenshots easy to take. You could also choose different providers like Domain Factory, Hetzner, Mittwald, All-Inkl or the giants 1&1 or Strato or Bluehost or whatever popular you have in your country.
This year, there will be 42 different sports and over 300 events taking place at the Olympics. Perhaps you have a project related to these upcoming games, or maybe you’ll be working on a project which is somehow related? Wouldn’t it be great to have a set of consistent icons for all sports-related activities, just in case? Well, that’s just what we thought.
This set of 45 icons was created by the design team at Icons8. Please note that this icon set is licensed under a Creative Commons Attribution 3.0 Unported. You may modify the size, color or shape of the icons. No attribution is required, however, reselling of bundles or individual pictograms is not cool. Please provide credits to the creators and link to the article in which this freebie was released if you would like to spread the word in blog posts or anywhere else.
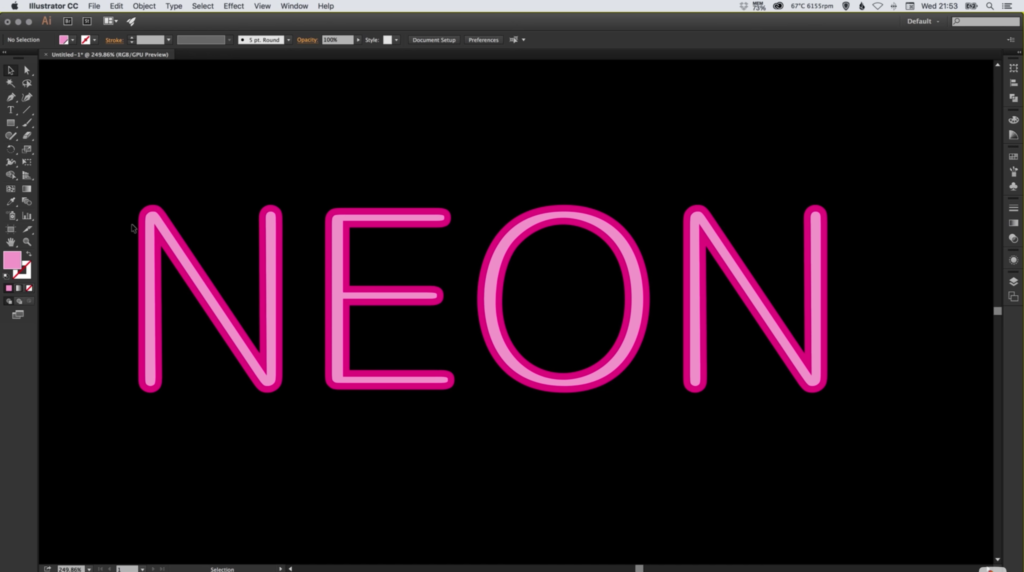
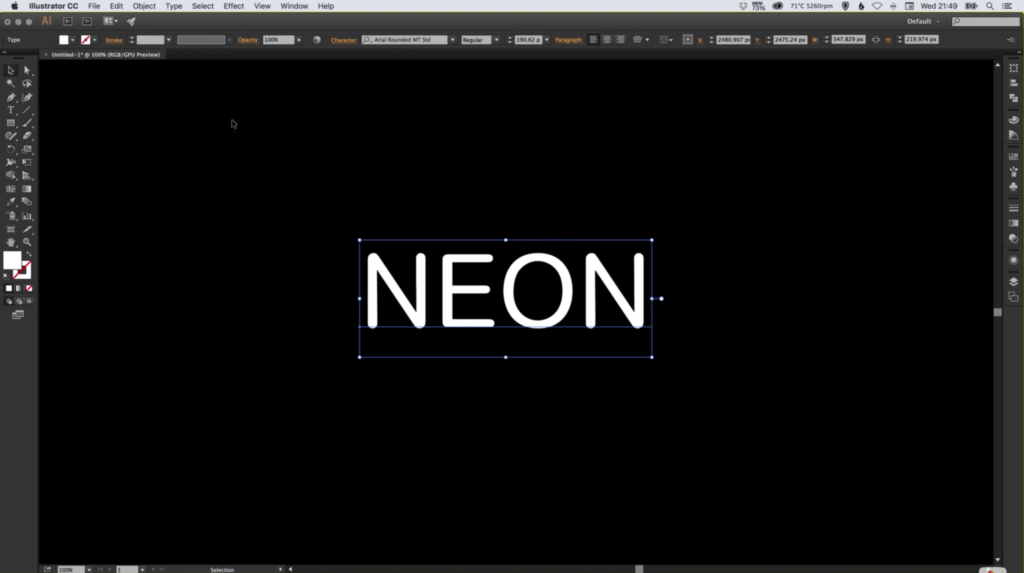
In this tutorial, we’re going to learn how to create a neon text effect in AdobeIllustrator.
The Steps (1-8)
1. Create a New Document.
2. Select the Rectangle Tool, Left-click and Drag to draw a four-sided shape that covers the entire Width and Height of the artboard. Set the colour of this shape to black #000000.
3. Select the Text Tool, Left-click anywhere on the artboard, type your text, and select a font of your choice.
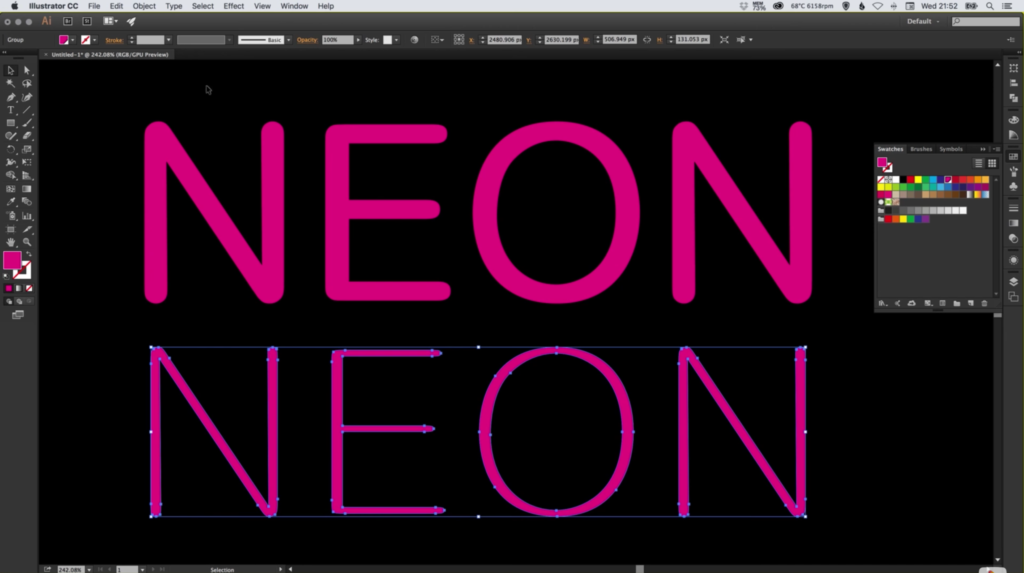
4. Ensure that the text has a Fill colour of pink #E6007E, and go to Type > Create Outlines to convert the text into a shape.
5. With the text selected, go to Object > Path > Offset Path, and set a minus/negative offset value (-5 for this tutorial) and click OK. The aim here is to create a copy of the text that is actually thinner, and fits inside of the original letters.
6. Give these thinner letters a lighter pink colour #EC8CC8.
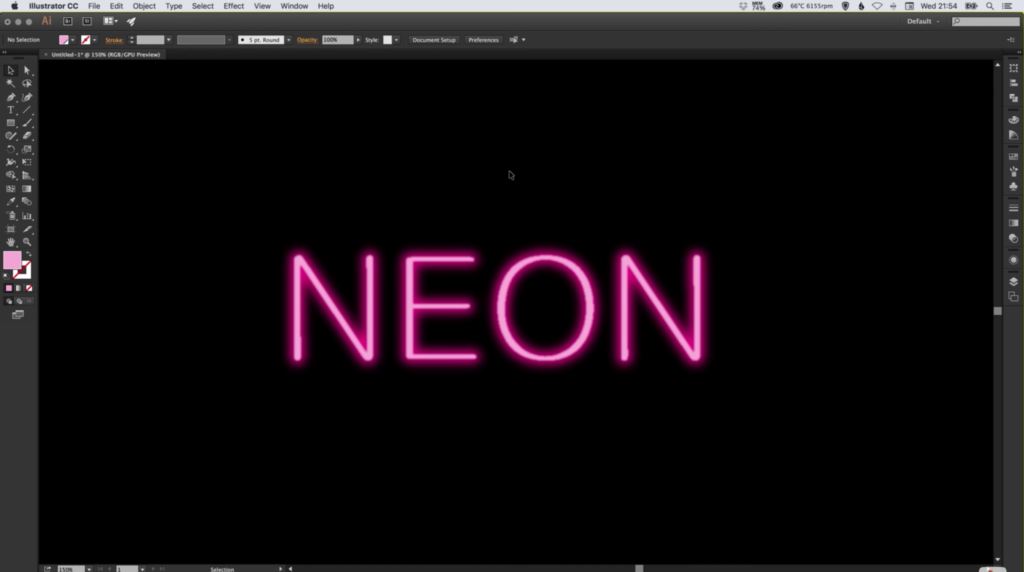
7. Next, select the darker pink letters and go to Effect > Blur > Gaussian Blur, and specify a value that gives a pink glow around each of the letters. Adjust the blur value depending on how much of a glow you would like around your letters.
8. You can also add a small amount of blur to the thinner light pink text too, in order to help it blend together with the other blurred letters more effectively (optional).
GPL WordPress themes are eliciting more and more demand in the WordPress community. The possibility of using one WordPress theme on more than one site lures the web audience, making them give preference to this specific type of ready-made web design product. So, taking into consideration the public interest in GPL WordPress themes, we have decided to create a compilation of the most popular recent themes licensed under the GPL.
Please bear in mind that the last 5 WordPress themes from the compilation are included in one bundle, which you can purchase at a discount. While one GPL WordPress theme costs $45, a set of 5 blogging WordPress themes is available for only $74. Isn’t that amazing?
So, let’s get straight to the list and review all GPL WordPress themes one-by-one. Btw, each of the WordPress themes below comes with free support.
As the name implies, the theme is best suited for business and financial websites. The clean and straightforward design focuses the users’ attention on the details. Thanks to the responsive framework, the theme runs smoothly across a variety of devices. Front page customizer lets you manage all layout elements intuitively.
This GPL WordPress theme is a great solution for fashion-related blogs and sites. The layout is designed to handle information-heavy web projects. Valid code and a number of pro customization options allow you to tweak the theme in many ways. Social media integration welcomes the online community to join your fan boards on Facebook, Twitter and Google+.
The next theme on today’s list of GPL WordPress themes is designed for avid travelers. You can use it for a blog, personal or business site. Its design is clean and minimalist. The header features a sticky drop-down menu. Travelop is integrated with social sharing options. In the footer of the theme, an Instagram feed introduces users to the latest photo and video updates.
Just like the rest of the GPL WordPress themes on this list, Sketchfield runs on the responsive Bootstrap framework. The layout can be tweaked by simply dragging and dropping its elements with the help of a mouse. The theme is integrated with a contact form and newsletter subscription form. Both of them are ready to go out-of-the-box.
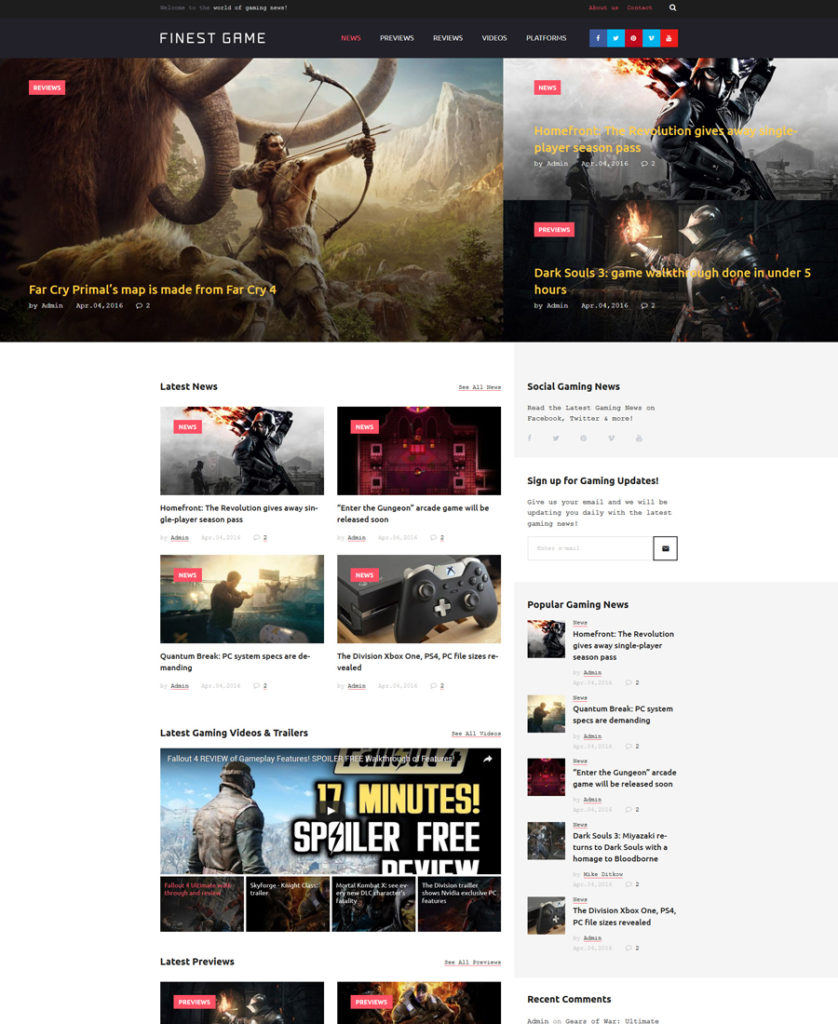
The next theme on the list of GPL WordPress themes is best suited for content heavy websites. Online magazines and news portals will perform at their best when built with the help of this theme. Pre-loaded with WordPress Live Customizer, the theme is intended to be handled equally well by users of all skill levels. A huge set of premium widgets is provided to help you make your web resource more impressive and user-friendly.
Editorso is one of those fully editable WordPress themes that are best suited for personal blogs. An integrated drag-and-drop page builder lets you tweak literally any element of the design, without any coding knowledge being involved. The theme is compatible with the latest WordPress versions. Thanks to the retina ready layout, your web resource will look razor sharp across a variety of gadgets.
Fairy Style is a rock-solid foundation for fashion and beauty web stores. An edge-to-edge slider in the header of the theme invites the audience in. Customizable blocks of promotional and category banners right below it introduce people to your special offers in a simple and intuitive manner. Featured items are highlighted with product badges, helping the users with quicker decision-making.
The theme is specifically tailored for sports blogs and news portals. It features a dark-colored layout, which brings a sense of elegance and luxury to the theme. The layout features lots of bold visuals, making the theme an eye-catcher. Two column content positioning lets you share the latest publications and provide additional navigation options within a user-friendly interface.
If you are a big fan of electronics or run a niche-specific business, then the following theme on the list of GPL WordPress themes will help you build your online presence with ease. The layout is focused on the effective presentation of content. Images are accompanied with texts, providing for better readability of the theme. The location of banners, sliders and featured content can be managed while simply dragging and dropping design elements.
Recipe blogs or other food related sites will impress the audience with their appetizing layouts thanks to this GPL WordPress theme. The design features lots of whitespace, which makes it so open and easy-to-navigate. Thanks to 2-column content positioning, you can make up a perfect balance of the latest blog updates and extra navigation elements.
We’ve already shown you a few GPL WordPress themes designed for news sites and online magazines, and here is one more great ready-made solution for news portals. Card-based content positioning on the front page lets you share loads of visual and written content in an easy to scan manner. Thanks to the smart use of whitespace, the content is more readable and images look more impressive. You can enhance the visual presentation of your blog or site by means of several gallery scripts and video integration.
This easy and intuitive WordPress theme will perfectly fit science geeks. The layout is spacious enough to share loads of data in an intuitive and quick to scan way. Thanks to the grid-based page structure, the theme is a suitable fit for information-heavy websites. Integrated live search greatly simplifies browsing.
The theme is intended to bring coffee shops to the web. Its brownish color scheme creates a soft and calming atmosphere on the page. Outstanding banners and bold sliders draw the users’ attention to your special offers. Featured items are supplied with product badges, star ratings, add to compare and wishlist functionalities. A block of user testimonials is intended to grow you site’s credibility.
Use this GPL WordPress theme to sell electronics online. Featuring a masculine design, the theme is intended to bring your store’s products to the forefront. The front page includes a number of customizable product carousels. Alongside online shop functionality, the theme is pre-loaded with a fully featured blog. You can highlight the latest blog updates on the front page.
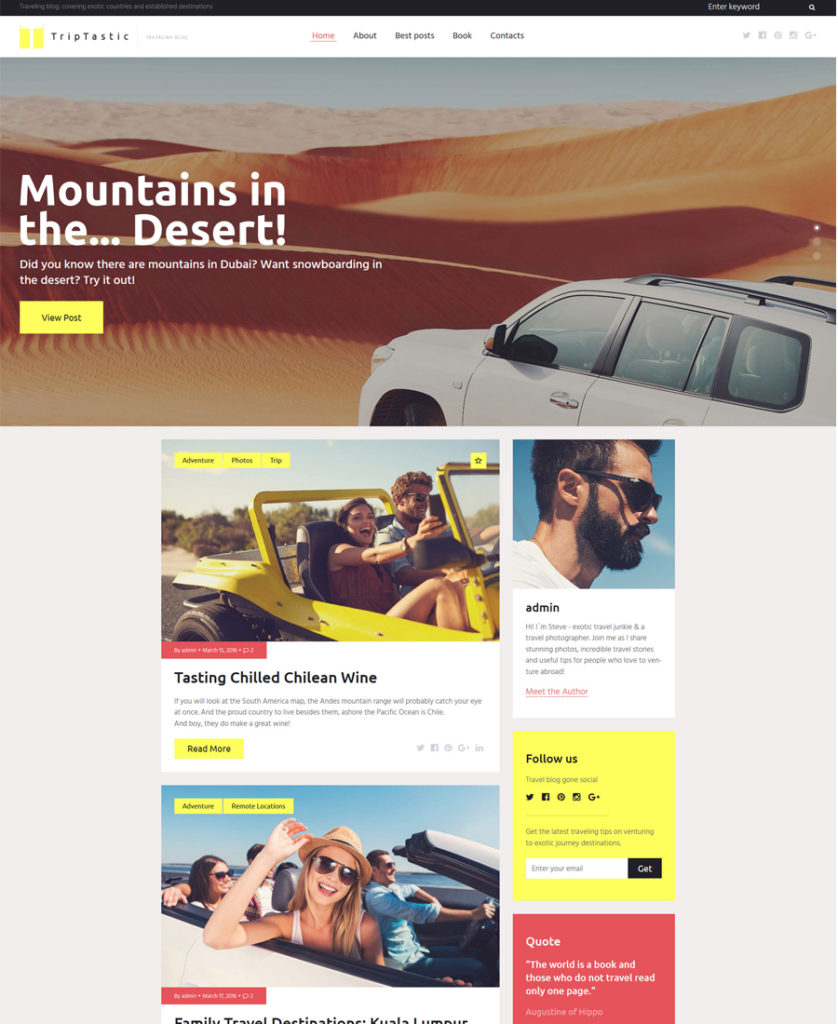
The next theme on the list of trendy GPL WordPress themes is TripTastic. The theme will appeal to adventure-goers. The header welcomes everyone with a page-width slider. The layout will be a perfect fit for travel blogs. The front page includes the latest blog highlights. Social sharing options below each publication invite the users to spread the word about their preferred data among friends and social media followers.
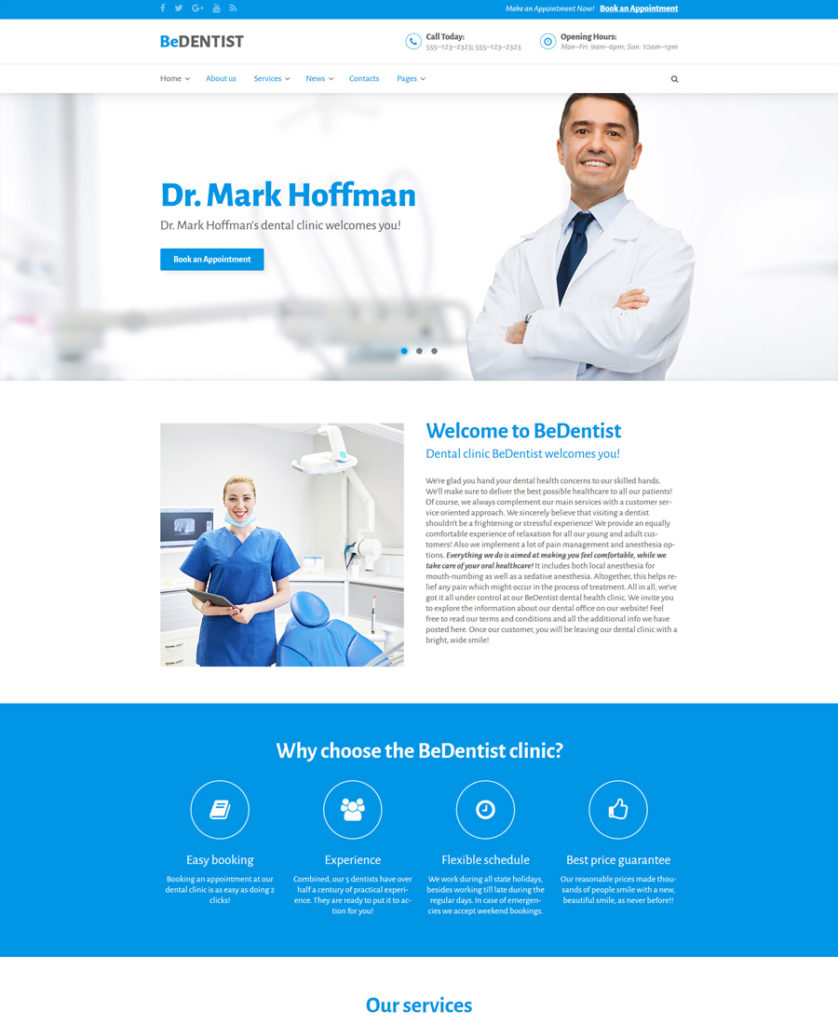
Medical and healthcare sites will look razor-sharp when built with the help of this theme. The layout is simple and intuitive. The main navigation panel is presented with a drop-down menu. Advanced search right next to it is provided to facilitate the users’ browsing experience. Contact details are easy to reach on the theme’s front page and in the footer. A set of user testimonials is added to enhance the users’ confidence in the credibility of your business.
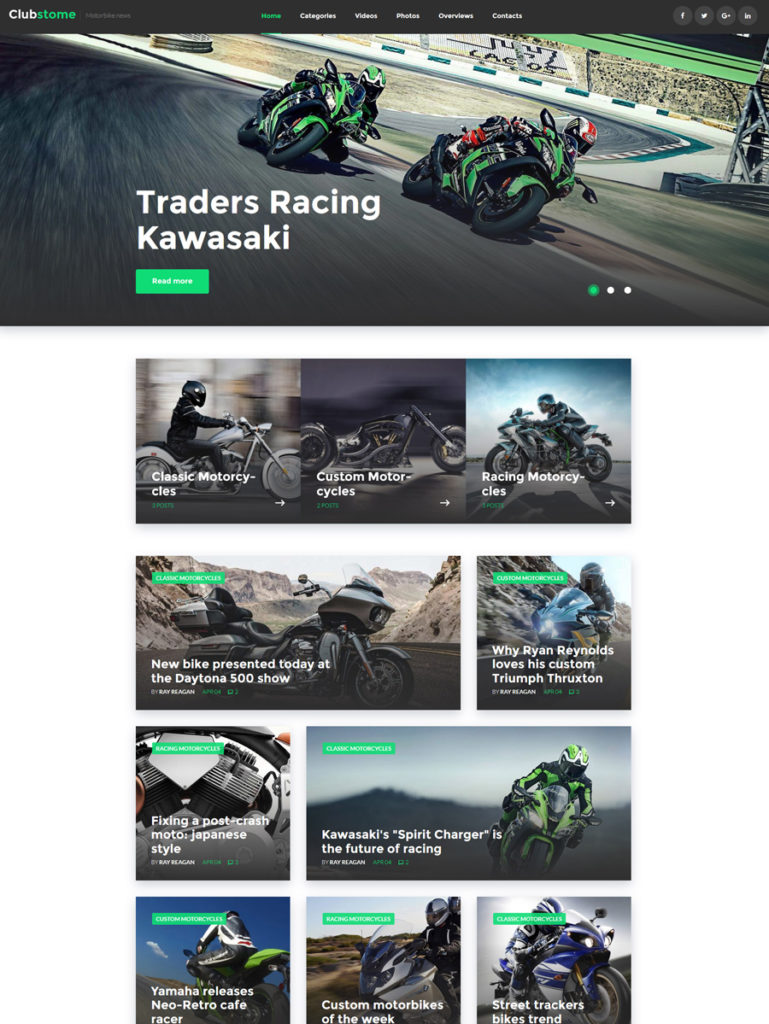
The theme is designed for sport sites, specifically the ones that are related to motor sports. The theme is intended to become a fully featured blog, where people can read your posts, share them in social media and post comments. The theme is also integrated with a newsletter subscription form. A contact form is provided to let users reach you with ease.
This simple and intuitive GPL WordPress theme is pre-loaded with a number of custom TM widgets. The latter are intended to enhance your site’s layout with more advanced functionality and make navigation more user-friendly. WordPress live customizer is also available. Bootstrap will make your web page adjustable to any screen size and resolution.
The theme will fit a variety of media sites. A well thought-out layout structure makes the pages quick to scan and easy to navigate. The highlighted content is featured in the theme’s header. Readable fonts and easy to define content blocks let you find the desired piece of content at a glance.
The theme is built with Power, i.e. a custom drag-and-drop page builder. With its help, you can manage your site’s layout without touching a single line of code. More than 25 modules will help you control your site’s look and feel.
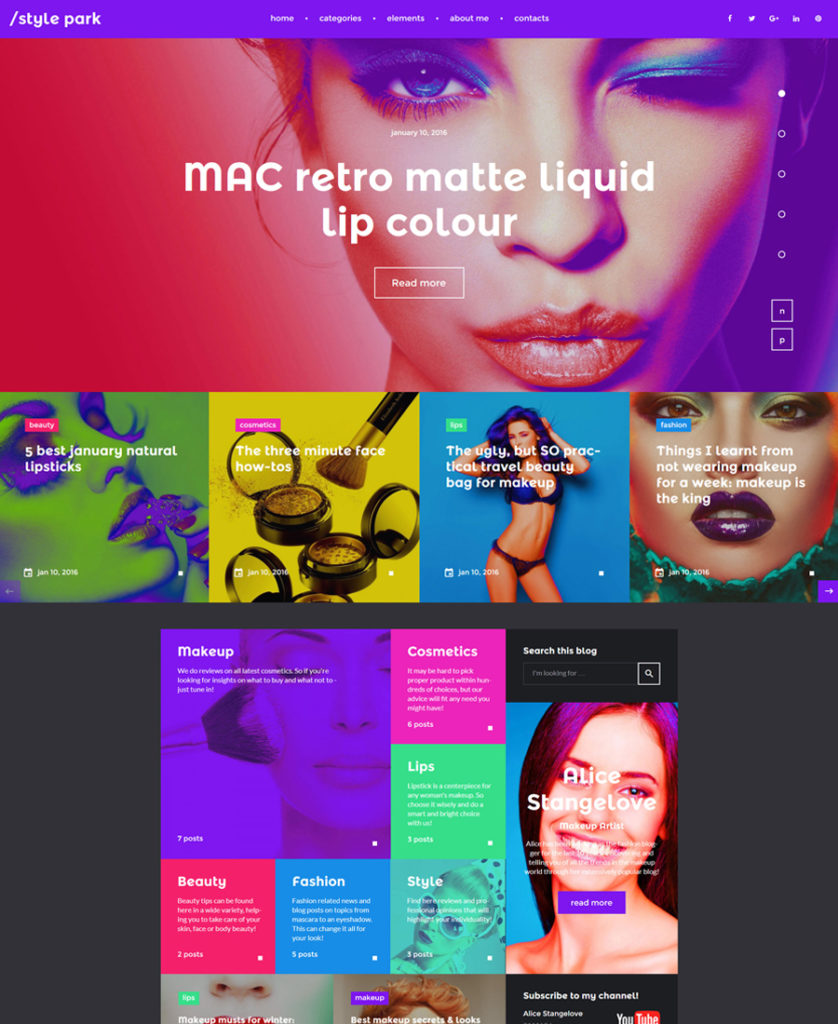
This is the first theme from the bundle of GPL WordPress themes. Intended for fashion and beauty related blogs, it looks very bright and eye-catching. A large hero slider and bold banners right below it introduce the users to your most trending topics. A widgetized sidebar is added to enhance the site’s browsing.
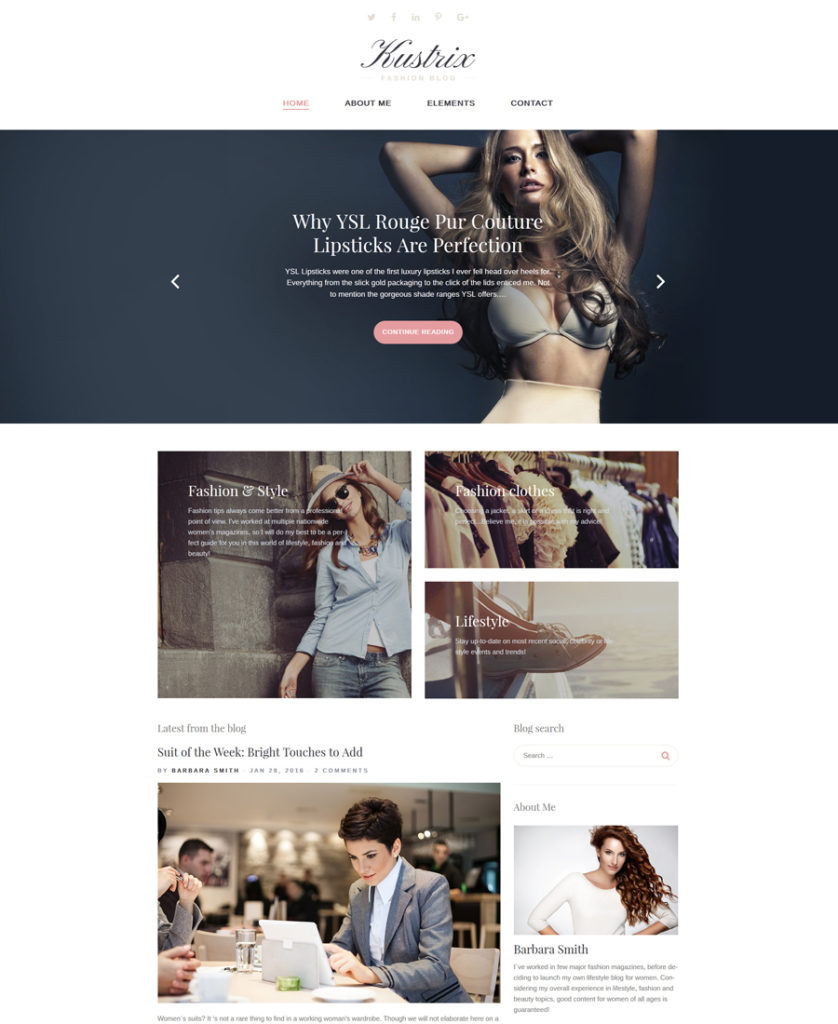
Here is another ready-made solution for fashion blogs. Unlike the previous theme, Kustrix features a more luxurious and refined style. The theme will be a perfect fit for posting about fashion shows, reporting about the latest catwalks or industry related events. Audio and video support is available as well, so you can spice up your site with your own recordings from the events.
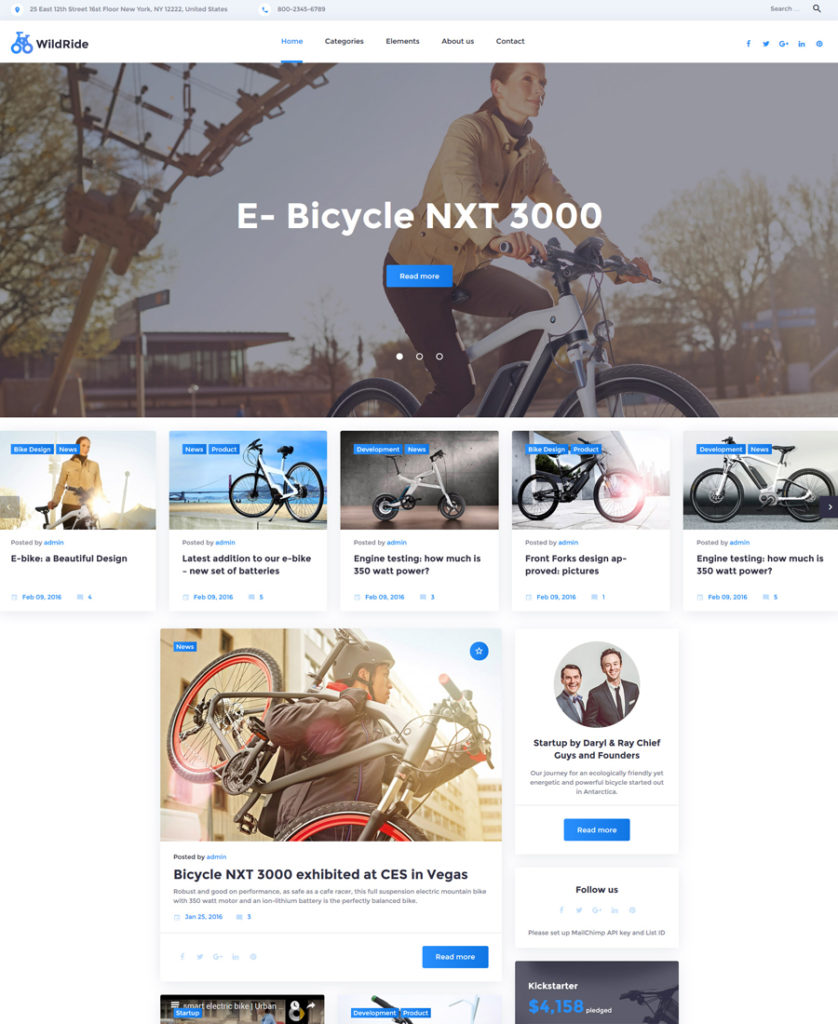
The theme will be a perfect fit for travel and sport sites. The layout features a well-balanced content structure. Texts are accompanied with images, which enhance the theme’s readability. The theme is quick and easy to tweak even by web design beginners. WordPress Live customizer is intended to facilitate your work with the theme.
If you are a big fan of sport and healthy lifestyle, then Fitnesys should help you build a solid and usable blog or personal site. It is retina ready and responsive. A sticky menu will provide your visitors with unlimited access to all of your site’s data. A customizable header slider will draw extra attention to your featured content.
This is the last, but not the least, theme on this list. Intended for food-related blogs and recipe sites, it features an image-heavy layout. The latter look razor-sharp across multiple devices. A responsive framework adjusts all content to the screens of desktop and handheld devices.
Conclusion
Summing up everything said above, we would like to acknowledge that the WordPress community gains more and more impressive GPL WordPress themes with every new day. The possibility of new releases becomes broader, as well as the purposes of using them in work. If you need a GPL theme for your blog, you can grab the last 5 blogging themes from the chart at a good discount.
Say you want an animation to run for 1 second, but then delay for 4 seconds before running again. Seems like that would be easy. Turns out it’s not-so-straightforward, but doable. You need to fake it.
Nope
There is an animation-delayproperty, but that won’t help us here. That delays the start of the animation, but after it’s started it runs continuously.
Solution: Keyframes with No Changes
You’ll need to do a little mental math:
I want the animation to run for 1 second.
~ plus ~
I want the animation to delay for 4 seconds in between iterations.
~ equals ~
5 total seconds
So when you call the keyframe animation, you use the total seconds:
.mover {
  animation: move 5s infinite;
}
But now our @keyframes will run for 5 seconds:
@keyframes move {
  /* this will happen over 5 seconds */
}
So to make our animation run for only 1 second, you’ll need to have the changes happen over 1/5 of the time, or 20%. Verbously, that would look like this:
@keyframes move {
  0% {
    transform: translate(0, 0);
  }

  /* Finish changes by here */
  20% {
    transform: translate(200px, 0);
  }

  /* Between 20% and 100%, nothing changes */
  100% {
    transform: translate(200px, 0);
  }
}
We can write with less code, since the 0% values are assumed and you can comma separate keyframe steps:
You can get as fancy as you want with the keyframes, you just need to remember to have everything set exactly the same between the final step of your animation and 100%.