Archive

Archive for November, 2016

Native Browser Copy To Clipboard

November 18th, 2016 No comments

It wasn’t that long ago where you couldn’t programmatically copy text to the clipboard from the web without using Flash. But it’s getting pretty well supported these days. IE 10+, Chrome 43+, Firefox 41+, and Opera 29+, says Matt Gaunt in writing about it on Google’s developer site.

Here’s the example from that article:

See the Pen Copy Text with a Button (Google Example) by Chris Coyier (@chriscoyier) on CodePen.

That article says it’s not supported in Safari, but it is as of Safari 10, which only dropped in September.

You don’t need a library to do this stuff, as evidenced by the above demo. But, there is one: clipboard.js. It’s only 3kb gzipped. The purpose is to give you a bit of a cleaner API to work with, like success and error events, and configuration through data-* attributes. Here’s a demo of that:

See the Pen Simplest Possible Clipboard.js by Chris Coyier (@chriscoyier) on CodePen.


Native Browser Copy To Clipboard is a post from CSS-Tricks

Categories: Designing, Others Tags:

15 warning signs you might be a designer

November 18th, 2016 No comments

Do you ever fall into one of those designer “stereotypes?” Admit it, maybe you wear a lot of black, or maybe you have unfriended someone for using Comic Sans. Even from afar, there are a few things that set designers apart from the rest of the crowd. How many of these fifteen signs can you relate to?

1. You have a favorite letter

Every designer has a go-to character that they love to play with in a variety of type styles. (I’ll admit to loving the ampersand and even had an ampersand coffee mug.) But the defining factor is that you will try to incorporate that character into the design in marquee ways as often as possible.

2. You have disliked dinner because of menu typography

The menu looked just awful. The type choices were abysmal. And then the food just left a bad taste in your mouth. Was it really bad? Or were you still stewing over the poor lettering choices?

3. Clever negative space makes your day

Remember when you first saw the arrow in the FedEx logo, or the faces in the Girl Scouts brand image? Designers live for that ah-ha moment, and crave coming up with an idea just as simple and timeless.

4. You want to kern everything

From street signs to letters in the mail, kerning opportunities are everywhere. Why doesn’t everyone else see them?

5. You judge a company by its business card

6. You see design everywhere

Design isn’t just something you do. It’s something you see. It’s something you create. You find cool design elements in the way plates are stacked in a department store or in the opening credits of a movie, or even when trying to pack the car for vacation. All of these elements are problems — like design — involve small pieces that need to be put together in a logical manner. And you thrive on that creative problem solving.

7. You buy craft beer… just for the label

Some of the coolest design ideas and illustrations on products today are coming out of the beer industry. From cool logos to mini bits of art on each label, you seem to have a growing collection of empty bottles. (It’s an art collection!)

8. You have a collection of Moleskines or other notebooks

Be honest: How many sketchbooks do you own right now? (I have four on my desk right now, and every single one is a Moleskine.) You just never know when you will need to map out a plan or jot something down before the inspiration leaves you. It can go away as quickly as it hits.

The other sign of a designer? Each of those notebooks is paired with a high-quality pen or pencil. No blue ballpoint pens here!

9. Your Amazon wishlist includes something from the Pantone collection

You don’t want to be that geek that buys a Pantone 19-4007 coffee mug for yourself, but it sure would make a great gift. If you were to check your public wishlist now, how many Pantone items would you find?

10. Coffee is a food group

You never really know when that spark of creativity is going to hit. Sometimes it’s 5 a.m.; sometimes it’s 9 p.m. With that kind of random schedule, coffee is a must. (No one will judge you if there are little brown rings on your paper notes.)

11. You know that turquoise and sky are different colors

The rainbow is much bigger than the seven-color arc that you learned about in school. It includes an infinite number of colors that you likely think about in terms of CMYK, RGB, or Hex, depending on the project. And nothing is more irritating that someone adding a color to a design that is off-palette because “it looked close in the color picker”.

12. You collect design elements

There’s a folder somewhere on your computer filled with design elements you have yet to use. From swatches to typefaces to stock images to full layouts, these little design pieces range from elements you made but did not use for specific projects to freebies that caught your eye. Whether you ever actually use them or not is in question, but they never get dragged to the trash, just in case the need comes around.

13. Art supply stores are your happy place

There’s nothing like opening a new pack of pencils or popping the cap off a new pen for the first time. You can spend hours browsing art supplies while your spouse keeps checking his or her watch. (I’ll admit, nothing has made me happier than the emergence of trendy adult coloring books; it almost justifies my hobby. And fewer people look at you oddly when you color in public.)

Credit for this image goes to Liana_Kyle.

13. You see solutions when others see problems

On a more serious note, as a designer you are a natural problem-solver. Just think of it, every design project solves some sort of conundrum. That natural ability probably comes through in most aspects of your life as you find yourself picture solutions during everyday conversations. You might also find yourself always in the position to help or unable to say no when asked for advice.

15. You want everything to have a place

You design on a grid. You watch details and line everything up in a pixel perfect manner. This desire for harmony and organization probably extends to other parts of your life as well. From the style of your home to the manner in which books are stacked on shelves, every item has a place. While others might not see it, there’s often a method to this madness or a design element in action.

Credit for this image goes to Fatima Flores.

Christmas Bundle of 400+ Design Elements from Graphicdome – only $14!

Source

Categories: Designing, Others Tags:

Web Development Reading List #159: Code Splitting, A New Bundler, And Blake2x

November 18th, 2016 No comments

As developers, are we paid to write code? This challenging question raises concerns about product quality, code quality, and our purpose as developers in a world of coded applications. You’ll find an interesting post that dives deeper into the matter in the “Work & Life” section of our reading list this week.

But we have other amazing resources to look at this week, too: new tools, new tutorials, and we’ll also take some time to reconsider CSS print styles. Let’s get started!

The post Web Development Reading List #159: Code Splitting, A New Bundler, And Blake2x appeared first on Smashing Magazine.

Categories: Others Tags:

Freebie: Thanksgiving Icon Set (15 Icons, PNG, PSD, AI, SVG)

November 18th, 2016 No comments

With Thanksgiving coming up next week, have you already thought about ways how to spend your days before the holiday? Well, you could send simple “Thank You” emails to your past clients, perhaps design something free for somebody, or take some time to improve your website. To those of you who celebrate Thanksgiving, we’ve got a nice icon set for you today — all available in PNG, PSD, AI and SVG formats.

This set of 15 free icons was created by the design team at ucraft. Please note that this icon set is licensed under a Creative Commons Attribution 3.0 Unported. You may modify the size, color or shape of the icons. No attribution is required, however, reselling of bundles or individual pictograms is not cool. Please provide credits to the creators and link to the article in which this freebie was released if you would like to spread the word in blog posts or anywhere else.

The post Freebie: Thanksgiving Icon Set (15 Icons, PNG, PSD, AI, SVG) appeared first on Smashing Magazine.

Categories: Others Tags:

The Future of Webdesign: Trends 2017

November 18th, 2016 No comments
mobile-website-speed-testing-tool-google

I’ll try my luck as a fortune teller once again, and dare to give you a preview of future web design trends for the year 2017. Some things remain the same; other things will move into the foreground. But one thing is sure: there won’t be any more classic desktop designs.

A bunch of things will change in 2017. Web design will become more complicated than it was before. However, that’s what makes our job so great. We get to keep on learning and improving ourselves. I wrote this article to allow you to do this early on.

1 – Mobile First Design

mobile-first-design

Does it sound stale when I mention this? Sorry, but I have to do it. In the medieval design process, the developer usually started with the desktop version of a website. It had to work properly because the client would see and approve this release first.

After that, the mobile variants were developed, and the website was adjusted to responsive views. In 2017, this won’t work anymore. Customers have educated themselves as well, and pure desktop sites are on the verge of being punished by Google. Mobile First will be imperative for a good ranking in the search results.

First, the mobile views will be developed, since a website has to look and work perfectly on smartphones and tablets. The desktop version is designed subsequently.

By the way, Google has provided a new online tool that is more informative than the old one.

Think with Google

A Test With the New Tool:

Test Run of my Website Techbrain.de. I Can be Rather Happy With This.

2 – Website Speed

Another trend of 2017 will be the optimization for extremely fast loading times. Google has declared a speed limit of 1.5 seconds for a couple of years now. In this short timespan, Google wants a website’s entire loading process to be completed.

Of course, 1.5 seconds are not contemporary anymore. A lot faster times would be possible. At least on landing and overview pages of a blog, loading speed of less than one second is possible – even with moderate effort. Some article pages may load slower, so one and a half seconds would be a good average.

Even loading times of half a second wouldn’t be a problem on a landing page and blog overview. Now, the time to deal with speed optimization has come, preparing your website for next year.

A Speed Test of My Landing Page.

A Speed Test of My Landing Page.

Further Information:

3 – Interactive Storytelling

story-telling-peugeot

Interactive storytelling will indeed assert itself, although it is very complex, and reminds me of old Flash pages to an extent. It offers an experience to the user. Each scroll changes the screen content and tells a story that the visitor is drawn into.

The website of Peugeot is a good example for that.

4 – Handcrafted Illustrations

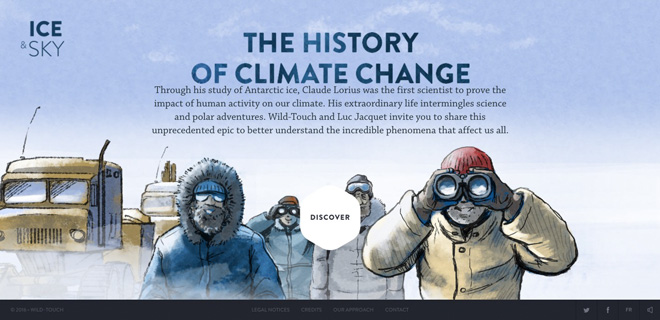
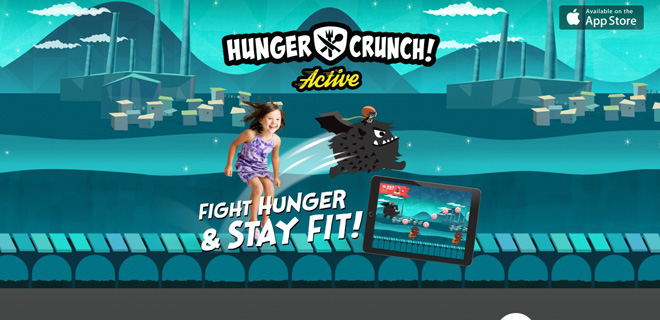
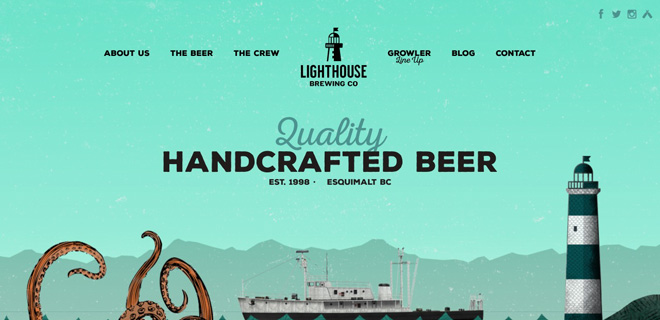
Hero images that fill the entire screen have been trending for a while now. But in the future, significantly fewer stock images will be used. The trend is definitely pointing towards a unique visitor experience. Businesses don’t mind spending money on this. Handmade, original illustrations have a much higher recognition value, and clearly show where the future will head to.

Some Examples:

Ice and Sky

ice-and-sky

Hunger Crunch

hunger-crunch

Lighthouse Brewing

lighthouse-brewing-company

5 – Lazy Loading

Lazy loading feeds a website’s visible area with content bites. The advantage, especially for sites with lots of content, like Facebook or Instagram, is obvious. A large amount of content is not loaded all at once but is only loaded after the user demands it. Only when the user scrolls down will the content be loaded. For the most part, this happens very quickly.

As the website speed is paramount for SEO – and conversion rates – I expect a widespread usage of lazy loading in 2017.

6 – Centered and/or Split Content

Centered content is a powerful style with high significance. The main message is placed in the center of the screen and highlighted by a couple of visual tricks. When it’s well executed, this technique achieves a dramatic visual effect.

This doesn’t work for all types of websites, however. Pages with minimal to moderate amounts of content will be well-served by this technique.

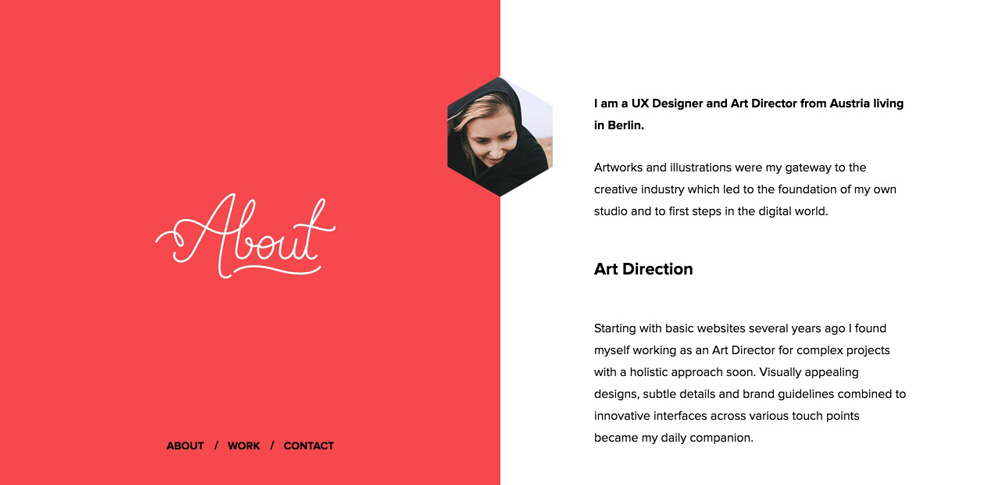
Split content divides the content into (mostly) two areas, which creates visual attention, giving the designers more creative freedom, without endangering the clarity of the content hierarchies.

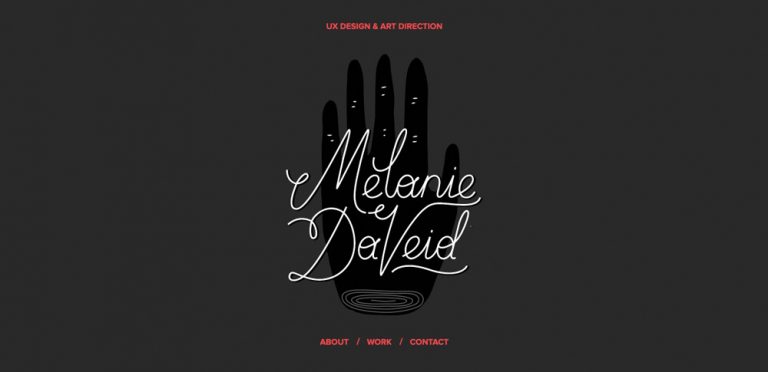
A Good Example for this is the Website of Melanie DaVeid

First, the site provides centered content on the landing page…

melanie-daveid

…next, the content is split.

melanie-daveid

Conclusion

A lot of exciting things are waiting for us in the coming year. I think I have addressed the most significant trends in this article. However, if you think that I have forgotten something, feel free to leave a comment down below. We are always happy to hear profound opinions.

Categories: Others Tags:

SmashingConf San Francisco 2017: Somethin’ Is Cookin’ In The Kitchen!

November 17th, 2016 No comments

Imagine a cloudy, rainy November evening. After a long day, you walk home along the streets, following the dimmed street lamps. Everybody seems to be busy, rushing somewhere, crossing paths with strangers and lonely stores. It’s dark and cold outside, and it’s difficult to see things through, so you decide to take a shortcut route to shorten the path.

Suddenly you see a bright light and music streaming from one of the remote corners of the street. Out of curiosity, you slowly walk towards the light, and hold your breath for a second. You discover a little cozy place with a fireplace, packed with people, jazzy tunes, and the smell of pizza, pasta and red wine. You see people smiling. Talking. Laughing. Sharing. Inviting you to join them.

The post SmashingConf San Francisco 2017: Somethin’ Is Cookin’ In The Kitchen! appeared first on Smashing Magazine.

Categories: Others Tags:

Learn CMS Basics and Become TemplateMonster’s Partner with Certification Center

November 17th, 2016 No comments
tm certification center

Are you thirsty for new knowledge? Do you want to have a better understanding of web design basics? Do you want to improve your skills and make your startup a success from the start? All this is possible with a new project launched by TemplateMonster – TM Certification Center.

The project is absolutely free, so everyone eager to learn is welcome to enroll. No matter how experienced you are, how many projects you have launched, and what web design heights you have already reached, TM Certification Center has something that will match you specifically.

TM Certification Center is made up of free courses for beginners and experienced webmasters. While the former can discover peculiarities of every CMS and better learn functionality included into each of them, the latter can confirm their high level of expertise in web design and development and become certified TM partners.

Let’s now see what TM Certification Center includes for each of these two big groups of users.

Courses for Beginners

The courses cover the basics that beginners need to know about the most popular CMS, i.e. WordPress, Joomla, OpenCart, and PrestaShop. You are offered sets of lectures dedicated to each of the aforementioned content management systems. By enrolling into any of them you may expect to get extensive information about the chosen CMS, its structure and functionality. You will be able to see how their admin panels look and feel from the inside so that you can do all installation and start customization work on your own.

Each course of lectures will give you step-by-step instructions on how to work with a ready-made theme compatible with a chosen CMS, install and manage it, and expend the functionality with modules. In the end of the course, you will pass quizzes that will reveal how well you have understood the provided information.

Certification for Experienced Webmasters

The course is intended for freelancers and web design studios that know how to work with ready-made website templates, and the ones launched by TemplateMonster in particular. The audience purchasing pre-designed web solutions is very diverse. In most cases, people hire a professional webmaster who can personalize a chosen theme in a way that matches their requirements perfectly. TemplateMonster has decided to launch the Certification Center for webmasters in order to make sure that the end-user will be provided with the highest quality of services possible.

So, if you know how to work with TemplateMonster’s themes, you can pass a quick and confirm your deep knowledge of how their WordPress, Joomla, OpenCart, and PrestaShop themes are organized. As a result, successful completion of the course guarantees that you will become a TM partner with a personal certificate. It will provide your high level of expertise in the field.

Each owner of TM certificate will be added to a localized list of TemplateMonster’s partners. This will help you find new clients and broaden your business opportunities.

So, if you are ready to grow as a professional and attain new knowledge, join TemplateMonster’s Certification Center now!

Read More at Learn CMS Basics and Become TemplateMonster’s Partner with Certification Center

Categories: Designing, Others Tags:

An Introduction to mo.js

November 17th, 2016 No comments

mo.js is a javascript library devoted to motion for the web. mo.js offers a declarative syntax motion and the creation of elements for animation. Even though mo.js is still in beta, there are already a host of features and amazing features to play with. Its author, Oleg Solomoka (otherwise known as @legomushroom) creates incredibly impressive demos and tutorials for the libraries offerings that you should check out, but in this article we’ll run through a really quick overview of features and tutorials to get you started and up on your feet.

Base premises

mo.js basically offers two ways to make something that moves. You can do what other libraries do and reach inside the DOM or SVG DOM and move it, or you can create a special mo.js object, which has some really and unique offerings. There are fundamental things available to both ways of working, such as custom path easing or timelines. The path easing and timelines also have pretty impressive working tools to make them easier to adjust while you’re working.

Shape

Depending on what you’re animating, the Shapes that and other objects that mo.js allows you to make might simplify your workflow. mo.js offers a declarative syntax that makes it very easy to create something on the fly.

Here is a really basic example:

See the Pen mo.js shape 1 by Sarah Drasner (@sdras) on CodePen.

Here are some of the base things you need to know:

  • The shapes that are available to you include: circle, rect, cross, equal, zigzag, and polygon. (Default is a circle)
  • You define a fill, a stroke, and a stroke-width (Default is fill with no stroke or stroke-width. Equal and cross don’t have space to fill, so they will not appear unless a stroke is specified.)
  • You define a radius for the shape, and adjust it on an axis with an additional radiusX or radiusY. (Default is 50)
  • You let it know if you want to show the shape isShowStart, this is a boolean- true or false. This allows you to see it if you’re not going to animate the shape. (Default is false)
  • Polygons, zigzag and equal allow you to pick a number of points so that you can create different types of shape (Default is three)
  • All shapes will be placed into the middle of the screen using absolute positioning, unless you specify top, left etc.

Here is an example of all the shapes:

See the Pen mo.js shape 2 by Sarah Drasner (@sdras) on CodePen.

You might notice if you look into the DOM that these are SVG shapes placed inside of a div for positioning. You can also pass a parent, like parent: '#id-to-be-placed-under' if you’d like to put the shape somewhere within the DOM. You can also pass any DOM node as a parent, so `parent: someEl` would work as well. At some point, you’ll also be able to choose between using a div or SVG, which will be awesome, because it makes it much easier to create a scaling animation for mobile if you can place it with an SVG viewBox.

We can also create custom shapes to animate as well, and add them in as the shape object.

//custom shape
class OneNote extends mojs.CustomShape {
  getShape () { return '<path d="M18.709
	...
"/>'; }
}
mojs.addShape( 'oneNote', OneNote ); 

const note1 = new mojs.ShapeSwirl({
  shape:    'oneNote',
  ...
});

Shape Motion

To create an animation with a shape in mo.js, we’d pass in an object, with the key and value expressing what we’d like to tween from and to. We can use transform properties like scale, and angle (known in CSS as rotate), opacity, and we can interpolate colors as well, as shown here with fill.

scale:        { 0 : 1.5 },
angle:        { 0 : 180 },
fill:         { '#721e5f' : '#a5efce' },

See the Pen mo.js shape 3 by Sarah Drasner (@sdras) on CodePen.

We can also specify a few other parameters:

  • duration
  • delay
  • repeat
  • speed- 1 is the default speed, so 0.5 would be half speed and 1.5 would be 1.5 faster
  • isYoyo- whether or not it tweens back and forth
  • easing- written as an object like ease.in, ease.out, or ease.inout
  • backwardEasing – a configuration if you want the the backswing of the yoyo to be different. This only works if you’re using isYoyo: true. If you want the way that it eases back to be different than the way that it eases forward, you would specify that with this method. It defaults to easing if not specified
  • isSoftHide- whether it hides the Shape with transforms rather than display (boolean that defaults to true)

Random

We can also pass in random values pretty easily, by writing this string- property : 'rand(min, max)', for instance, angle: ‘rand(0, 360)'

Chaining

If we’d like to chain two animations on a Shape, we can call .then() on the initial tween like so:

const polygon = new mojs.Shape({
  shape:        'polygon',
  points:       5,
  stroke:       '#A8CABA',
  scale:        { 0 : 1.5 },
  angle:        { 0 : 180 },
  fill:         { '#721e5f' : '#a5efce' },
  radius:       25,
  duration:     1200,
  easing:       'sin.out'
}).then ({
  stroke:       '#000',
  angle:        [-360],
  scale:        0,
  easing:       'sin.in'
});

See the Pen mo.js shape 4 by Sarah Drasner (@sdras) on CodePen.

Swirl

Things like swirl and blast are pretty interesting parts of mo.js, they’re pretty beautiful out of the box. Swirl is very similar to a regular shape object, but the movement out of the box is pretty much how it sounds- the shape swirls around. You have a few parameters to work with for a swirl, and they are all based on the sine that the swirl works with.

  • swirlSize- this is the deviation- so the amount it swirls horizontally
  • swirlFrequency- Frequency of sine
  • pathScale- sine length scales
  • degreeShift- this can shift the direction of sine, if you’d like to make it move towards a different direction on a 360 degree, especially useful for using swirl with a burst
  • direction- direction of the sine, either -1 or 1 (good for setting something in the other direction if you want it to look a little random)
  • isSwirl: If shape should follow sinusoidal path (boolean- true or false)

These can be a little confusing to read and grok, so I’ve made a demo so you can play with the values to understand them a little better:

See the Pen Mo.js ShapeSwirl Options by Sarah Drasner (@sdras) on CodePen.

Also, you can use a few base configurations like a custom shape or an object with some configurations to reuse for a few different SwirlShape options (or any other shape) with an ES6 spread operator like this, which is really nice if you have a few similar objects:

const note_opts_two = {
  shape:    'twoNote',
  scale:    { 5 : 20 },
  y:        { 20: -10 },
  duration:  3000,
  easing: 'sin.out'
};

const note1 = new mojs.ShapeSwirl({
  ...note_opts_two,
  fill:     { 'cyan' : color2 },
  swirlSize:      15, 
  swirlFrequency: 20
}).then({
  opacity:  0,
  duration: 200,
  easing: 'sin.in'
});

See the Pen Little Bouncy Radio by Sarah Drasner (@sdras) on CodePen.

Burst

A burst is also really quite lovely out of the box. If you use the default configuration, you would say this:

const burst = new mojs.Burst().play();

And it would return this (hit the Rerun button):

See the Pen Simplest Mo.js Burst by Sarah Drasner (@sdras) on CodePen.

To configure a burst, you have a few options:

  • count- the number of children in the burst (default is 5)
  • degree- the number of degrees around the center that the children come from
  • Radius- the radius that the children spread out to (radiusX and radiusY applies here as well)
  • isSoftHide- whether it hides the children with transforms rather than display (boolean that defaults to true)- this applies to all shapes, but I bring it up again because it’s particularly useful for a burst with several children.

All of the same rules for shape also apply to burst, and we can apply them to the nodes themselves as a separate object using children, like this:

const burst = new mojs.Burst({ 
  radius: { 0: 100 },
  count: 12,
  children: {
    shape: 'polygon',
    ...
  }
});

See the Pen Playing with mo.js burst by Sarah Drasner (@sdras) on CodePen.

Timeline

In a timeline, you can either add a bunch of objects or tweens that you have previously declared as a variable, or you can append them, and have them fall in order.

const timeline = new mojs.Timeline({
  .add( tween ) {}
  .append( tween ) {}
});
  • Add- allows you to add any of the objects or shapes to the above- they’ll all fire at once (but you can still use delays or stagger to adjust their timing)
  • Append- adds objects but staggers them in the order they are added

There are a few things you can do in a timeline that are worth noting: you can add repeats, delays, and speed, just like the objects themselves, as an object parameter like this:

new mojs.Timeline({
  repeat: 3,
  isYoyo: true
});

You can also nest a timeline inside another timeline, you can even nest them infinitely:

const subTimeline = new mojs.Timeline();

const master = new mojs.Timeline()
.add( subTimeline );

Tween

With all of these constructors, we haven’t even really spoken too much about tweening (animating) what already exists. All of the same repeat, durations, and easing are also available for tweens. To use a tween, we’d update styles or attributes (whatever you’re trying to change) along a progress, here’s a simple example:

var thingtoselect = document.querySelector('#thingtoselect');
new mojs.Tween({
  duration:    2000,
  onUpdate: function (progress) {
    square.style.transform = 'translateY(' + 200*progress + 'px)';
  }
}).play();

In the pen below, I used this kind of tween to create the effect on the far left side of the little zigzags drawing themselves on repeatedly (using the SVG line drawing trick with stroke-dashoffset). I’m also using the path easing available, which is discussed in the next section. The water in the tanks appears to move by updating SVG path attributes as well.

new mojs.Tween({
  repeat:   999,
  duration: 2000,
  isYoyo: true,
  isShowEnd: false,
  onUpdate: function (progress) {
    var laser1EProgress = laser1E(progress);
    for (var i = 0; i < allSideL.length; i++) {
      allSideL[i].style.strokeDashoffset = 20*laser1EProgress + '%';
      allSideL[i].style.opacity = Math.abs(0.8*laser1EProgress);
    }
  }
}).play();

See the Pen Raygun with Mo.js by Sarah Drasner (@sdras) on CodePen.

Tweens have pretty rich callbacks available that take into account fine-tuning that can sometimes make all the difference. Some examples of this are onStart vs. onRepeatStart, onComplete vs onRepeatComplete, and onPlaybackStart vs onPlaybackPause. A full list is available in the docs here.

Path Easing

A very cool feature of mo.js is that aside from the other built-in easing values, you can also pass in an SVG path as an easing value. I use this feature in almost every other demo in this post, but to be honest, I could never do path easing justice like the gorgeous tutorial Legomushroom has prepared on this page. I’ll simply explain the base premises to get you started and show you how it works, but really I highly recommend going through his post.

Before we go through all of path easing, it’s important to establish that if you’d like to work with something out of the box, the base functions will get you very far. The syntax for built in easing is written like so:

easing: 'cubic.in'

Mastering easing really can be the key ingredient to bringing your animations to life, so being able to fine tune your motion with custom paths is helpful. If you’re comfortable animating in CSS, you might like the Mo.js bezier easing, which accepts the same curve values (without some of the same restrictions, as CSS’s cubic bezier. Here’s an example of this kind of easing:

easing: 'bezier( 0.910, 0.000, 0.110, 1.005 )'

If you’d like more refined control than what bezier easing allows, path easing is really nice. You pass in an SVG path, and your shape is updated as work with it. Let’s look back again at the example I pulled out earlier from the raygun. We used a path easing to interpolate the values as it updated:

const laser1E = mojs.easing.path('M0,400S58,111.1,80.5,175.1s43,286.4,63,110.4,46.3-214.8,70.8-71.8S264.5,369,285,225.5s16.6-209.7,35.1-118.2S349.5,258.5,357,210,400,0,400,0');

new mojs.Tween({
  repeat:   999,
  duration: 2000,
  isYoyo: true,
  isShowEnd: false,
  onUpdate: function (progress) {
    var laser1EProgress = laser1E(progress);
    for (var i = 0; i < allSideL.length; i++) {
      allSideL[i].style.strokeDashoffset = 20*laser1EProgress + '%';
      allSideL[i].style.opacity = Math.abs(0.8*laser1EProgress);
    }
  }
}).play();

To really get a sense of how an path ease can affect the movement and behavior of an animation, check out the example codepen below in the tools section. The curve editor tool that Mo.js offers really helps to visualize and immediately get a sense of how an ease can refine what you create.

Mo.js Tools

One of the most impressive things about mo.js is the tooling. To get your palette wet, check out this vimeo:

I made a really quick pen to show both the player tool and the curve editor so that you can play around with them. Feel free to either fork it or just adjust it live in the codepen, it’s fun to try out. The curve tool is on the left side and the timeline is tucked at the bottom with a little arrow.

See the Pen mo.js shape 5- curve editor by Sarah Drasner (@sdras) on CodePen.

Here’s the coolest part: legomushroom isn’t done. He’s working on new tooling for the timeline now. Check out the awesome design for this tool here, and check out the broader label ‘help wanted’. If you’re interested in contributing to open source, here’s an opportunity to dig in and help make a really useful tool!

The other finished tools are available in their own repos:

There is also a Slack channel you can join if you’re interested in contributing or learning.

If you’re the kind of person who likes playing with things more than reading, all of the codepens from this post are available in this Collection.

There are, of course, things in the library that I didn’t cover in this article. I went over some of the most useful features of mo.js in my opinion, but there are more things to discover. Check out the docs for more information. Special thanks to legomushroom for proofreading this article prior to release.


An Introduction to mo.js is a post from CSS-Tricks

Categories: Designing, Others Tags:

12 JavaScript libraries to watch in 2017

November 17th, 2016 No comments

With hundreds of free JS libraries out there it’s tough to know where to put your energy. Some end up discarded or forked into new projects, while others grow rapidly and achieve widespread adoption.

Most developers already know the big names like jQuery and React. But in this post I’d like to introduce twelve alternative JS libraries that are less well-known but rising rapidly.

1) D3.js

Big data is a growing industry and data visualization is quickly becoming just as important. There are tons of charting & mapping libraries but few stand out as much as D3.js. This JS library works with SVG and canvas elements to render graphs, charts, and dynamic visualizations on the web.

It’s completely free to use, and it’s one of the most powerful visualization tools built on JavaScript. If you’re looking for a modern way to render data in the browser I would highly recommend taking a peek at this library to see what it offers.

2) Node.js

I know many devs are sick of hearing about Node all the time. But it really is the fastest growing JS library and it offers so much more than a dev environment. With NPM you can manage local packages for all your projects right from the command line.

This makes Node a full development toolkit that works well with other tools like Gulp. Plus dozens of related open source projects have been built on Node so you can work with unit testing in Mocha.js or build a front end interface with the Sails.js framework.

If you haven’t tried Node yet then you might be surprised just how much you’re missing.

3) Riot.js

Virtual DOM rendering and custom elements litter the React library. It has quickly become the choice of all professionals who want a powerful digital interface library for front end development.

But Riot.js is putting up a solid fight offering a nice alternative to React. By using the Riot framework you still have access to a virtual DOM but it’s much easier to control with simpler syntax requirements. Unfortunately this library isn’t as big as React and it’s not powered by Facebook, so you won’t have the huge community. But it’s a healthy alternative and it’s a decent competitor in the front end space.

4) Create.js

From web animation to digital media you can work with everything in CreateJS. This isn’t one single library, but rather a suite of libraries built for different purposes. For example Easel.js works with HTML5 canvas elements while Tweet.js helps you build custom tweening & animations for the web.

Every library in this collection serves a different purpose and offers modern features for all major browsers. But most of these libraries help with specialized features so they’re best used on specialty websites. If you’re curious, then take a look at the Create JS website to see what it offers.

5) Keystone.js

Earlier I mentioned Node.js and how many other libraries are built on top of it. Keystone.js is a fantastic example that goes beyond Node by offering a full-scale CMS engine.

With Keystone you can build MEAN webapps powered by Node/Express and MongoDB on the backend. Keystone.js is completely free but still very new. At the time of this writing it’s only in v0.3 so it has a long way to go for professional use.

But if you’re tickled by a pure JavaScript CMS then check it out and see what you think.

6) Vue.js

In the world of front end frameworks you typically find two prominent choices: Angular and Ember. But Vue.js is another very popular choice and it’s quickly gaining more attention since its v2.0 release.

Vue is an MVVM frontend JavaScript framework so it moves away from the typical MVC architecture. It’s tricky to learn but the syntax is simple once you understand how it all works. It’s certainly a viable choice in the war of front end frameworks, and it’s worth keeping a close eye on it over the next few years.

7) Meteor

You can integrate any platform into the Meteor framework with fantastic results. This open source project helps developers build JS-powered applications whether they’re real-time chat apps or social communities or custom dashboards.

There’s even a social news framework called Telescope built on top of Meteor. This lets you create a social news/social voting website from scratch running on Meteor and React.

Meteor is a beast of a library with lots of features, but it’s not easy to learn. However it is fun and skilled JS developers can build almost anything with this platform.

8) Chart.js

With Chart.js you can build bar charts, line charts, bubble charts, and many other similar features using JavaScript and the canvas API. This is one of the simplest JS libraries for data charting and it comes with built-in options for animations.

This is one of the few libraries I recommend for data graphs because it’s easy to setup, easy to customize, and it comes with some of the best documentation of any open source project.

9) WebVR

It seems like virtual reality has taken the world by storm with new startups and excited developers working tirelessly on VR projects. That’s why I wasn’t surprised to find WebVR, a new JavaScript API made for VR in your browser.

This works off the most popular devices like the Oculus Rift and the Vive but it’s currently in a development stage. The API is open source and constantly being tested against modern browsers to gauge how it functions on VR devices.

If you’re curious to learn more or get involved with the project check out the official site or visit the MozVR page for more info.

10) Three.js

It’s crazy to see how much 3D animation has grown dating back to the 1980s up to today. We’re all familiar with 3D animated movies but web animation is still a new frontier. And thankfully we have libraries like Three.js blazing a path for 3D animation on the web.

On the main site you’ll find dozens of live examples of Three.js in action. You can build motion-sensitive backgrounds, custom 3D web graphics, and dynamic interface elements that use 3D animation effects. If you have enough patience and drive you can build any 3D effect with this library. It is the best resource for 3D motion on the web, and it comes with lots of examples to get you started.

11) Omniscient.js

Functional programming with JavaScript is not a new thing. But it is fairly new on the web and it’s now much more commonplace with libraries like Omniscient.js. This free open source library handles views with a top-down rendering process for all front end components. You can write functional JS code from scratch and work with existing UI libraries like React.

I would specifically recommend this library to any experienced developers who want a smoother development process. It’s a complicated subject for beginners but Omniscient can radically change your dev workflow when used in coordination with React components.

12) Ractive.js

If you’re looking for a UI library that’s different than the rest I think Ractive.js fits the mold well. It comes with two-way binding for template elements and data so you can construct templates with elements that bind to Ractive functions in JavaScript.

This is a pretty dense library but it offers one of the smoothest learning curves for beginners. It’s not as detailed as React, and it uses vastly different syntax in JS and HTML. Visit the main site to learn more, and check out the examples page to see what’s possible with Ractive.

All the libraries in this post have something unique to offer the JS community. If you enjoy tinkering with JavaScript then take another look over each library here and see what they can offer your web dev projects.

LAST DAY: $2,500 Worth of Premium Quality Vectors – only $24!

Source

Categories: Designing, Others Tags:

Not An Imposter: Fighting Front-End Fatigue

November 17th, 2016 No comments

I recently spoke with a back-end developer friend about how many hours I spend coding or learning about code outside of work. He showed me a passage from an Uncle Bob book, “Clean Code”, which compares the hours musicians spend with their instruments in preparation for a concert to developers rehearsing code to perform at work.

I like the analogy but I’m not sure I fully subscribe to it; it’s that type of thinking that can cause burnout in the first place. I think it’s great if you want to further your craft and broaden your skill set, but to be doing it every hour of the day isn’t sustainable.

The post Not An Imposter: Fighting Front-End Fatigue appeared first on Smashing Magazine.

Categories: Others Tags: