Luminar: The Hot Editing App That Adapts to You
As an online professional, you naturally have your share of problems to solve and challenges to face. You look for tools to help you work your problems, ease your workload, and contribute to building better products.
One of the challenges you likely face is working with images. Unless you happen to be a professional photographer or at least a very experience one, you have to rely on other sources when you are in need of quality photos. Even if you have a basic photo editing tool, it may not suffice, and you’ve found that tools that can do the job are often cumbersome to work with, or have a steep learning curve.
If you happen to be a Mac user, here’s some good news for you.

Check out Luminar; the new photo editor for Mac that adjusts to your skillset.
- Luminar is the perfect photo editor for your creative imagery projects.
- Online marketing? Luminar enables you to create the attractive images required to adequately support a marketing campaign.
- Luminar can help to brand you as a pro blogger.
Luminar Mac photo editor is precisely what you need to get your output to the next level.
The World’s First Photo Editing Software That Adapts to Your Skill Level and Style
Highly sophisticated, complex apps can be more trouble to try to work with that they are worth; or so it seems at times. This isn’t true with Luminar. Luminar is indeed a sophisticated, complex piece of software, but it’s UI is oh so friendly and easy to work with. You can do a bang-up photo editing and enhancing job the first time through, and you’ll only get better.
This brief tutorial demonstrates just how easily Luminar adapts to your skill level in spite of its many powerful and versatile features. Check out this table comparing Luminar’s features with those of Aperture and Lightroom to see for yourself.
Color Splash

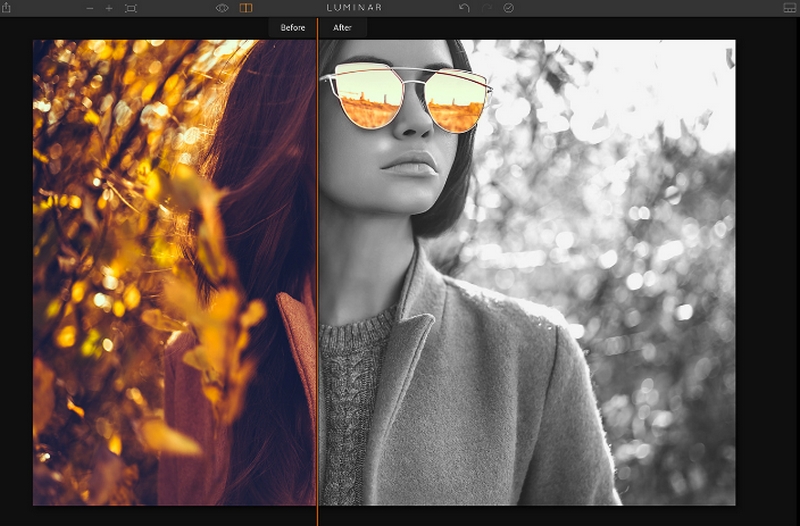
There are several ways to create a color splash effect, each of which is quite simple. You can, for example, create the effect with a B&W filter and masking brush. Load the file and click on the “Add Filter” button to see the image in B&W. Then, click on the Brush icon, select the Brush Erasing mode, and brush out the monochrome to restore the color.
Image Resizing

Upload an image in Luminar, edit it, and click “Shift-Command-E” to launch the export menu. The choose the appropriate sizing more, and click Save. The result? Your image is resized to your specifications.
Get Creative with Luminar
Nestled within Luminar’s amazing toolkit are three filters designed to get your creative juices flowing. You can do some amazing things with the Texture Overlay, Dramatic, and Color Temperature filters, as you will see when viewing the videos.
The Color Temperature Filter
You can make some images more relaxing by cooling them down using a bluish hue. Others can be made more intense, by warming them up using a reddish hue. Simply pick Color Temperature from the menu, and adjust the red or blue slider buttons (temperature and tint) as shown in the video. Like the other features found in this Mac image editor, this one is a breeze to work with.
Adding Texture with the Texture Overlay Filter
This can be an enjoyable experience; one in which you can do a great deal of experimenting to get a result that you find especially appealing. This could be a grungy look, a vintage look, or something that could best be described as uniquely creative.
It’s simply a matter of selecting the Texture Overlay filter, choosing a texture, and adjusting the lightness/darkness as you’ll see in this video:
The Dramatic Filter
As the name implies, the Dramatic filter allows you to create some downright exciting images. This filter helps make Luminar an image editor Mac users simply love working with. The video demonstrates the stunning results you can achieve by giving a photo an urban, gritty look. Simply select “Dramatic” in the menu, and use the slider button to get the result you want.
5 Cool Features Unique to Luminar that Offer a Special Touch

With these unique features, you can get results like this!

- Split Color Warmth – One slider is for warm colors, one is for cool colors. Adjusting them to add warmth, or produce a cool hue, enables you to do some creative toning, or increase a photo’s vibrancy.

2. Split Toning – You may wish to add color to either highlighted or shadowy regions in a photograph. Simply select the region type, and adjust the hue and saturation sliders. The “Amount slider” is used to increase overall intensity.
3. Golden Hour – This is a must-have filter when your sunset or sunrise photos are either too dark, or the anticipated subtle lighting effects appear washed out. Golden Hour’s sliders allow you to intensify subtle sunrise/sunset tones; or emulate them.
4. DeHaze – This filter lets you cut through haze and fog to bring out details that risk being lost in the mist. This tool consists of a single slider button.
5. Workspaces – This cool feature is a time saver. It allows you to set up one or more workspaces consisting of filters commonly used for various types of photographs. Once you’ve selected a workspace, you can modify it if needed.
Luminar can be used in several ways. You can use it as standalone software, as a plugin for Lightroom, Aperture, or Photoshop, or as an extension for Photos.
The easiest and best way to learn more about this impressive photo editor is to take it for a test drive.
Read More at Luminar: The Hot Editing App That Adapts to You
