Archive

Archive for August, 2018

Designing The Invisible: 3 Things I Learned Designing For Voice

August 22nd, 2018 No comments

Designing The Invisible: 3 Things I Learned Designing For Voice

Designing The Invisible: 3 Things I Learned Designing For Voice

William Merrill

2018-08-22T14:00:44+02:002018-08-22T12:45:32+00:00

The current iteration of voice-controlled digital assistants are still struggling to integrate as seamlessly as the big three voice players of Amazon, Google and Apple would hope. A 2017 report by Voicelabs states there’s only a 3 percent chance a user will be active in the second week after downloading a voice application and 62 percent of Alexa’s skills are still to get any kind of rating on its store (as of September 2017).

As designers, we have a real opportunity to provide valuable meaning to these assistants but we’re still trying to work out where the technology can add real benefits to the user. For many, embarking on a voice UI (VUI) project can be a bit like entering the Unknown. There are few success stories for designers or engineers to be inspired by, especially within contexts that illustrate how this nascent technology could help people thrive in new ways.

Experimenting With speechSynthesis

The Web Speech API gives you the ability to voice-enable your website in two directions: listening to your users via the SpeechRecognition interface and talking back to them via the speechSynthesis interface. All of this is done via a JavaScript API, making it easy to test for support. Read article ?

As part of BBC2’s Big Life Fix docuseries where teams of inventors create new and life-changing solutions for people in need, I had the opportunity to test and build a voice-controlled assistant for a woman called Susan. Susan has been living with a progressive form of Multiple Sclerosis for over 20 years and is now unable to complete everyday tasks for herself easily. With full-time carers, she relies on others to wash and dress her and has no ability to even change the channel on the TV without help.

While voice technology seemed like it would provide the smoothest pathway to overcoming Susan’s physical difficulties, Susan has never used a smartphone, so propelling her straight into an interaction with a voice assistant was never going to be easy — we had to think cleverly to help her learn to communicate with an incredibly alien technology.

The result for Susan is a highly customized voice-controlled assistant that now empowers her to complete everyday tasks with the freedom that others take for granted — from making a phone call to family, to listening to music. Built as an enhanced version of Amazon Alexa technology on their Echo Dot device, Susan’s voice assistant also involved physical customization as we 3D printed a casing in the shape of her favorite animal, an owl.

As we rapidly experimented and iterated on a solution for Susan, my team and I uncovered dozens of intricacies that come with designing for voice in a more inclusive and accessible way. Although it was a unique project, there were three key takeaways that are applicable to any VUI project.

1. Make It Personal

The tech works. It’s not just a matter of sitting back and waiting for computing power to increase in line with user expectation. We found the voice detection, recognition, and synthesis of each of the devices far more powerful than we anticipated. And it’s not as though there’s a lack of choice. There are over 30,000 Alexa skills on Amazon with an average of 50 new ones being published daily. Skills are specific capabilities that enable designers and developers to create a more personalized voice experience when using devices like the Amazon Echo Dot. They operate much like an app within the App store on your smartphone, allowing you to customize your voice assistant the way you please.

However, there currently is a big barrier to access. Skills must be added via the app rather than the device, often negating the benefits of a VUI and breaking the conversational flow (not to mention excluding those who can’t/won’t use a smartphone). This makes the process feel clumsy and disjointed at best, completely isolating at worst. Even once a skill is installed, no skill visibility and a restricted time frame for interaction result in a lack of confidence and anxiety; can it do what I want? How do I talk to it? Has it heard me? So, how do you build that connection and trust?

For Susan, it meant stripping away the unnecessary and presenting a curated selection of core functionality. By personalizing the content to the unique behaviors and requirements, we presented much-needed clarity and a more meaningful experience. Susan wanted to perform key tasks: answer the phone, make a call, change the TV channel, play music, and so on. By getting to understand her and her needs, we created an assistant that always felt relevant and useful. This was quite a manual process, but there is a huge opportunity for machine learning and AI here. If every voice assistant could offer an element of personalization, it could make the experience feel more relevant for everyone.

As we were designing for one individual, we could easily tailor the physical elements of the product for Susan. This meant designing — then 3D printing — a light diffuser in the shape of an owl (her favorite animal and something with a significant meaning to her). The owl acted as a visual manifestation of the technology and gave her something to talk to and project towards. It was her guide that gave her access to those skills she wanted, such as listening to music. As it was personal to her, it made the potentially alien, intimidating technology feel much more approachable and familiar.


Humanizing technology helps make it more accessible: Susan's personalized owl glows in response to her voice, letting her know she is being heard and understood.
Humanizing technology helps make it more accessible: Susan’s personalized owl glows in response to her voice, letting her know she is being heard and understood. (Large preview)

Although a fully custom 3D printed housing isn’t an option for every VUI project, there is an opportunity to create a more relevant device for people to communicate with, especially if their needs or usage of home assistants is quite specific. For example, you might talk to a voice-enabled light about your home lighting and a fridge about your groceries.

2. Think About Audio Affordances

Currently, the user does all the heavy lifting. With an obscured mental model and no hand-holding from the tech, we’re forced to imagine our desired endpoint and work backwards through the necessary commands. The simplest tasks aside (set a timer for 5 minutes, play Abba on Spotify, etc.), that’s incredibly hard to do, especially if you suffer from ‘foggy moments’ something that Susan explained to us — difficulty in finding the right words.

When Apple famously used skeuomorphic visual elements for their early iPhone apps, the user gained valuable, familiar reference points which afforded its use and method of interaction. Only once the mental model became more established did they have the freedom to move away from this literal representation, into their current flat UI.

When designing our VUI, we decided to lean on the well-established menu system seen throughout digital and web navigation. It’s a familiar tool which demands less cognitive processing from the user and allowed us to incorporate methods of way-finding that didn’t result in starting from the beginning if things went wrong.

As an example, Susan found verbalizing what she wanted, in the time frame offered by current digital assistants, a stressful and often unpleasant experience; often compounded by an error message from the device at the end of it. Rather than expecting her to give an explicit command such as “Alexa, play Abba from my Spotify playlist,” we decided to create a guided menu tool that could help her start slowly and get incrementally more specific about what she wanted Alexa to do.

Susan’s owl now prompts her with a curated list of options such as, “Play Music” or “Watch Something.” If she chooses music, it gets more specific as she progresses through each decision gate, to uncover the genre she feels like listening to; in the case of Abba, she would select “60s music.” This enables Susan to navigate to her desired outcome much more easily, and at a pace that suits her. All the while, the owl was glowing and responding to her voice, letting her know she was being heard and understood.


Susan's voice assistant gives her back some of the independence she lost to her condition, from empowering her to making a phone call to family, or simply listening to music.
Susan’s voice assistant gives her back some of the independence she lost to her condition, from empowering her to making a phone call to family, or simply listening to music. (Large preview)

3. There’s More To VUIs Than Voice

The non-lexical components of verbal communication impart a great deal of meaning to a conversation. Some can be replicated by the synthesized voice (intonation, pitch, and speed of speaking, hesitation noises, to name a few), but many can’t (such as gesture and facial expression). The tangible elements of the product need to replace these traditional, visual cues for the interaction for it to feel even slightly natural. But there’s more to it than that.

Firstly, when someone interacts with a product designed to replicate human behaviors, the visual components are interpreted by the user’s preconceived notions of the world (both inherent and learned) and affect their emotional responses. If something looks imposing and cold, you’re much less likely to initiate a conversation than with something that looks cute and cuddly.

In our case, as the technology was so foreign to the user, we needed to make it feel as familiar and inviting as possible — an owl. In doing so, we hoped to remove the feelings of anxiety and frustration we had experienced with other products. We also amplified the visual side of it — there is one color for an idle state — a gentle glow, almost like breathing, but when Susan says the wake words the light changes to awake and listening.

You can go further. Apple, for example, has a full-color display on their Homepod which affords a higher level of nuance to their interaction and visualization. Adding a visual experience might sound counterintuitive, but visualizations can be very helpful for the user.

Conclusion

Although applied to an individual use-case, these top-level learnings can help any project hoping to utilize the inherent benefits voice affords. Personalizing the content (where possible) provides much-needed clarity and a logical, relatable navigation system reduces cognitive load. Finally, don’t underestimate the importance of the visual components; when done well, they not only deliver fundamental conversation cues, they set the tone for the whole interaction.

For those looking to experiment with voice, Amazon now showcases tens of thousands of skills from companies like Starbucks and Uber, as well as those created by other innovative designers and developers. The Alexa Skills Kit (ASK) is a collection of self-service APIs, tools, documentation, and code samples that make it easy for you to add skills to Alexa, and start creating your own solutions. Wondering if voice even makes sense? Here’s some considerations before you get started.

Smashing Editorial(ra, il)

Categories: Others Tags:

5 Ways to Boost Local SEO

August 22nd, 2018 No comments

Let’s not beat around the bush, local SEO is hard.

If you represent a business in a large city and you’re aiming for a top 3 maps business listing (the Snack Pack), then it’s even harder.

You can spend many stressful hours tailoring every little aspect of your site, trying to achieve this and lose sanity along the way wondering where you’ve gone wrong.

It can be a very lonely place.

An important thing to do to retain your sanity is to be realistic and confront a few honest truths.

no one knows with full certainty…who will make it into the coveted snack pack

One of those truths is that no one knows with full certainty, how, or who will make it into the coveted snack pack for any given search query. Not the best SEO specialists, not the people working at Google—I’m not even convinced Google itself has any idea before the results page is generated.

Why is this?

Whilst there are lots of things you can do to influence your chances of ranking in the map snack pack, those results are influenced by things completely beyond your control.

One of the primary ranking factors is the location of the individual making the search as well as the user preferences based on previous experiences.

results are influenced by things completely beyond your control

For instance, an individual could run a search for ‘best cafes near me’ in one location, and one block away that same query could return completely different results. Using the same example, if the individual has been to other cafes in the area and rated them highly (without having visited yours) then theirs again could favored.

With the element of the unknown and uncontrollable working against you, you need to project manage the situation to ensure you don’t spend a disproportionate amount of time on something that might not be attainable in the first place.

With that in mind, we’ve put together a list of five of the top things that you can do that will help compete on the local front without your focus being purely on the map results (although implementing these five tactics will go a long way towards helping you rank in the map space).

1. Establishing a Reputation Through Reviews

The modern-day consumer is a savvy, well-researched individual who more often than not, will look through customer reviews/feedback on any product/service/experience they are considering.

Establishing a solid reputation through websites and platforms that are important and relevant to your business is therefore critical.

Relevant platforms might include TripAdvisor, Yelp, Bookings.com, FourSquare etc but whatever the main platforms are for your industry are, you want to be on there. You should also focus on getting reviews through your Google My Business Listing as this is often the first port of call for people who are searching for your business.

This not only means a job well done of course, but being proactive in encouraging your customers to submit their positive experiences. This might be as simple as having a small sign near your point of sale letting people know you are present on the platforms. It might be getting staff to remind customers of the same. You may even want to use your email marketing as the means to encourage engagement.

The only thing to avoid is inappropriately incentivizing customers to review (by offering them a discount or some payoff for doing so). This is universally seen by the platforms as bad practice and will often result in your business being penalized for doing so. In any case, if you’re doing a good job with satisfied customers, they shouldn’t require too much encouragement.

2. Engage in Social Media

Social media is a great way to engage with current, new and prospective customers for your business and these days, is a standard expectation as a way of representing your business.

Not only is it a great way to connect with your local customers, it’s a great way to get broad exposure and acquire new fans, followers and connections. You can do this organically or via targeted paid campaigns with great specificity.

With your new-found followers, you’ll find social media as a great platform to share a lot of information about your business that might otherwise be challenging via a website or through organic search results. Your new products, new discounts, upcoming events will instantly appear on their social media feeds without them having to seek it out.

3. Don’t Dismiss Online Directories

Another way many people find out about businesses in their local area is via online directories.

It’s easy to think that everyone uses Google and nothing but. The actual situation isn’t quite so clear-cut.

Whilst Google does dominate, it has the onerous responsibility of crawling the entire internet and sometimes returns results that aren’t precisely relevant and/or misses some that are if the sites have been poorly optimised.

An online directory therefore, becomes more targeted and specific, and the good ones are very easy to navigate which is why people turn to them.

Much like review sights and social media platforms, it’s important to be placed in whichever ones are relevant to your business. It’s also important that your name, address and phone numbers (NAP) are consistent across all the directories you submit too. It takes a bit of effort and research but you’ll find it is time well spent, and in the end, will also help your chance of ranking in the local map snack pack.

4. Connect with the Community

It’s very easy to get a form of online tunnel vision when it comes to thinking about ways to promote your business but you should always remember that people don’t live their entire lives on the internet… well, not yet anyway.

Nothing beats connecting with someone on a personal level than with a face-to-face interaction so it’s absolutely in your best interests to involve yourself in the community and be seen.

Some ways in which to do this is to attend local markets or trade fairs (if appropriate to your business). You’ll create hundreds of different personal engagements in doing so which will in many cases lead to more at your usual location.

Another thing to consider is sponsoring a local event or charitable cause. If you can show your business cares, then the community will be more likely to care and support you. These types of events also get great engagement on social media giving you great content to post and share and will generally make you feel pretty good too!

5. Create Some Local Content for Your Website

If you’re wanting to establish yourself in a local sense than the easiest place to a stake a claim for this is on your own website with some focused content. Tell your own story and explain why your neighborhood and community are an integral part of your business. Is it part of the origin of your business and if so, how? Has your locality influenced or is represented in your products in some way? Are you using local products or suppliers?

If these things feature it should be very apparent on your website. It may even be worth having a blog section where you can elaborate on these aspects in greater detail with standalone pieces. Once again, you’ll also be able to share this content on social media and show everyone just how important your location is to your business.

Conclusion

As stated in the intro, getting snack pack results can be an uphill and uncertain battle on many fronts but by being proactive you can still have a presence on the local front. An additional bonus is that by doing most of these things you’ll only increase your chances of getting into that sought-after Snack Pack.

Add Realistic Chalk and Sketch Lettering Effects with Sketch’it – only $5!

Source

Categories: Designing, Others Tags:

Do People Still Love Helvetica?

August 21st, 2018 No comments
helvetica

Do people still use Helvetica? Today, we will see what designers say about the notorious font. Are you curious to find out how many hate it and how many love it? So am I. Let’s find out!

Approximately 1000 years ago, the Chineseman Bi Sheng invented the mobile letter. An organic and geometric work that has revolutionized the writing in the western world. Five hundred years later, Johannes Gutenberd invented the typographic press using Bi Sheng’s idea of mobile letters.

helvetica

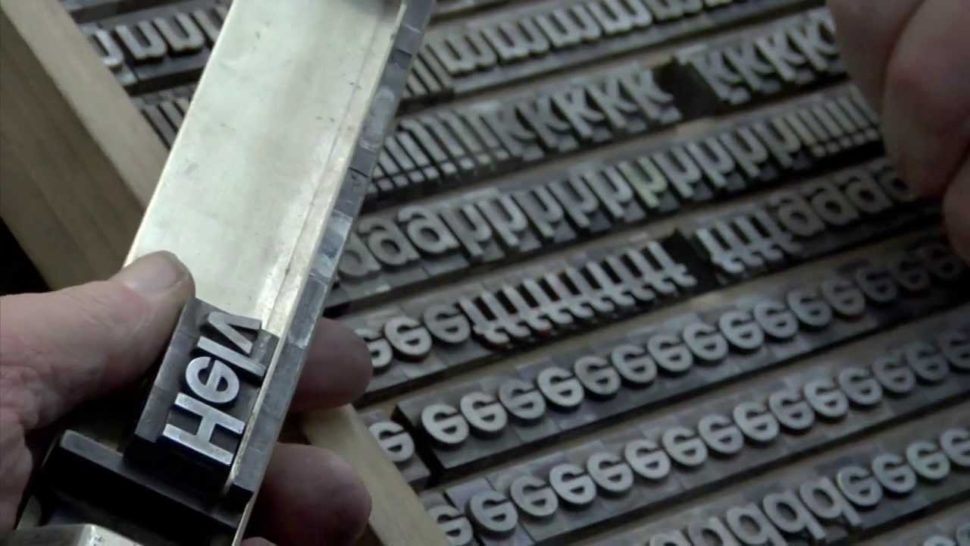
Back then, the letters were poured into matrixes and assembled in shapes, and after they were used, they were given separate boxes so that they can be reused any time. From that moment, the families of fonts started making their way into the world and they have been evolving ever since. So did the typographic techniques which, in 1880, have evolved into the automatic printing.

From the beginning of the 15th century to the present, thousands and thousands of fonts families have been designed. Some are called classic fonts, and their shape looks very much like the calligraphic hand writing. Other fonts are modern, with more abstract shapes and less organic, such as the one presented below.

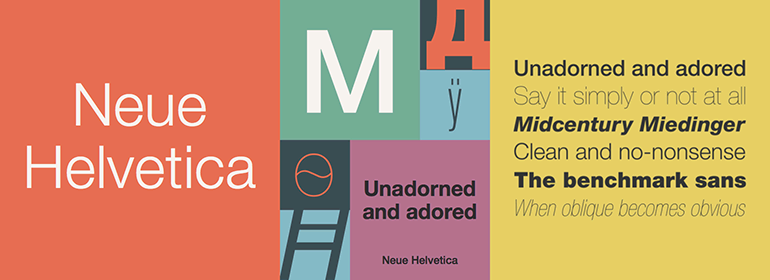
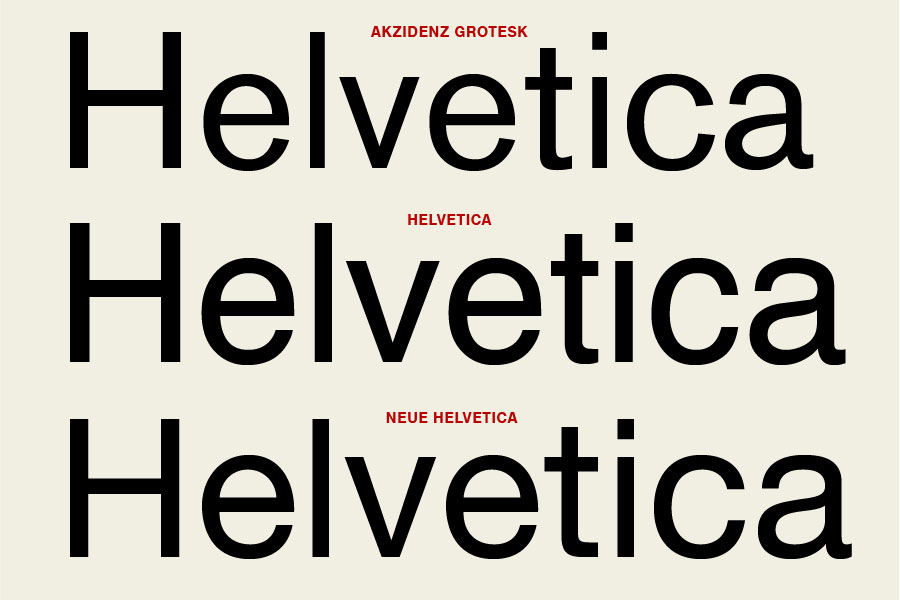
Helvetica was created as a completion of an older one called Akzidenz Grotesk, which was created in 1896. It was initially named Neue Haas Grotesk, and it received the name Helvetica in 1960. Its name comes from the Latin name of Switzerland, Helvetia, and it is also known by the name of Swiss 721 BT. Its first rivals in the world are Times New Roman, Baskerville, Gill Sans, and Verdana. Arial is also a variation of Helvetica. Linotype, the company that owns Helvetica has released an improved version of the font in 1983, Neue Helvetica. The font is very legible and it can be purchased on many websites for about $40.

helvetica

The psychologists say that the first messages transmitted using Helvetica are: you won’t lose your plane; you’ll make it in time at the destination; your money is safe if you use our services; we won’t open the package; everything will be ok. That’s why, notorious companies such as Orange, American Airlines, Royal Bank of Scotland, Panasonic, Zanussi, Lufthansa, or Toyota, use this font when displaying their names. It never gets old.

Helvetica turned 50 years in 2017 since its creation in 1957 by Max Miedinger and Eduard Hoffman, from the Haas Type Foundry Institute in Muenchenstein, Switzerland. It is the most used font in the world in all areas of work, being called the font of the twentieth century.

helvetica

“It’s durable. Helvetica comes from natural design forms. The font doesn’t have an expression of fashion. It has very clear lines and characters, it looks like a very serious typeface,” says Frank Wildenberg, managing director of Linotype, the German firm that owns the font.

There are versions of the font for different alphabets: Latin, Cyrillic, Jewish or Greek. It is part of the “sans-serifs” fonts. Its lines are clean, equall, and has a faded geometrical shape that doesn’t “scream” for attention.

Mixed Feelings about Helvetica

Helvetica is so appreciated that some people decided to dedicate it books. Lars Muller is one of the most dedicated to the font. He published a book called “Helvetica: Homage to a Typeface.” Moreover, he donated a set of the first inscriptions of the font to the Modern Art Museum in New York. Muller believes that the font has a “modern attitude” that comes as a response to the aesthetical premises from the 50’s-60’s. Helvetica is a font used by both the big corporations, and the small make-up shops or fast food chains. “It’s like the butter on bread,” believes Muller.

helvetica

Adrian Frutiger believes “Helvetica is the jeans, and Univers the dinner jacket. The font is here to stay.”

Wim Crouwel: “Helvetica was a real step from the 19th-century typeface… We were impressed by that because it was more neutral, and neutralism was a word that we loved. It should be neutral. It shouldn’t have a meaning in itself. The meaning is in the content of the text and not in the typeface.”

Massimo Vignelli: “You can say, “I love you,” in Helvetica. And you can say it with Helvetica Extra Light if you want to be really fancy. Or you can say it with the Extra Bold if it’s really intensive and passionate, you know, and it might work.”

helvetica

Not everybody loves this font, though. There are people who condemn the domination of Helvetica, and they see it as an old-fashioned font that encourages normality and routine.

Erik Spiekermann: “Most people who use Helvetica, use it because it’s ubiquitous. It’s like going to McDonald’s instead of thinking about food. Because it’s there, it’s on every street corner, so let’s eat crap because it’s on the corner.”

Menar Irvin: “Pshhh, Helvetica was so 2006. ITC Avant Garde Gothic Pro with the new ligatures & unicase glyphs are what’s hot.”

Jack Earl: “Helvetica: typography’s equivalent to internet explorer.”

Read More at Do People Still Love Helvetica?

Categories: Designing, Others Tags:

CSS Logical Properties

August 21st, 2018 No comments

A property like margin-left seems fairly logical, but as Manuel Rego Casasnovas says:

Imagine that you have some right-to-left (RTL) content on your website your left might be probably the physical right, so if you are usually setting margin-left: 100px for some elements, you might want to replace that with margin-right: 100px.

Direction, writing mode, and even flexbox all have the power to flip things around and make properties less logical and more difficult to maintain than you’d hope. Now we’ll have margin-inline-start for that. The full list is:

  • margin-{block,inline}-{start,end}
  • padding-{block,inline}-{start,end}
  • border-{block,inline}-{start,end}-{width,style,color}

Manuel gets into all the browser support details.

Rachel Andrew also explains the logic:

… these values have moved away from the underlying assumption that content on the web maps to the physical dimensions of the screen, with the first word of a sentence being top left of the box it is in. The order of lines in grid-area makes complete sense if you had never encountered the existing way that we set these values in a shorthand.

Here’s the logical properties and how they map to existing properties in a default left to right nothing-else-happening sort of way.

Property Logical Property
margin-top margin-block-start
margin-left margin-inline-start
margin-right margin-inline-end
margin-bottom margin-block-end
Property Logical Property
padding-top padding-block-start
padding-left padding-inline-start
padding-right padding-inline-end
padding-bottom padding-block-end
Property Logical Property
border-top{-size|style|color} border-block-start{-size|style|color}
border-left{-size|style|color} border-inline-start{-size|style|color}
border-right{-size|style|color} border-inline-end{-size|style|color}
border-bottom{-size|style|color} border-block-end{-size|style|color}
Property Logical Property
top offset-block-start
left offset-inline-start
right offset-inline-end
bottom offset-block-end

Direct Link to ArticlePermalink

The post CSS Logical Properties appeared first on CSS-Tricks.

Categories: Designing, Others Tags:

ABeamer: a frame-by-frame animation framework

August 21st, 2018 No comments

In a recent post, Zach Saucier demonstrated the awesome things that the DOM allows us to do, thanks to the element. Taking a snapshot of an element and manipulating it to create an exploding animation is pretty slick and a perfect example of how far complex animations have come in the last few years.

ABeamer is a new animation ecosystem that takes advantage of these new concepts. At the core of the ecosystem is the web browser animation library. But, it’s not just another animation engine. ABeamer is designed to build frame-by-frame animations in the web browser and use a render server to generate a PNG file sequence, which can ultimately be used to create an animated GIF or imported into a video editor.

First, a little about what ABeamer can do

A key feature is its ability to hook into remote sources. This allows us to build an animation by using the web browser and “beam” it to the cloud to be remotely rendered—hence the name “ABeamer.”

ABeamer doesn’t only distinguish itself from other animation frameworks by its capacity to render elements in a file sequence, but it also includes a rich and extensible toolset that is still growing, avoiding the need to constantly rewrite common animations.

ABeamer’s frame-by-frame design allows it to create overlays without dropping frames. (Demo)

The purpose isn’t to be another Velocity or similar real-time web browser animation library, but to use the web technologies that have become mainstream and allow us to create pure animations, image overlays and video edits from the browser.

I have plans to create an interface for ABeamer that acts as an animation editor. This will abstract the need to write code, making the technology accessible to folks at places like ad networks and e-commerce companies who might want to provide their customers a simple tool to build rich, animated content instead of static images for ad placements. It can create titles, filter effects, transitions, and ultimately build videos directly from image slideshows without having to install any software.

In other words, taking advantage of all these effects and features will require no coding skills whatsoever, which opens this up to new use cases and a wider audience.

Create animated GIFs like this out of images. (Demo)

But if JavaScript is used, what about security? ABeamer has two modes of server rendering: one for trusted environments such as company intranets that renders the HTML/CSS/JavaScript as it was built by sending the files; and another for untrusted environments such as cloud render servers that renders teleported stories by sending them by AJAX along with the assets. Teleportation sanitizes the content both on the client side and the server side. The JavaScript that is used during interpolation process is not allowed, nor is any plug-in that isn’t on an authorization list. ABeamer supports expressions, which are safe, teleportable, and in many cases, it can replace the need of JavaScript code.

Example of an advertisement made with ABeamer (Demo)

The last key feature is decoupling. ABeamer doesn’t operate directly with the document DOM, but instead uses adapters as a middleman, allowing us to animate SVG, canvas, WebGL, or any other virtual element.

Several examples of the chart animations built into ABeamer. (Demo)

Getting started with ABeamer

Now that we’ve covered a lot of ground for what ABeamer is capable of doing, let’s dive into what it takes to get up and running with it.

Installation

The ABeamer animation library can be downloaded or cloned on GitHub, but in order to generate animated GIFs, movies, or simplify the process of getting started, you’ll want to install it with npm:

# 1. install nodejs: https://www.nodejs.org

# 2. install abeamer
$ npm install -g abeamer

# 2. learn how to configure puppeteer to use chrome instead of chromium
$ abeamer check

# 3. install a render server (requires chrome web browser) 
$ npm install -g puppeteer

# 4. install imagemagick: https://www.imagemagick.org

# 5. install ffmpeg: https://www.ffmpeg.org/

Puppeteer is installed separately, since other server renders are also supported, like PhantomJS. Still, Puppeteer running on Chrome will produce the best results.

Spinning up a new project

The best way to get started it’s to use the ABeamer CLI to create a new project:

abeamer create my-project --width 640 --height 480

This will create a project with the following files:

  • abeamer.ini – Change this file to modify the frame dimensions and recompile main.scss. This file will be used by the server render and main.scss.
$abeamer-width: 640;
$abeamer-height: 480;
  • css/main.scss – CSS can also be used instead of SCSS, but it requires to change the dimensions in two places.
@import "./../abeamer.ini";

body,
html,
.abeamer-story,
.abeamer-scene {
  width: $abeamer-width + px;
  height: $abeamer-height + px;
}

#hello {
  position: absolute;
  color: red;
  left: 50px;
  top: 40px;
}

ABeamer content is defined inside a story, much like a theater play. Each story can have multiple scenes.

  • index.html – This is inside a scene where the animation happens:
<div class="abeamer-story" id=story>
  <div class="abeamer-scene" id=scene1>
    <div id=hello>Hello
      <span id=world>World</span>
    </div>
  </div>
</div>
$(window).on("load", () => {
  const story: ABeamer.Story = ABeamer.createStory(/*FPS:*/25);
  const scene1 = story.scenes[0];
  scene1.addAnimations([{
    selector: '#hello',
    duration: '2s',
    props: [{
      // pixel property animation.
      // uses CSS property `left` to determine the start value.
      prop: 'left',
      // this is the end value. it must be numeric.
      value: 100,
    },
    {
      // formatted numerical property animation.
      prop: 'transform',
      valueFormat: 'rotate(%fdeg)',
      // this is the start value,
      // it must be always defined for the property `transform`.
      valueStart: 10,
      // this is the end value. it must be numeric.
      value: 100,
    }],
  }, {
    selector: '#world',
    duration: '2s',
    props: [{
      // textual property animation.
      prop: 'text',
      valueText: ['World', 'Mars', 'Jupiter'],
    }],
  }]);
  story.render(story.bestPlaySpeed());
});

Live Demo

You may notice some differences between ABeamer and other web animation libraries:

  • ABeamer uses load instead of a ready event. This is due the fact that the app was designed to generate frame files, and unlike real-time animation, it requires all assets to be loaded before the process begins.
  • It sets FPS. Every state change in the CSS or DOM will fall into a specific frame. Think of it the way movie editors operate on a frame-by-frame basis. This way, when it renders to a file sequence, it guarantees that each file will represent a frame and that it is independent from the time it takes to render.
  • addAnimations doesn’t trigger an animation like other web animation libraries. Instead it builds the animation pipeline for each frame. This method is more verbose than other libraries but it benefits from allowing the same infrastructure to animate CSS/DOM elements, SVG, canvas and WebGL.
  • addAnimations can also animate text, colors and images — not only position, but rotation and scale as well.
  • render will start the rendering process. In case there is client rendering, it will simulate run-time. But if it’s server rendering, ABeamer will render at full-speed.

To test this animation, go ahead and open the index.html in your web browser.

Server Rendering

Now that we have an animation project created, we want to generate PNG file sequences, animated GIFs, and movies without frame drops. The process couldn’t be more simpler:

# 1. generate PNG file sequence
# assuming that you are in the parent directory
$ abeamer render my-project

# 2. generate animated gif (requires the PNG file sequence)
$ abeamer gif my-project

# 3. generate movie (requires the PNG file sequence)
$ abeamer movie my-project

The previous commands will place the resulting files in the project/story-frames.

Handling CORS

In the previous example, the project didn’t require loading any JSON, so it can be executed as a local file. But due CORS, if it required to load a JSON, it needs a live server.

To solve this, ABeamer has included a live server. Spin it up with this:

# 1. runs a live server on port 9000
$ abeamer serve

This will assign your project to: http://localhost:9000/my-project/

The render command then becomes:

$ abeamer render my-project --url http://localhost:9000/my-project/

Cloud Rendering

At the moment, there is no third-party cloud rendering. But as the project gains traction, I’m hoping that cloud companies see the potential and provide it as a service in the same manner as Google provides computation of Big Data that server farms can use as cloud render servers.

The benefits of cloud rendering would be huge:

  • It wouldn’t require any software installation on the client machine. Instead, it can all be done on the web browser. While there is currently no ABeamer UI, online code editors can be used, like CodePen.
  • Heavy render processes could be designed in a client machine and then sent to be rendered in the cloud.
  • Hybrid apps would be able to use ABeamer to build animations and then send them to the cloud to generate movies or animated GIFs on demand.

That said, cloud rendering is more restrictive than the server render since it doesn’t send the files, but rather a sanitized version of the story:

  • Interactive JavaScript code isn’t allowed, so case expressions are required
  • All animations are sanitized.
  • The animation can only use plugins that are allowed by the cloud server provider.

Setting up a cloud render server

If you are working in an environment where installing software locally isn’t allowed, or you have multiple users building animations, then it might be worth setting your own cloud render server.

Due to CORS, an animation must either be in a remote URL or have a live server in order to be sent to the cloud server.

The process of preparing, sending, and rebuilding on remote server side it is called teleportation. Animations requires changes to be teleported:

$(window).on("load", () => {
  const story: ABeamer.Story = ABeamer.createStory(/*FPS:*/25, { toTeleport: true });
  // the rest of the animation code
  // ....

  const storyToTeleport = story.getStoryToTeleportAsConfig();
  
  // render is no longer needed
  // story.render(story.bestPlaySpeed());
});

By setting toTeleport=true, ABeamer starts recording every animation in a way that it can be sent to the server. The storyToTeleport method will hold an object containing the animations, CSS, HTML and metadata. You need to send this by AJAX along with the required assets to the cloud.

On the server side, a web server will receive the data and the assets and it will execute ABeamer to generate the resulting files.

To prepare the server:

  • Create a simple project named remote-server using the command abeamer create remote-server.
  • Download the latest remote server code, extract the files, and override them with the ones existing in remote-server.
  • Save the received object from AJAX as remote-server/story.json and save all assets in the project.
  • Start a live server as you normally would using the abeamer serve command.
  • Render the teleported story:
abeamer render 
--url http://localhost:9000/remote-server/ 
--allowed-plugins remote-server/.allowed-plugins.json 
--inject-page remote-server/index.html 
--config remote-server/story.json

This will generate the PNG file sequence of the teleported story. For GIFs and movies you can run the same commands as before:

$ abeamer gif remote-server
$ abeamer movie remote-server

For more details, here’s the full documentation for the ABeamer teleporter.

Happy animating!

Hopefully this post gives you a good understanding of ABeamer, what it can do, and how to use it. The ability to use new animation techniques and render the results as images opens up a lot of possibilities, from commercial uses to making your own GIF generator and lots of things in between.

If you have any questions at all or have trouble setting up, leave a comment. In the meantime, enjoy exploring! I’d love to see how you put ABeamer to use.

The post ABeamer: a frame-by-frame animation framework appeared first on CSS-Tricks.

Categories: Designing, Others Tags:

“Old Guard”

August 21st, 2018 No comments

Someone asked Chris Ferdinandi what his biggest challenge is as a web developer:

… the thing I struggle the most with right now is determining when something new is going to change the way our industry works for the better, and when it’s just a fad that will fade away in a year or three.

I try to avoid jumping from fad to fad, but I also don’t want to be that old guy who misses out on something that’s an important leap forward for us.

He goes on explain a situation where, as a young buck developer, he was very progressive and even turned down a job where they weren’t hip to responsive design. But now worries that might happen to him:

I’ll never forget that moment, though. Because it was obvious to me that there was an old guard of developers who didn’t get it and couldn’t see the big shift that was coming in our industry.

Now that I’m part of the older guard, and I’ve been doing this a while, I’m always afraid that will happen to me.

I feel that.

I try to lean as new-fancy-progressive as I can to kinda compensate for old-guard-syndrome. I have over a decade of experience building websites professionally, which isn’t going to evaporate (although some people feel otherwise). I’m hoping those things balance me out.

Direct Link to ArticlePermalink

The post “Old Guard” appeared first on CSS-Tricks.

Categories: Designing, Others Tags:

Introducing YOOtheme Pro – The New Theme and Page Builder for WordPress

August 21st, 2018 No comments
YOOtheme Pro

YOOtheme Pro

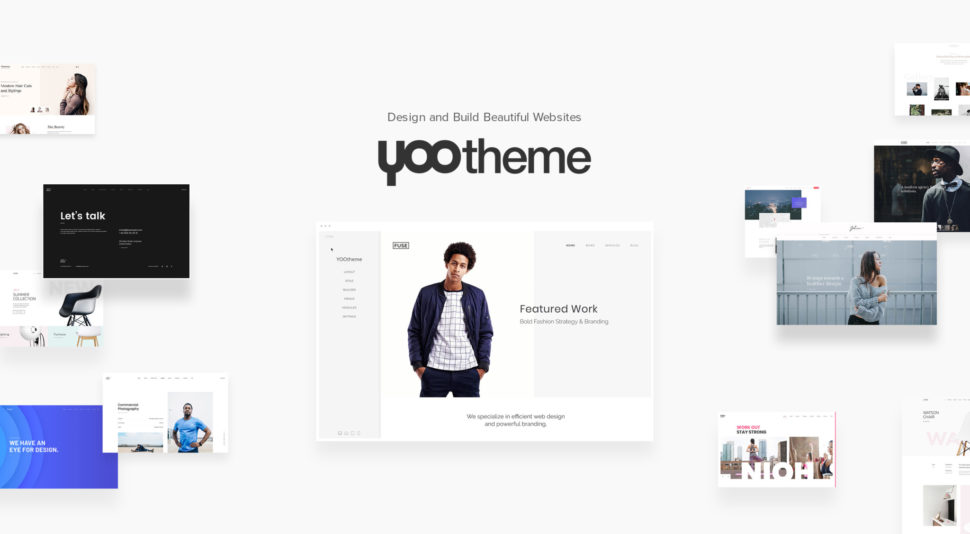
YOOtheme Pro, a powerful theme and page builder developed by YOOtheme, creates a new experience of building websites in WordPress. It shows designers an easy and exciting way to design and create websites thanks to the combination of premium layouts and an intuitive page builder, and it is also a great tool for developers due to its extendability and clean, semantic code. YOOtheme has been known as a leading theme provider since 2007, but with YOOtheme Pro they created the next page builder to be watched for in the WordPress world.

The Page Builder

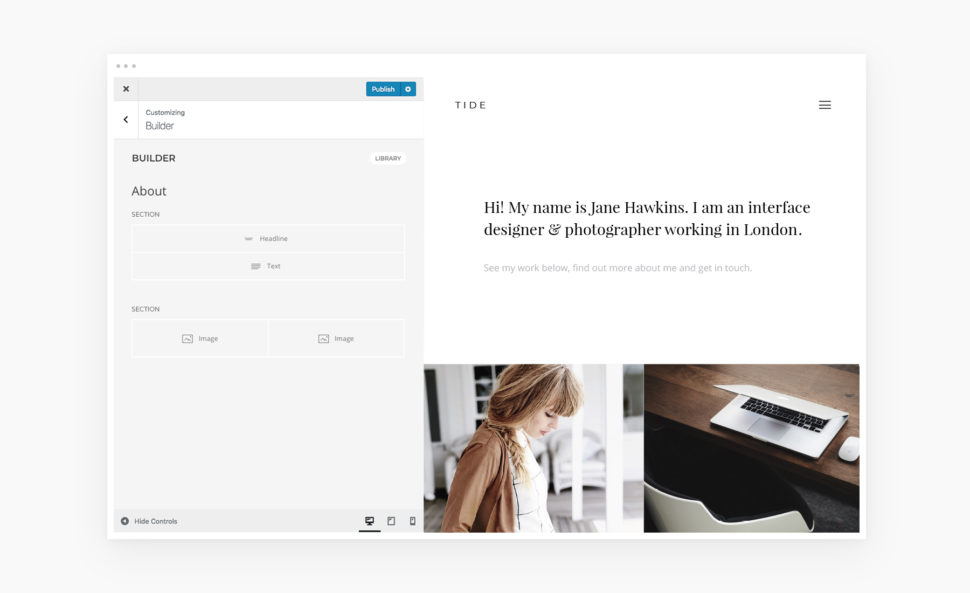
YOOtheme Pro is a great choice for users who are already familiar with WordPress since it is seamlessly integrated into the native WordPress customizer. Divide your content into sections, rows and grids and create your layout with these building blocks. Using drag and drop you can design stunning responsive page layouts without having to write a line of code. Everything you change will be instantly shown in live preview.

YOOtheme Pro

Build Your Content Easily

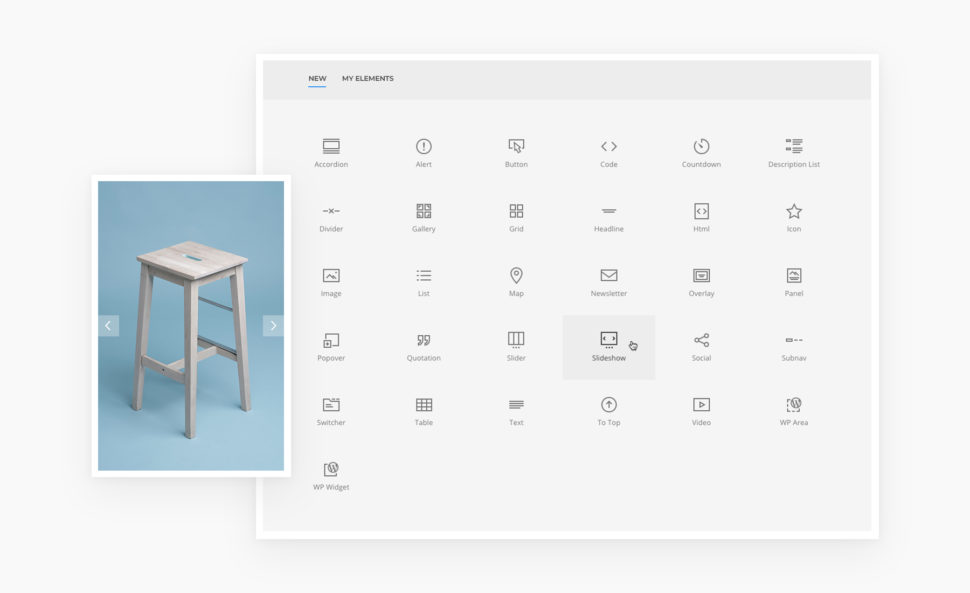
YOOtheme Pro comes with a growing library that currently contains more than 30 content elements. You can of course expect common elements like the Heading, Video, Image or Panel. But there are also some advanced ones, for instance, the Slideshow, Slider, Gallery that includes the masonry effect and the filter option, and much more. All elements are built with the popular front-end framework UIkit, which provides a modern codebase with fast and lightweight JavaScript. You can even bring the functionality of WordPress widgets to YOOtheme Pro and place them anywhere in your layout.

YOOtheme Pro

Create Sophisticated Layouts in No Time

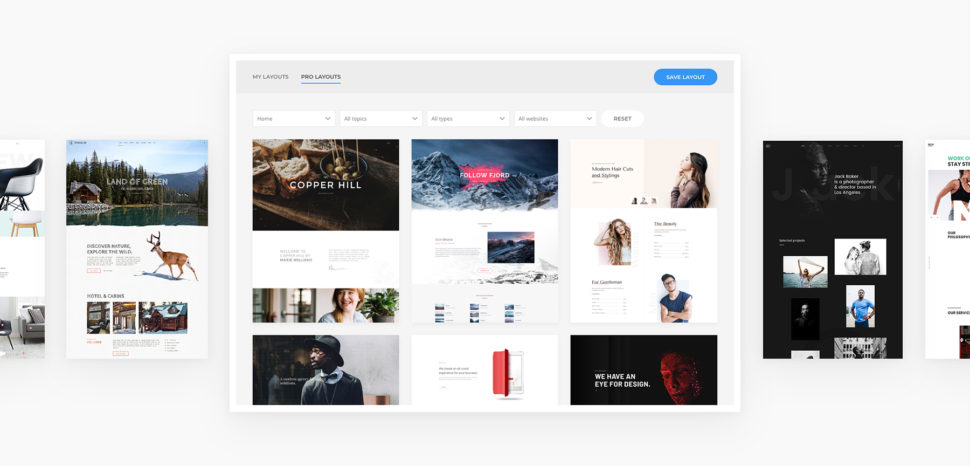
YOOtheme put a lot of effort into the development of their layouts. A team of professional designers regularly creates complete website concepts with a thought-out content structure and focus on modern design trends. Over 100 premium layouts with free-to-use images can be found in the Layout Library. You can filter layouts according to topics and purposes, mix and match them, save your own layouts and reuse them later. This gives you unlimited possibilities and makes creating websites in WordPress as simple as it gets.

YOOtheme Pro

Choose From Over 70 Beautiful Styles

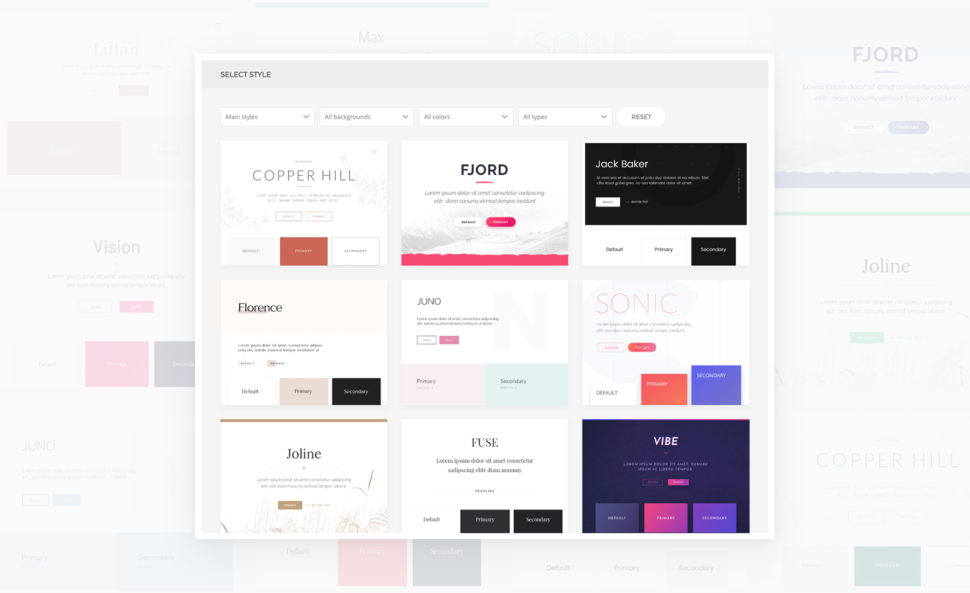
Another feature that makes YOOtheme Pro stand out is their Style Library. Choose one of over 70 handcrafted styles, and the look of your whole website will change in one click. From minimalistic and classic to extravagant and bold – this substantial collection represents all style trends. With YOOtheme Pro you can customize next to anything. You can not only change the style of each item separately, but also apply changes globally. YOOtheme Pro gives you all the power to style your WordPress website with none of the coding.

YOOtheme Pro

Integrated Unsplash Library

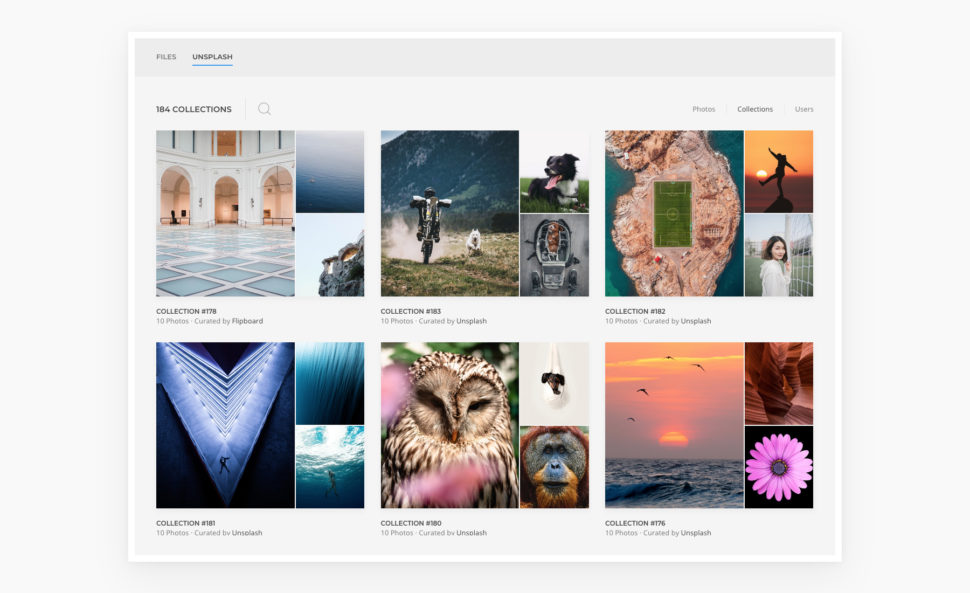
YOOtheme Pro seamlessly integrates the popular Unsplash library that provides quality, free-to-use photos. Instead of downloading dozens of images and trying them out on your website, you can search through the library without having to leave YOOtheme Pro. Filter images, browse through collections and users and directly insert images into your layouts. This will really speed-up your design process and save you a lot of time.

YOOtheme Pro

Lightning-fast and Developer-friendly

YOOtheme Pro is fast, lightweight and easy like no other page builder – a true piece of German engineering. It is powered by Vue.js and UIkit to provide a great user experience. YOOtheme Pro really cares about speed. The small code size together with the latest web technologies will get the first meaningful paint quickly on the screen. And with lazy loading images, auto-generated srcsets and next-gen image formats like WebP, YOOtheme Pro will boost the Google PageSpeed rank for your WordPress website. Even Google Fonts are stored locally, which saves the request to Google and makes them GDPR compliant. Even Google Fonts are stored locally, which saves the request to Google and makes them GDPR compliant.

Thanks to the modular and extendable architecture YOOtheme Pro is extremely developer-friendly. You can override everything and add custom elements, CSS, JavaScript and even new theme settings. An extensive documentation including a Developers section and video tutorials will help you get started.

Get YOOtheme Pro

YOOtheme Pro simplifies and at the same time empowers website building. With the regular release of theme packages, including beautifully crafted layouts on a particular topic, six style variations and free hand-picked photos, YOOtheme Pro is the only thing you’ll need to create a website. And while we could talk more about how YOOtheme Pro supports WooCommerce, has many desktop and mobile header layouts and a Footer Builder, we would rather let you see for yourself. So get YOOtheme Pro and experience the future of website building today.

Read More at Introducing YOOtheme Pro – The New Theme and Page Builder for WordPress

Categories: Designing, Others Tags:

Onboarding Users Of Your Product: From Trial To Payment

August 21st, 2018 No comments

Onboarding Users Of Your Product: From Trial To Payment

Onboarding Users Of Your Product: From Trial To Payment

Joe Leech

2018-08-21T14:20:21+02:002018-08-21T13:33:03+00:00

(This is a sponsored article.) In part one of this series, we looked at the Attraction phase of the customer lifecycle. This three-part series outlines the three phases of the product lifecycle, the future for UX, and the skills and approach you’ll need to design modern digital products.

  • Part 1: Attraction
    Going out there to get users to evaluate your product.
  • Part 2: Activation
    Signing up, onboarding users, asking for payment.
  • Part 3: Retention
    Encouraging users to come back and keep using and paying for your product.

Part Two: Activation

Plotting Out The Journey

When we talk about the Attraction phase, we’re talking about users discovering they have a need, discovering our product and visiting our website to see if our product meets their needs.

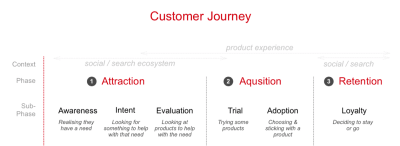
Within the lifecycle, we can split the larger three phases into smaller phases to help us plan our approach. In this case, we can use Philip Kotler’s model (expanded to 6 steps by Bryony Thomas).

  • Awareness
    Realizing they have a need.
  • Interest
    Looking for something to help with that need.
  • Evaluation
    Looking at products that help with their need.
  • Trial
    Trying the product to see if it meets their need.
  • Adoption
    Choosing a product and using it for a while.
  • Loyalty
    Deciding to stay using the product or switch to a different one.

(Large preview)

We’re interested in the middle two parts that fall under the Acquisition phase.

In part one, we looked at the Evaluation phase. The user is now ready to sign up and get going with our product; we used the example of the money management app:


Homepage showing what our app does.
Homepage showing what our app does. (Large preview)

Let’s take that app forward into the Acquisition phase of the lifecycle.

A. Trial/Onboarding

In the Trial phase, our user is going to sign up and see if it is the product for them.

The first challenge is to onboard the user. Onboarding is a real challenge as it can be complex, involving the user entering personal information as well as getting to grips with what the product does. There is a huge potential for users to drop out and leave.

Joshua Porter sums it up:

“Onboarding should not be a separate function/consideration/afterthought. It should be an initial (and primary) focus of design.”

Joshua Porter

So with that in mind, let’s take a look at onboarding.

Onboarding: Steady Progress Showing Value

For our money management app to work well we need for our user we need to accomplish three goals:

  1. Collect some personal data from our users.
    Who they are (including email, mobile phone number, etc.).
  2. Bank account access, to auto pull in transactions.
    As we’re in the EU, open banking regulations mean that all banks have to provide API access to transaction data.
  3. Familiarize them with the product.

That’s a big ask. Let’s think about how we can soften that. We need a simple hook to get started. We use a concept in psychology called ‘incremental commitment.’ We ask for a low commitment to the product and then when the user gets something in return was ask for more.

We ask the simple question, “How much do you think you spend on coffee a month?”


A simple question to get started
A simple question to get started. (Large preview)

This can be done along with a hook to encourage people to compare their spend to others. There’s now a quick, easy win for the user.

We give something back, in this case comparing to the average. Then, we ask the next question.


incremental commitment in action. We ask a follow-up.
Incremental commitment in action. We ask a follow-up. (Large preview)

It allows us to build trust, and for the user to get value from our product early.

Next, the big ask. We want bank account access. If we’d asked for this early, we’d see a larger dropout. But we now have built some trust, and our user is invested in the product.


(Large preview)

We then go for the big ask, granting bank access. As you can see, we are gently guiding our user through the onboarding, showing useful content at each step, trying to make it feel natural.

Asking for what could be challenging data like the mobile phone number is much easier if we offer context and say what benefit there is to the user. We could include the following on the sign-up page asking for the mobile number.


showing how giving us your mobile number adds value
Showing how giving us your mobile number adds value. (Large preview)

We can then ask further questions, like email and for a password which will have less impact being asked later after we’ve shown value.

Interaction by interaction we’re asking a question, gathering some data and showing how the product works.

Things To Avoid During Onboarding

There are other pitfalls to designing a product onboarding flow.

  • Avoid the term registration, Registration is a meaningless concept, offer a reason for why you are asking for a pieces of information.
  • Similarly don’t ask too many questions, that might sound obvious, but the more you ask the more likely it is for users to drop out.
  • Answer these three simple questions when it comes to form fields:
    • Why are you asking the question?
    • What will you use the data for?
    • What value does the user get from giving us this data?
  • Avoid Captcha; it is a big cause of dropouts as captchas can harm conversion rates. Plus, they aren’t very friendly.
  • And, of course, if your users are located in the EU, you need to wrangle with GDPR.

B. Adoption

Onboarding doesn’t end when the user has signed up. This is a common mistake made by organizations big and small. “Great, our new registrations are up month on month. But our retention rate is really poor” is a common problem.

We need to support our users through the first few weeks and months of using our app. We need to give them a reason to come back to us.

In part one, we talked about SEO and Marketing skills and tools we can use to improve the experience.

We’ll be expanding our skill set to look at email, and how we can improve the email experience. To encourage product adoption, we need to understand and map the email user journey.

Any modern UX or product designer needs to know how to design multi-channel experiences, and after the product itself email is the most important.

Planning And Encouraging The Second Visit

For our money management app we have access to the users’ bank transaction data. Rather than hoping they return to our app, we need to reach out and give them a reason to come back.

The pull: using email to get users to come back to our app

Let’s look at an email we can send them the next day. But before we do that, let’s look back at one question we asked users:


Notice that the ‘on coffee’ can be changed for other spending items. (Large preview)

The user could have changed ‘on coffee’ to be ‘at Restaurants’ or ‘at Amazon’ or another discretionary purchase option.

This is a tiny piece of personalization, and the best follow-up emails are personalized.

When designing an email the most important element is the subject line. A good subject line encourages the user to open it.

Let’s look at the most common email provider of them all, Gmail. Like we did in part one when designing Facebook ads, we’ll design in context, in this case the crowded inbox. Actually, the promotions inbox on Gmail.


There’s one email in there that stands out, yes it’s us! (Large preview)

By referencing the Frotos we identified in part one (Frotos: are the current bad state the user has and their wish for a new state. The From and the To, Froto) we should get a better open rate.

And yes, that is an emoji you see. Two in fact. ?

This article is great at helping you decide if emojis are right for you: Emojis in email subject lines: smiley face, or smiley poop? as it has a lot of data.

TLDR, emojis can help boost open rates, and well…

What an emoji (in a subject line) does is one of two things:

  1. It makes a bad subject line worse;
  2. Or it makes a good subject line better.

We also need to think about other email design considerations:

Don’t forget to test your emails to make sure they look as designed — Litmus is great at this.

User Research And Email

It’s a good idea to user research your emails, you’ll be surprised at what useful ideas you’ll get back. Using the emails as prompt material will encourage users to answer the question “What could you offer me that would make me come back to the app?”

Drip, Drip, Drip That Email

That’s email one done, great job! But now we need to think about an ongoing programme of emails. It takes a while to form a habit, and that’s what we’re after. Getting our users to keep coming back. It can take from 18 to 254 days so we need to keep sending those emails.

These emails should offer value to our users. The key insights our product offers should be easy to deliver by email, SMS, or indeed any digital channel.

Our product promises a “Personalised Savings Plan” that’s what we need to deliver.

The best performing products work seamlessly across digital channels.

To encourage product adoption and to help our user save we could offer SMS messages.


(Large preview)

SMS is a neglected message format. Yes, it can be annoying if done badly, but it can equally be effective for our users.

Some SMS stats:

  • 98% of text messages are read within 2 minutes;
  • Open rates are around 99% for text messages compared to 20% for email;
  • Click through rates are around 30% for SMS and less than 5% for email.

That makes a compelling case for the effectiveness of SMS. Look at the success of startup Shine and learn more about how they use SMS.

We can encourage our user to save money by using SMS, sending an email once a day. A daily, personalized, money coach is a huge benefit to our user.


(Large preview)

This article is a great for planning your messaging approach: Level-Up Email Campaigns With Customer Journey Mapping — Smashing Magazine.

Here’s some more great advice on planning email drip programmes:

User Research And Email/SMS

Researching the effectiveness of email and SMS is best done through AB testing. Testing different variants to see which performs better.

User research can help understand what content users will find useful and by what channel.

The Secret To Onboarding And Adoption: It Takes Time

Onboarding should be done gently, in short chunks offering value immediately. When it comes to asking for precious information like mobile phone number, bank account or email we need to demonstrate how we will deliver value.

To get a user to adopt our service takes time. We need to be able to deliver useful content over a long period of time to encourage them to keep using the product.

Next Up, Retention

In the first part we talked about the beginnings of the customer journey how to attract or users.

Coming up next, we’ll talk about how to retain users and get them to pay for our product — that holy grail of our user taking out a monthly subscription. Stay tuned!


The parts of the user journey
The parts of the user journey. (Large preview)

This article is part of the UX design series sponsored by Adobe. Adobe XD tool is made for a fast and fluid UX design process, as it lets you go from idea to prototype faster. Design, prototype, and share — all in one app. You can check out more inspiring projects created with Adobe XD on Behance, and also sign up for the Adobe experience design newsletter to stay updated and informed on the latest trends and insights for UX/UI design.

(ra, yk, il)
Categories: Others Tags:

Introducing Crello Animation Maker

August 21st, 2018 No comments
Formats_Crello

Crello is an innovative design app from Depositphotos that’s simple to pick up and use, and outputs high-quality results. In an increasingly saturated design tool market, it could be the best tool you’ve never tried.

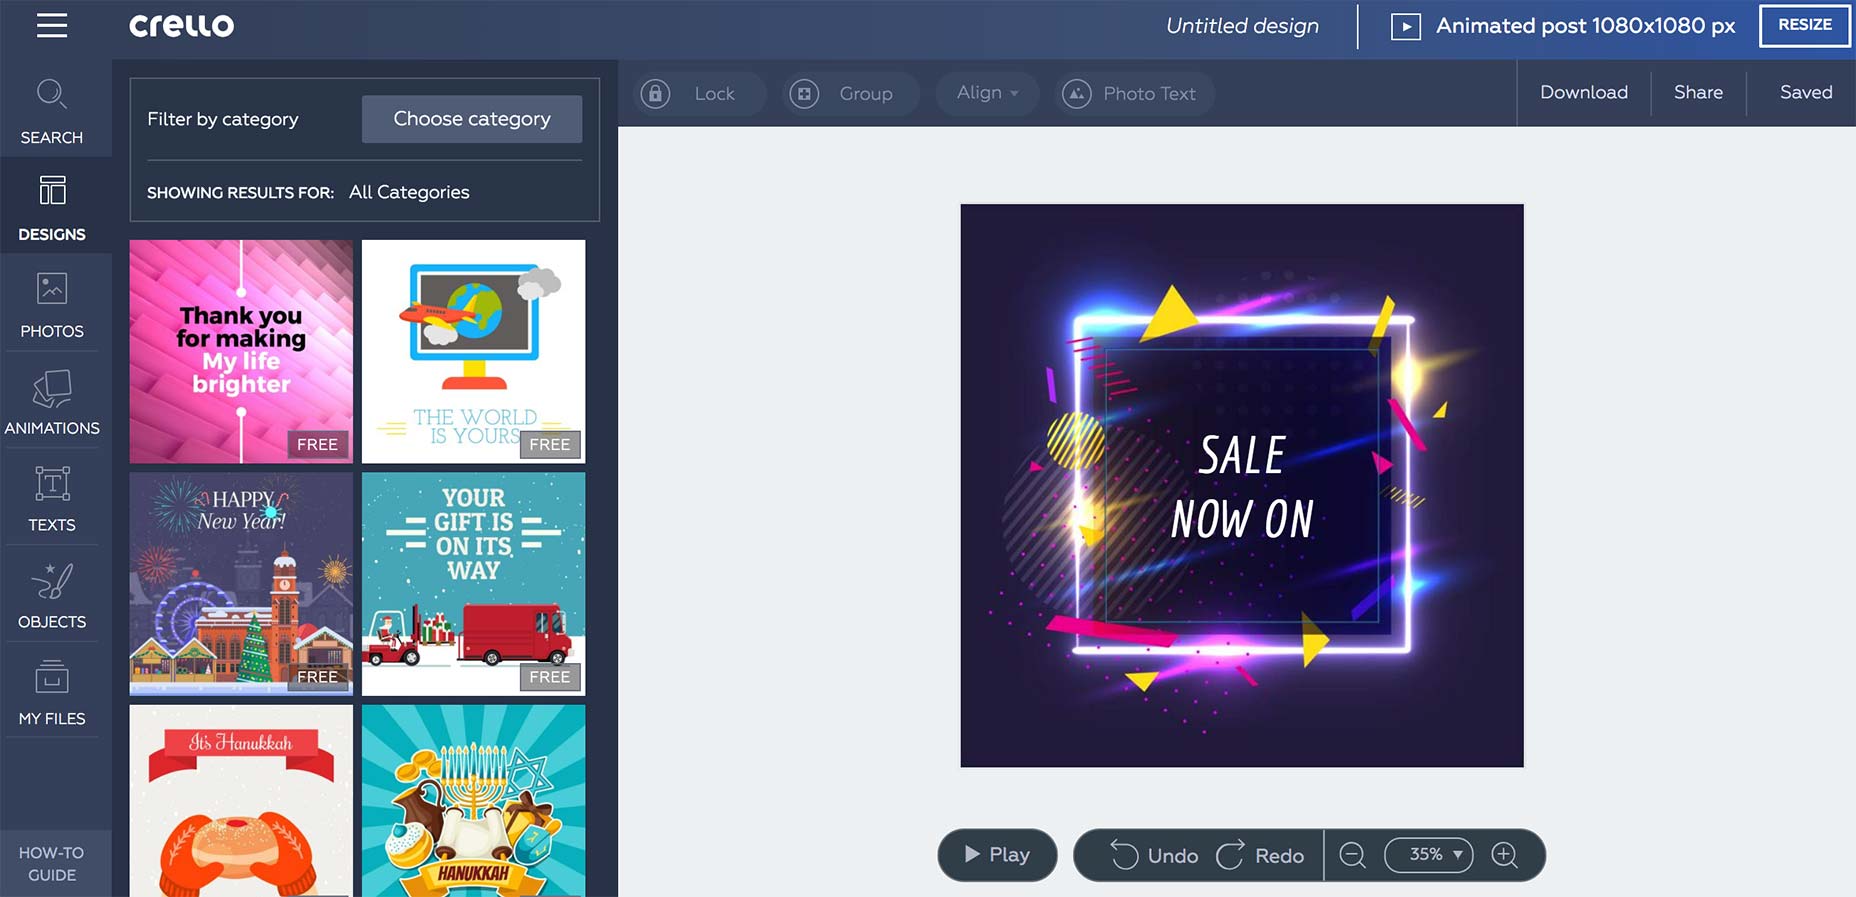
Now, after the popularity of Crello, Depositphotos are releasing Crello Animation Maker. A brand new set of features that enable anyone to convert design assets into engaging animation for the web, in just a few clicks.

Introducing Crello Animation Maker

Crello Animation Maker is designed to enable anyone to quickly and easily convert Crello designs into animated assets for use on social media, or in adverts.

It’s an incredible tool for marketing teams, who can take existing designs and create new campaigns in minutes, without having to pull the design team away from other tasks. Animation Maker gives you the tools to respond to the fast-paced world of social media, and maybe even take your brand viral.

Create animated posts for social media.

With Animation Maker you can easily add animated emojis, icons; combine video backgrounds with photos; even add illustrations to designs.

Crello Animation Maker gives you the option to output your designs in various formats, so you can export in the right format for Facebook, Instagram, and others. You can create 3 sizes of video: 1080×1080 for social media posts, full HD video clips, and Facebook cover videos.

Create Facebook cover videos.

Quickstart with Crello Animation Maker

Crello comes with over 12,000 professionally designed templates, which gives you a great starting point for any design. Once you’ve selected your template you can customize it to your heart’s content, or use it as-is as the basis of your Animation Maker design.

There are even dedicated Animated Maker templates you can use to kick-start your process. With templates, animated icons, illustrations, backgrounds and badges, all created by professional designers, it’s easy to get pro results.

Enhance_Crello

Crello Assets

Crello comes with a cornucopia of assets to grace your designs. The huge library of over 65,000,000 images and illustrations, and over 250 free fonts, means you’ll always find the right visuals to communicate your message.

The templates are split over 33 different formats, from posters, to fliers, to social media banners. Lacking inspiration? There are even themed collections to get you started.

Crello comes with millions of assets to use in your designs.

Who Should Try Crello?

Crello is designed to offer just as much help as necessary to get results. Beginners will find that they’re easily able to generate the kind of quality designs that usually require years of experience, and industry-tested pros will find everything they need to make life simple.

Perhaps the best use-case for Crello is in the vibrant startup scene; Crello enables teams to create all kinds of visual assets, without diverting the team’s graphic designer from key tasks like branding, and UI design. Professional developers will also appreciate Crello for those occasional jobs that previously had to be outsourced.

Crello is free to use, and all of the new premium motion features are free to try. If you decide that you want to keep on using the animation and video features you can upgrade to a pro account for just $9.99 per month.

Head over to Crello today, to try this incredible design tool for yourself.

[– This is a sponsored post on behalf of Crello –]

Add Realistic Chalk and Sketch Lettering Effects with Sketch’it – only $5!

Source

Categories: Designing, Others Tags:

Get to Know Knoed Creative(AOTW#9)

August 20th, 2018 No comments
knoed

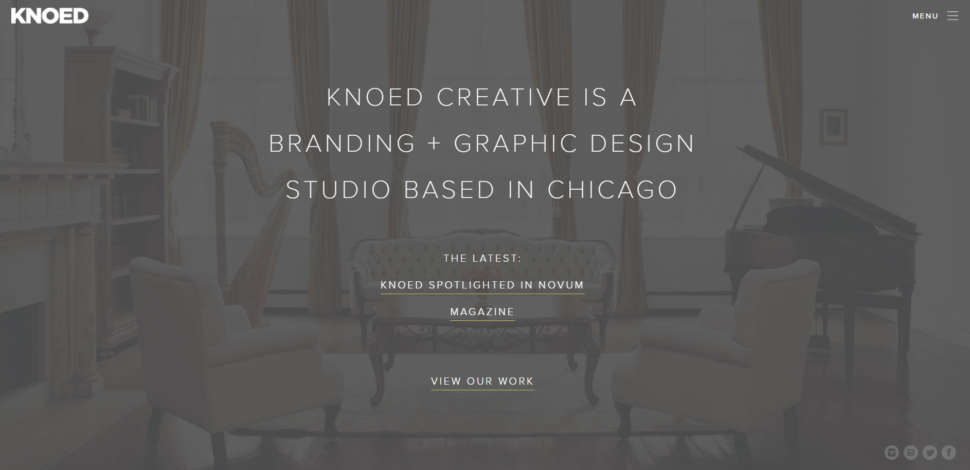
In this week’s installment of Agency of the Week, we’re going to take a look at an amazing and one of a kind agency called Knoed Creative.

knoed Creative

About Knoed Creative

Based in Chicago and owned by Kim Knoll and Kyle Eertmoed, Knoed is a brand building agency with one thing on their mind – helping people build their brand and share things they’re passionate about.

“There’s nothing more exciting to us than working with go-getters to turn their vision into something tangible, putting it out into the world and watching others experience it. We may start out with handshakes, but our projects always end with hugs and high fives.”

knoed Creative

Branding

The folks at Knoed love their high fives and hugs, but they also love building brands as their specialty.

“Branding is our specialty. There’s nothing more exciting to us than conceiving a brand from a blank slate, or wiping that slate clean and starting fresh. Whether you’re new to this or have gone through it before, you’ll find that our branding process is designed to eliminate the guesswork and provide clarity and confidence as your brand evolves.”

Knoed is no stranger to building quality. As many brands as they’ve built, they’ve built top of the line websites to go along with them. They involve the client in every step of the process and make sure that the final product fits the exact needs of each individual.

knoed Creative

Projects

When you browse their website, it’s easy to notice exactly how passionate they are about their work and the people they work with. Every detail seems to be thought about, gone over, and executed perfectly. Reading through all their ideas and thoughts on each individual project is inspiring to say the least. Let’s take a look at one of their projects:

knoed Creative

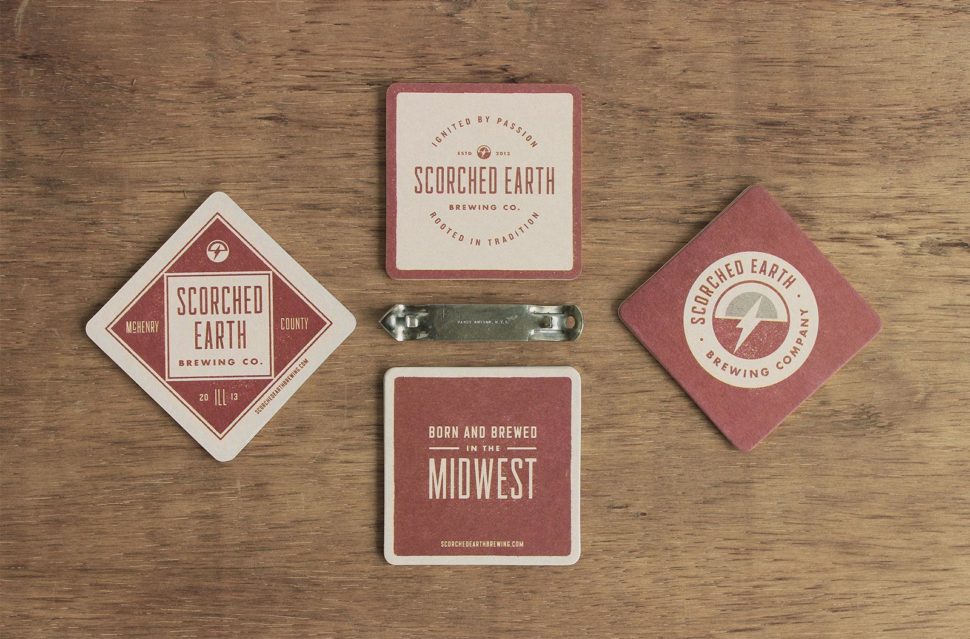
Of course, this is just the logo. Knoed helped bring Scorched Earth Brewing Company to life. Under their work tab on the main site, you’ll read some of the main focuses of this particular project. For Knoed, it wasn’t just about creating another face in the brewing industry, it was about helping the company stay true to their roots and stand out wildly.

“Paying respect to their roots, old world brewing techniques and farmhouse style beers, we designed their brand to feel rugged, utilitarian, honest and hardworking like the good Midwesterners they are.”

knoed Creative

The amount of passion and dedication Knoed puts behind their work is astonishing. Thanks to them, Scorched Earth Brewing Company has an entire identity based on what they’re truly all about. It’s not just another face in the crowd, it’s Scorched Earth Brewing Company!

It’s not every day you find an agency that puts everything they have behind their ideas, and they are definitely some talented people. If you like their work or just want to get to know a little bit more about them, follow the links to their main page and give them a shout!

Read More at Get to Know Knoed Creative(AOTW#9)

Categories: Designing, Others Tags: