Compound Components in React Using the Context API
Compound components in React allow you to create components with some form of connected state that’s managed amongst themselves. A good example is the Form component in Semantic UI React.
To see how we can implement compound components in a real-life React application, we’ll build a compound (multi-part) form for login and sign up. The state will be saved in the form component and we’ll put React’s Context AP to use to pass that state and the method from the Context Provider to the component that needs them. The component that needs them? It will become a subscriber to Context Consumers.
Here’s what we’re building:
See the Pen React Compound Component by Kingsley Silas Chijioke (@kinsomicrote) on CodePen.
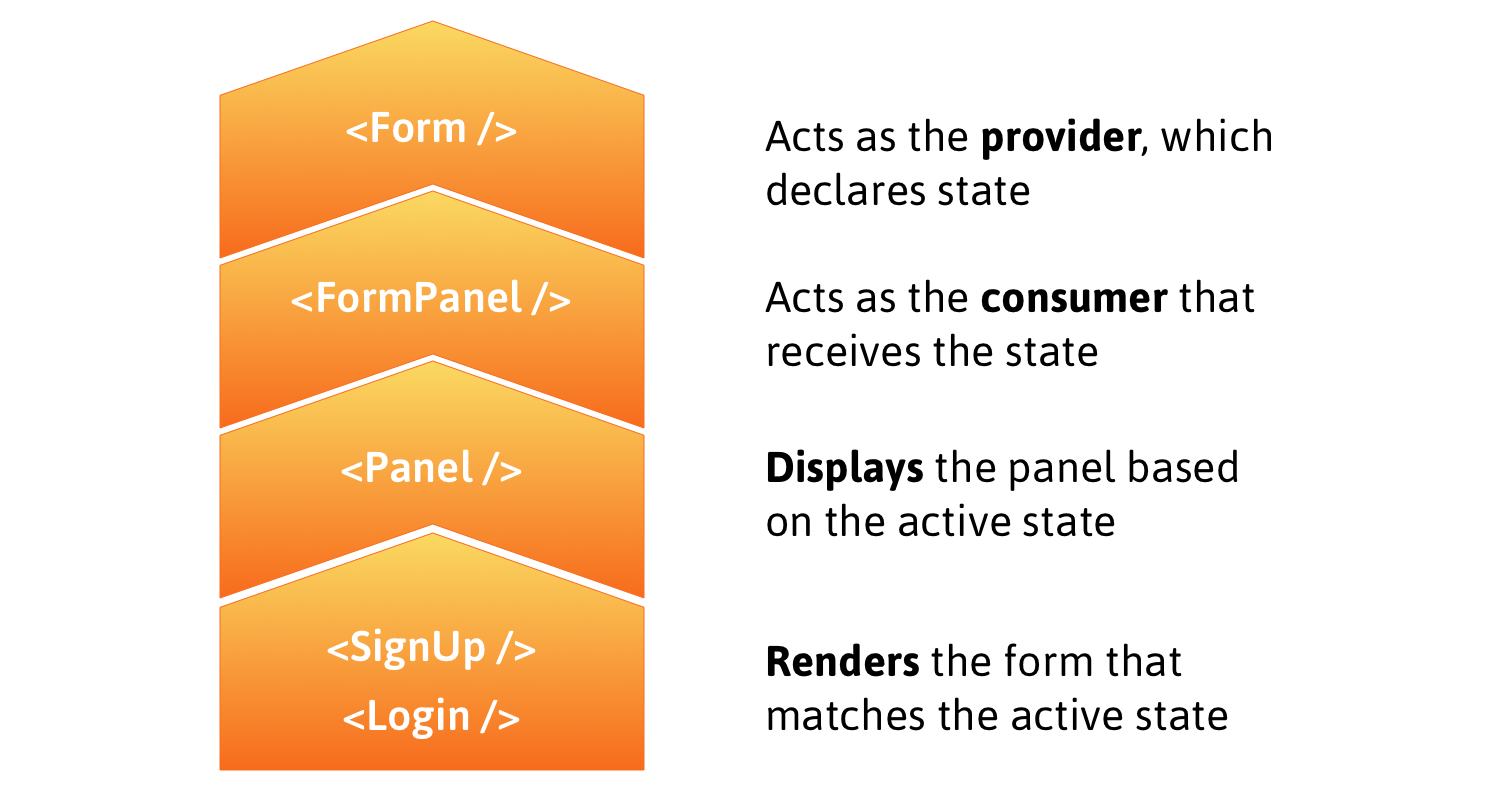
Here’s a rough outline that shows how the following steps fit together:

Before treading any further, you may want to brush up on the React Context API if you haven’t already. Neal Fennimore demonstrates the concept in this post and my primer on it is worth checking out as well.
Step 1: Creating context
First, let’s initialize a new context using the React Context API.
const FormContext = React.createContext({});
const FormProvider = FormContext.Provider;
const FormConsumer = FormContext.Consumer;
The provider, FormProvider, will hold the application state, making it available to components that subscribe to FormConsumer.
Step 2: Implement provider
One panel contains the form to log in and the other contains the form to sign up. In the provider, we want to declare the state, which determines the active panel, i.e. the form currently in display. We’ll also create a method to switch from one panel to another when a heading is clicked.
class Form extends React.Component {
  state = {
    activePanel: "login"
  };

  render() {
    return (
      <React.Fragment>
        <FormProvider
          value={{
            activePanel: this.state.activePanel,
            actions: {
              handlePanelSwitch: newPanel => {
                this.setState({
                  activePanel: newPanel
                });
              }
            }
          }}
        >
          {this.props.children}
        </FormProvider>
      </React.Fragment>
    );
  }
}
By default, the login panel will be shown to the user. When the signup panel is clicked, we want to make it the active panel by setting the state of activePanel to signup using the method handlePanelSwitch().
Step 3: Implement Consumers
We’ll use FormConsumer to make context available to the components that subscribe to it. That means the FormPanel component that handles displaying panels will look like this:
const FormPanel = props => {
  return (
    <FormConsumer>
      {({ activePanel }) =>
        activePanel === props.isActive ? props.children : null
      }
    </FormConsumer>
  );
};
And the Panel component will look like this:
const Panel = props => (
  <FormConsumer>
    {({ actions }) => {
      return (
        <div onClick={() => actions.switchPanel(props.id)}>
          {props.children}
        </div>
      );
    }}
  </FormConsumer>
);
To understand what is happening, let’s understand the approach here. The login and signup panels will have unique IDs that get passed via props to the Panel component. When a panel is selected, we get the ID and and use it to set activePanel to swap forms. The FormPanel component also receives the name of the panel via the isActive prop and we then check to see if the returned value is true. If it is, then the panel is rendered!
To get the full context, here is how the App component looks:
const App = () => {
  return (
    <div className="form-wrap">
      <Form>
        <div className="tabs">
          <Panel id="login">
            <h2 className="login-tab">Login</h2>
          </Panel>
          <Panel id="signup">
            <h2 className="signup-tab">Sign Up</h2>
          </Panel>
        </div>

        <FormPanel isActive="login">
          <Login />
        </FormPanel>

        <FormPanel isActive="signup">
          <SignUp />
        </FormPanel>
      </Form>
    </div>
  );
};
You can see how the components are composed when activePanel matches isActive (which is supposed to return true). The component is rendered under those conditions.
With that done, the Login component looks like this:
const Login = () => {
  return (
    <React.Fragment>
      <div id="login-tab-content">
        <form className="login-form" action="" method="post">
          <input
            type="text"
            className="input"
            id="user_login"
            placeholder="Email or Username"
          />
          <input
            type="password"
            className="input"
            id="user_pass"
            placeholder="Password"
          />
          <input type="checkbox" className="checkbox" id="remember_me" />
          <label htmlFor="remember_me">Remember me</label>

          <input type="submit" className="button" value="Login" />
        </form>
      </div>
    </React.Fragment>
  );
};
And the SignUp component:
const SignUp = () => {
  return (
    <React.Fragment>
      <div id="signup-tab-content" className="active tabs-content">
        <form className="signup-form" action="" method="post">
          <input
            type="email"
            className="input"
            id="user_email"
            placeholder="Email"
          />
          <input
            type="text"
            className="input"
            id="user_name"
            placeholder="Username"
          />
          <input
            type="password"
            className="input"
            id="user_pass"
            placeholder="Password"
          />
          <input type="submit" className="button" value="Sign Up" />
        </form>
      </div>
    </React.Fragment>
  );
};
Get it? Got it? Good!
You can use this pattern anytime you have components in your React application that need to share implicit state. You can also build compound components using React.cloneElement().
References
The post Compound Components in React Using the Context API appeared first on CSS-Tricks.