Archive

Archive for May, 2019

Everything You Always Wanted to Know About WordPress (But Were Afraid to Ask)

May 10th, 2019 No comments

WordPress is the most used CMS across the world today. It has attained the number one position because it is so simple to use and maintain, not only from a designer’s point of view, but also from the end user’s perspective.

In this article, we will look at a few different questions people have about WordPress. Some may seem downright silly, some a little technical, and some questions will be the ones that you yourself always wanted to ask!

How did we come up with the questions?

I simply searched for the term “WordPress” and Google suggested what people usually ask in its “People also ask” section from within the search result page itself.

So, let’s get the basics out of the way before we move on:

How Do I Start Using WordPress?

To create a self-hosted WordPress site you first need to download a copy of the latest version of WordPress.

Once you have the files, you need a place where you can host those digital files securely. You need a location that is always accessible online, a web server. This is going to be the home of your WordPress/Website files.

If you are just starting out, you can buy shared hosting which is relatively inexpensive. And you can move up to a VPS, Dedicated, or Cloud-based solutions as your needs increase with the popularity of your website.

Next, you need to invest in a domain name. It is the address that users will type to access your website.

Usually, both can be purchased through the same hosting company or through different vendors. Once you have these in place, you can easily install WordPress manually or using the famous 5-minute installation.

If you want to host locally on your computer you will need to download XAMPP on your PC or Mac. It will create the environment necessary to run WordPress locally. Usually, WordPress is set up on your localhost for development purposes only.

If that all sounds too complex, then you can simply create your blog or website on WordPress.com. It may be the best option when you are starting out.

Is It Free To Use WordPress?

WordPress is absolutely free to use both for personal and commercial use. As they say on their site:

Beautiful designs, powerful features, and freedom to build anything you want. WordPress is both free and priceless at the same time.

Though the software itself is free, you will still need associated services to put up a site of your own. And those can cost you money.

These associated services include a domain name, hosting, and the time offered by a WordPress professional to design and maintain your site.

This cost can be minimized by not hiring a designer and rather choosing a theme of your own, either free or paid. And investing in a little time understanding how to use & customize it. (Themes control the layout and design of your WordPress site.)

How Much Does It Cost To Build A WordPress Website?

As I mentioned in the above point, there are some costs that are incidental to setting up a WordPress site. And these include the cost of domain and hosting.

Domain names cost an average of around $10 per year. And hosting can cost you as low as $4 to $5 per month. All in all, it should not cost you more than $100 per year.

The other one-time associated cost lies with designing the site. If you download a free theme and learn to use it and customize it, then you avoid the most significant cost in setting your own site or blog.

Or you can hire a freelancer who can setup and customize your theme for a few hundred dollars. Of course, there is no upper limit to what you can pay a design agency in developing a customized theme for you.

It all depends on what you want to do with your site, and your budget.

How Long Does It Take To Build A WordPress Website?

The answer to this question would depend on the type of website you are building.

If you are just installing WordPress and applying a new theme to a blog and customizing the logo, header, and footer. The whole process could be completed within 4-5 hours’ time.

For a WordPress site, customizations could take longer. As you will have content to be updated for each of the pages too. 10-20 hours should be enough for this task.

If you are building a theme from scratch, I would break it up like this:

  • Approximately 24-30 hours for designs for the homepage, internal page layout, archive pages, and the blog page.
  • Coding the theme would take another 40 to 48 hours
  • For testing and final touches, keep aside 10 more hours.

(If you are building a larger site, it would inevitably take longer.)

Keep in mind that these are only estimates. And when working with a real client these estimates could be stretched beyond your wildest imaginations. No joking here.

What Are The Benefits Of Using WordPress?

There are innumerable benefits to using WordPress over other Content Management Systems. Listing a few of them briefly below:

  • Easy and intuitive to use: Using WordPress is easy and involves very minimal learning curve if any at all. And if you are a designer or a developer, the same holds true for you too. You will be up and running with the necessary skills to service your clients in no time at all.
  • Easy to setup: You will be surprised with the fewer steps you need to set it up on your web server or localhost. It usually takes less than 5 minutes to do this.
  • Lightweight and speedy: WordPress is lightweight right out of the box. It is around a 10MB download when you first download it from WordPress.org site. And therefore, very easy to handle in terms of uploading it to your server, backing it up, moving from one server to another, it occupies less space, runs faster etc.
  • Highly scalable: With the right infrastructure and resources you can scale it up to several hundreds and thousands of users at the same time. So, no surprise that some of the most used sites like TechCrunch, The New Yorker, Sony Music, Time Inc, and many other significant names use WordPress.
  • Most popular CMS: When it comes to its popularity, it is the number one. Today it powers 32% of all sites on the internet. This far exceeds the market share of any other CMS available today.
  • Easily add features and functionality: WordPress can be easily extended to add more features and functionality as per your need. And you can do that easily with the help of plugins without knowing how to program or code in WordPress. Plugins are bits of software that can be easily installed on your existing WordPress site to add additional features and functionality.

The other advantages of using WordPress include a thriving WordPress community, active development of the product, free software (also for commercial use), easy to find answers to your WordPress questions, active support through community Forum, a mature and stable product etc. The list of advantages goes on and on.

How Do Beginner Blogs Make Money?

I doubt that you would start making money as soon as you start a blog. If you are just starting out, then, of course, there is a long way to go for you.

The process of generating income from your blogs would generally be in this sequence:

First, you would have to start a blog. You buy a domain and hosting and install WordPress. You choose WordPress as it is the best blogging platform out there. Then you choose a theme of your liking and your blog is ready.

But a blog is not a blog unless you have some useful content there. So, you have some niche or demographics that you want to cater to. That is a good strategy because then you would know exactly what type of content you want to create. Ideally one should focus on creating content that solves some problems and helps change the lives of your audience for the better.

Next step would be to get your content in front of your audience. Sharing on social media, engaging with your audience, a bit of on-page optimization, a bit of SEO, and lots of time and patience.

Once your blog starts to become popular. When the readership increases with time, it is time to start monetizing now. Monetization could be in the form of advertisements, AdSense from Google, affiliate marketing etc.

It is not easy. But nothing worthwhile in life ever is, right? It takes a lot of hard work, learning, and patience to create a sustainable income stream from your online blog. But it is totally doable if you are up for it.

Do I Need Hosting For WordPress?

All websites need hosting to be accessible over the internet. Therefore, yes you need hosting for WordPress.

If you sign up for a blog or a website at WordPress.com, then the hosting is already configured for you. You don’t have to buy your own hosting separately. You simply register a subdomain with them as part of the signup process and start treating it as your own blog or website.

However, for the self-hosted option, you need to download the WordPress files from the WordPress.org site. You are more in control of your website with this option, and therefore, you are responsible for everything that is needed to run your website.

And that includes Hosting.

Is WordPress A Website Builder?

WordPress is not a website builder. It is a Content Management System (CMS).

Website builders are more like visual editors. You drag and drop an element on a page, and you can see exactly how the page is going to look. While with WordPress the design is already set. The theme you have chosen for the site will control the appearance and layout of the site.

With a site builder, you expect to be able to change the site design as you deem fit. But with a WordPress site, this expectation is not there. It is understood that the design is already in place. You focus more on the content part of it, i.e. adding and editing content on the site.

Site builders are easier to use in terms of design changes, but site builders are less flexible in terms of what they can accomplish. WordPress, on the other hand, is very flexible and can be extended in many ways to add more features and functionality through programming & plugins.

However, if you like the idea of the convenience of a site builder, you might enjoy WordPress’ latest innovation: Gutenberg. Gutenberg is a completely new way to design WordPress sites, along the lines of a site builder.

Is WordPress Good For SEO?

It is indeed the most SEO friendly CMS out there today. It takes care of so much of the SEO stuff just out of the box that you don’t really need to be an expert to create SEO friendly pages and posts on your blog. They are automatically created for you.

For example, it creates pretty permalinks for all posts and pages. It also gives you the option to manually alter the URL yourself, so you are in full control. When you have a meaningful URL, both humans and bots can understand better what the page is all about.

Image resizing and optimization is also handled by WordPress. It takes care of URL canonicalization and other necessary HTML markups so that you won’t have to worry about them.

It would also generate a page title automatically for you. However, there are numerous SEO plugins that you can install that can handle this process in a smoother way.

All in all, WordPress today is one of the best SEO friendly Content Management Systems out there.

Final Thoughts

In this article, I have answered many of the questions that people frequently ask on WordPress. As you know, it is an overwhelmingly popular CMS and people have many questions about it.

Did I answer your question? I hope so. If not, then feel free to ask them in the comments below. I look forward to answering them for you.

Featured image via Unsplash.

Add Realistic Chalk and Sketch Lettering Effects with Sketch’it – only $5!

Source

Categories: Designing, Others Tags:

CSS-Tricks Chronicle XXXV

May 10th, 2019 No comments

I like to do these little roundups of things going on with myself, this site, and the other sites that are part of the CSS-Tricks family.

I spoke at Smashing Conf San Francisco.

There’s a video! I can’t embed it here because of privacy settings or something, so here’s a link to the Vimeo.

It’s an evolution of my “How To Think Like A Front-End Developer” talk. That’s kinda how I like to roll with talks. Give the same one for about a year, but every time it’s different as I learn more.

I was on the One Month podcast.

Chris Castiglione and I chat about:

  • How Chris Coyier learned to code
  • What’s a front-end developer?
  • What resources does Chris Coyier use to stay up to date on web dev?
  • Lessons learned from over 300+ episodes of the ShopTalkShow Podcast

There’s a full transcript available.

We’ve released a number of new things on CodePen.

Quick hits:

And, as always on CodePen, we have a new CodePen Challenge, a new CodePen Spark (newsletter), and a new CodePen Radio (podcast) every single week.

I’m speaking at some upcoming conferences.

The front-end conference website got some upgrades.

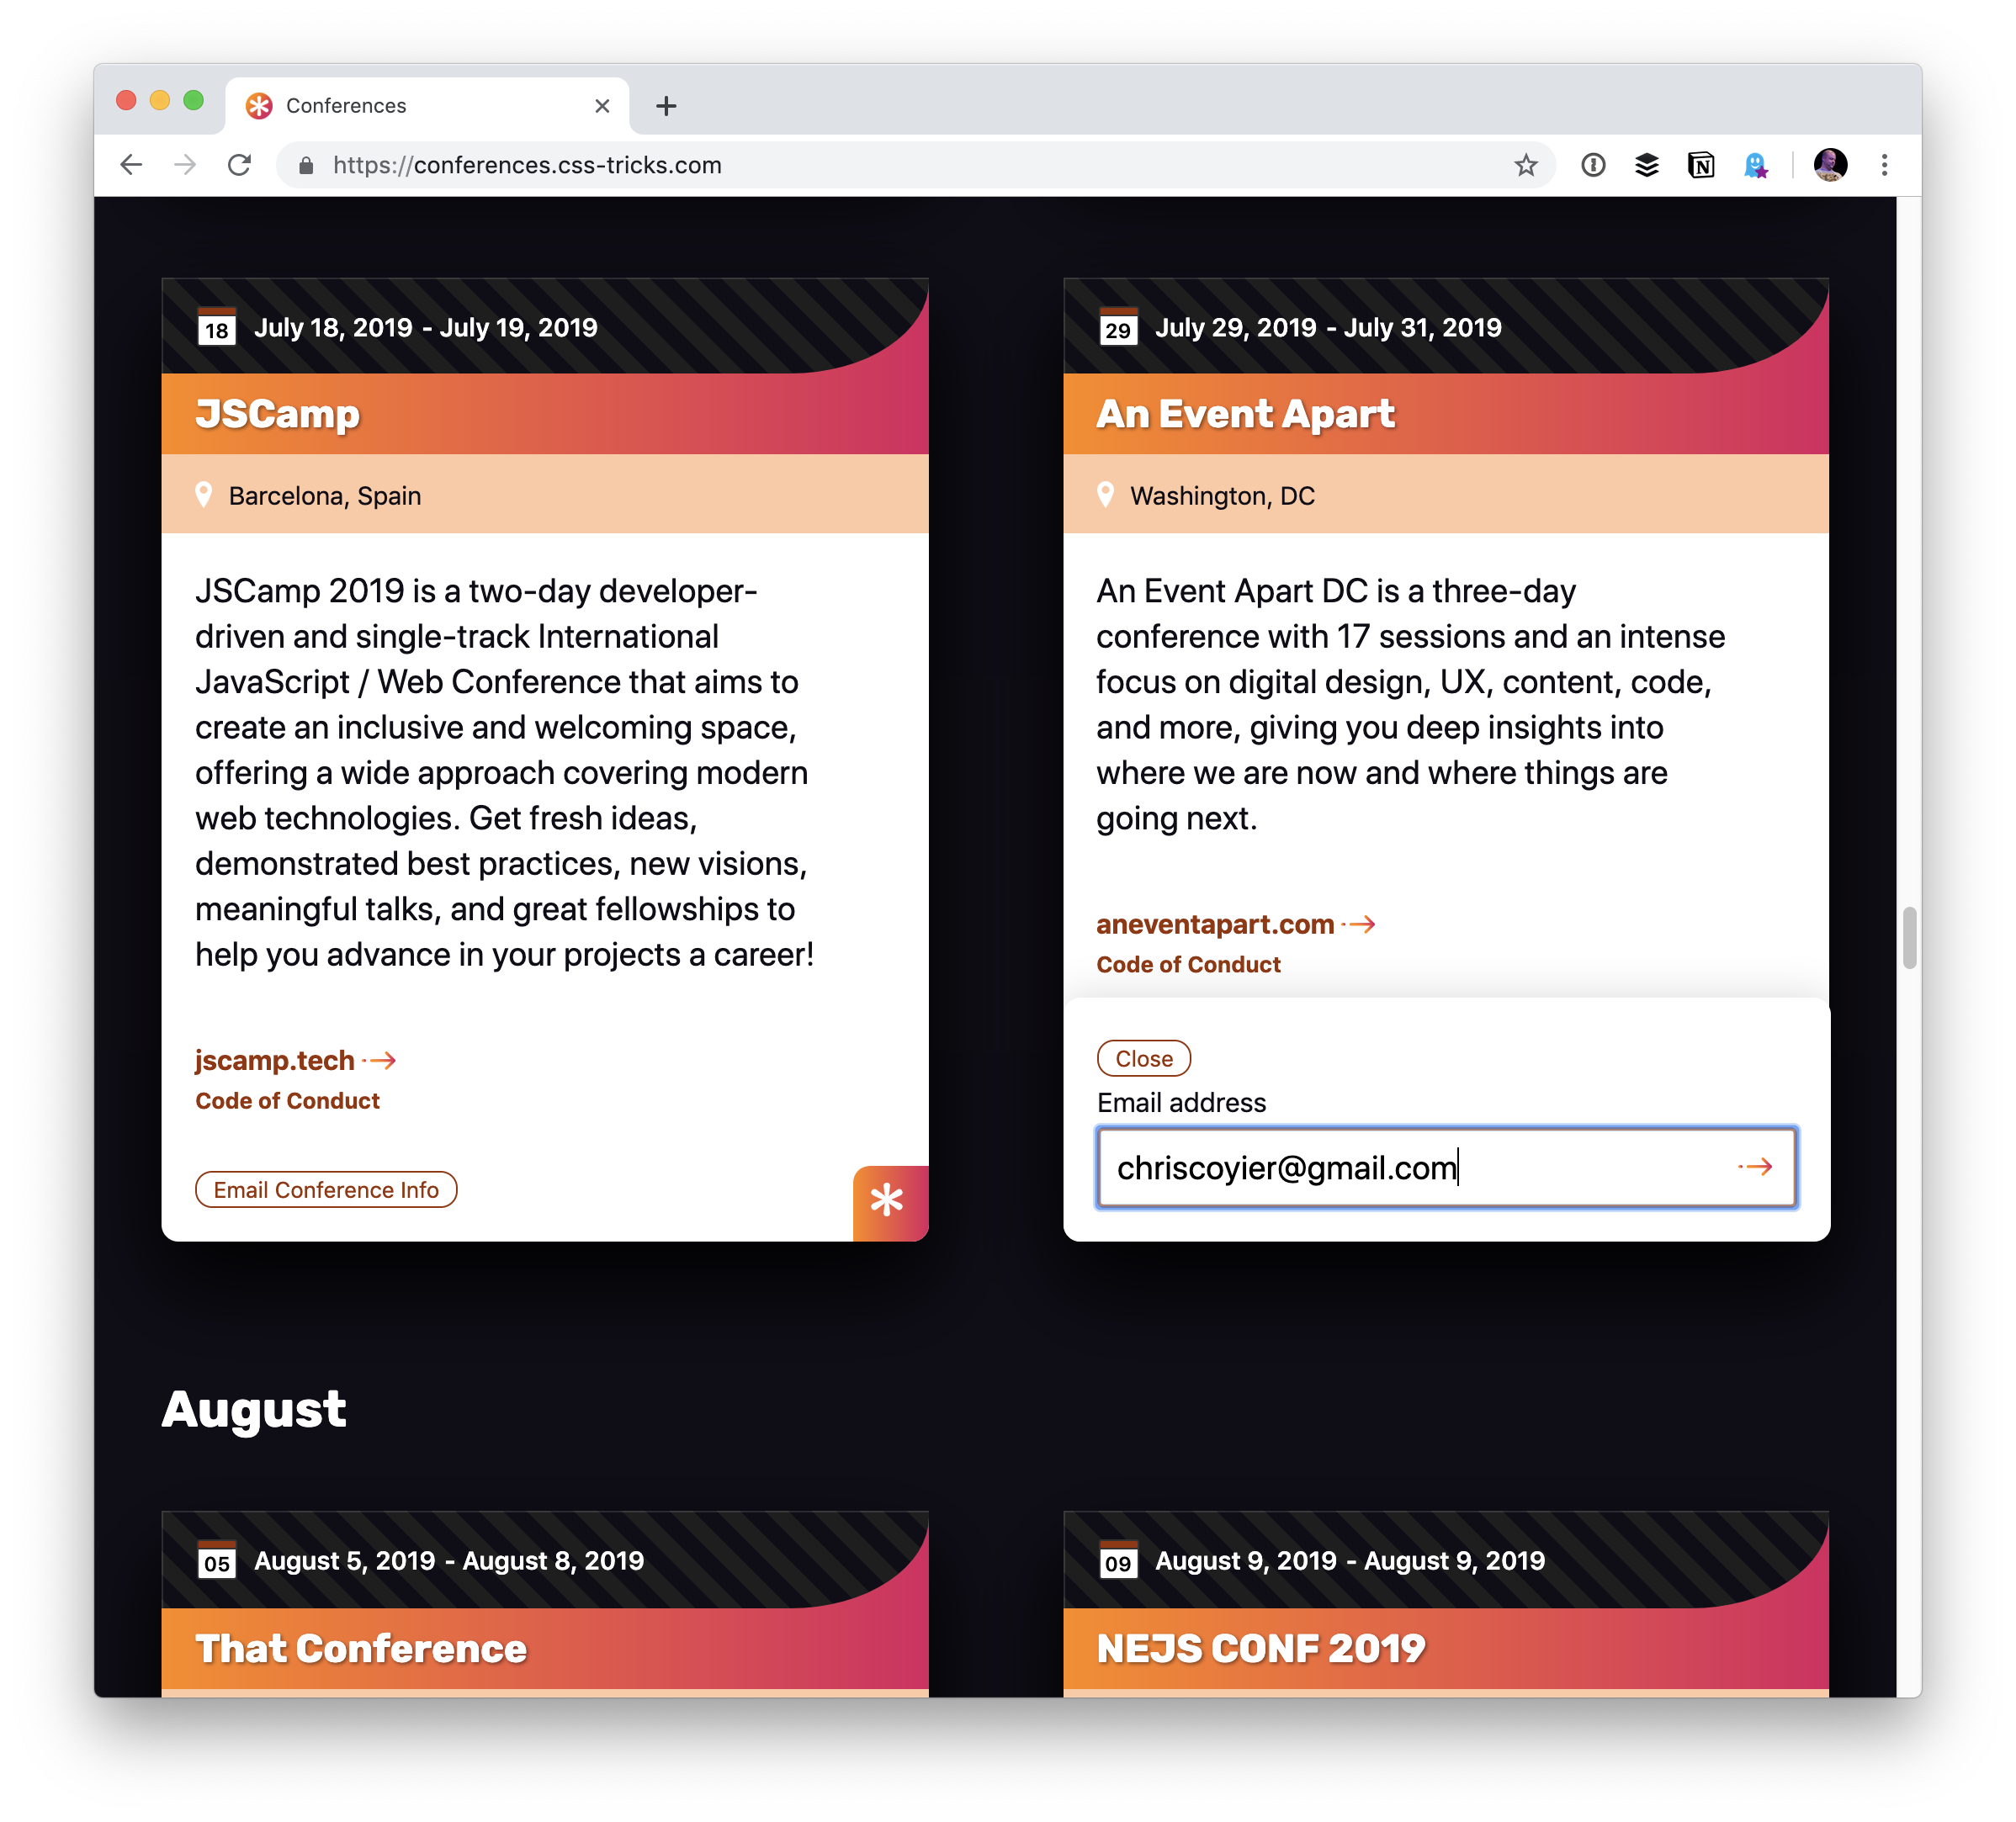
We keep a list of all conferences out there related to the topics we write about here on CSS-Tricks! All things front-end web design and development!

It’s a little 11ty site on Netlify, where you can contribute to anytime — particularly by adding conferences that fit the vibe that you know about.

Notably, every conference listed has a permalink (example). We did that so we could play around with dynamically generating images for them. It’s super basic right now, but it was fun to play with. Dynamic CMS data is fed into an SVG, then also converted to a PNG at build time. Fancy. My hope is to upgrade the CMS to allow for cool custom backgrounds for each conference and then use them in these generated graphics.

Also, each conference has a little button where you can email it to somebody via Netlify functions, like we wrote about.

Jobs are $100 off in May

You know we have a Job Board here on CSS-Tricks. It’s powered by the CodePen Job Board, which also powers the ShopTalk Show Job Board.

The price of posting a job is reduced from $299 to $199 just in May and runs for 60 days instead of 30.

Post one!

Dave and I have talked with people like Heydon Pickering, Jessica Ivins, Scott Jehl, and Guillermo Rauch on ShopTalk Show.

It’s a great podcast, really ;). You should subscribe.

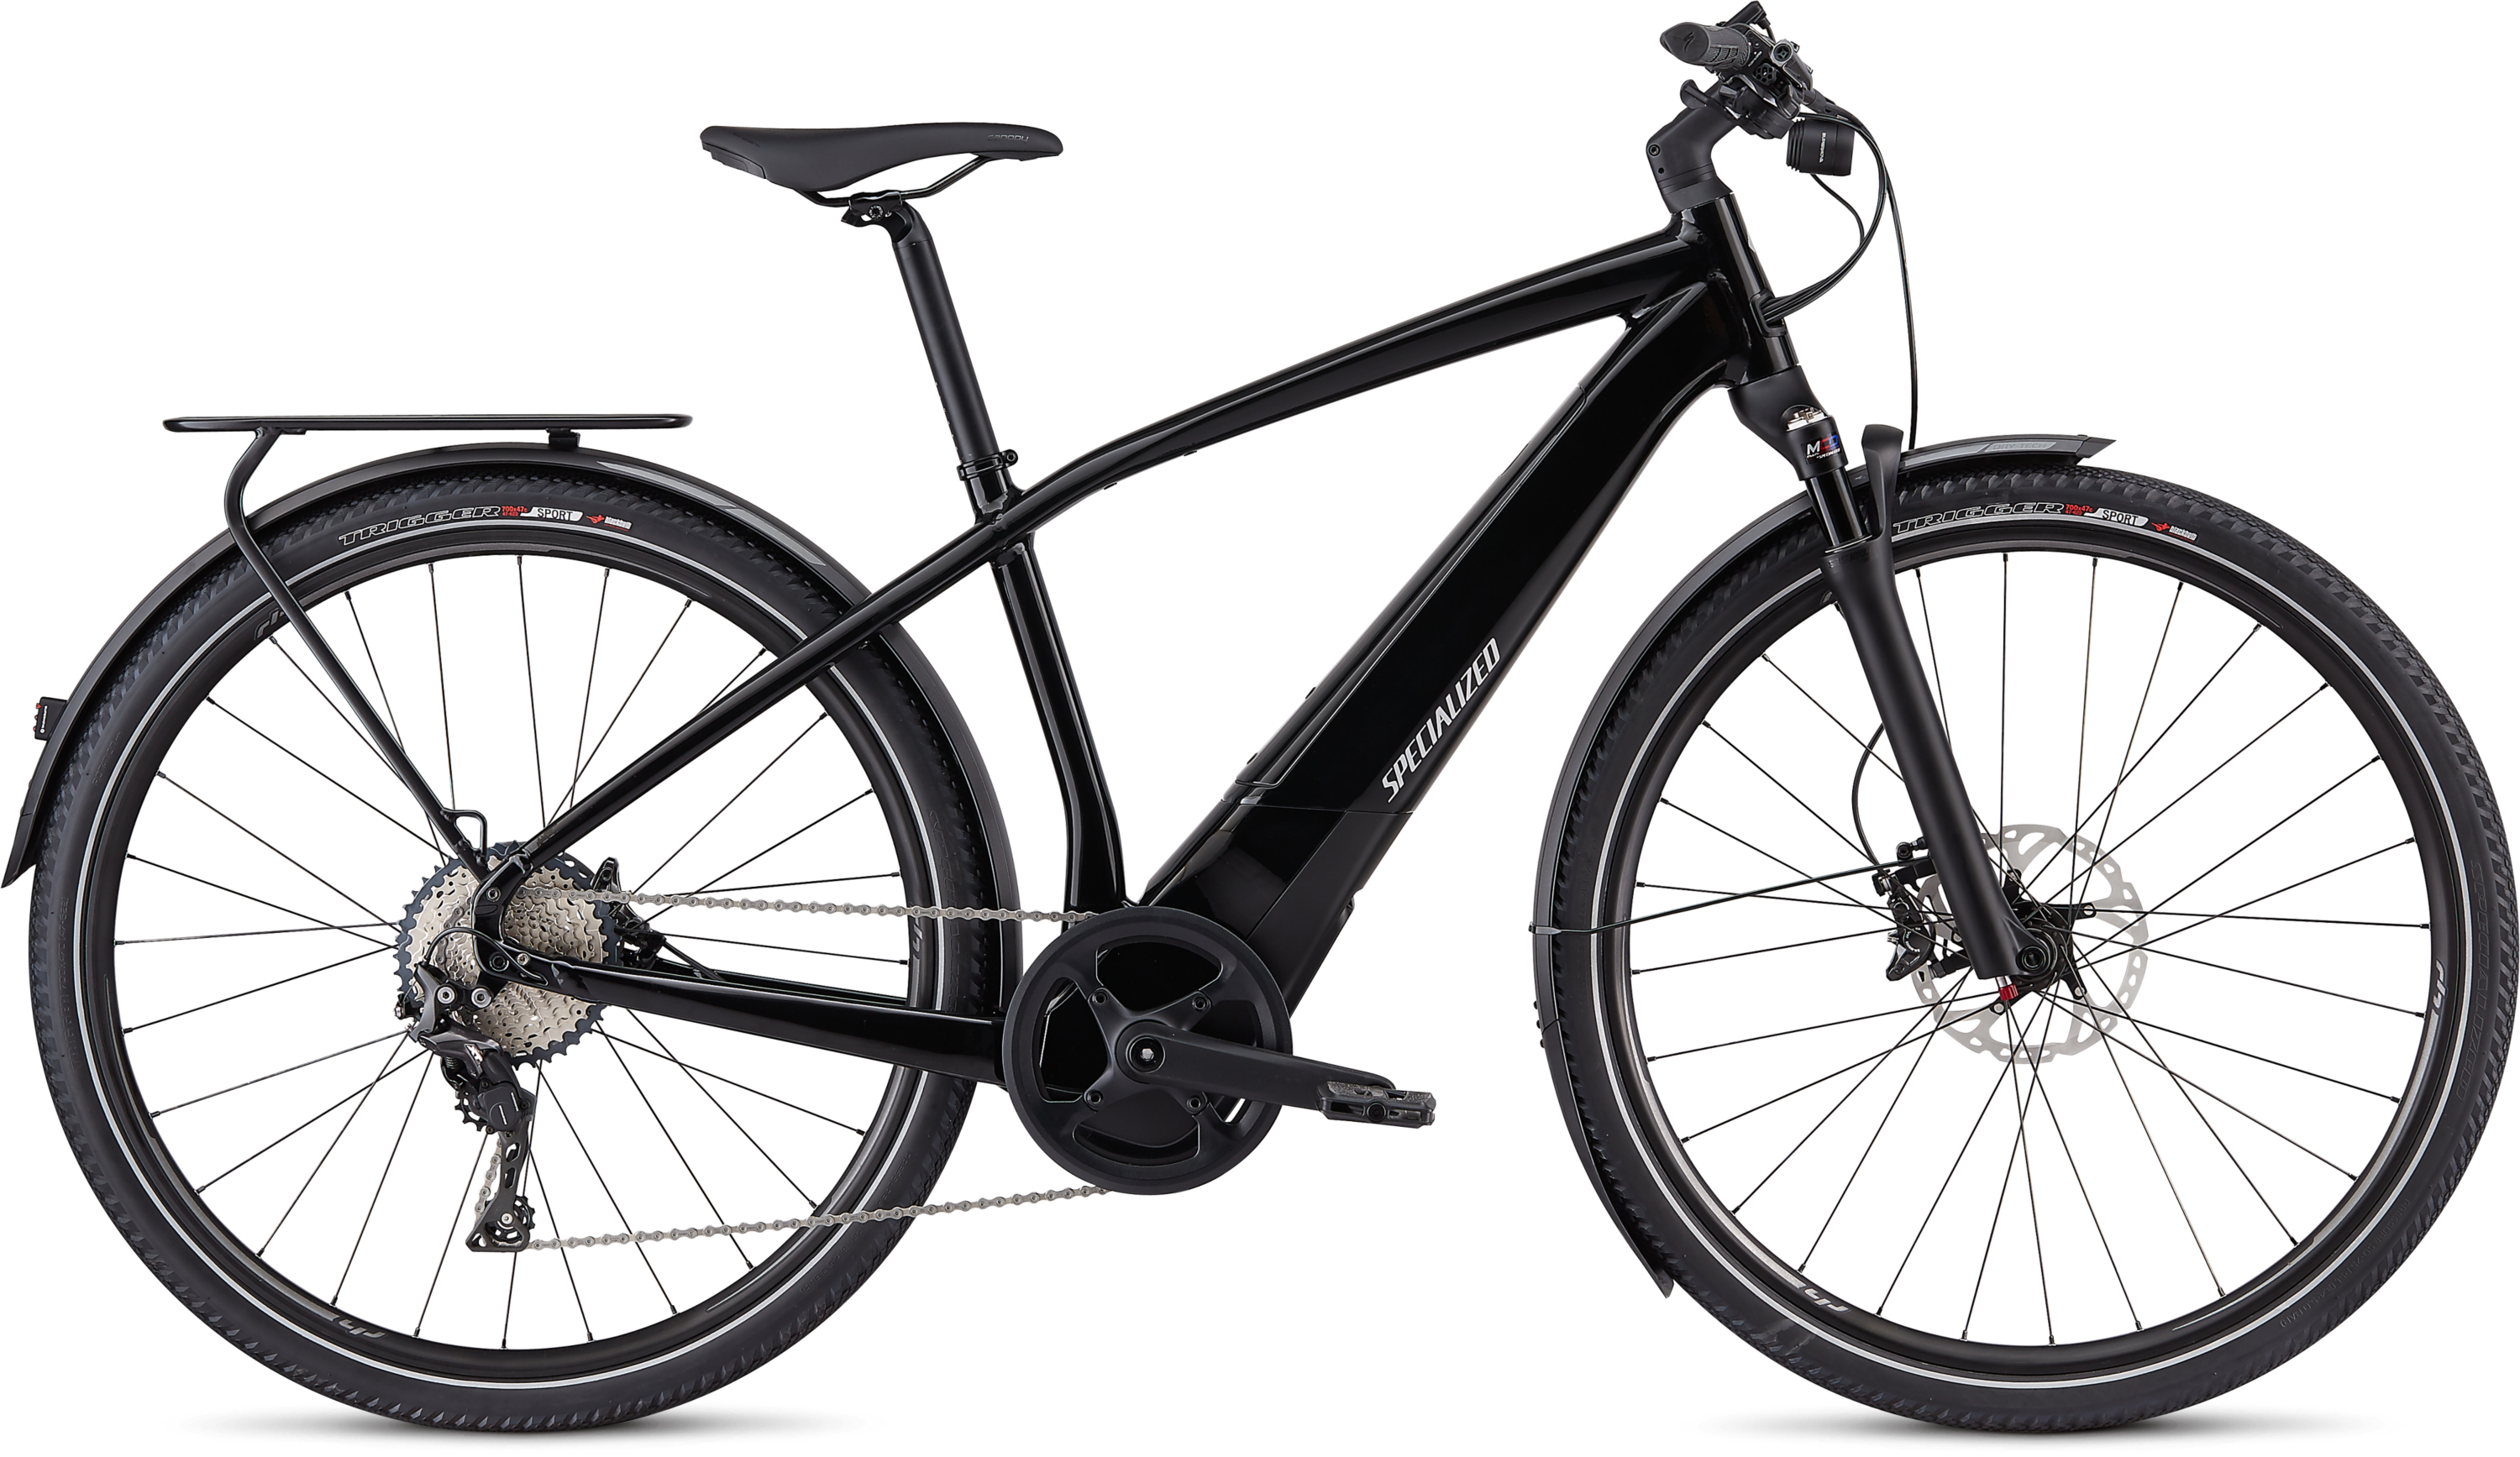
I bought a new bike!

A Specialized Vado (eBike). Cool right?

The trip from my house to work is a short bike ride, but it’s a fairly dramatic elevation change, and my big ass is not capable of hauling itself up there. It’s much easier with this, even with a couple of loaded saddlebags and a toddler on the back of it.

The post CSS-Tricks Chronicle XXXV appeared first on CSS-Tricks.

Categories: Designing, Others Tags:

The Thinking Behind Simplifying Event Handlers

May 9th, 2019 No comments

Events are used to respond when a user clicks somewhere, focuses on a link with their keyboard, and changes the text in a form. When I first started learning JavaScript, I wrote complicated event listeners. More recently, I’ve learned how to reduce both the amount of code I write and the number of listeners I need.

Let’s start with a simple example: a few draggable boxes. We want to show the user which colored box they dragged.

<section>
  <div id="red" draggable="true">
    <span>R</span>
  </div>
  <div id="yellow" draggable="true">
    <span>Y</span>
  </div>
  <div id="green" draggable="true">
    <span>G</span>
  </div>
</section>

<p id="dragged">Drag a box</p>

See the Pen
Dragstart events
by Tiger Oakes (@NotWoods)
on CodePen.

The intuitive way to do it

I wrote separate event listener functions for each element when I first started learning about JavaScript events. It’s a common pattern because it’s the simplest way to start. We want specific behavior for each element, so we can use specific code for each.

document.querySelector('#red').addEventListener('dragstart', evt => {
  document.querySelector('#dragged').textContent = 'Dragged red';
});

document.querySelector('#yellow').addEventListener('dragstart', evt => {
  document.querySelector('#dragged').textContent = 'Dragged yellow';
});

document.querySelector('#green').addEventListener('dragstart', evt => {
  document.querySelector('#dragged').textContent = 'Dragged green';
});

Reducing duplicate code

The event listeners in that example are all very similar: each function displays some text. This duplicate code can be collapsed into a helper function.

function preview(color) {
  document.querySelector('#dragged').textContent = `Dragged ${color}`;
}

document
  .querySelector('#red')
  .addEventListener('dragstart', evt => preview('red'));
document
  .querySelector('#yellow')
  .addEventListener('dragstart', evt => preview('yellow'));
document
  .querySelector('#green')
  .addEventListener('dragstart', evt => preview('green'));

This is much cleaner, but it still requires multiple functions and event listeners.

Taking advantage of the Event object

The Event object is the key to simplifying listeners. When an event listener is called, it also sends an Event object as the first argument. This object has some data to describe the event that occurred, such as the time the event happened. To simplify our code, we can use the evt.currentTarget property where currentTarget refers to the element that the event listener is attached to. In our example, it will be one of the three colored boxes.

const preview = evt => {
  const color = evt.currentTarget.id;
  document.querySelector('#dragged').textContent = `Dragged ${color}`;
};

document.querySelector('#red').addEventListener('dragstart', preview);
document.querySelector('#yellow').addEventListener('dragstart', preview);
document.querySelector('#green').addEventListener('dragstart', preview);

Now there is only one function instead of four. We can re-use the exact same function as an event listener and evt.currentTarget.href will have a different value depending on the element that fires the event.

Using bubbling

One final change is to reduce the number of lines in our code. Rather than attaching an event listener to each box, we can attach a single event listener to the

element that contains all the colored boxes.

An event starts off at the element where the event originated (one of the boxes) when it is fired. However, it won’t stop there. The browser goes to each parent of that element, calling any event listeners on them This will continue until the root of the document is reached (the tag in HTML). This process is called “bubbling” because the event rises through the document tree like a bubble.

Attaching an event listener to the section will cause the focus event to bubble from the colored box that was dragged up to the parent element. We can also take advantage of the evt.target property, which contains the element that fired the event (one of the boxes) rather than the element that the event listener is attached to (the

element).

const preview = evt => {
  const color = evt.target.id;
  document.querySelector('#dragged').textContent = `Dragged ${color}`;
};

document.querySelector('section').addEventListener('dragstart', preview);

Now we’ve reduced many event listeners to just one! With more complicated code, the effect will be greater. By utilizing the Event object and bubbling, we can tame JavaScript events and simplify code for event handlers.

What about click events?

evt.target works great with events like dragstart and change, where there are only a small number of elements that can receive focus or have input changed.

However, we usually want to listen for click events so we can respond to a user clicking on a button in an application. click events fire for any element in the document, from large divs to small spans.

Let’s take our draggable color boxes and make them clickable instead.

<section>
  <div id="red" draggable="true">
    <span>R</span>
  </div>
  <div id="yellow" draggable="true">
    <span>Y</span>
  </div>
  <div id="green" draggable="true">
    <span>G</span>
  </div>
</section>

<p id="clicked">Clicked a box</p>
const preview = evt => {
  const color = evt.target.id;
  document.querySelector('#clicked').textContent = `Clicked ${color}`;
};

document.querySelector('section').addEventListener('click', preview);

See the Pen
Click events: Not quite working
by Tiger Oakes (@NotWoods)
on CodePen.

When testing this code, notice that sometimes nothing is appended to “Clicked” instead of when clicking on a box. The reason that it doesn’t work is that each box contains a element that can be clicked instead of the draggable

element. Since the spans don’t have a set ID, the evt.target.id property is an empty string.

We only care about the colored boxes in our code. If we click somewhere inside a box, we need to find the parent box element. We can use element.closest() to find the parent closest to the clicked element.

const preview = evt => {
  const element = evt.target.closest('div[draggable]');
  if (element != null) {
    const color = element.id;
    document.querySelector('#clicked').textContent = `Clicked ${color}`;
  }
};

See the Pen
Click events: Using .closest
by Tiger Oakes (@NotWoods)
on CodePen.

Now we can use a single listener for click events! If element.closest() returns null, that means the user clicked somewhere outside of a colored box and we should ignore the event.

More examples

Here are some additional examples to demonstrate how to take advantage of a single event listener.

Lists

A common pattern is to have a list of items that can be interacted with, where new items are inserted dynamically with JavaScript. If we have event listeners attached to each item, then your code has to deal with event listeners every time a new element is generated.

<div id="buttons-container"></div>
<button id="add">Add new button</button>
let buttonCounter = 0;
document.querySelector('#add').addEventListener('click', evt => {
  const newButton = document.createElement('button');
  newButton.dataset.number = buttonCounter;
  
  // Make a new event listener every time "Add new button" is clicked
  newButton.addEventListener('click', evt => {

    // When clicked, log the clicked button's number.
    document.querySelector('#clicked').textContent = `Clicked button #${newButton.textContent}`;
  });

  buttonCounter++;

  const container = document.querySelector('#buttons-container');
  container.appendChild(newButton);
});

See the Pen
Lists: no bubbling
by Tiger Oakes (@NotWoods)
on CodePen.

By taking advantage of bubbling, we can have a single event listener on the container. If we create many elements in the app, this reduces the number of listeners from n to two.

let buttonCounter = 0;
const container = document.querySelector('#buttons-container');
document.querySelector('#add').addEventListener('click', evt => {
  const newButton = document.createElement('button');
  newButton.dataset.number = buttonCounter;
  buttonCounter++;

  container.appendChild(newButton);
});
container.addEventListener('click', evt => {
  const clickedButton = evt.target.closest('button');
  if (clickedButton != null) {
    // When clicked, log the clicked button's number.
    document.querySelector('#clicked').textContent = `Clicked button #${clickedButton.dataset.number}`;
  }
});

Forms

Perhaps there’s a form with lots of inputs, and we want to collect all the user responses into a single object.

<form>
  <label>Name: <input name="name" type="text"/></label>
  <label>Email: <input name="email" type="email"/></label>
  <label>Password: <input name="password" type="password"/></label>
</form>
<p id="preview"></p>
let responses = {
  name: '',
  email: '',
  password: ''
};

document
  .querySelector('input[name="name"]')
  .addEventListener('change', evt => {
    const inputElement = document.querySelector('input[name="name"]');
    responses.name = inputElement.value;
    document.querySelector('#preview').textContent = JSON.stringify(responses);
  });
document
  .querySelector('input[name="email"]')
  .addEventListener('change', evt => {
    const inputElement = document.querySelector('input[name="email"]');
    responses.email = inputElement.value;
    document.querySelector('#preview').textContent = JSON.stringify(responses);
  });
document
  .querySelector('input[name="password"]')
  .addEventListener('change', evt => {
    const inputElement = document.querySelector('input[name="password"]');
    responses.password = inputElement.value;
    document.querySelector('#preview').textContent = JSON.stringify(responses);
  });

See the Pen
Forms: no bubbling
by Tiger Oakes (@NotWoods)
on CodePen.

Let’s switch to a single listener on the parent element instead.

let responses = {
  name: '',
  email: '',
  password: ''
};

document.querySelector('form').addEventListener('change', evt => {
  responses[evt.target.name] = evt.target.value;
  document.querySelector('#preview').textContent = JSON.stringify(responses);
});

Conclusion

Now we know how to take advantage of event bubbling and the event object to simplify complex jumbles of event handlers into just a few… and sometimes down to just one! Hopefully this article has helped you think about your event handlers in a new light. I know this was a revelation to me after I’d spent my early development years writing duplicative code to accomplish the same thing.

The post The Thinking Behind Simplifying Event Handlers appeared first on CSS-Tricks.

Categories: Designing, Others Tags:

A responsive grid layout with no media queries

May 9th, 2019 No comments

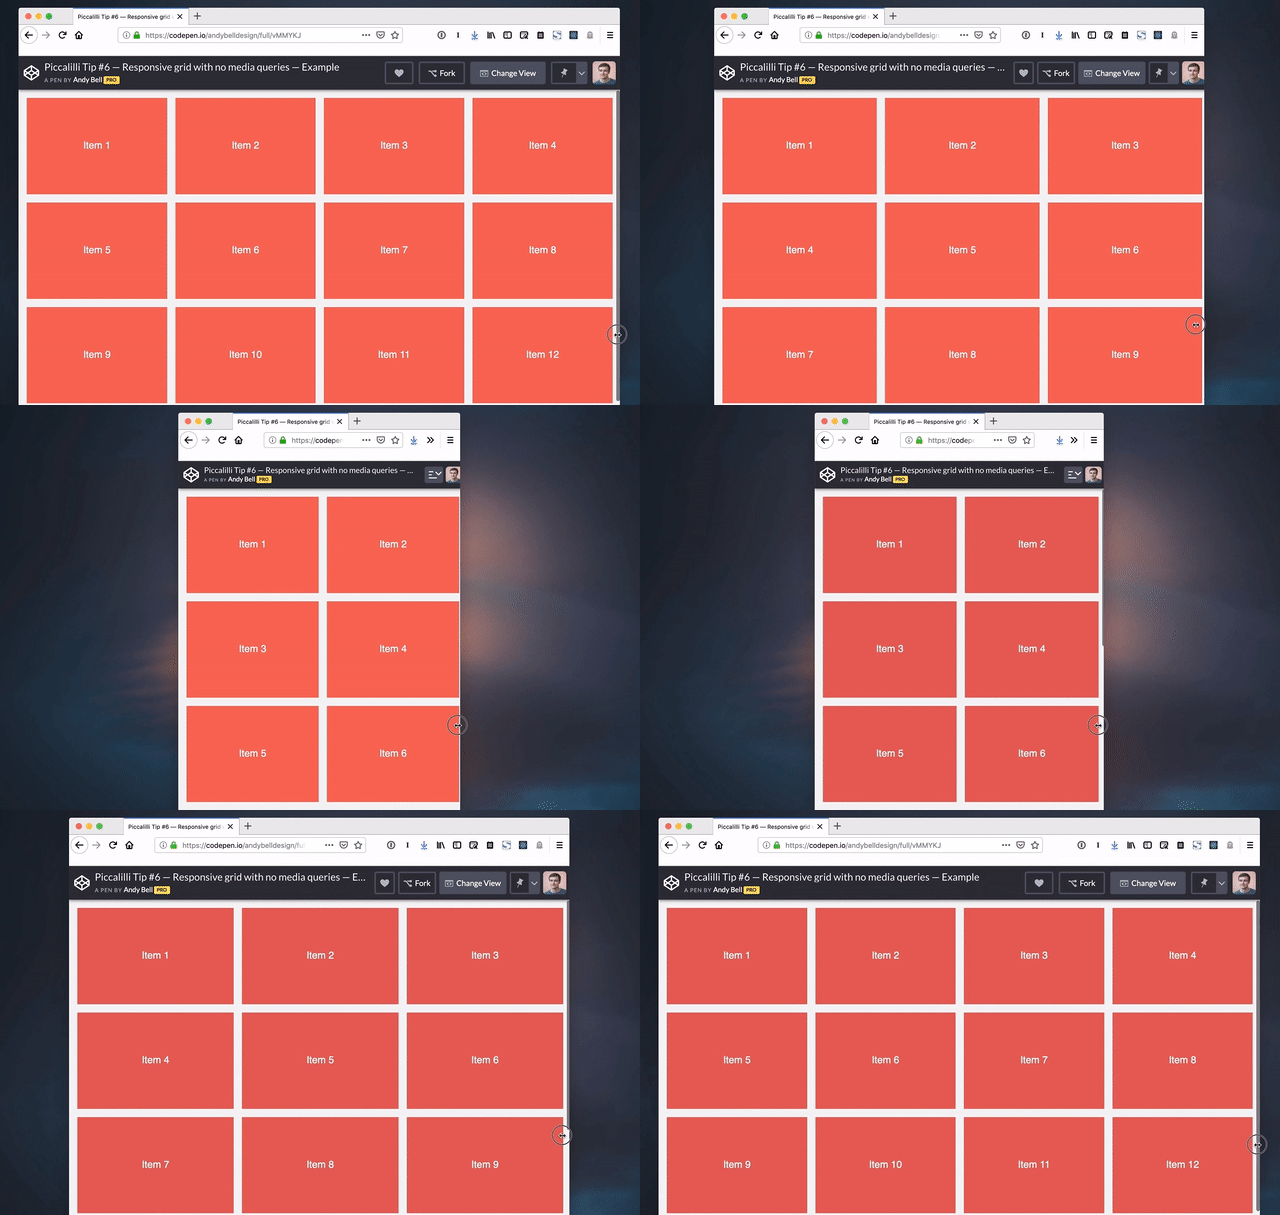
Andy Bell made a really cool demo that shows us how to create a responsive grid layout without any media queries at all. It happens to look like this when you change the size of the browser window:

I think this is a wonderful layout technique that’s just 6 lines (!) of CSS.

.auto-grid {
  --auto-grid-min-size: 16rem;
  display: grid;
  grid-template-columns: repeat(auto-fill, minmax(var(--auto-grid-min-size), 1fr));
  grid-gap: 1rem;
}

What this shows us is that we don’t have to write a million media queries to change the number of columns in a grid. Andy also proves that CSS Grid can automate so much of the tedious work of styling layouts.

I’ve seen this technique used in a couple of places (and we have a few starter grid templates to boot) but Andy’s article about how it all works finally made it all sink in just how useful grid is.

Direct Link to ArticlePermalink

The post A responsive grid layout with no media queries appeared first on CSS-Tricks.

Categories: Designing, Others Tags:

The Impact of Team Collaboration and Communication on Projects

May 9th, 2019 No comments

(This is a sponsored post.)

The CSS-Tricks team was cracking up the other day when Miranda introduced us to something called “swoop and poop.” That was a new term for most of us, but tell me if you’ve ever experienced this for yourself.

The idea is that someone in an organization — usually someone higher up on the chain, like a manager or director — has had no involvement in a project but “swoops” into a review session for it (like a team demo) and “poops” all over the work that’s been done. You know, things like colors in the design, why we’re using this framework versus that, or any number of various things that pay no mind to the scope of the project or the meeting. And it’s not like anyone want to push back on a HiPPO.

We then all turned to Chris because, well, case in point. Just kidding!

The thing about “swoop and poop” is that it’s totally avoidable. Sure, it’s a funny thing to say and there’s a lot of truth in it, but the issue really comes down to a lack of transparency and communication.

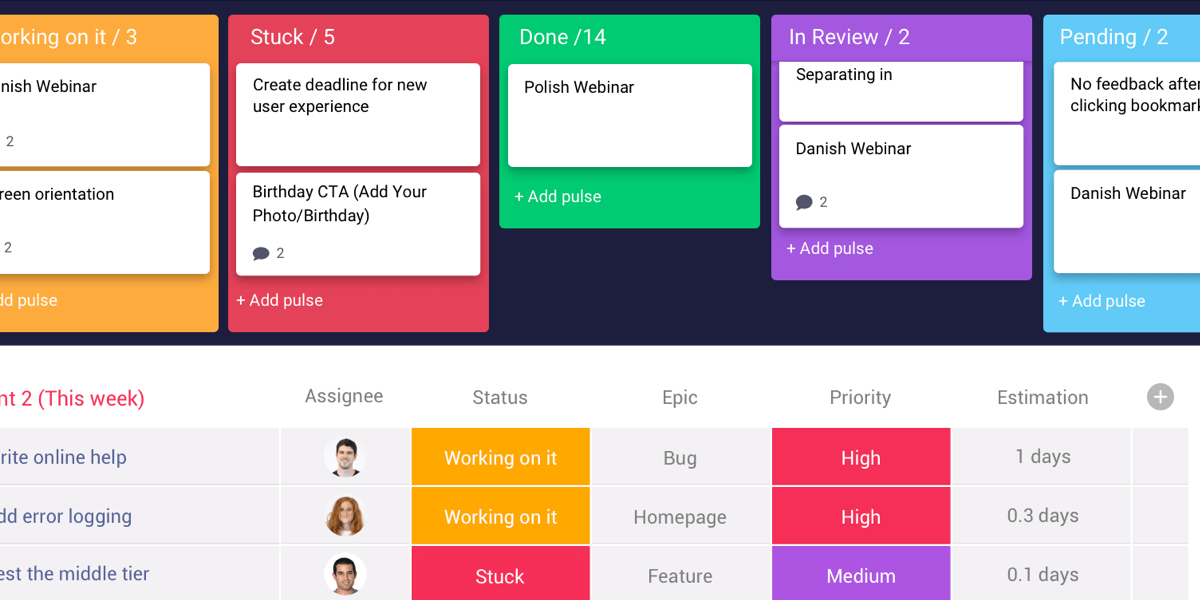
That’s where a system like monday.com can swoop in and make things shine. It’s a project management platform that’s more than project management. It has all the time tracking, milestones, calendars and task lists that you might expect, but there’s a lot more to help facilitate better collaboration and communication among — not just the immediate team members of a project — but everyone across the organization.

We’re talking about things like shared assets, comments and chat to help everyone on the team communicate better. Even better, monday.com puts all of these things in a central place so everyone has access to it. And if you feel out of the loop on a project, simply check your personalized news feed to catch up on all the latest activity for the things that directly affect your work.

That’s exactly the sort of remedy that prevents any ol’ person from swooping into a meeting and dropping bombs all over the work. By capturing important details, assets, decisions, discussions, budgets and everything else you could ever need on a project, monday.com makes it tough to be out of the loop, which leads to better team collaboration and communication.

Try monday.com and experience the difference better communication makes. It’s free to sign up, so go ahead and give it a spin.

Get Started

Direct Link to ArticlePermalink

The post The Impact of Team Collaboration and Communication on Projects appeared first on CSS-Tricks.

Categories: Designing, Others Tags:

Finding Inspiration In Digital Influencers

May 9th, 2019 No comments
eMarketer - TV vs mobile device time

Finding Inspiration In Digital Influencers

Finding Inspiration In Digital Influencers

Suzanne Scacca

2019-05-09T13:30:59+02:002019-05-10T01:35:02+00:00

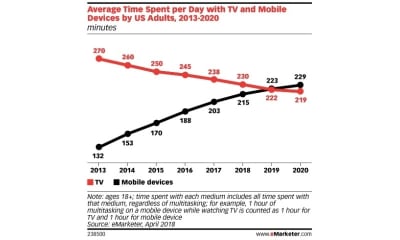
You want your client’s website to become the go-to destination for their target audience. So, you design them to look great, work perfectly and rank well in search. Is that enough? It could be, though I have a sneaking suspicion that the growing millennial and Gen Z consumer base are going to complicate that with their mobile-loving ways.

An eMarketer report from 2018 revealed that consumers’ time spent on mobile devices is about to surpass time spent watching TV:

eMarketer - TV vs mobile device time

eMarketer shows the TV versus mobile device statistics flip. (Image source: eMarketer) (Large preview)

And here’s why that matters so much:

TV is littered with celebrities. As consumers spend more time with their smartphones, there’s going to be a fundamental shift from trusting and admiring celebrities to trusting and admiring digital influencers.

In this post, I’m going to explain:

  • What a digital influencer is (as opposed to a celebrity or lifestyle influencer).
  • Why they’re so successful in building trust with their target audience.
  • How to leverage certain influencer-like qualities to attract higher levels of consistent traffic (and business) for the websites you build.

To be clear, this post has nothing to do with turning your clients’ websites into sponsor-driven money-making machines. This is about giving your website the same kind of clout as a digital influencer — and using that perceived expert status to consistently maintain high levels of traffic, engagement and referrals.

What Is An Influencer?

In the past, celebrities were mainly the ones that companies turned to promote their products or services. While that still happens today, you’re more likely to see celebrity influencers pushing luxury products.

Thanks to the Internet and social media, businesses no longer have to pay top-dollar to get a celebrity endorsement. Instead, we’re now seeing the rise of digital influencer marketing.

A digital influencer is one that’s built a brand around their expertise or knowledge. There are different ways to be an influencer, too:

  • Content creators
  • Industry experts
  • Micro-influencers (these are average joes who’ve amassed a following of more than 500)
  • Thought leaders.

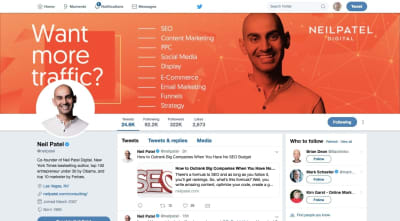
In reality, you’ll find that most digital influencers cover each one of these categories. For example, you have Neil Patel:

Neil Patel on Twitter

Neil Patel has hundreds of thousands of followers and a highly engaged audience. (Image source: Neil Patel) (Large preview)

He’s an entrepreneur, content creator, thought leader, trusted expert in content marketing and has way more than 500 followers wherever you encounter him online.

That’s obviously an extreme example of a digital influencer though. How about we look at a web developer that’s established himself as an authority in his space?

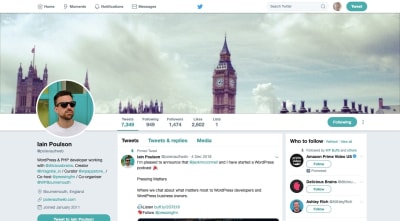
This is Iain Poulson‘s Twitter account:

Iain Poulson on Twitter

Iain Poulson is a micro-influencer web developer. (Image source: Iain Poulson) (Large preview)

Although his follower count and engagement levels don’t reach that of macro-influencers like Patel, it doesn’t make his words any less impactful with his target audience (on or off Twitter). The point is that he creates high-quality and engage-worthy content that his audience recognizes as such.

Regardless of the size of the influencer and the space in which they work, their words command so much authority that consumers can’t help but trust them. This is the power of the digital influencer.

This is why businesses flock to influencers for help in getting the word out about their brand. If a business can leverage that built-in authority, it can grow its follower and customer base with a solid recommendation from that influencer. Influencer Marketing Hub reports that those who’ve used influencer marketing earn $7.65, on average, for every $1.00 paid to a digital influencer.

Needless to say, digital influencers are powerful and valuable entities in the world we live in. Now, we need to look at how you can imbue your websites with digital influencer-like qualities to increase their own value on the web.

How To Turn Websites Into Digital Stars

To turn a website into a digital influencer-like entity, you have to make it embody those qualities that make digital influencers so trustworthy and powerful in the first place.

For the purposes of demonstrating what these qualities are, I’m going to use websites that represent today’s top digital influencers and/or their businesses.

Whether you’re in the process of building a new site for a client or you’re looking for a way to rebrand or upgrade one that already exists, use these tips to up the influencer factor:

1. Let the Navigation Tell Your Story

In general, the navigation (and sitemap) of a website is a very powerful tool for both your visitors as well as search engines.

The only thing is, many websites use a similarly-structured and labeled navigation. That’s fine if the website’s offer is plain and simple:

  • This is the product we sell (“Products” or “Services”).
  • This is who we are (“About” or “Team”).
  • Get in touch or buy the product (“Contact Us” or “Buy Now”).

What makes many digital influencers stand apart is that they’ve crafted a robust brand for themselves, which means they’re usually a double- or triple-threat. And they make sure the navigation highlights each of these strengths or offerings.

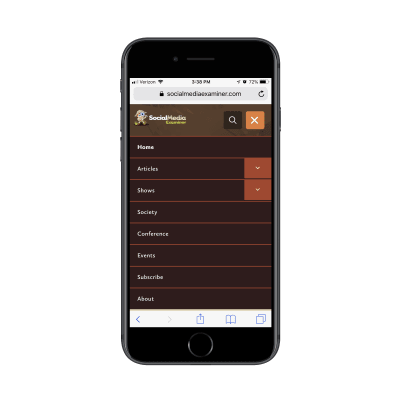
Social Media Examiner, for instance, demonstrates that it’s not just a blog containing posts related to social media. Social Media Examiner does it all:

Social Media Examiner mobile navigation

The Social Media Examiner mobile website navigation (Image source: Social Media Examiner) (Large preview)

As you can see, the navigation shows you all of the different ventures Social Media Examiner has going on:

  • Blogging
  • Podcasting
  • Membership
  • A live conference.

It’s an impressive list and one that will instantly demonstrate to visitors that they are the authority on social media.

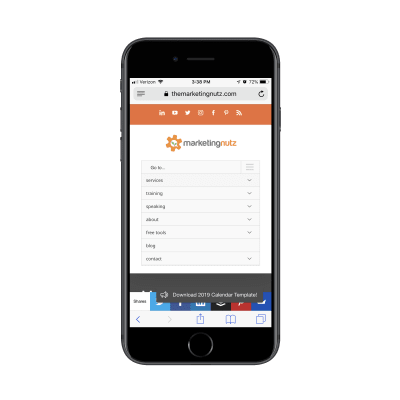
The Marketing Nutz takes a similar approach with its navigation:

Marketing Nutz mobile navigation

The Marketing Nutz navigation on mobile (Image source: The Marketing Nutz) (Large preview)

This navigation, however, is less focused on authority-building content. Instead, it highlights all of the ways in which it empowers its followers to get more out of their social media efforts with:

  • Social media training
  • Information on Pam Moore as a keynote speaker
  • Free social media management tools and ebooks
  • A regularly updated blog.

In sum, your navigation needs to be able to demonstrate the website’s/brand’s expertise and value within seconds. It should also be one that has visitors thinking, “Wow! They do all that?”

2. Lead with a Strong Visual

Another way to establish authority immediately is with a strong and unique visual. This sends the signal that this website isn’t just going to be a place to get information. It’s a place to actually experience something.

Take a look at the Youpreneur website:

Youpreneur home page image

The Youpreneur’s striking image and animated text (Image source: Youpreneur) (Large preview)

What you can’t see in the screenshot above is the animation directly below the image and tagline that definitely took some time to design.

See the cursor after the word “speaker”? This is a text animation that types out and deletes different entrepreneurial titles. Speaker. Blogger. Consultant. If the banner image didn’t capture their attention, this certainly will.

Jay Baer‘s personal website is another beautiful example of making a strong impression with visuals.

Jay Baer home page banner

Jay Baer uses a combination of image, colorful filter and video to make a strong first impression. (Image source: Jay Baer) (Large preview)

Not only does he include a uniquely personal photo of himself in the hero section of the home page, but he has also applied a powerful color filter atop it. Further, he leads with a call-to-action for visitors to watch his five-minute video.

Although the messaging puts the focus on the customer, these strong visuals simultaneously convey that Jay Baer is someone they need to stop and listen to.

You’ll want to strike the same balance with your own entry visuals and messaging. Make sure the text lets visitors know there’s something really valuable here to stick around for. But be savvy in how you design the visuals surrounding that message. There’s a lot you can to do to convince visitors that they’ve entered the website of authority instead of just a service provider or seller.

Recommended reading: Reasons Your Mobile App Retention Rate Might Be So Low

3. Be Ripe with Content

I touched on this point slightly in the navigation point, though I think it’s worth taking a closer look so you can see the ways influencer websites produce and disseminate a variety of content.

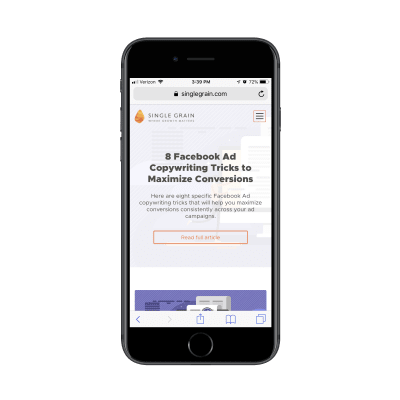
Here is the Single Grain blog:

Single Grain blog

Single Grain’s blog page (Image source: Single Grain) (Large preview)

Single Grain’s blog is full of new and cutting-edge posts on the subject of digital marketing. As you scroll down the page, you’ll soon see that each of the featured images is designed in the same manner. All are customly illustrated and contain a mix of visuals and light text.

This not only gives the blog a consistent and easily recognizable look, but it also gives the content an edge up when it gets shared on social media. Imagine you’re looking through your social media feed and happen upon a short post with a descriptive image attached to it. In a sea of image-less posts or ones that use meaningless stock images, this kind of visual content is sure to stand out.

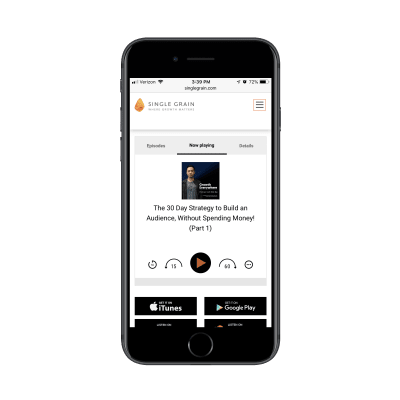
Now, what’s interesting about Single Grain is that its podcasts page has a different style from the blog:

Single Grain podcast

Single Grain’s podcast page (Image source: Single Grain) (Large preview)

You can tell right away that the lightness in design and custom illustrations for the blog posts have no place here. Instead, Single Grain uses a more traditional design and layout for its Growth Everywhere podcast.

That doesn’t necessarily say anything about the kind of content covered here compared to the blog; it’s not more serious in nature nor is it created by someone with more traditional leanings. It’s simply a matter of designing for the channel. In this case, simpler and less customized makes more sense for a podcast.

As you bring together the pieces of your client’s website, don’t feel as though all of their content needs to be shoved under a single “Resources” tab and designed in the same manner.

Instead, give each content channel (e.g. blog posts, podcast episodes, video training, etc.) a separate tab and design it in a way that makes the most sense. For instance, you want visitors to spend a lot of time looking through a blog post, so you might design custom yet consistently styled graphics for each one. With something like an ebook, you’d keep it simple: show a picture of a bound book (even if it’s a digital-only book) and pair it with some intro text.

Influencers treat their different channels like sub-brands with unique identities. You should do the same.

Recommended reading: Designing For Micro-Moments

4. Confidently Collect Leads

Recently, I wrote about how to design lead gen landing pages for mobile. There were different examples included (a SaaS company, a digital magazine, a monthly subscription box company, etc.), which isn’t surprising considering how valuable lead generation is for online businesses.

That said, you’d be hard-pressed to find a digital influencer that doesn’t have a lead magnet offer on his or her website. It’s almost a guarantee.

The main difference between how some websites promote their lead gen offers and how digital influencers do it is the strength of the message and design.

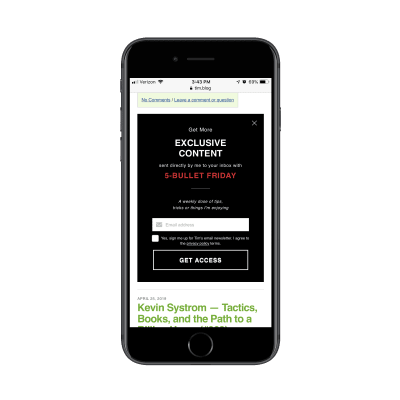
This is the blog of Tim Ferriss:

Tim Ferriss lead magnet promo

Tim Ferriss’ strongly worded and designed lead magnet promo (Image source: Tim Ferriss) (Large preview)

All this is is a promotional banner asking visitors to subscribe to the blog. Take note, however, that this isn’t posed as a request. This is an invitation to something special. And it’s intense. This is because of the special way in which the banner is designed:

  • The solid black background;
  • The words “EXCLUSIVE CONTENT”;
  • The red all-capped letters;
  • The call to “GET ACCESS”.

This is not at all the kind of thing you’d see on most websites and that’s because many of them just don’t exude the kind of in-your-face confidence and authority that digital influencers do.

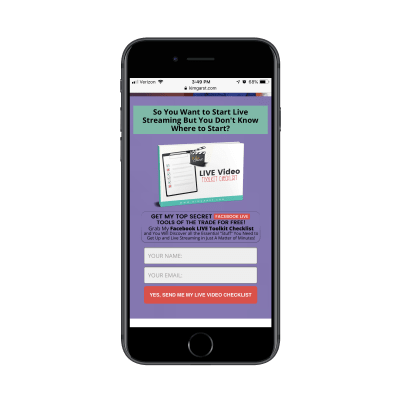
Kim Garst is another influencer with an eye-catching lead gen banner:

Kim Garst lead capture form

Kim Garst’s engaging lead capture form (Image source: Kim Garst) (Large preview)

Clearly, the color palette is one you can’t help but stop and look at. The teal and purple colors are pretty safe choices, but it’s the contrast of the red callouts that gives this an edge.

Also, check out the wording she uses — it’s very similar to how Ferriss gave his lead gen an air of exclusivity. With Kim’s lead gen promo, she uses strong wording like “Top Secret”, “Discover” and “A Matter of Minutes”. If visitors weren’t feeling as though they had to read any more of the content on her website, this would surely get them to reconsider.

Bottom line: to demonstrate your authority, you can’t waiver nor can you provide a soft sell (e.g. “Subscribe here”) when promoting a lead magnet. Instead, your messaging and design both need to convey the confidence and authority that tell visitors:

“Don’t miss this special opportunity to peek inside my brain and gain more valuable knowledge and skills than you could ever ask for!”

Wrapping Up

Digital influencers are a special breed, that’s for sure. But that doesn’t mean you can’t draw lessons from how they’ve managed to convey and reinforce authority through their websites.

What’s nice about digital influencer websites is that they show you that obvious cash-grab features (like affiliate advertising and gated content) aren’t necessary in order to increase conversions. By designing your website as an authority, you’ll see an increase in traffic, be able to more easily collect leads, and establish long-term trust with an audience.

The revenue increase will come naturally as visitors are dying to share the news about what they discovered.

Further Reading on SmashingMag:

(ra, yk, il)
Categories: Others Tags:

How to Take Your Website Viral

May 9th, 2019 No comments

It’s no surprise that some businesses are convinced that all they need is a Facebook page and some awesome paid posts in order to go viral. I get it. It’s relatively cheap. It’s easy. And they see it as a faster way to success than taking the time to build a website, grow an audience organically, and wait.

But social media virality is hard to come by and, when it does happen, can be short-lived.

Now, making a website or blog go viral? That can have long-lasting results for a business. But what exactly does it mean to make a website “go viral”? And is this something you need to worry about as a web designer?

A Word About What It Means to “Go Viral”

On the Internet, going viral happens when something — a social media post, a blog post, a video, a website — becomes so popular that word of it spreads like an actual virus. It almost becomes infectious, like anyone who comes in contact with it can’t help but be affected.

Think about something like The Ice Bucket Challenge or Pokémon Go.

?

These were some of the most popular cases of online virality in recent years. But where are they now?

The ALS Association is still working to raise funds for its cause (though through more traditional means now) and the augmented reality game is still kicking around. However, the fervor surrounding each died down almost as quickly as it began.

That’s because, by their very nature, viruses are short-lived.

Taking Inspiration from Viral Content

How many of your clients (or even prospects) ask how long it’ll take before their new website will make it to the top of search results? Or what the chances are that their blog will go viral?

Obviously, it’s your job to educate them on this before you go setting any expectations.

Make it clear that a website in the #1 position on Google isn’t some superficial status symbol. It’s achieved through lots of work done to and around the website. Google rewards quality, authority, and trustworthiness; not 15 minutes of fame.

If your clients understand the difference and agree that this is what they want, then explain to them that there are ways to design with viral-like qualities in mind. This way, you can still set their website up for widespread success, just with the more ideal approach of making it last.

1. Start with a Personal Visual Element

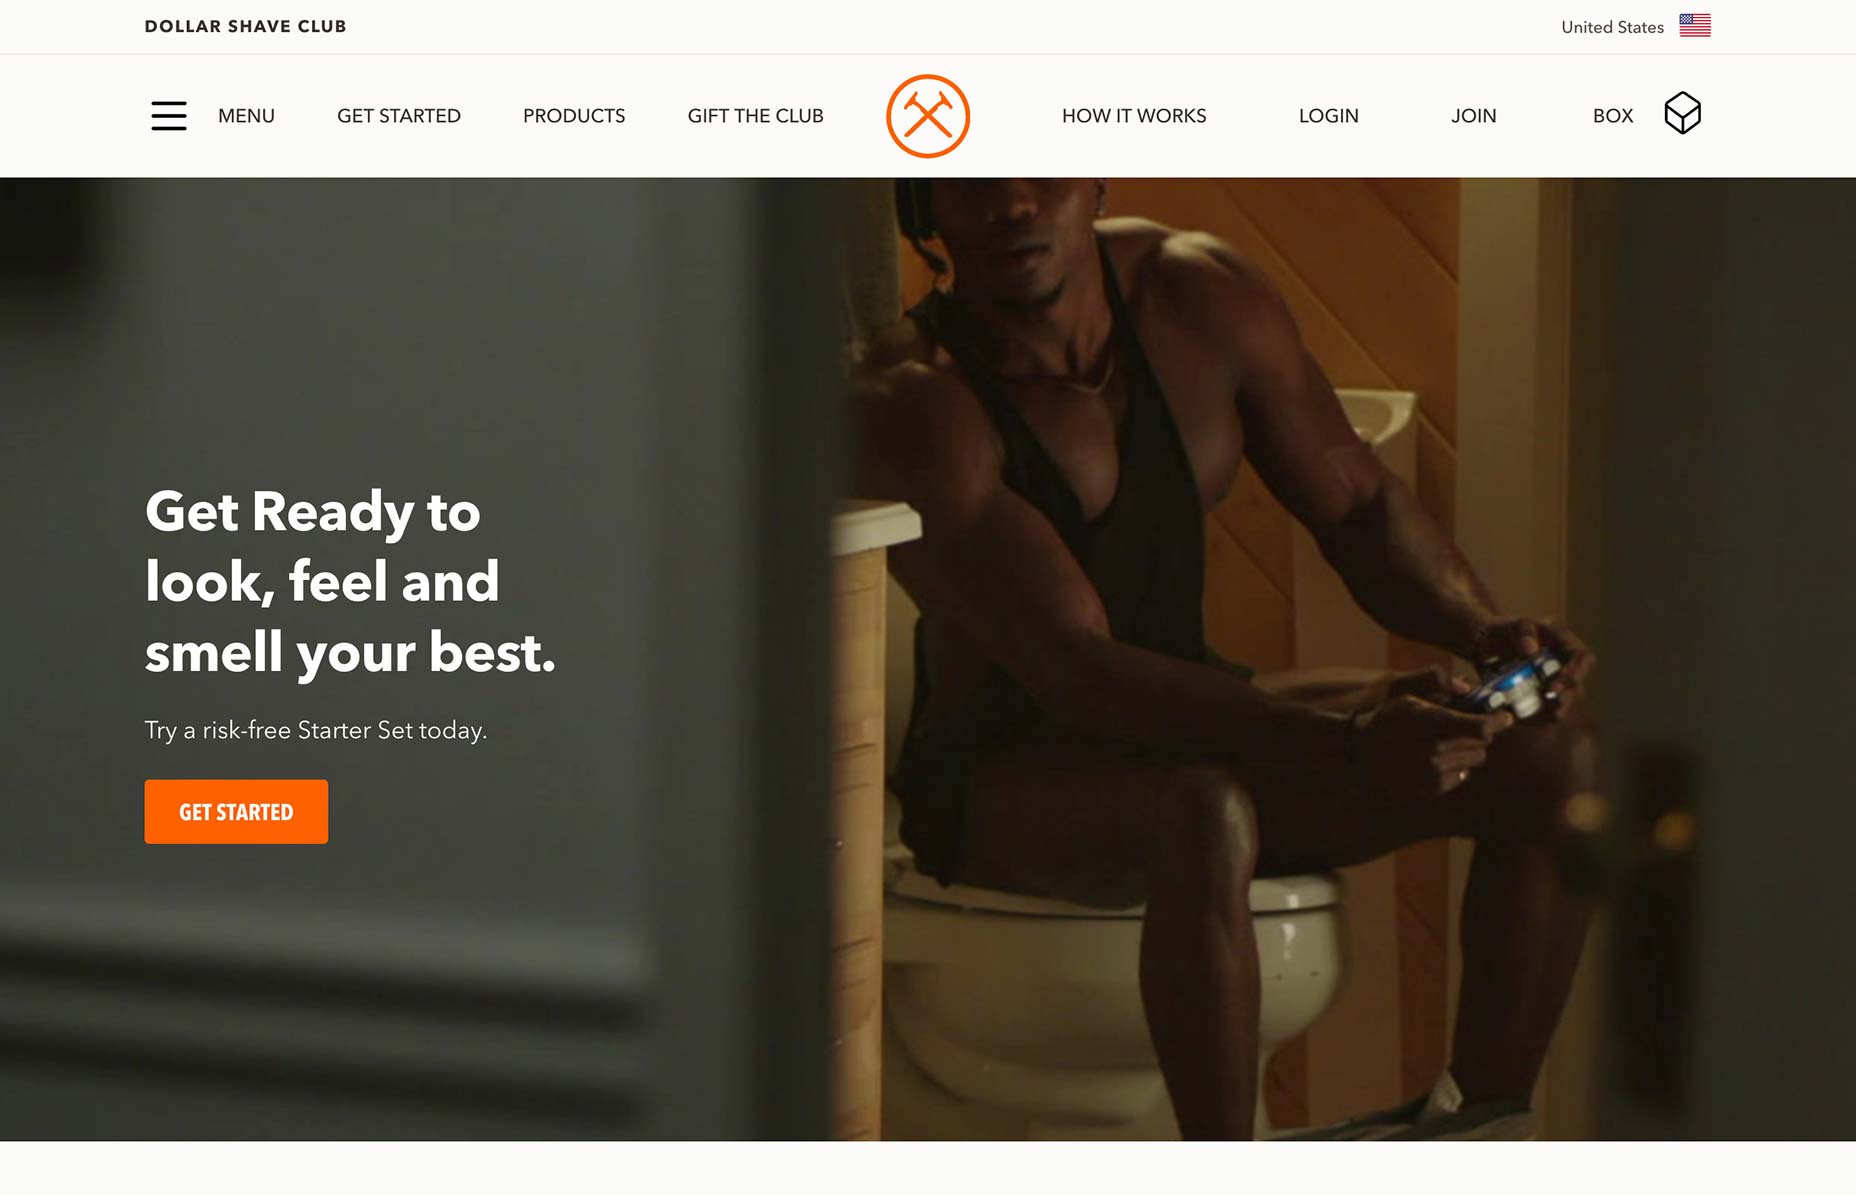
One of the things you’re going to find that viral brands have in common is that they draw you in with a personal element right off the bat. For example, do you remember the first commercial that Dollar Shave Club ran back in 2012? Let me remind you:

?

To date, this video has over 26 million views.

Dollar Shave Club has since been purchased by Unilever for $1 billion. If you’re looking for a brilliant example of viral marketing done well and that has staying power, look to this company.

While you’re at it, take a look at the website today:

Dollar Shave Club continues to put people first in its branding. Unlike other brands that use super polished and staged photos or videos on their websites, Dollar Shave Club portrays man in his “natural” state. It’s a strong and memorable way to introduce visitors to the website. It also allows Dollar Shave Club to inject a little levity into its brand even if it no longer has any need for those viral videos.

2. Make It Hard to Look Away

Suffice it to say, viral content is not boring. While design choices like color and typography can certainly lend to the engagement factor of a website, you’re going to need to do more than that to get visitors’ attention and hold it.

Just be careful about how far towards “gimmicky” you go with it. I’m going to show you two examples from the same company to explain what I mean.

This is the Cards Against Humanity website:

This is a company that makes a living by selling adult card games. Its choice to show off some of the ridiculous card pairings that may occur over the course of a game is a brilliant design choice for the website.

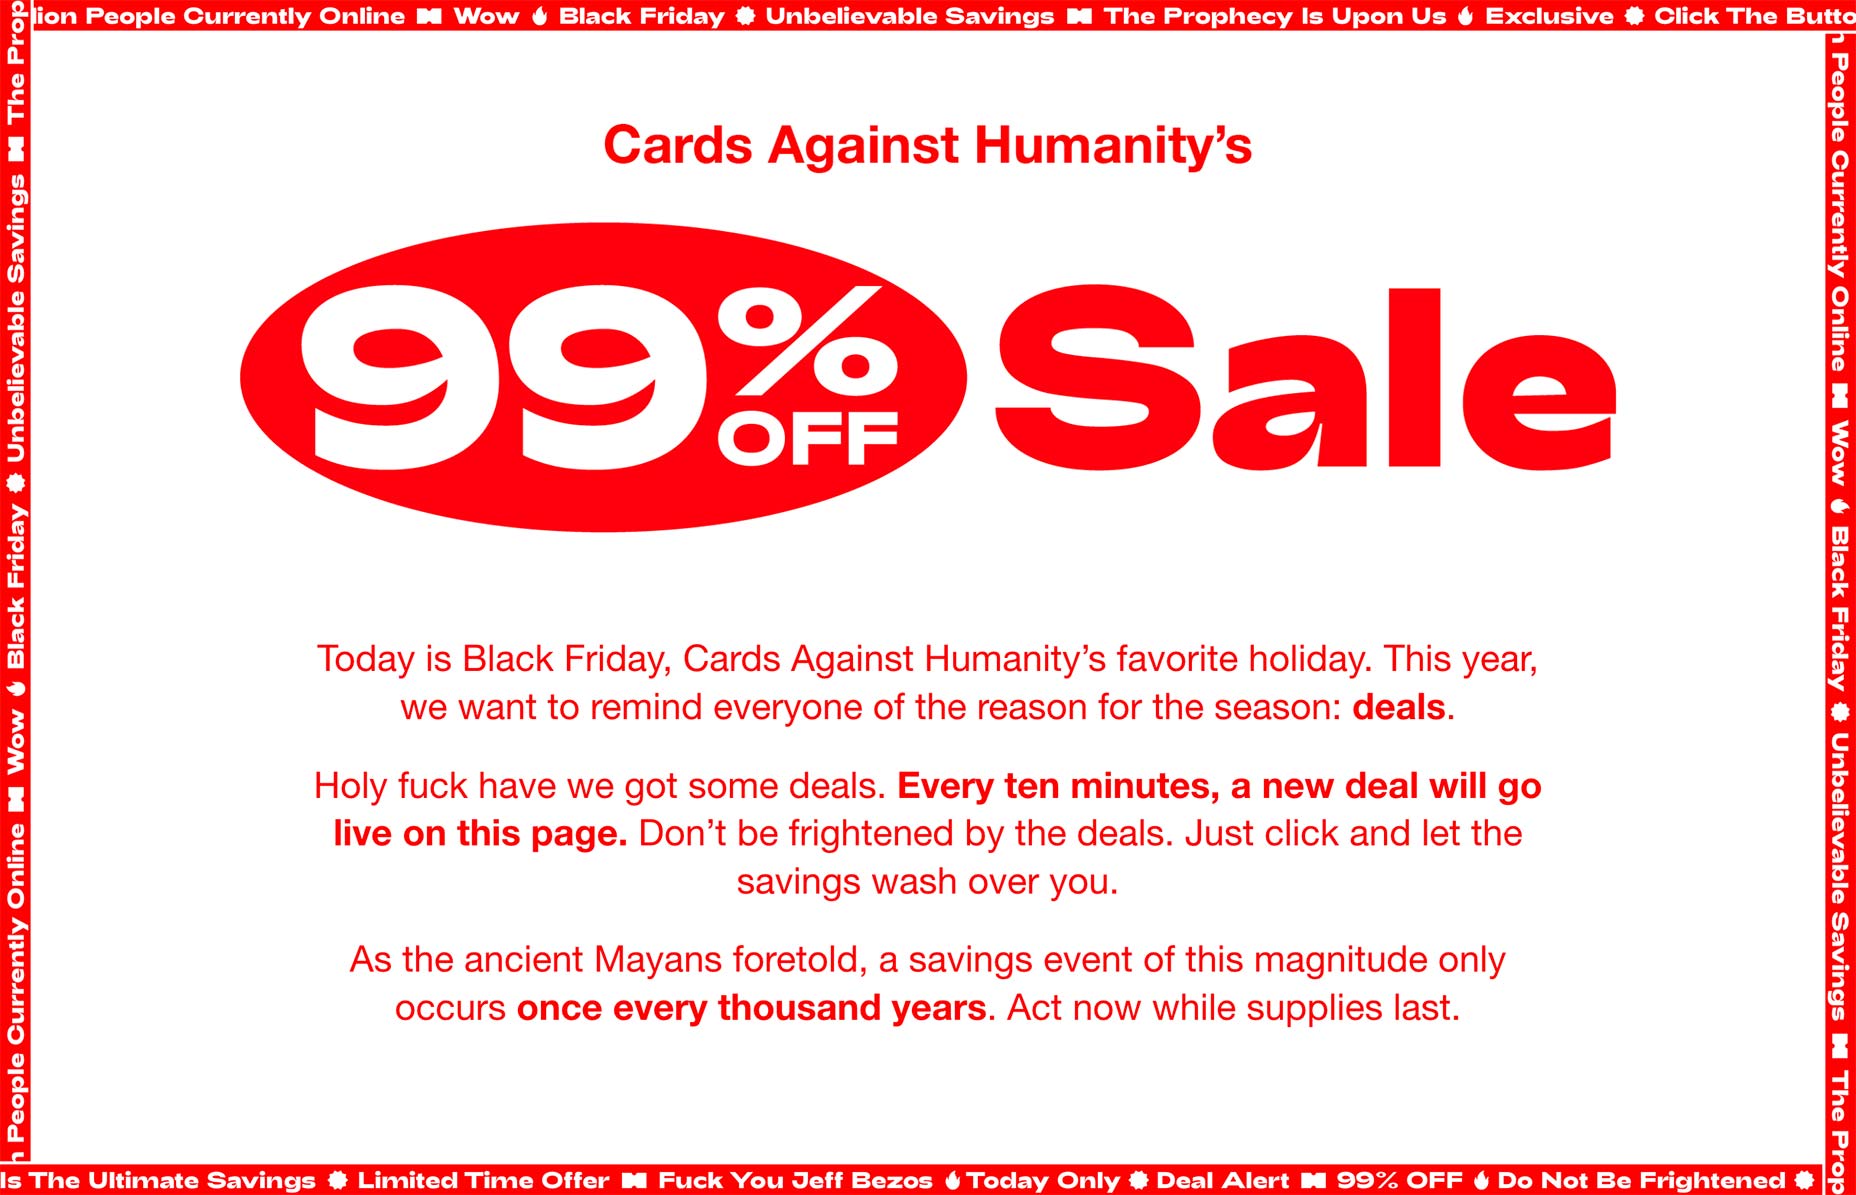
That said, the same company tends to go overboard on Black Friday, as it did in 2018 with the 99% Off Sale website:

The design of the website is pretty painful to look at. However, the sale’s gimmick only ran for 24 hours, so it’s not like the company was asking customers to return to the website again.

The lesson to take away from this? If you only want short-lived success with a website, feel free to go campy with the design. If you want more permanent success, delight visitors with subtle surprises instead.

3. Utilize Design Trends But Push Boundaries

Another thing to keep in mind about viral content and websites is that they tend to be risk-takers or, at the very least, have no shame. So, as you set about designing a website for a client that’s determined to make a huge splash from the get-go, you’re going to have to be okay with entering territory that’s never been covered before.

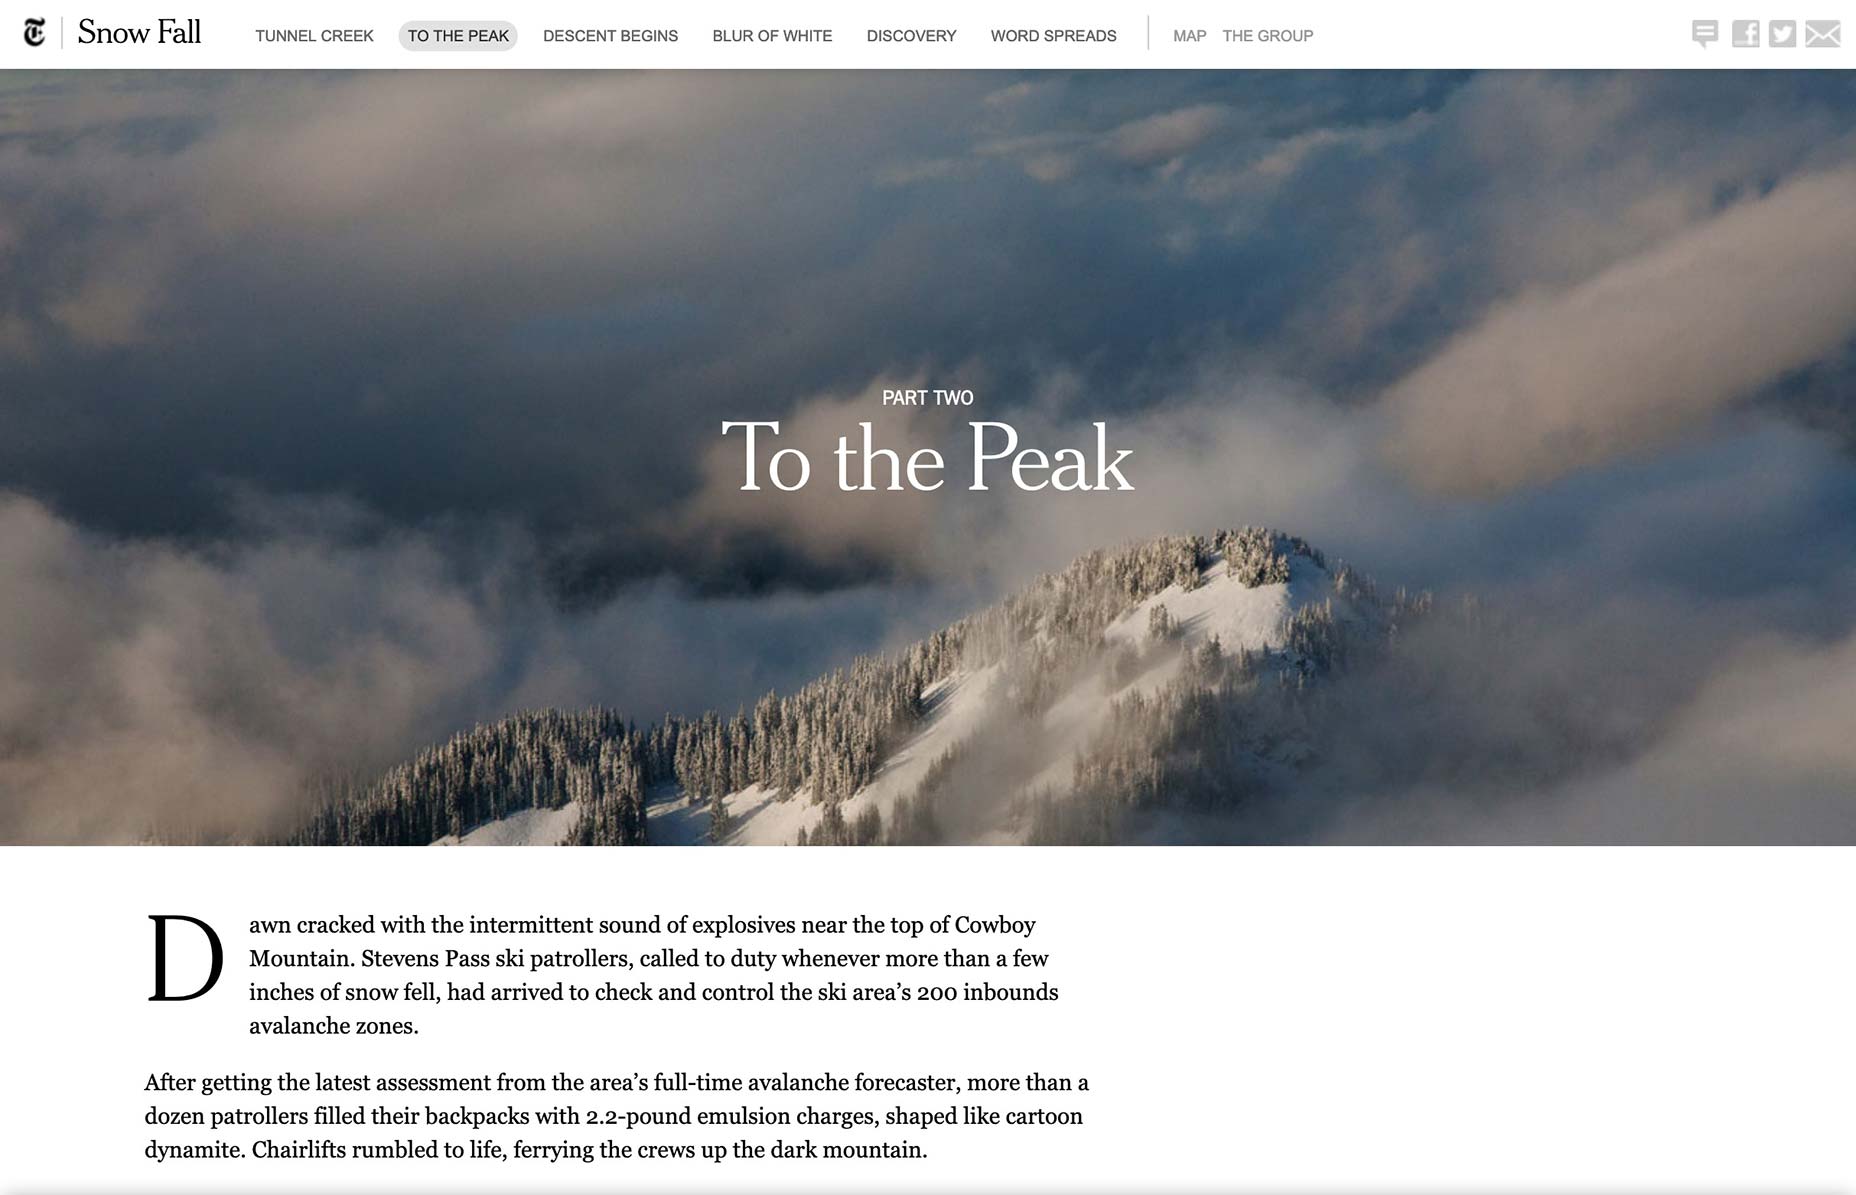
One of my favorite examples of this (and one of the reasons why I was so eager to get into marketing) was the Snow Fall piece published by The New York Times in 2012:

When this first came out, I remember how everyone was talking about it — even people who weren’t normally fans of reading The New York Times or long-form stories online. They just couldn’t believe that something that could’ve easily been a long and arduous piece to get through had almost become like a piece of digital art.

Looking at it today, you can see how a lot of what we’ve done in web design since — e.g. animation, parallax scrolling, and digital storytelling — comes from this brilliant gamble by the NYT. So, if there’s a lesson to take away from this viral piece of content, it’s this:

Don’t push boundaries for the sake of stirring up a reaction in the moment. Push boundaries to better the design and better the experience.

Wrap-Up

Really, what we need to do when clients start talking about going viral or shooting to the top of search overnight is to explain that turning your brand into a virus is not a good thing. The goal is to have long-term success; not become something that’s super popular only for a short while.

That said, while you can’t and shouldn’t make promises that you’ll design a website to go viral, you can talk to your clients about how you’ll utilize certain qualities of viral content to increase the desirability and shareability of their website.

Add Realistic Chalk and Sketch Lettering Effects with Sketch’it – only $5!

Source

Categories: Designing, Others Tags:

A Few Functional Uses for Intersection Observer to Know When an Element is in View

May 8th, 2019 No comments
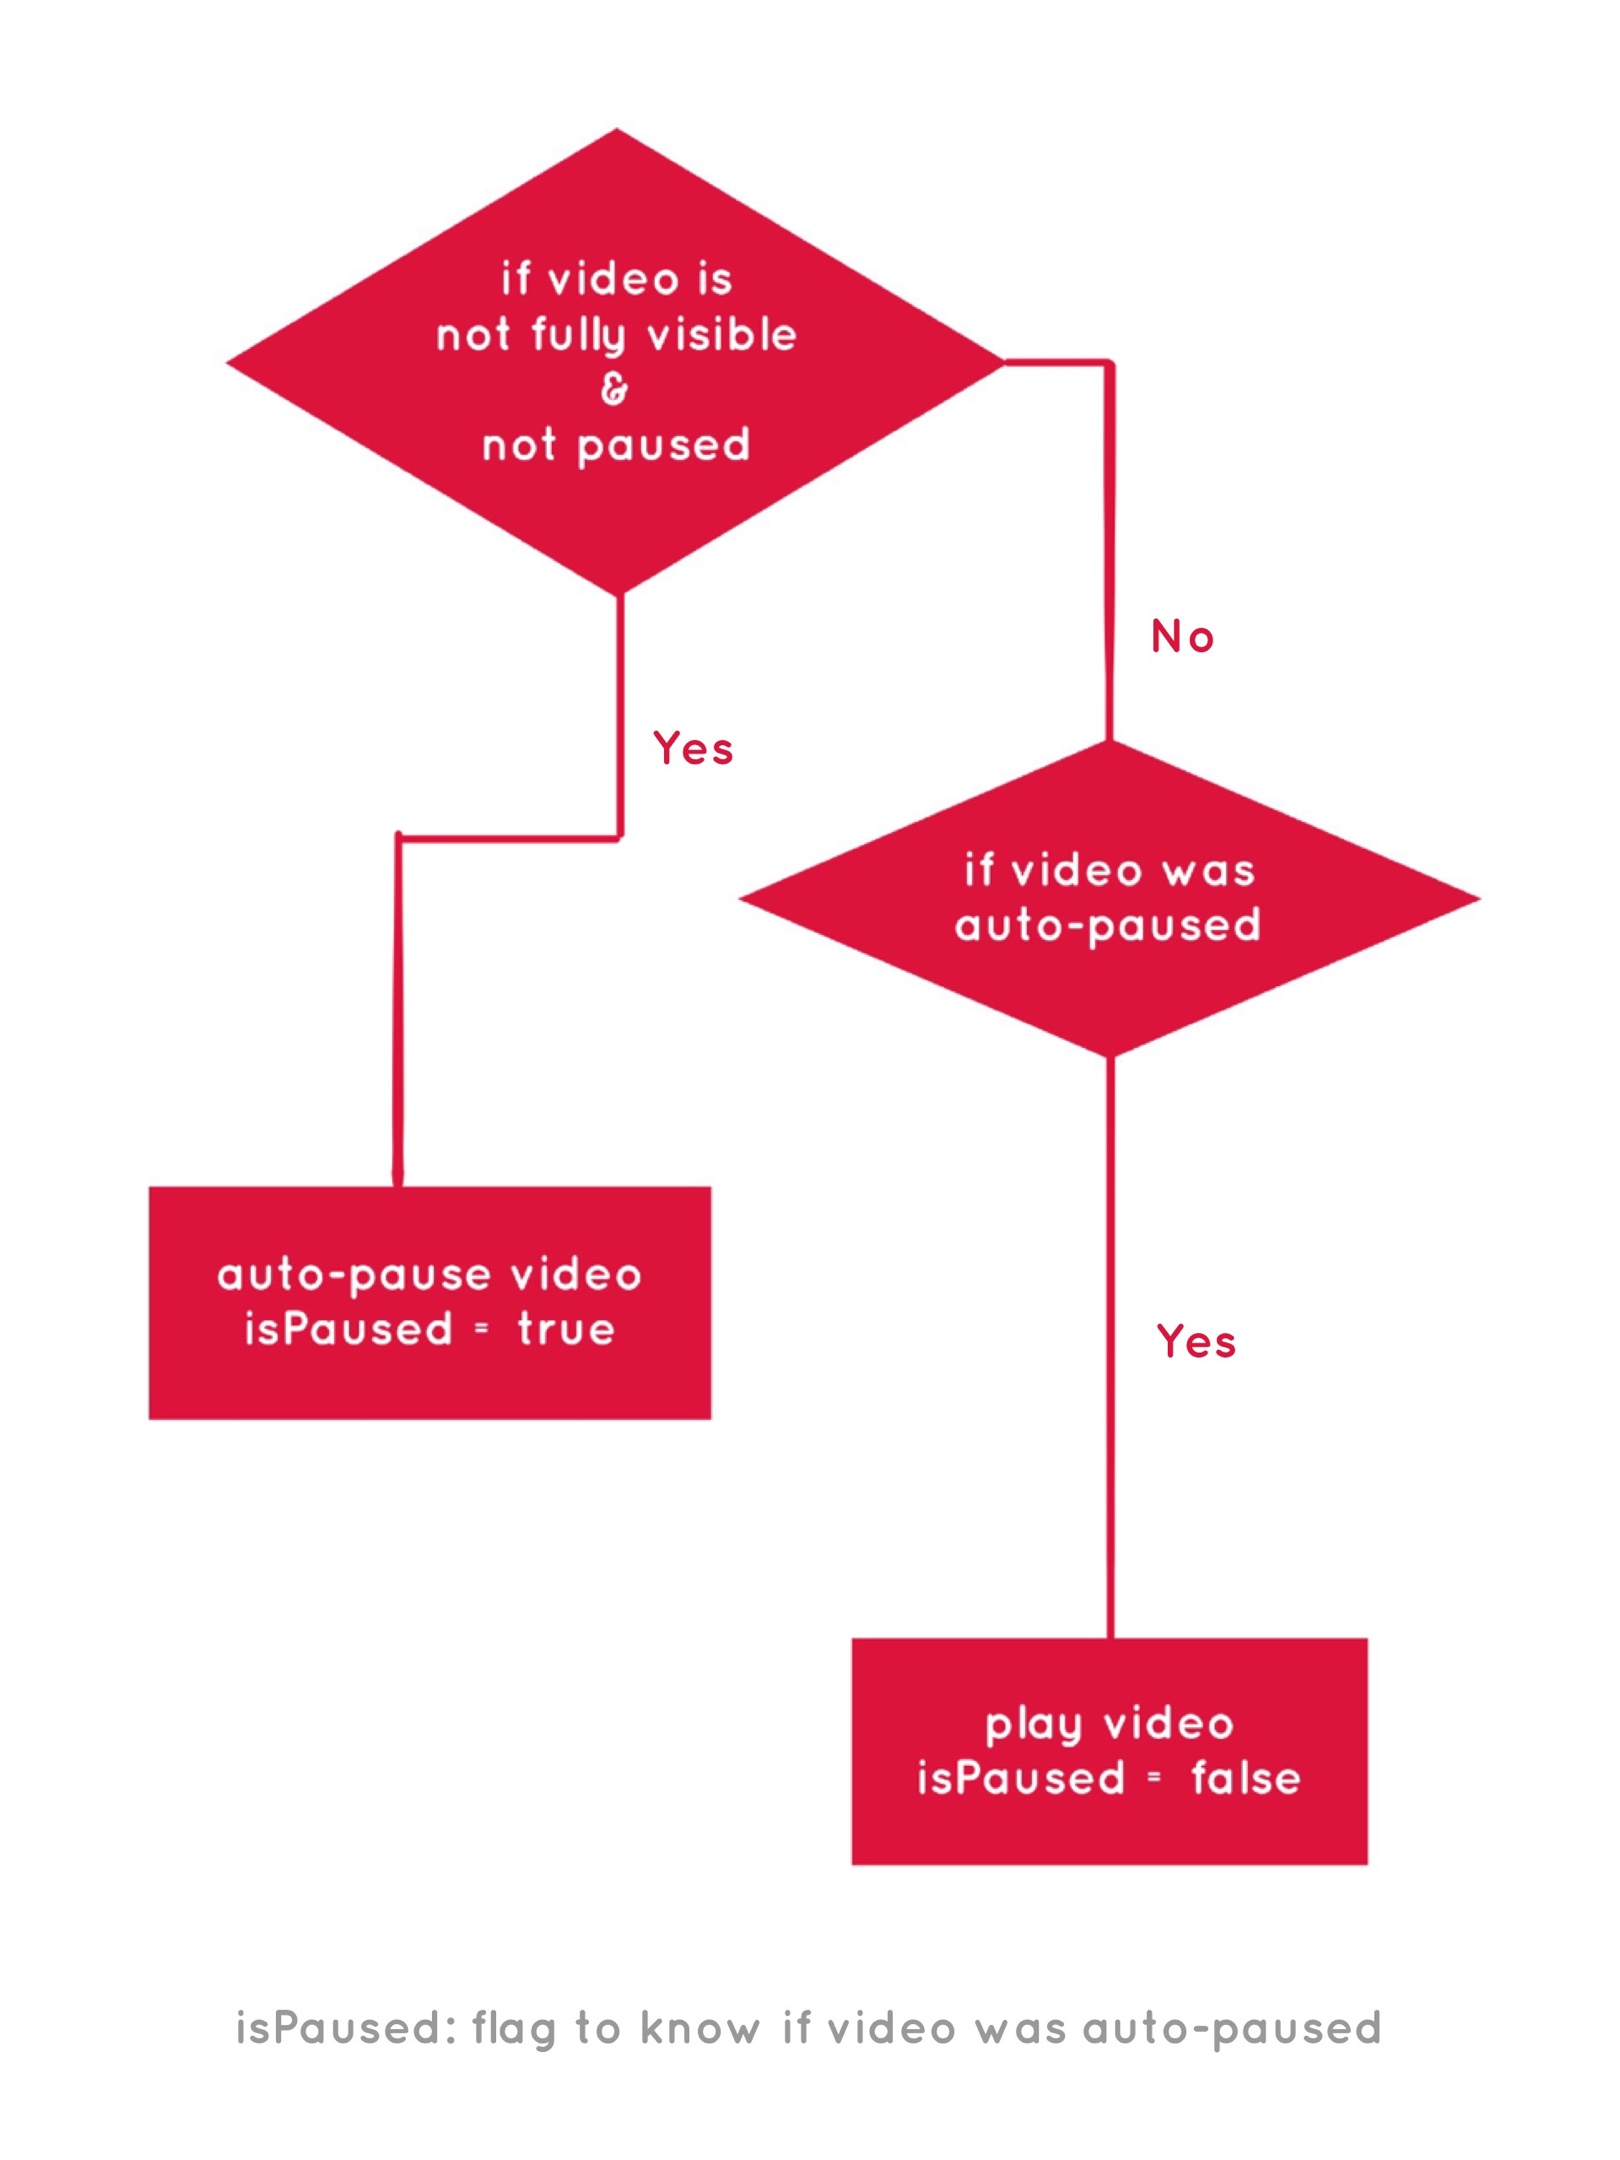
A flow chart for toggling play and pause on a video, where if video not fully visible and not paused, then isPaused is true. But if video was auto-paused, then IsPaused is false.

You might not know this, but JavaScript has stealthily accumulated quite a number of observers in recent times, and Intersection Observer is a part of that arsenal. Observers are objects that spot something in real-time — like birdwatchers going to their favorite place to sit and wait for the birds to come.

Different observers observe different things (not everyone watches hawks).

The very first observer I came to know was the Mutation Observer that looks for changes to the DOM tree. It was a one-of-a-kind at the time, but now we have many more observers.

Intersection Observer observes the “intersection” (i.e. the passing across) of an element through one of its ancestor elements or the area on screen where the page is visible (aka the viewport).

It’s sort of like watching a train pass through a station. You can see when the train comes in, when it leaves, and how long it was stationary.

Knowing when an element is about to come into view, if it has gone out of view, or how long it’s been since it came into view all have useful applications. So, we’ll see some of those use cases now — right after seeing the code for creating an IntersectionObserver object by way of the Intersection Observer API.

A quick overview of IntersectionObserver

The Intersection Observer API has already gained wide support at the time of this writing.

This browser support data is from Caniuse, which has more detail. A number indicates that browser supports the feature at that version and up.

Desktop

Chrome Opera Firefox IE Edge Safari
58 45 55 No 16 12.1

Mobile / Tablet

iOS Safari Opera Mobile Opera Mini Android Android Chrome Android Firefox
12.2 46 No 67 74 66

But if you want to check whether Intersection Observer is supported while you’re working with it, you could see if the property IntersectionObserver exists in the window object:

if(!!window.IntersectionObserver){}
/* or */
if('IntersectionObserver' in window){}

OK, now for a look at the object creation:

var observer = new IntersectionObserver(callback, options);

The IntersectionObserver object’s constructor takes two parameters. The first one is a callback function that’s executed once the observer notices an intersection and has asynchronously delivered some data about that intersection.

The second (optional) parameter is options, an object with information to define what’s going to be the “intersection.” We may not want to know when an element is about to come into view, but only when it’s fully visible. Something like that is defined through the options parameter.

Options has three properties:

  • root – The ancestor element/viewport that the observed element will intersect. Think of it as the train station that the train will intersect.
  • rootMargin – A perimeter of the root element, shrinking or growing the root element’s area to watch out for intersection. It’s similar to the CSS margin property.
  • threshold – An array of values (between 0 and 1.0), each representing the distance an element has intersected into or crossed over in the root at which the callback is to be triggered.

Let’s say our threshold is 0.5. The callback is triggered when the element is in or passes its half-visible threshold. If the value is [0.3, 0.6], then the callback is triggered when the element is in or passes its 30% visible threshold and also, its 60% visible threshold.

That’s enough of the theory now. Let’s see some demos. First up, lazy loading.

Use Case 1: Lazy loading images

See the Pen
Intersection Observer – Lazy Load
by Preethi Sam (@rpsthecoder)
on CodePen.

To see the loading at the mark, view this webpage since the embedded demo doesn’t show that.

CSS-Tricks has thoroughly covered lazy loading in before and it’s typically done like this: display a lightweight placeholder where images are intended, then swap them out for the intended images as they come (or are about to come) into view. Believe me, there’s nothing lazy about implementing this — that is, until we get something native to work with.

We’ll apply the same mechanics. First, we’ve a bunch of images and have defined a placeholder image to display initially. We’re using a data attribute carrying the URL of the original image to be shown that defines the actual image to load when it comes into view.

<img src="placeholder.png" data-src="img-1.jpg">
<img src="placeholder.png" data-src="img-2.jpg">
<img src="placeholder.png" data-src="img-3.jpg">
<!-- more images -->

The rest is scripting.

let observer = new IntersectionObserver(
(entries, observer) => { 
  entries.forEach(entry => {
    /* Here's where we deal with every intersection */
  });
}, 
{rootMargin: "0px 0px -200px 0px"});

The callback function above is an arrow function (though you can use a normal function instead).

The callback function receives two parameters: a set of entries carrying the information about each intersection and the observer itself. Those entries can be filtered or looped through so we can then deal with the intersection entries that we want. As for the options, I’ve only provided the rootMargin value, letting the root and threshold properties fall into their default values.

The root default is the viewport and threshold default is 0 — which can be roughly translated to “ping me the very moment that the element appears in the viewport!”

The oddity, though, is that I reduced the viewport’s observation area by two hundred pixels at the bottom using rootMargin. We wouldn’t typically do this for lazy loading. Instead, we might increase the margin or let it default. But reducing isn’t something we would usually do in this situation. I did it only because I want to demonstrate the original images loading at the threshold in the observed area. Otherwise, all the action would happen out of view.

When the image intersects the viewport’s observer area (which is 200px above the bottom in the demo), we replace the placeholder image with the actual image.

let observer = new IntersectionObserver(
(entries, observer) => { 
entries.forEach(entry => {
    /* Placeholder replacement */
    entry.target.src = entry.target.dataset.src;
    observer.unobserve(entry.target);
  });
}, 
{rootMargin: "0px 0px -200px 0px"});

entry.target is the element observed by the observer. In our case, those are the image elements. Once the placeholder is replaced in an image element, we don’t have to observe it anymore, so we call the observer’s unobserve method for it.

Now that the observer is ready, it’s time to start observing all the images by using its observer method:

document.querySelectorAll('img').forEach(img => { observer.observe(img) });

That’s it! we’ve lazy loaded the images. Onto the next demo.

Use Case 2: Auto-pause video when it’s out of view

Let’s say we’re watching a video on YouTube and (for whatever reason) we want to scroll down to read the comments. I don’t know about you, but I don’t usually pause the video first before doing that, which means I miss some of the video while I’m browsing.

Wouldn’t it be nice if the video paused for us when we scroll away from it? It would be even nicer if the video resumed when it’s back in view so there’s no need to hit Play or Pause at all.

Intersection Observer can certainly do that.

See the Pen
IntersectionObserver: auto-pause out of view video
by Preethi Sam (@rpsthecoder)
on CodePen.

Here’s our video in the HTML:

<video src="OSRO-animation.mp4" controls=""></video>

Here’s how we toggle between play and pause:

let video = document.querySelector('video');
let isPaused = false; /* Flag for auto-paused video */
let observer = new IntersectionObserver((entries, observer) => { 
  entries.forEach(entry => {
    if(entry.intersectionRatio!=1  && !video.paused){
      video.pause(); isPaused = true;
    }
    else if(isPaused) {video.play(); isPaused=false}
  });
}, {threshold: 1});
observer.observe(video);

Before I show you how we’re pausing and playing the video during each intersection (i.e. entry), I want to bring your attention to the threshold property of the options.

Th threshold has a value of 1. Both root and rootMargin will default. This is the same as saying, “hey, let me know as soon the element is fully visible on the viewport.”

Once the intersection happens and the callback is triggered, we pause or play the video based on this logic:

I have not called unobserve for the video, so the observer keeps observing the video and pauses every time it goes out of view.

Use Case 3: See how much content is viewed

This can be interpreted and implemented in many ways depending on what your content is and the way you prefer to measure how much of it has been viewed.

For a simple example, we’ll observe the last paragraph of every article in a list of articles on a page. Once an article’s last paragraph becomes fully visible, we will consider that article read — like how we might say that seeing the last coach of a train counts as having seen the whole train.

Here’s a demo that shows two articles on a page, each containing a number of paragraphs.

See the Pen
IntersectionObsever: content viewed
by Preethi Sam (@rpsthecoder)
on CodePen.

Our simplified HTML is something like this:

<div id="count"><!-- The place where "number of articles viewed" is displayed --></div>

<h2>Article 1</h2>
<article>
  <p><!-- Content --></p>
  <!-- More paragraphs -->
</article>
<h2>Article 2</h2>
<article>
  <p><!-- Content --></p>
  <!-- More paragraphs -->
</article>
<!-- And so on... -->
let n=0; /* Total number of articles viewed */
let count = document.querySelector('#count');
let observer = new IntersectionObserver((entries, observer) => { 
  entries.forEach(entry => {
    if(entry.isIntersecting){
      count.textContent= `articles fully viewed - ${++n}`; 
      observer.unobserve(entry.target);
    }
  });
}, {threshold: 1});

document.querySelectorAll('article > p:last-child').forEach(p => { observer.observe(p) });

During each intersection — the full view of the last paragraph of an article — we’re incrementing a count: n, that represents the total number of articles read. Then we display that number above the list of articles.

Once we’ve counted in an intersection of the last paragraph, it doesn’t need to be observed anymore, so we call unobserve for it.

Thanks for observing along!

That’s it for the examples we’re going to look at together for this post. You probably get the idea of how using it is, to be able to observe elements and trigger events based on where they intersect the viewport.

That said, it’s worth using caution when making visual changes based on the intersection data obtained through the observer. Sure, Intersection Observer is hassle free when it comes to logging intersection data. But when it’s being used to make onscreen changes, we need to ensure the changes aren’t lagging, which is a possibility because we’re basically making changes based on data retrieved asynchronously. That might require a little bit of time to load.

As we saw, each intersection entry has a set of properties conveying information about the intersection. I didn’t cover all of them in this post, so be sure to review them.

The post A Few Functional Uses for Intersection Observer to Know When an Element is in View appeared first on CSS-Tricks.

Categories: Designing, Others Tags:

Getting To Know The MutationObserver API

May 8th, 2019 No comments

MutationObserver watches the DOM, specifically the places you tell it to, like:

document.querySelector('#watch-this');

…and it can tell you (trigger a callback) when stuff happens — like when a child is added, removed, changed, or a number of other things.

I used it just the other day to watch the of a Pen and detected newly-injected processed Sass code, so you could use CodePen to see Sass and CSS side by side:

See the Pen
Sassmeister clone
by Chris Coyier (@chriscoyier)
on CodePen.

Direct Link to ArticlePermalink

The post Getting To Know The MutationObserver API appeared first on CSS-Tricks.

Categories: Designing, Others Tags:

4 Mistakes that Android App Developers Make

May 8th, 2019 No comments

Play Store – the platform that sees both high app count and users time is also the house of the highest uninstallation rate and user abandonment rate.

Businesses, who enter the market with the hope of getting all the different attached benefits that Android market offers, most often than not, fail to avail them and find themselves in the well of uninstalled applications or even worse, apps that are never opened again after one experience.

This strikingly new place (at the downhill) that businesses now find themselves in is usually the doing of a series of mistakes that Android app developers face when devising the mobile apps. Something that can easily be avoided upon investment into a sound Android app development company that knows what it is doing.

In this article, we are going to look into some mistakes that have to be avoided at all costs while Android app development to ensure that the apps offer the anticipated returns in the expected time. Knowing what these are will not just help you in becoming a better name in the wide Android market but will also help you offer a lot better experience to the end users.

Let us look at what those to-be-avoided mistakes are:

1- Copying the iOS Version of the App

One of the biggest mistakes that an Android designer and developer can make is copying the iOS version design and then coding it in. Something that happens more frequently than we would like in the name of fast development time and expedited launch.

Developers forget that the whole interface and the experience that Apple gives is very different from what Android is able to offer. The presumably small things like button placement and pop-up designs often combine themselves to become the reason behind giving the users a feeling that the app that they are using is not Native on a particular level.

2- Device and OS Compatibility

The next mistake that Android developers make is not expanding their umbrella of Android devices and OS that the app will go live on. They often restrict themselves on a few specific devices which they think are most used in the market (same with the OS version) and don’t prepare the application for other platforms or OSs.

The application should, at all costs, be responsive to some level of variation in flexible interface and features which adapts a specific screen configuration. Although it might seem like a very daunting process, following the guidelines passed by Android development manuals helps in achieving this to a great extent. A dynamic framework of the Android app enables you to offer configuration-specific files which get loaded on the basis of the present device’s configurations.

3- Main Thread Blocking

Whenever an app is launched on the Android Operating System a new Linus process begins with a single execution thread. It means that the applications all run in one thread, known as the main thread.

Now, when the developers accidentally block this main thread, a rough user interface happens which have a dire impact on the app’s complete responsiveness. In order to avoid this from happening, developers should make use of the main UI thread for making network calls, loading bitmap, reading and writing SD, processing of the image, and querying of the database.

4- Using Codes for Something that is Already There

Chances are that all the different things that you want to do – image loading, network calls, access to the database, and even social login can be done with the help of APIs.

There is a very high probability that all the time that you have been spending in writing long lines of codes to avail a specific task could be solved in less than half the time, through an API. So, before you start writing the codes, first search and see if there exists an API that can do the job in exactly that much efficiency and less than half the time.

So, here were the four mistakes that Android app developers make during the extensive process. Mistakes that can have a negative impact on not just your app but also your business as a whole, taking down with itself the profit and fame.

Think we missed a deadly mistake? Let us know in the comments below.

Categories: Others Tags: