Getting Started With Axios In Nuxt
Getting Started With Axios In Nuxt
Timi Omoyeni 2020-05-26T09:00:00+00:00
2020-05-26T15:09:03+00:00
Nuxt.js provides an Axios module for easy integration with your application. Axios is a promise-based HTTP client that works in the browser and Node.js environment or, in simpler terms, it is a tool for making requests (e.g API calls) in client-side applications and Node.js environment.
In this tutorial, we’re going to learn how to use the Axios module and how to make a request on the server-side using asyncData and fetch. These two methods make a request on the server-side but they have some differences which we’re also going to cover. Finally, we’ll learn how to perform authentication and secure pages/routes using the auth module and auth middleware.
This article requires basic knowledge of Nuxtjs and Vuejs as we’ll be building on top of that. For those without experience with Vuejs, I recommend you start from their official documentation and the Nuxt official page before continuing with this article.
What Is The Nuxt.js Axios Module?
According to the official Documentation,
“It is a Secure and easy Axios integration with Nuxt.js.”
Here are some of its features:
- Automatically set base URL for client-side & server-side.
- Proxy request headers in SSR (Useful for auth).
- Fetch Style requests.
- Integrated with Nuxt.js Progressbar while making requests.
To use the axios module in your application, you will have to first install it by using either npm or yarn.
YARN
yarn add @nuxtjs/axiosNPM
npm install @nuxtjs/axiosAdd it into your nuxt.config.js file:
modules: [
    '@nuxtjs/axios',
  ],

  axios: {
    // extra config e.g
    // BaseURL: 'https://link-to-API'
  }
The modules array accepts a list of Nuxt.js modules such as dotenv, auth and in this case, Axios. What we’ve done is to inform our application that we would be using the Axios module, which we reference using @nuxtjs/axios. This is then followed by the axios property which is an object of configurations like the baseURL for both client-side and server-side.
Now, you can access Axios from anywhere in your application by calling this.$axios.method or this.$axios.$method. Where method can be get, post, or delete.
Making Your First Request Using Axios
For this tutorial, I’ve put together a simple application on Github. The repository contains two folders, start and finish, the start folder contains all you need to get right into the tutorial. The finish folder contains a completed version of what we would be building.
After cloning the repo and opening the start folder, we would need to install all our packages in the package.json file so open your terminal and run the following command:
npm installOnce that is done, we can start our app using the npm run dev command. This is what you should see when you go to localhost:3000.
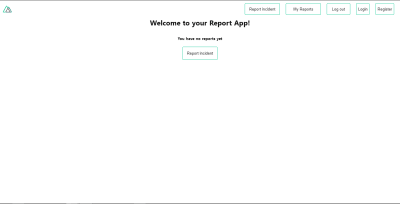
The next thing we have to do is to create a .env file in the root folder of our application and add our API URL to it. For this tutorial, we’ll be using a sample API built to collect reports from users.
API_URL=https://ireporter-endpoint.herokuapp.com/api/v2/This way, we do not have to hard code our API into our app which is useful for working with two APIs (development and production).
The next step would be to open our nuxt.config.js file and add the environmental variable to our axios config that we added above.
/*
   ** Axios module configuration
   */
  axios: {
    // See https://github.com/nuxt-community/axios-module#options
    baseURL: process.env.API_URL,
  },
Here, we tell Nuxt.js to use this baseURL for both our client-side and server-side requests whenever we use this Axios module.
Now, to fetch a list of reports, let us open the index.vue file and add the following method to the script section.
async getIncidents() {
  let res = await this.$store.dispatch("getIncidents");
  this.incidents = res.data.data.incidents;
}
What we have done is to create an async function that we call getIncidents() and we can tell what it does from the name — it fetches a list of incidents using the Vuex store action method this.$store.dispatch. We assign the response from this action to our incidents property so we can be able to make use of it in the component.
We want to call the getIncidents() method whenever the component mounts. We can do that using the mounted hook.
mounted() {
    this.getIncidents()
  }
mounted() is a lifecycle hook that gets called when the component mounts. That will cause the call to the API to happen when the component mounts. Now, let us go into our index.js file in our store and create this action where we’ll be making our Axios request from.
export const actions = {
  async getIncidents() {
    let res = await this.$axios.get('/incidents')
    return res;
  }
}
Here, we created the action called getIncidents which is an async function, then we await a response from the server and return this response. The response from this action is sent back to our getIncidents() method in our index.vue file.
If we refresh our application, we should now be able to see a long list of incidents rendered on the page.
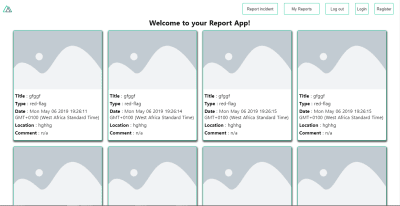
We have made our first request using Axios but we won’t stop there, we are going to be trying out asyncData and fetch to see the differences between them and using Axios.
AsyncData
AsyncData fetches data on the server-side and it’s called before loading the page component. It does not have access to this because it is called before your page component data is created. this is only available after the created hook has been called so Nuxt.js automatically merges the returned data into the component’s data.
Using asyncData is good for SEO because it fetches your site’s content on the server-side and also helps in loading content faster.
Note that asyncData method can only be used in the pages folder of your application as it would not work in the components folder. This is because asyncData hook gets called before your component is created.
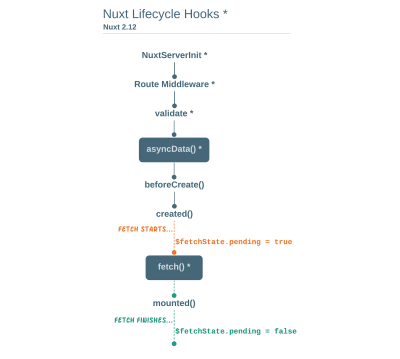
Let us add asyncData to our index.vue file and observe how fast our incidents data loads. Add the following code after our components property and let us get rid of our mounted hook.
async asyncData({ $axios }) {
    let { data } = await $axios.get("/incidents");
    return { incidents: data.data.incidents };
  },
  // mounted() {
  //   this.getIncidents();
  // },
Here, the asyncData method accepts a property from the context $axios. We use this property to fetch the list of incidents and the value is then returned. This value is automatically injected into our component. Now, you can notice how fast your content loads if you refresh the page and at no time is there no incident to render.
Fetch
The Fetch method is also used to make requests on the server-side. It is called after the created hook in the life cycle which means it has access to the component’s data. Unlike the asyncData method, the fetch method can be used in all .vue files and be used with the Vuex store. This means that if you have the following in your data function.
data() {
    return {
      incidents: [],
      id: 5,
      gender: 'male'
    };
}
You can easily modify id or gender by calling this.id or this.gender.
Using Axios As A Plugin
During the process of development with Axios, you might find that you need extra configuration like creating instances and interceptors for your request so your application can work as intended and thankfully, we can do that by extending our Axios into a plugin.
To extend axios, you have to create a plugin (e.g. axios.js) in your plugins folder.
export default function ({
  $axios,
  store,
  redirect
}) {
  $axios.onError(error => {
    if (error.response && error.response.status === 500) {
      redirect('/login')
    }
  })
  $axios.interceptors.response.use(
    response => {
      if (response.status === 200) {
        if (response.request.responseURL && response.request.responseURL.includes('login')) {
          store.dispatch("setUser", response);
        }
      }
      return response
    }
  )
}
This is an example of a plugin I wrote for a Nuxt application. Here, your function takes in a context object of $axios, store and redirect which we would use in configuring the plugin. The first thing we do is to listen for an error with a status of 500 using $axios.onError and redirect the user to the login page.
We also have an interceptor that intercepts every request response we make in our application checks if the status of the response we get is 200. If that is true we proceed and check that there is a response.request.responseURL and if it includes login. If this checks out to be true, we then send this response using our store’s dispatch method where it then mutated in our state.
Add this plugin to your nuxt.config.js file:
plugins: [
    '~/plugins/axios'
  ]
After doing this, your Axios plugin would intercept any request you make and check if you have defined a special case for it.
Introduction To The Auth Module
The auth module is used for performing authentication for your Nuxt application and can be accessed from anywhere in your application using $this.auth. It is also available in fetch, asyncData, middleware and NuxtInitServer from the context object as $auth.
The context provides additional objects/params from Nuxt to Vue components and is available in special nuxt lifecycle areas like those mentioned above.
To use the auth module in your application, you would have to install it using yarn or npm.
YARN
yarn add @nuxtjs/authNPM
npm install @nuxtjs/authAdd it to your nuxt.config.js file.
modules: [
  '@nuxtjs/auth'
],
auth: {
  // Options
}
The auth property accepts a list of properties such as strategies and redirect. Here, strategies accepts your preferred authentication method which can be:
local
For username/email and password-based flow.facebook
For using Facebook accounts as a means of authentication.Github
For authenticating users with Github accounts.Google
For authenticating users with Google accounts.- Auth0
- Laravel Passport
The redirect property accepts an object of links for:
login
Users would be redirected to this link if login is required.logout
Users would be redirected here if after logout current route is protected.home
Users would be redirected here after login.
Now, let us add the following to our nuxt.config.js file.
/*
 ** Auth module configuration
 */
auth: {
  redirect: {
    login: '/login',
    logout: '/',
    home: '/my-reports'
  },
  strategies: {
    local: {
      endpoints: {
        login: {
          url: "/user/login",
          method: "post",
          propertyName: "data.token",
        },
        logout: false,
        user: false,
      },
      tokenType: '',
      tokenName: 'x-auth',
      autoFetchUser: false
    },
  },
}
Please note that the auth method works best when there is a user endpoint provided in the option above.
Inside the auth config object, we have a redirect option in which we set our login route to /login, logout route to / and home route to /my-reports which would all behave as expected. We also have a tokenType property which represents the Authorization type in the header of our Axios request. It is set to Bearer by default and can be changed to work with your API.
For our API, there is no token type and this is why we’re going to leave it as an empty string. The tokenName represents the Authorization name (or the header property you want to attach your token to) inside your header in your Axios request.
By default, it is set to Authorization but for our API, the Authorization name is x-auth. The autoFetchUser property is used to enable user fetch object using the user endpoint property after login. It is true by default but our API does not have a user endpoint so we have set that to false.
For this tutorial, we would be using the local strategy. In our strategies, we have the local option with endpoints for login, user and logout but in our case, we would only use the *login* option because our demo API does not have a *logout* endpoint and our user object is being returned when *login* is successful.
Note: The auth module does not have a register endpoint option so that means we’re going to register the traditional way and redirect the user to the login page where we will perform the authentication using this.$auth.loginWith. This is the method used in authenticating your users. It accepts a ‘strategy’ (e.g local) as a first argument and then an object to perform this authentication with. Take a look at the following example.
let data {
          email: 'test@test.com',
          password: '123456'
}
this.$auth.loginWith('local', { data })
Using The Auth Module
Now that we have configured our auth module, we can proceed to our registration page. If you visit the /register page, you should see a registration form.
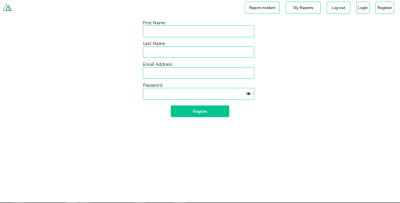
Let us make this form functional by adding the following code:
methods: {
  async registerUser() {
    this.loading = true;
    let data = this.register;
    try {
      await this.$axios.post("/user/create", data);
      this.$router.push("/login");
      this.loading = false;
      this.$notify({
        group: "success",
        title: "Success!",
        text: "Account created successfully"
      });
    } catch (error) {
      this.loading = false;
      this.$notify({
        group: "error",
        title: "Error!",
        text: error.response
          ? error.response.data.error
          : "Sorry an error occured, check your internet"
      });
    }
  }
}
Here, we have an async function called registerUser which is tied to a click event in our template and makes an Axios request wrapped in a try/catch block to an endpoint /user/create. This redirects to the /login page and notifies the user of a successful registration. We also have a catch block that alerts the user of any error if the request is not successful.
If the registration is successful, you would be redirected to the login page.
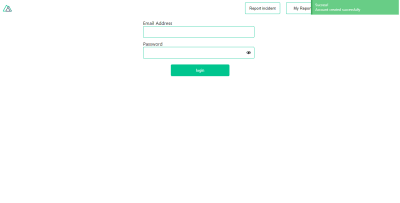
Here, we’re going to make use of auth authentication method this.$auth.loginWith('local', loginData) after which we would use the this.$auth.setUser(userObj) to set the user in our auth instance.
To get the login page working, let’s add the following code to our login.vue file.
methods: {
  async logIn() {
    let data = this.login;
    this.loading = true;
    try {
      let res = await this.$auth.loginWith("local", {
        data
      });
      this.loading = false;
      let user = res.data.data.user;
      this.$auth.setUser(user);
      this.$notify({
        group: "success",
        title: "Success!",
        text: "Welcome!"
      });
    } catch (error) {
      this.loading = false;
      this.$notify({
        group: "error",
        title: "Error!",
        text: error.response
          ? error.response.data.error
          : "Sorry an error occured, check your internet"
      });
    }
  }
}
We created an async function called logIn using the auth method this.$auth.loginWith('local, loginData). If this login attempt is successful, we then assign the user data to our auth instance using this.$auth.setUser(userInfo) and redirect the user to the /my-report page.
You can now get user data using this.$auth.user or with Vuex using this.$store.state.auth.user but that’s not all. The auth instance contains some other properties which you can see if you log in or check your state using your Vue dev tools.
If you log this.$store.state.auth to the console, you’ll see this:
{
  "auth": {
    "user": {
      "id": "d7a5efdf-0c29-48aa-9255-be818301d602",
      "email": "tmxo@test.com",
      "lastName": "Xo",
      "firstName": "Tm",
      "othernames": null,
      "isAdmin": false,
      "phoneNumber": null,
      "username": null
    },
    "loggedIn": true,
    "strategy": "local",
    "busy": false
  }
}
The auth instance contains a loggedIn property that is useful in switching between authenticated links in the nav/header section of your application. It also contains a strategy method that states the type of strategy the instance is running (e.g local).
Now, we will make use of this loggedIn property to arrange our nav links. Update your navBar component to the following:
<template>
  <header class="header">
    <div class="logo">
      <nuxt-link to="/">
        <Logo />
      </nuxt-link>
    </div>
    <nav class="nav">
      <div class="nav__user" v-if="auth.loggedIn">
        <p>{{ auth.user.email }}</p>
        <button class="nav__link nav__link--long">
          <nuxt-link to="/report-incident">Report incident</nuxt-link>
        </button>
        <button class="nav__link nav__link--long">
          <nuxt-link to="/my-reports">My Reports</nuxt-link>
        </button>
        <button class="nav__link" @click.prevent="logOut">Log out</button>
      </div>
      <button class="nav__link" v-if="!auth.loggedIn">
        <nuxt-link to="/login">Login</nuxt-link>
      </button>
      <button class="nav__link" v-if="!auth.loggedIn">
        <nuxt-link to="/register">Register</nuxt-link>
      </button>
    </nav>
  </header>
</template>
<script>
import { mapState } from "vuex";
import Logo from "@/components/Logo";
export default {
  name: "nav-bar",
  data() {
    return {};
  },
  computed: {
    ...mapState(["auth"])
  },
  methods: {
    logOut() {
      this.$store.dispatch("logOut");
      this.$router.push("/login");
    }
  },
  components: {
    Logo
  }
};
</script>
<style></style>
In our template section, we have several links to different parts of the application in which we are now using auth.loggedIn to display the appropriate links depending on the authentication status. We have a logout button that has a click event with a logOut() function attached to it. We also display the user’s email gotten from the auth property which is accessed from our Vuex store using the mapState method which maps our state auth to the computed property of the nav component. We also have a logout method that calls our Vuex action logOut and redirects the user to the login page.
Now, let us go ahead and update our store to have a logOut action.
export const actions = {
    // ....
  logOut() {
    this.$auth.logout();
  }
}
The logOut action calls the auth logout method which clears user data, deletes tokens from localStorage and sets loggedIn to false.
Routes like /my-reports and report-incident should not be visible to guests but at this point in our app, that is not the case. Nuxt does not have a navigation guard that can protect your routes, but it has is the auth middleware. It gives you the freedom to create your own middleware so you can configure it to work the way you want.
It can be set in two ways:
- Per route.
- Globally for the whole app in your
nuxt.config.jsfile.
router: {
  middleware: ['auth']
}
This auth middleware works with your auth instance so you do not need to create an auth.js file in your middleware folder.
Let us now add this middleware to our my-reports.vue and report-incident.vue files. Add the following lines of code to the script section of each file.
middleware: 'auth'Now, our application would check if the user trying to access these routes has an auth.loggedIn value of true. It’ll redirect them to the login page using our redirect option in our auth config file — if you’re not logged in and you try to visit either /my-report or report-incident, you would be redirected to /login.
If you go to /report-incidents, this is what you should see.
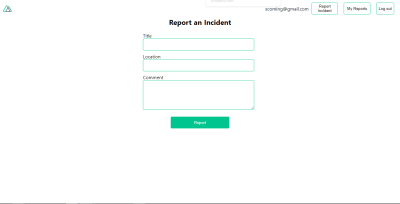
This page is for adding incidents but that right now the form does not send incident to our server because we are not making the call to the server when the user attempts to submit the form. To solve this, we will add a reportIncident method which will be called when the user clicks on Report. We’ll have this in the script section of the component. This method will send the form data to the server.
Update your report-incident.vue file with the following:
<template>
  <section class="report">
    <h1 class="report__heading">Report an Incident</h1>
    <form class="report__form">
      <div class="input__container">
        <label for="title" class="input__label">Title</label>
        <input
          type="text"
          name="title"
          id="title"
          v-model="incident.title"
          class="input__field"
          required
        />
      </div>
      <div class="input__container">
        <label for="location" class="input__label">Location</label>
        <input
          type="text"
          name="location"
          id="location"
          v-model="incident.location"
          required
          class="input__field"
        />
      </div>
      <div class="input__container">
        <label for="comment" class="input__label">Comment</label>
        <textarea
          name="comment"
          id="comment"
          v-model="incident.comment"
          class="input__area"
          cols="30"
          rows="10"
          required
        ></textarea>
      </div>
      <input type="submit" value="Report" class="input__button" @click.prevent="reportIncident" />
      <p class="loading__indicator" v-if="loading">Please wait....</p>
    </form>
  </section>
</template>
<script>
export default {
  name: "report-incident",
  middleware: "auth",
  data() {
    return {
      loading: false,
      incident: {
        type: "red-flag",
        title: "",
        location: "",
        comment: ""
      }
    };
  },
  methods: {
    async reportIncident() {
      let data = this.incident;
      let formData = new FormData();
      formData.append("title", data.title);
      formData.append("type", data.type);
      formData.append("location", data.location);
      formData.append("comment", data.comment);
      this.loading = true;
      try {
        let res = await this.$store.dispatch("reportIncident", formData);
        this.$notify({
          group: "success",
          title: "Success",
          text: "Incident reported successfully!"
        });
        this.loading = false;
        this.$router.push("/my-reports");
      } catch (error) {
        this.loading = false;
        this.$notify({
          group: "error",
          title: "Error!",
          text: error.response
            ? error.response.data.error
            : "Sorry an error occured, check your internet"
        });
      }
    }
  }
};
</script>
<style>
</style>
Here, we have a form with input fields for title, location, and comment with two-way data binding using v-model. We also have a submit button with a click event. In the script section, we have a reportIncident method that collects all the information provided in the form and is sent to our server using FormData because the API is designed to also accept images and videos.
This formData is attached to a Vuex action using the dispatch method, if the request is successful, you get redirected to /my-reports with a notification informing you that this request was successful otherwise, you would be notified of an error with the error message.
At this point, we don’t have reportIncident action in our store yet so in your browser console, you would see an error if you try to click submit on this page.
![error message that reads ‘[Vuex] unknown action type: reportIncident'](https://res.cloudinary.com/indysigner/image/fetch/f_auto,q_auto/w_400/https://cloud.netlifyusercontent.com/assets/344dbf88-fdf9-42bb-adb4-46f01eedd629/3f5d686f-0554-4ab4-aae5-0b3f154a0abb/07-action-error-message.png)
To fix this, add the reportIncident action your index.js file.
export const actions = {
  // ...
  async reportIncident({}, data) {
    let res = await this.$axios.post('/incident/create', data)
    return res;
  }
}
Here, we have a reportIncident function that takes in an empty context object and the data we’re sending from our form. This data is then attached to a post request that creates an incident and returns back to our report-incident.vue file.
At this point, you should be able to add a report using the form after which you would be redirected to /my-reports page.
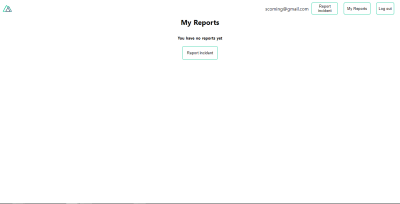
This page should display a list of incidents created by the user but right now it only shows what we see above, let’s go ahead to fix that.
We’re going to be using the fetch method we learned about to get this list. Update your my-reports.vue file with the following:
<script>
import incidentCard from "@/components/incidentCard.vue";
export default {
  middleware: "auth",
  name: "my-reports",
  data() {
    return {
      incidents: []
    };
  },
  components: {
    incidentCard
  },
  async fetch() {
    let { data } = await this.$axios.get("/user/incidents");
    this.incidents = data.data;
  }
};
</script>
Here, we use fetch method to get user-specific incidents and assign the response to our incidents array.
If you refresh your page after adding an incident, you should see something like this.
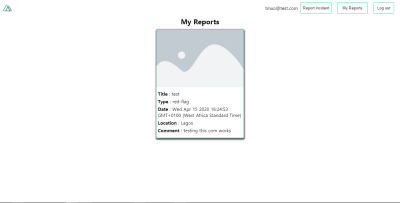
At this point, we would notice a difference in how fetch method and asyncData loads our data.
Conclusion
So far, we have learned about the Axios module and all of its features. We have also learned more about asyncData, and how we can fetch both of them together despite their differences. We’ve also learned how to perform authentication in our application using the auth module and how to use the auth middleware to protect our routes. Here are some useful resources that talk more about all we’ve covered.
- Getting started with meta tags in Nuxjs.
- Using the dotenv module in Nuxt.
- Using Fetch in your Nuxt app.
- Getting started with asyncData.
Resources
- “Auth Module,” NuxtJS.org
- “Axios Module: Introduction,” NuxtJS.org
FormData, MDN web docs- “API: The
asyncDataMethod,” NuxtJS.org - “The Vue Instance: Lifecycle Diagram,” VueJS.org
- “Understanding How
fetchWorks In Nuxt 2.12,” NuxtJS.org
(ks, ra, yk, il)