Archive

Archive for June, 2020

CSS :is() and :where() are coming to browsers

June 10th, 2020 No comments

Šime Vidas with the lowdown on what these pseudo-selectors are and why they will be useful:

  • :is() is to reduce repetition¹ of parts of comma-separated selectors.
  • :where() is the same, but nothing inside it affects specificity. The example of wrapping :where(:not()) is really great, as now there is a way to use :not() without bumping up the selector weight in a way you very likely don’t want.
  1. This is something that CSS preprocessors are good at (via nesting). Another nice little example of community-built tech pushing forward and native tech coming up later to help once the idea is fleshed out.

Direct Link to ArticlePermalink

The post CSS :is() and :where() are coming to browsers appeared first on CSS-Tricks.

Categories: Designing, Others Tags:

Mirage JS Deep Dive: Understanding Timing, Response And Passthrough (Part 3)

June 10th, 2020 No comments
Smashing Editorial

Mirage JS Deep Dive: Understanding Timing, Response And Passthrough (Part 3)

Mirage JS Deep Dive: Understanding Timing, Response And Passthrough (Part 3)

Kelvin Omereshone

2020-06-10T12:30:00+00:00
2020-06-15T05:34:05+00:00

Mirage JS was built to give frontend developers the ability to simulate actual backend API calls. So far, we have seen how we can create records with Mirage, intercept API requests via route handlers and, last but not least, how the shape of the data returned to us from Mirage is affected.

In this part of the series, we will see Mirage mechanism for simulating other aspects of an actual backend server like slow network, HTTP status code response, and also making requests to an actual backend even though Mirage is intercepting your frontend requests.

Let’s begin by simulating slow network requests.

Timing

When developing your frontend application that relies on a backend API, it’s useful to see how your application behaves under slow networks (think about testing loading messages and loaders). This test is important because requests to backend API are asynchronous in nature. What this means is that we can’t make assumptions about when we will get the response so we need to write our code as if it might come immediately, or there might be a delay.

A common reason for a delay in response is a slow Internet connection. It is then really important to know how your app would behave in such circumstances. Mirage caters to this need by making available a timing option which is a property passed to a route handler that tells the handler to wait for a particular duration specified by the timing option (in milliseconds) before returning a response whenever the route it is handling is called.

Note: By default, Mirage is setting a 400ms delay for the server during development and 0 during testing so your tests can run faster (no one really enjoys slow tests).

We now know in theory how to customize Mirage’s server response time. Let’s see a couple of ways to tweak that response time via the timing option.

timing On routes()

As earlier stated, Mirage sets a default delay for the server response time to be 400ms during development and 0 for tests. You could override this default on the routes method on the Server instance.

In the example below, I am setting the timing option to 1000ms in the routes method to artificially set the response delay for all routes:

import { Server } from 'miragejs'

new Server({
    routes() {
        this.routes = 1000
    }
})

The above tells Mirage to wait for 1000 milliseconds before returning a response. So if your front-end make a request to a route handler like the one below:

this.get('/users', (schema) => {
    return schema.users.all();
});

Mirage will take 1000 milliseconds to respond.

Tip: Instead of directly using the schema object, you could use ES 6 object restructuring to make your route handler cleaner and shorter like below:

this.get('/users', ({ users }) => {
    return users.all()
}

timing For Individual Routes

Although the this.timing property is useful, in some scenarios you wouldn’t want to delay all your routes. Because of this scenario, Mirage gives you the ability to set the timing option in a config options object you could pass at the end of a route handler.
Taking our above code snippets, let’s pass the 1000ms response delay to the route itself as opposed to globally setting it:

this.get('/users', ({ users }) => {
  return users.all();
 }, { timing: 1000 });

The result is the same as globally assigning the timing. But now you have the ability to specify different timing delays for individual routes. You could also set a global timing with this.timing and then override it in a route handler. Like so:

this.timing = 1000

this.get('users', ( { users } ) => {
    return users.all()
})

this.get('/users/:id', ({ users }, request) => {
    let { id } = request.params;
     return users.find(id);
 }, { timing: 500 });

So now when we make a request to /users/1, it will return the below user JSON in half of the time (500ms) it would take for every other route.

{
  "user": {
    "name": "Kelvin Omereshone",
    "age": 23,
    "id": "1"
  }
}

Passthrough

Route handlers are the Mirage mechanism for intercepting requests your frontend application makes. By default, Mirage will throw an error similar to the one below when your app makes a request to an endpoint that you haven’t defined a Route handler for in your server instance.

Error: Mirage: Your app tried to GET '/unknown', but there was no route defined to handle this request. Define a route for this endpoint in your routes() config. Did you forget to define a namespace?

You can, however, tell Mirage that if it sees a request to a route that you didn’t define a route handler for, it should allow that request to go through. This is useful if you have an actual backend and you want to use Mirage to test out endpoints that haven’t been implemented yet in your backend. To do this, you would need to make a call to the passthrough method inside the routes methods in your Mirage server instance.

Let’s see it in code:

import { Server } from 'miragejs'

new Server({
    routes() {
        // you can define your route handlers above the passthrough call
        this.passthrough()
    }
})

Note: It is recommended keeping the call to passthrough at the bottom in order to give your route handlers precedence.

Now when Mirage sees requests to a route that you didn’t define in Mirage, it would let them “passthrough”. I really find this useful because it makes Mirage play nicely with an actual backend. So a scenario would be, you are ahead of your backend team and you want to make a request to an endpoint that you don’t have in your production backend, you could just mock out that endpoint in mirage and because of the passthrough option, you wouldn’t need to worry about other parts of your app making requests failing.

Using passthrough To Whitelist Route

passthrough takes in options to allow you to have more control over routes you want to whitelist. So as opposed to calling passthrough without any option and allowing routes not present in mirage to passthrough, you can pass in one or more strings of the routes you want to whitelist to passthrough. So if we want to whitelist /reviews and /pets we can do that using passthrough like so:

this.passthrough('/reviews', '/pets)

You can also do multiple calls to passthrough:

this.passthrough('/reviews')
this.passthrough('/pets')

Note: I find passing multiple route strings to passthrough cleaner as opposed to making multiple calls. But you are free to use whatever feels natural to you.

Using passthrough On A Set Of HTTP Verbs

The above passthrough we defined will allow all HTTP verbs (GET, POST, PATCH, DELETE) to passthrough. If your use case requires you to allow a subset of the HTTP verbs to passthrough, Mirage provides an options array on the passthrough method wherein you pass the verbs you want Mirage to whitelist on a particular route. Let’s see it in code:

// this allows post requests to the /reviews route to passthrough
this.passthrough('/reviews', ['post']);

You could also pass multiple strings of routes as well as the HTTP verbs array like so:

// this allows post and patch requests to /reviews and /pets routes to passthrough

this.passthrough('/pets', 'reviews', ['post', 'patch'])

Response

Now you see the level of customization Mirage gives you with both the timing option and passthrough method, it feels only natural for you to know how to customize the HTTP status code Mirage sends for the requests you make. By default, Mirage would return a status of 200 which says everything went fine. (Check out this article for a refresher on HTTP status code.) Mirage, however, provides the Response class which you can use to customize the HTTP status code as well as other HTTP headers to be sent back to your frontend application.

The Response class gives you more control over your route handler. You can pass in the following to the Response class constructor:

  • The HTTP status code,
  • HTTP Headers,
  • Data (a JSON payload to be returned to the frontend).

To see how the Response class works, we would start on an easy note by rewriting our previous route handler using the Response class. So we would take the below route handler:

this.get('users', ( { users } ) => {
return users.all()
})

and then reimplement using the Response class. To do this we first need to import the Response class from Mirage:

import { Response } from 'miragejs'

We would then rewrite our route handler using the Response class:

this.get('/users', ({ users }) => {
    return new Response(200, {}, users.all());
});

Note: We are passing an empty {} to the header argument because we are do not want to set any header values for this response.

I believe we can infer that Mirage under the hood uses the Response class when we previously returned users.all() because both implementations would act the same way and return the same JSON payload.

I will admit the above use of Response is a little bit verbose because we are not doing anything special yet. However, the Response class holds a world of possibility to allows you to simulate different server states and set headers.

Setting Server States

With the Response class, you can now simulate different server states via the status code which is the first argument the Response constructor takes. You can now pass in 400 to simulate a bad request, 201 to simulate the created state when you create a new resource in Mirage, and so on. With that in mind, let’s customize /users/:id route handler and pass in 404 to simulate that a user with the particular ID was not found.

this.get('/users/:id', (schema, request) => {
   let { id } = request.params;
   return new Response(404, {}, { error: 'User with id ${id} not found'});
});

Mirage would then return a 404 status code with the error message similar to the below JSON payload:

{
  "error": "User with id 5 not found"
}

Setting Headers

With the Response class, you can set response headers by passing an object as the second argument to the Response constructor. With this flexibility, you can simulate setting any headers you want. Still using our /users/:id route, we can set headers like so:

this.get('/users/:id', (schema, request) => {
     let { id } = request.params;
     return new Response(404, {"Content-Type" : "application/json", author: 'Kelvin Omereshone' }, { error: `User with id ${id} not found`});
});

Now when you check Mirage logs in your browser console, you would see the headers we set.

Wrapping Up

In this part of the Mirage JS Deep Dive series, I have expounded three mechanisms that Mirage exposes to its users in order to simulate a real server. I look forward to seeing you use Mirage better with the help of this article.

Stay tuned for the next and final part of the series coming up next week!

  • Part 1: Understanding Mirage JS Models And Associations
  • Part 2: Understanding Factories, Fixtures And Serializers
  • Part 3: Understanding Timing, Response And Passthrough

(ra, il)

Categories: Others Tags:

Mobile App Marketing: How To Make Your New App Visible To Potential Customers

June 10th, 2020 No comments

If a website wants to be visible on Google, it needs a good SEO strategy. The same story goes for mobile apps, only this time it needs an ASO strategy – basically, how to get your app visible in the app store.

It doesn’t matter how awesome, how user-friendly or how useful your app is. If no one can see it, no one will download it. While this can be a source of great frustration, it doesn’t have to be. This article will explain ways of boosting visibility and attracting customers that will download your app.

Nail Your App’s Name

Your app’s name can make or break your downloads, and thus your visibility. A good name must:

  • Be short (short is easier to read, but it also means your title won’t get truncated by the App store, where titles are capped at 255 characters)
  • Be memorable
  • Be searchable
  • Connect with your customers’ emotions
  • Reflect your app’s main features (think of WeChat or Survey Junkie)

Try not to over complicate things and be too clever when naming your app, too.

Make Sure Your App Is Localised

A lot of companies make the mistake of having their app available in just one language. While this is useful to some of your audience, it’s obviously not useful to all of it.

Take a look at your analytics to see where most of your website visitors/customers are coming from. It’s very likely that you’ll find they’re visiting from a variety of different countries.

In that case, It’s a good idea to convert your app into numerous languages. Start with your most popular audiences so that you reach a global customer base. Talk to your developers so that they can create new language versions for each file.

Boost Your App Reviews

Nothing nudges a customer towards a sale quite like social proof. According to research, 91% of customers read online reviews, while as many as 84% of them trust online reviews. This means that you need to encourage as many positive reviews as possible.

The more positive reviews, testimonials, and ratings your app have, the more popular it will be.

One way to boost reviews is to email your app users a week or so after they’ve downloaded your app, politely asking them if they’ll kindly leave a review.

Another way is to incentivise users to leave a review by, for example, offering them something in exchange, such as a free gift of the chance to win something.

It also makes sense to keep replying to your reviews. This is especially true in the case of negative reviews. While all negative reviews might seem like a bad thing, a negative review that’s left on the table without a response is much worse than a negative review that the company has at least replied to. By replying to a negative review, you’re showing that you’re listening and that you care.

When you do reply to negative reviews, make sure to show empathy and understanding, and make sure to demonstrate that you’re doing all you can to fix the issue (if the customer is right). Never get drawn into an argument or go on the defensive.

Image source

Optimise Your Description

Your description is key when it comes to hooking folk who are trawling through the app store. It’s really important that it isn’t too long, that contains your main keyword, and that it gets to the point by directly explaining exactly what your app is about.

Take your time to nail your best features. Concentrate on the most important ones first.

Do your keyword research so that you know what people are searching for, too. You can use a tool like SearchMan.

It’s also a good idea to use conversational language and to explain how your app will benefit the end-user. Who’s it for and why do they need it?

MailChimp did a good job with their description

Create a Compelling App Icon

There are a lot of apps available in the app store. Without wanting to scare you, the numbers go way above a million.

A great way to ensure that your stands out from the rest is to create an eye-catching icon that no one can ignore.

A fabulous mobile icon must be unique, and it should ideally contain just 2 colours at the most. Avoid using photo images and avoid using too much text.

Overall? Be creative.

If you think creating a top-notch mobile app is beyond you, hire a graphic designer or illustrator to do it for you. You can use websites like Upwork to reach out to professionals.

Whatever you do, make sure you stick to Apple’s rules when it comes to icon sizes. Once you know the rules, you’re free to focus on the design.

Encourage User-Generated Content

User-generated content is another form of social proof that’s super powerful. It’s when your customers do the marketing for you by creating content that shows off the practical benefits of your app.

It works because other users want to see your app in action, and they want to see what it’s doing for others. If they can see that other people just like them are getting a lot of value out of it, they’ll probably be inclined to go ahead and download it, too.

Simply get in touch via email or social media with satisfied customers to see if they’d be open to creating a bit of content for you. Talk to them about what you need and what your company’s values are.

If your app is still fairly new and you’re struggling to find users who are up for this, consider asking family and friends.

Once you’ve got your content, you can use a tool like Quuu to promote it on social media.

Optimise Your App Store Listing With Feature Screenshots

App users are visual, which is why it’s so important that you add screenshots of your app.

The app store lets you upload 5 screenshots at the most, so you may as well use all 5. That said, it’s your first 3 screenshots that will be seen the most by users, which is why you need to pick the best 3 first. These are your visual selling points that can make or break your downloads and visibility.

WeChat optimise their app download page by adding screenshots

Conclusion

Now that you’ve got a great app and know how to make it more visible, there’s only one thing left to do – take action on the tips in this article and drum up a buzz around your app. As long as you do the right things, and as long as your app really is awesome, there’s no reason your download numbers can’t skyrocket. Then, it’s a case of making sure users stay engaged with it so that conversions improve, too.

Categories: Others Tags:

Proven Free Trial Approaches for Growing Your SaaS

June 10th, 2020 No comments

If a free trial model is executed well, it can become your new secret weapon for lowering your CAC (Customer Acquisition Cost) and increasing conversion rates. However, that level of success doesn’t come without its fair share of challenges. What if you lose money? How do you avoid freeloaders? Which free trial model should you choose?

If you’re looking to dive deeper into the free trial models that have swept across the SaaS industry, look no further. Here are the 4 top free trial models for SaaS and how to overcome common roadblocks related to them:

1. Full Access Free Trial (No Credit Card Required)

You might’ve heard this explained as an opt-in free trial.

It’s one of the most popular free trial models that exist today. It’s when the customer is given full access to the software for a limited amount of time. Free trial lengths usually range from 7 to 30 days. During this time, the user has time to poke around and check out all the nooks and crannies of the software with no limitations.

A full access free trial can be a great fit if you’re confident in your product and sales funnel. From a user’s perspective, it’s comforting to know that they can try the software before committing to purchasing it. According to data from Totango, there’s more potential for higher end-to-end conversion rates. That means higher free trial conversion, higher paid user conversions, and higher retention rates.

However, beware of freeloaders! If your SaaS product is something someone will only use once or twice, then a full access free trial would give them no reason to upgrade. In this case, a freemium model might be more fitting, which I’ll dive into a bit later.

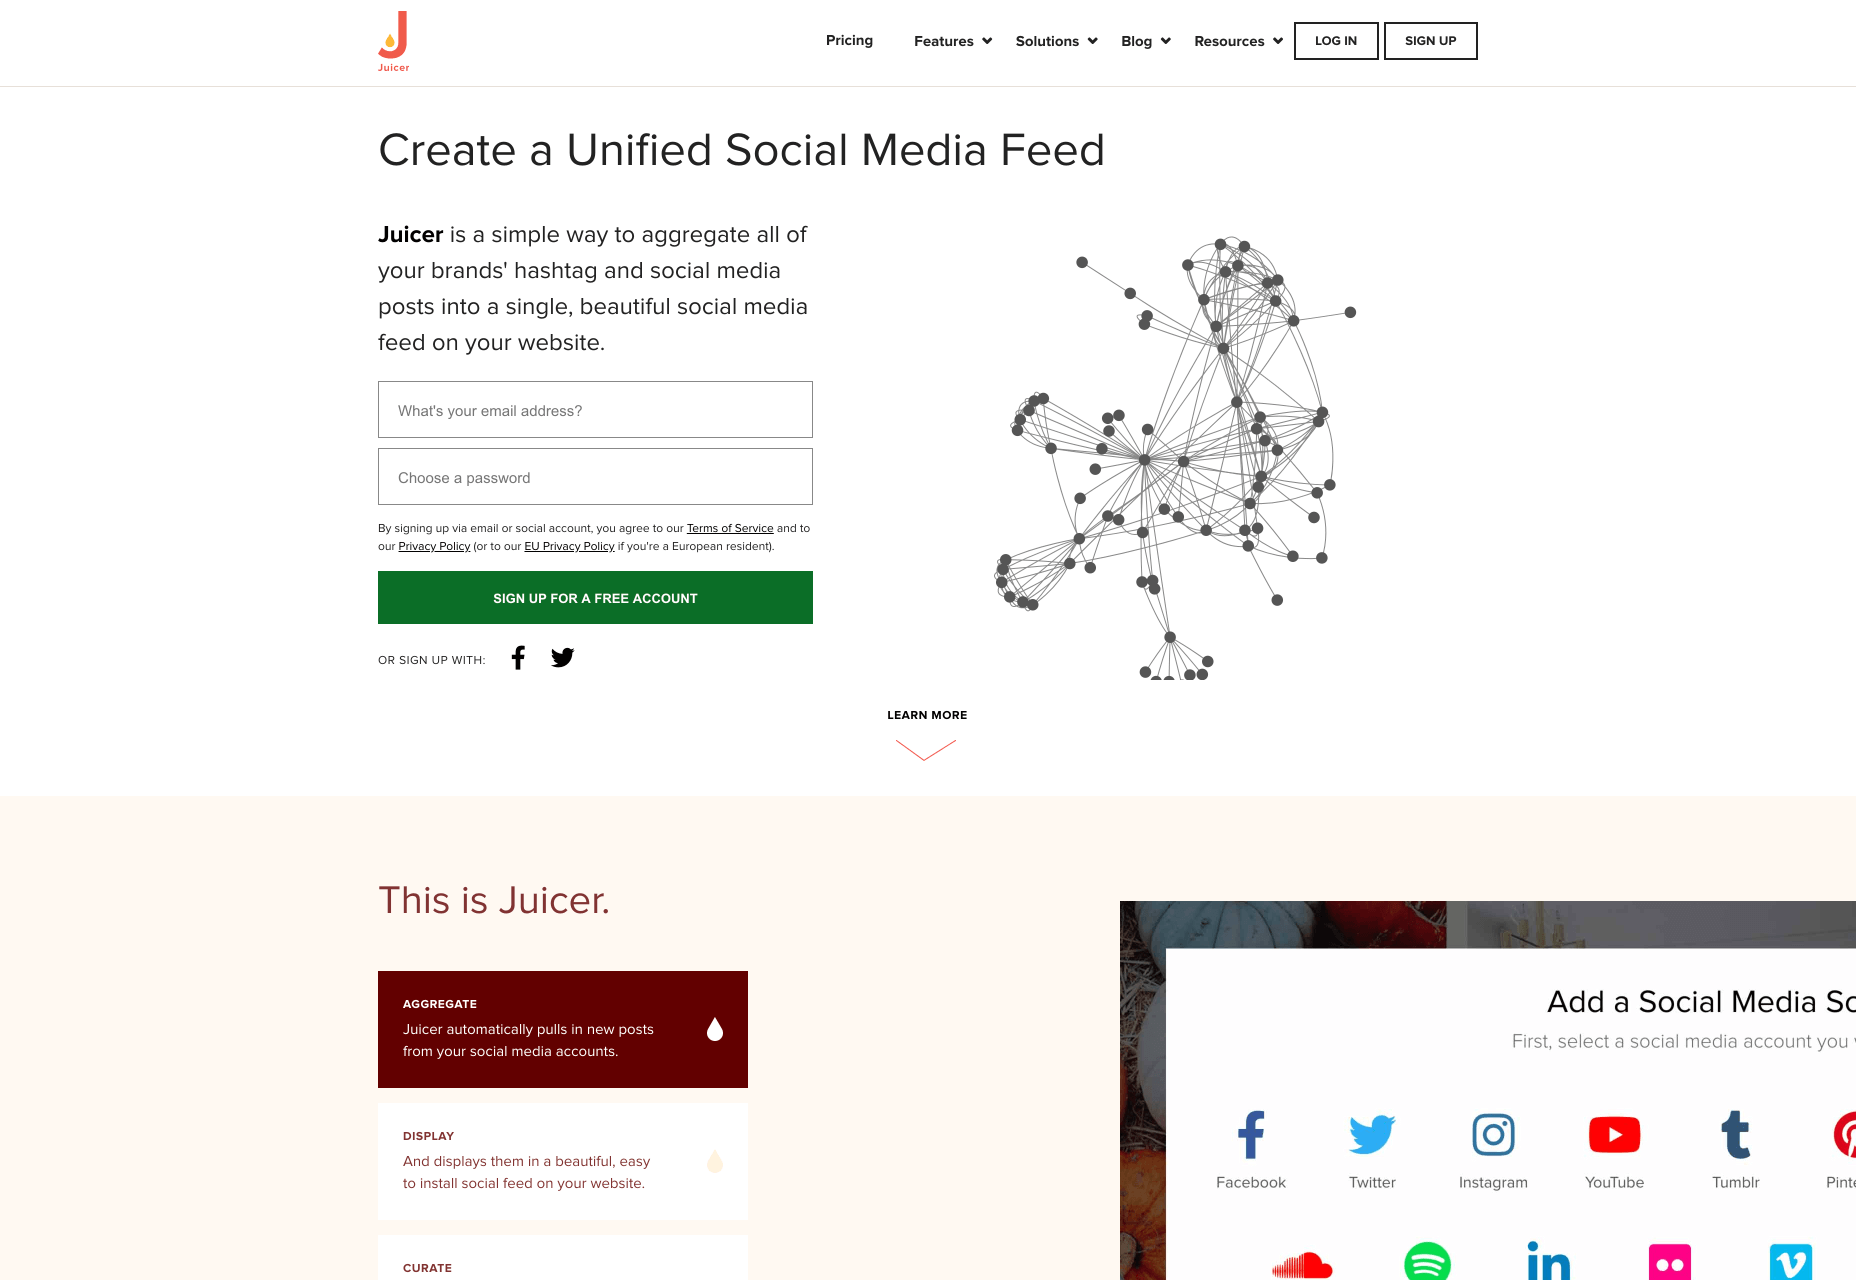
For web designers, an opt-in free trial model is your chance to create a fully seamless registration process. Juicer is a social media aggregator that serves as a great example for an easy free trial conversion. All that’s required to get started is an email and password.

It can be tempting to try and capture all of your customer’s data like their birthday, company name, and reason for signing up, but just remember that each extra step adds friction to the sign up process.

2. Full Access Free Trial (Credit Card Required)

Similar to the previous free trial model, except this one requires a credit card. This is also known as an opt-out free trial.

If your SaaS business is struggling with free trial to paid conversions, it can be tempting to require leads to enter their credit card details before starting their free trial. I get it, but just be aware that it can be a challenge to get free trial conversions if you choose this method.

Trust is a huge factor here. For example, potential leads might not trust a relatively unknown SaaS company with their credit card details. More well known brands or websites that prominently display social trust signals might have better luck in the trust department with new website visitors.

Even social trust signals aren’t likely to be enough, though. Be prepared to invest heavily into inbound marketing if you choose this method. While both the opt-in and opt-out methods will require inbound marketing to be successful, you’ll probably need to spend more time educating your audience first if you want them to give you their credit card details. With the opt-in method, you have a bit more time to educate potential customers once they’ve started their free trial.

Additionally, your marketing communication and user experience has to be on point. If you choose this option, you’ll have to be extremely careful to make the cancellation process as seamless as possible.

3. Live Demo Free Trial

Some SaaS products might not benefit from an opt-in or opt-out free trial. These might include products with complex processes, those that require implementation before the product can be used, the need for training, or any other sort of convoluted process that requires specialised knowledge. Not everyone has time to learn how to use your product, so you may overwhelm users if you allow them to explore your product on their own.
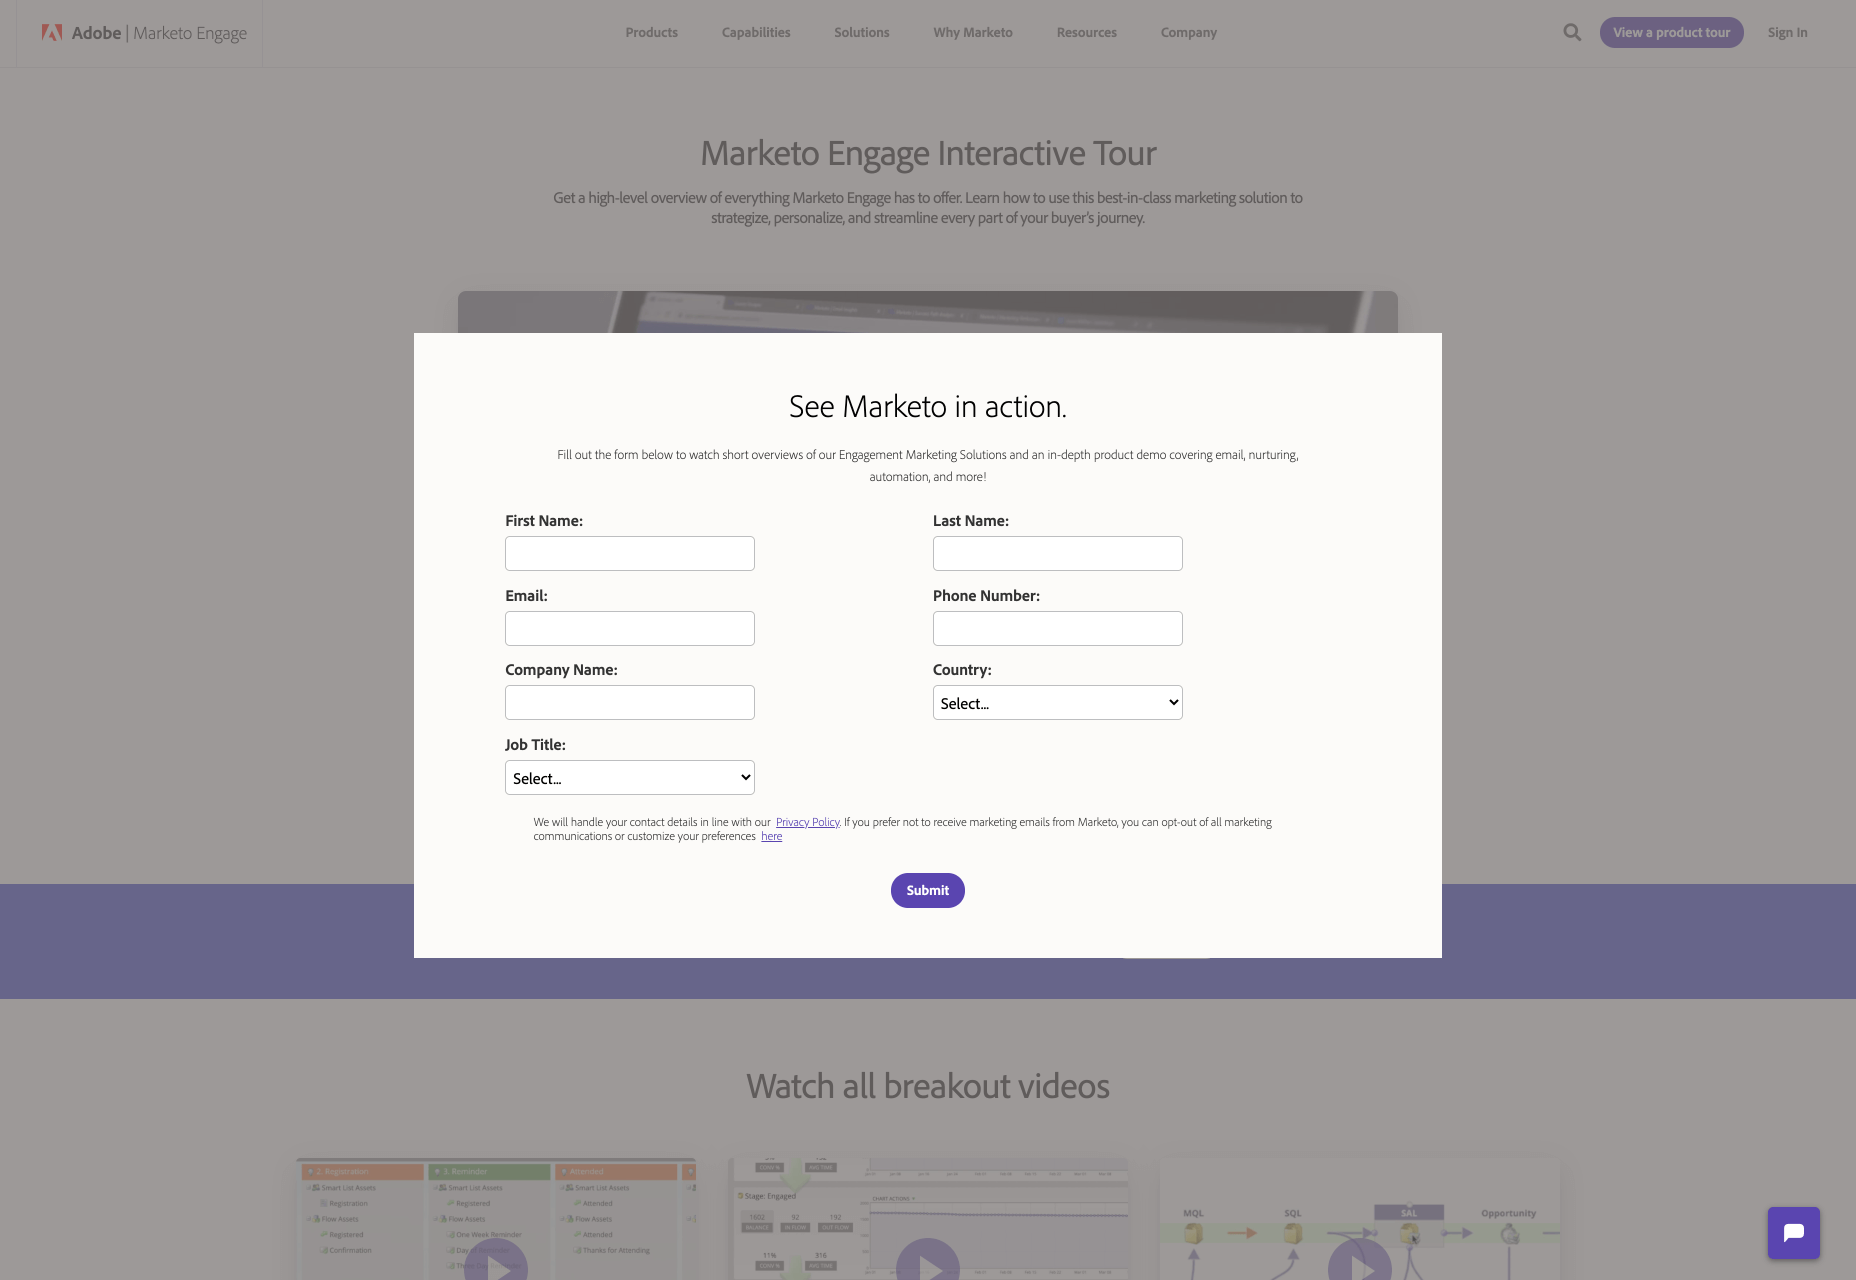
Complicated SaaS products may benefit from a live demo free trial. Companies can offer a free demonstration of the product, like Marketo does. Sometimes a live demo is paired with a “sandbox demo” which allows users to play around in the software in a controlled setting.

Alternatively, companies can offer a choice between a demo and a free trial, like Hubspot. It’s also worth noting that Hubspot features a vast learning center and top-tier support which gives them the flexibility to offer their complicated software as a free trial DIY version.

Along with the live demo or blended demo model, you can offer other ways to engage potential customers with a complex SaaS product. You can try:

  • Email courses
  • Explainer videos
  • Q&A sessions
  • Webinars

4. Freemium

The freemium model is a great way to mitigate some of the concerns with full access free trials. For example, you can restrict access to certain features if you’re concerned about giving too much value away in a full access free trial. Here are some of the most popular types of freemium models for SaaS:

Limited Features

Limited feature freemium models are what most people are referring to when they say “free forever” models. These types of freemium models offer certain features for free.

Many email marketing platforms offer limited access to their product for free, and Mailchimp does this exceptionally well.

With a quick glance, you can see a free plan is available with a variety of different plans also available for upgrade. If you scroll down their website, you’ll find the features of each plan clearly explained. The logistics of how this works will be different for every business, so you’ll have to decide which features you’ll offer for free.

For example, is your product mainly used by teams? If so, you could consider offering 1 account for free with more accounts available with an upgrade. This allows one core team member to try out your product and report back their findings to their team before making a purchase.

Usage Limitations & Credit Systems

Usage limitations and credit system freemium models are essentially the same. They involve either limiting usage or providing credits for limited usage. It comes down to a difference in customer-facing language. For example:

  • Usage Limitation: Get 3 Free Audiobooks!
  • Credit System: Get 9 Free Audiobook Credits (Worth 3 Audiobooks)!

Companies like Dropbox and PDF Pro operate from a usage limitation freemium model. With Dropbox, you get a certain amount of storage space before you have to pay; with PDF Pro, you can create, edit, and/or convert 3 PDF files for free before paying for more.

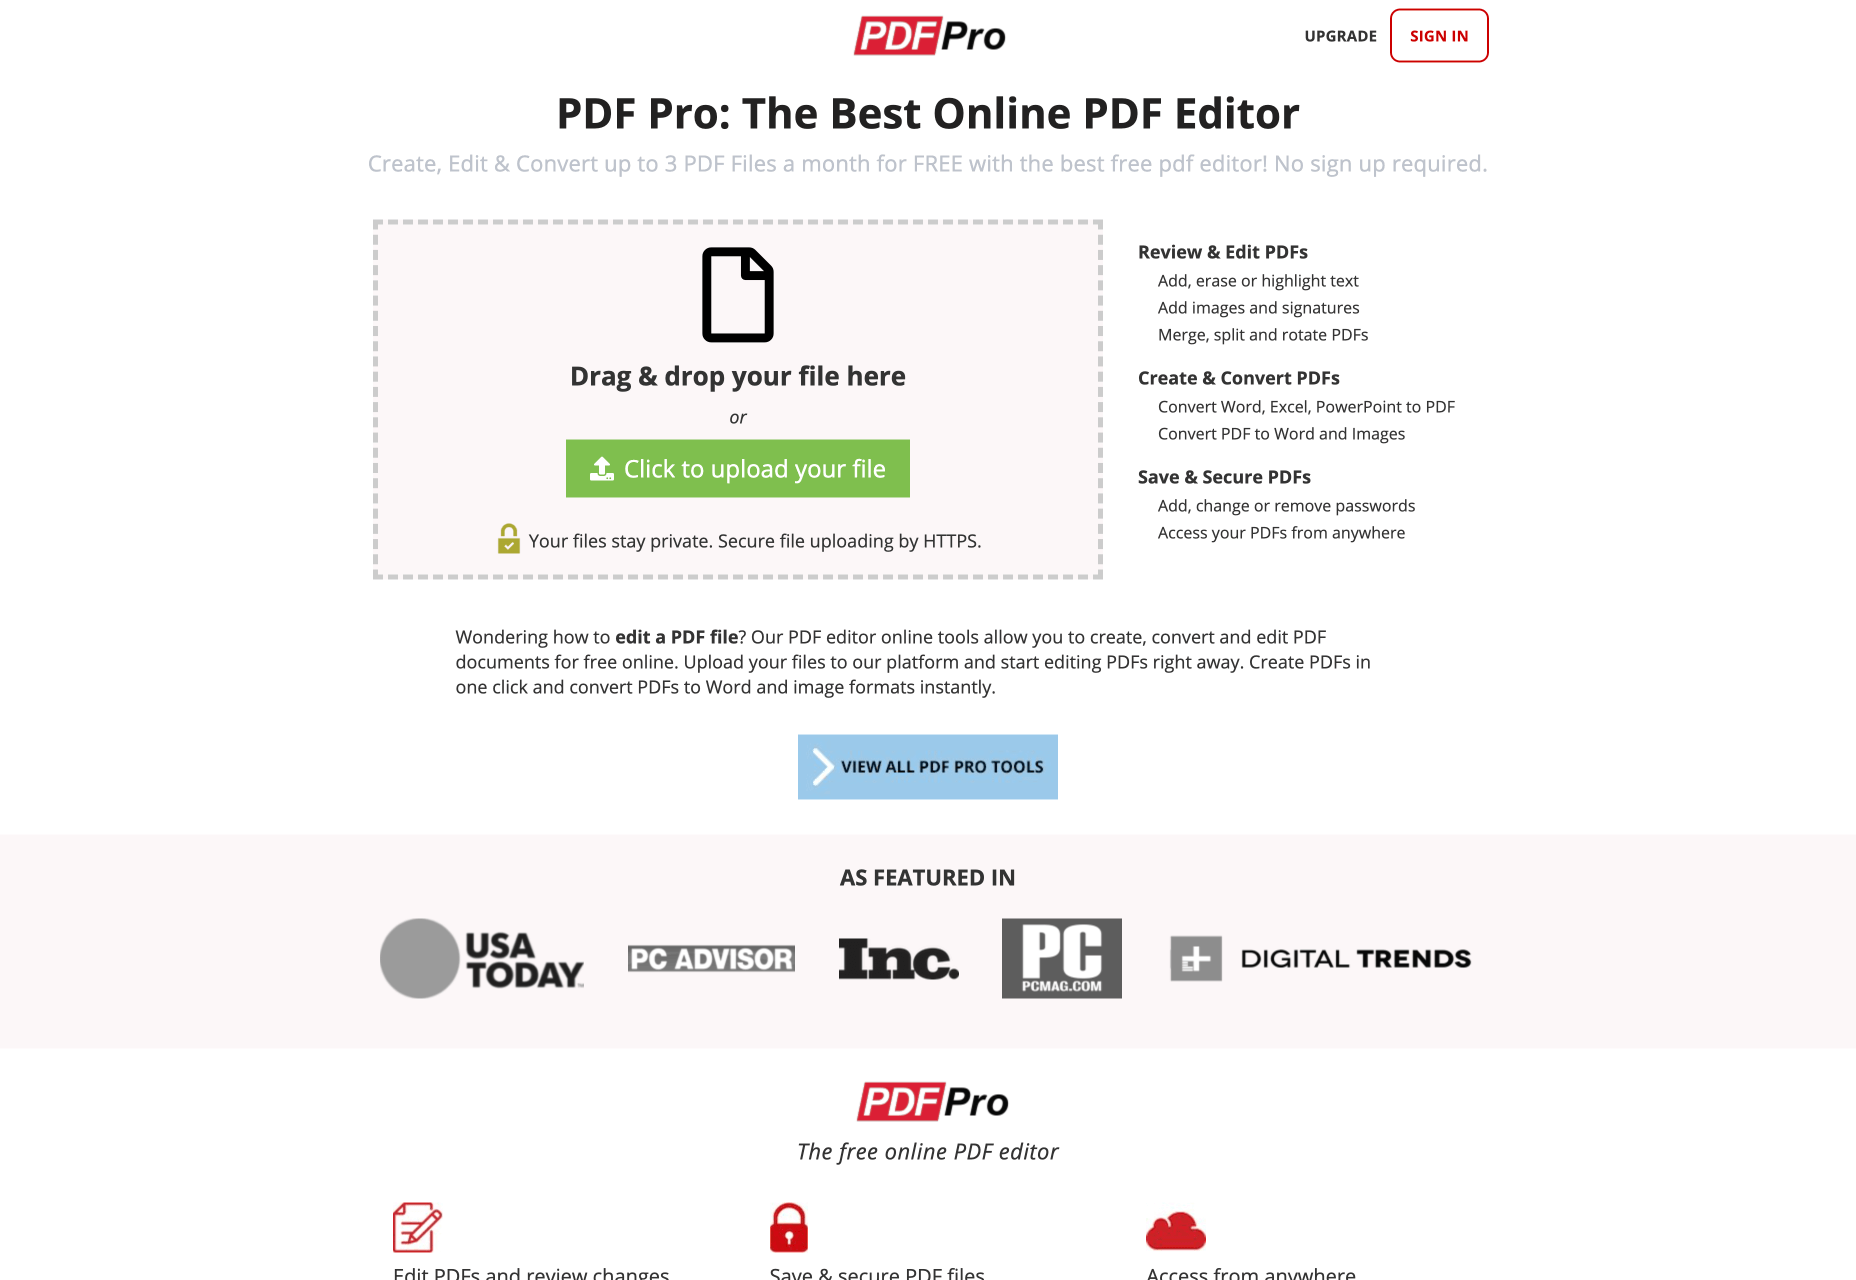
Usage limitation freemium models are generally straightforward and can allow for a great user experience. Just make sure that it’s communicated from the get-go that the user gets a certain amount of access to the product for free, but has to pay for more. Popular buzz terms like “free forever” can attract users, but ultimately lead to wrong assumptions later down the line.

Like the limited feature model, this is a great freemium model for SaaS products that need to strike a delicate balance between giving away too much and too little.

Advertisement Removal

Upgrading to remove ads is a popular freemium model with mobile games, entertainment services, blogs, and news sites. Some upgrades simply involve removing ads from the sidebar so you don’t have to see them. Other upgrades include removing the ads from interrupting the user experience. For example, a game that requires you to watch 30 seconds of an advertisement every 2 minutes would interfere with your experience playing the game.

You’ll have to be especially careful here if you want to ensure a pleasant experience for all users. Readers who visit a news website but are asked to pay in order to view the content might just leave the website and never come back. Mobile game players who are constantly plagued by ads might uninstall the game altogether. As with the rest of the freemium models, you’ll want to strike a balance between free and paid features that’s both fair and enjoyable.

Fully Functional

Sometimes companies toe the line between freeware and freemium. A great example of a fully functional freemium product is Skype. The core product is fully functional and requires no upgrade to use its full functionality. However, their business model is built around offering upgrades such as Skype credits and monthly subscriptions. Skype’s add-ons are not upgrades which detract from the main use of their product. Also, their add-ons are not heavily promoted to free users unless they’re looking for extra features.

Don’t feel locked into any of these boxes when it comes to choosing a freemium model for SaaS products. Blend credit systems with limited features. Try pairing opt-in free trials with demos if it makes sense. Feel free to try whatever works for your business.

Common Roadblocks with Free Trial Models

There are multiple ways free trial models can go haywire. Think something along the line of angry customers wanting a refund to a sudden drop in conversion rates. The goal here is to not panic, re-evaluate your situation, and make changes as necessary. Avoid making drastic changes as soon as you encounter the slightest issue. New systems take a while to work out all of the kinks. This is not meant to be one-size-fits-all advice, so test what works for your SaaS business.

Free Trial Users Aren’t Upgrading

There are a variety of reasons why your paid conversions might not be up to snuff. Before you panic, answer these two questions:

  1. Did you ask for the sale?
  2. Did you make it as easy as possible for the sale to happen?

If you answered no to either of those questions, try to remedy these problems before making drastic changes. It’s common to be hesitant to ask directly for an upgrade in fear of coming across pushy or aggressive. Sometimes this even flows over into design elements subconsciously. Things like small “Upgrade” buttons can easily be missed by users. Be bold, but not annoying. Don’t hesitate to let your users know what you offer and how it can help them!

It’s also possible that free trial users simply don’t know the benefits of upgrading. Have the benefits been displayed prominently on relevant web pages or delivered through an email campaign?

It should go without saying that you shouldn’t make it hard for your customers to upgrade. Customers should be able to upgrade in a matter of 2-3 clicks. Unless you’re dealing with a complicated SaaS product that requires a personal sales hand-off or an additional demo, try to keep the process as simple as possible.

Lastly, be aware that it is possible to give away too much value in a free trial. If users don’t see any reason to upgrade, then they won’t. It’s a balancing act between choosing enough to give away to encourage sign ups and keeping enough behind the paywall so that upgrading is worth it.

Too Many Customers Are Demanding a Refund

Again, there are many reasons customers could demand a refund. Maybe you’re targeting the wrong customers or underdelivering what you’ve promised to them.

Another culprit is confusion due to poor communication. Here’s an example:

You’re using an opt-out free trial method. On the 14th day of the free trial, the customer’s card is charged. Unfortunately, your customer was extremely surprised to wake up one morning and find your subscription fee charged to their credit card. Rage ensues. Angry customer support messages are received. No one is happy.

Of course, you’ll always have people that aren’t 100% happy with your service, and that’s okay! However, if you’re using the opt-out model, you’ll want to revisit all of your marketing communications and ensure it’s crystal clear when the customer’s card will be charged and how long they have to cancel if they wish to avoid a charge on their credit card. Emails work great here. So does prominent copy and reminders on the checkout pages and the customer’s account page. You’ll also want to make sure that it’s easy for your customers to cancel. No one wants to jump through hoops and talk to 5 different customer support agents before finally cancelling their account.

Don’t forget that ex-customers can be evangelists of your product too, so make sure every touchpoint is pleasant for your customers.

As a side note, make sure your refund terms are clear beforehand. Will you offer refunds, credits, free services, or no refunds at all? If the words “risk-free” or “guarantee” appear on your website, then be aware that people may associate those words with a refund guarantee.

Free Trial Conversions Are Down

So you bit the bullet and implemented a free trial model…but what happens when no one is signing up for a free trial?

If you have a live demo free trial or freemium model, then consider what’s actually included in your free trial. It might simply be the case that you’re not offering features which are compelling enough to potential users. If you want to find out which features are most sought-after, there are a variety of things you can do:

  • A quick competitor analysis could give you some insight
  • Try surveying your email subscribers to ask them for their input
  • Switch around which features you offer for free
  • Extend the free trial
  • Build out more robust inbound marketing campaigns
  • Ensure the benefits of the product are prominently displayed on the website
  • Consider a different free trial or freemium model

Which Free Trial Method Should You Choose?

In addition to everything we’ve covered above, here are some additional points to consider when it comes to free trial and freemium models.

Consider Your Product & Current Marketing Campaigns

For example, if your product is complicated and built for enterprise, you might want to consider a live demo model. Look at your customer sales cycles and current campaigns. Do you have the ability to educate potential customers about your product prior to a free trial? What are your product’s strengths and weaknesses? Is it something that people use a couple times and then don’t need anymore or is it solving a recurring need? This will help guide the type of free trial or freemium model you choose.

How Much Would a Stranger Trust Your SaaS Product? Enough to Give You Their Credit Card Information?

What kinds of social trust signals does your website display? Have you been featured in any trusted media? Look at all sorts of things that convey trustworthiness and feature them on the website and marketing materials. Case studies, reviews, and media mentions are all great examples of trust factors. If you can get your hands on relevant video testimonials from happy customers, those are great for sharing on social media.

Can You Handle Change?

As you work out the kinks with a new free trial model, you might need to make changes quickly. Customer communication will also need to be prioritised. Prompt and thoughtful responses to customer complaints can turn a frustrated customer into a happy one. Things like updated copy on your website and testing different email marketing messages might need to be tweaked quickly.

If it takes your company weeks to implement simple changes or they’re lacking in the customer support department, then be aware this can impact the effectiveness of your free trial model.

One last word of advice…realise how valuable your free users are, regardless of their decision to upgrade or not. In fact, Harvard Business Review found that a free user is typically worth 15% to 25% as much as a paid user. Even though they may not pay directly for your product, they pay dividends in the form of referrals if you treat them with care. Keep your customers at the forefront of your mind when creating and designing free trial experiences for your users.

Featured image via Unsplash.

Source

Categories: Designing, Others Tags:

Is Your Website Stressing Out Visitors?

June 10th, 2020 No comments
CLIF homepage with promotional images in nature

Is Your Website Stressing Out Visitors?

Is Your Website Stressing Out Visitors?

Suzanne Scacca

2020-06-10T10:00:00+00:00
2020-06-10T10:35:52+00:00

Stress is a nasty thing and many of us deal with it on a regular basis. Our jobs, school, homes, relationships, and even things going on around the world can trigger feelings of panic, unease, and depression. And those are just chronic stressors. Think about the small things that send your body into instant fight-or-flight mode on a daily basis (e.g. traffic jams, unhelpful customer service reps, getting sick when you have a big project due).

The last thing you want is for someone to visit one of the websites you’ve built, only to feel like they:

  • Need to battle their way through it, or
  • Leave immediately and never come back.

There are a variety of ways a website can cause stress and leave visitors wondering if their response should be to fight or flight. Slow loading times. Overwhelming navigations. Excessive 404 errors. You get the point. But the design itself could be a problem, too.

If your bounce rates are really high and performance isn’t an issue, then this is something you need to look into. Today, we’re going to look at some ways for web designers to take traditional stress-busting tips and apply them to websites.

How To De-stress Your Web Design

Most stress relief guides provide a similar set of tips. But how exactly do you apply something like “Get outside for fresh air” to a website?

Here are some ideas:

1. Draw from Nature

There’s a reason why stress relief articles always suggest that people get outside. There’s something about nature that’s very calming.

If you think about the way we live our lives today — always on, always connected, always trying to make a better life for ourselves — it’s the exact opposite of nature. That’s probably why we’re so attracted to its simplicity and healing qualities in times of stress.

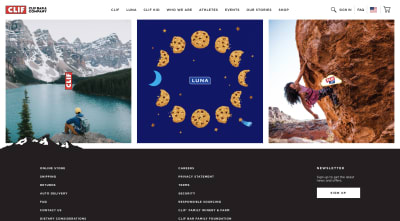
Companies with “natural” initiatives (think REI or CLIF) can get away with using imagery containing nature scenes and drawing on the feel-good vibes associated with them.

CLIF homepage with promotional images in nature

A snapshot from the CLIF website with nature images. (Source: CLIF) (Large preview)

For other companies, however, you’re going to have to think outside the box as nature photographs won’t make sense for most.

Something I’d recommend instead is to look at your color palette.

One of the great things about spending time in nature is the abundance of color you’ll find. Look at any travel blog or social media account and you’ll find proof of this immediately. For example, this is a snapshot of recent photos shared by @adventurefervor:

@adventurefervor on Instagram - nature photos

The @adventurefervor Instagram account shares nature content from all around the world. (Source: Instagram) (Large preview)

There is such a vast array of colors in nature that you could draw from.

That said, nature’s colors aren’t always peaceful or safe. Take, for instance, aposematism. This is the ability animals have to signal that there’s danger here — and they do it with color.

“The function of aposematism is to prevent attack, by warning potential predators that the prey animal has defenses such as being unpalatable or poisonous.”

The most commonly seen colors in aposematism are:

  • Red,
  • Yellow,
  • Black,
  • White.

Generally, when these colors are used, it’s in high contrast to the surrounding colors and scenery, so it’s not like the actual appearance of red or black is alarming. It has to do with the context.

What I’d recommend is that you take a look at your website and note if there are any colors sending the wrong signals.

Does a dark mode-like design seem too ominous for the lighter personality of the brand? Are red accents reminiscent of blood against the stark white background? Does the bright yellow coloring feel out of place?

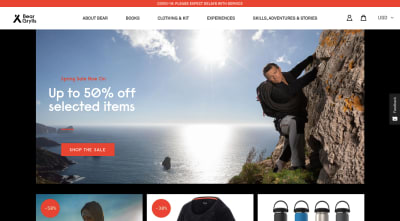
Bear Grylls‘s website, for example, feels a bit edgy and unnerving:

Bear Grylls website with adventure nature imagery, strong black and red accents

Adventurist Bear Grylls uses a combination of nature imagery and danger-evoking colors on his site. (Source: Bear Grylls) (Large preview)

I suspect the web designer went out of their way to imbue the website with the sharp black and red accent colors that appear here. Bear Grylls doesn’t run some feel-good travel show. He’s always putting himself (and others) in life-or-death situations. So, in this case, the aposematism-inspired color palette is a good choice.

For your website, though, I highly doubt you want your visitors to associate the brand with danger or death. So, spend some time studying nature photography (the stuff that makes you feel good) as well as reading up on color psychology to fix the signals your website is sending to visitors.

2. Create a Predictable Rhythm

Yoga is one of those activities often recommended for people experiencing stress. As the Mayo Clinic explains:

“Yoga brings together physical and mental disciplines that may help you achieve peacefulness of body and mind. This can help you relax and manage stress and anxiety.”

At the core of yoga, is a composite of physical poses and steady breathing. If you’ve ever practiced it before, you know how good it feels when you get into the rhythm of it. Breathing in… and breathing out.

Yoga isn’t the only mindfulness practice that draws on steady breathing to calm the nerves.

If you’ve ever used a meditation app like Calm before, you’re familiar with breath exercises:

As you focus on breathing in, holding that breath and releasing, your body and mind relax. Breathing exercises also help people calm hyperventilation and other erratic breathing patterns that get the heart rate up and send the mind racing.

So, how does this correlate to your website? Well, what we need to do is identify elements and interactions that feel unpredictable and shocking — ones that make visitors feel as if they have no control over the experience, like they can’t slow down and take it one bit at a time.

Rhythm and repetition play an important role in this, but you know this already. That’s why button shapes and colors are designed consistently site-wide. That’s why you choose no more than two or three fonts to establish a rhythm and dictate hierarchy in your content. That’s why you build mobile-first websites within a grid (even if the design sometimes appears asymmetrical).

The thing is, when new design patterns or elements become popular, it’s easy for these good and calming practices to go out the window.

Take, for instance, websites that use scroll-triggered animations like Unleashed.

The Unleashed website uses a variety of scroll-triggered animations. (Source: Unleashed) (Large preview)

While it’s certainly an attractive website and one that’s going to stand out from the competition, it presents an uneven experience from start to finish. Visitors are more likely to focus on the surprises that wait for them around the corner instead of on reading the content on the site (which is difficult with the way it’s presented).

This website is all about building anticipation; not value.

If you look at the Smashing Magazine, for example, the design still has the opportunity to “surprise” visitors every now and again:

Smashing Magazine’s design goes light on the surprise factor, using it to call attention when it makes sense. (Source: Smashing Magazine) (Large preview)

The big difference here is that hover-triggered animations don’t have to come at the expense of the predictability of the design or your visitors’ comfort levels.

Just be mindful of this. While it might seem like trying something new is what your site needs to stand out, don’t forget that you’re designing primarily for the user experience. And if users aren’t responding well to the creative choices you’ve made, it’s time to bring back a more stable rhythm to it.

3. Remove the Excess Noise

For a long time now, researchers have studied and reported on the damaging and stress-inducing effects environmental noise can have on people.

“Babisch established the modern noise reaction model, postulating an ‘indirect pathway,’ in which disturbance of sleep, communication and activity by low-level noise exposure causes changes of emotional and cognitive parameters and annoyance, followed by chronic stress reactions and adverse health effects.”

That’s no surprise to anyone who’s lived in a major city or visited one before. They’re polluted with sounds of people honking and shouting, loud buses or trains passing by, construction workers chipping away at the streets and buildings. At a certain point, it eventually gets to be too much.

This is one of the reasons why white noise machines, nature sounds and classical music are a popular means of drowning out the excess noise in our environments. They take all of the harshness and overwhelming nature of our surroundings and mute it or, at the very least, turn it down to a minimum.

When a website is designed with too much “noise”, a similar solution is needed.

But how do we define noise on websites? It’s not as though we all have auto-playing music on them anymore (at least, I hope not).

The big thing is to look for things that don’t belong there. If your design is overcrowded, remove the elements that contribute little to the user experience and conversion rate.

For example, how frequently do people engage with your live chat window? If it’s not happening frequently or the interactions aren’t meaningful, just get rid of it. The same goes for other non-essential elements. Banner ads. Auto-play on videos. Exit-intent pop-ups.

Is the interruption to the user’s experience really worth it?

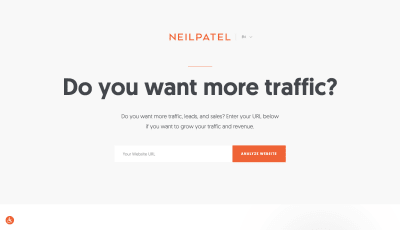
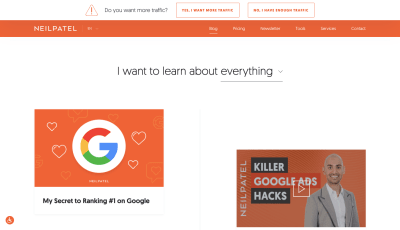
Let’s use Neil Patel‘s website as an example:

Neil Patel website 'Do you want more traffic?'

Neil Patel’s website asks the question, ‘Do you want more traffic?’. (Source: Neil Patel) (Large preview)

When visitors enter the home page, they’re asked: “Do you want more traffic?”

Let’s say the answer to that is “no” because the visitor has come here to read more about marketing and SEO on the blog. However, the top of the blog page again asks them the same question:

Neil Patel blog 'Do you want more traffic?'. Visitors have the choice to say 'Yes' or 'No'

The top of Neil Patel’s blog asks the question, ‘Do you want more traffic?’. (Source: Neil Patel) (Large preview)

Logic would dictate that clicking “No, I have enough traffic” would remove the banner from view since no “X” is available to dismiss it. Instead, visitors who click it are taken away from the blog and returned to the home page to start the loop all over again.

This type of website friction is no different than an environmental noise or irritant — kind of like a child asking “But why?” over and over again until you give them the answer they want. Eventually, visitors are going to get fed up with the pressure to convert and leave for good (maybe not in Patel’s case, but definitely on a website for lesser-known brands).

If you notice your visitors ignoring the noise you’ve placed before them on the website, don’t try and jam it down their throats even further. Just get rid of it.

Wrapping Up


Unlike the real world where people take time to identify their stressors, identify solutions to beat them and work through their issues, that’s not going to happen on a website.

They’re either going to suffer through the experience and be left with a sour taste in their mouth… or they’re going to immediately bounce off the site and be left with a sour taste in their mouth.

If you want to remove the stress from your web design, look to traditional stress relief activities to iron out the issues. If you can turn your website into a relaxing and welcoming environment — while still pushing all the right buttons to drive visitors to conversion — you’ll lower your bounce rates as well as visitors’ stress levels.

Smashing Editorial
(ra, yk, il)
Categories: Others Tags:

Cool Little CSS Grid Tricks for Your Blog

June 9th, 2020 No comments
Screenshot collage. Shows how the layout breaks when the last row is not missing exactly one item to be full.

I discovered CSS about a decade ago while trying to modify the look of a blog I had created. Pretty soon, I was able to code cool things with more mathematical and, therefore, easier-to-understand features like transforms. However, other areas of CSS, such as layout, have remained a constant source of pain.

This post is about a problem I encountered about a decade ago and, until recently, did not know how to solve in a smart way. Specifically, it’s about how I found a solution to a long-running problem using a modern CSS grid technique that, in the process, gave me even cooler results than I originally imagined.

That this is not a tutorial on how to best use CSS grid, but more of a walk through my own learning process.

The problem

One of the first things I used to dump on that blog were random photos from the city, so I had this idea about having a grid of thumbnails with a fixed size. For a nicer look, I wanted this grid to be middle-aligned with respect to the paragraphs above and below it, but, at the same time, I wanted the thumbnails on the last row to be left-aligned with respect to the grid. Meanwhile, the width of the post (and the width of the grid within it) would depend on the viewport.

The HTML looks something like this:

<section class='post__content'>
  <p><!-- some text --></p>
  <div class='grid--thumbs'>
    <a href='full-size-image.jpg'>
      <img src='thumb-image.jpg' alt='image description'/>
    </a>
    <!-- more such thumbnails -->
  </div>
  <p><!-- some more text --></p>
</section>

It may seem simple, but it turned out to be one of the most difficult CSS problems I’ve ever encountered.

Less than ideal solutions

These are things I have tried or seen suggested over the years, but that never really got me anywhere.

Floating impossibility

Floats turned out to be a dead end because I couldn’t figure out how to make the grid be middle aligned this way.

.grid--thumbs { overflow: hidden; }

.grid--thumbs a { float: left; }

The demo below shows the float attempt. Resize the embed to see how they behave at different viewport widths.

CodePen Embed Fallback

inline-block madness

At first, this seemed like a better idea:

.grid--thumbs { text-align: center }

.grid--thumbs a { display: inline-block }

Except it turned out it wasn’t:

CodePen Embed Fallback

The last row isn’t left aligned in this case.

At a certain point, thanks to an accidental CSS auto-complete on CodePen, I found out about a property called text-align-last, which determines how the last line of a block is aligned.

Unfortunately, setting text-align-last: left on the grid wasn’t the solution I was looking for either:

CodePen Embed Fallback

At this point, I actually considered dropping the idea of a middle aligned grid. Could a combo of text-align: justified and text-align-last: left on the grid produce a better result?

Well, turns out it doesn’t. That is, unless there’s only a thumbnail on the last row and the gaps between the columns aren’t too big. Resize the embed below to see what I mean.

CodePen Embed Fallback

This is pretty where I was at two years ago, after nine years of trying and failing to come up with a solution to this problem.

Messy flexbox hacks

A flexbox solution that seemed like it would work at first was to add an ::after pseudo-element on the grid and set flex: 1 on both the thumbnails and this pseudo-element:

.grid--thumbs {
  display: flex;
  flex-wrap: wrap;
	
  a, &::after { flex: 1; }
	
  img { margin: auto; }
	
  &:after { content: 'AFTER'; }
}

The demo below shows how this method works. I’ve given the thumbnails and the ::after pseudo-element purple outlines to make it easier to see what is going on.

CodePen Embed Fallback

This is not quite what I wanted because the grid of thumbnails is not middle-aligned. Thats said, it doesn’t look too bad… as long as the last row has exactly one item less image than the others. As soon as that changes, however, the layout breaks if it’s missing more items or none.

Why the ::after hack is not reliable.

That was one hacky idea. Another is to use a pseudo-element again, but add as many empty divs after the thumbnails as there are columns that we’re expecting to have. That number is something we should be able to approximate since the size of the thumbnails is fixed. We probably want to set a maximum width for the post since text that stretches across the width of a full screen can visually exhausting for eyes to read.

The first empty elements will take up the full width of the row that’s not completely filled with thumbnails, while the rest will spill into other rows. But since their height is zero, it won’t matter visually.

CodePen Embed Fallback

This kind of does the trick but, again, it’s hacky and still doesn’t produce the exact result I want since it sometimes ends up with big and kind of ugly-looking gaps between the columns.

A grid solution?

The grid layout has always sounded like the answer, given its name. The problem was that all examples I had seen by then were using a predefined number of columns and that doesn’t work for this particular pattern where the number of columns is determined by the viewport width.

Last year, while coding a collection of one element, pure CSS background patterns, I had the idea of generating a bunch of media queries that would modify a CSS variable, --n, corresponding to the number of columns used to set grid-template-columns.

$w: 13em;
$h: 19em;
$f: $h/$w;
$n: 7;
$g: 1em;

--h: #{$f*$w};
display: grid;
grid-template-columns: repeat(var(--n, #{$n}), var(--w, #{$w}));
grid-gap: $g;
place-content: center;
	
@for $i from 1 to $n {
  @media (max-width: ($n - $i + 1)*$w + ($n - $i + 2)*$g) {
    --n: #{$n - $i}
  }
}
CodePen Embed Fallback

I was actually super proud of this idea at the time, even though I cringe looking back on it now. One media query for every number of columns possible is not exactly ideal, not to mention it doesn’t work so well when the grid width doesn’t equal the viewport width, but is still somewhat flexible and also depends on the width of its siblings.

A magic solution

I finally came across a better solution while working with CSS grid and failing to understand why the repeat() function wasn’t working in a particular situation. It was so frustrating and prompted me to go to MDN, where I happened to notice the auto-fit keyword and, while I didn’t understand the explanation, I had a hunch that it could help with this other problem, so I dropped everything else I was doing and gave it a try.

Here’s what I got:

.grid--thumbs {
  display: grid;
  justify-content: center;
  grid-gap: .25em;
  grid-template-columns: repeat(auto-fit, 8em);
}
CodePen Embed Fallback

I also discovered the minmax() function, which can be used in place of fixed sizes on grid items. I still haven’t been able to understand exactly how minmax() works — and the more I play with it, the less I understand it — but what it looks like it does in this situation is create the grid then stretch its columns equally until they fill all of the available space:

grid-template-columns: repeat(auto-fit, minmax(8em, 1fr));
CodePen Embed Fallback

Another cool thing we can do here is prevent the image from overflowing when it’s wider than the grid element. We can do this by replacing the minimum 8em with min(8em, 100%) That essentially ensures that images will never exceed 100%, but never below 8em. Thanks to Chris for this suggestion!

Note that the min() function doesn’t work in pre-Chromium Edge!

CodePen Embed Fallback

Keep in mind that this only produces a nice result if all of the images have the same aspect ratio — like the square images I’ve used here. For my blog, this was not an issue since all photos were taken with my Sony Ericsson W800i phone, and they all had the same aspect ratio. But if we were to drop images with different aspect ratios, the grid wouldn’t look as good anymore:

CodePen Embed Fallback

We can, of course, set the image height to a fixed value, but that distorts the images… unless we set object-fit to cover, which solves our problem!

CodePen Embed Fallback

Another idea would be to turn the first thumbnail into a sort of banner that spans all grid columns. The one problem is that we don’t know the number of columns because that depends on the viewport. But, there is a solution — we can set grid-column-end to -1!

.grid--thumbs {
  /* same styles as before */
	
  a:first-child {
    grid-column: 1/ -1;
		
    img { height: 13em }
  }
}

The first image gets a bigger height than all the others.

CodePen Embed Fallback

Of course, if we wanted the image to span all columns except the last, one we’d set it to -2 and so on… negative column indices are a thing!

auto-fill is another grid property keyword I noticed on MDN. The explanations for both are long walls of text without visuals, so I didn’t find them particularly useful. Even worse, replacing auto-fit with auto-fill in any of the grid demos above produces absolutely no difference. How they really work and how they differ still remains a mystery, even after checking out articles or toying with examples.

However, trying out different things and seeing what happens in various scenarios at one point led me to the conclusion that, if we’re using a minmax() column width and not a fixed one (like 8em), then it’s probably better to use auto-fill instead of auto-fit because, the result looks better if we happen to only have a few images, as illustrated by the interactive demo below:

CodePen Embed Fallback

I think what I personally like best is the initial idea of a thumbnail grid that’s middle-aligned and has a mostly fixed column width (but still uses min(100%, 15em) instead of just 15em though). At the end of the day, it’s a matter of personal preference and what can be seen in the demo below just happens to look better to me:

CodePen Embed Fallback

I’m using auto-fit in this demo because it produces the same result as auto-fill and is one character shorter. However, what I didn’t understand when making this is that both keywords produce the same result because there are more items in the gallery than we need to fill a row.

But once that changes, auto-fit and auto-fill produce different results, as illustrated below. You can change the justify-content value and the number of items placed on the grid:

CodePen Embed Fallback

I’m not really sure which is the better choice. I guess this also depends on personal preference. Coupled with justify-content: center, auto-fill seems to be the more logical option, but, at the same time, auto-fit produces a better-looking result.

The post Cool Little CSS Grid Tricks for Your Blog appeared first on CSS-Tricks.

Categories: Designing, Others Tags:

Quick Guide to Build an Online Presence for Your Offline Businesses

June 9th, 2020 No comments

The worldwide pandemic situation has forced people to the online environment. Especially those who have no experience with a website, social media management, and marketing software.

Young entrepreneurs with small businesses that just started their cafes, food restaurants, libraries, clothing stores, or others. With the latest events, offline became online. Things are different, but in both cases, you have to please the customer and sell him the products he is used to while keeping the same standards. Think of this new challenge as a way to build a powerful WordPress blog or an eCommerce website to sell your goods. If you need help to craft a new site, ask for professional web design help so that you can focus on getting creative with your items or content ideas.

If your business does have an online presence, but you haven’t made it your first priority until now, you definitely need to see this guide.

Offline is the New Online

Having an offline business you manage for yourself is thought. However, if you’re the one who brought up the plan and developed a successful offline business, you have to enhance your online presence. By that, you must understand all the activities associated with your business’ name across the Internet. “This includes accounts, assets, interactions, and any pieces of information created by or about the business,” shows The Economic Times. As an addition to the list, a website would be the only place where you have full control. And, by full control, we refer strictly to the information published on the website, the UX and UI practices, and the overall design. Where you don’t have control and involves a lot of work coming from you is the SERP recognition and social platforms. Their algorithms play hard, and you cannot fool them. The recipe is to work hard and test, test, test until you reach satisfactory goals.

Daily Monitoring the Social Media Presence

For sure, you already have a Facebook company page or an Instagram business account where you post beautiful media content. But, how regularly do you publish content? What type of content? How many hashtags you’re using? How relevant are the hashtags? Without a clear plan of what you want to share with your audience, it’s impossible to win the heart of other possible clients. First of all, decide which are the best and relevant platforms for your business. Then, organize your posts and media content such as images, gifs, or videos. Create your own style of posting content and sharing information on these platforms. Furthermore, your social followers will send you private messages, will post in the public areas, as well as they’ll submit product reviews. You need to be there for them. Always! Every day. Support your social media efforts by being a kind, friendly, and professional person.

Use SEO Strategies to Get the Most Out of Your Content

SEO stands for Search Engine Optimization. This works for content optimization on your website, known as on-page SEO. However, there are also offline SEO practices you need to implement. So, let’s be honest. Everyone wants to stand out in front of other businesses on Google. When someone types a short or long-tail keyword, you would love your site to pop-up as a suggestion somewhere at the top of the list. To get there is not an easy task. If you want to know more information, you should check out tagDiv’s article on why is SEO vital on any website and how it really works.

Online Presence is a Purchase Decision Factor

Everyone has access to the Internet, and this weighs a lot when someone wants to purchase something. There’s basically information about everything on Google. Especially about your business! Public reviews and discussions on different groups or forums are influencing people’s purchasing decisions. If people read multiple negative reviews or bad news about your business, they think twice before buying it.

Furthermore, the vlogging era is more powerful than ever. For example, if you’re into the cosmetic or makeup industry, beautiful women may expose your products into well-crafted and documented videos. You, as a service provider, need to take care that people continue to get entertained and be happy with your items.

Reasons to Bring Your Business Online

There are many reasons why your offline business should be online. Not only according to these challenging times, when people were forced to learn faster how to use technology and the Internet to survive. For many of you, the online transition was an investment you probably never thought of. However, once you started this adventure, you have two major reasons to continue.

1. The possibility to extend your market

You’ll no longer sell your items in a tiny store located somewhere. Your site will be online! This means you could sell all over your country, state, and why not, all over the world! Every beginning is hard, but once you get along, you’ll never go back to the old fashioned way. By going beyond the location-based boundaries, you’ll increase your revenue, and your brand will be recognized worldwide. The website will become the front-store, and you’ll continue to handle things behind your desk.

2. Help clients to decide more easily on an item

Working with people is the hardest job ever. Whatever their requirements, you always have to be friendly and helpful. Online conversations give you more time to think and measure your words carefully. It’s important to express positive emotions with your replies. Your clients seek out for your professional help :).

In the end…

What matters in the end? To be everywhere and to be effective. People love staying in touch with you and developing a relationship with your brand. They resonate with your products, and they’ll always sustain your business, as long as you are always there for them. At different times, distinct measures are requested.

Categories: Others Tags:

Implementing Video Effectively to Power-Up Email Campaigns

June 9th, 2020 No comments

Branded email campaigns and newsletters remain one of the marketing channels with the highest conversion rates out there. You can say that it favors both brands and customers.

On the one hand, it offers audiences a way to hand-pick the type of branded content they want to receive in their mailboxes. And on the other, that it provides companies with a direct way to communicate with their customers that allows long-form, accurate communication.

But, as popular as email marketing has become, it is not always used to its full potential. As only some campaigns have discovered that no email works better than the ones you combine with video content!

In this piece, I’ll walk you through some of the best email video tips and tricks as used by the best video companies in the business. To help you boost the effectiveness of your campaigns.

First of all, why video?

No other medium can communicate as quickly and effectively as video. Having some pictures and a text description just doesn’t do it anymore for most audiences!

And there’s a good reason why video has become such a key item in the current digital landscape: it can effectively tackle complex topics in a simple and captivating way. You see it everywhere, on social media, landing pages, e-learning courses, and (of course) email campaigns.

But far from just taking my word for it, consider that even just including the word “video” on the email subject can increase open rates up to 19%. Or that using video on emails can increase click-through rates by up to 300%.

Not only has video become the most preferred medium for audiences to consume content, but it also offers brands a wide range of avenues to reach their marketing goals. Video can spark awareness by teasing new products or services, foster consumer trust using emotional storytelling, answer your clients’ FAQs, announce company events… the list could go on, but you’ve probably got it: there’s little video can’t accomplish.

Pair it with the right email strategy, and it only gets better from there!

Choosing the right type of video for your email campaign

As I’ve pointed out before, video can help you accomplish a wide range of marketing goals. Because of their flexible nature, videos belong in any email where you want to increase open rates and conversions. But first you’ll need to figure out what is your email’s goal to determine what type of video will be best suited for the job.

Every branded video is unique in its own way, and each day innovative marketing teams are coming up with new types. But as for now, I’ve selected the five most common types of videos used in effective email campaigns to give you a solid starting point.

Product videos

As you’ve probably guessed from the title, product videos are all about… well, your product! If you’re looking for a simple and straightforward piece that highlights the main characteristics and benefits of your goods, this is the type of video you want.

Product videos in email campaigns can be great at sparking interest for an upcoming new product, like a movie teaser. Or, if you’re launching an upgraded version of your product or service, you can create a short video that enlists its key new features.

Customer testimonials

Now, let’s take the spotlight away from your product or service for a second, and towards the people who buy and make them. Because people trust people, it’s as simple as that. And what’s more convincing than a customer offering its honest review of your product or service?

Customer testimonials are a great addition to your email campaign if you’re looking to grow credibility and confidence. All you need is to interview one of your clients about how your brand changed his or her life for good. If you achieve a real and relatable testimonial, your audience will likely think about you as a trustworthy company that benefits a community.

Explainer videos

Moving on to one of the most effective types of marketing videos for marketing in the consideration stage of a funnel: animated explainer videos. Because of their short-format and animated style, explainers are great at describing complex processes or ideas in a way that’s easy to understand.

They do this by using a three-act story structure: first, they introduce a problem your audience is having, then they present your product or service, and lastly, they showcase how it solves the problem better than anyone.

As part of your email campaign, explainer videos offer a direct and creative way of addressing your audience’s interests and issues. Unlike a traditional ad, explainer videos give something back to your viewers, something they actually care for and can help them in their everyday lives.

Company stories

We’d all like to know more about the people behind the things we buy! Company videos give your brand and coworkers a chance in the spotlight to share their stories. What does a normal day in your office look like? How did the company start? What are your brand values? These may seem like obvious answers to you, but it might be new information to your audience.

By including company stories on your email campaign, you’re humanizing your brand in the eyes of your customers. Sharing your passion goes a long way towards developing a lasting relationship with your customers, and will make them feel closer.

Event videos

Promoting events through email is just like sending an invitation right to your customers’ mailbox. With an original event video, you can get people interested in an upcoming product presentation, a launch party, or an educational webinar. Plus, brands also use event videos to recap past events and update customers on special company activities.

Best practices when using an email with videos for marketing

While there are plenty of ways you can combine video and email, there are some practices that have been proven to deliver exceptional results. Here are a few of the most important ones to keep in mind.

About (not) embedding video in your email

When talking about using video on your emails, you’re probably thinking about embedding. After all, this is how you usually use video on your landing page or social media posts. But when it comes to emails, it can get a little tricky.

The thing is that most email platforms out there don’t allow directly embed videos on emails. Sure, technology advances quickly in this age, but currently, the best way to send videos is by emailing a thumbnail image that links back to the video on your site. This way, linking is the most practical form of ensuring your audience can watch your video no matter the email platform or device they use.

Plus, linking towards a video hosted on your site, or YouTube for that matter, you’ll get access to actionable data, like views count, where they stopped watching, and whether they shared it to someone. By using this data to perfect future emails and videos, you can personalize your communications according to your audience’s behavior.

Judging a video by its thumbnail

So, if you’re going to link a video hosted on your site, you’re going to need a captivating thumbnail. It can be just a small picture with a play button that will direct users to your video, but there are a couple of tricks to intrigue your audience into clicking.

Animated thumbnails attract even more clicks than images, and most email clients support them (except for some Outlook versions that show only the first frame). A variation of the animated thumbnail is called the cinemagraph, that’s a GIF where just one small part of the image moves in an endless loop. You can also use this technique to design a static image with an animated play button.

One thing you’ll need to consider when using thumbnails on your email is that large files from unknown sends can sometimes trigger spam filters. While there’s no rule about specific pixel sizes, keeping it under the 2.7 MB mark will do just fine. If your thumbnail is heavier than that, you can try adjusting the size or using a compression tool.

Adding video to your email signature

Apart from using video on your newsletters, you can also incorporate it on your email signature. This technique is especially effective for sales teams that exchange emails with clients and potential customers, but for other departments of your company as well. Try using a thumbnail on your email signature that links back to a relevant video, such as an “About Us” company video hosted on your site.

Tips to make an engaging video that furthers people down your funnel

So, your audience has opened your email, clicked on the thumbnail, and watched your video. Congrats on a job almost done! There are still a couple of tips and tricks that can help you get to the finish line: the buying decision.

  • Make it emotional and entertaining: The most effective type of branded content is the one that doesn’t feel branded at all. By adding a personal touch and eliciting emotions, you’ll increase audience engagement and maybe even go viral. After all, we react to content that makes us feel something, even just a tiny laugh.
  • Keep it simple and short: In today’s age of short attention span, nobody has the time to sit through a long video. By keeping your video short (around the 90-seconds mark would be perfect, thank you), you’re making sure your audience will get to the end of the piece, and that’s where our last tip comes in….
  • End with a strong and clear CTA: The last, but definitely not least, part of your video is the call to action. If your audience loved your video, they need to know where to go next! Make sure you end your piece with clear instructions on how they can acquire your product or service.

Summing Up!

While other digital content trends might come and go, email remains a stalwart tool on any company’s marketing toolbelt. Email campaigns that use video content are getting the best of both worlds.

First off, they are sending a personalized message right to their customers’ mailbox. And then, they are using the most effective and captivating medium to communicate their brand.

As we’ve seen in this piece, you need to plan out your email campaign thoroughly. But, once your first email is on its way, you’ll soon be able to track your results and improve on your strategy. So, get started and good luck!

Categories: Others Tags:

Making My Netlify Build Run Sass

June 9th, 2020 No comments

Let’s say you wanted to build a site with Eleventy as the generator. Popular choice these days! Eleventy doesn’t have some particularly blessed way of preprocessing your CSS, if that’s something you want to do. There are a variety of ways to do it and perhaps that freedom is part of the spirit of Eleventy.

I’ve seen people set up Gulp for this, which is cool, I still use and like Gulp for some stuff. I’ve seen someone use templating to return preprocessed CSS, which seems weird, but hey, whatever works. I’ve even seen someone extend the Eleventy config itself to run the processing.

So far, the thing that has made the most sense to me is to use npm scripts do the Sass processing. Do the CSS first, then the HTML, with npm-run-all. So, you’d set up something like this in your package.json:

  "scripts": {
    "build": "npm-run-all build:css build:html",
    "build:css": "node-sass src/site/_includes/css/main.scss > src/site/css/main.css",
    "build:html": "eleventy",
    "watch": "npm-run-all --parallel watch:css watch:html",
    "watch:css": "node-sass --watch src/site/_includes/css/main.scss > src/site/css/main.css",
    "watch:html": "eleventy --serve --port=8181",
    "start": "npm run watch"
  },

I think that’s fairly nice. Since Eleventy doesn’t have a blessed CSS processing route anyway, it feels OK to have it de-coupled from Eleventy processing.

But I see Netlify has come along nicely with their build plugins. As Sarah put it:

What the Build Plugin does is give you access to key points in time during that process, for instance, onPreBuild, onPostBuild, onSuccess, and so forth. You can execute some logic at those specific points in time

There is something really intuitive and nice about that structure. A lot of build plugins are created by the community or Netlify themselves. You just click them on via the UI or reference them in your config. But Sass isn’t a build-in project (as I write), which I would assume is because people are a pretty opinionated about what/where/how their CSS is processed that it makes sense to just let people do it themselves. So let’s do that.

In our project, we’d create a directory for our plugins, and then a folder for this particular plugin we want to write:

project-root/
  src/
  whatever/
  plugins/
    sass/
      index.js
      manifest.yml

That index.js file is where we write our code, and we’ll specifically want to use the onPreBuild hook here, because we’d want our Sass to be done preprocessing before the build process runs Eleventy and Eleventy moves things around.

module.exports = {
  onPreBuild: async ({ utils: { run } }) => {
    await run.command(
      "node-sass src/site/_includes/css/main.scss src/site/css/main.css"
    );
  },
};

Here’s a looksie into all the relevant files together:

Now, if I netlify build from the command line, it will run the same build process that Netlify itself does, and it will hook into my plugin and run it!

One little thing I noticed is that I was trying to have my config be the (newer) netlify.yml format, but the plugins didn’t work, and I had to re-do the config as netlify.toml.

So we de-coupled ourselves from Eleventy with this particular processing, and coupled ourselves to Netlify. Just something to be aware of. I’m down with that as this way of configuring a build is so nice and I see so much potential in it.

I prefer the more explicit and broken up configuration of this style. Just look at how much cleaner the package.json gets:

Removed a bunch of lines from the scripts area of a package.json file, like the specific build:css and build:html commands

I still have this idea…

…of building a site that is a dog-fooded example of all the stuff you could/should do during a build process. I’ve started the site here, (and repo), but it’s not doing too much yet. I think it would be cool to wire up everything on that list (and more?) via Build Plugins.

If you wanna contribute, feel free to let me know. Maybe email me or open an issue to talk about what you’d want to do. You’re free to do a Pull Request too, but PRs without any prior communication are a little tricky sometimes as it’s harder to ensure our visions are aligned before you put in a bunch of effort.

The post Making My Netlify Build Run Sass appeared first on CSS-Tricks.

Categories: Designing, Others Tags:

5 Myths About Jamstack

June 9th, 2020 No comments

Jamstack isn’t necessarily new. The term was officially coined in 2016, but the technologies and architecture it describes have been around well before that. Jamstack has received a massive dose of attention recently, with articles about it appearing in major sites and publications and new Jamstack-focused events, newsletters, podcasts, and more. As someone who follows it closely, I’ve even seen what seems like a significant uptick in discussion about it on Twitter, often from people who are being newly introduced to the concept.

The buzz has also seemed to bring out the criticism. Some of the criticism is fair, and I’ll get to some of that in a bit, but others appear to be based on common myths about the Jamstack that persist, which is what I want to address first. So let’s look at five common myths about Jamstack I’ve encountered and debunk them. As with many myths, they are often based on a kernel of truth but lead to invalid conclusions.

Myth 1: They are just rebranded static sites

JAMStack is 99.9% branding and .1% substance. ?? https://t.co/nxoEVQ43oE

— Nicole Sullivan – Black Lives Matter (@stubbornella) February 9, 2020

Yes, as I covered previously, the term “Jamstack” was arguably a rebranding of what we previously called “static sites.” This was not a rebranding meant to mislead or sell you something that wasn’t fully formed — quite the opposite. The term “static site” had long since lost its ability to describe what people were building. The sites being built using static site generators (SSG) were frequently filled with all sorts of dynamic content and capabilities.

Static sites were seen as largely about blogs and documentation where the UI was primarily fixed. The extent of interaction was perhaps embedded comments and a contact form. Jamstack sites, on the other hand, have things like user authentication, dynamic content, ecommerce, user generated content.

A listing of sites built using Jamstack on Jamstack.org

Want proof? Some well-known companies and sites built using the Jamstack include Smashing Magazine, Sphero, Postman, Prima, Impossible Foods and TriNet, just to name a few.

Myth 2: Jamstack sites are fragile

A Medium article with no byline: The issues with JAMStack: You might need a backend

Reading the dependency list for Smashing Magazine reads like the service equivalent of node_modules, including Algolia, GoCommerce, GoTrue, GoTell and a variety of Netlify services to name a few. There is a huge amount of value in knowing what to outsource (and when), but it is amusing to note the complexity that has been introduced in an apparent attempt to ‘get back to basics’. This is to say nothing of the potential fragility in relying on so many disparate third-party services.

Yes, to achieve the dynamic capabilities that differentiate the Jamstack from static sites, Jamstack projects generally rely on a variety of services, both first- or third-party. Some have argued that this makes Jamstack sites particularly vulnerable for two reasons. The first, they say, is that if any one piece fails, the whole site functionality collapses. The second is that your infrastructure becomes too dependent on tools and services that you do not own.

Let’s tackle that first argument. The majority of a Jamstack site should be pre-rendered. This means that when a user visits the site, the page and most of its content is delivered as static assets from the CDN. This is what gives Jamstack much of its speed and security. Dynamic functionality — like shopping carts, authentication, user generated content and perhaps search — rely upon a combination of serverless functions and APIs to work.

Broadly speaking, the app will call a serverless function that serves as the back end to connect to the APIs. If, for example, our e-commerce functionality relies on Stripe’s APIs to work and Stripe is down, then, yes, our e-commerce functionality will not work. However, it’s important to note that the site won’t go down. It can handle the issue gracefully by informing the user of the issue. A server-rendered page that relies on the Stripe API for e-commerce would face the identical issue. Assuming the server-rendered page still calls the back end code for payment asynchronously, it would be no more or less fragile than the Jamstack version. On the other hand, if the server-rendering is actually dependent upon the API call, the user may be stuck waiting on a response or receive an error (a situation anyone who uses the web is very familiar with).

As for the second argument, it’s really hard to gauge the degree of dependence on third-parties for a Jamstack web app versus a server-rendered app. Many of today’s server-rendered applications still rely on APIs for a significant amount of functionality because it allows for faster development, takes advantage of the specific area of expertise of the provider, can offload responsibility for legal and other compliance issues, and more. In these cases, once again, the server-rendered version would be no more or less dependent than the Jamstack version. Admittedly, if your app relies mostly on internal or homegrown solutions, then this may be different.

Myth 3: Editing content is difficult

Kev Quirk, on Why I Don’t Use A Static Site Generator:

Having to SSH into a Linux box, then editing a post on Vim just seems like a ridiculously high barrier for entry when it comes to writing on the go. The world is mobile first these days, like it or not, so writing on the go should be easy.

This issue feels like a relic of static sites past. To be clear, you do not need to SSH into a Linux box to edit your site content. There are a wide range of headless CMS options, from completely free and open source to commercial offerings that power content for large enterprises. They offer an array of editing capabilities that rival any traditional CMS (something I’ve talked about before). The point is, there is no reason to be manually editing Markdown, YAML or JSON files, even on your blog side project. Aren’t sure how to hook all these pieces up? We’ve got a solution for that too!

One legitimate criticism has been that the headless CMS and build process can cause a disconnect between the content being edited and the change on the site. It can be difficult to preview exactly what the impact of a change is on the live site until it is published or without some complex build previewing process. This is something that is being addressed by the ecosystem. Companies like Stackbit (who I work for) are building tools that make this process seamless.

Animated screenshot. A content editor is shown on a webpage with a realtime preview of changes.
Editing a site using Stackbit

We’re not the only ones working on solving this problem. Other solutions include TinaCMS and Gatsby Preview. I think we are close to it becoming commonplace to have the simplicity of WYSIWYG editing on a tool like Wix running on top of the Jamstack.

Myth 4: SEO is Hard on the Jamstack

Kym Ellis, on What the JAMstack means for marketing:

Ditching the concept of the plugin and opting for a JAMstack site which is “just HTML” doesn’t actually mean you have to give up functionality, or suddenly need to know how to code like a front-end developer to manage a site and its content.

I haven’t seen this one pop up as often in recent years and I think it is mostly legacy criticism of the static site days, where managing SEO-related metadata involved manually editing YAML-based frontmatter. The concern was that doing SEO properly became cumbersome and hard to maintain, particularly if you wanted to inject different metadata for each unique page that was generated or to create structured data like JSON-LD, which can be critical for enhancing your search listing.

The advances in content management for the Jamstack have generally addressed the complexity of maintaining SEO metadata. In addition, because pages are pre-rendered, adding sitemaps and JSON-LD is relatively simple, provided the metadata required exists. While pre-rendering makes it easy to create the resources search engines (read: Google) need to index a site, they also, combined with CDNs, making it easier to achieve the performance benchmarks necessary to improve a site’s ranking.

Basically, Jamstack excels at “technical SEO” while also providing the tools necessary for content editors to supply the keyword and other metadata they require. For a more comprehensive look at Jamstack and SEO, I highly recommend checking out the Jamstack SEO Guide from Bejamas.

Myth 5: Jamstack requires heavy JavaScript frameworks

If you’re trying to sell plain ol’ websites to management who are obsessed with flavour-of-the-month frameworks, a slick website promoting the benefits of “JAMstack” is a really useful thing.

– jdietrich, Hacker News

Lately, it feels as if Jamstack has become synonymous with front-end JavaScript frameworks. It’s true that a lot of the most well-known solutions do depend on a front-end framework, including Gatsby (React), Next.js (React), Nuxt (Vue), VuePress (Vue), Gridsome (Vue) and Scully (Angular). This seems to be compounded by confusion around the “J” in Jamstack. While it stands for JavaScript, this does not mean that Jamstack solutions are all JavaScript-based, nor do they all require npm or JavaScript frameworks.

In fact, many of the most widely used tools are not built in JavaScript, notably Hugo (Go), Jekyll (Ruby), Pelican (Python) and the recently released Bridgetown (Ruby). Meanwhile, tools like Eleventy are built using JavaScript but do not depend on a JavaScript framework. None of these tools prevent the use of a JavaScript framework, but they do not require it.

The point here isn’t to dump on JavaScript frameworks or the tools that use them. These are great tools, used successfully by many developers. JavaScript frameworks can be very powerful tools capable of simplifying some very complex tasks. The point here is simply that the idea that a JavaScript framework is required to use the Jamstack is false — Jamstack comes in 460 flavors!

Where we can improve

So that’s it, right? Jamstack is an ideal world of web development where everything isn’t just perfect, but perfectly easy. Unfortunately, no. There are plenty of legitimate criticisms of Jamstack.

Simplicity

Sebastian De Deyne, with Thoughts (and doubts) after messing around with the JAMstack:

In my experience, the JAMstack (JavaScript, APIs, and Markup) is great until is isn’t. When the day comes that I need to add something dynamic–and that day always comes–I start scratching my head.

Let’s be honest: Getting started with the Jamstack isn’t easy. Sure, diving into building a blog or a simple site using a static site generator may not be terribly difficult. But try building a real site with anything dynamic and things start to get complicated fast.

You are generally presented with a myriad of options for completing the task, making it tough to weigh the pros and cons. One of the best things about Jamstack is that it is not prescriptive, but that can make it seem unapproachable, leaving people with the impression that perhaps it isn’t suited for complex tasks.

Tying services together

Agreed. In yesterday’s web you could grab an instrument and begin playing. Today’s web development feels like a conductor trying to pull together a massive orchestra into a cohesive song – you have to understand each individual musician’s part to have any chance of success.

— Brian Rinaldi (@remotesynth) May 1, 2020

When you actually get to the point of building those dynamic features, your site can wind up being dependent on an array of services and APIs. You may be calling a headless CMS for content, a serverless function that calls an API for payment transactions, a service like Algolia for search, and so on. Bringing all those pieces together can be a very complex task. Add to that the fact that each often comes with its own dashboard and API/SDK updates, things get even more complex.

This is why I think services like Stackbit and tools like RedwoodJS are important, as they bring together disparate pieces of the infrastructure behind a Jamstack site and make those easier to build and manage.

Overusing frameworks

In my opinion, our dependence on JavaScript frameworks for modern front-end development has been getting a much needed skeptical look lately. There are tradeoffs, as this post by Tim Kadlec recently laid out. As I said earlier, you don’t need a JavaScript framework to work in the Jamstack.

However, the impression was created both because so many Jamstack tools rely on JavaScript frameworks and also because much of the way we teach Jamstack has been centered on using frameworks. I understand the reasoning for this — many Jamstack developers are comfortable in JavaScript frameworks and there’s no way to teach every tool, so you pick the one you like. Still, I personally believe the success of Jamstack in the long run depends on its flexibility, which (despite what I said about the simplicity above) means we need to present the diversity of solutions it offers — both with and without JavaScript frameworks.

Where to go from here

Sheesh, you made it! I know I had a lot to say, perhaps more than I even realized when I started writing, so I won’t bore you with a long conclusion other than to say that, obviously, I have presented these myths from the perspective of someone who believes very deeply in the value of the Jamstack, despite it’s flaws!

If you are looking for a good post about when to and when not to choose Jamstack over server-side rendering, check out Chris Coyier’s recent post Static or Not?.

The post 5 Myths About Jamstack appeared first on CSS-Tricks.

Categories: Designing, Others Tags: