Archive

Archive for July, 2020

Differences Between Static Generated Sites And Server-Side Rendered Apps

July 2nd, 2020 No comments
Diagram explaining how static site generation works

Differences Between Static Generated Sites And Server-Side Rendered Apps

Differences Between Static Generated Sites And Server-Side Rendered Apps

Timi Omoyeni

2020-07-02T12:00:00+00:00
2020-07-03T14:04:15+00:00

JavaScript currently has three types of applications that you can build with: Single Page Applications (SPAs), pre-rendering/static generated sites and server-side rendered applications. SPAs come with many challenges, one of which is Search Engine Optimization (SEO). Possible solutions are to make use of Static Site Generators or Server-Side Rendering (SSR).

In this article, I’m going to explain them alongside listing their pros and cons so you have a balanced view. We’re going to look at what static generated/pre-rendering is as well as frameworks such as Gatsby and VuePress that help in creating statically generated sites. We’re also going to look at what server-side rendered (SSR) applications are as well as frameworks like Nextjs and Nuxtjs that can help you create SSR applications. Finally, we’re going to cover the differences between these two methods and which of them you should use when building your next application.

Note: You can find all the code snippets in this article on GitHub.

What Is A Static Site Generator?

A Static Site Generator (SSG) is a software application that creates HTML pages from templates or components and a given content source. You give it some text files and content, and the generator will give you back a complete website, and this completed website is referred to as a static generated site. What this means is that your site pages are generated at build time and your site content does not change unless you add new contents or components and “rebuild” or you have to rebuild your site if you want it to be updated with new content.
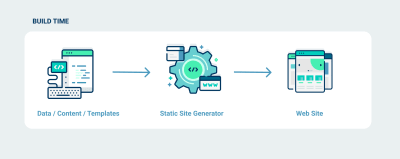
Diagram explaining how static site generation works

How static site generation works (Large preview)

This approach is good for building applications that the content does not change too often — sites that the content does not have to change depending on the user, and sites that do not have a lot of user-generated content. An example of such a site is a blog or a personal website. Let’s look at some advantages of using static generated sites.

PROS

  • Fast website: Since all of your site’s pages and content have been generated at build time, you do not have to worry about API calls to the server for content and this makes your site very fast.
  • Easy to deploy: After your static site has been generated, you would be left with static files, and hence, it can be easily deployed to platforms like Netlify.
  • Security: Static generated site are solely composed of static files, the risk of being vulnerable to cyber attacks is minimal. This is because static generated sites have no database, attackers cannot inject malicious code or exploit your database.
  • You can use version control software (e.g git) to manage and track changes to your content. This can come in handy when you want to roll back changes you made to the content on your site.

CONS

  • Content can become stale if it changes too quickly.
  • To update its content, you have to rebuild the site.
  • Build time would increase depending on the size of the application.

Examples of static site generators are GatsbyJS and VuePress. Let us take a look at how to create static sites using these two generators.

Gatsby

According to their official website,

“Gatsby is a free and open-source framework based on React that helps developers build blazing-fast websites and apps.”

This means developers familiar with React would find it easy to get started with Gatsby.

To use this generator, you first have to install it using NPM:

npm install -g gatsby-cli

This will install Gatsby globally on your machine, you only have to run this command once on your machine. After this installation is complete, you can create your first static site generator using the following command.

gatsby new demo-gatsby

This command will create a new Gatsby project that I have named demo-gatsby. When this is done, you can start up your app server by running the following command:

cd demo-gatsby
gatsby develop

Your Gatsby application should be running on localhost:8000.
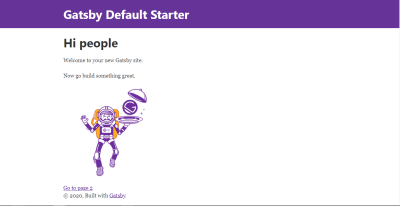
Gatsby default landing page

Gatsby default starter page (Large preview)

The folder structure for this app looks like this;

--| gatsby-browser.js  
--| LICENSE        
--| README.md
--| gatsby-config.js
--| node_modules/  
--| src/
----| components
----| pages
----| images
--| gatsby-node.js     
--| package.json   
--| yarn.lock
--| gatsby-ssr.js      
--| public/
----| icons
----| page-data
----| static

For this tutorial, we’re only going to look at the src/pages folder. This folder contains files that would be generated into routes on your site.

To test this, let us add a new file (newPage.js) to this folder:

import React from "react"
import { Link } from "gatsby"
import Layout from "../components/layout"
import SEO from "../components/seo"
const NewPage = () => (
  <Layout>
    <SEO title="My New Page" />
    <h1>Hello Gatsby</h1>
    <p>This is my first Gatsby Page</p>
    <button>
      <Link to='/'>Home</Link>
    </button>
  </Layout>
)
export default NewPage

Here, we import React from the react package so when your code is transpiled to pure JavaScript, references to React will appear there. We also import a Link component from gatsby and this is one of React’s route tag that is used in place of the native anchor tag ( <a target="_blank" href='#'>Link). It accepts a to prop that takes a route as a value.

We import a Layout component that was added to your app by default. This component handles the layout of pages nested inside it. We also import the SEO component into this new file. This component accepts a title prop and configures this value as part of your page’s metadata. Finally, we export the function NewPage that returns a JSX containing your new page’s content.

And in your index.js file, add a link to this new page we just created:

import React from "react"
import { Link } from "gatsby"
import Layout from "../components/layout"
import Image from "../components/image"
import SEO from "../components/seo"
const IndexPage = () => (
  <Layout>
    <SEO title="Home" />
    <h1>Hi people</h1>
    <p>Welcome to your new Gatsby site.</p>
    <p>Now go build something great.</p>
    <div style={{ maxWidth: `300px`, marginBottom: `1.45rem` }}>
      <Image />
    </div>
    <Link to="/page-2/">Go to page 2</Link>
    {/* new link */}
    <button>
      <Link to="/newPage/">Go to New Page</Link>
    </button>
  </Layout>
)
export default IndexPage

Here, we import the same components that were used in newPage.js file and they perform the same function in this file. We also import an Image component from our components folder. This component is added by default to your Gatsby application and it helps in lazy loading images and serving reduced file size. Finally, we export a function IndexPage that returns JSX containing our new link and some default content.

Now, if we open our browser, we should see our new link at the bottom of the page.
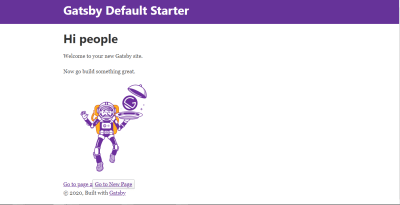
Gatsby default landing page with link to a new page

Gatsby landing page with new link (Large preview)

And if you click on Go To New Page, it should take you to your newly added page.
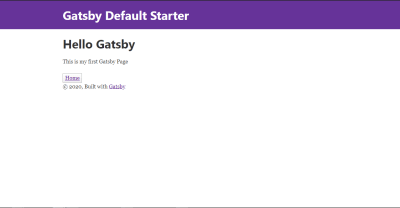
New page containing some texts

New gatsby page (Large preview)

VuePress

VuePress is a static site generator that is powered by Vue, Vue Router and Webpack. It requires little to no configuration for you to get started with it. While there are a number of tools that are static site generators, VuePress stands out from amongst the pack for a single reason: its primary directive is to make it easier for developers to create and maintain great documentation for their projects.

To use VuePress, you first have to install it:

//globally
yarn global add vuepress # OR npm install -g vuepress

//in an existing project
yarn add -D vuepress # OR npm install -D vuepress

Once the installation process is done, you can run the following command in your terminal:

# create the project folder
mkdir demo-vuepress && cd demo-vuepress

# create a markdown file
echo '# Hello VuePress' > README.md

# start writing
vuepress dev

Here, we create a folder for our VuePress application, add a README.md file with # Hello VuePress as the only content inside this file, and finally, start up our server.

When this is done, our application should be running on localhost:8080 and we should see this in our browser:
A VuePress webpage with a text saying ‘Hello VuePress'

VuePress landing page (Large preview)

VuePress supports VueJS syntax and markup inside this file. Update your README.md file with the following:

# Hello VuePress
_VuePress Rocks_
> **Yes!**
_It supports JavaScript interpolation code_
> **{{new Date()}}**
<p v-for="i of ['v','u', 'e', 'p', 'r', 'e', 's', 's']">{{i}}</p>

If you go back to your browser, your page should look like this:
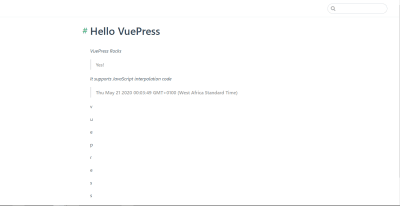
Updated VuePress page

Updated Vuepress page (Large preview)

To add a new page to your VuePress site, you add a new markdown file to the root directory and name it whatever you want the route to be. In this case, I’ve gone ahead to name it Page-2.md and added the following to the file:

# hello World
Lorem ipsum dolor sit amet, consectetur adipisicing elit, sed do eiusmod
tempor incididunt ut labore et dolore magna aliqua. Ut enim ad minim veniam,
quis nostrud exercitation ullamco laboris nisi ut aliquip ex ea commodo
consequat.

And now, if you navigate to /page-2 in your browser, we should see this:
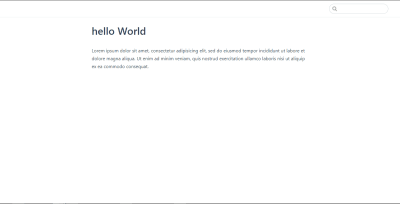
A VuePress webpage containing hello world

A “Hello World” page in VuePress (Large preview)

What Is Server-Side Rendering? (SSR)

Server-Side Rendering (SSR), is the process of displaying web-pages on the server and passing it to the browser/client-side instead of rendering it in the browser. Server-side sends a fully rendered page to the client; the client’s JavaScript bundle takes over and allows the SPA framework to operate.

This means if you have an application that is server-side rendered, your content is fetched on the server side and passed to your browser to display to your user. With client-side rendering it is different, you would have to navigate to that page first before it fetches data from your server meaning your user would have to wait for some seconds before they’re served with the content on that page. Applications that have SSR enabled are called Server-side rendered applications.
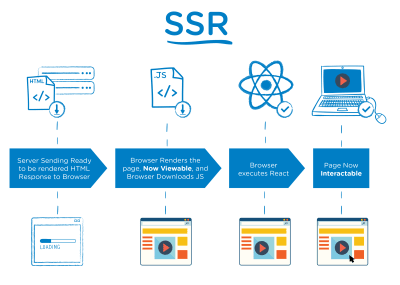
A diagram explaining how server-side rendering works

How SSR works (Large preview)

This approach is good for building complex applications that require user interaction, rely on a database, or where the content changes very often. This is because content on these sites changes very often and the users need to see the updated content as soon as they’re updated. It is also good for applications that have tailored content depending on who is viewing it and applications where you need to store user-specific data like email and user preference while also catering for SEO. An example of this is a large e-commerce platform or a social media site. Let us look at some of the advantages of server-side rendering your applications.

Pros

  • Content is up to date because it fetches content on the go;
  • Your site loads fast because it fetches its content on the server-side before rendering it to the user;
  • Since in SSR JavaScript is rendered server-side, your users’ devices have little relevance to the load time of your page and this leads to better performance.

CONS

  • More API calls to the server since they’re made per request;
  • Cannot deploy to a static CDN.

Further examples of frameworks that offer SSR are Next.js and Nuxt.js.

Next.js

Next.js is a React.js framework that helps in building static sites, server-side rendered applications, and so on. Since it was built on React, knowledge of React is required to use this framework.

To create a Next.js app, you need to run the following:

npm init next-app
# or
yarn create next-app

You would be prompted to choose a name your application, I have named my application demo-next. The next option would be to select a template and I’ve selected the Default starter app after which it begins to set up your app. When this is done, we can now start our application

cd demo-next
yarn dev 
# or npm run dev

Your application should be running on localhost:3000 and you should see this in your browser;
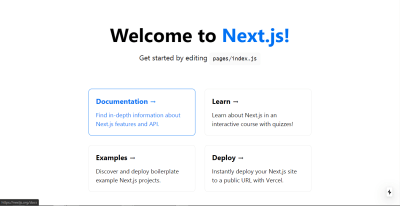
Default Nextjs landing page

Next.js landing page (Large preview)

The page that is being rendered can be found in pages/index.js so if you open this file and modify the JSX inside the Home function, it would reflect in your browser. Replace the JSX with this:

import Head from 'next/head'
export default function Home() {
  return (
    <div className="container">
      <Head>
        <title>Hello Next.js</title>
        <link rel="icon" href="/favicon.ico" />
      </Head>
      <main>
        <h1 className="title">
          Welcome to <a href="https://nextjs.org">Next.js!</a>
        </h1>
        <p className='description'>Nextjs Rocks!</p>
      </main>
      <style jsx>{`
        main {
          padding: 5rem 0;
          flex: 1;
          display: flex;
          flex-direction: column;
          justify-content: center;
          align-items: center;
        }
        .title a {
          color: #0070f3;
          text-decoration: none;
        }
        .title a:hover,
        .title a:focus,
        .title a:active {
          text-decoration: underline;
        }
        .title {
          margin: 0;
          line-height: 1.15;
          font-size: 4rem;
        }
        .title,
        .description {
          text-align: center;
        }
        .description {
          line-height: 1.5;
          font-size: 1.5rem;
        }
      `}</style>
      <style jsx global>{`
        html,
        body {
          padding: 0;
          margin: 0;
          font-family: -apple-system, BlinkMacSystemFont, Segoe UI, Roboto,
            Oxygen, Ubuntu, Cantarell, Fira Sans, Droid Sans, Helvetica Neue,
            sans-serif;
        }
        * {
          box-sizing: border-box;
        }
      `}</style>
    </div>
  )
}

In this file, we make use of Next.js Head component to set our page’s metadata title and favicon for this page. We also export a Home function that returns a JSX containing our page’s content. This JSX contains our Head component together with our main page’s content. It also contains two style tags, one for styling this page and the other for the global styling of the app.

Now, you should see that the content on your app has changed to this:

Nextjs landing page containing ‘welcome to Nextjs' text

Updated landing page (Large preview)

Now if we want to add a new page to our app, we have to add a new file inside the /pages folder. Routes are automatically created based on the /pages folder structure, this means that if you have a folder structure that looks like this:

--| pages
----| index.js ==> '/'
----| about.js ==> '/about'
----| projects
------| next.js ==> '/projects/next'

So in your pages folder, add a new file and name it hello.js then add the following to it:

import Head from 'next/head'
export default function Hello() {
  return (
    <div>
       <Head>
        <title>Hello World</title>
        <link rel="icon" href="/favicon.ico" />
      </Head>
      <main className='container'>
        <h1 className='title'>
         Hello <a href="https://en.wikipedia.org/wiki/Hello_World_(film)">World</a>
        </h1>
        <p className='subtitle'>Lorem ipsum dolor sit amet, consectetur adipisicing elit. Voluptatem provident soluta, sit explicabo impedit nobis accusantium? Nihil beatae, accusamus modi assumenda, optio omnis aliquid nobis magnam facilis ipsam eum saepe!</p>
      </main>
      <style jsx> {`
      
      .container {
        margin: 0 auto;
        min-height: 100vh;
        max-width: 800px;
        text-align: center;
      }
      .title {
        font-family: "Quicksand", "Source Sans Pro", -apple-system, BlinkMacSystemFont,
          "Segoe UI", Roboto, "Helvetica Neue", Arial, sans-serif;
        display: block;
        font-weight: 300;
        font-size: 100px;
        color: #35495e;
        letter-spacing: 1px;
      }
      .subtitle {
        font-weight: 300;
        font-size: 22px;
        color: #526488;
        word-spacing: 5px;
        padding-bottom: 15px;
      }
      `} </style>
    </div>
  )
}

This page is identical to the landing page we already have, we only changed the content and added new styling to the JSX. Now if we visit localhost:3000/hello, we should see our new page:
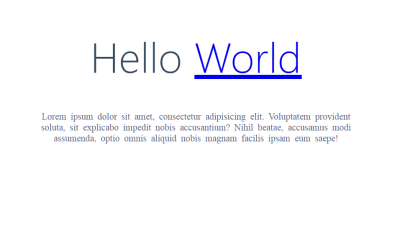
A Nextjs webpage containing ‘Hello world'

A “Hello World ” page in Next.js (Large preview)

Finally, we need to add a link to this new page on our index.js page, and to do this, we make use of Next’s Link component. To do that, we have to import it first.

# index.js
import Link from 'next/link'

#Add this to your JSX
<Link href='/hello'>
  <a>Next</a>
</Link>

This link component is how we add links to pages created in Next in our application.

Now if we go back to our homepage and click on this link, it would take us to our /hello page.

Nuxt.js

According to their official documentation:

“Nuxt is a progressive framework based on Vue.js to create modern web applications. It is based on Vue.js official libraries (vue, vue-router and vuex) and powerful development tools (webpack, Babel and PostCSS). Nuxt’s goal is to make web development powerful and performant with a great developer experience in mind.”

It is based on Vue.js so that means Vue.js developers would find it easy getting started with it and knowledge of Vue.js is required to use this framework.

To create a Nuxt.js app, you need to run the following command in your terminal:

yarn create nuxt-app <project-name>
# or npx
npx create-nuxt-app <project-name>

This would prompt you to select a name along with some other options. I named mine demo-nuxt and selected default options for the other options. When this is done, you can open your app folder and open pages/index.vue. Every file in this folder file is turned into a route and so our landing page is controlled by index.vue file. So if you update it with the following:

<template>
  <div class="container">
    <div>
      <logo />
      <h1 class="title">
        Hello Nuxt
      </h1>
      <h2 class="subtitle">
        Nuxt.js ROcks!
      </h2>
      <div class="links">
        <a
          href="https://nuxtjs.org/"
          target="_blank"
          class="button--green"
        >
          Documentation
        </a>
        <a
          href="https://github.com/nuxt/nuxt.js"
          target="_blank"
          class="button--grey"
        >
          GitHub
        </a>
      </div>
    </div>
  </div>
</template>
<script>
import Logo from '~/components/Logo.vue'
export default {
  components: {
    Logo
  }
}
</script>
<style>
.container {
  margin: 0 auto;
  min-height: 100vh;
  display: flex;
  justify-content: center;
  align-items: center;
  text-align: center;
}
.title {
  font-family: 'Quicksand', 'Source Sans Pro', -apple-system, BlinkMacSystemFont,
    'Segoe UI', Roboto, 'Helvetica Neue', Arial, sans-serif;
  display: block;
  font-weight: 300;
  font-size: 100px;
  color: #35495e;
  letter-spacing: 1px;
}
.subtitle {
  font-weight: 300;
  font-size: 42px;
  color: #526488;
  word-spacing: 5px;
  padding-bottom: 15px;
}
.links {
  padding-top: 15px;
}
</style>

And run your application:

cd demo-nuxt
# start your applicatio
yarn dev # or npm run dev

Your application should be running on localhost:3000 and you should see this:

Default Nuxtjs landing page

Nuxt.js landing page (Large preview)

We can see that this page displays the content we added in to index.vue. The router structure works the same way Next.js router works; it renders every file inside /pages folder into a page. So let us add a new page (hello.vue) to our application.

<template>
  <div>
    <h1>Hello World!</h1>
    <p>Lorem ipsum dolor sit amet, consectetur adipisicing elit. Id ipsa vitae tempora perferendis, voluptate a accusantium itaque vel ex, provident autem quod rem saepe ullam hic explicabo voluptas, libero distinctio?</p>
  </div>
</template>
<script>
export default {};
</script>
<style>
</style>

So if you open localhost:3000/hello, you should see your new page in your browser.
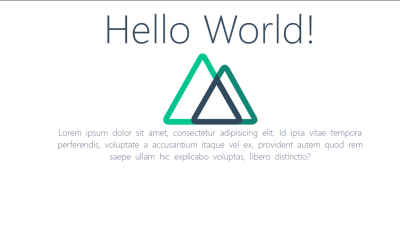
A Nuxtjs webpage containing ‘Hello World'

“Hello World” page in Nuxtjs (Large preview)

Taking A Closer Look At The Differences

Now that we have looked at both static-site generators and server-side rendering and how to get started with them by using some popular tools, let us look at the differences between them.

Static Sites Generators Server-Side Rendering
Can easily be deployed to a static CDN Cannot be deployed to a static CDN
Content and pages are generated at build time Content and pages are generated per request
Content can become stale quickly Content is always up to date
Fewer API calls since it only makes it at build time Makes API calls each time a new page is visited

Conclusion

We can see why it is so easy to think both static generated sites and server-side rendered applications are the same. Now that we know the differences between them are, I would advise that we try to learn more on how to build both static generated sites and server-side rendered applications in order to fully understand the differences between them.

Further Resources

Here are some useful links that are bound to help you get started in no time:

(ks, ra, il)
Categories: Others Tags:

How-to guide for creating edge-to-edge color bars that work with a grid

July 1st, 2020 No comments

Hard-stop gradients are one of my favorite CSS tricks. Here, Marcel Moreau combines that idea with CSS grid to solve an issue that’s otherwise a pain in the butt. Say you have like a 300px right sidebar on a desktop layout with a unique background color. Easy enough. But then say you want that background color to stretch to the right edge of the browser window even though the grid itself is width-constrained. Tricker.

CodePen Embed Fallback

Direct Link to ArticlePermalink

The post How-to guide for creating edge-to-edge color bars that work with a grid appeared first on CSS-Tricks.

Categories: Designing, Others Tags:

A Complete Guide to Dark Mode on the Web

July 1st, 2020 No comments

Dark mode has gained a lot of traction recently. Like Apple, for instance, has added dark mode to its iOS and MacOS operating systems. Windows and Google have done the same.

DuckDuckGo's light and dark themes

Let's get into dark mode in the context of websites. We'll delve into different options and approaches to implementing a dark mode design and the technical considerations they entail. We'll also touch upon some design tips along the way.


Toggling Themes

The typical scenario is that you already have a light theme for your site, and you're interested in making a darker counterpart. Or, even if you're starting from scratch, you'll have both themes: light and dark. One theme should be defined as the default that users get on first visit, which is the light theme in most cases (though we can let the user's browser make that choice for us, as we'll see). There also should be a way to switch to the other theme (which can be done automatically, as we'll also see) — as in, the user clicks a button and the color theme changes.

There several approaches to go about doing this:

Using a Body Class

The trick here is to swap out a class that can be a hook for changing a style anywhere on the page.

<body class="dark-theme || light-theme">

Here's a script for a button that will toggle that class, for example:

// Select the button
const btn = document.querySelector('.btn-toggle');

// Listen for a click on the button
btn.addEventListener('click', function() {
  // Then toggle (add/remove) the .dark-theme class to the body
  document.body.classList.toggle('dark-theme');  
})

Here's how we can use that idea:

<body>
  <button class="btn-toggle">Toggle Dark Mode</button>
  <h1>Hey there! This is just a title</h2>
  <p>I am just a boring text, existing here solely for the purpose of this demo</p>
  <p>And I am just another one like the one above me, because two is better than having only one</p>
  <a href="#">I am a link, don't click me!</a>
</body>

The general idea of this approach is to style things up as we normally would, call that our “default” mode, then create a complete set of color styles using a class set on the element we can use as a “dark” mode.

Let's say our default is a light color scheme. All of those “light” styles are written exactly the same way you normally write CSS. Given our HTML, let's apply some global styling to the body and to links.

body {
  color: #222;
  background: #fff;
}
a {
  color: #0033cc;
}

Good good. We have dark text (#222) and dark links (#0033cc) on a light background (#fff). Our “default” theme is off to a solid start.

Now let's redefine those property values, this time set on a different body class:

body {
  color: #222;
  background: #fff;
}
a {
  color: #0033cc;
}


/* Dark Mode styles */
body.dark-theme {
  color: #eee;
  background: #121212;
}
body.dark-theme a {
  color: #809fff;
}

Dark theme styles will be descendants of the same parent class — which is .dark-theme in this example — which we've applied to the tag.

How do we “switch” body classes to access the dark styles? We can use JavaScript! We'll select the button class (.btn-toggle), add a listener for when it's clicked, then add the dark theme class (.dark-theme) to the body element's class list. That effectively overrides all of the “light” colors we set, thanks to the cascade and specificity.

Here's the complete code working in action. Click the toggle button to toggle in and out of dark mode.

CodePen Embed Fallback

Using Separate Stylesheets

Rather than keeping all the styles together in one stylesheet, we could instead toggle between stylesheets for each theme. This assumes you have full stylesheets ready to go.

For example, a default light theme like light-theme.css:

/* light-theme.css */


body {
  color: #222;
  background: #fff;
}
a {
  color: #0033cc;
}

Then we create styles for the dark theme and save them in a separate stylesheet we're calling dark-theme.css.

/* dark-theme.css */


body {
  color: #eee;
  background: #121212;
}
body a {
  color: #809fff;
}

This gives us two separate stylesheets — one for each theme — we can link up in the HTML section. Let's link up the light styles first since we're calling those the default.

<!DOCTYPE html>
<html lang="en">
<head>
  <!-- Light theme stylesheet -->
  <link href="light-theme.css" rel="stylesheet" id="theme-link">
</head>


<!-- etc. -->


</html>

We are using a #theme-link ID that we can select with JavaScript to, again, toggle between light and dark mode. Only this time, we're toggling files instead of classes.

// Select the button
const btn = document.querySelector(".btn-toggle");
// Select the stylesheet <link>
const theme = document.querySelector("#theme-link");

// Listen for a click on the button
btn.addEventListener("click", function() {
  // If the current URL contains "ligh-theme.css"
  if (theme.getAttribute("href") == "light-theme.css") {
    // ... then switch it to "dark-theme.css"
    theme.href = "dark-theme.css";
  // Otherwise...
  } else {
    // ... switch it to "light-theme.css"
    theme.href = "light-theme.css";
  }
});

Using Custom Properties

We can also leverage the power of CSS custom properties to create a dark theme! It helps us avoid having to write separate style rulesets for each theme, making it a lot faster to write styles and a lot easier to make changes to a theme if we need to.

We still might choose to swap a body class, and use that class to re-set custom properties:

// Select the button
const btn = document.querySelector(".btn-toggle");


// Listen for a click on the button
btn.addEventListener("click", function() {
  // Then toggle (add/remove) the .dark-theme class to the body
  document.body.classList.toggle("dark-theme");
});

First, let's define the default light color values as custom properties on the body element:

body {
  --text-color: #222;
  --bkg-color: #fff;
  --anchor-color: #0033cc;
}

Now we can redefine those values on a .dark-theme body class just like we did in the first method:

body.dark-theme {
  --text-color: #eee;
  --bkg-color: #121212;
  --anchor-color: #809fff;
}

Here are our rulesets for the body and link elements using custom properties:

body {
  color: var(--text-color);
  background: var(--bkg-color);
}
a {
  color: var(--anchor-color);
}

We could just as well have defined our custom properties inside the document :root. That's totally legit and even common practice. In that case, all the default theme styles definitions would go inside :root { } and all of the dark theme properties go inside :root.dark-mode { }.

Using Server-Side Scripts

If we're already working with a server-side language, say PHP, then we can use it instead of JavaScript. This is a great approach if you prefer working directly in the markup.

<?php
$themeClass = '';
if (isset($_GET['theme']) && $_GET['theme'] == 'dark') {
  $themeClass = 'dark-theme';
}


$themeToggle = ($themeClass == 'dark-theme') ? 'light' : 'dark';
?>
<!DOCTYPE html>
<html lang="en">
<!-- etc. -->
<body class="<?php echo $themeClass; ?>">
  <a href="?theme=<?php echo $themeToggle; ?>">Toggle Dark Mode</a>
  <!-- etc. -->
</body>
</html>

We can have the user send a GET or POST request. Then, we let our code (PHP in this case) apply the appropriate body class when the page is reloaded. I am using a GET request (URL params) for the purpose of this demonstration.

And, yes, we can swap stylesheets just like we did in the second method.

<?php
$themeStyleSheet = 'light-theme.css';
if (isset($_GET['theme']) && $_GET['theme'] == 'dark') {
  $themeStyleSheet = 'dark-theme.css';
}


$themeToggle = ($themeStyleSheet == 'dark-theme.css') ? 'light' : 'dark';
?>
<!DOCTYPE html>
<html lang="en">
<head>
  <!-- etc. -->
  <link href="<?php echo $themeStyleSheet; ?>" rel="stylesheet">
</head>


<body>
  <a href="?theme=<?php echo $themeToggle; ?>">Toggle Dark Mode</a>
  <!-- etc. -->
</body>
</html>

This method has an obvious downside: the page needs to be refreshed for the toggle to take place. But a server-side solution like this is useful in persisting the user's theme choice across page reloads, as we will see later.


Which method should you choose?

The “right” method comes down to the requirements of your project. If you are doing a large project, for example, you might go with CSS properties to help wrangle a large codebase. On the other hand, if your project needs to support legacy browsers, then another approach will need to do instead.

Moreover, there's nothing saying we can only use one method. Sometimes a combination of methods will be the most effective route. There may even be other possible methods than what we have discussed.


Dark Mode at the Operating System Level

So far, we've used a button to toggle between light and dark mode but we can simply let the user's operating system do that lifting for us. For example, many operating systems let users choose between light and dark themes directly in the system settings.

The “General” settings in MacOS System Preferences

Pure CSS

CodePen Embed Fallback
Details

Fortunately, CSS has a prefers-color-scheme media query which can be used to detect user's system color scheme preferences. It can have three possible values: no preference, light and dark. Read more about it on MDN.

@media (prefers-color-scheme: dark) {
  /* Dark theme styles go here */
}


@media (prefers-color-scheme: light) {
  /* Light theme styles go here */
}

To use it, we can put the dark theme styles inside the media query.

@media (prefers-color-scheme: dark) {
  body {
    color: #eee;
    background: #121212;
  }


  a {
    color: #809fff;
  }
}

Now, if a user has enabled dark mode from the system settings, they will get the dark mode styles by default. We don't have to resort to JavaScript or server-side scripts to decide which mode to use. Heck, we don't even need the button anymore!

JavaScript

CodePen Embed Fallback
Details

We can turn to JavaScript to detect the user's preferred color scheme. This is a lot like the first method we worked with, only we're using matchedMedia() to detect the user's preference.

const prefersDarkScheme = window.matchMedia('(prefers-color-scheme: dark)');nnif (prefersDarkScheme.matches) {n  document.body.classList.add('dark-theme');n} else {n  document.body.classList.remove('dark-theme');n}

There is a downside to using JavaScript: there will likely be a quick flash of the light theme as JavaScript is executed after the CSS. That could be misconstrued as a bug.

And, of course, we can swap stylesheets instead like we did in the second method. This time, we link up both stylesheets and use the media query to determine which one is applied.

Overriding OS Settings

We just looked at how to account for a user's system-wide color scheme preferences. But what if users want to override their system preference for a site? Just because a user prefers dark mode for their OS doesn't always mean they prefer it on a website. That's why providing a way to manually override dark mode, despite the system settings, is a good idea.

View Code

Let's use the CSS custom properties approach to demonstrate how to do this. The idea is to define the custom properties for both themes like we did before, wrap dark styles up in the prefers-color-scheme media query, then define a .light-theme class inside of that we can use to override the dark mode properties, should the user want to toggle between the two modes.

/* Default colors */
body {
  --text-color: #222;
  --bkg-color: #fff;
}
/* Dark theme colors */
body.dark-theme {
  --text-color: #eee;
  --bkg-color: #121212;
}

/* Styles for users who prefer dark mode at the OS level */
@media (prefers-color-scheme: dark) {
  /* defaults to dark theme */
  body { 
    --text-color: #eee;
    --bkg-color: #121212;
  }
  /* Override dark mode with light mode styles if the user decides to swap */
  body.light-theme {
    --text-color: #222;
    --bkg-color: #fff;
  }
}

Now we can turn back to our trusty button to toggle between light and dark themes. This way, we're respecting the OS color preference by default and allowing the user to manually switch themes.

// Listen for a click on the button 
btn.addEventListener("click", function() {
  // If the OS is set to dark mode...
  if (prefersDarkScheme.matches) {
    // ...then apply the .light-theme class to override those styles
    document.body.classList.toggle("light-theme");
    // Otherwise...
  } else {
    // ...apply the .dark-theme class to override the default light styles
    document.body.classList.toggle("dark-theme");
  }
});
CodePen Embed Fallback

Browser Support

The prefers-color-scheme media query feature enjoys support by major browsers, including Chrome 76+, Firefox 67+, Chrome Android 76+ and Safari 12.5+ (13+ on iOS). It doesn't support IE and Samsung Internet Browser.

That's a promising amount of support!. Can I Use estimates 80.85% of user coverage.

Operating systems that currently support dark mode include MacOS (Mojave or later), iOS (13.0+), Windows (10+), and Android (10+).


Storing a User's Preference

What we've looked at so far definitely does what it says in the tin: swap themes based on an OS preference or a button click. This is great, but doesn't carry over when the user either visits another page on the site or reloads the current page.

We need to save the user's choice so that it will be applied consistently throughout the site and on subsequent visits. To do that, we can save the user's choice to the localStorage when the theme is toggled. Cookies are also well-suited for the job.

Let's look at both approaches.

Using localStorage

We have a script that saves the selected theme to localStorage when the toggle takes place. In other words, when the page is reloaded, the script fetches the choice from localStorage and applies it. JavaScript is often executed after CSS, so this approach is prone to a “flash of incorrect theme” (FOIT).

View Code
// Select the button
const btn = document.querySelector(".btn-toggle");
// Select the theme preference from localStorage
const currentTheme = localStorage.getItem("theme");


// If the current theme in localStorage is "dark"...
if (currentTheme == "dark") {
  // ...then use the .dark-theme class
  document.body.classList.add("dark-theme");
}


// Listen for a click on the button 
btn.addEventListener("click", function() {
  // Toggle the .dark-theme class on each click
  document.body.classList.toggle("dark-theme");
  
  // Let's say the theme is equal to light
  let theme = "light";
  // If the body contains the .dark-theme class...
  if (document.body.classList.contains("dark-theme")) {
    // ...then let's make the theme dark
    theme = "dark";
  }
  // Then save the choice in localStorage
  localStorage.setItem("theme", theme);
});
CodePen Embed Fallback

Using Cookies with PHP

To avoid FLIC, we can use a server-side script like PHP. Instead of saving the user's theme preference in localStorage, we will create a cookie from JavaScript and save it there. But again, this may only be feasible if you're already working with a server-side language.

View Code
// Select the button
const btn = document.querySelector(".btn-toggle");


// Listen for a click on the button 
btn.addEventListener("click", function() {
  // Toggle the .dark-theme class on the body
  document.body.classList.toggle("dark-theme");
  
  // Let's say the theme is equal to light
  let theme = "light";
  // If the body contains the .dark-theme class...
  if (document.body.classList.contains("dark-theme")) {
    // ...then let's make the theme dark
    theme = "dark";
  }
  // Then save the choice in a cookie
  document.cookie = "theme=" + theme;
});

We can now check for the existence of that cookie and load the appropriate theme by applying the proper class to the tag.

<?php
$themeClass = '';
if (!empty($_COOKIE['theme']) && $_COOKIE['theme'] == 'dark') {
  $themeClass = 'dark-theme';
}
?>


<!DOCTYPE html>
<html lang="en">
<!-- etc. -->
<body class="<?php echo $themeClass; ?>">
<!-- etc. -->
</body>
</html>

Here is how to do that using the separate stylesheets method:

<?php
$themeStyleSheet = 'light-theme.css';
if (!empty($_COOKIE['theme']) && $_COOKIE['theme'] == 'dark') {
  $themeStyleSheet = 'dark-theme.css';
}
?>


<!DOCTYPE html>
<html lang="en">
<head>
  <!-- etc. -->
  <link href="<?php echo $themeStyleSheet; ?>" rel="stylesheet" id="theme-link">
</head>
<!-- etc. -->

If your website has user accounts — like a place to log in and manage profile stuff — that's also a great place to save theme preferences. Send those to the database where user account details are stored. Then, when the user logs in, fetch the theme from the database and apply it to the page using PHP (or whatever server-side script).

There are various ways to do this. In this example, I am fetching the user's theme preference from the database and saving it in a session variable at the time of login.

<?php
// Login action
if (!empty($_POST['login'])) {
  // etc.


  // If the uuser is authenticated...
  if ($loginSuccess) {
    // ... save their theme preference to a session variable
    $_SESSION['user_theme'] = $userData['theme'];
  }
}


// Pick the session variable first if it's set; otherwise pick the cookie
$themeChoice = $_SESSION['user_theme'] ?? $_COOKIE['theme'] ?? null;
$themeClass = '';
if ($themeChoice == 'dark') {
  $themeClass = 'dark-theme';
}
?>


<!DOCTYPE html>
<html lang="en">
<!-- etc. -->
<body class="<?php echo $themeClass; ?>">
<!-- etc. -->
</body>
</html>

I am using PHP's null coalesce operator (??) to decide where to pick the theme preference: from the session or from the cookie. If the user is logged in, the value of the session variable is taken instead that of the cookie. And if the user is not logged in or has logged out, the value of cookie is taken.


Handling User Agent Styles

To inform the browser UA stylesheet about the system color scheme preferences and tell it which color schemes are supported in the page, we can use the color-scheme meta tag.

For example, let's say the page should support both “dark” and “light” themes. We can put both of them as values in the meta tag, separated by spaces. If we only want to support a “light” theme, then we only need to use “light” as the value. This is discussed in a CSSWG GitHub issue, where it was originally proposed.

<meta name="color-scheme" content="dark light">

When this meta tag is added, the browser takes the user's color scheme preferences into consideration when rendering UA-controlled elements of the page (like a

Categories: Designing, Others Tags:

Information And Information Architecture: The BIG Picture

July 1st, 2020 No comments
Wizard example

Information And Information Architecture: The BIG Picture

Information And Information Architecture: The BIG Picture

Carrie Webster

2020-07-01T12:30:00+00:00
2020-07-01T17:34:35+00:00

We are living in a world exploding with information, but how do we find what is relevant to us at the time that we need it? I believe that good information architecture is key to helping us navigate through the mountains of data and information we have created for ourselves.

In this article, we will first describe what information architecture is, why it’s important, and approaches to effective implementation. Then we explore ideas around the broader view of the information age, how we use information, and how it impacts our world and our lives. These insights are designed to help you to understand the bigger picture, which enables us to grasp the value that good information architecture delivers to help our information-overloaded lives.

What Is Information Architecture And Why Is It Important?

“Information architecture is the practice of deciding how to arrange the parts of something to be understandable.”

The Information Architecture Institute

From a user experience perspective, this really means understanding how your users think, what problems they are trying to solve, and then presenting information in a logical way that makes sense from within this context.

Whether it is a website, a software application or a smartphone app, it’s about first designing the structure of how your information is organized, and then translating this into a logical navigation hierarchy that makes sense to the users who will be accessing it. In this world where we can sometimes feel as though we are drowning in data, information architecture provides us with a logical way of organizing this data to make it easier to locate.

Here are some other reasons why good information architecture is important:

For The User

  • It reduces cognitive load.
    Too much information on a screen with no clear pathway can make it difficult for a user to focus. Too many options can lead to choice deferral where a user chooses not to make a decision at all.
  • It speeds up the process of finding the right information.
    This is the opposite of choice deferral, where the user is able to easily locate what they are looking for with clear navigation choices.
  • It can keep the user focussed on the task they are trying to achieve.
    If the task a user is engaging in is easy to follow without additional non-contextual navigation elements, it’s less likely they will be distracted.
  • It makes it easier to analyze and understand information by the addition of context.
    Providing a visual navigation path of exactly where the user is within a website can provide more context for the content they are viewing. For example, during an online bank account application, displaying the total number of steps in the process and visually indicating exactly which step you are at, and what the next steps may involve gives context to the flow.
  • Reduces frustration and contacting support.
    If it is clear to the user where they can find what they need, there is no need to request help. For example, if a customer has received a purchased item that is faulty, without obvious instruction on how to rectify the situation, they may call the customer support center.

Below are a couple of examples helping to illustrate the points about the user.

Wizard example

(Image source: Shaun Utter) (Large preview)

The example above demonstrates:

  • The use of a “wizard” style application form and illustrates many of the points above.
  • Clear navigation steps across the top of the page providing context as to where the user is in the process.
  • Simple choices to guide the user.
  • Contextual information links in the form of FAQs relating to the step the user is at.
  • Navigation button at the bottom of the page giving specific instructions for the next step.

(Large preview)

The website example above, Punk Avenue shows another example of clear main navigation, with a brief summary of what you will find on each page. Below that is a series of tabs that keep you on the same page and visually indicate what information you are viewing.

For A Business

  • Keeps customers on their website for longer.
    Research shows that visitors to a website will often leave within 10-20 seconds, but with a clear purpose, you can engage your visitors for a longer period. Although good design and messaging help to present the site’s value proposition, a well-designed navigation display can also contribute to demonstrate what kind of information supports this value proposition.

  • Increases the chance of customer conversion.
    If your site visitor can find what they want via the navigation, and there are simple and minimal steps provided on how to acquire it, the chances of conversion are far higher than a site design that is unable to direct the user to the right information.

  • Reduces risk of customers going to a competitor.
    If a visitor to your site can easily find what they are looking for through effective navigation and good design, chances are they’ll stay there rather than move onto the next Google search result.

  • Reduces duplication of information (by design).
    Good information architecture can ensure that the same or similar content is not replicated. Understanding and documenting the content structure, particularly on information-heavy sites, can prevent these potential issues.

  • Better ROI through efficient use of the platform.
    The investment spent on ensuring that the information architecture on your site is effective and makes sense to your users is a compelling way to increase your customer conversions and the income derived from those sales.

  • Reduces cost of support when a user can’t find something.
    As described earlier, creating an unnecessary load on the customer support team is an additional cost that can be avoided by a site that functions well and provides assistance for customers when they need it.

The example below helps to illustrate some of the points above about business.

(Image source: Optimizely Blog) (Large preview)

The example above demonstrates how poor navigation displays can impact customer conversion. This case study shows an increase in customer revenue by 53.8%. The additional information in-between the search bar and the products was removed which also served to move the product display closer to the top of the page. The vertical information that was removed created the effect of what may have been perceived as a superfluous navigation bar, or maybe just information that was not considered relevant for a user in their product search.

When thinking about designing the information architecture for your website or app, efficient site navigation is crucial.


As a designer, ask yourself “Does the language resonate with the user, does the hierarchy make sense to the user flow, can they easily find their way back to where they were?”

If your website is content-heavy, you may also consider the use of site search. Let’s explore some research around site search vs navigation.

Search vs Navigation

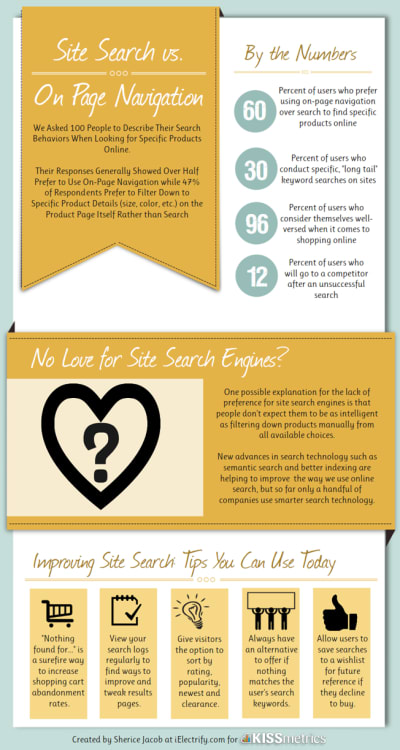
In 1997, Jakob Neilson conducted a study that showed over 50% of website users would use the search function over site navigation. In 2012, econsultancy.com reported that 30% of website visitors to e-commerce sites will use the site search, while a Kiss metrics study found that 40% of users preferred using search. In 2010, Gerry Mcgovern’s study demonstrated 30% of users preferring search.

(Image source: Neil Patel) (Large preview)

Although the relationship between these findings may seem elusive, one thing is clear; and that is that users will use both site search and site navigation to find information, in varying proportions.

In order to provide the best user experience for your customers, you may need to consider integrating a site search, in conjunction with an effective and well-designed site navigation if your website has a complex structure and large amounts of information.

Here is a practical example of where a site search would be useful for site visitors. Let’s say you visit a website that sells cleaning and health products, and you were looking to buy some antibacterial hand wash. There are two categories you can see, “Body Washing Products” and “Skin Cleansers”. Which one do you choose?

Body washing products

Body washing products (Image source: Good Housekeeping) (Large preview)

Skin cleansers

Skin cleansers (Image source: Skincare Hero) (Large preview)

And if you were to browse these categories that may have products listed alphabetically, there may be a large list to scan through. Below are some similar phrases that could be used, depending on what any individual’s idea of antibacterial hand wash could also be called:

  • hand sanitizer
  • sanitizing soap
  • hand disinfectant
  • disinfectant hand wash
  • hand sterilizer
  • hygienic soap
  • antiseptic handwash

If you are looking for “hygienic soap”, it may take you a while to scan the list to find the “antibacterial hand wash”. As it is difficult to cater to all possible synonym variations in the navigation structure of a site, a well-designed site search can allow users to search for these variations, by adding what we call metatags to each piece of content. For example, the “antibacterial hand wash” product could have additional hidden information or tags that include all the terms listed above, allowing users to search for any of these and return search results that match.

The Politico website below uses both navigation and a search function. It demonstrates an example of a content-heavy site that groups the information into categories making it easier to find topics. The site utilizes a “megamenu” which is accessed from the top left corner of the page. This is a common way to provide a menu of options with categories and subcategories that can be used for those visitors that want to browse content, and the search function can be used to locate a specific piece of information.

(Large preview)

According to research from measuringu.com, about 14% of users will start with a search and the rest will start by browsing through the navigation options.

Good And Bad Information Architecture Examples

Let’s review some website examples demonstrating good and bad uses of information architecture. Great navigation is a reflection of well-designed information architecture that considers the target audience’s needs.

Useful Navigation

This Sears website makes good use of mega drop-down menus. These help to provide navigation options to sub-categories that are clearly grouped. It also uses images to provide much faster cognition for the user.

(Large preview)

Visual Navigation Driven By Search

Pinterest demonstrates a useful way to present visual user-generated content based on search terms. The search is the navigation. This works well based on the sheer amount of content available on the site, which would make it difficult to provide a simple navigation system based on categories.

Pinterest website

Pinterest (Large preview)

Overwhelming Navigation

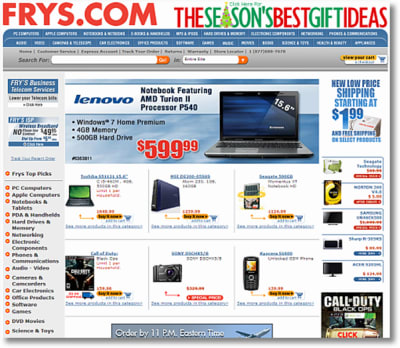
This website example is complete information overload with bad use of white space and way too many choices. It doesn’t help that the design of the website is cramped making it hard to identify all the options available. ?

Frys.com

(Large preview)

How Do You Get It Right?

Here is a brief list of considerations and processes to use when you are designing the information architecture for a product or service.

  • First understand your user’s needs and what tasks they are trying to achieve.
    You can conduct user interviews to really understand what problems your product or service is solving. From here, think about how they might interact with your website and what pathways they could take to achieve their objectives.
  • Try to create a hierarchy with minimal sub-levels.
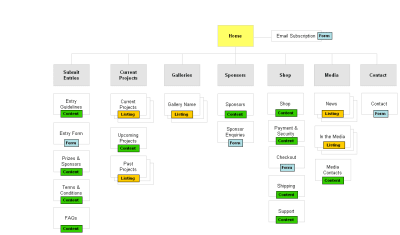
    If you can achieve this, then the user can access any information on your site with a maximum of two clicks.

Sitemap example

Map out your site navigation to see if you can organise into a minimal number of sub-levels or categories. (Large preview)
  • Don’t use jargon in the navigation language.
    Understand the language of your audience. Test with your users to ensure they understand the correct meaning of the language used.
  • Don’t rely on images or icons alone as a navigation tool.
    There are very few universally understood icons, such as Help, Error, and Print, and these may differ culturally.

(Large preview)

iphone icons with labels

Note that on smartphones, icons are always accompanied by a text label to help you navigate. (Large preview)
  • Always indicate to the user exactly where they are within the site so they can easily navigate back to a previous page. Breadcrumb navigation is one example of how to do this effectively as shown in the example below. It can sit below the main navigation showing you each page you have clicked on with the current location displaying as the last on the right.

Breadcrumb examples

Breadcrumb navigation example (Large preview)
  • Use design to create distinct visual differences between the hierarchy levels.
    For example, a top-level hierarchy heading may be displayed with a larger font size. These visual differences can guide the user’s eye to more important information first. It can also be the job of the visual designer to help differentiate these areas.

Methods To Test Your Navigation

Card Sorting

Write out the name of each information section on paper, and have participants sort cards containing all your navigation sections into groups that make sense to them. Try doing this same sort with at least five participants so you can start to identify patterns and preferences for the categories and subcategories that are created. This is called an open card sort. A closed card sort can be used if you decide to have predetermined top-level categories that the participants place the cards under based on what makes sense to them.

Card sorting

Card sorting (Image source: UX Indonesia on Unsplash) (Large preview)

Recommended reading: Card Sorting Beginner’s Guide: Improving Your Information Architecture

Scenario Testing

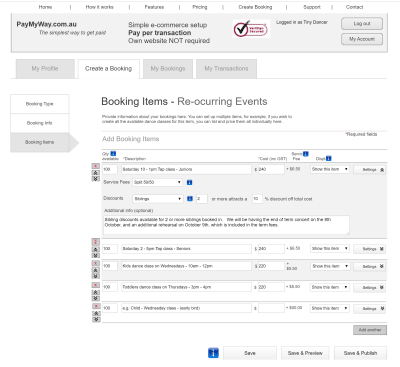
By using a wireframe or prototype, ask participants to complete a specific task by navigating through the site. You can use a clickable wireframe to test this by observing how clear it is for a user to carry out the activity. An example task (refer to the wireframe below) might be to register on the website and then make a booking for a single event and publish it.

Wireframe example

Scenario testing (Large preview)

Tools

Treejack is a tool that allows you to validate your navigation structure. It asks the participants to indicate where they would look to find specific information and provides you with insightful actions.

Treejack tool

Navigation testing tool (Large preview)

Free Keyword Tools

You can use free tools to help to identify commonly used search terms that can help with language choice in your navigation. For example, answerthepublic.com is a free site that allows you to enter a search term to see what other related search terms are being used.

Answer the public keyword search tool

Keyword search tool (Large preview)

We’ve covered the basics of information architecture, and now it’s time to move onto the bigger picture, the Information Age. Understanding context around the massive amounts of data and information we are surrounded by can help to shape your outlook as a UX designer, as it has helped inform the direction and approach to my own design practice.

The Information Age

We live in a time where our access to information is unprecedented. It is instantaneous, it is global, it is everywhere, it is the Internet. News stories are broadcast as they unfold, communication with friends and family in other parts of the world has never been easier, and Google has become our personal library of virtually limitless topics. Information is king and queen.

Key Facts About Information

  • 90% of the world’s data has been created in the past 2 years.
  • The amount of data in the world doubles every two years.
  • If all the data in our world was stored on 128G iPad tablets, they would create a stack going from the Earth to the Moon 6.6 times!?
  • Only 37% of all data is considered “useful”. And of that 37%, a much smaller percentage is actually analyzed.
  • 33 percent of managers feel that information overload was impacting their health.
  • 66 percent of managers reported increased conflict with teammates as well as reduced job satisfaction.

And finally, let’s examine how information can be used and abused in this age of information.


“We live in a time where our access to information is unprecedented. It is instantaneous, it is global, it is everywhere, it is the Internet.”

The Power Of Information

“With power comes great responsibility.”

This famous quote is often attributed to Uncle Ben from Spiderman. We can think of this in reference to how powerful information can be, but when in the wrong hands, there is an opportunity to abuse this power. Below is my perspective on how the power of information can manifest in our world, and why it is both a precious and dangerous commodity.

“Information Is Power”

Internet activist, Aaron Swartz, took his life in 2013 at the age of 26. Aaron was the original creator of Reddit, and among many achievements, his untimely death occurred when he was fighting felony charges for illegally accessing and downloading academic information. He wrote a manifesto that called for activists to “liberate” information secured by corporations, and campaigned against Internet censorship.

We recognize that information alone is useless if no one can find it. And then once it is made available, it needs to be acted upon. On a large scale, information can be shared to protect public health and safety, to help governments to create better policies and to empower individuals to live better lives. It can also be used for propaganda purposes for political gain, to create fear for the purpose of control, and to instill beliefs for the sole purpose of financial profit.

Information Can Change World Events In An Instant

How quickly have governments pivoted and changed their approach to the COVID-19 pandemic based on new information? Not to mention the release of conflicting information from alternate sources that has also created mass confusion.

An example of this pivot was seen in Australia, when our Prime Minister announced non-elective surgery would be suspended from March 26, but just hours later, it was moved to April 1st after the health minister met with the private hospital sector that afternoon. This was due to the updated information received that would see the stand-down of medical staff, even as hospitals prepared for a surge in COVID-19 cases.

Dangers Of Misinformation

In current times, examples: “Fake news” claims, presidential tweets, and allegations of misinformation coming from China around the COVID19 pandemic. Donald Trump who is attributed with the reference to “Fake News”, now more generally attributes incorrect news reporting to journalists and media outlets such as CNN.

Unfounded “conspiracy theories” are another example of ways to link seemingly related information points that have no solid relationship evidence. For example:

Information Security

In 2018, it was revealed Facebook was exposed to a massive security breach after hackers exploited a vulnerability to access user’s personal data. The impact of the access to this kind of personal information could have ramifications for those individuals impacted for years to come.

In July 2017, shortly after I left employment at Equifax (no connection whatsoever!), a data breach impacting over 147 million people occurred in the US. The data exposed included Social Security numbers, birth dates, and some credit card details. After spending $1.4 billion on security upgrades, it is still resolving ongoing class actions from consumers that were impacted.

The importance of protecting privacy and personal data has become increasingly important throughout the world. 132 of 194 countries currently have legislation in place to protect the sharing of personal information without consent, and the data and privacy of individuals. In 2017-18 there was a 10% rise in the number of countries enacting data privacy laws.

Based on the examples above, it is clear that information in itself doesn’t discriminate for good or for evil. That’s why it is so important to validate data sources and analyze information before taking it on board.

Conclusion

We have reviewed how we use information, the power it yields, the sheer volume of data we have created, the impacts of information overload, and how information architecture can be used to organize and structure this information for those seeking it. There is no denying that in this age of Information why it is so important to focus on information architecture as a solid foundation for delivering the right information to your customers to make their lives easier.

Further Reading on SmashingMag:

(ah, ra, il)

Categories: Others Tags:

The Ultimate Guide To Copywriting In 2020

July 1st, 2020 No comments
copywriting guide

With the years passing us by, attracting prospects to your business and resources is also changing. Businesses are going online and copywriting is playing an important role in promoting them on the internet.

But what is that one thing that’s compelling people to buy products and services by just searching a few queries on a search bar?

The answer is content.

Today we see many web pages that are loaded with content; content that is convincing enough to convert your readers into customers.

So here it is, copywriting is the practice of utilizing any piece of content that implies the art and science of using words in a copy, promotional enough to sell products or services and forces a prospect to take action.

Many factors come into play for growing a business effectively including:

But the major portion that contributes to business growth is high-quality content. Check out these stats:

So now that we have checked the definition of copywriting, let’s move ahead to check the importance of copywriting.

Copywriting: Why Is It Crucial For Business?

We have seen the best marketers investing most in developing a content strategy for their business growth. So stating that copywriting is crucial for your business would be an understatement.

Let me cover the importance of copywriting for a business and why you should invest in good copy.

Great content is the core of a great copy. Also, a good content strategy costs 62% less and generates 3 times more leads.

A copy loaded with great content is much more engaging than television advertisements or a cold email.

About 60% of people prefer buying a product or service after reading informative content about it. Talking about branding, 70% of the audience would prefer learning about an organization through articles rather than an advertisement.

The stats until now have shown how important it is for a business to curate a great copy for:

  • Generating Leads
  • Increasing awareness among the target audience
  • Engaging the audience to your content

Still not convinced?

Let’s consider more statistics.

Business owners have started to realize the importance of a good copy to reach their customers’ minds. Thus, it’s not surprising that on an average 25% of the budget is spent on content marketing.

As business owners, it’s very necessary to plan a good copywriting strategy due to the omnipresence of content. Content is present to make people aware of your ideas. We on a daily basis create and engage with content on various channels such as:

Social Media

If you want to reach your audience using limited words and thoughts, social media copywriting can be the perfect solution. Social media is a platform with an ever-increasing number of audiences towards 3.1 billion in 2021, which makes it an important area to promote business.

Number of social media users worldwide 2010-2021(in billions)

Website

Having a website today is nothing new but to make people aware of it is the real task. A good copy plays an important role in making your website rank on top of search engine result pages (SERPs).

As per Julia McCoy, a serial content writer, entrepreneur, and author, 61% of U.S. online consumers have made a purchase based on recommendations from a blog.

Email

Email is amongst the first and oldest forms of personalized marketing in the digital world. Many alternative channels are becoming popular, but still, emails play a prominent role in the marketing world.

From an engaging subject and interesting body to a compelling call-to-action(CTA), copywriting is needed everywhere.

So these are some well-known areas where copywriting is indispensable for any business organization.

Types of Copywriting

Based on the site owners’ need and dependability, copywriting can fall in 2 categories:

  • SEO Copywriting
  • Direct Response Copywriting

SEO Copywriting

If your goal is to top the SERPs and gain some organic traffic for your website, SEO copywriting is the right choice.

SEO copywriting is all about writing content that uses relevant, niche-oriented keywords and focuses on a target audience.

For creating an SEO friendly copy, you need to ask yourself one question:

Who is your target audience?

The minute you answer this question correctly, the path to ranking your content on the SERPs will become easier.

Many content curators forget the real goal of writing for the audience. Instead, they write for keywords.

Let’s have a look at different components that contribute to Google’s Ranking Algorithm.

You’ll see “trust” and “authority” having the largest share as compared to other components.

To summarize, I would say that SEO copywriting is all about creating content that shares some value to its readers and is compelling enough to be ranked on top of the SERPs.

3 SEO Copywriting Takeaways

Let’s have a look at some of the best practices for SEO Copywriting.

Headline

The headline is the first thing that is read by the readers and is an important element in leaving a lasting impression on your readers.

“On average, five times as many people read the headline as read the body copy. When you have written your headline, you have spent eighty cents out of your dollar. —David Ogilvy”

A headline in SEO copywriting is all about creating an attraction for the visitors so that they could scroll further to read.

The headline also plays an important role in boosting the click-through-rates(CTRs) when your page appears in SERPs. To become a successful copywriter, think, and plan on your title first. Then carry it forward with your content.

This is arguably the best practice regarding headlines but some people might take a different approach.

Bonus Tip:
Headlines that use numbers in their text are mostly considered winners as per Conversion XL. Try including some sort of figures to make it more vivid.
Content

After the headline comes the most vital part of any SEO copy i.e. content. After all, the whole copy is based and relies on its content. Before beginning right away, understand your readers (target audience) and the information to be shared with them.

Google Panda 4.1 update talked about penalizing thin or shallow content. As per the experts, a typical post (SEO copy) is approximately 1000 words. It is not about the length but how much value you share with your visitors. Many find it difficult to rank highly dense content due to the shallow information they provide whereas small articles might rank at the top as readers find it highly informational.

Bonus Tip
Try including at least one of your targeted keyphrases at the beginning of your introduction, if not the exact keyphrase, try addressing the keyword intent.
Keyword Frequency

The number of times your keyword or keywords appearing in the content is keyword frequency.

Take an example:

“An article that targets best ps4 controls as a keyphrase, then how many times it is used in an article is considered as the keyword density for best ps4 controls.

Here is the formula for checking the exact keyword density:

For a Keyword:

Nk/Tw*100

Where Nk is the total count of keywords and Tw is the total number of words used in your content.

For a Keyword Phrase:

(Nk*Np/Tw)*100

Here Np is the total number of words in a phrase.

The ideal keyword density is considered as 1 to 2 percent for getting SEO benefits. I would advise you not to be too calculative; just avoid some common SEO mistakes like:

  • Stuffing header tags
  • Keyword stuffing
  • Excessive keyword insertion

To make it brief, SEO copywriting is all about implementing SEO best practices and naturally pushing your content upwards in the SERPs. Also, SEO copywriting is all about captivating your audience by leveraging psychology and persuasion.

Direct Response Copywriting

Direct response copywriting is a derivative of TV advertising where the motive of the writers is to engage people not only in reading but also memorizing their copy. The main goal behind a direct response copy is sharing value while raking in conversions.

If you analyze closely, it is much more than a normal television advertisement. The idea is to generate content by which the reader is ready to take action upon digesting the words.

Here are some examples of actions that you may want your readers to take:

  • Make purchase
  • Sign up for a newsletter
  • Download a resource, a freebie or something
  • Follow on social media

Direct Response Copywriting Takeaways

Let me share some tips that can make your copy a powerhouse of conversions.

3 Tips Before Writing Your Copy
#1 Determine your goal:

Before curating the copy, determine the goal behind its creation. Every author should decide what action they want their readers to take after reading the copy. If the publisher wants the reader to buy a product, download something, or subscribe to articles or newsletters, the mode of conversion has to be predetermined.

#2 Plan your path:

Now that you’ve decided your goal, this is the time when you have to be particular about what channel or medium you will use. Some common paths chosen by marketers are:

  • Emails
  • Personal Messaging
  • Creating a sales page with long-form information
  • Advertisements
  • Social Media Announcements
#3 Share, don’t demonstrate the value:

Try to share value with your copy. Instead of telling the community how much value you’re bringing to the community, try to bring a positive change. Tell people how your product is going to add value to their lives instead of showing how valuable your product is.

4 Takeaways While Writing your Copy

Once you have decided on your goal and found your medium where you want to publish your copy, it’s time to get into action.

#1 It all starts with a headline

As mentioned in the SEO Copywriting section, the headline is the first thing that the user reads.

The legendary copywriter David Ogilvy has said it much better:

“On average, five times as many people read the headline as read the body copy. When you have written your headline, you have spent eighty cents out of your dollar.”

If the heading doesn’t capture the attention of the reader and fails to arouse any curiosity, your copy goes in vain.

Have a look at David Ogilvy’s best selling copy that used a heading to arouse curiosity:

#2 Adding Compelling CTAs to your Copy

The main goal behind writing a Direct Response copy is to drive actions. Thus, placing CTAs in the copy is the best way to capture reader action.

The characteristics of a good CTA are:

  • Make the reader crystal clear about the big benefit they are going to receive on clicking that button
  • Make it transparent to that next step once that action is undertaken
  • The CTA should be free of any doubts and confusions

Above is an example from SEMrush that showcases some of the perfect CTAs needed in a copy.

The reader knows exactly what’s going to happen when they click the button.

#3 Write to define your readers

Each and every word of your copy should define your readers. By defining the readers I mean that the reader should be convinced that the copy is exclusively written for him or her.

Upon reading your copy they should understand that the product or service is going to bring a positive change in their current scenario. Many business owners try to work upon the fallacy of how great their product is, which is a wrong approach.

While writing the copy keep the readers in focus instead of creating a hype of the product.

Have a look at another example by SEMrush.

# 4 Invest time in Long Form Copy

We have become too busy in our lives. Everyone needs quick results within a span of a few microseconds. There is a misconception that short-form content outperforms longer forms of content every single time but that isn’t the case.

When it comes to direct response copy, try to invest time in a long-form copy.

Here are some benefits of writing a long-form copy:

  • Long-form copy allows readers to engage with content with the desire to learn more.
  • Long-form copy gives copywriters the chance of packing in more information which might not have been possible in a short-form copy.
  • Long-form copy delivers more value to your readers.

Here is an example from WordStream’s own analytics that depicts their progress when they switched to long-form copies.

The above screenshot depicts how the average visit duration rose gradually after they focussed on more words from late 2012.

Direct Response copywriting is all about crafting words in a fashion that targets your readers’ emotions and most importantly addresses their worries, fears, and immediate needs.

Copywriting in 2020

Having discussed the important forms of copywriting and how crucial it is for a business, let’s have a look at the future of copywriting in 2020.

Copywriting, a traditional tool of marketers to promote a product, has already passed through major changes over the years. Copywriting started as a method for persuading readers to become potential customers.

Modern copywriting is an outcome of what I call a digital earthquake. With the introduction of the internet, everything changed and thus changed the role of copywriters. The digital earthquake brought the culture of blogging, SEO, eCommerce, social networking, personalized marketing, and much more.

This means in the coming years we will experience more transitions in copywriting. Let’s go through some copywriting trends for 2020.

5 Copywriting Trends 2020

Here are the top 5 copywriting trends for 2020 that are essential for a successful content marketing strategy:

#Trend 1: Channelize or Repurpose the Copy

Let me ask you, readers, a question:

What is the main motive behind curating great content?

The answer is to make your copy reachable to as many people as possible. Thus in 2020, it would be necessary to channelize or repurpose your copy on various platforms regularly.

What does this mean? Does it mean that one has to create a unique copy for each platform on a daily basis?

That seems to be a daunting task.

If you thought so, then you got me wrong. By channelizing I mean picking up a single copy and publishing it across various platforms.

Just pick one of your best copies. It could be anything, consider your email newsletter with the highest open rate. Turn that email content into a social post or a website blog.

Here is the average share of different forms of content:

By repurposing a unique copy across various platforms, one can :

  • Reach new audiences
  • Boost organic traffic
  • Diversifies a single copy across various platforms
  • Compel the reader to navigate through different stages of the buyer journey

#Trend 2: Visual Content

Apart from textual and readable content, visual content is also becoming a huge move in the copywriting world. Video content has already established itself as a go-to option for many B2B and B2C organizations.

Many marketers consider videos an effective way of building trust among their audience. In the present scenario business owners are much more focused on building a long-term relationship with their audience instead of just selling them a product.

As said by Mark Schaefer, Executive Director, Schaefer Marketing Solutions:

“The new era demands a focus on ignition, not just content, on trust, not just traffic, and on the elite people in your audience who are spreading and advocating your content.”

Videos are a great way of igniting emotions. Therefore I have included videos as an important point of copywriting trends 2020. Popular video platforms include:

  • YouTube
  • Vimeo
  • Snapchat
  • TikTok
  • Facebook
  • Instagram
  • LinkedIn
  • Own website

# Trend 3: Optimize Copy for Voice Search

Voice search has been a booming technology in the recent past, with the invention of smart devices such as Google Home and Amazon’s Alexa. Thus, I would encourage optimizing your copy with the users’ voice intent.

Another big reason for voice search optimization is mobile as a preference for searching for information. As per Statista, the global mobile users count is increasing exponentially.

Number of smartphone users worldwide from 2016 to 2021 (in billions)

Thus, audiences in 2020 will embrace voice search with open arms. This means that copywriters will have to keep a watch on their copy and optimize it for voice search.

#Trend 4: Understanding User Intent

Before writing a copy, one needs to understand the purpose behind curating it. This is where understanding user intent becomes even more important. User intent plays a key role if one wants to make the copy rank on top of the SERPs.

Typically there are four forms of user intent:

Navigational

These are specific queries when the user wants to visit a specific site or page.

(eg., “makewebbetter.com”, “facebook.com”)

Informational

These are broad or general queries when the user is looking for some sort of information.

( eg., “why is Sahara so hot”). The informational queries end up returning thousands of results on the search engine result pages.

Transactional

Transactional intent focusses on action-based queries where the user is ready to perform any sort of activity. (eg., “buy Adidas sneakers” or “book tickets for Paris”).

Investigational

Queries that intend to research about any piece of information are known as investigational intent.

(eg., “best headphones for gaming”, “bose headphones customer reviews”).

The importance of understanding user intent has become even more important after Google made the announcement of their new BERT update.

With the vision of giving its searchers freedom from keywords and paving a way that makes searching natural in 2020, the search engines will focus more on understanding the intent behind the query instead of the query itself.

#Trend 5: Aim for the Featured Snippet

What is a featured snippet?

Featured Snippets are some selected search results that appear on top of the search result pages. The main motive of featured snippets is to answer user queries right away upon searching.

Why are featured snippets important?

If we look from the searcher’s perspective, featured snippets are quick results or answers to queries being searched. Featured snippets help a copy to get good click-through rates and are a perfect opportunity to drive organic traffic to a site.

Featured snippets are important for a copywriter to increase the awareness of a brand, increase traffic, and consequently increase conversion rates.

As per Ahrefs, if a copy ranks first for a search term and owes a featured snippet in the SERPs, then there is a chance of getting 31% more traffic on the page. This is compared to a result that only has the first position on SERPs.

How are featured snippets important in 2020?

As we are stepping our foot into the future, the nature of searchers is also changing. 2020 will be all about what Alice Corner refers to as “no-click users”. Thus, copywriters need to focus on the long-form copy that answers the audiences’ urging questions. In addition to that, the copy should be backed by a short yet highly descriptive headline.

Copywriting Strategies for 2020

Soon we will be witnessing a whole new era of copywriting. Thus, content curators need to get ready for the upcoming year. Here, I’ll be discussing three copywriting strategies for creating a compelling copy.

#1 Joseph Sugerman’s Slippery Slide Concept

Joseph Sugerman, a legendary copywriter and the author of The Adweek Copywriting Handbook started his business with JS&A and laid the foundation of the Slippery Slide concept.

The Adweek Copywriting Handbook is a perfect tool for copywriters to understand the mentality and philosophy which is required to excel as a successful copywriter.

As per the handbook,

“our readers should be so compelled to read your copy that they cannot stop reading until they read all of it as if sliding down a slippery slide.”

The job of every copywriter is to make a copy that arouses readers to engage with the copy. The reader should be compelled to read until the end.

This is where the Slippery Slide concept comes into play. As depicted in the image below:

  • It all starts with a perfect headline.
  • Moving ahead is the magic of the words that should be woven in a manner to entangle the reader till the end.
  • The ending should be all about leaving an impression that leads to action.

Thus, as a copywriting strategy for 2020, it’s important to engage your readers and compel them to read until the end.

#2 AIDA Formula

AIDA stands for Attention, Interest, Desire, and Action.

It is a conventional formula used by copywriters and marketers to develop continuity in a copy. Also, the AIDA formula is an effective way of implementing the Slippery Slide concept in your copy.

Let’s understand each and every element of the formula in detail:

Attention

The first thing that a copy needs is your reader’s attention. A visitor must be compelled to read the complete copy. Once the job of garnering attention is done, it’s time to develop an interest in your readers to read more.

Here are some tips to capture your readers’ attention:

  • Create an effective yet unique headline.
  • Add graphics that can beautify your content.
  • Use a hero image for the copy.

Example for hero image:

Interest

Most visitors have a short attention span, thus it’s very necessary to develop an interest in your readers. There are two ways to achieve this:

  1. Preparing for scanners and scrollers

Many have the tendency of scrolling and scanning a page upon landing on the page. Considering such readers, the copy has to be curated in a way that develops an interest in their minds. To achieve this, the copy has to have elements such as images, videos, CSS, etc. that can beautify it.

  1. Opening paragraph

After a catchy headline, the next thing that needs attention is the opening paragraph. An opening paragraph can turn the tables for your copy and its performance.

If upon reading the opening paragraph, the readers don’t get curious enough, then there is a possibility that they might lose interest in reading the copy further.

Desire

Interest ultimately leads to desire and makes readers search for more information.

Here are some strategies that are helpful in creating that desire:

  • Show the product benefits in your copy.
  • Explain to your readers how the product can bring a positive change in your life.
  • Try to convince your readers with real examples such as case studies, client testimonials, etc.

Action

Once the reader has read your copy, all you want is your reader taking some action. That action can be a purchase, a file download, a subscription, a like or share on the content piece.

The user action can be achieved with the help of the following methodologies:

Using Clear CTAs

One of the conventional methods is using clear Call to Actions (CTAs). CTAs are distinct buttons that have some text which is action-oriented and allows the users to call for action.

Creating Urgency

Creating urgency is an old technique of playing with the psychological mindset of the reader. With the help of urgency, a marketer compels a user to make a quick decision.

Countdown timers on product pages are the best examples of creating urgency.

Incentives and Offers

This is another technique of making the reader take action. Adding a small offer for your readers not only helps in getting quick actions but also in winning the trust and loyalty of the readers.

#3 Social Proof

As per Nielsen Norman Group:

“People are guided by other people’s behavior, so we can represent the actions, beliefs, and advice of the crowd in a design to influence users.”

This means when people are confused about what to do next, then they look up to what others have done. In brief, social proof plays an important role in influencing the actions of an individual.

Thus, for 2020 it becomes even more important to back your copy with good social proof.

Check the SEMRush homepage:

But the challenge is:

To show social proof, one needs to have enough social proof.

Many copywriters find it difficult in backing up their copy with enough social proof but the following two techniques can make it easier for you:

  • Feature the strongest form of social proof available with you. This could be the total number of subscriptions for your product or service. Or maybe feature the best client testimonial available.
  • Giving a crystal clear unique selling proposition (USP). In short, tell people why one should come to you to buy a product or service.

Thus, these are two best approaches for backing up the copy with social proof.

Over To You

If you have reached the end, this means I’ve been successful in keeping up your interest with my copy.

We have covered all about copywriting including the types of copywriting, its importance in business, trends for 2020, and some strategies that will step up your copywriting game in 2020 and coming years.

To sum it up, I perceive copywriting in 2020 to be revolutionized with the latest technologies like voice search and copywriters would have to work upon various other opportunities like visual content to stay ahead of the curve.

Irrespective of which year it is, the basics of copywriting(just like any other concept) will always remain the same such as keeping your readers interest, using engaging headlines, and maintaining flow in your content. Copywriting in 2020 will be all about implementing new technologies while keeping up the conventional strategies.

Also please ensure to measure the performance of your content to understand what’s working for you and what’s not.

I hope I was able to cover all there is about copywriting and its best practices, and you all gained some useful insights from my copy.

Which of these copywriting strategies and trends would rule the year 2020? Do you plan to use any of these in your marketing plan? Did I miss out on something?

Please have your say. I am listening.

Categories: Others Tags:

Show Them Your Assets – Tips for Handing Off Designs to Developers

July 1st, 2020 No comments

You’ve been working away at your latest design project, and the client has given the go-ahead on your lovingly created digital concepts. Now it’s time to bring those designs to life, and you have a developer queued up to do just that.

So your part’s done, right? Not quite. You’re going to want to make sure your developer has the best head start they can in order to create the site as you imagined.

Below are a few tips to make that handover process a little easier.

Communicate to Make It Great

Get Talking

Scheduling a face-to-face meeting with your developer to talk over your project’s specifics and ambitions will help align your expectations and make the intent behind your concepts more clear. It’s quite likely they’ll even ask questions and request assets you haven’t even thought of yet!

It’s not just a one-and-done thing either, your developer’s going to have questions or requirements that arise as the project progresses. Deciding on a communication channel to allow easy discussion will help you both immensely.

Annotating Your Concepts

Developers might seem like magicians with the way they bring your websites to life, but they’re not clairvoyant! Annotating your concepts where advanced functionality is required reduces ambiguity and makes it more likely that your cool, quirky idea is going to make it to production. If it’s a feature that’s particularly unusual, you might want to find an example of a website or code sandbox that does something similar.

An example of Figma’s comment tool in use to make developer notes.

Figma and Sketch both have comment functionality in order to make annotations a little easier, also allowing multiple parties to comment. If dealing with PDFs, there is also an annotation tool available through Adobe Acrobat.

Specify the Basics

The basis of modern front end development revolves around DRY thinking. Some might argue thinking about code can be pretty dry, but we’re not talking about that – in this case, DRY stands for Don’t Repeat Yourself. Most developers will tackle a project by starting with defining variables: what colors, font sizes, grid columns… anything that can be reused! Good, consistent design follows this same principle – although it’s a habit that can be hard to get going at first.

Tip: It’s always easier to define variables if this mentality is approached towards the start of the project!

Colors

Make a style guide that specifies the colors you’ve used in your designs. Think about their logical applications to help signpost how they might work as a variable – for example, what colors did you use for paragraph text, hyperlinks and backgrounds? Did you consider colors to convey status messaging, such as successes, warnings and errors?

Typefaces

Which fonts have you used for your project? Is there a consistent set of font sizes you used throughout? If you haven’t already, maybe consider a ratio-based type scale – I like to use ModularScale to help with this.

Basic HTML Elements

Think about general styling for these basic html tags:

  • Paragraphs
  • Headings

  • Bullet lists
      and numbered lists

      1. Emphasized text , and

    Buttons

    How about buttons and links? What should they do when they’re hovered over, focused (using the tab key on a keyboard) or disabled?

    Forms Fields and Inputs

    What should form fields look like? Is there any validation checking that should occur when a form is submitted? How about checkboxes and radio buttons?

    It’s unlikely that you’re going to be able to cover absolutely every single eventuality – allow your developer to use some common sense to fill in the gaps, and be available to them if they have any questions. In the words of John Maxwell and your aunt’s home office wall sticker, teamwork makes the dream work.

    Get Your Favic-on

    Favicons are widely recognized as the small icon that appears to the left of the site title on your browser’s tab bar. Nowadays, the application of your site’s favicon is much further reaching, showing up in Google search results and app tiles. There’s also extra theming options available, such as the ability to customize the color of Google Chrome Android’s browser bar color for your site.

    Using a generator site such as realfavicongenerator takes the pain out of much of this decision-making, allowing you to upload specific graphics as desired, creating silhouettes of your icon for Windows Metro tiles and macOS Safari pins, and packaging everything into easy-to-use files and code.

    Compress Your Images

    Nobody wants to load a 20MB image when they’re on a slow connection or a data plan – it pays dividends to plan ahead and downsize your images so that they’re production-ready for the web. If you’re worried image compression is going to harm your image quality, fear not – you can go a long way with image compression before quality is seriously compromised.

    1. Start by reducing the image resolution – for batch jobs, I use Adobe Photoshop’s image processor script to downsize images to fit 1920 x 1200 pixels
    2. Alternatively, if you’re working on a static project – where specific images will be used only in specific places – you could use your design software (nearly all mainstream UI software allows you to do this now) to export your images at 2x size to support devices with high pixel densities.
    3. I also convert my image color profiles to SRGB to ensure consistency across most modern display types (this one’s optional)
    4. I then take my newly downsized images and run them through imageOptim at 80% quality. Generally I would aim to get my images under 300kb – if there are any that are still significantly over this target once compressed, I’d run these through again at 70% quality (I wouldn’t recommend going lower than this, though).

    Don’t forget you can also do this for PNGs! Enabling PNGCrush in imageOptim will let you significantly reduce the size of PNGs… just be ready for it to take a while.

    Make Your Vectors SVG-Easy to Use

    If your design contains graphics or illustrations you created using vector software, it can be used on the web as an SVG file. Usually, these files will be a lot smaller than JPGs or PNGs. You can export graphics in most (if not all) vector software in this format.

    Optionally, you could use imageOptim or SVGOMG to compress the SVG code without sacrificing quality. Your developer might already use a script that does this automatically when processing the site for production, so it may be worth asking ahead.

    Get Your Licenses in Check

    If you’re using premium fonts, make sure you’ve purchased a webfont license so you can hand over the correct files to the developer. I’d recommend doing this sooner rather than later – although not often, occasionally web versions of fonts can have slightly different bounding boxes to their desktop counterparts, making it a real pain for developers to work with further down the line.

    If you’ve been using samples of stock photos (or if you’ve been going crazy lifting whatever you can find on Google Images), make sure everything is kosher before you go live. Make sure you purchase licensed photos, and if certain photos you want to use require attribution, make the developer aware of this.

    Source

Categories: Designing, Others Tags:

Security and Safety While Working Remotely: Tips and Tricks To Keep You Secure

July 1st, 2020 No comments

The past six months have been for the most part a tough experience for scores of people the world over, as the coronavirus has made its way around the globe.

Countries closed off their borders, and many businesses closed down. Those that didn’t shut their doors, asked their employees to work from home instead of risking their health by coming to work.

Working from the office as opposed to home are two very different beasts. In addition to productivity, another issue you need to be aware of while working remotely, is your cybersecurity.

When at the office, you’re probably working on a network that the company protects. Your home network probably won’t measure up with the same level of cybersecurity. Subsequently, you need to be extra-sure that documents won’t be leaked or given unauthorized access to your companies’ data.

While your home computer security won’t be that comprehensive, there are ways to strengthen your cybersecurity while working from home. Here are a few tips on how you can do that.

10 Tips and Tricks To Keep You Secure While Working Remotely

1. Antivirus Apps Are Your Friend

Most companies put a premium on data security. This is why firms invest heavily in security solutions that prevent malware infections. They also often restrict access to websites and prevent employees from installing programs. It is far more difficult to achieve this level of computer security with your home office setup, but leaving your computer vulnerable should never be a consideration.

So how do you prevent unauthorized access to your work documents? One solution is the use of antivirus apps. You simply install an antivirus program on the devices you use to access company data.

If you’re worried about the price-tag on some of these apps, there are also free antivirus programs you can use to decrease the odds that your computer will become infected with viruses and malware.

2. Keep Your Computer And Devices Updated

Keeping your devices updated can be painstaking since it takes time to update your devices and you are required to restart your computer several times during the process. With this in mind, here’s what you need to understand about system updates.

People often discover security vulnerabilities in apps and operating systems. Many of these vulnerabilities can leave your computer or device open to being taken over by a hacker. A computer that hasn’t undergone any updates is a prime target for cybercriminals.

Fortunately, system updates are one way to patch over these vulnerabilities. The bottom line is, if you want to keep your data safe, be sure you update all of your apps and devices you use for your work.

3. Secure Your Wi-Fi

As necessary as it is, securing your devices isn’t enough. You also need to be sure you don’t have any unauthorized persons accessing your wi-fi network, or worse, gaining control of your router. If an attacker gets into your network or router, they will gain access to your data, including passwords and emails. This makes it critical you secure your wi-fi network.

To start, turn off your wi-fi router’s ability to broadcast your network name, or SSID. You will also want to change the wi-fi password to something stronger. Next, be sure you encrypt your password. For best results, use WPA2, considered the most secure encryption method to date. And while you’re at it…

4. Secure Your Router Login And Password Too

If you are still using the default login and password for your router, then now is the best time to change them. The default login name and passwords on many router models are on the internet and are easy to search for. Change your router login details and keep attackers off your network.

5. Use A VPN

If you’re connected to a public internet network or sending an important email, be sure you use a VPN. Many wi-fi networks, including public ones, are unencrypted. Using a VPN encrypts your data and prevents unauthorized people from viewing your data.

6. Lock Your Device

Make it a habit to lock your device or computer whenever you leave the table. Whether it’s for a quick trip to the bathroom or a brief coffee break, locking up ensures no one can catch a peek of your work or correspondence.

Even if you are working at home with no one around, it’s always best you lock your screen when you take a break. You probably don’t want your children to hit buttons on your computer, nor would you want an errant house pet to send a blank email to your coworkers. Another thing to remember is to password protect your computer too!

7. Stick To Corporate Tools And Resources

While at work, refrain from using non-company tools and resources for work-related activities. Companies spend money to configure their tools for their employee’s use, and for confidentiality and security. This also means there is less risk of emailing the wrong email address, or accidentally misplacing a saved file.

8. Learn To Spot Suspicious Emails

Don’t be in a rush to respond to emails you receive on your work email address. Sometimes, a malicious email can make it past your company’s email server while disguised as something legitimate. Read each email carefully and keep an eye out for any red flags.

Don’t hesitate to contact your coworkers or your boss if you need clarification on the contents of an email you receive. Be also wary of any links in the emails that end up in your inbox, and avoid clicking on them.

9. Be Transparent With Your Work Progress

Remember to log your work progress in your company’s work tracker. This lets your supervisors know you are working and you aren’t wasting company time. Always be ready to report on your work and the progress you have made with your tasks.

One more thing: Try to keep your work hours reasonable. When people work from home, they forget time, starting work early and ending late. This causes you to become tired faster and contributes to stress. Bottom line is, stick to normal working hours.

10. A Comfortable Workplace Is a Must

Your health is important, so be sure you use a comfortable chair with adequate support for your back, and a desk that’s at the correct height. These adjustments will help make working on your computer easier, and far more comfortable.

Lighting is also important. You don’t want to end up straining your eyes. So remember to stand up periodically, stretch your arms and legs, and stay hydrated by drinking enough water. Take a break if you need to, and it’s best you don’t skip eating lunch or dinner.

The Bottom Line

Working from home doesn’t have to be a stressful experience. By keeping these handy tips in mind, and your remote working experience will not only be a secure one, but a pleasant one.


Photo by Daria Nepriakhina on Unsplash

Categories: Others Tags:

HIPAA Compliance Web Development – Tips to Use and Pitfalls to Avoid

July 1st, 2020 No comments

With the development of artificial intelligence and technologies to analyze big data, the value of this information has increased greatly. So have the opportunities for its use by scammers.

Sensitive data is the biggest target for hackers of all types, and because of this, confidential medical records are considered even more valuable than credit card and bank account information.

If you plan to create a website, application, or Internet of Things (IoT) technology that will collect and store confidential health records of your users, then HIPAA rules are a major consideration. In this article, we will explain the issues in more detail and help you avoid problems.

HIPAA Rules and Sensitive Data

If you plan to create a technical solution for a company in the field of medicine and/or health, then the Health Insurance Portability and Accountability Act (HIPAA) regulations must be followed. HIPPA defines the procedure for storing, processing, and deleting data to ensure sensitive medical information collected through sites and applications stays secure. This means that your web development project must meet the criteria to be considered HIPAA compliant.

Health information has the greatest value on the black market, which can make it difficult to detect the theft of medical information. Your ability to protect the personal information of your users is a direct indicator of the site’s reputation and the basis for trust with the client.

In comparison, when fraudsters hack your credit card, you will know about it once you review your statement or when the card issuer’s fraud department alerts you. But in the case of health information, the patient may never suspect that his or her sensitive data has landed in the hands of criminals. This information can be used to illegally purchase prescription drugs, traffic drugs and commit organ transplant fraud, or to blackmail a person whose information has been stolen. One of the primary tasks of the site developer is to protect this data by handling it in accordance with the standards.

How to Make Your Website or App HIPAA Compliant

Below are the basic HIPPA requirements for sites that store sensitive medical data.

SSL Protection

A Secure Sockets Layer (SSL) certificate for the site is how one can recognize that the personal data of users on the site is protected. The absence of this certificate is the reason why a browser displays a warning about an insecure connection, which leads to user distrust. Some web surfers leave the site as quickly as possible fearing that hackers can gain access to data stored on their personal computers using an open connection. As for the healthcare industry, the absence of such a certificate is a big mistake because the site will run afoul of HIPAA regulations, and users will be hesitant to store their data in a place where it can be compromised.

Full Data Encryption

This requirement means that all data that you store in the cloud must also be fully encrypted. That means you need to choose your cloud provider with the utmost care to ensure that sensitive data is protected. You need to choose a reliable host that adheres to HIPAA requirements and takes Protected Health Information (PHI) seriously.

Full Data Backup

If your site, application, or device works with sensitive medical data, you must have copies of the data, and it must be stored in an even more reliable place with stronger encryption than the original source.

Permanent Data Deletion

There is a flip side of the coin: as soon as the storage of personal client information is no longer necessary (for example, when the client no longer uses your services), you must immediately get rid of all the information related to the person. It’s not enough to just click the delete button. The information should be deleted correctly so the server does not store traces of it to make it impossible to restore personal data that is no longer relevant to your business.

HIPAA Compliance Officer

If your company works with medical data of a type that allows patient identification, you need to constantly monitor the database it is stored in and verify compliance with the HIPPPA requirements. As with any regulation, changes to HIPAA laws are also possible, especially with further development of big data technologies and machine learning. Unfortunately, hackers are coming up with more and more new methods of tricking security systems. Therefore, it is better to hire a responsible person whose primary task will be to monitor changes in legislative regulations and immediately make appropriate suggestions to strengthen security measures on the site.

Limited Access

The human factor must also be taken into account. Both the user interface and back end of your site should be designed in a way that only the users have access to their data, and only one administrator (the most trusted person possible) has access to the administrative panel of the site and the information stored. Moreover, both users and the administrator need to change passwords as often as possible. This is a general security requirement, but practice shows that this action has saved data from theft on many occasions.

Summary

The procedure for working with data and ensuring its security is one of the most important requirements for creating IT solutions in the healthcare sector. That is why it makes sense to choose developers and vendors who have a clear understanding of the HIPAA guidelines. For example, the Archer Software team can help you with the implementation of such a solution with all the necessary data protection standards.


Photo by Martha Dominguez de Gouveia on Unsplash

Categories: Others Tags: