Archive

Archive for July, 2020

How To Build An Accessible Front-End Application With Chakra UI And Nuxt.js

July 20th, 2020 No comments
A demo application showing Chakra UI and NuxtJS

How To Build An Accessible Front-End Application With Chakra UI And Nuxt.js

How To Build An Accessible Front-End Application With Chakra UI And Nuxt.js

Kelvin Omereshone

2020-07-20T10:00:00+00:00
2020-07-20T15:27:08+00:00

For many people, the web is an essential part of their daily lives. They use it at work, home, and even on the road. Web accessibility means people with disabilities can use the web equally. So it’s crucial for developers and organizations building on the web to build inclusivity and accessibility into their applications.

In order to make the web more accessible, there are a couple of best practices and standards that you will have to implement in your applications, such as adhering to the following:

Learning to implement these standards can seem like a daunting task when you factor in project deadlines and other constraints that you have to work with as a developer. In that light, let me introduce you to a UI design system that was built to help you make your web applications accessible.

Chakra UI

Chakra UI is a design system and UI framework created by Segun Adebayo. It was created with simplicity, modularity, composability, and accessibility in mind. Chakra UI gives you all the building blocks needed to create accessible front-end applications.

Note: While Chakra UI depends on CSS-in-JS under the hood, you don’t need to know it in order to use the library.

Though the framework was originally created for React, Jonathan Bakebwa spear-headed the porting to Vue. So Vuejs/NuxtJS developers can now utilize Chakra UI to create accessible web applications.

Features Of Chakra UI

Chakra UI was created with the following principles in mind:

  • Style props
    Chakra UI makes it possible to style components or override their styles by using props. This reduces the need for stylesheet or inline styles. Chakra UI achieves this level of flexibility by using Styled Systems under the hood.
  • Composition
    Components in Chakra UI have been broken down into smaller parts with minimal props to keep complexity low, and compose them together. This will ensure that the styles and functionality are flexible and extensible. For example, you can use the CBox and CPseudoBox components to create new components.
  • Accessible
    Chakra UI components follow the WAI-ARIA guidelines specifications and have the right aria-* attributes. You can also find the accessibility report of each authored component in a file called accessibility.md. See the accessibility report for the CAccordion component.
  • Themeable
    Chakra UI affords you the ability to easily reference values from your theme throughout your entire application, on any component.
  • Dark mode support
    Most components in Chakra UI are dark mode compatible right out of the box.

How Chakra UI Supports Accessibility

One of the core principles behind the creation of Chakra UI is accessibility. With that in mind, all components in Chakra UI comes out of the box with support for accessibility by providing:

  • Keyboard Navigation — useful for users with motor skills disabilities,
  • Focus Management,
  • aria-* attributes which are needed by screen readers,
  • Focus trapping and restoration for modal dialogs.

Getting Started With Chakra UI And Nuxt

Note: To use Chakra UI with Vue.js see the Getting Started guide.

For our demo project, we will be building Chakra-ui explorer — an accessible single-page web application to search Chakra UI components.

Getting Started With Chakra-ui Explorer

Assuming you already have NPM installed, create a new Nuxt application by running:

$ npx create-nuxt-app chakra-ui-explorer

Or if you prefer in yarn, then run:

$ yarn create nuxt-app chakra-ui-explorer

Follow the installation prompt to finish creating your Nuxt application.

Setting Up Chakra UI

Chakra UI uses Emotion for handling component styles. So to get started with Chakra UI, you will need to install Chakra UI alongside Emotion as a peer dependency. For this project, we will be using the official Nuxt modules for both Chakra UI and Emotion which will reduce the friction in getting started with Chakra UI. Let’s add them to our project by running the following command:

npm i @chakra-ui/nuxt @nuxtjs/emotion

Note: @nuxtjs/emotion allows your component styles to be generated and injected in the server build.

After installing both modules, you will need to register them in the nuxt.config.js file under the modules array option:

// nuxt.config.js
modules: ['@chakra-ui/nuxt', '@nuxtjs/emotion'],

To complete our setup process of Chakra UI, we need to touch our default layout component in layouts/ and add CThemeProvider, CColorModeProvider, and CReset components from Chakra UI.

It is recommended thatyou use the CReset component to ensure all components provided by Chakra UI work correctly.

The CThemeProvider component will make your theme available to every part of your application, while the CColorModeProvider component is responsible for handling our application’s color mode which can be in one of two states: light or dark. Finally, the CReset component will remove all browser default styles.

Let’s add the aforementioned components in layouts/default.vue. In our template section, let’s add this:

<!-- layouts/default.vue -->
<template>
  <div class="container">
    <c-theme-provider>
      <c-color-mode-provider>
        <c-box as="section">
          <c-reset />
          <nuxt />
        </c-box>
      </c-color-mode-provider>
    </c-theme-provider>
  </div>
</template>

Then in our script section, we will import and register the components like so:

<script>
import { CThemeProvider, CColorModeProvider, CReset, CBox } from '@chakra-ui/vue'

export default {
  name: 'DefaultLayout',
  components: {
    CThemeProvider,
    CColorModeProvider,
    CReset,
    CBox
  }
}
</script>

Your default.vue layout component should look like this:

<template>
   <div class="container">
    <c-theme-provider>
      <c-color-mode-provider>
        <c-box as="section">
          <c-reset />
          <nuxt />
        </c-box>
      </c-color-mode-provider>
    </c-theme-provider>
  </div>
</template>

<script>
import { CThemeProvider, CColorModeProvider, CReset, CBox } from '@chakra-ui/vue'

export default {
  name: 'DefaultLayout',
  components: {
    CThemeProvider,
    CColorModeProvider,
    CReset,
    CBox
  }
}
</script>

Note: Notice I am wrapping both and components in a c-box component.

Setting Your Application Theme

Chakra UI allows you the ability to set a theme for your application. By ‘theme’, I mean the setting of your application’s color palette, type scale, font stacks, breakpoints, border-radius values, and so on. Since colors and contrast are vital components of accessibility, it’s important to use colors that are easily perceived.

Out of the box Chakra UI ships with a default theme object that affords for most of your application needs in terms of colors, fonts, and so on. The default theme is set up with contrast in mind which allows for the easily toggling of color modes (more on this later).

Chakra UI, however, allows you to extend or completely replaced the default theme. This is possible by accepting a theme object based on the Styled System Theme Specification.

The values in the theme object are automatically available for use in your application. For example, the colors specified in theme.colors can be referenced by the color, borderColor, backgroundColor, fill, stroke, and style props in your components.

To personalize your application, you can override the default theme provided by Chakra UI or set new values in it. To do that, the Chakra UI Nuxt module exposes a chakra object which will take in an extendTheme property which takes an object. The object given to extendTheme will be recursively merged to the Chakra UI default theme object. Let’s add our brand color palette to Chakra so we can use it in our application.

Note: Chakra UI recommends adding color palette into the colors object of your theme using keys from 50 — 900. You can use web tools like coolors and palx to generate these palettes.

For our demo homepage, I will be using a brand color of lime. To make Chakra UI aware of this color, I’ll create a customeTheme object in a folder called chakra(you can call it whatever you want) in the root of my project’s directory. In this object, I will define our brand color palette.

Create a file called theme.js in the folder you created and then add the following snippet:

// ./chakra/theme.js

const customTheme = {
  colors: {
    brand: {
      50: '#f6fcee',
      100: '#e2f4c8',
      200: '#cbec9e',
      300: '#b2e26e',
      400: '#94d736',
      500: '#75c800',
      600: '#68b300',
      700: '#599900',
      800: '#477900',
      900: '#294700'
    }
  }
}

module.exports = customTheme

Now let’s merge our custom theme to Chakra UI. We do that in nuxt.config.js. First, we need our custom theme object:

import customTheme from './chakra/theme'

Next, we have to specify the chakra key provided by the Chakra UI Nuxt module and pass in customTheme to the extendTheme property:

chakra: {
  extendTheme: customTheme
},

Your nuxt.config.js file should look like this:

// nuxt.config.js
import customTheme from './chakra/theme'

export default {
  mode: 'spa',
  /*
   * Headers of the page
   */
  head: {
    title: process.env.npm_package_name || '',
    meta: [
      { charset: 'utf-8' },
      { name: 'viewport', content: 'width=device-width, initial-scale=1' },
      {
        hid: 'description',
        name: 'description',
        content: process.env.npm_package_description || ''
      }
    ],
    link: [{ rel: 'icon', type: 'image/x-icon', href: '/favicon.ico' }]
  },
  /*
   * Customize the progress-bar color
   */
  loading: { color: '#fff' },
  /*
   * Global CSS
   */
  css: [],
  /*
   * Plugins to load before mounting the App
   */
  plugins: [],
  /*
   * Nuxt.js dev-modules
   */
  buildModules: [
    // Doc: https://github.com/nuxt-community/eslint-module
    '@nuxtjs/eslint-module'
  ],
  /*
   * Nuxt.js modules
   */
  modules: [
    '@chakra-ui/nuxt',
    '@nuxtjs/emotion'
  ],

  chakra: {
    extendTheme: customTheme
  },
  /*
   * Build configuration
   */
  build: {
    /*
     * You can extend webpack config here
     */
    extend (config, ctx) {}
  }
}

When you run your application with npm run dev, your homepage should look like this:

A demo application showing Chakra UI and NuxtJS

(Large preview)

Now that we have successfully installed Chakra UI and added our application’s custom theme, let’s begin building out Chakra-ui explorer.

Creating Our Main Navigation

We want our navigation to have our brand name, in this case, it will be Chakra-ui explorer, 2 navigation links: Documentation and Repo, and a button which is responsible for toggling our color mode. Let’s create a new component under the components directory called NavBar in which we’ll create our application’s main navigation using Chakra UI.

Let’s do this. Add the following snippet to NavBar.vue:

<template>
  <c-box
    as="nav"
    h="60px"
    px="4"
    d="flex"
    align-items="center"
    shadow="sm"
  >
    <c-link
      as="nuxt-link"
      to="/"
      color="brand.700"
      font-weight="bold"
      :_hover="{ color: 'brand.900' }"
    >
      Chakra-ui Explorer
    </c-link>

    <c-box
      as="ul"
      color="gray.500"
      d="flex"
      align-items="center"
      list-style-type="none"
      ml="auto"
    >
      <c-box as="li" mr="8">
        <c-link
          color="gray.500"
          :_hover="{ color: 'brand.400' }"
          is-external
          href="https://vue.chakra-ui.com"
        >
          Documentation
        </c-link>
      </c-box>
      <c-box as="li" mr="8">
        <c-link
          color="gray.500"
          :_hover="{ color: 'brand.400' }"
          is-external
          href="https://github.com/chakra-ui/chakra-ui-vue"
        >
          Repo
        </c-link>
      </c-box>
      <c-box as="li">
        <c-icon-button
          variant="ghost"
          variant-color="gray[900]"
          aria-label="Switch to dark mode"
          icon="moon"
        />
      </c-box>
    </c-box>
  </c-box>
</template>

<script>
import { CBox, CLink, CIconButton } from '@chakra-ui/vue'
export default {
  name: 'NavBar',
  components: {
    CBox,
    CLink,
    CIconButton
  }
}
</script>

Next, we need to import this component in our default layout component — default.vue and add it to our template so overall our default layout should look like this:

<template>
  <div class="container">
    <c-theme-provider>
      <c-color-mode-provider>
        <c-box as="section">
          <c-reset />
          <nav-bar />
          <nuxt />
        </c-box>
      </c-color-mode-provider>
    </c-theme-provider>
  </div>
</template>

<script>
import { CThemeProvider, CColorModeProvider, CReset, CBox } from '@chakra-ui/vue'
import NavBar from '@/components/NavBar'
export default {
  name: 'DefaultLayout',
  components: {
    CThemeProvider,
    CColorModeProvider,
    CReset,
    CBox,
    NavBar
  }
}
</script>

When you run your application now, you’ll get to see this:

You can see that the navigation is already accessible without even specifying it. This can only be seen when you hit the Tab key on your keyboard; Chakra UI handles focus management while you can focus on each link on the navigation menu.

The as Prop

From our NavBar.vue‘s snippet above, you will notice the as prop. This is a feature available to Chakra UI components that allows you to pass an HTML tag or another component to be rendered as the base tag of the component along with all its styles and props. So when we did:

<c-box as="li">
      <c-icon-button
        variant="ghost"
        variant-color="gray[900]"
        aria-label="Switch to dark mode"
        icon="moon"
      />
</c-box>

we are asking Chakra UI to render an

  • element and place a button component inside it. You can also see us use that pattern here:

     <c-link 
         as="nuxt-link"
         to="/" 
         color="brand.700" 
         font-weight="bold" 
         :_hover="{ color : 'brand.900' }">
          ChakraMart
     </c-link>
    

    In the above case, we are asking Chakra UI to render the Nuxt’s component.

    The as prop gives you the power to use the right(or wrong) element for the context of your markup. What this means, is you can leverage it to build your application template using semantic markups which will make your application more meaningful to screen readers. So instead of using a generic div element for the main content of your application, with the as prop you can render a main element telling screen readers that this is the main content of your application.

    Note: Check out the documentation for all props exposed by Chakra UI components. Also, take a closer look at how the brand color in chakra/theme.js was specified. You can see from the snippet above that we’re using it as any of the colors that Chakra UI provides. Another thing to be aware of is the moon icon that we used for the CIconButton on our NavBar. The moon icon is one of the default icons that Chakra UI provides out of the box.

    Color Mode

    One of the features of Chakra UI is color mode support. And you can tell from the use of the moon icon in Chakra-ui explorer’s navigation, we plan on integrating dark mode. So instead of leaving it for last, let’s get it over with and wire it up right now. To do this, CColorModeProvider using Vue’s provide/inject, provides, $chakraColorMode and $toggleColorMode functions. $chakraColorMode returns the current color mode of your application while $toggleColorMode toggles the color mode from light to dark and vice versa. To use these two functions, we’ll need to inject them into the NavBar.vue component. Let’s do this below in the section:

    <script>
    <script>
    import { CBox, CLink, CIconButton } from '@chakra-ui/vue'
    export default {
      name: 'NavBar',
      inject: ['$chakraColorMode', '$toggleColorMode'],
      components: {
        CBox,
        CLink,
        CIconButton
      },
    }
    </script>
    

    Let’s create a computed property to return the color mode:

    ...
     computed: {
        colorMode () {
          return this.$chakraColorMode()
        }
      }
    

    Now that we have injected both functions in NavBar.vue let’s modify the toggle color mode button. We’ll start with the icon so that it shows a different icon depending on the color mode. Our CIconButton component now looks like this at this state:

    <c-icon-button
      variant="ghost"
      variant-color="gray[900]"
      aria-label="Switch to dark mode"
      :icon="colorMode == 'light' ? 'moon' : 'sun'"
    />
    

    Currently, we are using an aria-label attribute to tell screen-readers to Switch to dark mode. Let’s modify this to support both light and dark mode:

    <c-icon-button
      variant="ghost"
      variant-color="gray[900]"
      :aria-label="`Switch to ${colorMode == 'light' ? 'dark : 'light'} mode`"
       :icon="colorMode == 'light' ? 'moon' : 'sun'"
    />
    

    Lastly, we will add a click event handler on the button to toggle the color mode of our application using the $toggleColorMode function. Like so:

    <c-icon-button
       variant="ghost"
       variant-color="gray[900]"
       :aria-label="`Switch to ${colorMode == 'light' ? 'dark' : 'light'} mode`"
       :icon="colorMode == 'light' ? 'moon' : 'sun'"
       @click="$toggleColorMode"
    />
    

    To test if our color mode set up is working, I’ll add an interpolation of the color mode and a text next to the CIconButton toggling our color mode. Like so:

    <c-box as="li">
      <c-icon-button
        variant="ghost"
        variant-color="gray[900]"
        :aria-label="`Switch to ${colorMode == 'light' ? 'dark' : 'light'} mode`"
        :icon="colorMode == 'light' ? 'moon' : 'sun'"
        @click="$toggleColorMode"
      />
      Current mode: {{ colorMode }}
    </c-box>
    

    Here is what our app currently looks like:

    So we have done the heavy lifting in setting up color mode in Chakra UI. So now we can style our application based on the color mode. Let’s go to default.vue and use the color mode slot prop provided by CColorModeProvider to style our application. Let’s modify our template first in default.vue.

    <template>
      <div class="container">
        <c-theme-provider>
          <c-color-mode-provider #default="{ colorMode }">
            <c-box
              v-bind="mainStyles[colorMode]"
              w="100vw"
              h="100vh"
              as="section"
            >
              <c-reset />
              <nav-bar />
              <nuxt />
            </c-box>
          </c-color-mode-provider>
        </c-theme-provider>
      </div>
    </template>
    

    We are destructuring colorMode from the slot props property provided by CColorModeProvider and then passing it as a dynamic key to a mainStyle object which we will create in a bit. The idea is to use a different set of styles based on the colorMode value. I am also using the width and height with the shorthand props — w and h respectively to set the width and height of our CBox component. Let’s define this mainStyles object in our script section:

    <script>
    import { CThemeProvider, CColorModeProvider, CReset, CBox } from '@chakra-ui/vue'
    import NavBar from '@/components/NavBar'
    export default {
      name: 'DefaultLayout',
      components: {
        CThemeProvider,
        CColorModeProvider,
        CReset,
        CBox,
        NavBar
      },
      data () {
        return {
          mainStyles: {
            dark: {
              bg: 'gray.900',
              color: 'whiteAlpha.900'
            },
            light: {
              bg: 'whiteAlpha.900',
              color: 'gray.900'
            }
          }
        }
      }
    }
    </script>
    

    Chakra-ui explorer now has dark mode support!

    Now we have our navigation bar and have successfully set up dark mode support for our application, let’s focus on index.vue in our pages/ directory where the meat of our application can be found. We’ll start off with adding a CBox component like so:

    <c-box
      as="main"
      d="flex"
      direction="column"
      align-items="center"
      p="10" 
    >
    </c-box>
    

    Then we’ll add the CInput component inside it. Our index.vue page component will then look like this:

    <template>
      <c-box
        as="main"
        d="flex"
        align-items="center"
        direction="column"
        w="auto"
        p="16"
      >
        <c-input placeholder="Search components..." size="lg" mb="5" is-full-width />
      </c-box>
    </template>
    
    <script>
    import { CBox, CInput } from '@chakra-ui/vue'
    export default {
      components: {
        CBox,
        CInput
      }
    }
    </script>
    

    Here is how our application looks like now:

    You can see from the above screencast how the CInput element automatically knows when it’s in dark mode and adjust accordingly even though we didn’t explicitly set that. Also, the user can hit the tab key to focus on that CInput component.

    Adding The Components’ List

    So the idea of the Chakra-ui explorer (as stated earlier) is to show the user all of the available components in Chakra UI so that we can have a list of those components as well as the links that will take the user to the documentation of the component. To do this, I will create a folder called data at the root of our project’s directory then create a file called index.js. In index.js, I will export an array of objects which will contain the names of the components. Here is how the file should look like:

    // ./data/index.js
    
    export const components = [
      {
        name: 'Accordion'
      },
      {
        name: 'Alert'
      },
      {
        name: 'AlertDialog'
      },
      {
        name: 'AspectRatioBox'
      },
      {
        name: 'AspectRatioBox'
      },
      {
        name: 'Avatar'
      },
      {
        name: 'Badge'
      },
      {
        name: 'Box'
      },
      {
        name: 'Breadcrumb'
      },
      {
        name: 'Button'
      },
      {
        name: 'Checkbox'
      },
      {
        name: 'CircularProgress'
      },
      {
        name: 'CloseButton'
      },
      {
        name: 'Code'
      },
      {
        name: 'Collapse'
      },
      {
        name: 'ControlBox'
      },
      {
        name: 'Divider'
      },
      {
        name: 'Drawer'
      },
      {
        name: 'Editable'
      },
      {
        name: 'Flex'
      },
      {
        name: 'Grid'
      },
      {
        name: 'Heading'
      },
      {
        name: 'Icon'
      },
      {
        name: 'IconButton'
      },
      {
        name: 'IconButton'
      },
      {
        name: 'Input'
      },
      {
        name: 'Link'
      },
      {
        name: 'List'
      },
      {
        name: 'Menu'
      },
      {
        name: 'Modal'
      },
      {
        name: 'NumberInput'
      },
      {
        name: 'Popover'
      },
      {
        name: 'Progress'
      },
      {
        name: 'PseudoBox'
      },
      {
        name: 'Radio'
      },
      {
        name: 'SimpleGrid'
      },
      {
        name: 'Select'
      },
      {
        name: 'Slider'
      },
      {
        name: 'Spinner'
      },
      {
        name: 'Stat'
      },
      {
        name: 'Stack'
      },
      {
        name: 'Switch'
      },
      {
        name: 'Tabs'
      },
      {
        name: 'Tag'
      },
      {
        name: 'Text'
      },
      {
        name: 'Textarea'
      },
      {
        name: 'Toast'
      },
      {
        name: 'Tooltip'
      }
    ]
    

    For our implementation to be complete, I will import the above array into pages/index.vue and iterate over it to display all the components. Also, we will give the user the ability to filter the components using the search box. Here is the complete implementation:

    // pages/index.vue
    <template>
      <c-box
        as="main"
        d="flex"
        align-items="space-between"
        flex-direction="column"
        w="auto"
        p="16"
      >
        <c-input v-model="search" placeholder="Search components..." size="lg" mb="10" is-full-width />
        <c-grid template-columns="repeat(4, 1fr)" gap="3" p="5">
          <c-box v-for="(chakraComponent, index) of filteredComponents" :key="index" h="10">
            {{ chakraComponent.name }}
      
          <c-badge>
              <c-link
                is-external
                :href="lowercase(`https://vue.chakra-ui.com/${chakraComponent.name}`)"
              >
                <c-icon name="info" size="18px" />
              </c-link>
            </c-badge>
          </c-box>
        </c-grid>
      </c-box>
    </template>
    
    <script>
    import { CBox, CInput, CGrid, CLink, CBadge, CIcon } from '@chakra-ui/vue'
    import { components as chakraComponents } from '../data'
    export default {
      components: {
        CBox,
        CInput,
        CGrid,
        CBadge,
        CIcon,
        CLink
      },
      data () {
        return {
          search: ''
        }
      },
      computed: {
        filteredComponents () {
          return chakraComponents.filter((component) => {
            return this.lowercase(component.name).includes(this.lowercase(this.search))
          })
        }
      },
      methods: {
        lowercase (value) {
          return value.toLowerCase()
        }
      }
    }
    </script>
    

    And now our application looks like this:

    You can now see how dark mode is automatic for the component’s list as well as how the focus management is added for the links (by default) to aid accessibility.

    Putting Chakra UI To The Test

    Finally, let’s see how our app scores by running the Lighthouse accessibility test on it. Mind you, this test is based on the Axe user impact assessment. Below is a screencast of the test. You can also run the test yourself by following these steps.

    From the screencast above you can see that our Chakra UI app has a score of 85 on the lighthouse accessibility test.

    Conclusion

    In this article, we have touched on the need for building accessible interfaces and we have also seen how to use Chakra UI to build accessible applications from the ground up by building an explorer (Chakra-ui explorer) for the Chakra UI components.

    (ra, yk, il)
  • Categories: Others Tags:

    Popular Design News of the Week: July 13, 2020 – July 19, 2020

    July 19th, 2020 No comments

    Every week users submit a lot of interesting stuff on our sister site Webdesigner News, highlighting great content from around the web that can be of interest to web designers.

    The best way to keep track of all the great stories and news being posted is simply to check out the Webdesigner News site, however, in case you missed some here’s a quick and useful compilation of the most popular designer news that we curated from the past week.

    Squircley – All You Need to Start Creating Beautiful Squircles

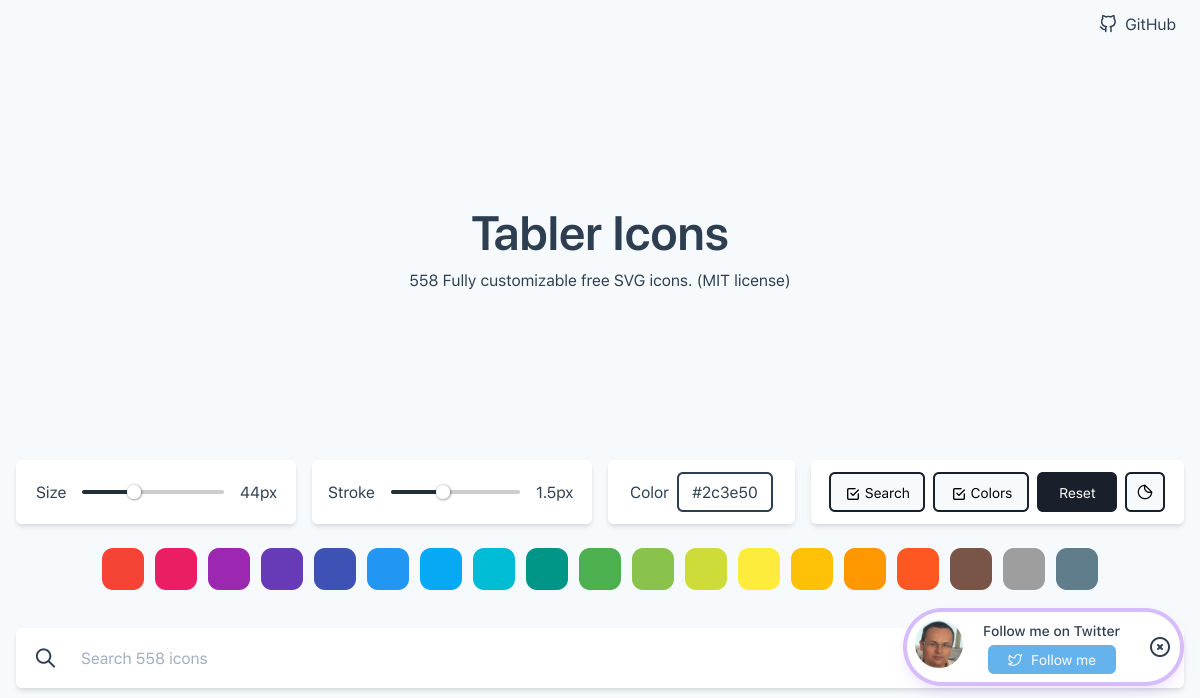
    Tabler Icons – 550+ Highly Customizable Free SVG Icons

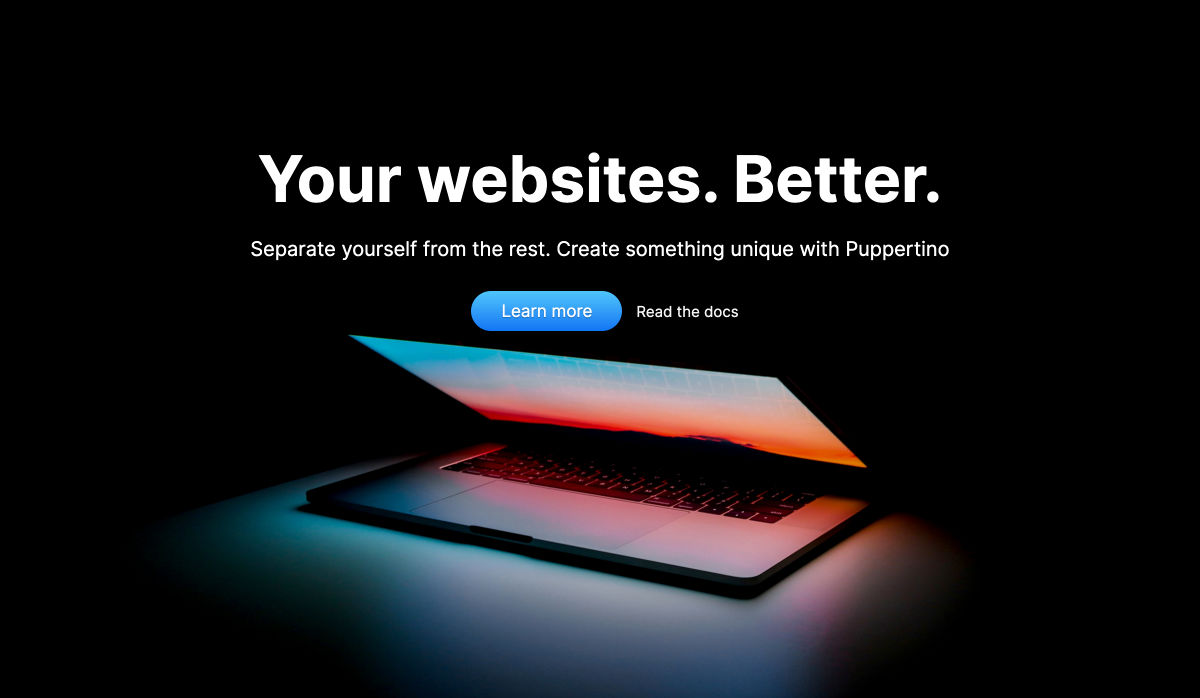
    Puppertino – A CSS Framework Based on Apple’s Design and Human Guidelines

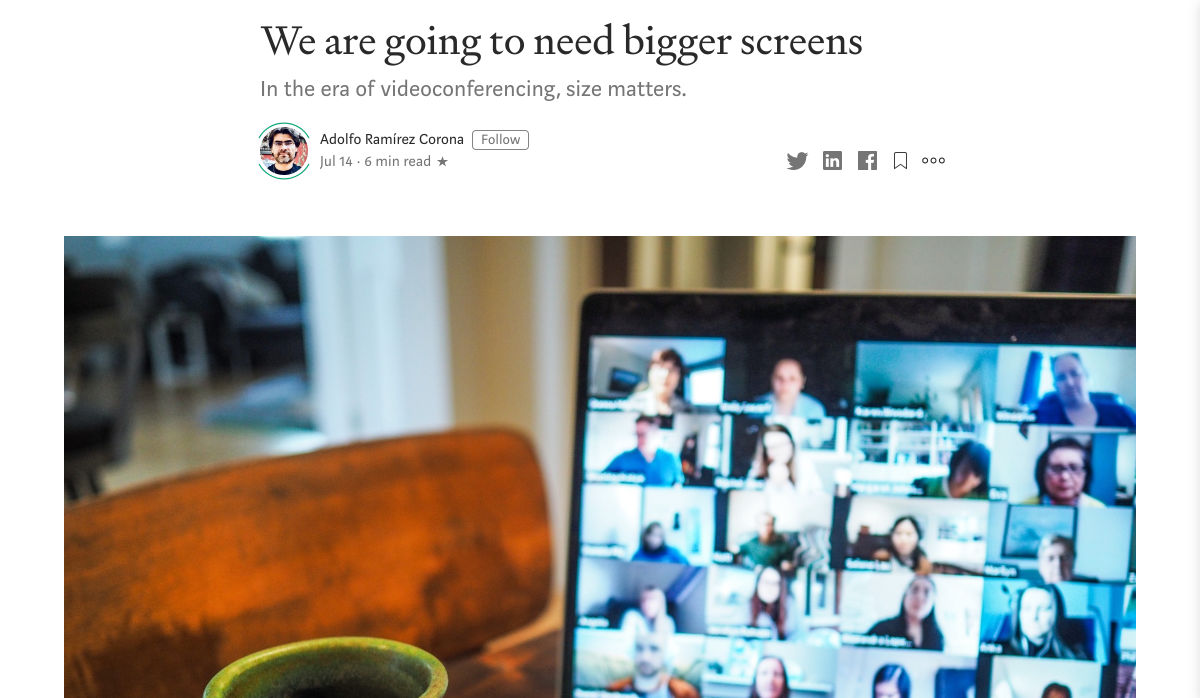
    We are Going to Need Bigger Screens

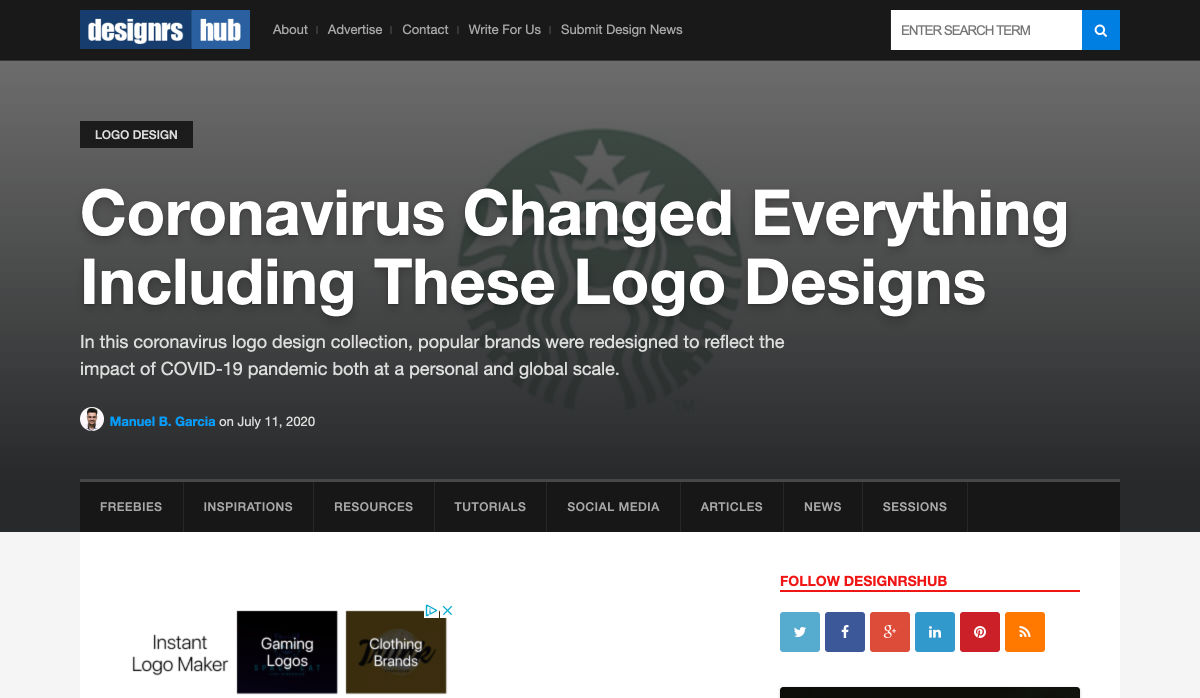
    Coronavirus Changed Everything Including these Logo Designs

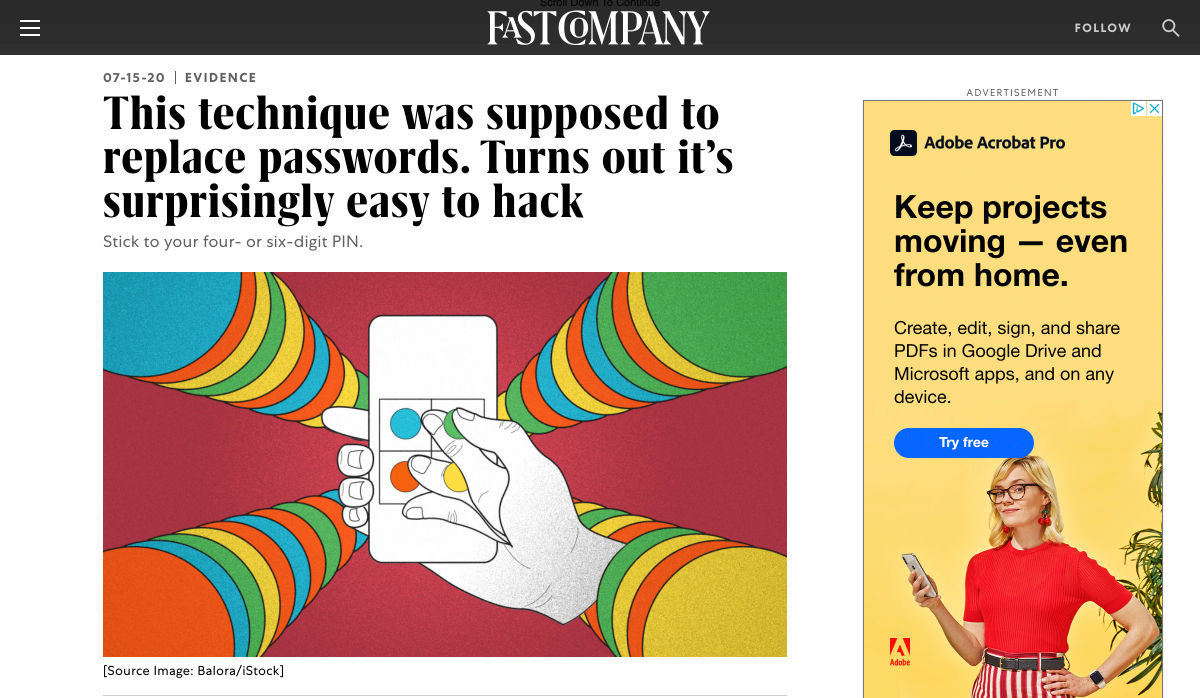
    This Technique was Supposed to Replace Passwords. Turns Out it’s Surprisingly Easy to Hack

    The Web Design Hack Hall of Fame

    61 UI/UX Resources for Web Designers

    Don’t Quit, Create

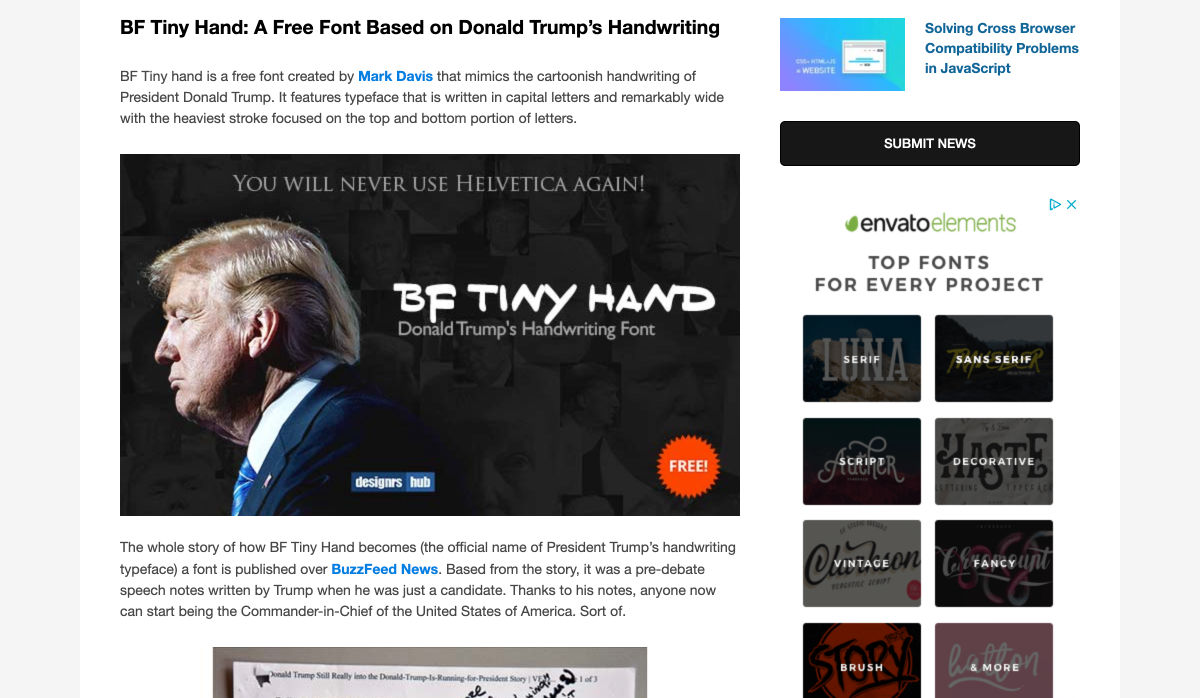
    BF Tiny Hand: A Free Donald Trump’s Handwriting Font

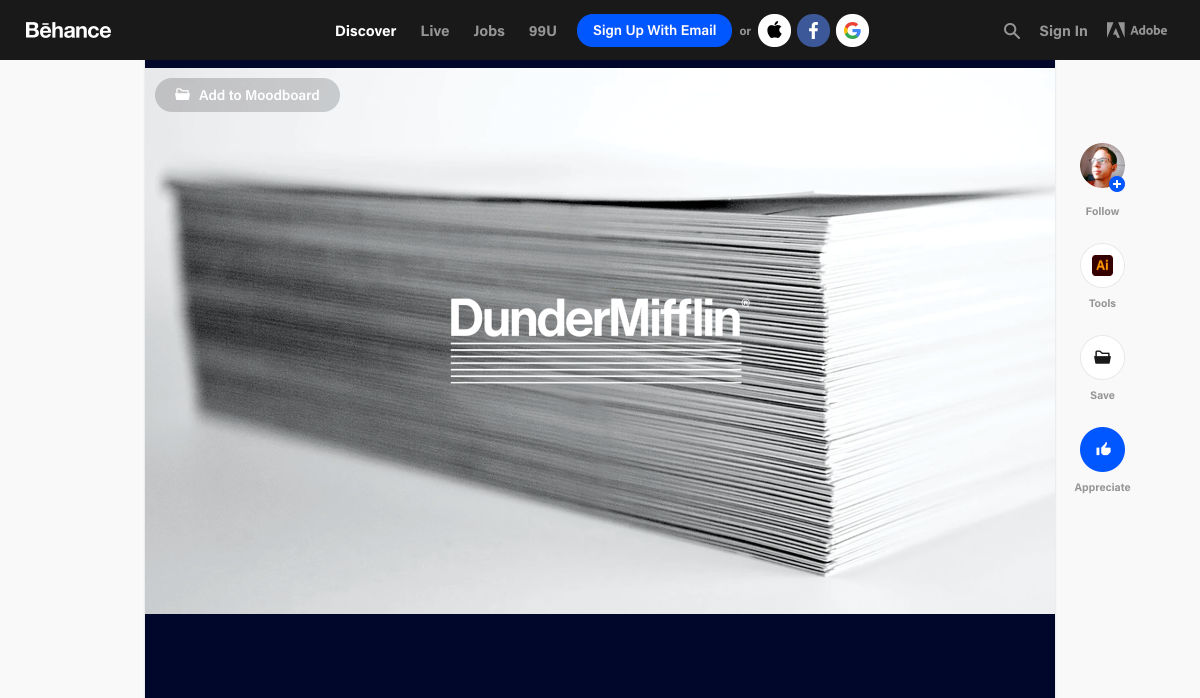
    Dunder Mifflin Identity

    16 Examples of Large Typography in Web Design

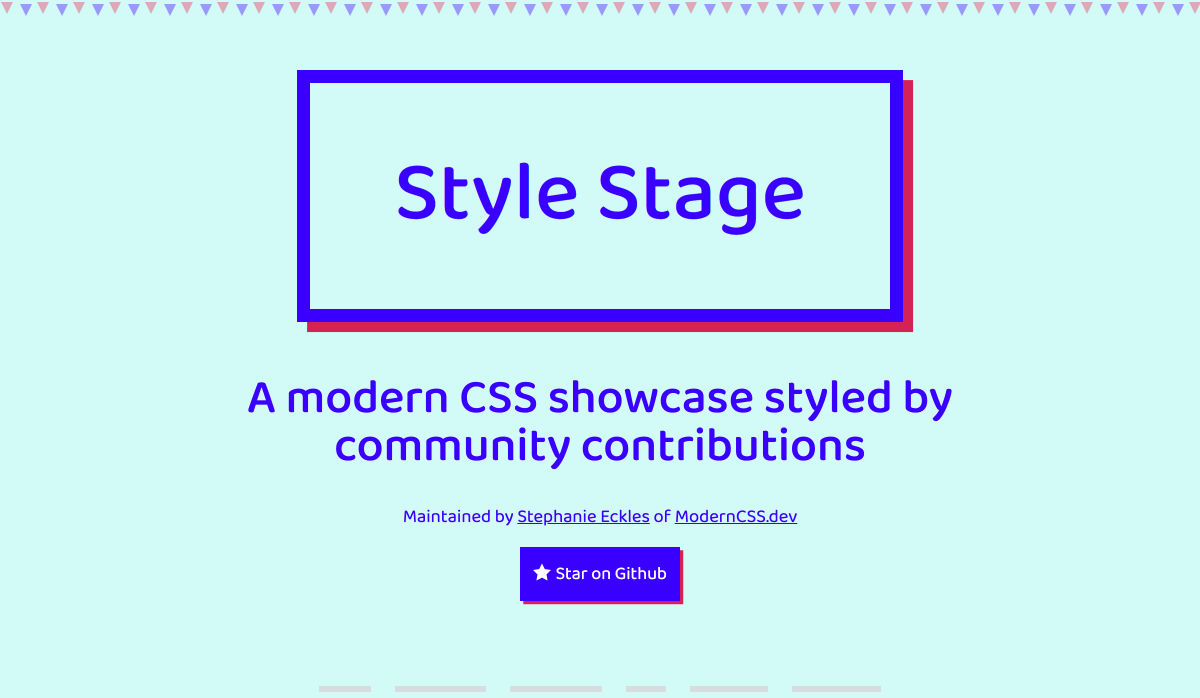
    Style Stage

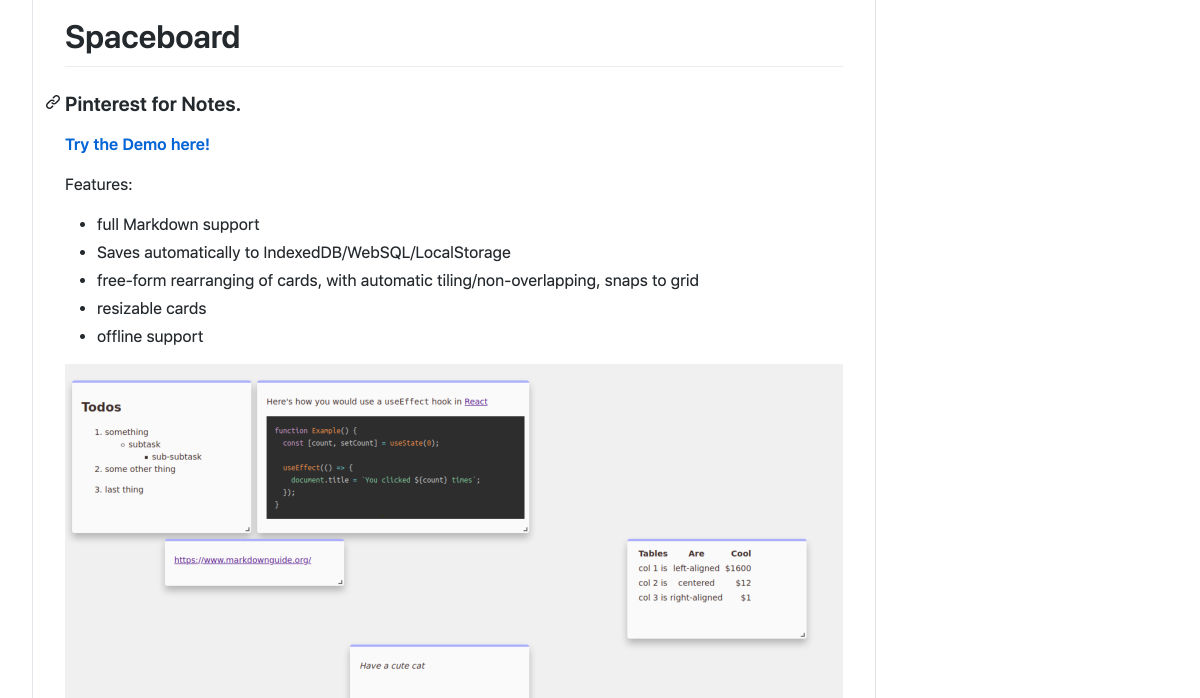
    Spaceboard – Pinterest for Markdown Notes

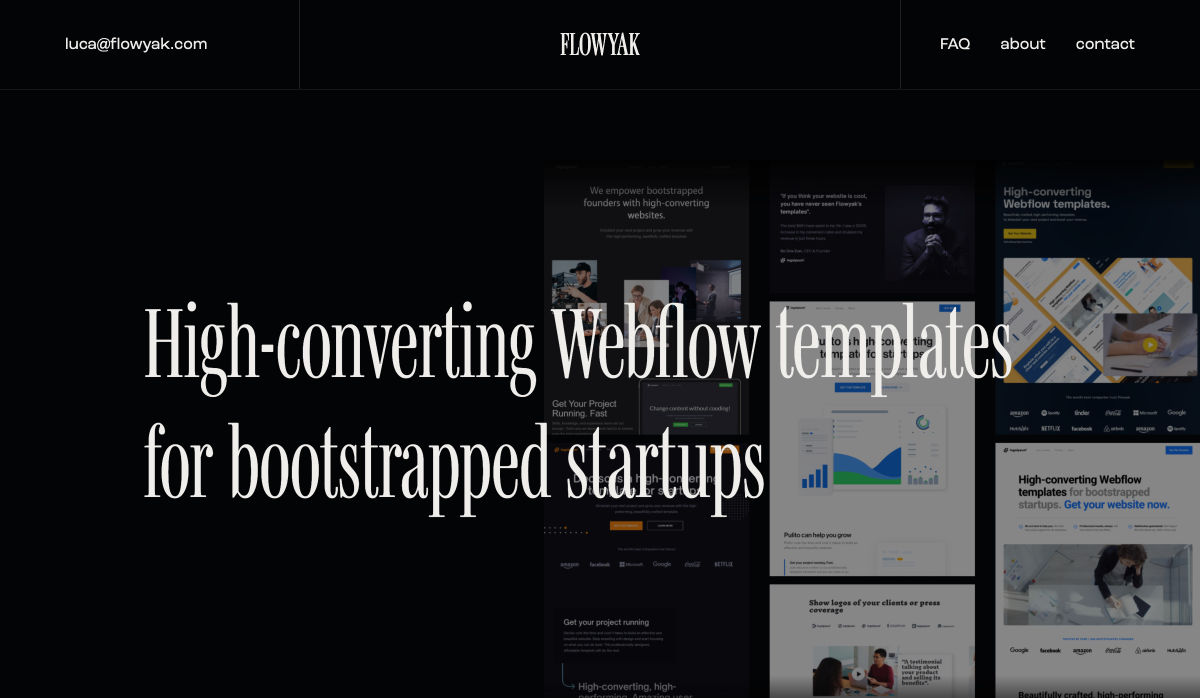
    Flowyak – High-converting Webflow Templates for Bootstrapped Startups

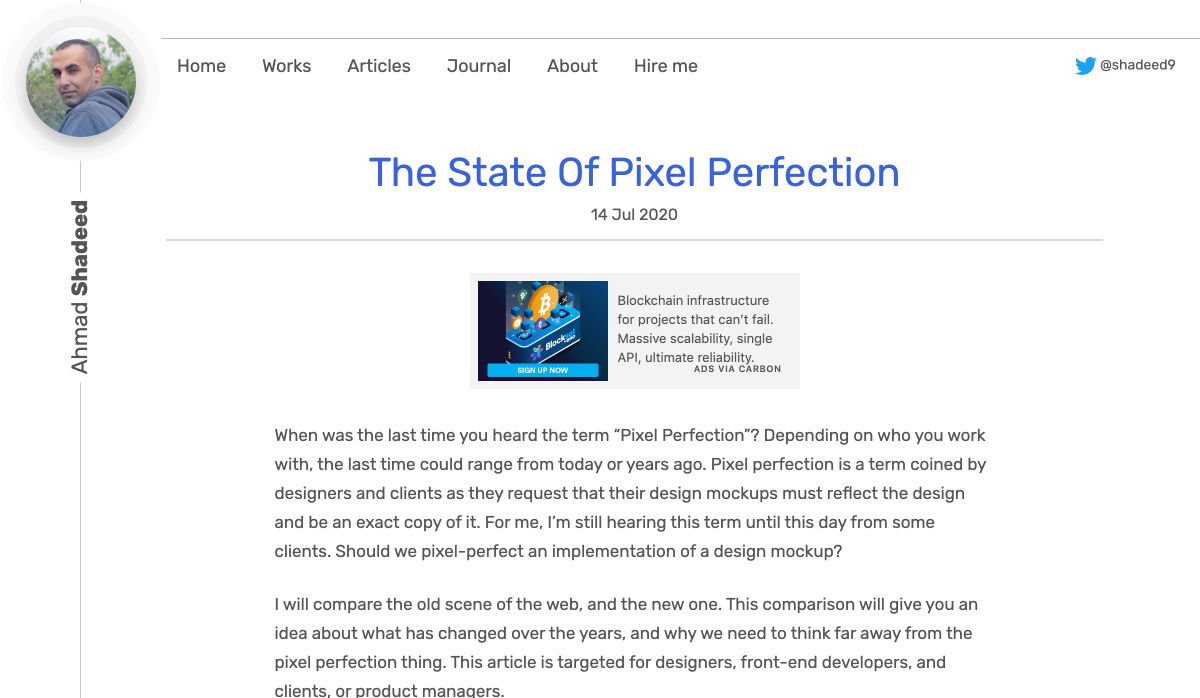
    The State of Pixel Perfection

    The Best Tools for Checking your Website’s Speed

    12 Screen Reader Facts for Accessible Web Design

    Why You Should Build your Blog on WordPress Vs. Squarespace

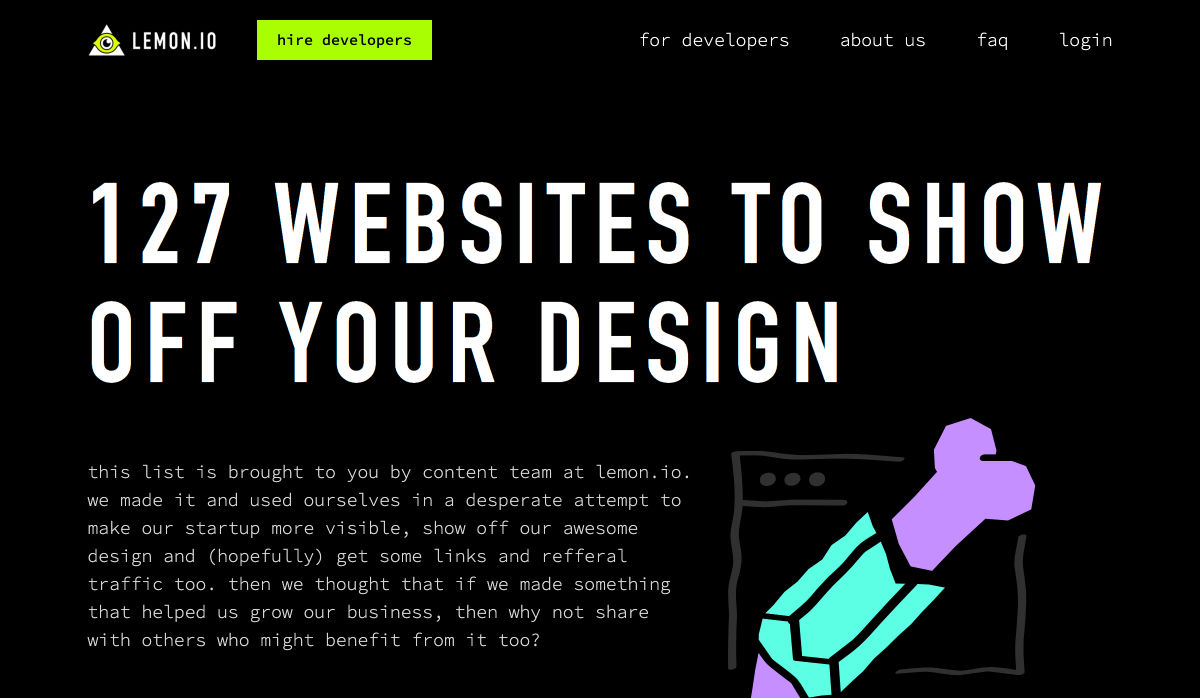
    127 Websites to Show Off your Design

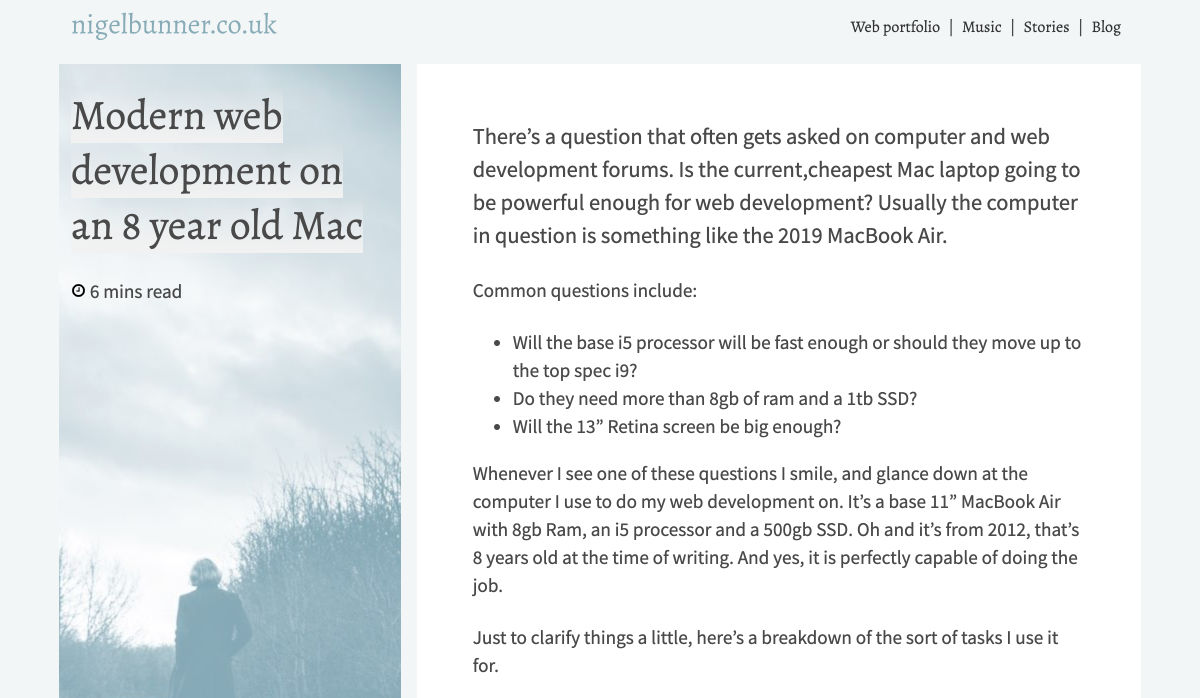
    Modern Web Development on an 8 Year Old Mac – Music, Design and Stories by Nigel Bunner

    Website Best Practices Checklist: 9 Web Design Best Practices

    Design Ethnography

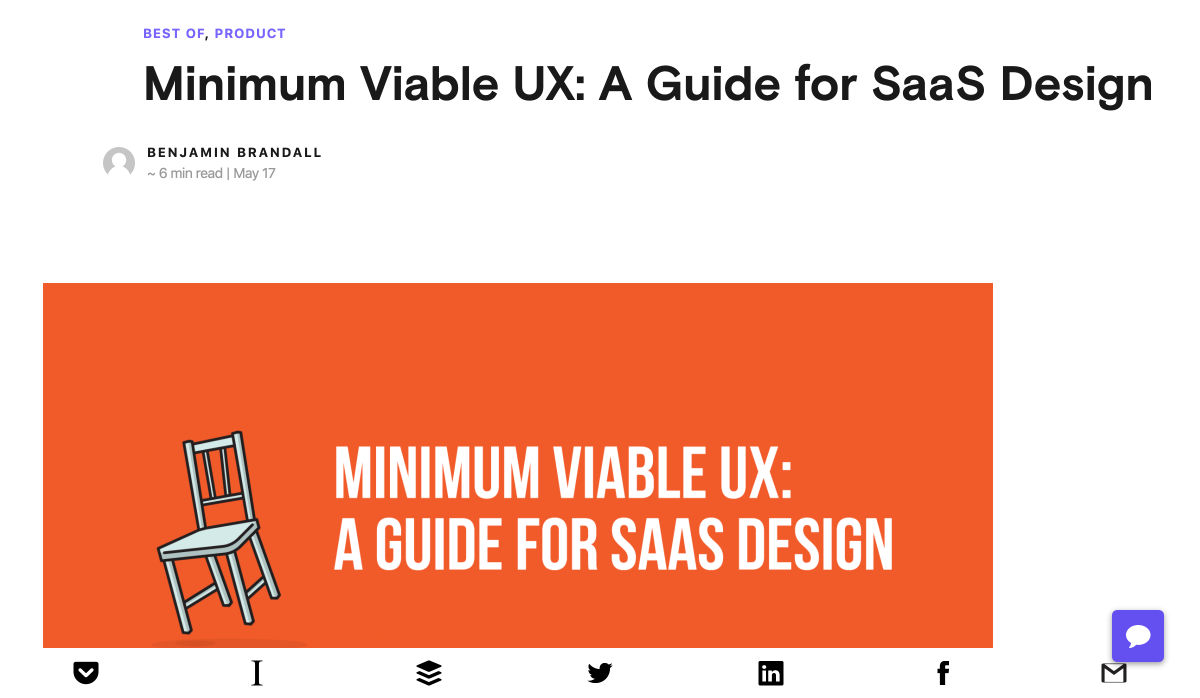
    Minimum Viable UX: A Guide for SaaS Design

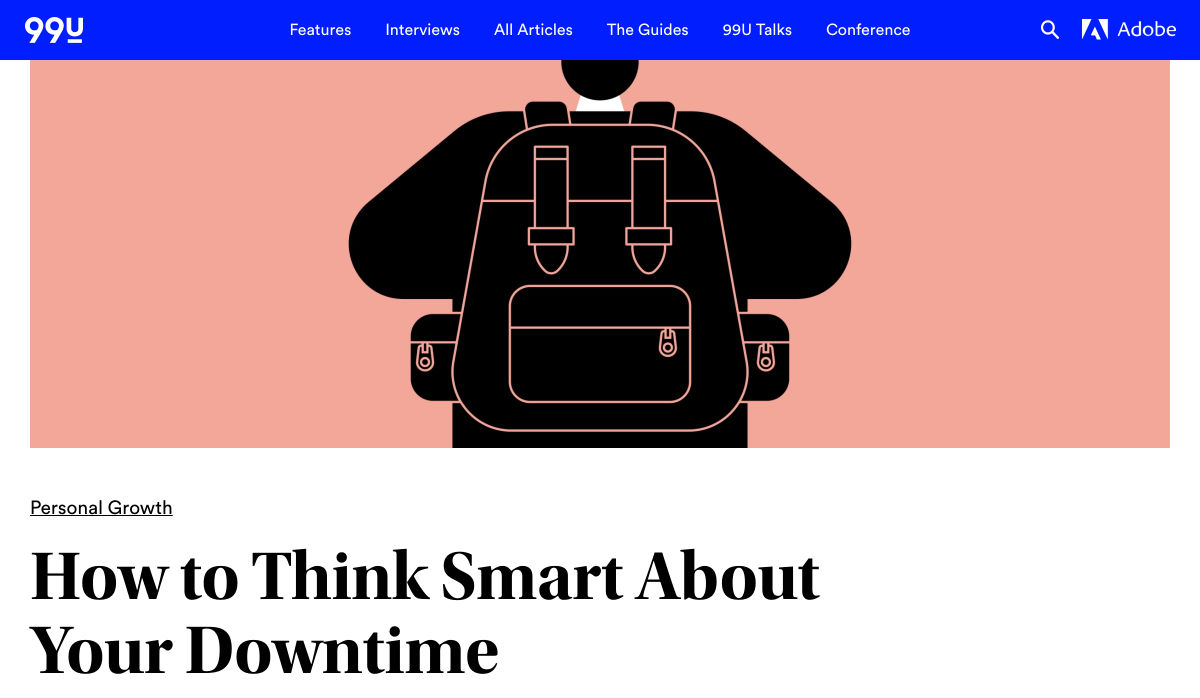
    How to Think Smart About your Downtime

    Want more? No problem! Keep track of top design news from around the web with Webdesigner News.

    Source

    Categories: Designing, Others Tags:

    How to Italicize Text

    July 17th, 2020 No comments

    HTML and CSS offer us the ability to italicize text. I’m talking about text like this. Let’s cover everything you’ll need to know.

    What is italic text and why would you italicize text?

    You italicize text most often to call attention to it. Literally to emphasize a word, so that someone reading the sentence will give that word or phrase some extra oomph, as you might intend as the writer. Or, it might be following a particular style guide, like italicizing the title of something, say a published article.

    Use the tag

    The “em” in literally stands for emphasis. Browsers will, by default, make italicize text that is wrapped in HTML tags.

    <p>
      That was a <em>wonderful</em> party, Bebe.
    </p>

    Imagine the sound of that sentence, where the reader is emphasizing that word giving the sentence a different feel that if they didn’t.

    Use the tag

    The element is to apply italics to text without implying emphasis. It’s to visually set some text apart from other text without implying that a reader is applying extra weight to those words. Perhaps something like:

    <p><i>Miranda thought:</i> What an interesting metaphor on the global economy.</p>
    <p><i>Chris thought:</i> Is that mustard?</p>

    What’s the difference between and ?

    One more time:

    • is for emphasis
    • is for italic text without the emphasis

    If you’re tempted to use for the title of something, like:

    <p>
      The book 
      <!-- Not the end of the world, but... --> 
      <i>Mr. Penumbra's 24-Hour Bookstore</i>
      is good.
    </p>
    
    <p>
      The book 
      <!-- ...this is more semantically correct. --> 
      <cite>Mr. Penumbra's 24-Hour Bookstore</cite>
      is good.
    </p>

    Fortunately browsers italicize content wrapped in tags, just like does, so no further work is required there if you’re citing a work (e.g. Moby Dick) or a publication (e.g. The New York Times).

    Use your own HTML class and CSS

    If the goal is set text apart visually, then we don’t have to reach for the element. Spans have no semantic meaning and can be styled for visual emphasis:

    <p>
      Shoes are <span class="emphasis">on sale</span> this week!
    </p>
    .emphasis {
      background: lightyellow;
      font-style: italic;
    }

    The CSS property font-style is the one you need for making text italic, which you can apply to any selector you like.

    Watch out for “Faux Italic”

    Not all fonts have italicized characters. Or, you might be in a situation where the italic version of the font isn’t loaded. In either case, the browser will try to fake it anyway, which almost always looks awful (or at least much worse than using an actual italic font).

    Nothing is going to warn you about this — you kinda just need an eye for it. Here’s an example of the font Merriweather in faux italic:

    CodePen Embed Fallback

    Unicode italics

    There are a zillion characters available in Unicode, including letters that have an italic vibe.

    CodePen Embed Fallback

    You might use this when you don’t have HTML control to do things like italics like, say, on Twitter when composing a tweet.

    The accessibility of this is awful. It will reach each character individually, making it (presumably, to me) hard to understand the word. Be very careful when using this, if you e even use it all.

    Italics in variable fonts

    This is a bit of an advanced concept, but there are things called variable fonts. They offer customization right in the browser. So rather than a second font file for the bold version, they have information in them to bold themselves with that one file. But “bold” is just an example of what a variable font might offer. Not all of them necessarily do.

    A variable font might have a “slant” or “italic” option and you could apply that look that way.

    v-fonts.com

    There it is, five different answers to the question of when to italicize text. Hopefully this also helps with the next logical question: Which method should I use?


    The post How to Italicize Text appeared first on CSS-Tricks.

    You can support CSS-Tricks by being an MVP Supporter.

    Categories: Designing, Others Tags:

    CSS Painting Order

    July 17th, 2020 No comments

    Usually, when I see terms like “painting order” or “stacking context” my brain will start to shut off and my eyes will gloss over. Not that my brain doesn’t normally shut off more often than not, but that’s another topic for another time.

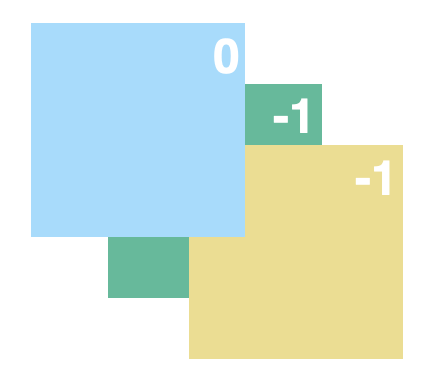
    Martin Robinson over at Igalia touches on these concepts using an example that’s pretty easy to grok, even for me. He starts with two boxes that overlap with negative margins.

    Then he introduces a third box that’s a child of the green box. The green box is given a z-index of -1. As you might expect, both the green and yellow boxes stack below the blue box.

    Here’s where my brain started melting. If the z-index of the green box stays the same at -1 but we give it’s child a massive value, say 1,000, things look… exactly the same.

    I’m sure many of you can already guess (or simply flat out know) why the blue box stays on top, even though changing the yellow box’s z-index implies it should be on top instead, but I sure didn’t. Martin found the technical answer in the CSS2 specification buried deep down in Appendix E, which he graciously linked up — otherwise, I’m sure I’d never have found it.

    We learn from the Appendix E that a stacking context is an atomically painted collection of page items. What does this mean? To put it simply, it means that things inside a stacking context are painted together, as a unit, and that items outside the stacking content will never be painted between them. Having an active z-index is one of the situations in CSS which triggers the creation of a stacking context. Is there a way we can adjust our example above so that the third element belongs to the same stacking context as the first two elements? The answer is that we must remove it from the stacking context created by the second element.

    So, yeah. As long as the yellow box is a child of the green box, the two form a stacking context that the blue box has no part of. Getting yellow above blue requires removing it from blue’s stacking context.

    That’s the crux of Martin’s post, but he takes it even further and it’s worth heading over there. If you do, you’ll see how stacking order leads to some bonafide CSS tricks.

    It’s not the first time we’ve linked up proof that z-index is not a level playing field so I’m going to try to commit this to memory the next (and inevitable) time I wrestle with stacking elements.

    Direct Link to ArticlePermalink


    The post CSS Painting Order appeared first on CSS-Tricks.

    You can support CSS-Tricks by being an MVP Supporter.

    Categories: Designing, Others Tags:

    Develop, Preview, Test

    July 17th, 2020 No comments

    Guillermo:

    I want to make the case that prioritizing end-to-end (E2E) testing for the critical parts of your app will reduce risk and give you the best return. Further, I’ll show how you can adopt this methodology in mere minutes.

    His test is:

    1. Spin up Puppeteer (Headless Chrome) and Chai
    2. Go to the homepage
    3. Test if the homepage has his name on it.

    YES.

    Just one super basic integration goes a long way. If your site spins up, returns a page, and renders stuff on it that you expect, a lot is going right. Then, once you have that, you can toss in a handful more where you navigate around a little and click some things. And, if it still works, you’re in pretty good shape.

    I’ve had a little trouble with Cypress over the years, but you’ll probably have better luck than I did. Overall, I think it’s the nicest player in the integration test market.

    Direct Link to ArticlePermalink


    The post Develop, Preview, Test appeared first on CSS-Tricks.

    You can support CSS-Tricks by being an MVP Supporter.

    Categories: Designing, Others Tags:

    5 Strategies to Write more Effective Business Proposals

    July 17th, 2020 No comments

    Writing business proposals is hard. That is, it’s a time-consuming process with no guarantees that you’re going to get the results you want. However, there are plenty of ways you can sure up your chances of success.

    Today we’ll look at some of the most important strategies to write more effective business proposals.

    This is crucial. The average win rate for a business proposal is just under 50%. In other words, half of your proposals don’t work out. These five simple strategies will help you increase your win rate, and push your margins up in the process.

    Better yet, none of them are rocket science. Let’s look at some simple ways to improve your business proposal win rate.

    Understand What the Client Really Wants

    The biggest mistake sales professionals make is failing to solve prospects’ problems. That is, an effective business proposal starts by trying to understand the client’s business goals. An effective proposal convinces the client that you can help them meet these goals.

    Ultimately, they don’t care how you do this.

    This is where an effective discovery session comes in. While listening to the client in these sessions is obviously important, it’s also vital to cut through to the headline issue they’re facing. Let’s think about an example scenario.

    Say you run a marketing agency, and you get in touch with an eCommerce store to help with their SEO. But when you get under the hood, they’re traffic figures are actually pretty healthy. Rather, the problem is that their product pages are a disaster.

    In this case, the prospect only thinks they want help with their SEO. Your task is to scratch below the surface and see that they really want more sales. Since you’ve already identified the pain point to fix, the task of your proposal is to convince them of this.

    Of course, this is an extreme example.

    To grasp what clients really want in every discovery session, you can use certain prompts. These include:

    • What are you hoping to achieve?
    • What are the main problems facing your business right now?
    • What are your goals for this project?
    • How does this project fit into your wider business strategy?

    The answers to these questions will then inform your next stage. You can also supplement this with feedback from previous clients.

    Frame Your Introduction with Concrete Goals

    An effective introduction achieves a few different things. First, and most importantly, it grabs the reader’s attention. They should be excited to read on. To achieve this, it’s best to start with a simple promise in your title.

    This includes what you’re going to achieve, and how long it will take.

    The key here is to reference the fundamental business problem that you identified in your discovery session. You should then quantify the value you can add to this. For example, double your sales or generate 10,000 more leads.

    Now that you have their attention, the remainder of your intro has another goal. Specifically, you want to start convincing the reader that you really understand they’re business needs. Of course, this is also a great chance to hammer home your goal.

    Essentially, what you want to do is briefly outline what they’re current situation is, and where they’ll be once you’ve worked your magic.

    You might optionally want to add a brief reference to the method you’ll use to achieve your goal. However, this is only effective if it’s actually possible to do this in a couple of words. Unfortunately, whether you can do this or not really depends on what kind of business you run.

    For instance, ‘web design project‘ is easy to drop into a casual sentence, and it won’t put anyone off reading. ‘High capacity sewage management system’ does not have the same effect in an intro.

    On the subject of grabbing your readers’ attention, here a bonus takeaway. Obviously most proposals are read on a computer. However, 34% are read on mobile. While this may come as a surprise, the implication is obvious.

    You simply can’t afford to lose a third of your business just because your proposals aren’t mobile-friendly.

    Use Detailed Timescales to Increase Buy-In

    When they formulate project proposals, most sales professionals are afraid to use concrete time scales. In a way, this is understandable. There’s a certain risk to offering detailed timescales, as it’s easy for things to go wrong.

    However, the alternative is much worse. In fact, omitting time scales completely makes your proposal seem amateurish and uncredible. To mitigate risks, it’s best to include time scales with an extra buffer for yourself when you need it.

    This also means you’ll seem to be ahead of schedule during project delivery.

    Besides this, the real benefit of providing timescales is psychological. To understand this, put yourself in the reader’s shoes for a minute. Whoever wrote this proposal has already put the work into figuring out every detail of this project, down to when they’ll deliver everything.

    If you were in this situation, you’d likely feel two things. Consciously, you’d be impressed by the work ethic of anyone who did this much of a project before they’d even made the sale. Unconsciously, you’d feel like the project was already underway.

    Therefore, when the time comes, it wouldn’t feel like such a leap to sign on the dotted line.

    Add Proof Using Case Studies

    So far in your business proposal, you’ve been trying to convince the reader that you can solve their particular business problem. The trouble is, that so far they’ve had to take your word for it. That is, they have nothing to go on except that you’ve told them you can solve their problem.

    But how do they know you’re not just a smooth talker?

    This is where proof comes in. Over 70% of people are more likely to make a purchase when they’ve heard a positive opinion from a stranger. This rises to over 90% when it’s a peer’s opinion.

    You can leverage this fact to make your business proposals more effective. This works in two ways. First, it adds credibility to your claims. That is, it shows that you’re not all talk. When the time comes, you can actually deliver the goods.

    Second, it adds an element of FOMO. This works best when you use a case study from a client who works in a similar sphere to your new prospect. Remember, you’re writing this proposal because the reader has a problem with their business.

    Whether that’s poor sales or low lifetime customer values, the last thing they want is for them to suffer when they’re competitors are thriving.

    Reference Value when Presenting Costs

    In any business proposal, the biggest barrier is getting the reader to get over the costs associated with your project. Times are tough, and many businesses are wary about throwing cash around.

    This is another chance to utilise a little bit of psychology.

    Specifically, you can use an effect called anchoring bias. This is where people create a reference point in their minds when they hear a piece of information. This reference then influences how they think about new pieces of information.

    To utilise this, always give a concrete figure for the value you’re offering before any mention of the price. This ensures that the reader is always referencing the amount they’ll have to pay to the larger gains they’ll receive.

    Another great practice is using investment as a header instead of costs, or pricing. This emphasizes the benefit of doing business with you – it’s an investment for future success, not just a one-time cost.

    Then signing on the dotted line is a no brainer.

    How to Write More Effective Business Proposals

    As we’ve already discussed, the core problem when writing business proposals is that they take a lot of effort, but there’s no guarantee they’ll pay off. However, this is something you need to overcome.

    Indeed, effective business proposals are the only sure-fire way to score high-value clients.

    To that end, we’ve looked at a few concrete strategies to make your proposals more effective. Even better, these are all things you can implement today. At their core, they all start by trying to understand the client’s fundamental business problem.

    You then use the remainder of your proposal to convince them that you’re the person to solve this problem. We’ve looked at a couple of extra ways to sure up this approach, but at the core, it’s really that simple.


    Photo by Scott Graham on Unsplash

    Categories: Others Tags:

    Bringing You The Best Of Smashing

    July 17th, 2020 No comments

    Bringing You The Best Of Smashing

    Bringing You The Best Of Smashing

    Iris Lješnjanin

    2020-07-17T11:00:00+00:00
    2020-07-19T18:35:17+00:00

    Well, I guess we can all agree that this year has been quite something. We’ve all been challenged in one way or the other, and the new normal is not quite the old normal. Still, the overriding emphasis remains on safety and everyone’s wellbeing, as well as the importance on sharing thoughts and feelings on creative wellness within the community.

    Unfortunately, the effects of COVID-19 are still so wide-reaching throughout the world, so that the Smashing team has had to make big changes to our plans this year. As Rachel Andrew, editor-of-chief of Smashing Magazine, nicely puts it:

    “The pandemic has made life unpredictable and scary for many people. At Smashing, we’ve had to very quickly figure out new ways of delivering great content — in a way that supports the business but also our speakers and workshop leaders. We have been encouraged by the enthusiasm from the community, the messages of support, and the willingness to try these new formats.”

    On that note, we have decided to take all 2020 dates online. We hope to see you there!

    August 20–21 SmashingConf Live Tell me more ?
    September 7–8 SmashingConf Freiburg Tell me more ?
    October 13–14 SmashingConf Austin Tell me more ?
    November 10–11 SmashingConf San Francisco Tell me more ?

    We’re able to do these all these wonderful things because of your support, and we truly and sincerely appreciate it.

    Interactive Workshops To Help You Boost Your Skills

    With online workshops, we aim to give you the same experience and access to experts as in an in-person workshop, without needing to leave your desk. So you can learn at your own pace, in your own time, and follow interactive exercises along the way.

    We’ve done our best to provide you with a mix of both design- and frontend-related workshops:

    July 28–29 Designing For Emotion Aarron Walter Design
    August 6–14 Web Application Security Scott Helme Front-end
    August 17–31 Behavioral Design Susan and Guthrie Weinschenk Design
    Aug. 19 – Sept. 3 Front-End Testing Umar Hansa Front-end
    Aug. 20 – Sept. 4 Designing For A Global Audience Yiying Lu Design
    September 1–16 Jamstack! Jason Lengstorf Front-end
    September 10–11 The CSS Layout Masterclass Rachel Andrew Front-end
    Sept. 17 – Oct. 2 Vue.js: The Practical Guide Natalia Tepluhina Front-end
    Sept. 22 – Oct. 6 Smart Interface Design Patterns, 2020 Edition Vitaly Friedman Design & UX
    Attending a Smashing online event means that you’ll be taking part in live sessions, Q&As, discussion zones, challenges, and so much more! See all schedules and events ?

    Sit Back, Relax, And Tune In!

    The Smashing Podcast is the perfect way to take a little bit of Smashing along with you on your morning commute, when working out at the gym, or just washing the dishes. Every two weeks, Drew McLellan talks to design and development experts about their work on the web. You can subscribe in your favorite app to get new episodes as soon as they’re ready.

    1. What Is Art Direction? 2. What’s So Great About Freelancing?
    3. What Are Design Tokens? 4. What Are Inclusive Components?
    5. What Are Variable Fonts? 6. What Are Micro-Frontends?
    7. What Is A Government Design System? 8. What’s New In Microsoft Edge?
    9. How Can I Work With UI Frameworks? 10. What Is Ethical Design?
    11. What Is Sourcebit? 12. What Is Conversion Optimization?
    13. What Is Online Privacy? 14. How Can I Run Online Workshops?
    15. How Can I Build An App In 10 Days? 16. How Can I Optimize My Home Workspace?
    17. What’s New In Drupal 9? 18. How Can I Learn React?
    19. What Is CUBE CSS? 20. What Is Gatsby?

    Is there a topic that you’d love to hear and learn more about? Or perhaps you or someone you know would like to talk about a web- and design-related topic that is dear to your hearts? We’d love to hear from you! Feel free to reach out to us on Twitter and we’ll do our best to get back to you as soon as possible.

    Catching up with what’s new in the web industry doesn’t mean you have to be tied up to a chair and desk! Do as Topple the Cat does it: grab your headphones and stretch those legs! You can subscribe and tune in anytime with any of your favorite apps.

    Our Most Recent Addition To The Smashing Bookshelf

    We shipped the first copies of Click! How to Encourage Clicks Without Shady Tricks a few weeks ago, and if you pre-ordered a copy of the book, you must have received a personal note from the author himself, Paul Boag. It was fun to follow the reactions pop up on social media — Ari Stiles shared some tweets in her recent post.

    Click! comes along at a time when many of us need a creative “nudge.” The book inspires us to think differently about our routines for building online sites and services—what works, and what doesn’t. You can jump to the table of contents, or if you’d like to take a peek first, you can download a free PDF excerpt right away (17.3 MB). Happy reading!


    Print + eBook

    $
    39.00

    Quality hardcover. Free worldwide shipping. 100 days money-back-guarantee.

    eBook

    $
    19.00


    Free!

    DRM-free, of course.

    ePUB, Kindle, PDF.
    Included with Smashing Membership.


    Get the eBook

    Download PDF, ePUB, Kindle.
    Thanks for being smashing! ??

    Trending Topics On Smashing Magazine

    As you may already know, we aim to publish a new article every single day that is dedicated to various topics current in the web industry. Here are some that our readers enjoyed most and have recommended further:

    Best Picks From Our Newsletter

    We’ll be honest: Every second week, we struggle with keeping the Smashing Newsletter issues at a moderate length — there are just so many talented folks out there working on brilliant projects! Kudos to everyone involved!

    Interested in sponsoring? Feel free to check out our partnership options and get in touch with the team anytime — they’ll be sure to get back to you right away.

    P.S. A huge thank you to Cosima Mielke for writing and preparing these posts!

    Free Fonts With Personality

    Typography is a powerful communication tool, a way to express ideas, and a trigger for creativity. Based on this understanding, the Argentinian-based type foundry Rostype creates fonts that are free to use for anyone, in personal and commercial projects.

    Rostype

    There are currently 15 fonts available, and each one of them shines with a unique personality. Some are designed with a special focus on readability, others are the perfect display typefaces, made to stand out, some are retro-inspired, others more futuristic and dynamic. There’s even a typeface inspired by the coronavirus lockdown. A treasure chest if you’re looking for a typeface that is a bit more distinctive.

    The Making Of A Typeface

    It’s always insightful to sneak a peek behind the scenes of how other design teams work and think. Chris Bettig, Design Director at YouTube, now shares an interesting case study on how he and his team created YouTube Sans, a tailor-made font that doubles as a brand ambassador.

    YouTube Sans

    Before the new typeface made its appearance, YouTube used the iconic play button and a modified version of Alternate Gothic for the wordmark. However, as Chris Bettig explains, there was no clear typographical guidance. Designed to work across the entire range of YouTube’s products and reflecting the platform’s worldview as well as the community of creators who use it, YouTube Sans changed that. For more insights into how the font came to life and the challenges the design team faced along the way, be sure to check out the case study.

    Dealing With Browser Font Rendering Inconsistencies

    We all know those moments when a bug literally bugs us but we can’t seem to figure out how to solve it. Stephanie Stimac recently came across such an issue: When she opened her personal website in Safari, she noticed how drastically different the title of her page was rendering compared to other browsers. It appeared much bolder than expected.

    Browser Font Rendering Inconsistencies

    To find the reason for these rendering inconsistencies, Stephanie started to dissect differences between the user agent style sheet and the computed CSS properties and soon found herself far down the rabbit hole, comparing the confusing behavior with Chrome, Firefox, and Edge. There’s no simple answer to the question which browser is actually handling the styling correctly, but after running a number of tests, Stephanie found out how to prevent the browser from deciding how to bold font-weights: you need to explicitly define the font weight with numerical values. A small detail that makes a significant difference.

    Continuous Performance Measurements Made Easy

    When launching a website, it’s common to run performance tests to ensure the site is fast and follows best practices. But how do we keep it fast as soon as deploys are happening every day? Speedlify is Zach Leatherman’s answer to this question.

    Speedlify

    Speedlify is a static site published as an open-source repository that uses Lighthouse and Axe to continuously measure performance and publish the performance statistics — at most once an hour and automatically once a day. You can run it manually, locally on your computer and check in the data to your repo, or, if you’re using Netlify, it can run entirely self-contained. A great way to keep performance always in sight.

    The Anatomy Of A Push Notification

    Push notifications were first introduced on iOS back in 2009, web push followed five years later. Today, they are supported across a lot of platforms and browsers — from iOS and Android to Amazon Echo, Windows, Chrome, Safari, Firefox, Edge, and more. Each one of these platforms is a bit different, though, making it complicated for designers to wrap their heads around what exactly goes into a push notification.

    Design and Anatomy of a Push Notification 2020

    A useful reminder comes from Lee Munroe. He summarized how many lines of text you need on which platform, requirements for images, if there are character restrictions, and other details that can be hard to remember. The overview also comes in handy to assess what your notification will look like on operating systems you don’t have access to. One for the bookmarks.

    Editing Keyframe Animations Live

    When you’re creating animations, it’s always helpful to see the animation in action as you tweak it. Unfortunately, that also involves a lot of switching back and forth between your text editor and the browser. Mitch Samuels was tired of doing that, so he built a tool to save him time: Keyframes.app.

    Keyframes.app

    The tool lets you create a CSS keyframe animation with a visual timeline editor. You can add steps to a timeline, use the simple UI to adjust the CSS properties you want your target element to have at each step, and the animated preview will update live. Once you’re happy with the result, you can copy the CSS and use it in your project right away. Keyframe.app is also available as a Chrome extension. A real timesaver.

    Determining The Best Build Tool For Your Project

    Build tools aim to make the lives of developers easier by streamlining workflows and codifying best practices. However, picking the right build tool for a project can be a challenge. To help you make a more informed decision, folks from the Google Chrome developer relations team built Tooling.Report.

    Tooling Report

    Based on a suite of tests to assess how well a build tool adheres to best practices, Tooling.Report gives you an overview of various bundlers and the features they support. It’s not only a quick way to determine the best tool for a project but also a reference for incorporating best practices into existing codebases — with the long-term goal of improving all build tools and, thus, the health of the web.

    Turning A Flat Image Into A Folded Poster

    Some coding experiments leave even the most experienced developers in awe. And even if it’s something you won’t be using every day, it’s always inspiring to see fellow developers think outside the box and explore what’s possible with web technologies. The folded poster effect that Lynn Fisher created with pure CSS is such an experiment.

    CSS Folded Poster Effect

    With a bit of CSS, Lynn makes your average image look like a folded poster. With paper creases running over the image horizontally and vertically and a background shadow that gives the poster a 3D effect. A cool little project that beautifully shows what can be achieved with CSS.

    Striking A Balance Between Native And Custom Select Elements

    How do you build a styled select element that is not only styled on the outside but on the inside, too? In her article “Striking a Balance Between Native and Custom Select Elements”, Sandrina Pereira shares her attempt to create a good-looking, accessible select that benefits from as many native features as possible.

    Striking A Balance Between Native And Custom Select Elements

    The idea is to make the select “hybrid”, which means that it’s both a native and a styled alternate select in one design pattern. Users of assistive technology will get a native element, but when a mouse is being used, the approach relies on a styled version that is made to function as a select element. Clever!

    Hybrid Positioning With CSS Variables And max()

    Some ideas require you to think outside the box and explore new paths to make them happen. Imagine this example: You want to have a page navigation on the side, right under the header when it’s scrolled all the way to the top. It is supposed to scroll with the page when the header is out of view and stay at the top for the rest of the scrolling. That’s exactly what Lea Verou wanted to achieve in a recent project.

    Hybrid positioning with CSS variables and max()

    You might say, that’s a case of position: sticky, but there’s a more finely-tuned approach to getting the job done, as Lea shows. Without any JavaScript. Her solution relies on CSS variables and the new max() function that lets you apply min/max constraints to CSS properties. A fallback helps in browsers that don’t support max() yet. Clever!

    Stories From The Dark Side Of The Web

    Hackers, data breaches, shadow government activities, cybercrime, hacktivism — a lot is going on on the dark side of the web. But who are the people behind these activities? And what’s their “mission”? Jack Rhysider dedicated a podcast to the stories that happen on the hidden parts of the network: Darknet Diaries.

    Darknet Diaries

    No matter if it’s the story of a gambler who finds a bug in a video poker machine that lets him win excessive amounts of money, the story of a penetration tester breaking into buildings, or a nation state hacking into a company within another nation, the Darknet Diaries is full of gripping insights into a secret world. The podcast adheres to journalistic standards by fact-checking and ethical sourcing of information, and while all of this is great entertainment, it also aims at explaining the culture around cybersecurity to make listeners more responsive, informed citizens of their digital lives. Be sure to tune in.

    Smashing Newsletter

    Every second Tuesday, we send a newsletter with useful techniques on front-end and UX. Subscribe and get Smart Interface Design Checklists PDF in your inbox.


    Front-end, design and UX. Sent 2× a month.
    You can always unsubscribe with just one click.

    Smashing Editorial
    (cm, vf, ra)
    Categories: Others Tags:

    It’s Good To Talk: Thoughts And Feelings On Creative Wellness

    July 17th, 2020 No comments
    A comic from 'The Awkward Yeti' titled 'Work/Play balance'.

    It’s Good To Talk: Thoughts And Feelings On Creative Wellness

    It’s Good To Talk: Thoughts And Feelings On Creative Wellness

    Jhey Tompkins

    2020-07-17T09:30:00+00:00
    2020-07-19T18:35:17+00:00

    In fields as fast-paced and technical as web design and development, it’s easy to lose sight of our own wellbeing. For many, there’s a constant sense of trying to keep up or ahead. We may not even realize we’re doing it.

    Ask yourself, when was the last time you stepped away for a day and didn’t think about coding or design for a day? For me, that’s very hard to answer. For many, it’s a vocation that we can’t switch on and off. We can’t turn it off at 5 or 6 PM. Let’s talk about that and ways we can deal with it.

    It’s important to start right off the bat by saying this article isn’t a dictation. The aim here is to spark interest, engagement, and discussion. These are things that sometimes get lost in the whirlwind industry we are a part of. Different things work for different people, and these words are written with the best intentions.

    Why now? I’d planned to write something about this topic at the tail end of last year. I was making my way back from my first NodeConfEU and feeling inspired by a talk I attended, “Building Open Source Communities with Tierney Cyren”.

    I made a bunch of notes, then life and other commitments cropped up and the article made its way to the backburner. But, that’s OK. And that’s kind of where this post leads us to. It’s OK if you didn’t write that post, work on that side project this weekend, and so on.

    Pressure Culture

    If you’re reading this, odds are you’ve seen or experienced pressure culture — that constant, nagging expectation to dedicate every waking hour to skills development and side projects, even if your heart might not be in it. This pressure can be self-imposed, and whether we like it or not social media also plays a big part. If we aren’t careful, it can eat away at us.

    Pressure culture isn’t something that’s popped up recently. It’s been around a long time, a constant looming external force. Left unchecked it can fill you with guilt, anxiety, and other feelings we aren’t fond of.

    A comic from 'The Awkward Yeti' titled 'Work/Play balance'.

    Work/Play balance by The Awkward Yeti. (Image source: theawkwardyeti.com) (Large preview)

    This is a common result of the idea of ‘The ideal worker,’ with pressure coming from those higher up in workplace hierarchies. These ‘Never say no’ employees feel obliged to wear themselves thin in order to progress in their careers. There’s a great Harvard Business Review article called “Managing the High-Intensity Workplace” that explores this mindset.

    Social media pressure is also very real. The tendency to idealize our online lives is well documented. We often forget that we are likely only looking at someone else’s highlight reel. That is true of work as well as play. If we forget that and spend a lot of time-consuming content from those we idolize, that pressure creeps in. We want to be as awesome as the people on our feed, but at what cost?

    There was a period a little while back where tweets like this were quite frequent:

    Get home.

    Watch Netflix or do more coding learning?

    Seems like a small decision.

    For one night it is.

    But multiplied over a year, this decision defines your future.

    — ???? ???? ???? ?? (@WellPaidGeek) November 6, 2019

    The message is completely understandable. Time is valuable. The hard truth is that if you want to get far in your career, prepare to put in the hours. Nothing gets handed out. Self-improvement and commitment to your craft are great, but only if you find the right balance.

    Messages like those above put you under an enormous amount of pressure. That pressure isn’t healthy, and can actually hamper your development. It can lead to things like burnout and potentially, even depression. What is burnout? This study phrases it quite well:

    “Burnout is a psychological syndrome characterized by emotional exhaustion, feelings of cynicism and reduced personal accomplishment.”

    It’s not a nice place to be. I can speak from experience here. Feeling as if things are bearing down on you and you need to keep up. “I need to make that new thing or learn that new framework to keep up with my peers.” I remember seeing tweets from people. They’d say things like, “I missed a day of my bootcamp course. I’d better do double tonight.” This makes for sad reading. You don’t want to end up resenting what you do for a job.

    Burnout cannot only impact your personal wellbeing, but can also affect other areas of your life. Does your work suffer as a result? Do you still have the energy to give it your full attention? How about that creative spark? Is it gone? We’ve all heard of writer’s block. Well, creative’s block is a thing too!

    The above tweet was a great example of how social media can influence us. Read the responses and engagement. There’s an almost 50?50 split on how it’s perceived. This response from Chris Coyler was great:

    I don’t mind the sentiment here, but don’t burn out!https://t.co/Ho7CPcamEb

    Just last night I had some stuff in mind I really wanted to get done on the ol laptop but I was just too tired after putting the kid down so I literally watched Netflix and everything will be ok

    — Chris Coyier (@chriscoyier) November 6, 2019

    And it’s so true. It’s OK to sit back and not force yourself to work on things. It’s fine to take the night off, the week off, and so on. Those projects will still be there for you. They’re not going anywhere. You might even decide you don’t want to return to them at all, and that’s fine too! It’s all about balance.

    With the pandemic and many of us in lockdown, this trend has reared its head again. I’ve seen my fair share of messages implying if you haven’t picked up new skills with your new free time, you’ve wasted it. As if it’s some kind of opportunity. Not that a global pandemic is exhausting enough right?

    A comic from “The Awkward Yeti” titled 'Hope and dreams'

    Hopes and Dreams by The Awkward Yeti. (Image source: theawkwardyeti.com) (Large preview)

    Even now, pressure culture is not black and white. The free time gained where we had other commitments is an opportunity. An opportunity to try something new or do something we haven’t had the time for. It might be that that thing is ‘rest’. For me, my weekend commitments halted, so I decided to finally start streaming. And, I’ve loved it! Still, I try not to let it take up more time than my other commitments would. If it gets too much, I take a break and step away.

    Handling Pressure Culture

    Getting AFK (Away from keyboard)

    How can we combat these feelings of pressure? It sounds like the opposite of what our minds tell us, but one way is to get away from that keyboard. Disconnect and go do something else. I’m not saying lock up your laptop for a week and go cold turkey, but a break does you good.

    Go for a walk, read a book, do nothing! We already saw that Chris enjoys a night with Netflix! I myself recently picked up a stylus for the iPad so I can go chill out on a bean bag and sketch doodles. There’s also a 1000 piece puzzle laid out on a table downstairs that’s quite good to sit next to zone out with.

    Yes, it’s difficult at the moment. We can’t make a trip to the theme park or the cinema or even hit the gym. But, we can still get AFK. Even sporadic breaks throughout the day can do you wonders. I often get up every once in a while and do a few handstands!

    This is true even when the world isn’t in crisis. Getting away from things can be great for you. It’s not healthy to tie yourself to the same thing 24 hours a day. Step back, broaden your scope, and appreciate that there’s so much more on offer for you. Close this tab and get away now if you’d like. I’d prefer it if you stuck around until the end, though.

    Getting AFK ?? pic.twitter.com/tXSxB52gLk

    — Jhey ? (@jh3yy) June 14, 2020

    It might not even be a case of getting physically AFK either. There’s a Slack community I’m in that has this notion of ‘fun laptop time’ which is an interesting idea. Have a separate machine that you can unwind on or do other things on. One that isn’t logged in to social media perhaps? One that you can do ‘fun’ things on. Maybe that is still coding something or creative writing or watching a live stream. The possibilities are endless.

    Give yourself space to live away from your work. This article on Lifehacker cites the case that taking up something new can help with burnout. I can relate to that too. Scheduling something completely unrelated to work is quite good at this. For me, I know when the season is in full swing, I’ll be spending some of my Saturdays AFK running around a field.

    Footballlll! ?? pic.twitter.com/0c1XEIQMBu

    — Jhey ? (@jh3yy) July 14, 2020

    With AFK, we’re mainly referring to sitting at a desk with a physical keyboard. Odds are, if you have a smartphone, the little digital one on that isn’t far away. A FOMO tip that might seem counterintuitive is to share being AFK. Share what you’re up to with people. It might surprise you how much people appreciate seeing others getting AFK. Rachel’s been plane spotting for example!

    Just picked this up on my PiAware tracker and watched it go overhead. https://t.co/MHPoXlPzmZ

    — Rachel Andrew (@rachelandrew) May 28, 2020

    Please Talk

    And that leads us to the title of this post. It’s good to talk. Is there a stigma attached to talking about our feelings and struggles? Yes. Should there be? Hell no!

    FOMO, burnout, depression, anxiety, and so on. They’re all real things and likely touch more of us than we know. I listen to various podcasts. I remember one in which the speaker and guest spoke about almost an obsession with chasing goals. When you reach that goal, you hit a low. Maybe it didn’t fill that void you were hoping for? But, although I wasn’t having a conversation with them, hearing that did me some good. It was relatable.

    I’d had this feeling inside, never expressing it. Now I knew it wasn’t uncommon. So I spoke about it with other people, and they could relate too. One big example for me was buying my house. It had been a goal for a year or so to get on the property ladder. Once I got the keys, it was a bit deflating. But, I should’ve been super happy about it.

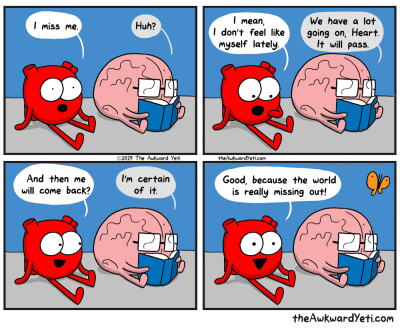
    A comic from 'The Awkward Yeti' titled 'Return of Me'

    Return of Me by The Awkward Yeti. (Image source: theawkwardyeti.com) (Large preview)

    We could all bottle those things up. But, speaking about things and getting your thoughts out can go some way in taking the pressure off. Another perspective can really help you out! It might be hearing something as little as ‘I do that too’ or ‘Don’t be so hard on yourself, you’re doing great!’ that can go a long way. It’s not that you’re fishing for compliments, but it sometimes takes that other perspective to bring you back to reality.

    Now don’t get me wrong. Talking about things is easier said than done, but the results might surprise you. Based on my own experience and others I’ve spoken to, here are some things you can do to combat those negative feelings.

    • Be willing to take the first step.
      Interaction doesn’t have to be a dying art. It won’t work for everyone and you can’t force others to embrace it. There will be those who do, though, people who feel exactly the same and were looking for someone to talk to.
    • Speak more openly.
      I’ve personally been terrible at this and I don’t mind admitting it. I’m getting better though. I speak more openly with those I engage with both on and offline and I’m happier for it. The takeaway being that there’s no shame in being yourself and doing what you want to do. If you’re being made to feel that way, it could be a good time to shift your circle or change up those you engage with. One nifty tip if you work remotely and feel isolated during the day is to set a reminder for yourself. For example, set a reminder every day at noon to reach out to people. This is quite effective. Most IM services can do this. For example, with Slack:
      /remind me "Reach out to people!" every weekday at 12:00 pm
    • If it can’t be offline, take it online.
      You don’t have to speak to people in person. Hop on a call with someone. Or even a video call. There are also so many online communities out there now too. If you don’t want to talk about how you feel, it’s great to even talk about what you’re up to or hear what others are up to. You soon realize people aren’t churning 24 hours a day like social media might have you think. I’ve recently joined an online community of creatives on Discord. I must say, it’s been brilliant. The Party Corgi network has been a game changer for me.
    • Broaden your scope.
      It’s so easy to lose track and become so focussed on your own little circle. I ended up randomly hopping around Twitch the other day. And I sat there and thought to myself, “This is brilliant”. There are so many creatives out there doing fantastic things, things I wasn’t even aware of. Why do I get so fixated on my own little bubble?
    • One tip that trumps all others? Be humble.
      You gain more from being positive. Good vibes breed good vibes. Plus, no one likes a hater.

    To Conclude

    It’s completely normal to feel a sense of pressure or get that horrible ‘imposter syndrome.’ But, don’t let it get to you. Do what you can and what you want to. Don’t sacrifice your health to get ahead. It’s OK to step away sometimes.

    The next time you feel a little overwhelmed with things and feel that pressure coming for you. Have a chat with a family member, reach out to a colleague, even an online acquaintance. Maybe share it with folks at Smashing? I love seeing what people get up to.

    If this is a career you plan on sticking with, what’s the rush? You might be doing this for tens of years. Embrace your journey. It’s not a race. For one thing, you might not even be on the same road.

    Further Reading on SmashingMag:

    (fb, yk, il)

    Categories: Others Tags:

    On dependency

    July 17th, 2020 No comments

    Rob Weychert:

    But I can’t host your site or even my own site. I didn’t build the CMS. Other people made the hardware and software I use to generate and optimize images. Other people made the fonts. Other people standardized the digital formats for those images and fonts. I didn’t write the HTML and CSS specifications, nor the browsers that interpret them, nor the operating systems that run the browsers. I didn’t solder the circuit boards. And so on.

    There is so much hardware and software behind a website to the extent that there is certainly no one person who understands it all. We build everything on each other’s shoulders. (Related: I, Website)

    But we can exert some influence about what technology we choose to use. Rob has three major considerations:

    1. Complexity: How complex is it, who absorbs the cost of that complexity, and is that acceptable?
    2. Comprehensibility: Do I understand how it works, and if not, does that matter?
    3. Reliability: How consistently and for how long can I expect it to work?

    I like that system. But even more, I like that he has a system at all. I bet most people don’t. That’s why “just npm install the problem away” is such a reliable conference joke.

    Direct Link to ArticlePermalink


    The post On dependency appeared first on CSS-Tricks.

    You can support CSS-Tricks by being an MVP Supporter.

    Categories: Designing, Others Tags:

    Backdrop Filter effect with CSS

    July 16th, 2020 No comments

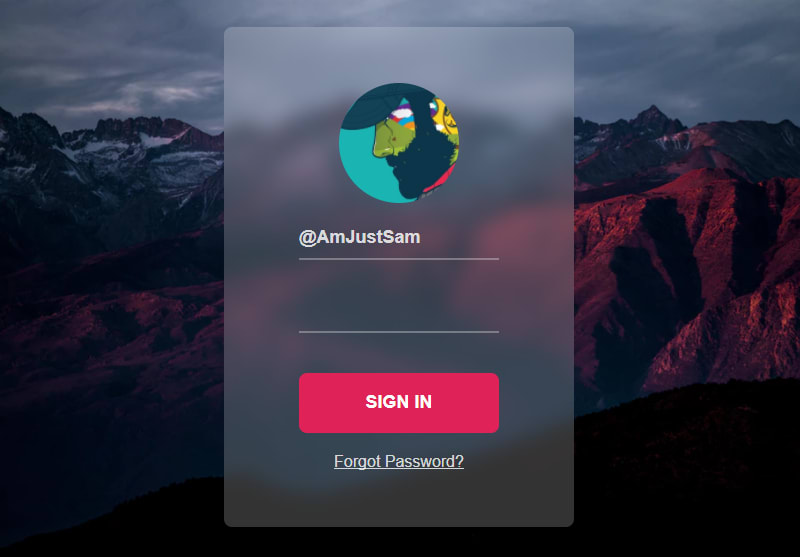
    I love these little posts where some tricky-looking design is solved by a single line of CSS using a little-known property. In this case, the design is a frosted glass effect and the CSS property is backdrop-filter.

    The approach? Easy peasy:

    .container {
      backdrop-filter: blur(10px);
    }

    The comments in the post are worth looking into because they address cross-browser support. Coverage is actually pretty good. Caniuse shows 83% global coverage with Firefox (and, predictably, Internet Explorer) lacking support. One commenter offered a nice fallback, along with a small tweak that desaturates the effect:

    .container {
      background: rgba(0,0,0,0.8);
      backdrop-filter: saturate(180%) blur(10px);
    }

    Nice. But we can take it a little further by sprinkling @supports in there, as demonstrated in our background-filter Almanac entry:

    .container {
      background: rgba(0,0,0,0.8);
    }
    
    @supports (-webkit-backdrop-filter: none) or (backdrop-filter: none) {
      .container {
        -webkit-backdrop-filter: blur(10px);
        backdrop-filter: blur(10px);
      }
    }

    Notice the -webkit prefix in there. It’s still worth using it in production, though that’s not a big deal assuming you’re wired up with Autoprefixer. Here’s the demo from the Almanac:

    CodePen Embed Fallback

    OK, so maybe not the one-line solution it appeared to be. But hey, it’s cool that this sort of thing is relatively trivial in CSS.

    Direct Link to ArticlePermalink


    The post Backdrop Filter effect with CSS appeared first on CSS-Tricks.

    You can support CSS-Tricks by being an MVP Supporter.

    Categories: Designing, Others Tags: