Archive

Archive for January, 2021

Rendering the WordPress philosophy in GraphQL

January 18th, 2021 No comments
The plugin provides an interface for whitelisting CPTs to be exposed in the API.

WordPress is a CMS that’s coded in PHP. But, even though PHP is the foundation, WordPress also holds a philosophy where user needs are prioritized over developer convenience. That philosophy establishes an implicit contract between the developers building WordPress themes and plugins, and the user managing a WordPress site.

GraphQL is an interface that retrieves data from—and can submit data to—the server. A GraphQL server can have its own opinionatedness in how it implements the GraphQL spec, as to prioritize some certain behavior over another.

Can the WordPress philosophy that depends on server-side architecture co-exist with a JavaScript-based query language that passes data via an API?

Let’s pick that question apart, and explain how the GraphQL API WordPress plugin I authored establishes a bridge between the two architectures.

You may be aware of WPGraphQL. The plugin GraphQL API for WordPress (or “GraphQL API” from now on) is a different GraphQL server for WordPress, with different features.

Reconciling the WordPress philosophy within the GraphQL service

This table contains the expected behavior of a WordPress application or plugin, and how it can be interpreted by a GraphQL service running on WordPress:

Category WordPress app expected behavior Interpretation for GraphQL service running on WordPress
Accessing data Democratizing publishing: Any user (irrespective of having technical skills or not) must be able to use the software Democratizing data access and publishing: Any user (irrespective of having technical skills or not) must be able to visualize and modify the GraphQL schema, and execute a GraphQL query
Extensibility The application must be extensible through plugins The GraphQL schema must be extensible through plugins
Dynamic behavior The behavior of the application can be modified through hooks The results from resolving a query can be modified through directives
Localization The application must be localized, to be used by people from any region, speaking any language The GraphQL schema must be localized, to be used by people from any region, speaking any language
User interfaces Installing and operating functionality must be done through a user interface, resorting to code as little as possible Adding new entities (types, fields, directives) to the GraphQL schema, configuring them, executing queries, and defining permissions to access the service must be done through a user interface, resorting to code as little as possible
Access control Access to functionalities can be granted through user roles and permissions Access to the GraphQL schema can be granted through user roles and permissions
Preventing conflicts Developers do not know in advance who will use their plugins, or what configuration/environment those sites will run, meaning the plugin must be prepared for conflicts (such as having two plugins define the SMTP service), and attempt to prevent them, as much as possible Developers do not know in advance who will access and modify the GraphQL schema, or what configuration/environment those sites will run, meaning the plugin must be prepared for conflicts (such as having two plugins with the same name for a type in the GraphQL schema), and attempt to prevent them, as much as possible

Let’s see how the GraphQL API carries out these ideas.

Accessing data

Similar to REST, a GraphQL service must be coded through PHP functions. Who will do this, and how?

Altering the GraphQL schema through code

The GraphQL schema includes types, fields and directives. These are dealt with through resolvers, which are pieces of PHP code. Who should create these resolvers?

The best strategy is for the GraphQL API to already satisfy the basic GraphQL schema with all known entities in WordPress (including posts, users, comments, categories, and tags), and make it simple to introduce new resolvers, for instance for Custom Post Types (CPTs).

This is how the user entity is already provided by the plugin. The User type is provided through this code:

class UserTypeResolver extends AbstractTypeResolver
{
  public function getTypeName(): string
  {
    return 'User';
  }

  public function getSchemaTypeDescription(): ?string
  {
    return __('Representation of a user', 'users');
  }

  public function getID(object $user)
  {
    return $user->ID;
  }

  public function getTypeDataLoaderClass(): string
  {
    return UserTypeDataLoader::class;
  }
}

The type resolver does not directly load the objects from the database, but instead delegates this task to a TypeDataLoader object (in the example above, from UserTypeDataLoader. This decoupling is to follow the SOLID principles, providing different entities to tackle different responsibilities, as to make the code maintainable, extensible and understandable.

Adding username, email and url fields to the User type is done via a FieldResolver object:

class UserFieldResolver extends AbstractDBDataFieldResolver
{
  public static function getClassesToAttachTo(): array
  {
    return [
      UserTypeResolver::class,
    ];
  }

  public static function getFieldNamesToResolve(): array
  {
    return [
      'username',
      'email',
      'url',
    ];
  }

  public function getSchemaFieldDescription(
    TypeResolverInterface $typeResolver,
    string $fieldName
  ): ?string {
    $descriptions = [
      'username' => __("User's username handle", "graphql-api"),
      'email' => __("User's email", "graphql-api"),
      'url' => __("URL of the user's profile in the website", "graphql-api"),
    ];
    return $descriptions[$fieldName];
  }

  public function getSchemaFieldType(
    TypeResolverInterface $typeResolver,
    string $fieldName
  ): ?string {
    $types = [
      'username' => SchemaDefinition::TYPE_STRING,
      'email' => SchemaDefinition::TYPE_EMAIL,
      'url' => SchemaDefinition::TYPE_URL,
    ];
    return $types[$fieldName];
  }

  public function resolveValue(
    TypeResolverInterface $typeResolver,
    object $user,
    string $fieldName,
    array $fieldArgs = []
  ) {
    switch ($fieldName) {
      case 'username':
        return $user->user_login;

      case 'email':
        return $user->user_email;

      case 'url':
        return get_author_posts_url($user->ID);
    }

    return null;
  }
}

As it can be observed, the definition of a field for the GraphQL schema, and its resolution, has been split into a multitude of functions:

  • getSchemaFieldDescription
  • getSchemaFieldType
  • resolveValue

Other functions include:

This code is more legible than if all functionality is satisfied through a single function, or through a configuration array, thus making it easier to implement and maintain the resolvers.

Retrieving plugin or custom CPT data

What happens when a plugin has not integrated its data to the GraphQL schema by creating new type and field resolvers? Could the user then query data from this plugin through GraphQL? For instance, let’s say that WooCommerce has a CPT for products, but it does not introduce the corresponding Product type to the GraphQL schema. Is it possible to retrieve the product data?

Concerning CPT entities, their data can be fetched via type GenericCustomPost, which acts as a kind of wildcard, to encompass any custom post type installed in the site. The records are retrieved by querying Root.genericCustomPosts(customPostTypes: [cpt1, cpt2, ...]) (in this notation for fields, Root is the type, and genericCustomPosts is the field).

Then, to fetch the product data, corresponding to CPT with name "wc_product", we execute this query:

{
  genericCustomPosts(customPostTypes: "[wc_product]") {
    id
    title
    url
    date
  }
}

However, all the available fields are only those ones present in every CPT entity: title, url, date, etc. If the CPT for a product has data for price, a corresponding field price is not available. wc_product refers to a CPT created by the WooCommerce plugin, so for that, either the WooCommerce or the website’s developers will have to implement the Product type, and define its own custom fields.

CPTs are often used to manage private data, which must not be exposed through the API. For this reason, the GraphQL API initially only exposes the Page type, and requires defining which other CPTs can have their data publicly queried:

Transitioning from REST to GraphQL via persisted queries

While GraphQL is provided as a plugin, WordPress has built-in support for REST, through the WP REST API. In some circumstances, developers working with the WP REST API may find it problematic to transition to GraphQL. For instance, consider these differences:

  • A REST endpoint has its own URL, and can be queried via GET, while GraphQL, normally operates through a single endpoint, queried via POST only
  • The REST endpoint can be cached on the server-side (when queried via GET), while the GraphQL endpoint normally cannot

As a consequence, REST provides better out-of-the-box support for caching, making the application more performant and reducing the load on the server. GraphQL, instead, places more emphasis in caching on the client-side, as supported by the Apollo client.

After switching from REST to GraphQL, will the developer need to re-architect the application on the client-side, introducing the Apollo client just to introduce a layer of caching? That would be regrettable.

The “persisted queries” feature provides a solution for this situation. Persisted queries combine REST and GraphQL together, allowing us to:

  • create queries using GraphQL, and
  • publish the queries on their own URL, similar to REST endpoints.

The persisted query endpoint has the same behavior as a REST endpoint: it can be accessed via GET, and it can be cached server-side. But it was created using the GraphQL syntax, and the exposed data has no under/over fetching.

Extensibility

The architecture of the GraphQL API will define how easy it is to add our own extensions.

Decoupling type and field resolvers

The GraphQL API uses the Publish-subscribe pattern to have fields be “subscribed” to types.

Reappraising the field resolver from earlier on:

class UserFieldResolver extends AbstractDBDataFieldResolver
{
  public static function getClassesToAttachTo(): array
  {
    return [UserTypeResolver::class];
  }

  public static function getFieldNamesToResolve(): array
  {
    return [
      'username',
      'email',
      'url',
    ];
  }
}

The User type does not know in advance which fields it will satisfy, but these (username, email and url) are instead injected to the type by the field resolver.

This way, the GraphQL schema becomes easily extensible. By simply adding a field resolver, any plugin can add new fields to an existing type (such as WooCommerce adding a field for User.shippingAddress), or override how a field is resolved (such as redefining User.url to return the user’s website instead).

Code-first approach

Plugins must be able to extend the GraphQL schema. For instance, they could make available a new Product type, add an additional coauthors field on the Post type, provide a @sendEmail directive, or anything else.

To achieve this, the GraphQL API follows a code-first approach, in which the schema is generated from PHP code, on runtime.

The alternative approach, called SDL-first (Schema Definition Language), requires the schema be provided in advance, for instance, through some .gql file.

The main difference between these two approaches is that, in the code-first approach, the GraphQL schema is dynamic, adaptable to different users or applications. This suits WordPress, where a single site could power several applications (such as website and mobile app) and be customized for different clients. The GraphQL API makes this behavior explicit through the “custom endpoints” feature, which enables to create different endpoints, with access to different GraphQL schemas, for different users or applications.

To avoid performance hits, the schema is made static by caching it to disk or memory, and it is re-generated whenever a new plugin extending the schema is installed, or when the admin updates the settings.

Support for novel features

Another benefit of using the code-first approach is that it enables us to provide brand-new features that can be opted into, before these are supported by the GraphQL spec.

For instance, nested mutations have been requested for the spec but not yet approved. The GraphQL API complies with the spec, using types QueryRoot and MutationRoot to deal with queries and mutations respectively, as exposed in the standard schema. However, by enabling the opt-in “nested mutations” feature, the schema is transformed, and both queries and mutations will instead be handled by a single Root type, providing support for nested mutations.

Let’s see this novel feature in action. In this query, we first query the post through Root.post, then execute mutation Post.addComment on it and obtain the created comment object, and finally execute mutation Comment.reply on it and query some of its data (uncomment the first mutation to log the user in, as to be allowed to add comments):

# mutation {
#   loginUser(
#     usernameOrEmail:"test",
#     password:"pass"
#   ) {
#     id
#     name
#   }
# }
mutation {
  post(id:1459) {
    id
    title
    addComment(comment:"That's really beautiful!") {
      id
      date
      content
      author {
        id
        name
      }
      reply(comment:"Yes, it is!") {
        id
        date
        content
      }
    }
  }
}

Dynamic behavior

WordPress uses hooks (filters and actions) to modify behavior. Hooks are simple pieces of code that can override a value, or enable to execute a custom action, whenever triggered.

Is there an equivalent in GraphQL?

Directives to override functionality

Searching for a similar mechanism for GraphQL, I‘ve come to the conclusion that directives could be considered the equivalent to WordPress hooks to some extent: like a filter hook, a directive is a function that modifies the value of a field, thus augmenting some other functionality. For instance, let’s say we retrieve a list of post titles with this query:

query {
  posts {
    title
  }
}

…which produces this response:

{
  "data": {
    "posts": [
      {
        "title": "Scheduled by Leo"
      },
      {
        "title": "COPE with WordPress: Post demo containing plenty of blocks"
      },
      {
        "title": "A lovely tango, not with leo"
      },
      {
      "title": "Hello world!"
      },
    ]
  }
}

These results are in English. How can we translate them to Spanish? With a directive @translate applied on field title (implemented through this directive resolver), which gets the value of the field as an input, calls the Google Translate API to translate it, and has its result override the original input, as in this query:

query {
  posts {
    title @translate(from:"en", to"es")
  }
}

…which produces this response:

{
  "data": {
    "posts": [
      {
        "title": "Programado por Leo"
      },
      {
        "title": "COPE con WordPress: publica una demostración que contiene muchos bloques"
      },
      {
        "title": "Un tango lindo, no con leo"
      },
      {
        "title": "¡Hola Mundo!"
      }
    ]
  }
}

Please notice how directives are unconcerned with who the input is. In this case, it was a Post.title field, but it could’ve been Post.excerpt, Comment.content, or any other field of type String. Then, resolving fields and overriding their value is cleanly decoupled, and directives are always reusable.

Directives to connect to third parties

As WordPress keeps steadily becoming the OS of the web (currently powering 39% of all sites, more than any other software), it also progressively increases its interactions with external services (think of Stripe for payments, Slack for notifications, AWS S3 for hosting assets, and others).

As we‘ve seen above, directives can be used to override the response of a field. But where does the new value come from? It could come from some local function, but it could perfectly well also originate from some external service (as for directive @translate we’ve seen earlier on, which retrieves the new value from the Google Translate API).

For this reason, GraphQL API has decided to make it easy for directives to communicate with external APIs, enabling those services to transform the data from the WordPress site when executing a query, such as for:

  • translation,
  • image compression,
  • sourcing through a CDN, and
  • sending emails, SMS and Slack notifications.

As a matter of fact, GraphQL API has decided to make directives as powerful as possible, by making them low-level components in the server’s architecture, even having the query resolution itself be based on a directive pipeline. This grants directives the power to perform authorizations, validations, and modification of the response, among others.

Localization

GraphQL servers using the SDL-first approach find it difficult to localize the information in the schema (the corresponding issue for the spec was created more than four years ago, and still has no resolution).

Using the code-first approach, though, the GraphQL API can localize the descriptions in a straightforward manner, through the __('some text', 'domain') PHP function, and the localized strings will be retrieved from a POT file corresponding to the region and language selected in the WordPress admin.

For instance, as we saw earlier on, this code localizes the field descriptions:

class UserFieldResolver extends AbstractDBDataFieldResolver
{
  public function getSchemaFieldDescription(
    TypeResolverInterface $typeResolver,
    string $fieldName
  ): ?string {
    $descriptions = [
      'username' => __("User's username handle", "graphql-api"),
      'email' => __("User's email", "graphql-api"),
      'url' => __("URL of the user's profile in the website", "graphql-api"),
    ];
    return $descriptions[$fieldName];
  }
}

User interfaces

The GraphQL ecosystem is filled with open source tools to interact with the service, including many provide the same user-friendly experience expected in WordPress.

Visualizing the GraphQL schema is done with GraphQL Voyager:

GraphQL Voyager enables us to interact with the schema, as to get a good grasp of how all entities in the application's data model relate to each other.

This can prove particularly useful when creating our own CPTs, and checking out how and from where they can be accessed, and what data is exposed for them:

Interacting with the schema

Executing the query against the GraphQL endpoint is done with GraphiQL:

GraphiQL for the admin

However, this tool is not simple enough for everyone, since the user must have knowledge of the GraphQL query syntax. So, in addition, the GraphiQL Explorer is installed on top of it, as to compose the GraphQL query by clicking on fields:

GraphiQL with Explorer for the admin

Access control

WordPress provides different user roles (admin, editor, author, contributor and subscriber) to manage user permissions, and users can be logged-in the wp-admin (eg: the staff), logged-in the public-facing site (eg: clients), or not logged-in or have an account (any visitor). The GraphQL API must account for these, allowing to grant granular access to different users.

Granting access to the tools

The GraphQL API allows to configure who has access to the GraphiQL and Voyager clients to visualize the schema and execute queries against it:

  • Only the admin?
  • The staff?
  • The clients?
  • Openly accessible to everyone?

For security reasons, the plugin, by default, only provides access to the admin, and does not openly expose the service on the Internet.

In the images from the previous section, the GraphiQL and Voyager clients are available in the wp-admin, available to the admin user only. The admin user can grant access to users with other roles (editor, author, contributor) through the settings:

The admin user can grant access to users with other roles (editor, author, contributor) through the settings.

As to grant access to our clients, or anyone on the open Internet, we don’t want to give them access to the WordPress admin. Then, the settings enable to expose the tools under a new, public-facing URL (such as mywebsite.com/graphiql and mywebsite.com/graphql-interactive). Exposing these public URLs is an opt-in choice, explicitly set by the admin.

Granting access to the GraphQL schema

The WP REST API does not make it easy to customize who has access to some endpoint or field within an endpoint, since no user interface is provided and it must be accomplished through code.

The GraphQL API, instead, makes use of the metadata already available in the GraphQL schema to enable configuration of the service through a user interface (powered by the WordPress editor). As a result, non-technical users can also manage their APIs without touching a line of code.

Managing access control to the different fields (and directives) from the schema is accomplished by clicking on them and selecting, from a dropdown, which users (like those logged in or with specific capabilities) can access them.

Preventing conflicts

Namespacing helps avoid conflicts whenever two plugins use the same name for their types. For instance, if both WooCommerce and Easy Digital Downloads implement a type named Product, it would become ambiguous to execute a query to fetch products. Then, namespacing would transform the type names to WooCommerceProduct and EDDProduct, resolving the conflict.

The likelihood of such conflict arising, though, is not very high. So the best strategy is to have it disabled by default (as to keep the schema as simple as possible), and enable it only if needed.

If enabled, the GraphQL server automatically namespaces types using the corresponding PHP package name (for which all packages follow the PHP Standard Recommendation PSR-4). For instance, for this regular GraphQL schema:

Regular GraphQL schema

…with namespacing enabled, Post becomes PoPSchema_Posts_Post, Comment becomes PoPSchema_Comments_Comment, and so on.

Namespaced GraphQL schema

That’s all, folks

Both WordPress and GraphQL are captivating topics on their own, so I find the integration of WordPress and GraphQL greatly endearing. Having been at it for a few years now, I can say that designing the optimal way to have an old CMS manage content, and a new interface access it, is a challenge worth pursuing.

I could continue describing how the WordPress philosophy can influence the implementation of a GraphQL service running on WordPress, talking about it even for several hours, using plenty of material that I have not included in this write-up. But I need to stop… So I’ll stop now.

I hope this article has managed to provide a good overview of the whys and hows for satisfying the WordPress philosophy in GraphQL, as done by plugin GraphQL API for WordPress.


The post Rendering the WordPress philosophy in GraphQL appeared first on CSS-Tricks.

You can support CSS-Tricks by being an MVP Supporter.

Categories: Designing, Others Tags:

AnimXYZ

January 18th, 2021 No comments

There are quite a few CSS animation libraries. They tend to be a pile of class names that you can apply as needed like “bounce” or “slide-right” and it’ll… do those things. They tend to be pretty opinionated with nice defaults, and not particularly designed around customization.

It looks like AnimXYZ is designed to be highly customizable, calling itself “the first composable CSS animation toolkit.”

You use as many of the different composable bits as you need to get the in/out animation you want. Play with their builder and you’ll see output like:

<div
  class="square-group"
  xyz="tall-2 duration-6 ease-out-back stagger-1 skew-left-2 big-25% fade-50% right-5"
>
  <div class="square xyz-out"></div>
  <div class="square xyz-out"></div>
  <div class="square xyz-out"></div>
</div>

The class name xyz-out becomes xyz-in to trigger the opposite animation.

I don’t love it when libraries use made up HTML attributes to control themselves. It’s unlikely that web standards will use xyz in the future, but who knows, and if this goes on enough production sites, that door is closed forever. But worse, it encourages other libraries to do the same.

All those attribute values are reminiscent of Tailwind. To use Tailwind effectively, the build process runs PurgeCSS to remove all unused classes, which will serve a tiny fraction of the complete set of classes Tailwind offers. I think of that because the processed stylesheet of AnimXYZ is ~9.7 kB compressed, which is larger than the file size Tailwind uses as an example on their marketing page. The point being, if classes were used, there would probably be a more straightforward way of purging the unused classes, which I bet would make the size almost negligible. Perhaps the JavaScript framework-specific usage is more clever.

But those criticisms aside, it’s cool! Not only are there smart defaults that are highly composable, you have 100% control via CSS Custom Properties.

CodePen Embed Fallback

Don’t miss the XYZ-ray button on the lower right of the website that lets you see what animations are powering what elements. It’s also on the docs which are super nice.

There is just something nice about declarative animations. I remember chatting with Matt Perry about Framer Motion and enjoying its approach.


The post AnimXYZ appeared first on CSS-Tricks.

You can support CSS-Tricks by being an MVP Supporter.

Categories: Designing, Others Tags:

State of JavaScript 2020

January 18th, 2021 No comments

We rounded up a bunch of published 2020 annual reports right before the year ended and compiled them into a big ol’ list. The end of the list called out a couple of in-progress surveys, one of which was the 2020 State of JavaScript. Well, the results are in and available to check out!

Just shy of 24,000 folks participated in this year’s survey… almost exactly 2,000 more than 2019.

I love charts like this:

Notice how quickly some technologies take off then start to gain negative opinions, even as the rate of adoption increases.

What I like about this particular survey (and the State of CSS) is how the data is readily available to export in addition to all the great and telling charts. That opens up the possibility of creating your own reports and gleaning your own insights. But here’s what I’ve found interesting in the short time I’ve spent looking at it:

  • React’s facing negative opinions. It’s not so much that everybody’s fleeing from it, but the “shiny” factor may be waning (coming in at 88% satisfaction versus a 93% peak in 2017). Is that because it suffers from the same frustration that devs expressed with a lack of documentation in other surveys? I don’t know, but the fact that we see both growth and a sway toward negative opinions is interesting enough that I’ll want to see where it goes in 2021.
  • Awwwww, Gulp, what happened?! Wow, what a change in perception. Its usage has dipped a bit, but the impression of it is now solidly in “negative opinions” territory. I still use it personally on a number of projects and it does exactly what I need, but I get that there are better build processes these days that don’t require writing a bunch of pipes and whatnot.
  • Hello, Svelte. It’s the most fourth most used framework (15%) but enjoys the highest level of satisfaction (89%). I’m already interested in giving it a go, but this makes me want to dive into it even more — which is consistent with the fact that it also garners the most interest of all frameworks (68%).
  • Javascript is sorta overused and sorta overly complex. Well, according to the polls. It’s just so interesting that the distribution between the opinions is almost perfectly even. At the same time, the vast majority of folks (80.6%) believe JavaScript is heading in the right direction.

Direct Link to ArticlePermalink


The post State of JavaScript 2020 appeared first on CSS-Tricks.

You can support CSS-Tricks by being an MVP Supporter.

Categories: Designing, Others Tags:

Exciting New Tools for Designers, January 2021

January 18th, 2021 No comments

The new year is often packed with resolutions. Make the most of those goals and resolve to design better, faster, and more efficiently with some of these new tools and resources.

Here’s what new for designers this month.

Radix UI

Radix UI is an open-source UI component library for building high-quality, accessible design systems and web apps. It includes examples and guidelines for all kinds of user interface elements that provide guidance and really make you think about accessible website design. (And everything is usable!)

Froala Charts

Froala Charts is made to help you create data visualizations for web or mobile apps. Build any chart you can imagine – bar, line, area, heat map, sankey, radar, time series, and more. Plus, you can customize anything and everything, so it all matches your brand. This premium tool is enterprise-level and comes with a one-time license fee.

CSSfox

CSSfox is a collection of designs that you can use for inspiration. The curated community project includes posts, reviews, and award nominees and winners.

Pattern Generator

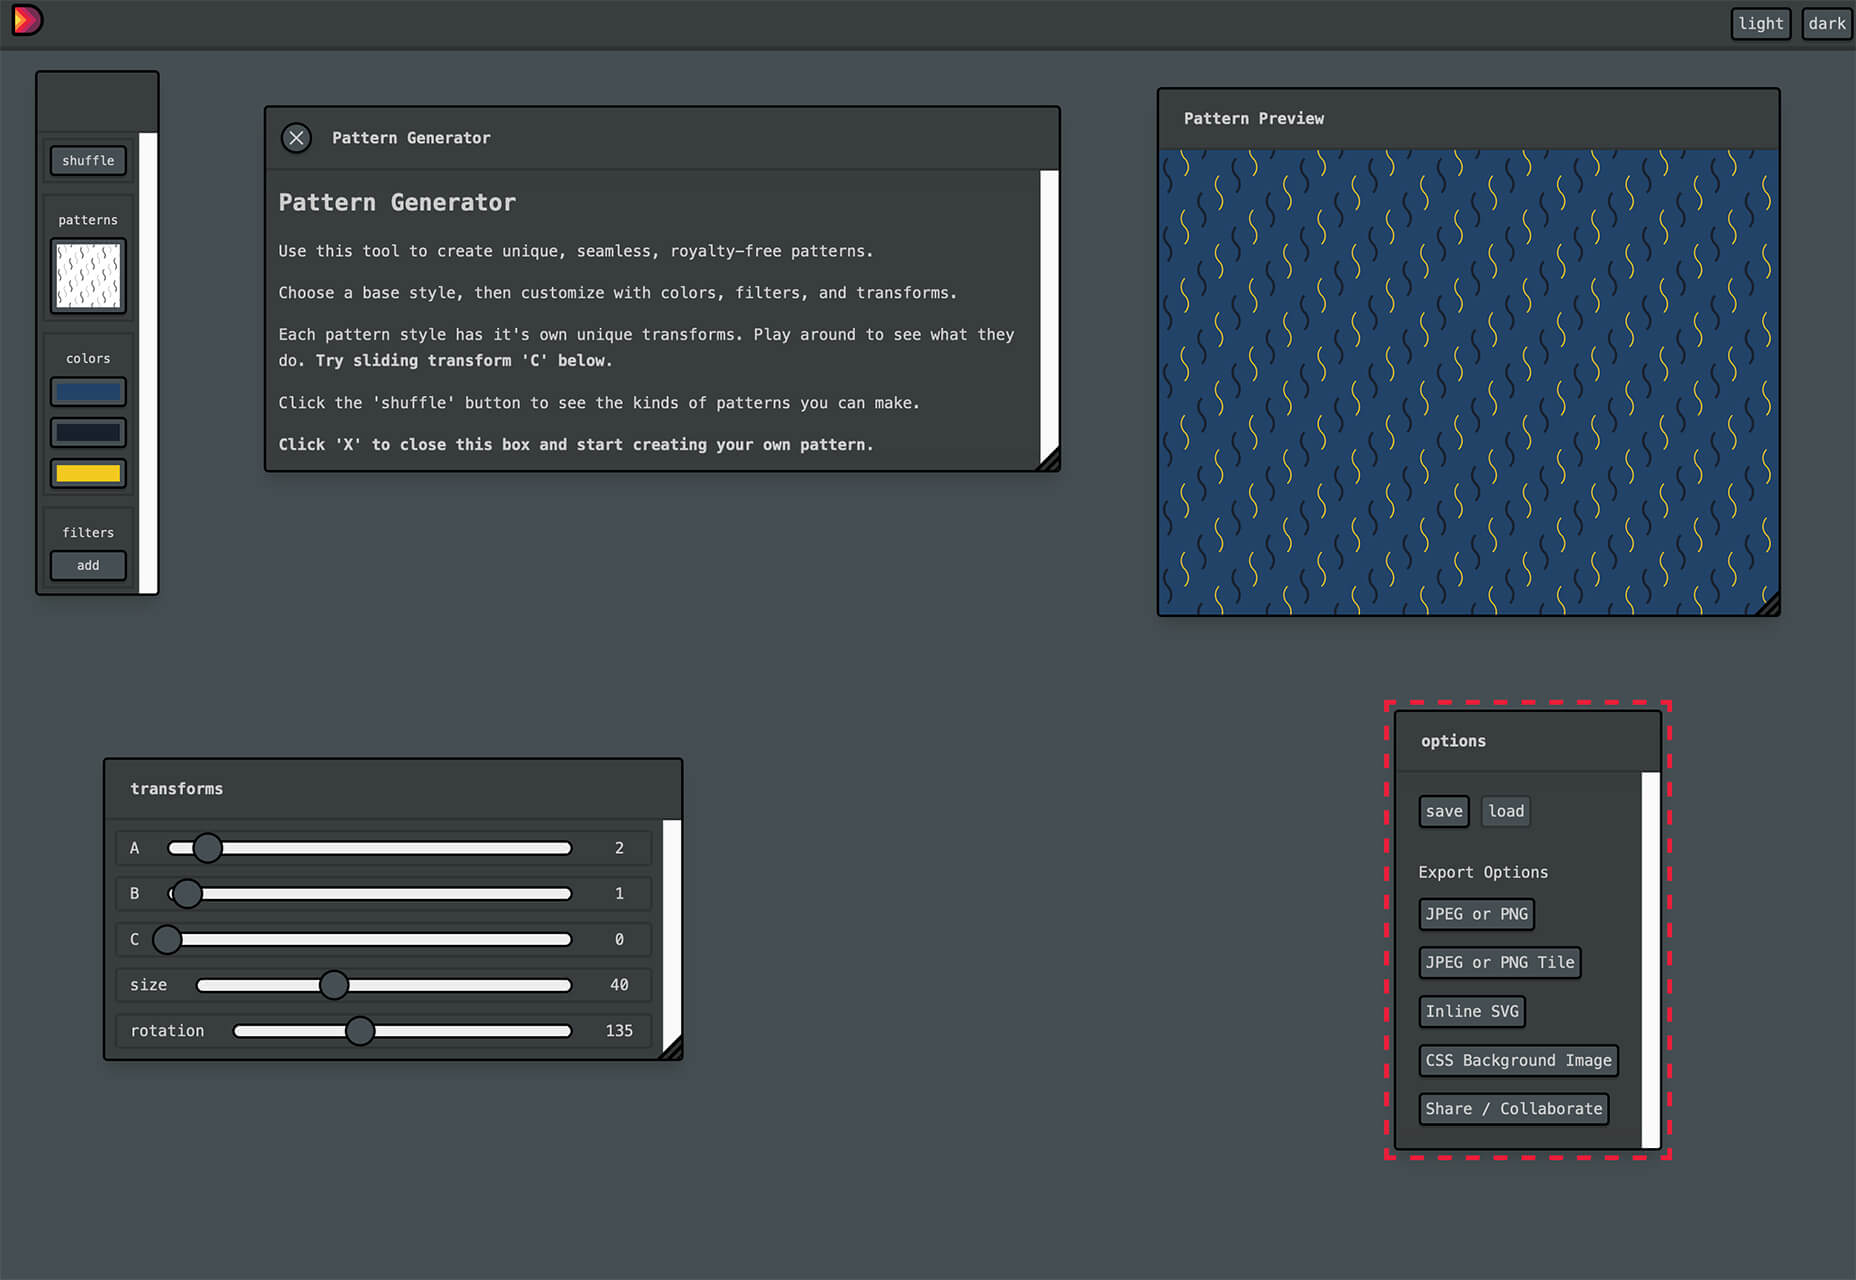
Pattern Generator is a tool to create seamless and royalty-free patterns that you can use in projects. Almost every element of the pattern design is customizable, and you can “shuffle” to get new style inspiration. Design a pattern you like and export it for use as a JPG, PNG, SVG, or CSS.

Type Scale Clamp Generator

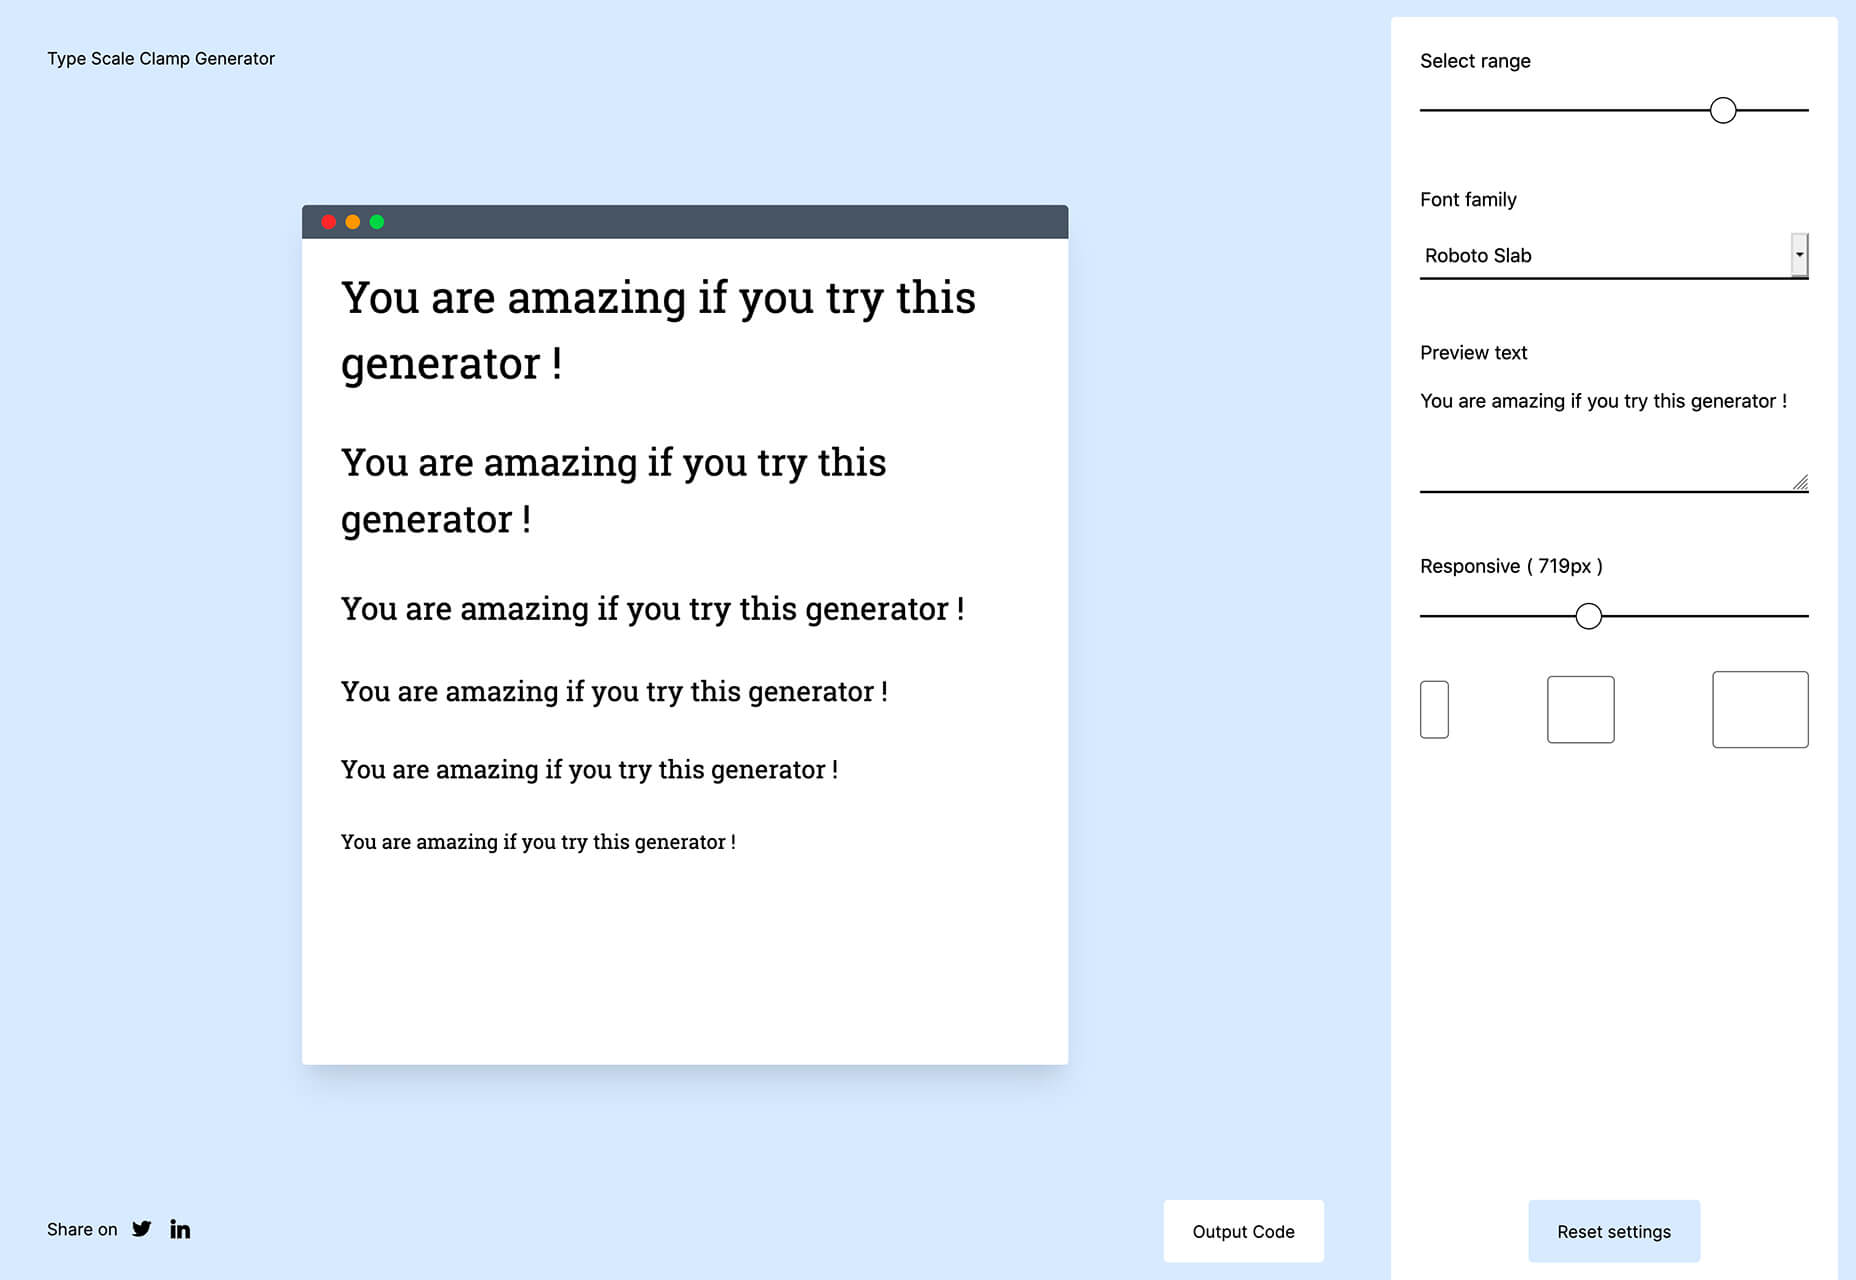
Type Style Clamp Generator helps you create a visualize a typographic scale for web projects. Pick a font and determine a few other settings and see the scale right on the screen. You can even put in your own words to see how they would look. Then, flip to see how sizes appear on different devices. Find a scale you like and snag the code with a click.

Flowdash

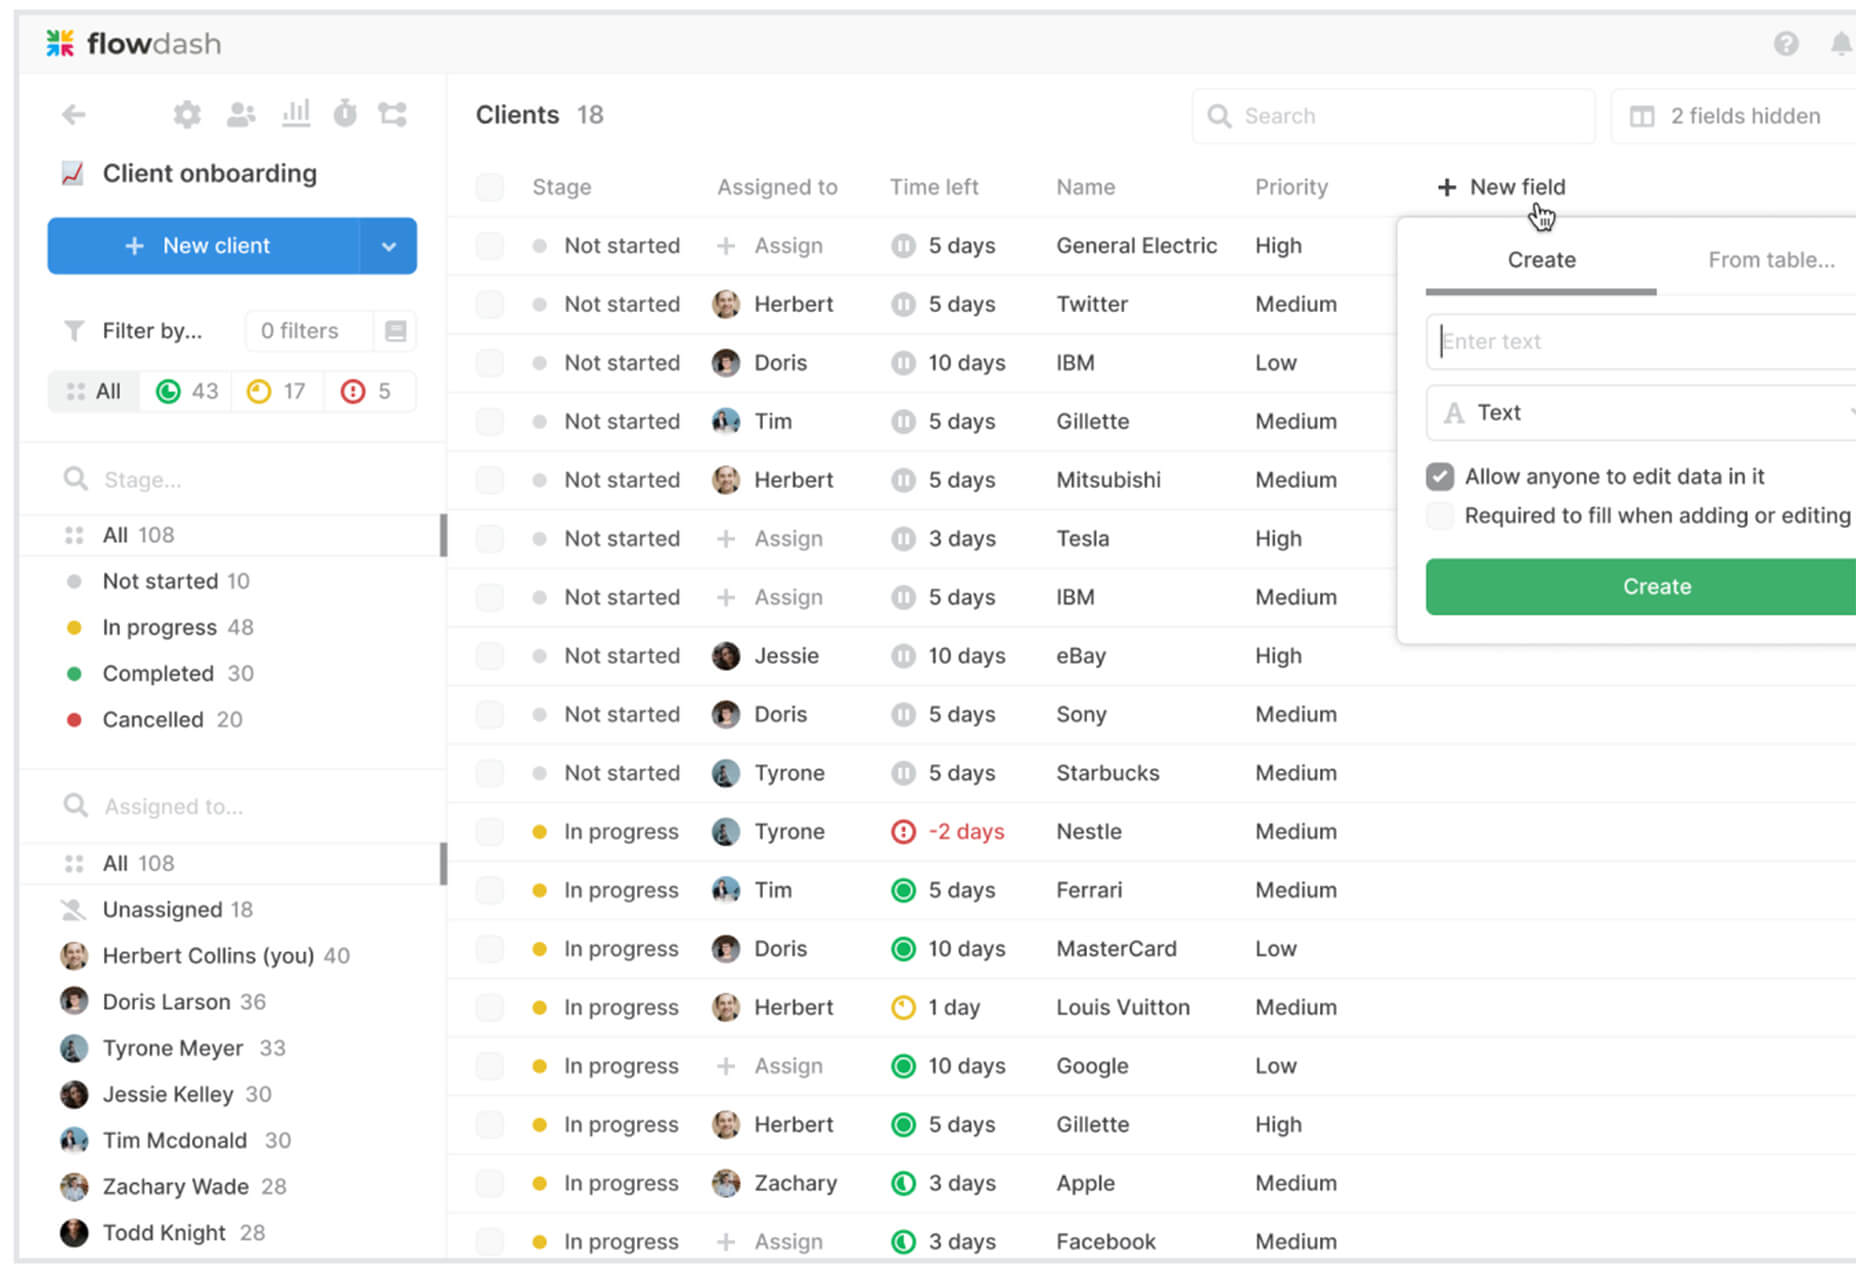
Flowdash is a premium app that helps you build custom tools, data sets and streamline your business operations with one tool. Manage data and processes without code. The tool combines a spreadsheet’s familiarity with a visual workflow builder, plus built-in integrations to automate repetitive tasks so your team can focus on what matters.

Scale

Scale is a website that provides new and open-source illustrations that you can use for projects. Maybe the illustration generator’s neatest part is that you can change the color with just a click to match your brand. Then download the image as an SVG or PNG.

Pe•ple

Pe•ple is a tool that adds a “customizable community” to any website to help grow your fanbase and provide a boost to SEO. It allows you to integrate chat, commenting, emojis, and passwordless login, among other things.

K!sbag: Free Minimal Portfolio Template

K!sbag is a free minimal website template that’s made for portfolio sites. (Did you resolve to update yours in 2021?) It includes 6 pages in a ready-made HTML format and PSD.

Merico Build

Merico Build is like a fitness tracker for code. It uses contribution analytics to empower developers with insight dashboards and badges focused on self-improvement and career growth. Sign up with tools you already use – Github or Gitlab.

Automatic Social Share Images

Automatic Social Share Images solves a common website problem: Missing or broken images when posts or pages are shared on social media. This tutorial walks you through the code needed to create the right meta tags so that popular social media channels pick up the image you want for posts. The best part is this code helps you create a dynamic preview image, so you don’t have to make something special every single time.

Animated SVG Links

Animated SVG Links can add a little something special to your design. This pen is from Adam Kuhn and includes three different link styles.

Blush

Blush helps you create illustrations. With collections made by artists across the globe, there’s something for everyone and every project. All art is customizable, so you can play with variations to create something unique.

Palms

Palms is a set of 43 sets of hands to help illustrate projects. Each illustration is in a vector format and ready to use.

Tabbied

Tabbied allows you to create and customize patterns or artwork in a minimal style for various projects or backgrounds. Tinker with your artwork and patterns and then download a free, high-resolution version.

How to Create Animated Cards

How to Create Animated Cards is a great little tutorial by Johnny Simpson that uses WebGL and Three.js to create a style like those on Apple Music. The result is a stylish modern card style that you can follow along with the CodePen demo.

Bandero

Bandero is a fun slab with a rough texture and interesting letterforms. The character set is a little limited and is best-suited for display use.

Magilla

Magilla is a stunning modern serif with great lines and strokes. The premium typeface family has six styles, including an outline option.

Roadhouse

Roadhouse is one of those slab fonts that almost screams branding design. The type designer must have had this in mind, too, with stripe, bevel, inline, half fill, outline, drop extrude, and script options included. (This family is quite robust, or you can snag just one style.)

Street Art

Street Art is for those times when a graffiti style is all that will do. What’s nice about this option – free for personal use – is that the characters are highly readable.

Source

The post Exciting New Tools for Designers, January 2021 first appeared on Webdesigner Depot.

Categories: Designing, Others Tags:

Popular Design News of the Week: January 11, 2021 – January 17, 2021

January 17th, 2021 No comments

Every week users submit a lot of interesting stuff on our sister site Webdesigner News, highlighting great content from around the web that can be of interest to web designers.

The best way to keep track of all the great stories and news being posted is simply to check out the Webdesigner News site, however, in case you missed some here’s a quick and useful compilation of the most popular designer news that we curated from the past week.

Front-End Performance Checklist 2021

Google Design’s Best of 2020

Skynet – Build a Free Internet

An Early Look at Full Site Editing in WordPress

30 Basic Fonts

5 Great Ways to Develop your Eye for Design

No More Facebook – Privacy-friendly Alternatives to Facebook Products

Bold CMS – The CMS that Understands your Content

Design in 2021 – What will Design Activism Look Like?

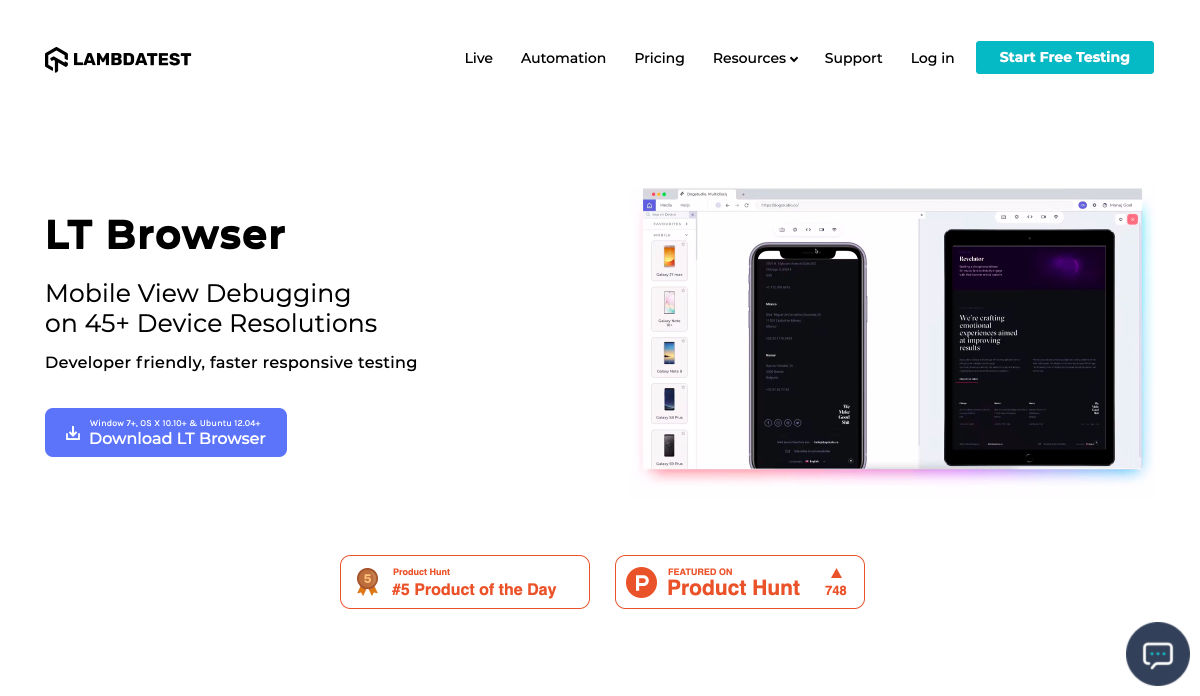
LT Browser – Next-gen Browser to Build, Test & Debug Mobile Websites

40 Best Canva Alternatives for Effortless Graphic Design

How to Design with Contrast

Design in 2021 – What will Interactive Design Look Like?

20 Essential WordPress Settings to Change

No Meetings, no Deadlines, no Full-Time Employees

Free Porto Illustrations – Free 20 Stylish Hand Drawn Illustrations

Digital Images 101: All You Need to Know as a Designer

8 Typography Design Trends for 2021 – [Infographic]

Learnings from Designing for Multi-language User Interfaces

A UX Analysis of Cyberpunk 2077?s HUD

Five Websites Inspired by Vintage Games

Effective User Onboarding: Top Proven Tips and Examples

Overcoming Common Designer Biases

What Makes a Great Business Idea?

How to Use Design Thinking to Improve your Daily Workflow

Want more? No problem! Keep track of top design news from around the web with Webdesigner News.

Source

The post Popular Design News of the Week: January 11, 2021 – January 17, 2021 first appeared on Webdesigner Depot.

Categories: Designing, Others Tags:

On Auto-Generated Atomic CSS

January 15th, 2021 No comments

Robin Weser’s “The Shorthand-Longhand Problem in Atomic CSS” in an interesting journey through a tricky problem. The point is that when you take on the job of converting something HTML and CSS-like into actual HTML and CSS, there are edge cases that you’ll have to program yourself out of, if you even can at all. In this case, Fela (which we just mentioned), turns CSS into “atomic” classes, but when you mix together shorthand and longhand, the resulting classes, mixed with the cascade, can cause mistakes.

I think this whole idea of CSS-in-JS that produces Atomic CSS is pretty interesting, so let’s take a quick step back and look at that.

Atomic CSS means one class = one job

Like this:

.mb-8 {
  margin-bottom: 2rem;
}

Now imagine, like, thousands of those that are available to use and can do just about anything CSS can do.

Why would you do that?

Here’s some reasons:

  • If you go all-in on that idea, it means that you’ll ship less CSS because there are no property/value pairs that are repeated, and there are are no made-up-for-authoring-reasons class names. I would guess an all-atomic stylesheet (trimmed for usage, which we’ll get to) is a quarter the size of a hand-authored stylesheet, or smaller. Shipping less CSS is significant because CSS is a blocking resource.
  • You get to avoid naming things.
  • You get some degree of design consistency “for free” if you limit the available classes.
  • Some people just prefer it and say it makes them faster.

How do you get Atomic CSS?

There is nothing stopping you from just doing it yourself. That’s what GitHub did with Primer and Facebook did in FB5 (not that you should do what mega corporations do!). They decided on a bunch of utility styles and shipped it (to themselves, largely) as a package.

Perhaps the originator of the whole idea was Tachyons, which is a just a big ol’ opinionated pile of classes you can grab as use as-is.

But for the most part…

Tailwind is the big player.

Tailwind has a bunch of nice defaults, but it does some very smart things beyond being a collection of atomic styles:

  • It’s configurable. You tell it what you want all those classes to do.
  • It encourages you to “purge” the unused classes. You really need to get this part right, as you aren’t really getting the benefit of Atomic CSS if you don’t.
  • It’s got a UI library so you can get moving right away.

Wait weren’t we talking about automatically-generated Atomic CSS?

Oh right.

It’s worth mentioning that Yahoo was also an early player here. Their big idea is that you’d essentially use functions as class names (e.g. class="P(20px)") and that would be processed into a class (both in the HTML and CSS) during a build step. I’m not sure how popular that got really, but you can see how it’s not terribly dissimilar to Tailwind.

These days, you don’t have to write Atomic CSS to get Atomic CSS. From Robin’s article:

It allows us to write our styles in a familiar “monolithic” way, but get Atomic CSS out. This increases reusability and decreases the final CSS bundle size. Each property-value pair is only rendered once, namely on its first occurence. From there on, every time we use that specific pair again, we can reuse the same class name from a cache. Some libraries that do that are:

Fela
Styletron
React Native Web
Otion
StyleSheet

In my honest opinion, I think that this is the only reasonable way to actually use Atomic CSS as it does not impact the developer experience when writing styles. I would not recommend to write Atomic CSS by hand.

I think that’s neat. I’ve tried writing Atomic CSS directly a number of times and I just don’t like it. Who knows why. I’ve learned lots of new things in my life, and this one just doesn’t click with me. But I definitely like the idea of computers doing whatever they have to do to boost web performance in production. If a build step turns my authored CSS into Atomic CSS… hey that’s cool. There are five libraries above that do it, so the concept certainly has legs.

It makes sense that the approaches are based on CSS-in-JS, as they absolutely need to process both the markup and the CSS — so that’s the context that makes the most sense.

What do y’all think?


The post On Auto-Generated Atomic CSS appeared first on CSS-Tricks.

You can support CSS-Tricks by being an MVP Supporter.

Categories: Designing, Others Tags:

3 Approaches to Integrate React with Custom Elements

January 15th, 2021 No comments

In my role as a web developer who sits at the intersection of design and code, I am drawn to Web Components because of their portability. It makes sense: custom elements are fully-functional HTML elements that work in all modern browsers, and the shadow DOM encapsulates the right styles with a decent surface area for customization. It’s a really nice fit, especially for larger organizations looking to create consistent user experiences across multiple frameworks, like Angular, Svelte and Vue.

In my experience, however, there is an outlier where many developers believe that custom elements don’t work, specifically those who work with React, which is, arguably, the most popular front-end library out there right now. And it’s true, React does have some definite opportunities for increased compatibility with the web components specifications; however, the idea that React cannot integrate deeply with Web Components is a myth.

In this article, I am going to walk through how to integrate a React application with Web Components to create a (nearly) seamless developer experience. We will look at React best practices its and limitations, then create generic wrappers and custom JSX pragmas in order to more tightly couple our custom elements and today’s most popular framework.

Coloring in the lines

If React is a coloring book — forgive the metaphor, I have two small children who love to color — there are definitely ways to stay within the lines to work with custom elements. To start, we’ll write a very simple custom element that attaches a text input to the shadow DOM and emits an event when the value changes. For the sake of simplicity, we’ll be using LitElement as a base, but you can certainly write your own custom element from scratch if you’d like.

CodePen Embed Fallback

Our super-cool-input element is basically a wrapper with some styles for a plain ol’ element that emits a custom event. It has a reportValue method for letting users know the current value in the most obnoxious way possible. While this element might not be the most useful, the techniques we will illustrate while plugging it into React will be helpful for working with other custom elements.

Approach 1: Use ref

According to React’s documentation for Web Components, “[t]o access the imperative APIs of a Web Component, you will need to use a ref to interact with the DOM node directly.”

This is necessary because React currently doesn’t have a way to listen to native DOM events (preferring, instead, to use it’s own proprietary SyntheticEvent system), nor does it have a way to declaratively access the current DOM element without using a ref.

We will make use of React’s useRef hook to create a reference to the native DOM element we have defined. We will also use React’s useEffect and useState hooks to gain access to the input’s value and render it to our app. We will also use the ref to call our super-cool-input‘s reportValue method if the value is ever a variant of the word “rad.”

CodePen Embed Fallback

One thing to take note of in the example above is our React component’s useEffect block.

useEffect(() => {
  coolInput.current.addEventListener('custom-input', eventListener);
  
  return () => {
    coolInput.current.removeEventListener('custom-input', eventListener);
  }
});

The useEffect block creates a side effect (adding an event listener not managed by React), so we have to be careful to remove the event listener when the component needs a change so that we don’t have any unintentional memory leaks.

While the above example simply binds an event listener, this is also a technique that can be employed to bind to DOM properties (defined as entries on the DOM object, rather than React props or DOM attributes).

This isn’t too bad. We have our custom element working in React, and we’re able to bind to our custom event, access the value from it, and call our custom element’s methods as well. While this does work, it is verbose and doesn’t really look like React.

Approach 2: Use a wrapper

Our next attempt at using our custom element in our React application is to create a wrapper for the element. Our wrapper is simply a React component that passes down props to our element and creates an API for interfacing with the parts of our element that aren’t typically available in React.

Here, we have moved the complexity into a wrapper component for our custom element. The new CoolInput React component manages creating a ref while adding and removing event listeners for us so that any consuming component can pass props in like any other React component.

function CoolInput(props) {
  const ref = useRef();
  const { children, onCustomInput, ...rest } = props;
  
  function invokeCallback(event) {
    if (onCustomInput) {
      onCustomInput(event, ref.current);
    }
  }
  
  useEffect(() => {
    const { current } = ref;
    current.addEventListener('custom-input', invokeCallback);
    return () => {
      current.removeEventListener('custom-input', invokeCallback);
    }
  });
  
  return <super-cool-input ref={ref} {...rest}>{children}</super-cool-input>;
}

On this component, we have created a prop, onCustomInput, that, when present, triggers an event callback from the parent component. Unlike a normal event callback, we chose to add a second argument that passes along the current value of the CoolInput‘s internal ref.

CodePen Embed Fallback

Using these same techniques, it is possible to create a generic wrapper for a custom element, such as this reactifyLitElement component from Mathieu Puech. This particular component takes on defining the React component and managing the entire lifecycle.

Approach 3: Use a JSX pragma

One other option is to use a JSX pragma, which is sort of like hijacking React’s JSX parser and adding our own features to the language. In the example below, we import the package jsx-native-events from Skypack. This pragma adds an additional prop type to React elements, and any prop that is prefixed with onEvent adds an event listener to the host.

To invoke a pragma, we need to import it into the file we are using and call it using the /** @jsx */ comment at the top of the file. Your JSX compiler will generally know what to do with this comment (and Babel can be configured to make this global). You might have seen this in libraries like Emotion.

An element with the onEventInput={callback} prop will run the callback function whenever an event with the name 'input' is dispatched. Let’s see how that looks for our super-cool-input.

CodePen Embed Fallback

The code for the pragma is available on GitHub. If you want to bind to native properties instead of React props, you can use react-bind-properties. Let’s take a quick look at that:

import React from 'react'

/**
 * Convert a string from camelCase to kebab-case
 * @param {string} string - The base string (ostensibly camelCase)
 * @return {string} - A kebab-case string
 */
const toKebabCase = string => string.replace(/([a-z0-9]|(?=[A-Z]))([A-Z])/g, '$1-$2').toLowerCase()

/** @type {Symbol} - Used to save reference to active listeners */
const listeners = Symbol('jsx-native-events/event-listeners')

const eventPattern = /^onEvent/

export default function jsx (type, props, ...children) {
  // Make a copy of the props object
  const newProps = { ...props }
  if (typeof type === 'string') {
    newProps.ref = (element) => {
      // Merge existing ref prop
      if (props && props.ref) {
        if (typeof props.ref === 'function') {
          props.ref(element)
        } else if (typeof props.ref === 'object') {
          props.ref.current = element
        }
      }

      if (element) {
        if (props) {
          const keys = Object.keys(props)
          /** Get all keys that have the `onEvent` prefix */
          keys
            .filter(key => key.match(eventPattern))
            .map(key => ({
              key,
              eventName: toKebabCase(
                key.replace('onEvent', '')
              ).replace('-', '')
            })
          )
          .map(({ eventName, key }) => {
            /** Add the listeners Map if not present */
            if (!element[listeners]) {
              element[listeners] = new Map()
            }

            /** If the listener hasn't be attached, attach it */
            if (!element[listeners].has(eventName)) {
              element.addEventListener(eventName, props[key])
              /** Save a reference to avoid listening to the same value twice */
              element[listeners].set(eventName, props[key])
            }
          })
        }
      }
    }
  }
  
  return React.createElement.apply(null, [type, newProps, ...children])
}

Essentially, this code converts any existing props with the onEvent prefix and transforms them to an event name, taking the value passed to that prop (ostensibly a function with the signature (e: Event) => void) and adding it as an event listener on the element instance.

Looking forward

As of the time of this writing, React recently released version 17. The React team had initially planned to release improvements for compatibility with custom elements; unfortunately, those plans seem to have been pushed back to version 18.

Until then it will take a little extra work to use all the features custom elements offer with React. Hopefully, the React team will continue to improve support to bridge the gap between React and the web platform.


The post 3 Approaches to Integrate React with Custom Elements appeared first on CSS-Tricks.

You can support CSS-Tricks by being an MVP Supporter.

Categories: Designing, Others Tags:

Wireframes in Mobile App Development: Their Use and Benefits

January 15th, 2021 No comments

Mobile app development is an exciting process. Prominent mobile app developers need to pour ample creative thinking to create an app right from its conception to delivery.

One of the most critical stages in this entire process is wireframing. It is vital to figure out the meaning, use, and practical benefits of wireframing in mobile app development. So, let us begin the journey.

The Meaning of Wireframes in Mobile App Development

Any software development company involved in mobile app development needs to explore the initial thought process, the way the app navigates, and its functionality. This precise blueprint of an app is known as a wireframe in mobile app development.

Creating wireframes is also a significant process in website design and development. The developers carry out wireframing between the thought process for the app and the actual coding process.

More importantly, wireframing is about how the app functions and not about how the app looks. Hence, one wouldn’t find any stylish fonts, catchy colors, and other attractive aesthetics in wireframes.

Wireframe ensures a user-centric app design, focusing on the functionality of the app. Now, can mobile app developers skip wireframing and directly jump into coding and development?

The answer is yes; however, without wireframing, the developers may face many unanticipated obstacles during the development process, leading to increased engineering costs.

The Uses of Wireframing:

Wireframe helps the developers map their thought process and properly layout the sequence of app functioning. Thus, it is a procedure to blueprint the thought process into the actual working of the app, eliminating the hurdles of graphics and other attributes.

The following are the uses of wireframing:

Planning and Organizing Your App:

A mobile app, website, and webpage development is a complicated process as you require to synchronize many technical attributes in it. The wireframe is a simple yet detailed black and white sort of blueprint that layouts the size and tentative placement of all your page elements.

Again, you can accommodate a variety of features and expected navigation of your app or webpage seamlessly in wireframing. Thus, you can plan and organize your app or website development process keeping wireframe as the starting point.

Simplifying Visual Concepts:

The wireframe is a concise 2D illustration of the app’s interface. It simplifies the visual concepts of your app to a great extent. It is beneficial to hire mobile app developers that are well-versed with wireframing, as they can compile various technical aspects of the app comprehensively in the beginning.

You may not get the whole idea of the design of your app by wireframing. Yet, you can channelize the workflow of your app development process and the work of the final app.

A Clear Roadmap of Your App:

Wireframing derives many crucial elements of your app, including:

  • The ideal distribution of screen space.
  • The exact priority of the content.
  • Features and functions of the app.
  • Flow and correlation between screens.
  • Placement of Call to Actions.

Thus, you can make the most effective use of wireframing to have a basic schematic illustration of the working of your app.

The Benefits of Wireframing in Mobile App Development

Using wireframes in mobile app development brings many benefits to your software development company in the long run. Let us take a glance at some of the most significant benefits:

A Target-Driven Approach:

Your app or website design and the development process become target-oriented by adopting wireframing. Initially, you can determine the purpose of the app and wireframe to define the process to resolve a particular pain point.

Due to proper wireframing at the right stage, you would be aware of the possible obstacles in the development process. Again, you can deliver the best app considering the expectations of your users.

Apart from the aesthetic appeal of the app, solving the concerned problem of the users remains your priority.

Adjust to the Motivation of the Users:

Wireframing provides you with an opportunity to step into the users’ shoes before developing your app. Why would users like to download and use your app? You can think of the motivation of your users and adjust your app accordingly during wireframing.

You always prefer to hire mobile app developers with an intellect to solve problems apart from the technical capabilities. Wireframing allows you to develop your app to be the ‘bang on target solution’ to the users’ issues.

Optimize the Screens in Your App:

To develop an efficient mobile app, the number of screens and their flow should be limited. Your users want precise information in the least possible time. Wireframing helps you to optimize and organize the number of screens in your app and their sequence too.

Avoid stuffing too much information in your mobile app. Yet, the screens need to take the users to their desired solution quickly. Wireframing helps you to decide on the sequence of options and Call to Actions. You can also test several alternatives beforehand.

Effective Organization of Resources:

It is easy to wireframe an app using a pencil and paper or user-friendly online tools conveniently. Decide on using low-fidelity or high-fidelity wireframes depending upon the complexity of the app. After wireframing, you can swiftly assign the right task to the right person or team, and thus, make the most out of your resources.

On finalizing the flow of information, navigation, and your ideal app interface, you can assign the right responsibilities to the right individuals or teams to carry out the development process in an integrated and synchronized manner.

The Takeaway

Understanding the importance and benefits of wireframing would help you to develop and deliver the best mobile apps or websites. Your users would prefer your apps if you could help them reach the target through simple, sensible steps, adopting wireframes.


Photo by Kelly Sikkema on Unsplash

Categories: Others Tags:

How to power Your Cyber Security with Cyber Threat Intelligence?

January 15th, 2021 No comments

Digital technologies have transformed the world’s economic and cultural bodies by providing automation and greater connectivity to almost all the industry making it a very attractive ground for cyberattacks.

Cyber Threat Intelligence is the collection of data that is analyzed using tools and techniques to understand the threat and take action against the cyberattack’s motives, goals, and attack behavior. It enables users to be proactive to combat the attacks by making quicker and more informed security decisions before being attacked.

Cyber Threat Intelligence connects universal actions. For example, if a file has been identified as a hacker, it can be blocked globally, across all networks in no time.

Today, businesses can have access to immense threat databases that can exponentially improve the efficiency of solutions by investing in cyber threat intelligence.

What are the different types of Threat Intelligence?

1. Strategic threat intelligence

Strategic threat intelligence delivers a broad overview of the threat landscape of an organization. It’s the main security for executive-level and other decision marketing professionals to provide high-level strategy built on the data in the reports, which is less technical. It offers understandings of defencelessness and threats linked with precautionary actions, threat actors and goals, and the effect of the possible attacks.

2. Tactical Threat Intelligence

Tactical threat intelligence is the basic type of intelligence that is much detailed in the tactics of the threat actor, the techniques, and procedures (TTPs). It understands the attack paths and provides effective ways to defend against or lessen those attacks. The report includes the weak points in the security systems that could be targeted and ways to identify such attacks. Using this data, you strengthen the current security controls or processes that could have been attacked and work on securing and strengthening the weak areas in the system, speeding up incident response.

3. Technical Threat Intelligence

Technical threat intelligence emphasizes particular proofs or indications of an attack and creating a base to study such attacks. Threat Intelligence analyst scans reported IP addresses, malware samples, the content of phishing emails, and fraudulent URLs which are known as indicators of compromise (IOCs). The timing in technical intelligence is very critical to share as IOCs such as fraudulent URLs or malicious IPs become obsolete in a few days.

4. Operational Threat Intelligence

Operational threat intelligence is the most useful type of threat intelligence as it is known to focus on the knowledge about cyber-attacks and connected events. It gives detailed insights on the causes of the attack like the nature, motive, timing, and pattern on how the attack was done. The hacker information is gathered from their online discussion or chats, which makes it tough to acquire.

Who will Benefit from Threat Intelligence?

Cyber threat intelligence adds value across security functions for organizations of all sizes, helping them process the data to understand their attackers, speeding up their response to incidents, and proactively staying ahead of the threat actor’s next move.

Small businesses attain a level of protection that would have been impossible and by leveraging external threat intelligence, enterprises with big security teams can cut costs and required skills. Making their analysts more efficient and effective.

Unique advantages offered to the security team by threat intelligence:

  • Sec/IT Analyst – Can enhance stoppage and finding abilities and strengthen defenses
  • SOC – Cab prioritize cases based on risk and effect to the organization
  • CSIRT – Can accelerate case investigations, management, and prioritizing
  • Intel Analyst – Can expose and track threat actors targeting the organization
  • Executive Management – Can recognize the risks the organization encounters and the options to address their effect.

What is the Importance of threat intelligence in cybersecurity?

It is essential for the continuous monitoring of cybersecurity threat intelligence as the nature of threats is always on the change. Threat intelligence is useful in many ways but most importantly it helps security professionals understand the thought process, motives, and attack behavior of the attacker causing the threat. This data educates the security teams on the attacker’s tactics, techniques, and procedures workings, and these learnings can be used to improve the current security efforts like threat monitoring, identification, and incident response time.

How to power Your Cyber Security with Cyber Threat Intelligence?

It’s high time to keep connected systems and devices up, running, and protected with cyber threat intelligence for which a cyber threat intelligence analyst needs to have a good understanding of the industry being working on. A cyber-threat intelligence analyst tries to learn and understand the attacker by questioning similar questions:

  • Who are these attackers?
  • What are they using to attack?
  • Where exactly are they targeting?
  • When are they going to attack us?
  • Why are they attacking us?
  • How does this attacker function?

The threat intelligence life cycle has 5 basic stages:

1. Planning and Direction

The first step is to ask the right question. This is where the analyst has to consider the 5 Ws and How questions. An organization should always investigate with others in a similar industry to check if they too are facing similar attacks.

2. Collection and Processing

This step seconds the first stage. The collected data will direct how an organization builds its cybersecurity structure, and this information should come from trustworthy sources. Firstly collecting data within the organization, like network logs and scans to other trustworthy security research establishments.

3. Analysis

Now, the threat intelligence analyst tries to put together the processed data to find any gaps where an attacker could get in or have already made its way. If an attacker has already penetrated the network, the investigation will be done by a SOC analyst. With the gathered information, the organization can decide to share it with the cyber community, for other organizations to be alert and prepared.

4. Dissemination

In the dissemination stage, the threat intelligence team is required to present a light format of their analysis and the results to the stakeholders. The analysis is translated and presented briefly, avoiding any confusion to its audience.

5. Feedback

Feedback is the final stage of the threat intelligence lifecycle and getting accurate feedback on the presented report can determine whether any further alterations need to be made for threat intelligence operations. There could be changes based on the Stakeholders’ priorities, which they wish to receive in the intelligence reports, or how data should be presented to them.


Photo by Possessed Photography on Unsplash
Creator; Mubarak Musthafa, Vice President of Technology & Services at
ClaySys Technologies.

Categories: Others Tags:

10 Ways to Manage Your Workforce Effectively

January 15th, 2021 No comments

If you are running a business, you probably know how important it is to keep your team happier and productive. Whether you are running a business in-office or remotely, workforce management is essential for the growth of your business.

Effective workforce management offers a number of benefits like:

  • Optimizes work scheduling
  • Improves staff productivity
  • Motivates employees
  • Increases retention
  • Saves time and money
  • Offers data security

Below are some of the proven ideas to manage your workforce effectively:

1. Automate Time Tracking and Attendance

You will be surprised to know that time theft costs companies $11 billion annually. It might not be intentional by your employees, but it leads to decreased productivity.

You can avoid this by tracking the time and attendance of your team. The recent survey says that daily time tracking can decrease productivity leaks by 80%.

You can improve time utility by using time tracking and attendance software. These software’s are designed to monitor the working hours, overtime, break time, paid time off (PTO), and even the leaves of your employees.

Also, these can be easily integrated with various human resource and payroll management software. Some of the most popular time tracking tools are Time Doctor, TSheets, On The Clock, and When I Work.

These solutions are highly effective for any workplace, including remote teams.

2. Automate Task Assignment

Equal distribution of tasks among the team members is essential for the team’s efficiency. You have to be careful because increasing the workload on individual employees can decrease their productivity by 68%.

Manual distribution of work might be difficult under the scenario when you have to consider the number of projects they are working on, the current work progress, and their time of completion.

This is where employee scheduling software can be of great help. Using these tools, you can assign different tasks to individual team members and also keep track of their activities in detail.

For example, you can easily find which task is assigned to which team member and the estimated time of completion. Some of the best tools for work scheduling are Monday.com, Nifty, MeisterTask, Backlog, Trello, and JIRA.

3. Choose Easy to Learn Tools and Apps

Presently, 75% of global organizations are estimated to increase the use of productivity tools. While using these tools are necessary, it is also essential that tools should not cause confusion and become time-consuming to learn.

Using myriads of different apps and solutions can invite complexity in the process and become difficult for your team to learn. Ultimately, your team will spend more time getting used to these apps, rather than focusing on their work.

Therefore, keep the number of tools to the minimum. Choose a tool that matches your organizational needs.

4. Measure Work Productivity

You may want your team to operate efficiently and autonomously as much as possible. But, you will not be able to know how each of your team members performed in the day unless you measure their daily work productivity.

This is the reason why 71.5% of global organizations have established a way to measure the daily work productivity of their employees.

Now, it is possible to track your employees’ productivity using productivity tracking software. These are high-tech apps that give you insights into your employees’ performance and time utilization.

Some of the popular tools are EmailAnalytics, ProofHub, ActivTrak, iDoneThis, etc.

5. Keep Your Team Connected On The Go

As per recent research, people spend approximately four hours a day on their smartphones. It doesn’t include just personal use but also official work.

At times, employees use their personal devices like Tabs and laptops other than mobile phones to get their tasks done outside their workplace. If you are using collaboration tools, make sure your tool supports mobile devices as smoothly as it does with desktops.

This idea will keep you and your entire team connected even if they are on the move.

6. Use Cloud Storage

Your team has to access, share, and update project related data constantly. Sometimes, they need access to the data outside their usual workplace and from different devices. 85% of employees lose at least one to two hours of productivity a week searching for information.

Therefore, you must provide a centralized storage system where your team can easily access without fearing data theft. This is where you need a cloud storage solution.

Already 90% of companies are on the cloud. Certainly, the role of cloud storage is crucial for any organization irrespective of the type and size of a company.

The biggest benefits of these solutions are that they provide massive storage, high security, and accessibility from any location.

Some of the highly reliable cloud solutions like Google Drive, OneDrive, Dropbox, and Icedrive.

Cloud storage solution gives your employees the freedom to work from any location they want. While it offers convenience to the employees, it helps you get your task done in stipulated time.

7. Stay Connected Visually

Communication is a vital element to make your team function well. Approximately 80% of the U.S. workforce feels stressed because of ineffective company communication.

This is especially true for teams working remotely. Most of the time, remote team members feel neglected and gradually lose interest and zeal in completing their assigned tasks. This ultimately leads to the loss of time and project delay.

Working far from the rest of the team members should not be a reason for communication gaps. You can stay connected visually by using different live video chat tools.

These tools not only allow you to video chat, but also let you record the chat, share files, text chat, send offline messages, and do a lot more. Many of these tools also come free.

You would be best if you have a reliable video calling tool, like Skype, Google Hangout, LINE, Tango, Viber, etc.

8. Provide Regular Feedback

You can’t improve yourself unless you know where exactly you need to work. Over 70% of employees feel that they would have felt a better sense of loyalty if they had flexible working hours. Moreover, 96% of people believe that job flexibility would have improved the overall quality of life.

As an employer, you probably are aware of the diversity in employees and their unique personal and professional needs. Some of them might be juggling between their personal and professional life, which is hampering their productivity.

Considering their issues, you can provide them options to choose their working hours or place of work, required tools, or equipment that goes well with both of you. You can move your entire work online with project management and other tools discussed above.

By offering flexibility to your team, you are helping them not just with their productivity, but also with better work-life balance, time-saving, and minimizing commute stress.

This is a win-win for both of you as your employees are happier and you get a better business outcome. Therefore, you must take work flexibility into account in your organizational culture.

9. Create a Happier Work Atmosphere

One of the essential elements to manage the workforce is to keep them happy. Research by Oxford University says that workers are 13% more productive when they are happy.

Unfortunately, not all employers look into this factor seriously or translate it in the wrong form. The report says 89% of employers believe that employees quit jobs for more money, but in reality, only 12% do.

Remember, it is not always the salary or perks that give employees work satisfaction. Sometimes, they need a little extra to stay motivated, such as:

  • Show gratitude by saying thanks when it was least expected.
  • Motivate them with pictures or quotes.
  • Show empathy and encourage when they are not productive enough.
  • Providing more hold over the project or task assigned.
  • Celebrate small wins within office hours and thank them.

There are many other proven ways than these to create a happier atmosphere at work. Apply as many as possible for you. After all, happier employees are the key to a successful business.

10. Set Attainable Goals

Your team might be highly skilled, experienced, and extraordinary, but that doesn’t necessarily make them capable of achieving unrealistic goals.

If you want them to perform within the timeline and as per the requirement, it is essential to give them enough time and a limited load of work. The best way is to fragment a single large goal into smaller ones and assign them one by one.

This way, your employees will feel happier about reaching each milestone and stay confident throughout the project. Also, smaller achievements will positively impact them as they will be motivated to work even harder.

Conclusion

Team management is a crucial aspect of business success. Happy employees are more productive. Follow the above ways to manage your workforce effectively and take your business revenue to the next level.


Photo by Aatik Tasneem on Unsplash

Categories: Others Tags: