Archive

Archive for July, 2021

Exciting New Tools for Designers, July 2021

July 12th, 2021 No comments

The dog days of summer are here. From vacations to pool time, you might not be thinking about work that much. But there are still plenty of new tools and resources popping up to help you become a better or more efficient designer.

Here’s what new for designers this month.

Haikei

Haikei is a web app that you can use to generate SVG shapes, backgrounds, and patterns in a web-based editor that you can use with any design tool or workflow process. Everything is customizable and it is free with access to 15 generator functions. (Additional templates and generators will be available when the pro plan is released later.)

Pixelhunter

Pixelhunter is a smart image resizer for social media platforms. It recognizes objects and crops pictures automatically. It supports 102 sizes and is free to use.

Compo

Compo is an Apple app that allows you to play with shapes and colors and create compositions on your own. You can see shapes and colors like the Bauhaus masters, creating from a blank canvas or shuffling in more creative ways. You can move, rotate, copy, overlap, and adjust shapes and colors to suit your style. Available for iPad and iPhone.

Backlight

Backlight is an all-in-one design system platform that allows you to build code and reference sites in a space where designers and developers can work together. It has a series of “starter kits” to help you with the technology you use from React to Chakra to Tailwindcss. It’s designed to be collaborative with everything in one place and integrates into your workflows. The tool is just launching and you can request early access to learn more.

Multi Color Text With CSS

Multi Color Text With CSS is pure fun. Check out the pen by Shireen Taj.

Mega Creator

Mega Creator is an online graphic design tool that helps you create images, icons, illustrations, backgrounds, and more for a number of uses. It has templates that are sized for common uses such as social media. You can upload your own elements to work with (free) or use including graphic assets for a fee.

Noloco

Noloco is a no-code solution for designers to build web apps. You can start building for free and design almost anything you can dream up from a set of drag-and-drop ready-made blocks. (And it will work across all screen sizes.)

Tinter

Tinter is a tiny web tool to generate color variations of images. The tool also generates monochrome colors of images with multiple variants, without hampering the quality of the image.

Radix Colors

Radix Colors is an accessible, open-source color system for designing gorgeous websites and apps. It includes 28 color scales with 12 steps each and includes support for dark mode as well as matching transparencies.

WP Cost Calculator

WP Cost Calculator is a smart, simple tool that allows you to easily create price estimation forms. It’s perfect for a number of industries that use online pricing.

TraveledMap

TraveledMap allows you to create customizable maps thanks to the use of markers, routes, and photos, which you can share or add to your website or blog. This tool is made for travelers and tourism pros.

Glyph Neue Icons

Glyph Neue Icons is a collection of 1,500 icons in SVG and PNG format. (They are free with a link.) Icons come in plenty of categories and styles for all types of use.

Streamline Icons

Streamline Icons is a set of thousands of icons in 12 different styles and themes that you can use for projects. They work through the Streamline app or a plugin for Figma, Sketch, or Adobe XD.

Health Icons

Health Icons is a set of free, open-source health icons for personal or commercial projects. They include filled and outline styles that are editable. There are more than 800 icons in the collection.

OMG, SVG Favicons FTW!

OMG, SVG Favicons FTW! Is a look at the benefits of using SVG favicons in web projects. It also examines some of the challenges – such as browsers support – with code snippets to help you get started.

Aspect Ratio in CSS

Aspect Ratio in CSS explores a design concept we talk about a lot in other places, but not so much with CSS. This piece by Ahmad Shadeed takes a look at how you can go beyond the “padding hack” and use native aspect ratio support in CSS to maintain image height and width ratios in responsive design.

Fight Kick

Fight Kick is a bold font with a lot of personality. The free demo version has 249 characters and is for personal use only.

Glow Better

Glow Better is a beautiful premium typeface with a pair of options – a serif and script. Both contain letterforms with swashes and tails that are delightful.

Huggable Hedgehogs

Huggable Hedgehogs is a playful font that’s perfect for children’s projects. Everything has a mono-height in the all uppercase typeface.

Monice

Monice is a rounded sans serif with thick lines and high readability. It includes bold, regular, and italic styles with free (demo, personal) and commercial options.

Rustica

Rustica is a robust premium typeface with 20 styles and family options. It has slim curves and an easy-to-read character set that would work for almost any use. It also supports 219 languages.

Source

The post Exciting New Tools for Designers, July 2021 first appeared on Webdesigner Depot.

Categories: Designing, Others Tags:

Using the Specificity of :where() as a CSS Reset

July 12th, 2021 No comments

I don’t know about you, but I write these three declarations many times in my CSS:

ul {
  padding: 0;
  margin: 0;
  list-style-type: none;
}

You might yell at me and say I can just put those in my CSS resets. I wish I could, but I don‘t want to and I’ll tell you why in a second.

User agents set values to those properties in a list for a purpose, and that is to make lists more readable. These are the default styles in chromium browsers for a

    element:

    ul {
      list-style-type: disc;
      margin-block-start: 1em;
      margin-block-end: 1em;
      margin-inline-start: 0px;
      margin-inline-end: 0px;
      padding-inline-start: 40px;
    }

    So, without adding any class in HTML or style in CSS, we get those for free. That‘s a nice thing and I don‘t want to lose it. But I would appreciate it if I could make the browser understand that there is very high chance I don’t want that default feature in cases where I add a class to the element.

    So here is a quick solution to reset a

      element that has a class:

      ul[class] {
        padding: 0;
        margin: 0;
        list-style-type: none;
      }

      Now I don’t lose the default style except when I add a class to my

        element.

        The problem

        There is a problem with this solution. Imagine there is a list that we want to have a different list-style-type for it, like the following:

        ul[class] {
          padding: 0;
          margin: 0;
          list-style-type: none;
        }
        
        .list {
          list-style-type: square;
        }

        This doesn’t work since ul[class] has higher specificity. That’s where our solution breaks down.

        We could add more weight to the selector’s specificity:

        ul.list {
          list-style-type: square; /* Specificity: 0, 1, 1 */
        }
        
        /* or */
        
        .sidebar .list {
          list-style-type: square; /* Specificity: 0, 2, 0 */
        }

        If you are OK adding more weight to the selector, you are good to go. But I’m not OK with it, personally. For example, I don’t want to put the element’s name in my CSS most of the times due to a separation of concerns principle. Or, if you are following BEM methodology, problems will most certainly arise as this conflicts with it.

        So what can we do?

        The solution

        A few months ago, I learned about some hot selectors, including :is() and :where(). One thing about these two functional pseudo selectors, is that they can change specificity, giving us the power to nullify or increase that specificity.

        The key about :where() is that it always has 0 specificity. So we can get rid of our problem very easily like this:

        :where(ul[class]) {
          list-style: none;
        }
        
        .list {
          list-style: square; /* Now this works like a charm! */
        }

        With the power of this selector, libraries can give us style with no specificity. So there would be no specificity to compete with when we as authors write CSS.

        Demo

        In the following demo, you can remove :where() to see what we talked about in action:

        CodePen Embed Fallback

        The post Using the Specificity of :where() as a CSS Reset appeared first on CSS-Tricks. You can support CSS-Tricks by being an MVP Supporter.

Categories: Designing, Others Tags:

Popular Design News of the Week: July 5 2021 – July 11, 2021

July 11th, 2021 No comments

Every day design fans submit incredible industry stories to our sister-site, Webdesigner News. Our colleagues sift through it, selecting the very best stories from the design, UX, tech, and development worlds and posting them live on the site.

The best way to keep up with the most important stories for web professionals is to subscribe to Webdesigner News or check out the site regularly. However, in case you missed a day this week, here’s a handy compilation of the top curated stories from the last seven days. Enjoy!

The 17 Best WordPress Alternatives (Open-Source & Hosted)

Essential CSS Concepts Every Designer Should Know

Kable – The Better Way to Build Subscription Partnerships

35+ CSS Glow Effects (Free Code + Demos)

3 Essential Design Trends, July 2021

The Anatomy of a Web Page: 14 Basic Elements

How To Build Better UI Designs With layout Grids

User Inyerface – A Worst-Practice UI Experiment

10 CSS & JavaScript Snippets for Creating the Parallax Scrolling Effect

5 Ways To Achieve A Human-Centered Web Design

Source

The post Popular Design News of the Week: July 5 2021 – July 11, 2021 first appeared on Webdesigner Depot.

Categories: Designing, Others Tags:

:focus-visible in WebKit

July 9th, 2021 No comments

This is a nice update from Manuel Rego Casasnovas. Igalia has this idea to sort of crowd-source important web platform features that need to get worked on (that’s the sort of work they do). They call it Open Prioritization. The “winner” of that (the one with the most-pledged dollars) is what they’ll do. That turned out to be :focus-visible support in WebKit (Safari). As I write, people have pledged $29,337.13 of the $35,000 goal, so not bad!

That choice was made in January 2021, and as Manuel was writing in June 2021, it’s basically done because it shipped in Safari Technical Preview 125 meaning it’s in Apple’s hands now. Pretty nice speed for a web feature, and a great one since it will highly encourage proper focus styles rather than that bummer situation where people remove focus styles for aesthetic reasons, hurting accessibility.

And, bonus!

In addition, the WPT test suite has been improved counting now ~40 tests for this feature. Also in January neither Firefox or Chrome were using :focus-visible on the UA style sheet, however they both use it there nowadays. Thus, doing the implementation on WebKit has helped to move forward this feature on different places.

Direct Link to ArticlePermalink


The post :focus-visible in WebKit appeared first on CSS-Tricks. You can support CSS-Tricks by being an MVP Supporter.

Categories: Designing, Others Tags:

SVG Favicons in Action

July 9th, 2021 No comments

We are going to prepare such an icon.

How to create an SVG favicon (in theory)

Getting dark mode support for an SVG favicon relies on a CSS trick (10 points to Gryffindor), namely that we can drop a tag right inside SVG, and use a media query to detect the user’s current theme preference. Something like this:

<svg>
  <style>
    @media (prefers-color-scheme: dark) {
      // Your dark styles here
    }
  </style>

  <!-- more stuff -->

</svg>

With this pattern, your light/dark favicon is only limited by your imagination. For example,

Ever heard of favicons made with SVG? If you are a regular reader of CSS-Tricks, you probably have. But does your website actually use one?

The task is more non-trivial than you might think. As we will see in this article, creating a useful SVG favicon involves editing an SVG file manually, which is something many of us try to avoid or are uncomfortable doing. Plus, we are talking about a favicon. We can spend a few hours playing with a hot new CSS framework. But a favicon? It sometimes feels too small to be worth our time.

This article is about creating an SVG favicon for real. If you’re in front of your laptop, get the vector file of a logo ready. By the end of your (active!) reading, your SVG favicon will be ready to shine.

Why an SVG favicon at all?

We are here for the “how” but it’s worth reflecting: what is an SVG favicon even good for? We already have other file types that handle this, right?

SVG is a vector format. As such, it has valuable features over raster formats, including those typically used for favicons, like PNG. SVGs scale and are often more compact than its binary cousins because, well, they’re just code! Everything is drawn in numbers and letters!

That’s good news, but how does this help our favicon? Desktop favicons are small, at most 64×64. And you can ship your icons in several resolutions. Scaling is a feature we don’t really need here.

File size is another source of disappointment. While SVG has a clear edge over a high resolution PNG file, the tables turn in low resolution. It is common for a 48×48 PNG favicon to result in a smaller file size than its SVG equivalent.

Yet, we have a good reason to pay attention to SVG favicon: dark mode support.

Dark mode has received a lot of attention recently. You may even have implemented dark mode for your own websites. What does that mean for favicon? It means the ability to show different icons based on the brightness of the browser tab’s background.

We are going to prepare such an icon.

How to create an SVG favicon (in theory)

Getting dark mode support for an SVG favicon relies on a CSS trick (10 points to Gryffindor), namely that we can drop a tag right inside SVG, and use a media query to detect the user’s current theme preference. Something like this:

<svg>
  <style>
    @media (prefers-color-scheme: dark) {
      // Your dark styles here
    }
  </style>

  <!-- more stuff -->

</svg>

With this pattern, your light/dark favicon is only limited by your imagination. For example, change the color of all lines:

<svg>
  <style>
    path { fill: black; }
    @media (prefers-color-scheme: dark) {
      path { fill: white; }
    }
  </style>

  <!-- more stuff -->

</svg>

Now is the time to actually write these styles. This is when the troubles begin.

SVGs are images, and the logo we are using to build our favicon was probably created with a tool like Adobe Illustrator or InkScape. Why not use the same tool again? That’s because apps like these haven’t really integrated CSS and media queries into their products. It’s not that they can’t handle them, but you have to forget the mouse-only experience they promise. You are going to use the keyboard and type code.

Which leads us to a second option: write the CSS by hand. After all, this is the way to go with front-end development. Why should it be different here? Unfortunately, SVG is often hard to read. Sure, this is an XML dialect, which is (almost) like HTML. But SVG images are cluttered with long path declarations and other markup we often don’t see in our day-to-day work. For example, the Raspberry Pi logo is more than 8KB of raw data. This make manual editing more tedious than it sounds.

That is a lot of code.

How to create an SVG favicon (in practice)

To understand how we can deal with an SVG favicon quickly and easily, we first need to define what we want to achieve.

The technique we covered above calls for creativity: replace a color, invert them all (which we’ll get to), change a shape… But the setup for a favicon is not the right time for this. A favicon should almost always be the website’s logo. Its appearance? Aesthetic? The message it conveys? All these questions have been answered already. Preparing the favicon should be fine-tuning the logo so it fits the small space allocated in browser tabs.

Often, the logo is perfect as-is and its favicon counterpart is a scaled down version of it. Sometimes, we need to add margin to make it square. What motivates a dark icon, then?

Contrast.

Many logos are designed for light backgrounds. When they don’t, another version exists solely for the purpose of darker backgrounds.

Notice that even the colors change slightly to account for the darker background.

Therefore, whether we prepare a favicon manually or with a tool, we automatically pick the light-compatible logo and start with that. After all, desktop tabs are traditionally white or light gray. The problem arises when going dark mode.

Facebook blue logo is suitable for both light and dark backgrounds
In the best case, the logo is naturally a good fit for light and dark backgrounds. This happens with colorful logos, like Facebook’s.
Amazon’s favicon is 16×16, but Amazon’s logo is only 14×14—almost a quarter of the pixels is lost in padding!
The favicon is sometimes made background-proof by embedding its own background. This technique has a drawback, though. It needs padding so the logo doesn’t touch the edge of the background.
Adidas logo is barely noticeable on dark background
The worst case is a dark logo, perfect for light backgrounds and ill-suited for dark ones. Adidas is either clearly visible, or almost invisible.

Now that we have pinpointed the problem, we can formulate a solution: sometimes, we need a brighter icon for dark mode. It’s very simple. For a colorful, yet too dark logo, we can add brightness to a dark mode favicon with a CSS filter:

<svg>
  <style>
    @media (prefers-color-scheme: dark) {
      :root {
        filter: brightness(2);
      }
    }
  </style>

  <!-- more stuff -->
</svg>

If the logo is in shades or gray, we can invert its colors using another CSS filter:

<svg>
  <style>
    @media (prefers-color-scheme: dark) {
      :root {
        filter: invert(100%);
      }
    }
  </style>

  <!-- more stuff -->

</svg>

Your turn! Open your SVG logo in a text editor and drop any of those snippets above just before the closing tag. Open your logo in a browser, switch from light to dark, then from dark to light (Windows or Mac), and observe the magic. Adjust the brightness or invert filters as needed.

Responsive brightness in action

How fast was that?

Even faster: The SVG favicon editor

That brightness hack we covered didn’t come out of nowhere. I wrote it while upgrading RealFaviconGenerator with the SVG favicon editor. This online tool includes everything we discussed earlier. Submit your SVG logo to get a preview of your favicon in tabs and Google result pages.

After that, play with the editor to produce the perfect favicon. In this example, we make the dark icon lighter, using the brightness filter hack behind te scene:

Grayscale logos benefit from the invert filter as well:

Click on the “Generate Favicon” button, et voilà! Favicon ready, fine tuned for light and dark modes in under a minute. Mission accomplished.

Conclusion

Beyond coolness, SVG favicons actually solve a problem that its PNG counterpart cannot. It’s only been about a year since we’ve had the ability to use SVG this way at all, but so far, it seems seldom used. With intentional purpose and tooling, maybe SVG favivons will rise and find its place among the favicon classics.


The post SVG Favicons in Action appeared first on CSS-Tricks. You can support CSS-Tricks by being an MVP Supporter.

Categories: Designing, Others Tags:

Best Discounted & Free Student Software Options

July 9th, 2021 No comments
free student software

Being a student can be hard, even overwhelming at times. Most college students have to juggle a social life, part-time jobs, and internships while also trying to keep up with their education. Add the pandemic and increased digitalization to the mix and you have a huge tangle to sort in your hands. 

While students have to learn difficult subjects and master software that will help them land a job, they might feel a little lost. Especially since most software, they have to learn is professional and quite expensive. Thankfully, all is not lost. Many of the major players have options to help out students whether giving away their software for free or providing special rates for students. 

In this article, we’ll have a look at the most popular and vital software options that students can get for free or with a sweet deal. 

Best Free Software for Students 2021

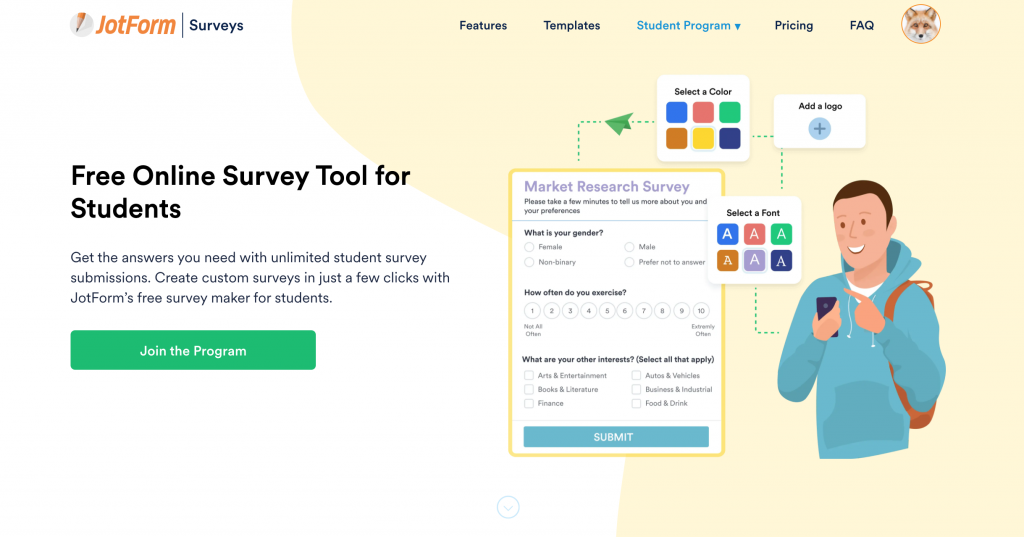
1. JotForm Student Survey Program

 If you’re a student the chances are quite high that you’ve already prepared a survey or will prepare one in the future. We all know how difficult it can get to create and publish a survey. Especially, if you are not aware of online tools that can create online surveys in a matter of minutes and share them with people even faster. 

JotForm is an excellent tool to create surveys and it’s already free to anyone who wants to try it out. But, what’s better is that JotForm also has a special plan for students that gives them the survey plan for completely free.  

The JotForm Student Survey plan removes submission limits from surveys and offers robust survey features, and hundreds of free templates. All you have to do is to apply to the program and if you can prove that you’re a student, you can create your own survey in a matter of minutes. You can apply to the program from here.

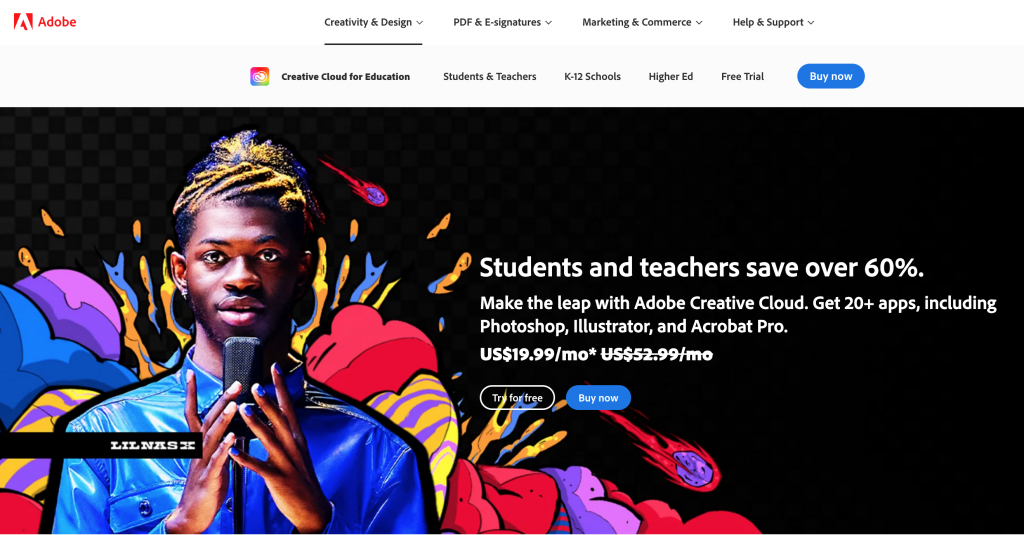
2.ADOBE – Creative Cloud for Education

Adobe is one of those giants that actually introduced discounted rates to premium tools for students. Famous for its design and production tools, including but not limited to, Photoshop, InDesign, After Effects, Illustrator, The Adobe Creative Cloud is a wonderful tool for any student that wants to get their hands on tools that will eventually help them learn a profession. 

The Creative Cloud is discounted to $19.99/mo for students. That’s around %60 cheaper than getting the toolset for its retail pricing. For an incredibly cheap price, you can get every tool offered by Adobe (there should be around 20) if you can prove you’re a student. 

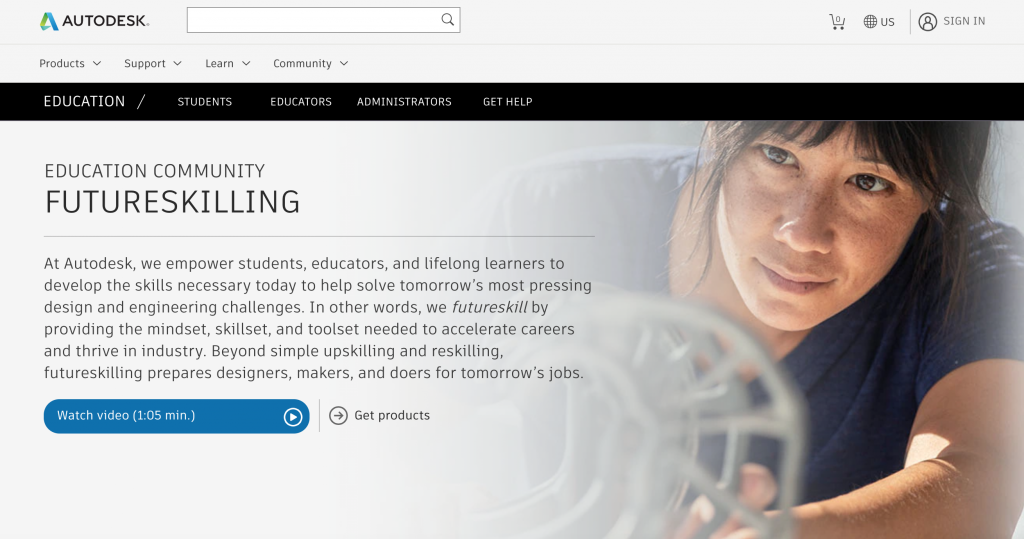
3. Autodesk Futureskilling

Autodesk is also one of those giants that have assumed the role of assisting the future professionals of many different industries. Not only that, they also support educators and lifelong learners and they call the process futureskilling. Autodesk offers all of its products for free to people who can prove they are a student or educator.

Autodesk comes with a rich portfolio of tools vital to many industries including AutoCAD and MAYA. Honestly, their portfolio is so wide that the options wouldn’t fit into a single article.

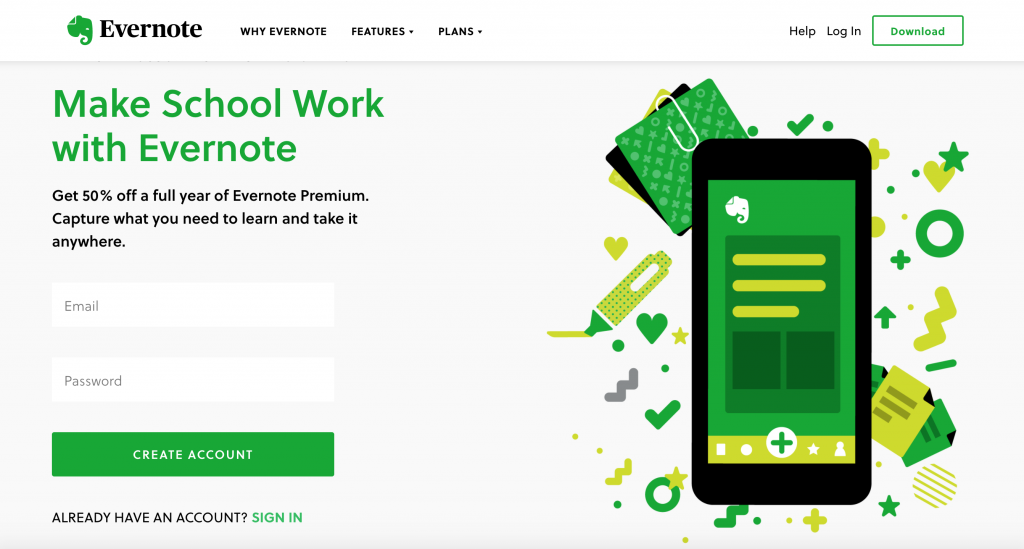
4. Evernote for Students

Evernote is an excellent note-taking app. Their main goal is to make note-taking digital and paperless. As we do almost everything, including studying on our computers and tablets, it only makes sense to have a tool that can utilize the advantages of computers while doing something as simple as note-taking.

Evernote has a free plan that’s quite useful in itself, however, students can get one-year access to its premium plan. We couldn’t find any information about if it’s possible to renew the student plan if you can prove you’re still a student. So, it’s up to you to go for the upgrade right away or try the free plan before upgrading.

5. Atlassian Classroom Licensing

Atlassian offers a lot of different tools, especially to future software engineers and computer science students. Atlassian boasts an impressive portfolio including all Jira services and even Trello. 

Atlassian offers a %75 discount on most of its products, however, these aren’t available to individual students. Instead, these discounts are offered to institutions to be handed out to students. So, you should probably check in with your institution to see if you have the option. 

Honorable Mention: Audacity

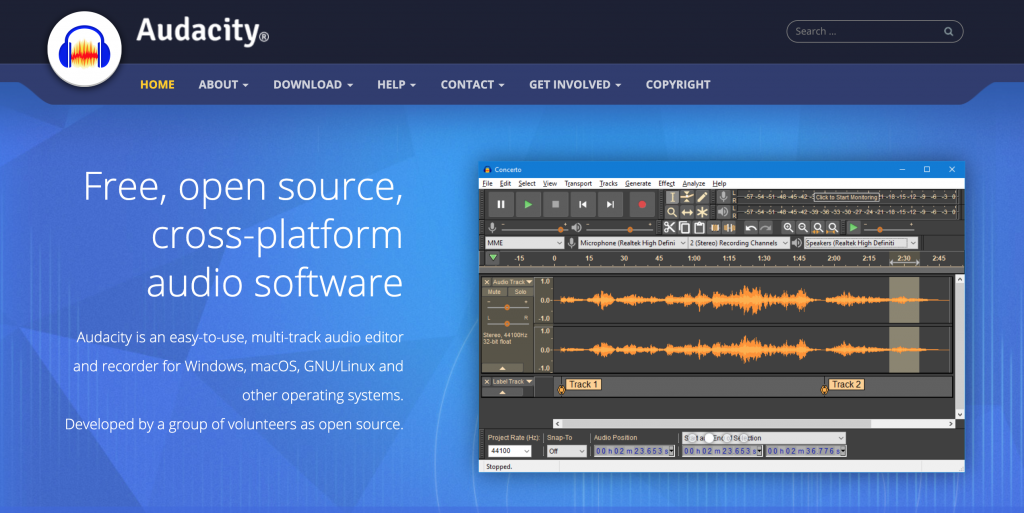
Audacity is a free, open-source audio recording and editing software. It doesn’t have a special offer for students as it’s already free-to-use. It’s been developed by a group of volunteers.

Audacity is a wonderful tool for recording music, podcasts, or any type of audio. You can also edit your recordings. So, you can finally actually record that podcast that you thought would be a great idea while hanging out with your friends.

To Conclude…

All in all, many companies are providing huge discounts or even giving away their full products for free to help future professionals. These were the most popular free student software options we gathered for you. If you think we missed a software that you believe deserves a spot on this article, let us know in the comments below. 

Categories: Others Tags:

Beginner JavaScript Notes

July 8th, 2021 No comments

Wes has a heck of a set of “notes” for learning JavaScript. It’s organized like a curriculum, meaning if you teach JavaScript, you could do a lot worse. It’s actually more like 85 really fleshed-out blog posts organized into sections and easily navigable. If you want to be walked through it via video, then buy the course. Smart.

If you’re looking for other curriculum for JavaScript, your best bets are:

Like any other learning experience in life, the best way to learn is multiple angles. If HTML & CSS are more your target, we have a bunch of suggestions there.

Direct Link to ArticlePermalink


The post Beginner JavaScript Notes appeared first on CSS-Tricks. You can support CSS-Tricks by being an MVP Supporter.

Categories: Designing, Others Tags:

Building a Command Line Tool with Nodejs and Fauna

July 8th, 2021 No comments

Command line tools are one of the most popular applications we have today. We use command line tools every day, and they range from git, npm or yarn. Command line tools are very fast and useful for automating applications and workflows.

We will be building a command line tool with Node.js and Fauna for our database in this post. In addition, we will be creating a random quotes application using Node.js, and add permission and a keyword for our app.

Prerequisites

To take full advantage of this tutorial, make sure you have the following installed on your local development environment:

Getting Started with Fauna

Register a new account using email credentials or a GitHub account. You can register a new account here. Once you have created a new account or signed in, you are going to be welcomed by the dashboard screen:

Creating a New Fauna Instance

To create a new database instance using Fauna services, you have to follow some simple steps. On the dashboard screen, press the button New Database:

Next, enter the name of the database and save. Once a database instance is set up, you are ready to access the key. Use access keys to connect authorization and a connection to the database from a single-page application. To create your access key, navigate to the side menu, and go to the Security tab and click on the New Key button.

Creating a Collection

Navigate to your dashboard, click on the Collections tab from the side menu, press the New Collection, button, input your desired name for the new collection, and save.

Creating Indexes

To complete setup, create indexes for our application. Indexes are essential because searching documents are done using indexes in Fauna by matching the user input against the tern field. Create an index by navigating to the Indexes tab of our Fauna dashboard.

Now, we are ready to build our notes command-line application using Node.js and our database.

Initializing a Node.js App and Installing Dependencies

This section will initialize a Node.js application and install the dependencies we need using the NPM package. We are also going to build a simple quotes application from this link.

Getting Started

To get started, let’s create a folder for our application inside the project folder using the code block below on our terminal:

mkdir quotes_cli
cd quotes_cli
touch quotes_app
npm init -y

In the code block above, we created a new directory, navigated into the directory, and created a new file called quotes_app, and ended by initializing the npm dependencies. Next, add a package to make requests to the quotes server using axios.

npm i axios

Add a package for coloring our texts, chalk is an NPM package that helps us add color to print on the terminal. To add chalk, use the code block below

npm i chalk Let’s also import a dotenv package using the code block:

npm i dotenv

Building the Quotes App

In our quotes_app file, let’s add the code block below

const axios = require('axios')
const chalk = require('chalk');
const dotenv = require('dotenv');
const url = process.env.APP_URL
axios({
  method: 'get',
  url: url,
  headers: { 'Accept': 'application/json' },
}).then(res => {
  const quote = res.data.contents.quotes[0].quote
  const author = res.data.contents.quotes[0].author
  const log = chalk.red(`${quote} - ${author}`) 
  console.log(log)
}).catch(err => {
  const log = chalk.red(err) 
  console.log(log)
})

In the code block above, we imported axios, chalk, and dotenv. We added the URL of our database, our Fauna database, and using axios, we made a GET request to the URL and added headers to enable us to get our response in json.

To log a quote, we use JavaScript promises to log the quote and its author on our console and added a catch method for catching errors.

Before we run, let’s change the permissions on our file using the code below:

chmod +x quotes_app

Next, run the application using our keyword below:

./quotes_app

We should get a result similar to the image below

Conclusion

In this article, we learned more about Fauna and Node.js command-line tools. You can extend the application to be able to add date reminders in real-time.

Here is a list of some resources that you might like after reading this post:


The post Building a Command Line Tool with Nodejs and Fauna appeared first on CSS-Tricks. You can support CSS-Tricks by being an MVP Supporter.

Categories: Designing, Others Tags:

Digital Transformation of Employee Training and Development

July 7th, 2021 No comments

Employee training must now be less time-consuming, offered preferably on-the-job and in tiny chunks, and stay efficient and relevant to a specific employee’s present job obligations.

As a result, employees can broaden their knowledge and abilities without jeopardizing the custom software development firm’s continuity or lowering productivity. The answer to these current needs is the digital transformation of employee training and development.

Methods for Bringing Training and Development into the Digital Age

For digital transformation of employee T&D, a variety of tools can be helpful:

Learning management systems (LMS)

A learning management system (LMS) is the foundation of digitalized staff training. LMSs assist in creating and delivering learning materials to trainees, the organization of collaboration and communication between trainers and trainees, the assessment of training results, and the tracking of progress, among other things. They’re most commonly utilized in online training, but they’re also appropriate for hybrid learning, which mixes traditional classroom instruction with e-learning. Modern LMSs focus on learners and effective dissemination of learning content, whereas early LMSs focused on course management.

Mobile Applications

Mobile applications supplement digitalized training by extending the capabilities of learning management systems (LMSs). Mobile devices can access training materials 24 hours a day, seven days a week, using m-learning. As a result, even individuals operating in remote areas can benefit from learning. You can also utilize mobile app development to refresh employees’ abilities after they have completed their training. Audio simulation programs, for example, can help employees practice communicating with consumers by simulating real-life discussions.

Extended Reality Technologies

Extended reality (XR) technologies are more advanced kinds of digital transformation of employee training and development that can make learning more immersive. Despite the significant price and time commitment required to create and distribute 3D e-learning content in XR environments, these technologies are becoming more widely adopted. Virtual reality (VR), augmented reality (AR), and mixed reality (MR) technologies are all included in XR. They provide advanced learning opportunities for employees, particularly in areas with a strong focus on practice, such as manufacturing and healthcare.

Digital Transformation of Training and Development in Practice

Let’s take a look at how digital transformation technologies are affecting different forms of staff training. Using the example of a custom software development company LMS supported by additional tools, we will examine LMS-driven digital transformation (mobile apps, XR).

Employee Orientation & Onboarding

All corporate records, including HR-related documents like hiring forms and onboarding training materials, were distributed among several departments before digital transformation. There were old and new versions of documents and paper and electronic copies simultaneously, resulting in chaos. Orientation and onboarding are becoming more accessible, faster, and more convenient due to digital transformation. It allows for the creation of a centralized repository for all corporate papers.  

LMS: LMSs can assist new employees in acclimating to the firm. In a software development company’s intranet, the FortySeven47 LMS allows for the creation of employee profiles. They can also obtain a start guide on administrative processes (computer logins, extensions, email setups, and so on) and an introductory movie with information about the company’s mission, values, corporate culture, policies, and benefits, among other things, through the LMS. To make the onboarding process even more accessible, the LMS can use ready-made templates saved in the libraries of custom software development companies to make filling out new-hire forms a breeze.

Mobile apps: Employee apps, like LMSs, can store e-learning content and useful information (interactive manuals, corporate policies, a contact list, etc.). They can use interactive maps to assist new staff in finding their way about the office. Gamification is frequently used in mobile apps to enhance employee engagement and motivation. For example, in a vast organization, new recruits may be rewarded for finding specific places. Employee handbooks, job description management, orientation training management, and other onboarding functions are supported by some programs.

XR: MR can boost custom software developer or staff training and onboarding, too. It lets users view and interact with 3D information in real-time and visualize and manipulate data.

Self-learning, Continuous Learning & Microlearning

Trainees can access all accessible learning resources at any time, rather than being limited to a single book or course, thanks to digital transformation. Trainees can acquire and refresh their knowledge by having books, classes, and assessment tests on their PCs or mobile devices. Microlearning — the ability to study in small bits via mobile devices – has emerged due to digital transformation.

LMS: Employees can have unrestricted access to learning content through LMSs, which provides a fresh impetus for self-learning. It’s simple to search, download, and track updates to learning content using the FortySeven IT LMS and to continue learning as needed. Microlearning is a fantastic fit for a custom software agency’s LMS because it simplifies and delivers short lessons that condense the crucial aspects of staff training.

Mobile apps: Mobile applications are helpful for on-the-go learning and self-assessment. They can include extra e-learning information (videos, photos, charts, graphs, and so on) to supplement more extensive training resources, allowing learners to better prepare for classroom or workshop sessions. The Skill Pill app, for example, will enable you to provide short training films on areas like customer service, management, sales and marketing, and more. 

XR: Due to their high cost and restricted availability for individual learners, these technologies are impractical for self-learning. However, because they provide immersive and engaging content, they can add value to microlearning in the workplace.

Instructor-led Training

Due to the use of various digital communication and collaboration tools, digital transformation makes instructor-led training available anywhere, anytime, and for any number of trainees, as opposed to traditional classroom training. Furthermore, new technologies such as XR enable staff training through simulations, which is just as effective as hands-on learning but without the hazards, which is especially important for medical training.

LMS: LMSs can assist with scheduling in-house and external instructor-led training, delivering a variety of learning content to trainees, and arranging knowledge assessments, among other things. Employees can be automatically enrolled in training using software development companies LMS workflows, and training, workshops, exams, and other events can be scheduled. It allows you to create and transmit many types of training information (documents, photos, audio, and video) and incorporate multimedia (such as recorded webinars) from other websites. It allows you to create and transmit many types of training information (documents, photos, audio, and video) and incorporate multimedia (such as recorded webinars) from other websites.

Mobile apps: Instructor-led instruction can be supplemented using mobile apps. After studying a new topic, trainees can read e-books and take quizzes on their mobile devices. When trainees have concerns regarding the course, assignments, exams, or other issues, m-learning allows them to engage with other trainees or an instructor rapidly. Scoreboards, certificates, and badges are common features in mobile apps that reward trainees for finishing a topic, a course, or passing an exam, among other things.  

XR: Employees can benefit from virtual reality training. Walmart, for example, uses virtual reality simulations in instructor-led training. Employees wearing virtual reality headsets were put through their paces in real-world scenarios, such as a Black Friday sale. As a result, they were taught how to interact with customers, resolve problems, and so on quickly and professionally. Custom software development companies can help with practical training for employees. An employee, for example, may have a valuable lesson on fixing an aircraft engine under the supervision of an instructor after attending a lecture on aviation engine maintenance and repair. The student scans a real airplane engine that has to be repaired using a tablet with custom software installed. The tablet then superimposes digital representations of engine parts and repair instructions on top of the actual engine. In this situation, you can utilize software development to make 3D holograms of the machine, allowing the instructor to describe the engine’s structure in more depth visually.

Conclusion

It’s impossible to picture the development of FortySeven software professionals and training without the use of technology. Employee retention is aided by digital transformation, which allows for effective and rapid cultivation and updating of employees’ skills and knowledge. Furthermore, digital transformation solutions span all primary training functions, from onboarding to self-learning, and can be utilized independently (LMSs) or as essential additions to employee training that can enhance learners’ experience (mobile and XR technologies).

Categories: Others Tags:

How to Write a Press Release: The Complete Guide for 2021

July 7th, 2021 No comments

A press release is one of the most valuable tools in a marketing team’s arsenal. Though press releases have been around for decades, they remain one of the best ways to reach new customers, improve your brand reputation, and generate awareness. 

Press releases are also wonderfully cost-effective. Unless you’re using paid distribution channels, all you have to spend is your time to create your press release.

So, how do you get started?

What is a Press Release?

A Press Release is a short, simple, and compelling news story designed to promote the goods and services of a business. You’ll usually see these pieces of content published on industry websites, news channels, social media platforms, and even on the company’s blogs looking for awareness. 

The idea behind a press release is you provide a publication or group with all of the most valuable facts and insights into your latest newsworthy story. You might use a press release to announce a new product or to tell people about your recent partnership, for instance. 

A press release post then delivers this information to a wider potential audience by distributing the content in a range of different places. 

Why Should My Business Send Press Releases?

Why not simply tell people about your latest products and sales on social media, and leave it at that? The simple answer is Press Releases help you to gain the attention you might not get from your own media channels alone. With a press release, you can:

You can send a press release for various reasons, including announcing breaking news, talking about newly launched products, discussing upcoming events, confirming partnerships, and more. It’s also worth creating a press release when new people join your executive team when you receive an award, or even if something bad happens (for crisis management)

What’s Included in a Press Release?

A press release will include different information depending on what you’re trying to accomplish. In general, PR posts feature:

How to Write a Press Release (Step by Step)

Now you know what goes into a press release and why these tools are so valuable, it’s time to start planning your big announcement. 

Here are our top tips for creating an amazing press release.

1. Choose the Right Story

Press releases are focused on sharing valuable news with a specific audience. It would be best if you had something important and new to say, or you risk not getting your story published at all. You can’t just talk about a product or service that’s selling well (unless it’s breaking world, or brand records). 

Think about whether your PR topic is:

When asking yourself what your PR story should be about, consider whether you want to publish it if you were a publication leader. From an objective perspective, does this story have value?

2. Answer the Right Questions

A press release doesn’t just provide information. Written correctly, this content will also answer essential questions for your audience. For instance, let’s take a look at the questions you should answer, with an example. 

For this example, we’ll be looking at a social media marketing firm partnering with an SEO brand:

3. Target the Right Sector

Like most pieces of great copy, a press release should generally be written with a specific audience in mind. The interesting thing about a press release is that you’re not just writing for the people who might be interested in your products and services. You’re also writing for a specific publication, journalist, broadcaster, or editor. 

When you’re writing your content, you’ll need to keep both audiences in mind to ensure that you get your message across. Focus on the kind of crucial messages which will appeal to your end-users and customers but address the preferences and needs of the editor too. Many publications will have guidelines to follow if you want a chance of getting your content on their site. 

If you’re sending your press release to multiple locations, you might need to look into doing several different versions of your press releases, each with slightly different wording and information, based on your target publication.

4. Get the Headline Right

There are few things more important in a press release than an amazing headline. 

A good headline will immediately attract the attention of your publication, as well as anyone who might end up reading your article. The media uses headlines to determine whether stories are worth reading or publishing. This means that you need to get attention quickly. 

Most press release headlines don’t try to be clever. There isn’t a lot of fancy language to worry about. Instead, your focus should be on sharing the main point of the press release fast.

For instance, if you’re announcing the arrival of new security measures in your business to protect hybrid workers, you might have a headline like:

5. Use the Right Structure

Structuring a press release can be tough.

Some companies have specific requests on how your press release should look. For instance, you might have to place the date and time in a specific place. For instance, CNN always puts the date of the release before the headline:

If you don’t have to follow a specific format, you should stick with the inverted pyramid structure. This strategy involves placing the most critical information first and moving down the hierarchy to less important info – like contact details. 

When structuring your press release, make sure the headline immediately tells your customers and readers what the story is about and presents immediate value. The opening paragraph will then summarise the main factors and elements of the story, giving a fuller explanation of what the story is about. For instance, for the “[Company] implements end-to-end encryption for hybrid workers” example, the first paragraph might read:

[Company] recently announced an investment in the latest encryption tools for information at rest and transit for hybrid employees. This new security strategy is rolling out immediately to new and existing customers of [company], with access to extra features available for premium subscribers.

The second paragraph then follows up with contextual insight into why this story is important. For instance, in the example above, the second paragraph might say:

This new investment comes at a time when more employees are moving into the hybrid working model. [Company] believes that higher encryption is crucial for teams working in a cloud environment, even with access to VPNs and other security measures available. 

The third paragraph then presents details on the story, including information on who’s involved, how this story came about, and anything else that business leaders might need to know. If there is an additional paragraph, you might include some quotes from business leaders or industry authorities to add credibility or opinions. 

6. Perfect Your Writing

No matter how short or simple, any press release is an insight into your company and brand. Don’t rely on the publication company you choose to do all the editing for you. Make sure you proofread your content and ensure everything sounds fantastic. It’s also worth double-checking any details to ensure that stats and facts remain accurate. 

When boosting the writing of your press release, remember:

Remember, a compelling, human quote can really make a difference to your press release too. This is a chance to allow the executive voices in your business to shine through. Make sure you highlight exactly why you’re so excited about the press release in the quote while using emotive language to connect with customers. For instance,

The company CEO said: “We’re proud to be offering our current and new customers access to this new security service. After working with the best encryption professionals in the industry, we’re confident we can reduce data breaches and security concerns for hybrid workers.”

7. Double-Check Your Press Release

Before you send your press releases to anyone, it’s best to do a quick check to ensure that everything sounds great and that you haven’t left any annoying errors unaddressed. Use this quick checklist to examine your content:

Make sure you include information on how to reach out to you if the publication notices anything wrong with your site’s performance. 

Where To Send Your Press Releases

Once you’ve worked through your press release (and double-checked it for quality and accuracy), you can think about where you’re going to send it. For example, you may send multiple versions of your press release to different companies and publications. Ideally, you’ll create an entire press kit, which might include pictures of your team, product, or service, as well as contact details and extra brand information. 

Some companies prefer to approach press relationships by pitching their story to a few carefully selected editors and publications. This is often a good idea if you’re trying to reach a particular audience or you want to improve your reputation by connecting with a certain brand. 

Alternatively, you can use PR wire services to send your information to multiple companies at once. There are various services online to help you get your press announcements to the right people. Options to look into include:

Start small and gradually build a list of contacts to help you get your voice and business out there. Eventually, you’ll find it’s much easier to get publications to accept your press releases. You might even find that people start approaching you to find out if you have any upcoming news. 

Go and Get Published!

Now you’re equipped with everything you need to know to create a fantastic press release and attract new eyes to your business. The only thing to do next is to get out there and start sending your press releases to the right people. Remember, once your press release is published, make sure you promote it through your social channels, email, and website. 


Featured image via Pexels.

Source

The post How to Write a Press Release: The Complete Guide for 2021 first appeared on Webdesigner Depot.

Categories: Designing, Others Tags: