Archive
Parcel CSS: A New CSS Parser, Transformer, and Minifier
Hot off the presses from Devon Govett, creator of Parcel, is Parcel CSS:
A CSS parser, transformer, and minifier written in Rust.
Nice. The CSS world could use a little processing shake up like this.
Ya know how esbuild has seriously shaken things up for the JavaScript processing world? Maybe we need a cssbuild? It would process imports and do bundling (something we generally rely on Sass for). The point would be extreme speed. Maybe it would be plugin-based and compatible with the PostCSS API so that existing PostCSS plugins would work on it. Maybe it could make sourcemaps and do modification. Maybe it would run your Sass, too, I dunno. But something to spark the CSS ecosystem like that could be cool.
It looks like it doesn’t do bundling (standalone anyway). I suppose it would have to just invent a syntax for that, as I think Sass somewhat regrets the ambiguity of how it uses @import just like native CSS does and I wouldn’t blame anyone for not wanting to go down that road. It’s tricky territory, for sure, as inventing syntax kinda puts it into a different category of tool. I think it would be worth it though, as breaking up CSS into smaller files but bundling them in development is like… a thing people do.
So why run your CSS through this thing? From the docs, it looks like you’d wanna do that because…
- it’s a minifier (looks like it’s cssnano under the hood),
- it does vendor prefixing (looks like it’s Autoprefixer under the hood),
- it can process as CSS modules (the classic library, not the native ones), and
- you get sourcemaps.
But it seems like the killer Parcel CSS feature is what they are calling “Syntax lowering” meaning you can use “future” CSS today (like, say, nesting) by having it processed down to things that browsers understand, like Babel does in JavaScript.
I have no idea what powers Parcel CSS. though it feels similar in spirit to postcss-preset-env. I’m unsure if that’s what’s being leveraged or not. I guess PostCSS is required for Autoprefixer which is being used, so maybe? I just don’t see it in the package.json.
Will Parcel CSS become an ecosystem?
So I guess the big question is: If Parcel CSS becomes the CSS parser of choice, will we get plugins? And if we do, will it become a robust ecosystem like PostCSS plugins?
Parcel CSS: A New CSS Parser, Transformer, and Minifier originally published on CSS-Tricks. You should get the newsletter and become a supporter.
Open Source & Sustainability
It’s a god-damned miracle to me that open source is as robust as it is in tech. Consider the options. You could have a job (or be entrepreneurial) with your coding skills and likely be paid quite well. Or, you could write code for free and have strangers yell at you every day at all hours. I like being a contributing kinda guy, but I don’t have the stomach for the latter because of the work that potentially comes with open source.
Fair enough, in reality, most developers do a bit of coding work on both sides. And clearly, they find some value in doing open-source work; otherwise, they wouldn’t do it. But we’ve all heard the stories. It leads to developer burnout, depression, and countless abandoned projects. It’s like we know how to contribute to an open-source project (and even have some ground rules on etiquette), but lack an understanding of how to maintain it.
Dave, in “Sustaining Maintaining,” thinks it might be a lack of education on how to manage open source:
There’s plenty of write-ups on GitHub about how to start a new open source project, or how to add tooling, but almost no information or best practices on how to maintain a project over years. I think there’s a big education gap and opportunity here. GitHub has an obvious incentive to increase
num_developersandnum_repos, but I think it’s worthwhile to ease the burden of existing developers and increase the quality and security of existing repos. Open source maintenance needs a manual.
That’s a wonderful idea. I’ve been around tech a hot minute, but I don’t feel particularly knowledgeable about how to operate an open-source project. And frankly, that makes me scared of it, and my fear makes me avoid doing it at all.
I know how to set up the basics, but what if the project blows up in popularity? How to I manage my time commitment do it? How do I handle community disputes? Do I need a request for comments workflow? Who can I trust to help? What are the monetization strategies? What are the security concerns? What do I do when there starts to be dozens, then hundreds, then thousands of open issues? What do I do when I stop caring about this project? How do I stop myself from burning it to the ground?
If there was more education around how to do this well, more examples out there of people doing it well and benefitting from it, and some attempts at guardrails from the places that host them, that would go a long way.
Money is a key factor. Whenever I see success in open source, I see actually usable amounts of money coming in. I see big donations appropriately coming into Vue. I see Automattic building an empire around their core open-source products. I see Greensock having an open-source library but offering membership and a license for certain use cases and having that sustain a team long-term.
If you’re interested in monetizing open source, Nicholas C. Zakas has been writing about it lately. It’s a three-parter so far, but starts here in “Making your open source project sponsor-ready, Part 1: Companies and trust”:
While it’s possible to bring in a decent amount of money through individual sponsorships, the real path to open source sustainability is to get larger donations from the companies that depend on your project. Getting $5 to $10 each month from a bunch of individuals is nice, but not as nice as getting $1,000 each month from a bunch of companies.
I think it would be cool to see a lot more developers making a proper healthy living on open source. If nothing else it would make me feel like this whole ecosystem is more stable.
Open Source & Sustainability originally published on CSS-Tricks. You should get the newsletter and become a supporter.
How I Saved My Design Agency & Tripled My Profits
There was a point at which I was very close to losing my business, and I didn’t realize how close.
I wasn’t always a good planner, and I didn’t plan to start an agency. One day I was a freelance graphic designer, my job list grew, I hired some help, and suddenly I was managing a team.
There isn’t a guidebook for new business owners, you have to learn on the job, and there’s no one-size-fits-all approach. We expanded rapidly from two to four people, then seven, and suddenly we hit 16 employees in just 18 months. It was pretty scary and felt like driving on the freeway without brakes. A client shared a story that they were turning over $20m, and the owner was only taking home $30k. It felt like where I was headed. At that point, I could easily have lost it all.
I took a hard look at the numbers and realized that we were barely breaking even, let alone profitable. That needed to change to stabilize the business and regain control of my operations. The change wasn’t easy, and there were some hard lessons, but 11 years later, with a strong local team and 40+ awards for our work, I’m thankful for that wake-up call.
There are other people in my position struggling with the same issues I faced, so I’d like to share the four key things I did that helped turn things around and move us from surviving to thriving.
1. Don’t Diversify Your Services
I wanted to do it all, and as the business owner, it was hard to turn down a new client. Our instincts are to help, and declining opportunities feels wrong. In our industry, digital agencies, especially web design agencies, try to cover all bases from marketing, SEO, adwords, design, photography, and coding. Everyone wants to be a one-stop shop for clients. I used to be that person: I would wash your car and shine your shoes if I could.
Do not give in to that fear.
When you’re a generalist, you spread yourself too thin. I know: a decade ago, we were offering dozens of services outside of the web design realm: packaging, branding, copywriting, sticker design, SEO, hosting, analytics, you name it, we provided it. We used over seven different CMS for our projects. If a client wanted it, we tried to offer it, no matter how unsuitable it was for us.
On the surface, we fulfilled our projects, and our clients were always thrilled with the results. But below the surface, our operations were dissolving into a mess. Our eyes weren’t on the prize; we were always chasing after each little job for cash. It took too much time to learn new skills. When I looked at our timesheets and deducted the unbillable hours, our projects would hardly break even.
What hurt us even further is that with diversifying, we had to manage multiple workflows, software, and systems: Sketch, Illustrator, Photoshop, WordPress, Joomla, Drupal, Google Analytics, Final Cut Pro, etc. It was expensive with minimal return. It was like an Olympic swimmer signing up for a swimming-diving-ice-skating club when their passion is swimming.
So I took a step back. I boiled it down to what we enjoyed and excelled at. Ask yourself: for what do you want to be known? For us, it was psychology-driven, conversion-focused web design. This was the service our team had the most skills in and collectively could give the best value to our clients. Once I’d figured that out, it was easy to eliminate those other services and specialize.
You can niche down by service or industry and be the specialist in what you offer.
2. Know Your Numbers
The first red flag that my business was in trouble was when I said to my accountant, “I feel like my business is doing great.” He replied, “I don’t care how you feel. The facts are in the numbers. Show me your accounts, and I’ll tell you if you’re actually doing well.” As an intuition-driven guy, it was a real eye-opener; I’d only ever relied on gut instinct.
At one point, we had a ton of work coming in, so I hired a few juniors to help the rest of the team. The team grew to 16, and the vibes in the studio were great, but the numbers weren’t. Instead of increasing efficiency, projects took 40 hours longer than they should have done. Why? The seniors and mid-level designers were taking time out to train the juniors! Reassessing the team showed me I needed to hire experienced staff, so projects ran on time and budget. It was a hard decision but a necessary one to keep us afloat.
The crucial numbers for any design agency are your timesheets, where bottlenecks lie, how much you’re spending, how long a project takes; these determine your actual margins. Setting up quantitative software like Toggl, Gantt, and Asana were a game-changer for us. They gave our project management real purpose and potential. Knowing the average hours our primary type of project took made it easy to give clients realistic deadlines, anticipate the need for fresh hiring, and know when our plates were full. You do not want to bite off more than you can chew.
3. Become The Best Fit For Your Target Market
You can’t please everyone, and frankly, you shouldn’t be trying to. One type of bait won’t attract every kind of fish. First, identify the type of fish you want to catch, the pond where this type of fish lives, and finally, bait your hook with something that type of fish can’t resist.
Your sales team should be able to identify them instantly, and all you then need to do is streamline your team, process, and systems towards being the best fit for them.
4. Double Down On Marketing That Works
There are many different marketing avenues you can go down, but go down too many, and it becomes a tangled web of confused messaging.
Remember, just because your competitors are doing it does not mean it’s the most effective approach for your target market.
There are really only inbound and outbound types of strategies, and it’s a great idea to list out the pros and cons (and the ROI of each) concerning your target market. Or, you can approach marketing based on your existing skillset — for example, if you detest being in front of a camera and don’t want to do video marketing, then just don’t do it.
Identify what works for you, and then be consistent. Consistency is the secret to a successful marketing strategy.
The post How I Saved My Design Agency & Tripled My Profits first appeared on Webdesigner Depot.
Netlify Identity, a Key Aspect to Jamstack Development

Now you’ve got a website with authentication, great! But how do you keep going with your TODO app? You’ll need some kind of cloud storage for the data on your user’s lists. For that, you’ll have to reach outside of Netlify to find a cloud storage provider you like. Netlify has had
(This is a sponsored post.)
Netlify is amazing at static file hosting, but it’s really so much more than that. You can build any sort of website, even highly dynamic apps, with the Jamstack approach and static file hosting at the core.
Say you want to build a TODO app with users. Those users will need to sign up and log in. Can’t do that with a static site, right? You can, actually. Netlify helps with Netlify Identity, a robust offering they’ve had for years. Enabling it is just a few clicks in the admin UI, and they even provide auth widgets so you have to build precious little to get this working.
Now you’ve got a website with authentication, great! But how do you keep going with your TODO app? You’ll need some kind of cloud storage for the data on your user’s lists. For that, you’ll have to reach outside of Netlify to find a cloud storage provider you like. Netlify has had a first-class integration with Fauna for years, so that’s a good choice.
You’ll need to communicate with Fauna, of course, and being a static site, JavaScript is how that’s going to work. Fortunately, your client-side JavaScript can communicate with your own server-side JavaScript that Netlify helps with, which is called Netlify Functions. That’s right, Netlify helps you build/deploy Lambda functions. This means you can actually have the Lambda functions do the communicating with Faunda, keeping your API keys safe.
Those are the building blocks. This is a well-worn approach, and really at the heart of Jamstack. Need a head start? Netlify has templates for this kind of thing. Here are some examples with this approach in mind: netlify-fauna-todo-app and netlify-faunadb-example. We even have a tutorial that covers that. And there’s a one-minute video demo:
There you have it, a website that is every bit as dynamic as something you’d build with a traditional server. Only now, you’re building with Netlify meaning you get so many other advantages, like the fact that you’re deploying from commits to a Git repository and getting build previews, and every other amazing feature Netlify offers.
Netlify Identity, a Key Aspect to Jamstack Development originally published on CSS-Tricks. You should get the newsletter and become a supporter.
What Would it Take to Prevent CSS Tooltips From Overflowing?
Say you have an elements with CSS tooltips and you’re going to position those tooltips such that it opens up next to the element on hover (or probably better: when clicked/tapped). Next to it where? Above it? What if the element is already really close to the top of the screen? In that case, it should probably open below it. Or vice versa — and the same goes for the left and right edges of the screen. You definitely want it to be visible rather than overflowing the viewport.
Sometimes when you open new UI elements, they need to be edge-aware to prevent the content inside from triggering weird scrollbars, or worse, cutting off content.
This is an age-old problem on the web. I remember using jQuery UI tooltips on purpose because it had this special ability to be edge-aware. You can imagine the JavaScript behind it. You figure out where the element is going to be and use positioning math to figure out if it will be within the viewport. If it won’t be, try a different position that does fit.
As ever, everything old is new again. Check out Floating UI, designed just for this problem.

Floating UI is a low-level toolkit to position floating elements while intelligently keeping them in view. Tooltips, popovers, dropdowns, menus, and more.
It looks super well done. I like the focus, the demos are super well done, and it’s a pretty tiny dependency.
But ya know what would be even cooler? If CSS could do this all by itself. That’s the vibe with CSS Anchored Positioning — for now just an “explainer” document:
When building interactive components or applications, authors frequently want to leverage UI elements that can render in a “top-layer”. Examples of such UI elements include content pickers, teaching UI, tooltips, and menus. “Enabling Popups” introduced a new
popupelement to make many of these top-layer elements easier to author.Authors frequently wish to “pin” or “anchor” such top-layer UI to a point on another element, referred to here as an “anchor element”. How the top-layer UI is positioned with respect to its anchor element is further influenced or constrained by the edges of the layout viewport.

I love it. The web platform at its best. Seeing what authors are needing to do and reaching for libraries to do, and trying to step in and do it natively (and hopefully better).
What Would it Take to Prevent CSS Tooltips From Overflowing? originally published on CSS-Tricks. You should get the newsletter and become a supporter.
Adding Vite to Your Existing Web App

We’ll get to how to set up aliases in a moment, but for now, let’s instead modify our reactStartup file (or whatever your entry file is called) as follows:
import React from "react";
import { render } from "react-dom";

render(
  <div>
    <h1>Hi there</h1>
  </div>,
  document.getElementById("home")
);
Now we can run it our npm run dev command and browse to localhost:3000.


Hot module reloading (HMR)
Now that the development server is running, try modifying your source code. The output should update almost immediately via Vite’s HMR. This is one of Vite’s nicest features. It makes the development experience so much nicer when changes seem to reflect immediately rather than having to wait, or even trigger them ourselves.
The rest of this post will go over all the things I had to do to get my own app to build and run with Vite. I hope some of them are relevant for you!
Aliases
It’s not uncommon for webpack-based projects to have some config like this:
resolve: {
  alias: {
    jscolor: "util/jscolor.js"
  },
  modules: [path.resolve("./"), path.resolve("./node_modules")]
}
This sets up an alias to jscolor at the provided path, and tells webpack to look both in the root folder (./) and in node_modules when resolving imports. This allows us to have imports like this:
import { thing } from "util/helpers/foo"…anywhere in our component tree, assuming there’s a util folder at the very top.
Vite doesn’t allow you to provide an entire folder for resolution like this, but it does allow you to specify aliases, which follow the same rules as the
Vite (pronounced “veet”) is a newish JavaScript bundler. It comes batteries-included, requires almost no configuration to be useful, and includes plenty of configuration options. Oh—and it’s fast. Incredibly fast.
This post will walk through the process of converting an existing project to Vite. We’ll cover things like aliases, shimming webpack’s dotenv handling, and server proxying. In other words, we’re looking at how to move a project from its existing bundler to Vite. If you’re looking instead to start a fresh project, you’ll want to jump to their documentation.
Long story, short: the CLI will ask for your framework of choice—React, Preact, Svelte, Vue, Vanilla, or even lit-html—and whether you want TypeScript, then give you a fully functioning project.
Scaffold first! If you are interested in learning about integrating Vite into a legacy project, I’d still recommend scaffolding an empty project and poking around it a bit. At times, I’ll be pasting some clumps of code, but most of that comes straight from the default Vite template.
Our use case
What we’re looking at is based on my own experience migrating the webpack build of my booklist project (repo). There isn’t anything particularly special about this project, but it’s fairly big and old, and leaned hard on webpack. So, in that sense, it’s a good opportunity to see some of Vite’s more useful configuration options in action as we migrate to it.
What we won’t need
One of the most compelling reasons to reach for Vite is that it already does a lot right out of the box, incorporating many of the responsibilities from other frameworks so there are fewer dependencies and a more established baseline for configurations and conventions.
So, instead of starting by calling out what we need to get started, let’s go over all the common webpack things we don’t need because Vite gives them to us for free.
Static asset loading
We usually need to add something like this in webpack:
{
  test: /.(png|jpg|gif|svg|eot|woff|woff2|ttf)$/,
  use: [
    {
      loader: "file-loader"
    }
  ]
}
This takes any references to font files, images, SVG files, etc., and copies them over to your dist folder so they can be referenced from your new bundles. This comes standard in Vite.
Styles
I say “styles” as opposed to “css” intentionally here because, with webpack, you might have something like this:
{
  test: /.s?css$/,
  use: [MiniCssExtractPlugin.loader, "css-loader", "sass-loader"]
},

// later

new MiniCssExtractPlugin({ filename: "[name]-[contenthash].css" }),
…which allows the application to import CSS or SCSS files. You’ll grow tired of hearing me say this, but Vite supports this out of the box. Just be sure to install Sass itself into your project, and Vite will handle the rest.
Transpilation / TypeScript
It’s likely your code is using TypeScript, and or non-standard JavaScript features, like JSX. If that’s the case, you’ll need to transpile your code to remove those things and produce plain old JavaScript that a browser (or JavaScript parser) can understand. In webpack that would look something like this:
{
  test: /.(t|j)sx?$/,
  exclude: /node_modules/,
  loader: "babel-loader"
},
…with a corresponding Babel configuration to specify the appropriate plugins which, for me, looked like this:
{
  "presets": ["@babel/preset-typescript"],
  "plugins": [
    "@babel/plugin-proposal-class-properties",
    "@babel/plugin-syntax-dynamic-import",
    "@babel/plugin-proposal-optional-chaining",
    "@babel/plugin-proposal-nullish-coalescing-operator"
  ]
}
While I could have probably stopped using those first two plugins years ago, it doesn’t really matter since, as I’m sure you’ve guessed, Vite does this all for us. It takes your code, removes any TypeScript and JSX, and produces code supported by modern browsers.
If you’d like to support older browsers (and I’m not saying you should), then there’s a plugin for that.
node_modules
Surprisingly, webpack requires you to tell it to resolve imports from node_modules, which we do with this:
resolve: {
  modules: [path.resolve("./node_modules")]
}
As expected, Vite already does this.
Production mode
One of the common things we do in webpack is distinguish between production and development environments by manually passing a mode property, like this:
mode: isProd ? "production" : "development",…which we normally surmise with something like this:
const isProd = process.env.NODE_ENV == "production";And, of course, we set that environment variable via our build process.
Vite handles this a bit differently and gives us different commands to run for development builds versus those for production, which we’ll get into shortly.
File extensions
At the risk of belaboring the point, I’ll quickly note that Vite also doesn’t require you to specify every file extension you’re using.
resolve: {
  extensions: [".ts", ".tsx", ".js"],
}
Just set up the right kind of Vite project, and you’re good to go.
Rollup plugins are compatible!
This is such a key point I wanted to call it out in its own section. If you still wind up with some webpack plugins you need to replace in your Vite app when you finish this blog post, then try to find an equivalent Rollup plugin and use that. You read that correctly: Rollup plugins are already (or usually, at least) compatible with Vite. Some Rollup plugins, of course, do things that are incompatible with how Vite works—but in general, they should just work.
For more info, check out the docs.
Your first Vite project
Remember, we’re moving an existing legacy webpack project to Vite. If you’re building something new, it’s better to start a new Vite project and go from there. That said, the initial code I’m showing you is basically copied right from what Vite scaffolds from a fresh project anyway, so taking a moment to scaffold a new project might also a good idea for you to compare processes.
The HTML entry point
Yeah, you read that right. Rather than putting HTML integration behind a plugin, like webpack does, Vite is HTML first. It expects an HTML file with a script tag to your JavaScript entrypoint, and generates everything from there.
Here’s the HTML file (which Vite expects to be called index.html) we’re starting with:
<!DOCTYPE html>
<html lang="en">
  <head>
    <meta charset="UTF-8" />
    <title>The GOAT of web apps</title>
  </head>
  <body>
    <div id="home"></div>
    <script type="module" src="/reactStartup.tsx"></script>
  </body>
</html>
Note that the tag points to /reactStartup.tsx. Adjust that to your own entry as needed.
Let’s install a few things, like a React plugin:
npm i vite @vitejs/plugin-react @types/nodeWe also create the following vite.config.ts right next to the index.html file in the project directory.
import { defineConfig } from "vite";
import react from "@vitejs/plugin-react";

export default defineConfig({
  plugins: [react()]
});
Lastly, let’s add a few new npm scripts:
"dev": "vite",
"build": "vite build",
"preview": "vite preview",
Now, let’s start Vite’s development server with npm run dev. It’s incredibly fast, and incrementally builds whatever it needs to, based on what’s requested.
But, unfortunately, it fails. At least for right now.
We’ll get to how to set up aliases in a moment, but for now, let’s instead modify our reactStartup file (or whatever your entry file is called) as follows:
import React from "react";
import { render } from "react-dom";

render(
  <div>
    <h1>Hi there</h1>
  </div>,
  document.getElementById("home")
);
Now we can run it our npm run dev command and browse to localhost:3000.


Hot module reloading (HMR)
Now that the development server is running, try modifying your source code. The output should update almost immediately via Vite’s HMR. This is one of Vite’s nicest features. It makes the development experience so much nicer when changes seem to reflect immediately rather than having to wait, or even trigger them ourselves.
The rest of this post will go over all the things I had to do to get my own app to build and run with Vite. I hope some of them are relevant for you!
Aliases
It’s not uncommon for webpack-based projects to have some config like this:
resolve: {
  alias: {
    jscolor: "util/jscolor.js"
  },
  modules: [path.resolve("./"), path.resolve("./node_modules")]
}
This sets up an alias to jscolor at the provided path, and tells webpack to look both in the root folder (./) and in node_modules when resolving imports. This allows us to have imports like this:
import { thing } from "util/helpers/foo"…anywhere in our component tree, assuming there’s a util folder at the very top.
Vite doesn’t allow you to provide an entire folder for resolution like this, but it does allow you to specify aliases, which follow the same rules as the @rollup/plugin-alias:
import { defineConfig } from "vite";
import react from "@vitejs/plugin-react";

import path from "path";

export default defineConfig({
  resolve: {
    alias: {
      jscolor: path.resolve("./util/jscolor.js"),
      app: path.resolve("./app"),
      css: path.resolve("./css"),
      util: path.resolve("./util")
    }
  },
  plugins: [react()]
});
We’ve added a resolve.alias section, including entries for everything we need to alias. Our jscolor util is set to the relevant module, and we have aliases for our top-level directories. Now we can import from app/, css*/*, and util/ from any component, anywhere.
Note that these aliases only apply to the root of the import, e.g. util/foo. If you have some other util folder deeper in your tree, and you reference it with this:
import { thing } from "./helpers/util";…then the alias above will not mess that up. This distinction is not well documented, but you can see it in the Rollup alias plugin. Vite’s alias matches that same behavior.
Environment variables
Vite, of course, supports environment variables. It reads config values out of your .env files in development, or process.env, and injects them into your code. Unfortunately, things work a bit differently than what you might be used to. First, it does not replace process.env.FOO but rather import.meta.env.FOO. Not only that, but it only replaces variables prefixed with VITE_ by default. So, import.meta.env.VITE_FOO would actually be replaced, but not my original FOO. This prefix can be configured, but not set to empty string.
For a legacy project, you could grep and replace all your environment variables to use import.meta.env, then add a VITE_ prefix, update your .env files, and update the environment variables in whatever CI/CD system you use. Or you can configure the more classic behavior of replacing process.env.ANYTHING with values from a .env file in development, or the real process.env value in production.
Here’s how. Vite’s define feature is basically what we need. This registers global variables during development, and does raw text replacement for production. We need to set things up so that we manually read our .env file in development mode, and the process.env object in production mode, and then add the appropriate define entries.
Let’s build that all into a Vite plugin. First, run npm i dotenv.
Now let’s look at the code for the plugin:
import dotenv from "dotenv";

const isProd = process.env.NODE_ENV === "production";
const envVarSource = isProd ? process.env : dotenv.config().parsed;

export const dotEnvReplacement = () => {
  const replacements = Object.entries(envVarSource).reduce((obj, [key, val]) => {
    obj[`process.env.${key}`] = `"${val}"`;
    return obj;
  }, {});

  return {
    name: "dotenv-replacement",
    config(obj) {
      obj.define = obj.define || {};
      Object.assign(obj.define, replacements);
    }
  };
};
Vite sets process.env.NODE_ENV for us, so all we need to do is check that to see which mode we’re in.
Now we get the actual environment variables. If we’re in production, we grab process.env itself. If we’re in dev, we ask dotenv to grab our .env file, parse it, and get back an object with all the values.
Our plugin is a function that returns a Vite plugin object. We inject our environment values into a new object that has process.env. in front of the value, and then we return our actual plugin object. There is a number of hooks available to use. Here, though, we only need the config hook, which allows us to modify the current config object. We add a define entry if none exists, then add all our values.
But before moving forward, I want to note that the Vite’s environment variables limitations we are working around exist for a reason. The code above is how bundlers are frequently configured, but that still means any random value in process.env is stuck into your source code if that key exists. There are potential security concerns there, so please keep that in mind.
Server proxy
What does your deployed web application look like? If all it’s doing is serving JavaScript/CSS/HTML—with literally everything happening via separate services located elsewhere—then good! You’re effectively done. What I’ve shown you should be all you need. Vite’s development server will serve your assets as needed, which pings all your services just like they did before.
But what if your web app is small enough that you have some services running right on your web server? For the project I’m converting, I have a GraphQL endpoint running on my web server. For development, I start my Express server, which previously knew how to serve the assets that webpack generated. I also start a webpack watch task to generate those assets.
But with Vite shipping its own dev server, we need to start that Express server (on a separate port than what Vite uses) and then proxy calls to /graphql over to there:
server: {
  proxy: {
    "/graphql": "http://localhost:3001"
  }
}
This tells Vite that any requests for /graphql should be sent to http://localhost:3001/graphql.
Note that we do not set the proxy to http://localhost:3001/graphql in the config. Instead, we set it to http://localhost:3001 and rely on Vite to add the /graphql part (as well any any query arguments) to the path.
Building libs
As a quick bonus section, let’s briefly discuss building libraries. For example, what if all you want to build is a JavaScript file, e.g. a library like Redux. There’s no associated HTML file, so you’ll first need to tell Vite what to make:
build: {
  outDir: "./public",
  lib: {
    entry: "./src/index.ts",
    formats: ["cjs"],
    fileName: "my-bundle.js"
  }
}
Tell Vite where to put the generated bundle, what to call it, and what formats to build. Note that I’m using CommonJS here instead of ES modules since the ES modules do not minify (as of this writing) due to concerns that it could break tree-shaking.
You’d run this build with vite build. To start a watch and have the library rebuild on change, you’d run
vite build --watch.
Wrapping up
Vite is an incredibly exciting tool. Not only does it take the pain, and tears out of bundling web apps, but it greatly improves the performance of doing so in the process. It ships with a blazingly fast development server that ships with hot module reloading and supports all major JavaScript frameworks. If you do web development—whether it’s for fun, it’s your job, or both!—I can’t recommend it strongly enough.
Adding Vite to Your Existing Web App originally published on CSS-Tricks. You should get the newsletter and become a supporter.
Top 10 online form builders of 2022
From designing easy-to-read forms that your prospects want to fill out, to data-collection forms that help with webinar registration, reservations, and contact tracing, it’s important to work with the best online form builder that helps you meet your specific conversion goals.
Best online form builders
Here are 10 online form builders to consider based on factors like ease of use, design quality and variety, advanced features, the ability to automate, and, of course, price.
1. Jotform
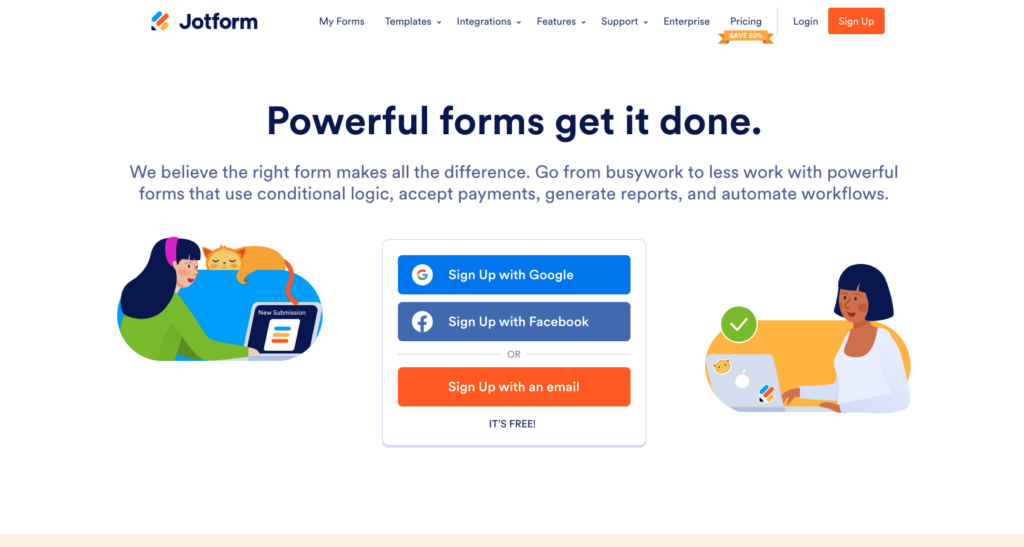
With more than 10,000 templates, Jotform is known for having the largest collection of templates available. This online form builder offers fully mobile-responsive forms and accessible forms as well as numerous plugins, multipage forms, field types, and integrations like Salesforce, Insightly, and PayPal for online payments.
Jotform’s Starter plan is free and includes five forms. There are also three paid tiers.
2. Moosend
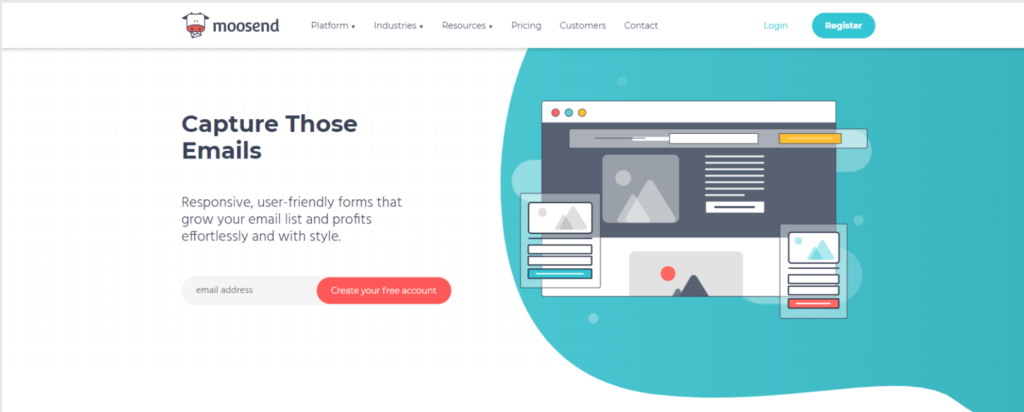
Moosend’s forms are designed to increase your subscriptions and grow your mailing list quickly. The platform allows you to create beautiful forms with dozens of templates and matching landing pages. The drag-and-drop editor also lets you customize the forms so you can add images, fonts, and logos for better branding and visual interest. Plus, Moosend’s forms seamlessly integrate with your website via add-ons, plugins, and custom code.
This powerful forms tool offers a free plan, or you can choose from monthly and annual plans that include more advanced features.
3. Socital

As one of the newest online form builders, Socital is one of the most user-friendly solutions you’ll find, no matter how much form-building experience you have. Features include popup tools for cart abandonment, email notifications, form submission options, social tools, and template and format editors for subscription forms. Socital has five monthly plans to choose from.
4. Typeform
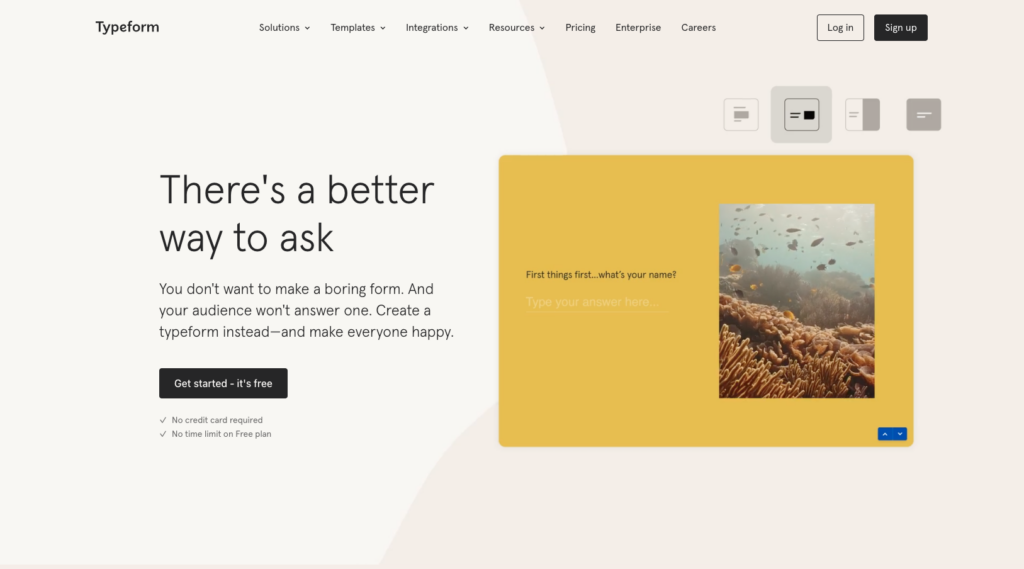
With an Instagram aesthetic, this tool is one of the most visually attractive form builders. No coding skills are required for this user-friendly tool that offers more than 60 form templates. Enjoy several Typeform options, including quizzes, contact forms, polls, surveys, and lead generation forms as well as videos, images, and GIFs. You can choose a free plan or one of three paid tiers.
5. Wufoo
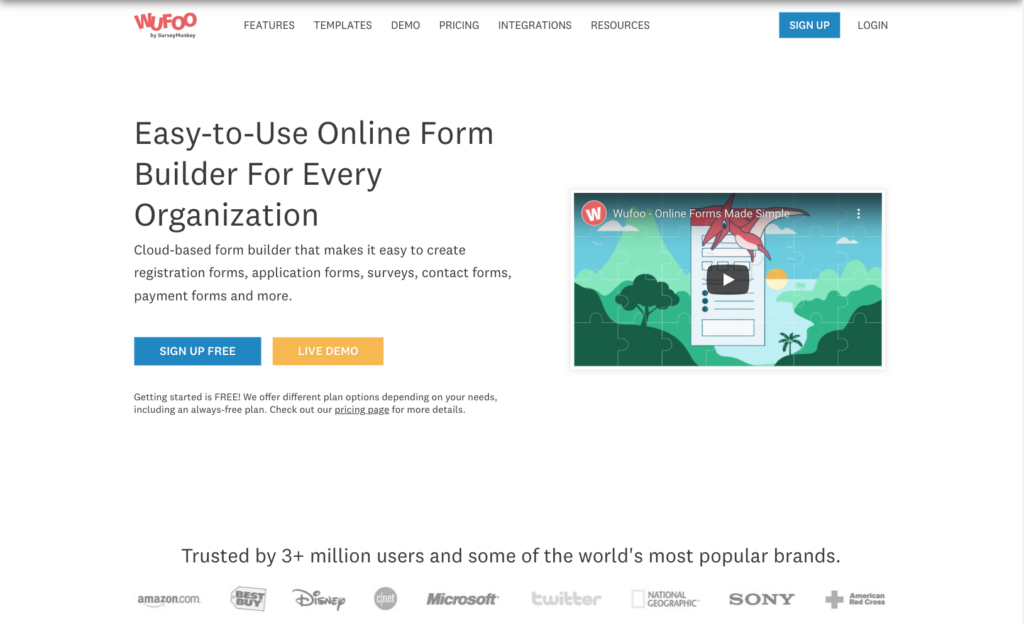
Wufoo gives you 400 templates organized into categories, including surveys, registrations, invitations, online orders, and lead generation forms. Enjoy the drag-and-drop process for form creation or use customization tools to change various elements of each form.
Designed for all types of businesses, Wufoo also offers advanced features, including payment integrations, report designers, and analytics tools. Integrations include Stripe, Campaign Monitor, and Squarespace.
Made more for experienced users, Wufoo offers four pricing plans as well as a free plan with basic features.
6. Convertful

With its plethora of form templates, Convertful is ideal for bloggers, agencies, and e-commerce companies. Features include a WordPress plug-in as well as the ability to include gamification tools and coupon boxes. It works well with users of all experience levels.
Convertful integrates with email marketing software like HubSpot, Moosend, and Sendinblue. There’s a free plan plus paid tiers. Even the free plan includes features like unlimited widgets as well as lead and form fields.
7. Pabbly
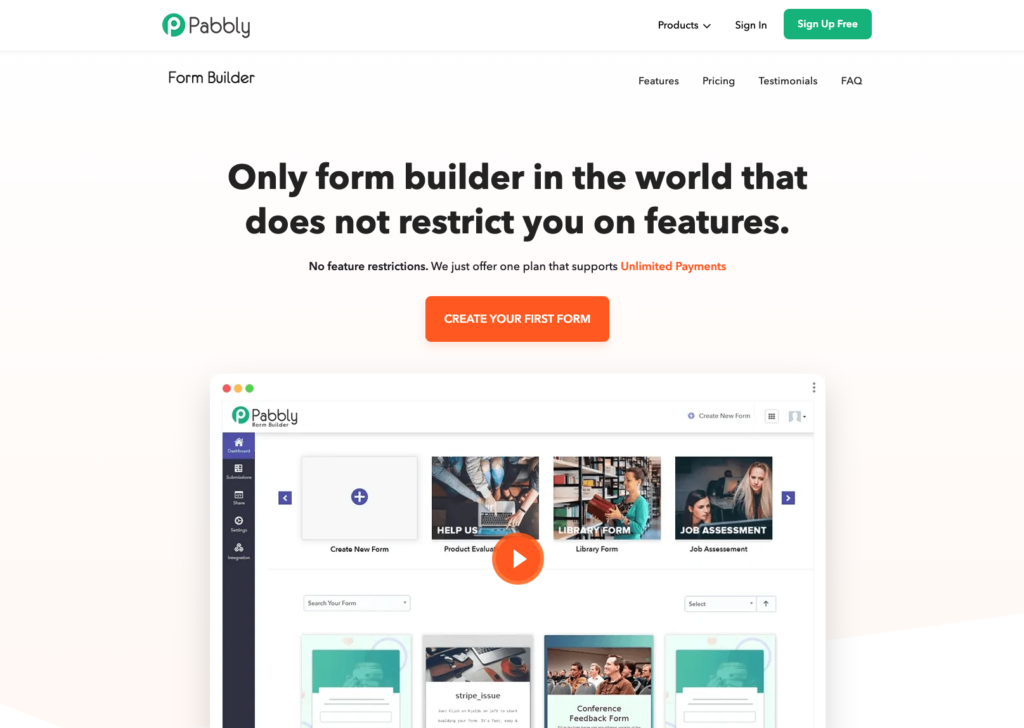
This form builder is affordable and versatile, including more than 250 templates and a drag-and-drop editor. Advanced features include website embedding, payment integrations, webhooks, customizations, calculated fields, conditional logic, multistep forms, and data encryption, yet it’s suitable for everyone. You can also integrate third-party apps, such as PayPal, Stripe, Mailchimp, Dropbox, and Google Analytics. Pabbly offers a single pricing plan.
8. Formstack

This solution is one of the easiest to use that features advanced technology like conditional logic. You can use Formstack’s form templates or create your own from scratch. The drag-and-drop form builder has a “reorder content” button to rearrange form fields. Formstack also offers custom branding, advanced reporting, and a theme builder.
Formstack integrates with Zapier, PayPal, and Google Analytics. Although there’s no free plan, you can try one of their five paid plans for 14 days at no cost.
9. Paperform

Paperform has numerous mobile-friendly form templates, including real estate lead forms, customer feedback forms, and subscription forms. It’s one of the best online form builders to use when you want to incorporate your brand imagery. Smart form functionality includes conditional logic and calculation fields. Paperform also integrates with more than 1,000 third-party apps and offers three pricing plans.
10. Google Forms

Google Forms gives you an intuitive, real-time form builder with many question types, including short text, checkboxes, and dropdown menus. You can make all types of forms for various purposes, including forms for feedback, subscription signup, and event registration.
One of the best features is the data validation capability to visualize the information you collect. Responses can be connected to a Google Sheet. Google Forms is free and included in G Suite plans.
Conclusion
Many companies offer a wide assortment of form templates that serve all types of industries, businesses, and forms needs. Do your research, and you’ll be sure to find the one that works for you.
The post Top 10 online form builders of 2022 appeared first on noupe.
Most Popular Java Tools For Every Phase Of Development
In terms of development, best does not always mean popular; choosing the best depends on the context. We consider popularity as a credible tool to judge the performance or applicability of a tool, and that is because many people are using it for their work.
There are a few Java tools that web developers can utilize in different phases of programming/development to help them execute their Java code more successfully. Java is a popular programming language that has been existent for a long time.
Due to this, the wide range of tools available to work with Java is no surprise. But having these many tools makes it difficult to choose the one for your project.
This guide will list the best Java tools for development in every phase.
A Short Overview of all Development Stages
Developing an application or software is a process, and as every process is completed in stages, this one also follows a set procedure. Every stage in the development lifecycle is connected, where the completion of one stage sets the foundation for the next one.
Here are the six main development stages.
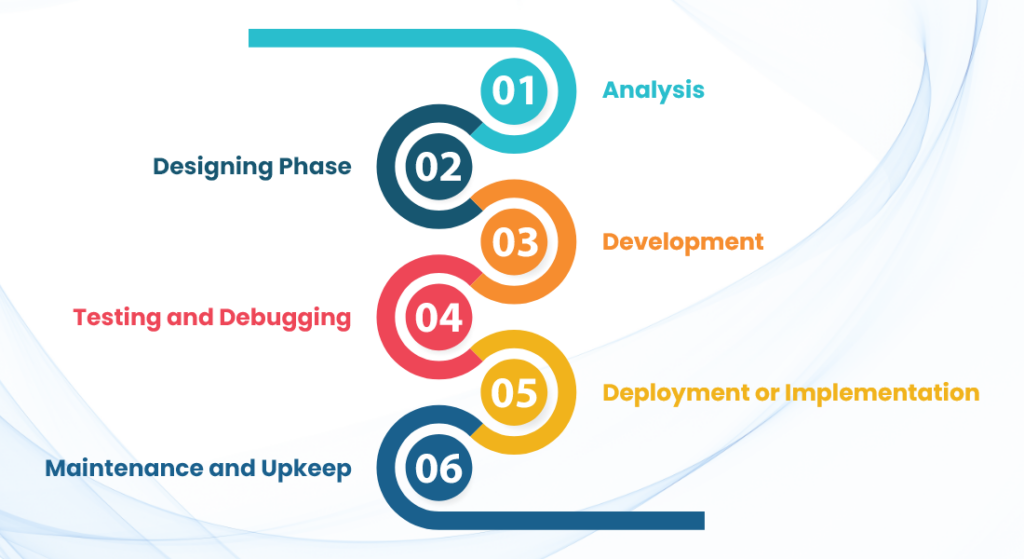
- Analysis: Every development project begins with understanding the requirements and then analyzing them to ascertain the project’s fitness. The purpose is to understand the requirements and know whether the development team can execute them.
- Designing Phase: The second stage in Java development services caters to designing the application or software. Here the designing team will build sketches, mockups, high-fidelity prototypes, and clickable prototypes. The purpose is to help visualize how the solution will look post-development.
- Development: The developers here get to work by using different Java tools to develop and produce the software or application code. Not only here, but the java development tools are available for all the stages.
- Testing and Debugging: This is where dedicated testing and quality assurance professionals conduct different types of testing on the code. The purpose is to ensure that the code is performing well; it is readable, scalable, and clean.
- Deployment or Implementation: Here, the developed and tested code is deployed in the form of the final product on the intended platform. Special tools are used by the developers to deploy the solution.
- Maintenance and Upkeep: The development lifecycle does not end because, after deployment, we also need to maintain and update the solution fulfilling new demands from the customers and solving their issues.
To complete these stages, you need to outsource the work to a Java development company or hire Java developers for in-house development. In any case, the professionals will need to work with some Java tools that will support them in development, testing, and maintenance tasks.
Best Java Tools for Development
What follows is an account of different tasks and components of development and the tools you can use for each of these tasks.
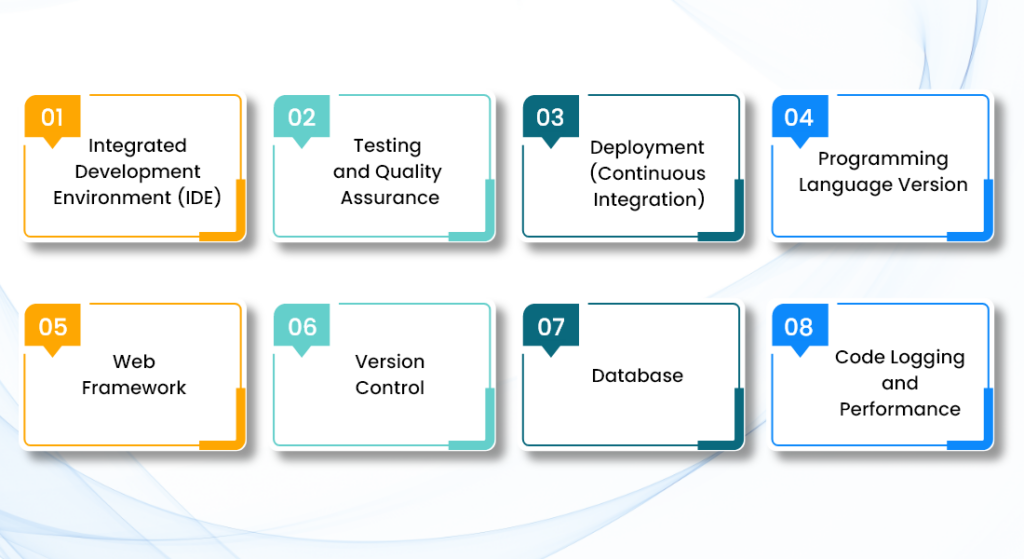
- Integrated Development Environment (IDE)
An IDE is a comprehensive platform offering developers different development facilities under a single platform. Every IDE has a source code editor, build automation tools, and a code debugger.
To execute Java development services with grace and authenticity, the best IDE is Eclipse. However, IntelliJ IDEA is always in Eclipse’s hindsight giving it a cutthroat competition, but the latter has remained ahead.
Both Eclipse and IntelliJ IDEA are open source IDE, which means they are free to use and come with plugins and inbuilt features jam-packed to help you create the best possible solution.
Specifically, Eclipse has refactoring and syntax checking assistance features with code completion functionality. IntelliJ IDEA also comes with a smart code completion function along with a framework-oriented assistance package to further improve the developer’s coding experience.
- Testing and Quality Assurance
Testing the code of the application or software you have produced is crucial to achieving success. Testing helps clean the code and ensure that every function and feature is working as intended. Here are the top testing tools used in Java development services.
JUnit is basically a framework that helps write the routines for repeatable tests to be executed on the code. Among the top JavaScript frameworks, JUnit is considered the best as it is easy to use and can help test one block of code efficiently.
- Deployment (Continuous Integration)
Deployment involves the process of configuring the software or application on the right platform. Continuous Integration (CI) is a part of the deployment, and there are specified tools required for this function.
One of the top Java tools for development used here is Bamboo, which is built by Atlassian and used to build, test, and deploy the application code. It helps run parallel tests and lets you work with docker agents.
- Programming Language Version
Even though we know that the programming language here is Java, you must also have the right version to ensure effective development. At present, Java 17 of JDK 17.
Working with the latest Java version does not require understanding every aspect specifically. Rather it is more about building a strong foundational base for you to work upon.
- Web Framework
Java-based web frameworks have prewritten code scripts embedded into the program. These frameworks have become one of the most used Java tools for development. Developers use these frameworks that have templates we can use to build applications and customize it to produce the intended outcome.
In Java, AngularJS and Spring MVC are the two best web frameworks giving the developers supreme control over the development environment. AngularJS is well suited for web applications development, and it is an extensible platform and is compatible with other libraries.
- Version Control
Version Control in Java development services involves tracking and managing the changes to the code. Changing the code from time to time is a regular activity for a developer, and a version control system is highly beneficial as it makes the work easier and quicker.
In this category, the best system is Git. Git has the upper hand to GitHub due to its inherent capabilities and collaboration capabilities with other developers working on the project.
- Database
Choosing the right database is highly context-dependent. A database helps in storing and retrieving information stored on the server. Among the most essential Java tools for development, having the right database is imperative.
Oracle DB and MySQL hold the top spots in Java-based development exercises because they have great features built for enterprise-level application development. MySQL is sometimes preferred because of its open-source and the availability of a large community that can assist a developer.
- Code Logging and Performance
Creating a code log is essential to establish an authentic record of all the activities happening in the development process. On the other hand, code performance is essential to ensure that the code renders and compiles to show its intended functionality.
For these purposes, developers use Retrace, one of the best debugging and performance-checking tools that integrate seamlessly with the development processes. It also helps log, combine errors, and record metrics of the code.
Conclusion
With so many vendors and open source contributors in the Java ecosystem, it’s difficult to compile a dedicated list of Java programming tools and technologies. However, we have attempted to create a list of ideal Java tools for development that you can use without hesitation.
Due to their popularity and accessibility, these tools have presented great potential in streamlining the development process and ensuring an efficient turnout. Whilst you hire Java developers, make sure to understand their expertise and experience in using the tools listed above. They will help you make a better choice.
The post Most Popular Java Tools For Every Phase Of Development appeared first on noupe.


