Archive

Archive for February, 2022

Your CSS reset needs text-size-adjust (probably)

February 12th, 2022 No comments

Kilian Valkhof:

[…] Mobile Safari increases the default font-size when you switch a website from portrait to landscape. On phones that is, it doesn’t do it on iPad. Safari has been doing this for a long time, as a way to improve readability on non-mobile optimized websites. While undoubtedly useful in a time when literally no website was optimized for mobile, it’s significantly less helpful nowadays. […] Text size increasing randomly in a single situation is exactly the type of thing you want to guard for with a CSS reset.

This is very literally what text-size-adjust does. MDN:

When an element containing text uses 100% of the screen’s width, the algorithm increases its text size, but without modifying the layout. The text-size-adjust property allows web authors to disable or modify this behavior, as web pages designed with small screens in mind do not need it.

You can see Apple’s own docs showing off this is exactly what they do (on iPhones). There is an ancient bug where this would prevent zooming, but probably not a huge concern anymore.

Kilian’s recommendation:

html {
  -moz-text-size-adjust: none;
  -webkit-text-size-adjust: none;
  text-size-adjust: none;
}

Firefox doesn’t even support it, so I’d maybe lose that vendor prefix, but otherwise I’d say I’m on board. I’d like to think I can handle my own text sizing.

Reminds me of how Mobile Safari does that zooming thing with text inputs under 16px, so watch out for that too.

To Shared LinkPermalink on CSS-Tricks


Your CSS reset needs text-size-adjust (probably) originally published on CSS-Tricks. You should get the newsletter and become a supporter.

Categories: Designing, Others Tags:

Multi-Value CSS Properties With Optional Custom Property Values

February 11th, 2022 No comments

Imagine you have an element with a multi-value CSS property, such as transform: optional custom property values:

.el {
  transform: translate(100px) scale(1.5) skew(5deg);
}

Now imagine you don’t always want all the transform values to be applied, so some are optional. You might think of CSS optional custom property values:

.el {
  /*         |-- default ---| |-- optional --| */
  transform: translate(100px) var(--transform);
}

But surprisingly using optional custom property values like this does not work as intended. If the --transform variable is not defined the whole property will not be applied. I’ve got a little “trick” to fix this and it looks like this:

.el {
  transform: translate(100px) var(--transform, );
}

Notice the difference? There is a fallback defined in there that is set to an empty value: (, )

That’s the trick, and it’s very useful! Here’s what the specification has to say:

In an exception to the usual comma elision rules, which require commas to be omitted when they’re not separating values, a bare comma, with nothing following it, must be treated as valid in var(), indicating an empty fallback value.

This is somewhat spiritually related to the The CSS Custom Property Toggle Trick that takes advantage of a custom property having the value of an empty space.

Demo

Like I said, this is useful and works for any multi-value CSS property. The following demo shows it using text-shadow, background, and filter in addition to the transform example we just discussed.

See the Pen
CSS var – Fallback To Nothing
by Yair Even Or (@vsync)
on CodePen.

Some properties that accept multiple values, like text-shadow, require special treatment because they only work with a comma delimiter. In those cases, when the CSS custom property is defined, you (as the code author) know it is only to be used in a situation where a value is already defined where the custom property is used. Then a comma should be inserted directly in the custom property before the first value, like this:

--text-shadow: ,0 0 5px black;

This, of course, inhibits the ability to use this variable in places where it’s the only value of some property. That can be solved, though, by creating “layers” of variables for abstraction purposes, i.e. the custom property is pointing to lower level custom properties.

Beware of Sass compiler

While exploring this trick, uncovered a bug in the Sass compiler that strips away the empty value (,) fallback, which goes against the spec. I’ve reported the bug and hope it will be fixed up soon.

As a temporary workaround, a fallback that causes no rendering can be used, such as:

transform: translate(100px) var(--transform, scale(1));

Multi-Value CSS Properties With Optional Custom Property Values originally published on CSS-Tricks. You should get the newsletter and become a supporter.

Categories: Designing, Others Tags:

Developers Speculating About the Long-Distant Future: 2022

February 10th, 2022 No comments

This is a wonderful roundup from Jeremy, who I picture circling January 1, 2022, in red marker on a giant paper calendar back in 2008 and patiently counting the days.

See, there was a little smattering of internet drama back in 2008 (weird, right?) where Hixie kind of “officially speculated” that HTML5 would take 19 years to make it to full “recommended” status (2003-2022). Seems like most web developers at the time were quite certain HTML, and perhaps the internet as we know it, would be essentially obsolete by 2022. They were not right.

To Shared LinkPermalink on CSS-Tricks


Developers Speculating About the Long-Distant Future: 2022 originally published on CSS-Tricks. You should get the newsletter and become a supporter.

Categories: Designing, Others Tags:

A Chrome Extension for Cloudinary That Helps You Pluck Out Useful Media URLs From Your Library Quickly

February 10th, 2022 No comments

(This is a sponsored post.)

Cloudinary is a host for your digital assets like images and video. If you don’t already know them, you should, because you can build it into the asset management you almost certainly need to do if you run any size of website. Cloudinary helps you serve the assets as efficiently as technologically possible, meaning optimization, resizing, CDN hosting, and goes further in allowing interesting transforms on those assets.

If you already use it, unless you use it entirely through the APIs, you’ll know Cloudinary has a Media Library that gives you a UI dashboard for everything you’ve ever uploaded to Cloudinary. This is where you find your assets and open them up to play with the settings and transformations and such (e.g. blur it — then serve in the best possible format with automatic quality adjustments). You can always pop over to cloudinary.com to use this. But wouldn’t it be nice if this process was made a bit easier?

That clutch moment where you get the URL of the image you need.

There are all sorts of moments while bopping the web around doing our jobs as developers where you might need to get your fingers on an asset URL.

Gimme that URL!

Here’s a personal example: we have a little custom CMS thing for building our weekly email The CodePen Spark. It expects a URL to an image.

This is the exact kind of moment that the brand new Chrome Media Library Extension could help. Essentially it gives you a context menu you can use right in the browser to snag a URL to an asset. Right click, Insert and Asset URL.

It pops up a UI right inline (where you are on the web) of your Media Library, and you pick an image from there. Find the one you want, open it up, and you can either “edit” it to customize it to your liking, or just Insert it straight away.

Then it plops the URL right onto the site (probably an input) where you need it.

You can set up defaults to your liking, but I really like how the defaults are f_auto and q_auto which are Cloudinary classics that you’ll almost surely want. They mean “serve in the best possible format” and “optimize it intelligently”.

Sharon Yelenik introduced it on the Cloudinary blog:

Say your team creates social posts on a browser tab on an automated marketing application. To locate a media asset, you must open another tab to search for the asset within the Media Library, copy the related URL, and paste it into the app. In some cases, you even have to download an asset and then upload it into the app.

Talk about a classic example of menial, mundane, and repetitive chores!

Exactly. I like the idea of having tools to optimize workflows that should be easy. I’d also call Cloudinary a bit of a technical/developer tool, and there is an aspect to this that could be set up on anyone’s machine that would allow them to pick assets from your Media Library easily, without any access control worries.

If all this appeals to you:

Or see more at Cloudinary Labsdocumentation, and blog post.


A Chrome Extension for Cloudinary That Helps You Pluck Out Useful Media URLs From Your Library Quickly originally published on CSS-Tricks. You should get the newsletter and become a supporter.

Categories: Designing, Others Tags:

16 Best Typeface Micro-Sites

February 10th, 2022 No comments

Are you looking for a unique font that will make your next project shine? Or maybe you need a typeface with a beautiful design and rich history behind it. Luckily, mini-sites for fonts allow us to creatively explore a font’s origins and history. We know (from our own experience) how important it is for UI and UX designers to have a variety of fonts for our designs.

Now that 2022 is here, it’s time to expand our font collection. That’s why, after extensive research, we have created the ultimate list of the best 16 creative mini websites for fonts.

Are you ready to take a look at the most creative, cute, and fun font websites available on the market?

1. GT Eesti

This website is about the history of one of the most popular fonts on the market, GT Eesti. As you will notice, the typeface has a long history (more than 80 years) and was recently reborn in Switzerland.

As for the font, GT Eesti is a flexible geometric sans serif that can be used in almost any project. As one of the most creative websites for fonts, full of animations and interesting information, GT Eesti quickly made it onto our list.

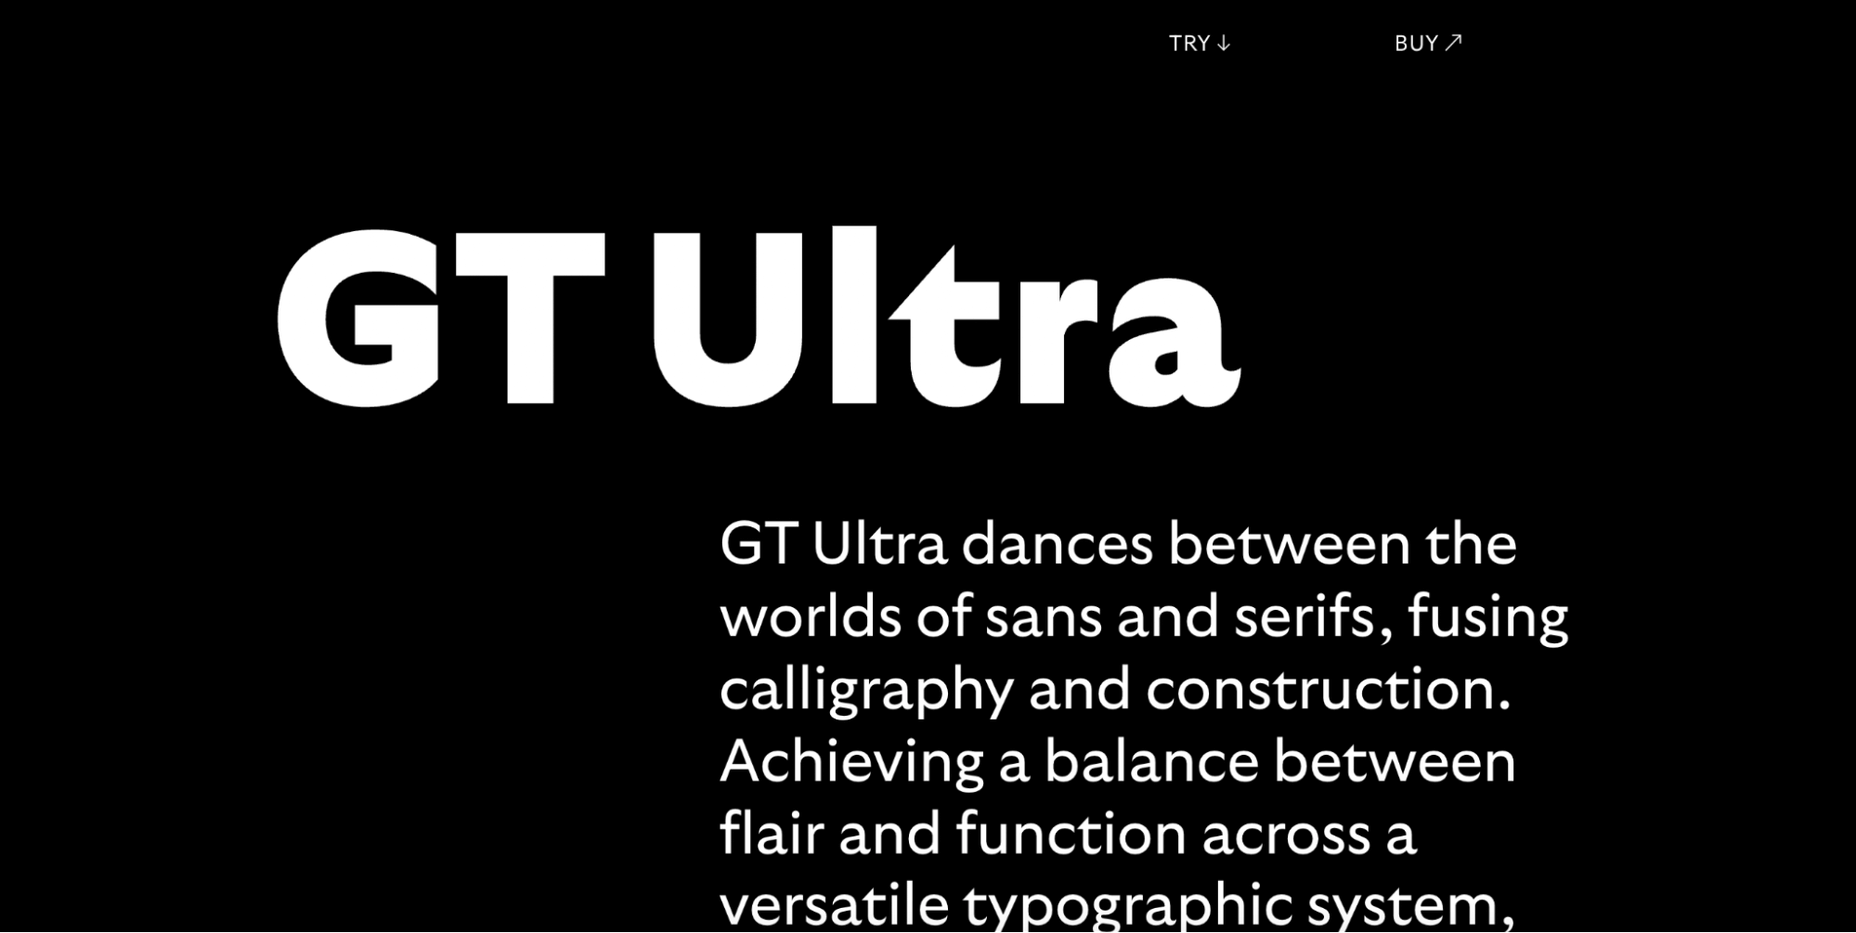
2. Ultra Font

Are you looking for a font that combines calligraphy and elegance and sits between the sans and serif styles? 

Then GT Ultra is just what you need. We loved how the creator tells the story and structure of Ultra with beautiful animations on this unique, one-page website.

3. Maru Typeface

Maru is by far the cutest design on this list. The website is a vertical narrative of the typeface’s history. 

The typeface was inspired by the designer’s travels to Japan, and the mini-site fully reflects that. Best of all, Maru also includes a great collection of cute emojis and stickers.

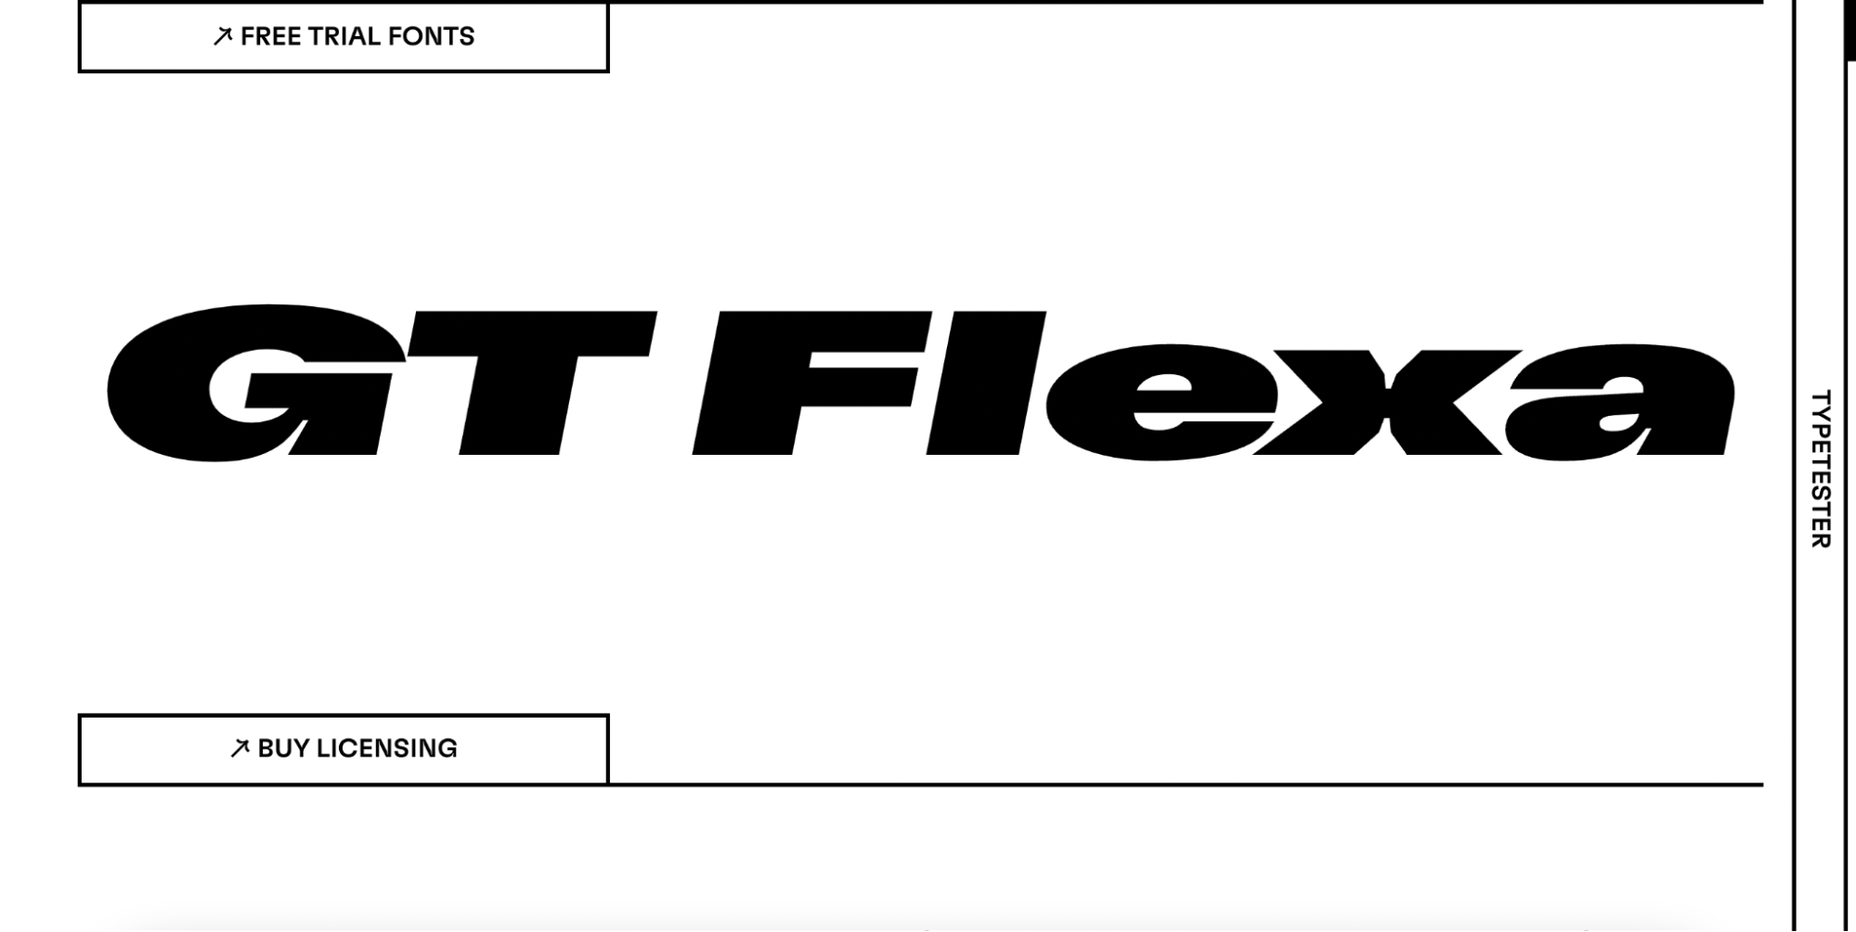
4. GT Flexa

GT Flexa is a very flexible font that you can easily use for a responsive UI design. We enjoyed navigating through the minimalist mini-site and exploring the creation and history of Flexa. 

Flexa also offers a free trial that allows you to try the font before you buy.

5. Super

Super’s mini-site reminded us of earlier decades. GT Super is a vintage typeface inspired by the serif fonts of the 70s and 80s. 

Therefore, it can beautifully frame nostalgic designs. The font was designed by Noel Leu and is available in two styles (text and display).

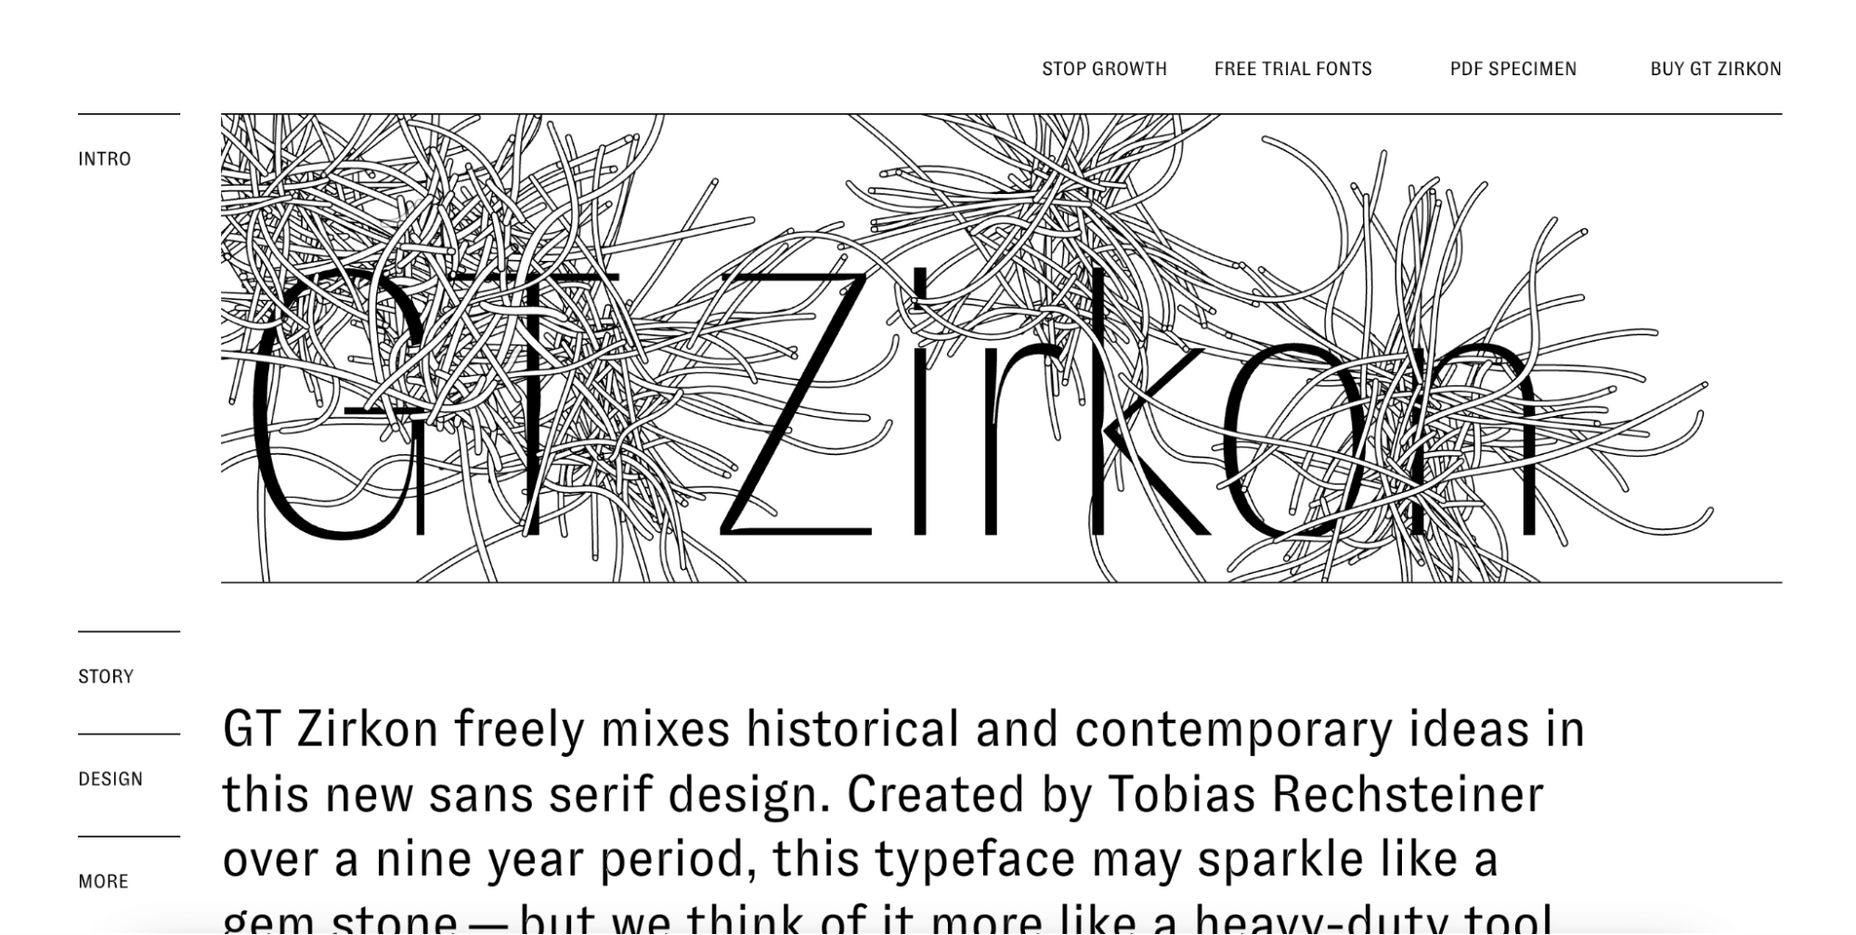
6. GT Zirkon

GT Zircon is located in a place where creativity meets minimalism. This is one of our favorite mini-sites for fonts. 

The site showcases Zirkon’s history and design process through creative graphics, videos, and animations.

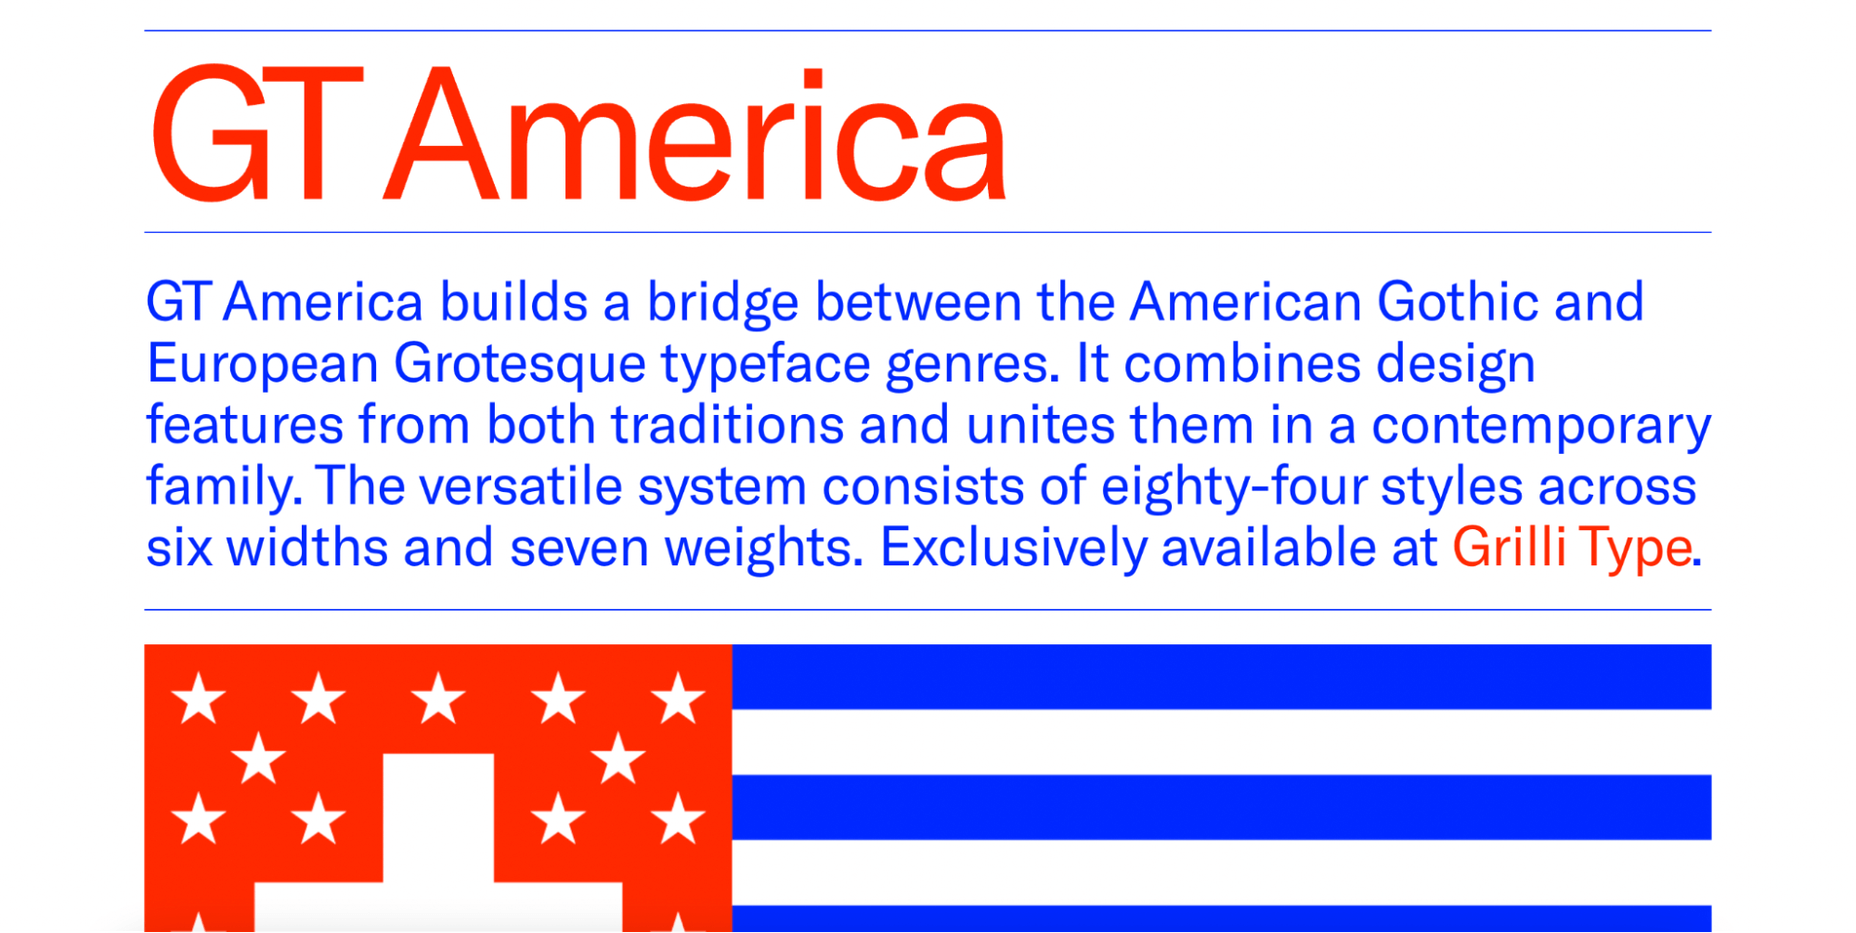
7. America Font 

This mini-site allows you to explore the history, style, and character overview of GT America, a contemporary font family. 

The designer has used elements from American Gothic and European Grotesque to create one of the most flexible typefaces available.

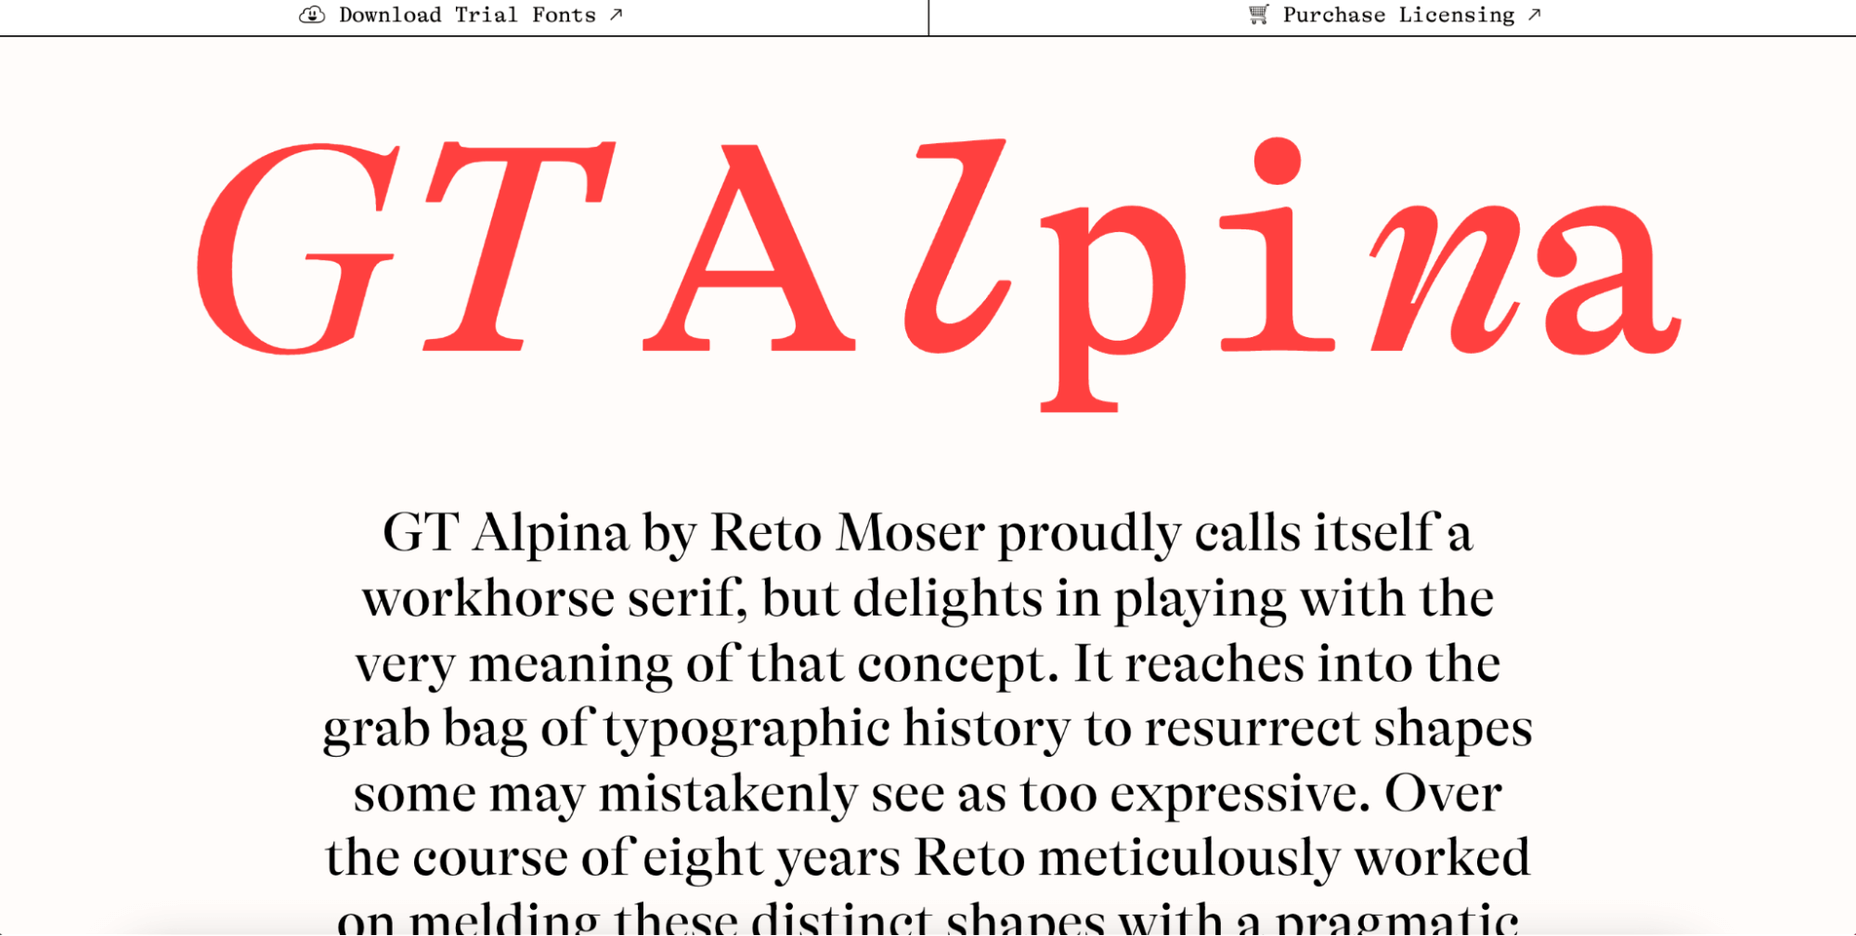
8. Alpina

Reto Moser recently designed one of the most popular GT typefaces, the Alpina “Workhorse” serif. 

This innovative, one-page website tells us the story of Alpina and explains how the designer jazzed up, posed, and flexed the classic book typography to create a wide range of typeface variations.

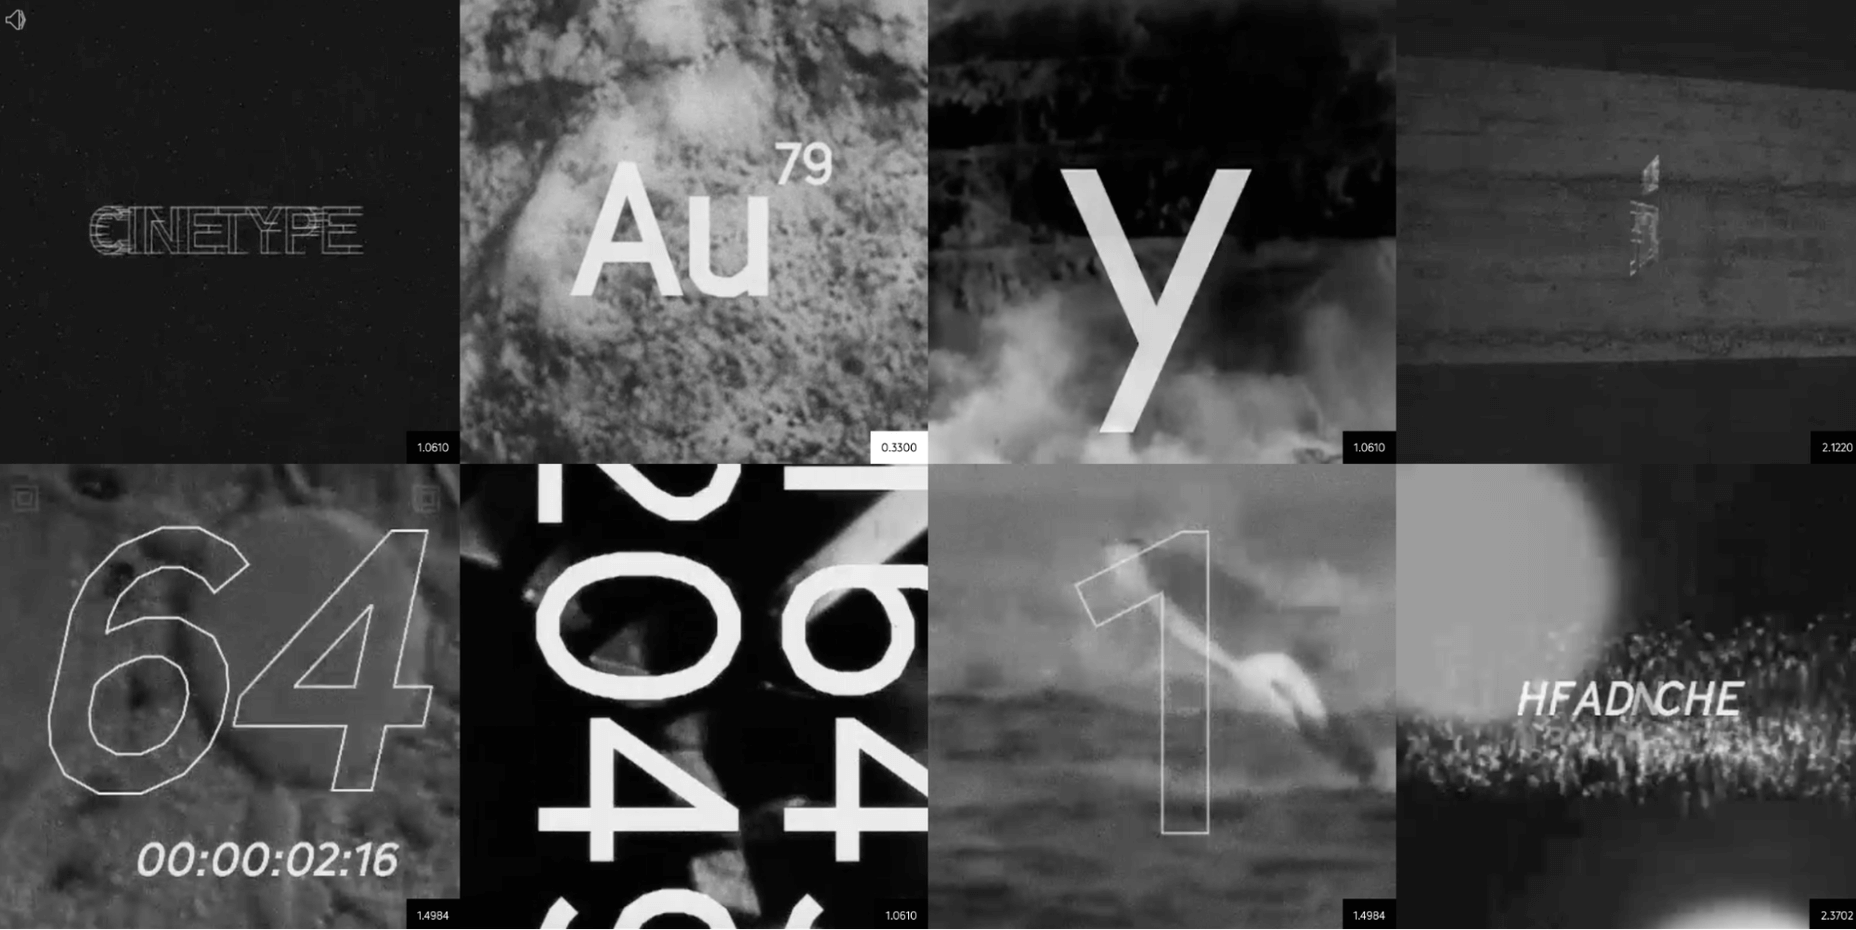
9. Cinetype

As the name suggests, this mini-site is inspired by classic cinematic movie reels. If you’re looking for a font inspired by the fascinating world of cinemas, Cinetype is simply the best choice. And on this creative website, you will learn all the reasons why.

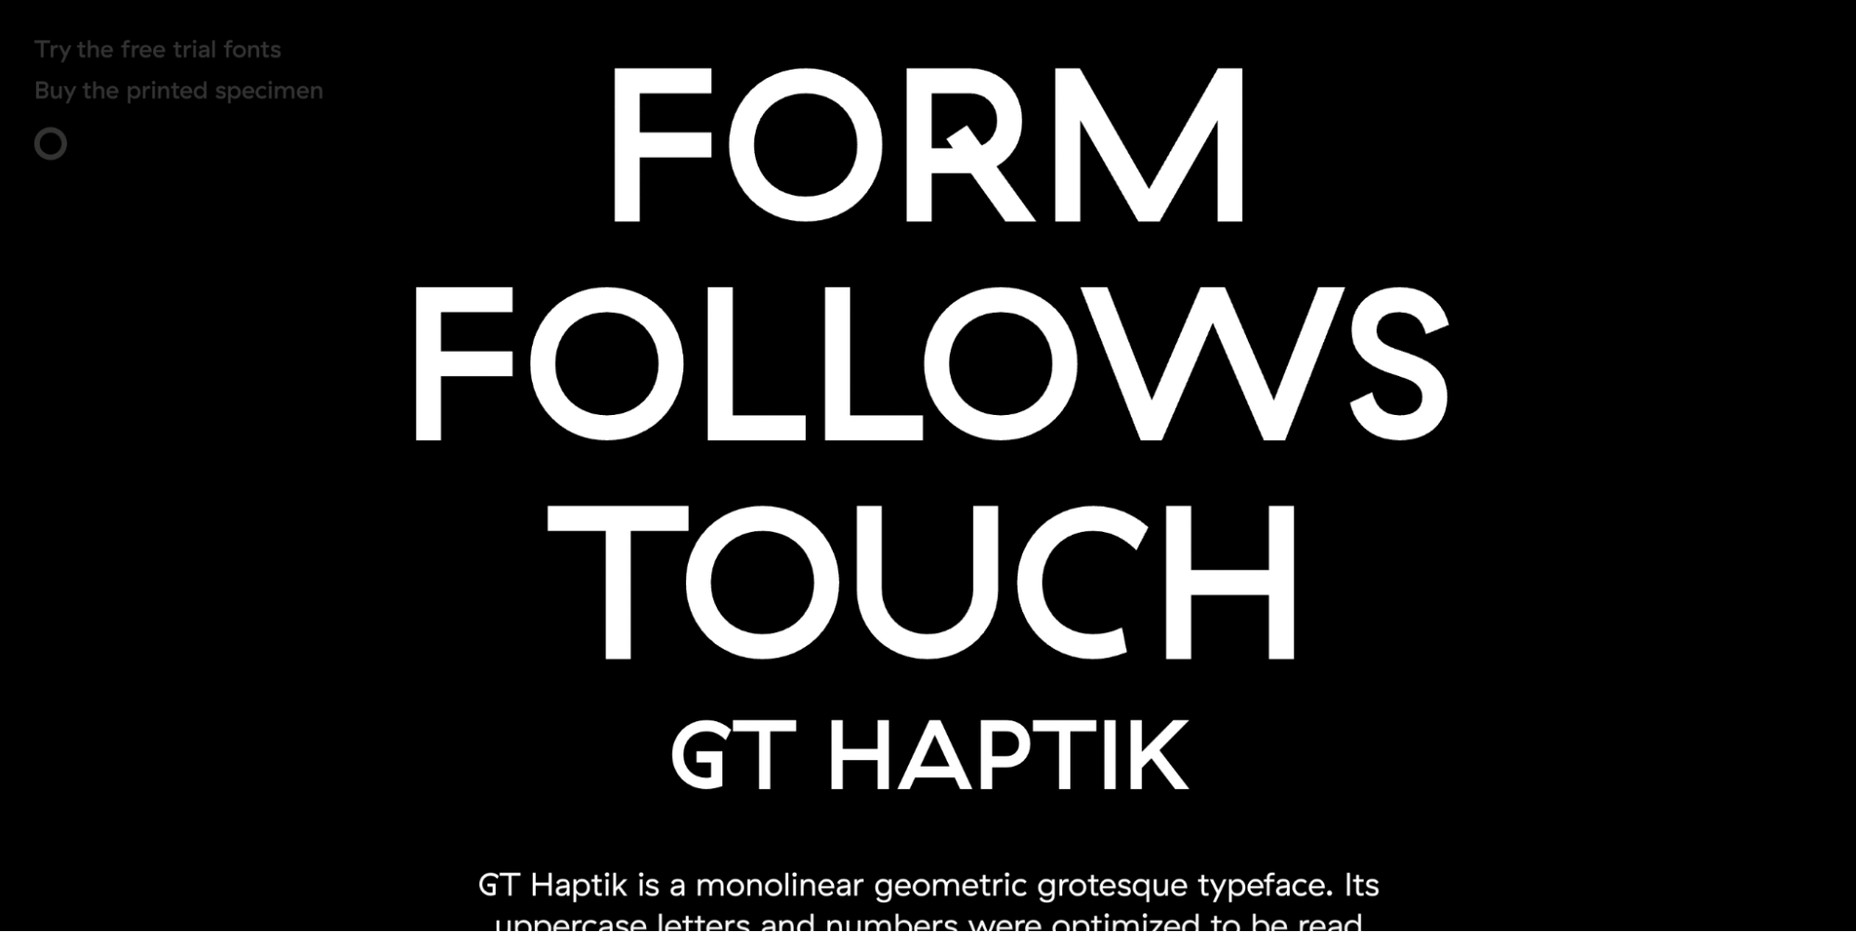
10. Haptik Typeface

When it comes to monolinear geometric typefaces, Haptik is one of the best. This innovative mini-website tells how the Haptik font came to be and highlights the history of the font. 

The hand gesture gifs at the bottom of this one-page site are some of the most creative mini-videos we have seen in a long time.

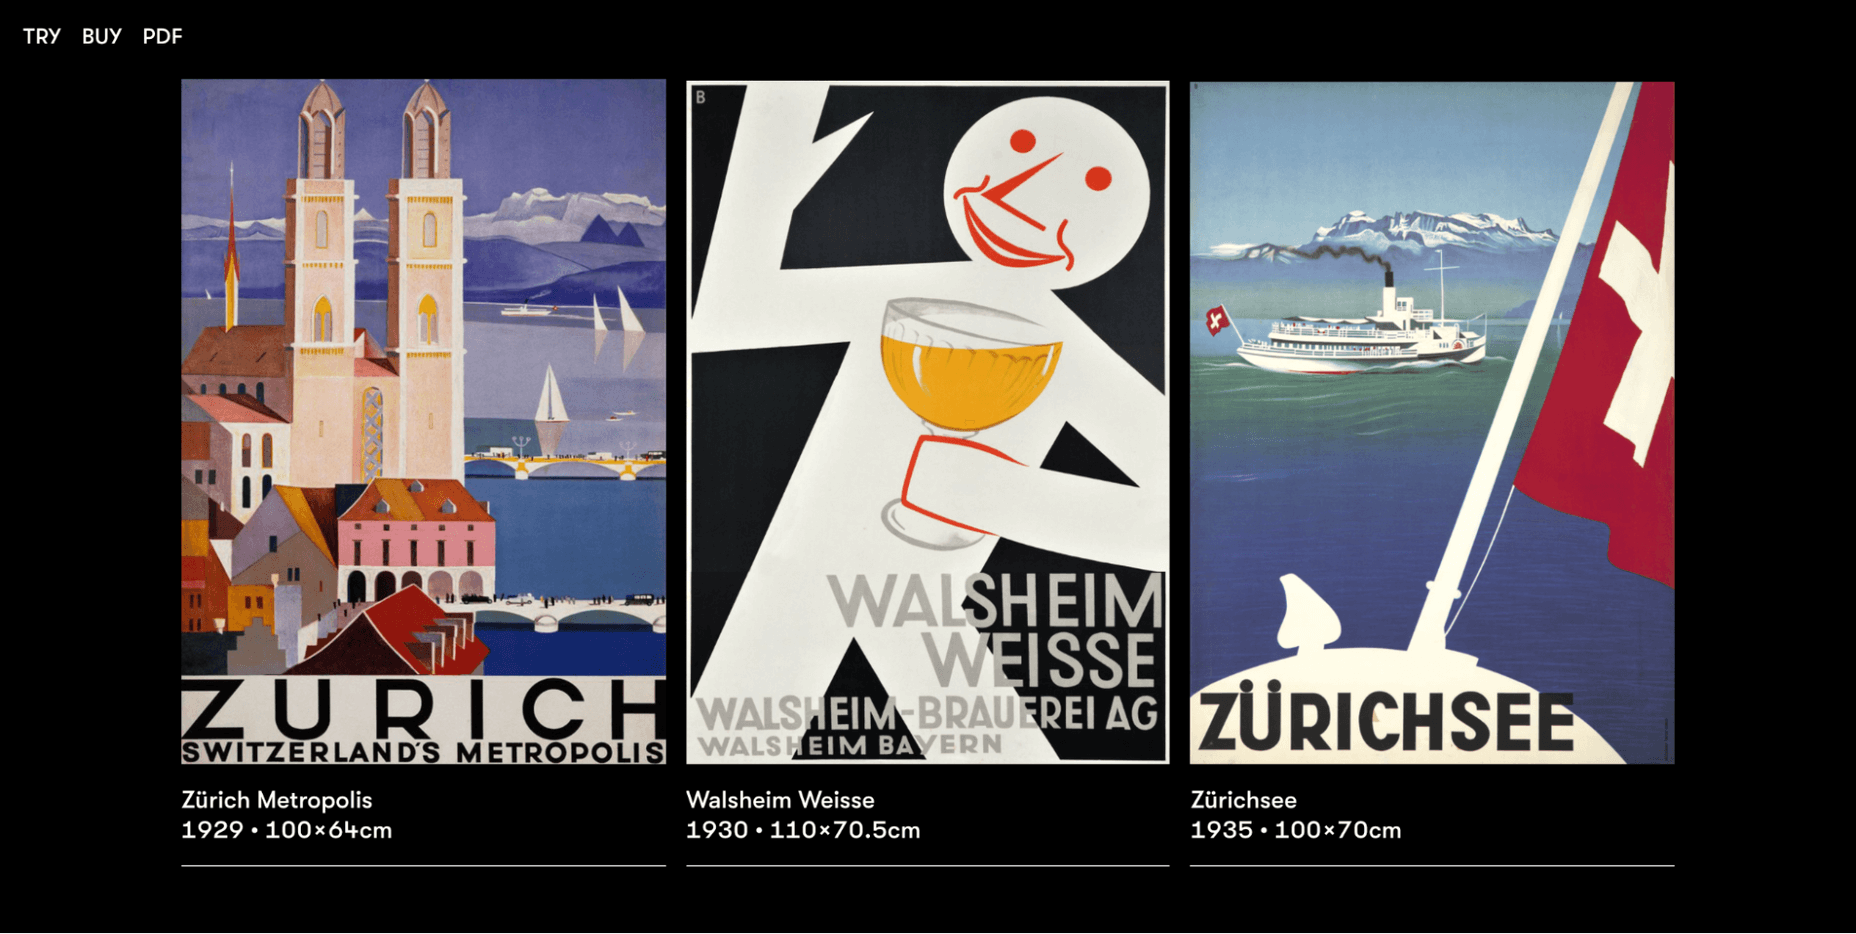
11. Walsheim

Walsheim is a typeface designed by Noel Leu. This mini-site explains how the designer was inspired by the fascinating poster designs of Otto Baumberger, a successful Swiss painter of the 20th century (1889-1961). If you like fonts with a deep backstory, Walsheim is a must-have for you.

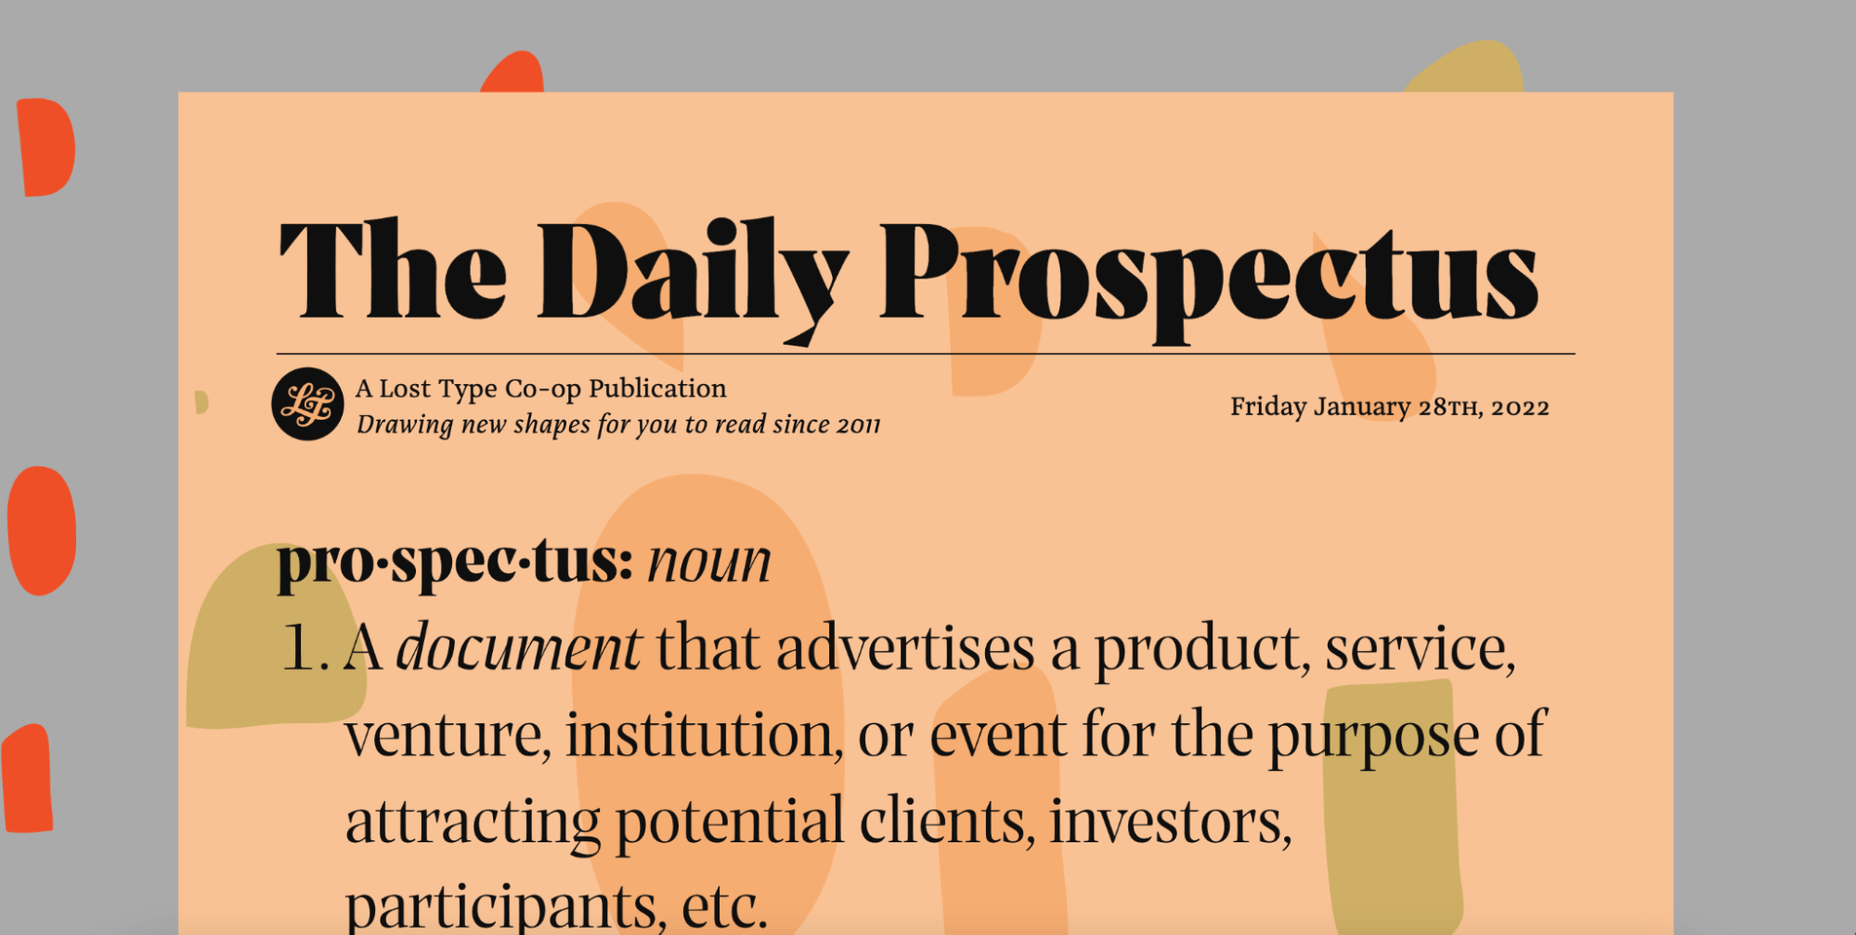
12. Prospectus

The Prospectus mini-site is specially designed to look like a newspaper. And let us say: the result is extraordinary. 

This one-page website explores the origins, construction phase, and classifieds of the Prospectus typeface, allowing us to experiment in real-time with the weight, height, tracking, and size of the typeface.

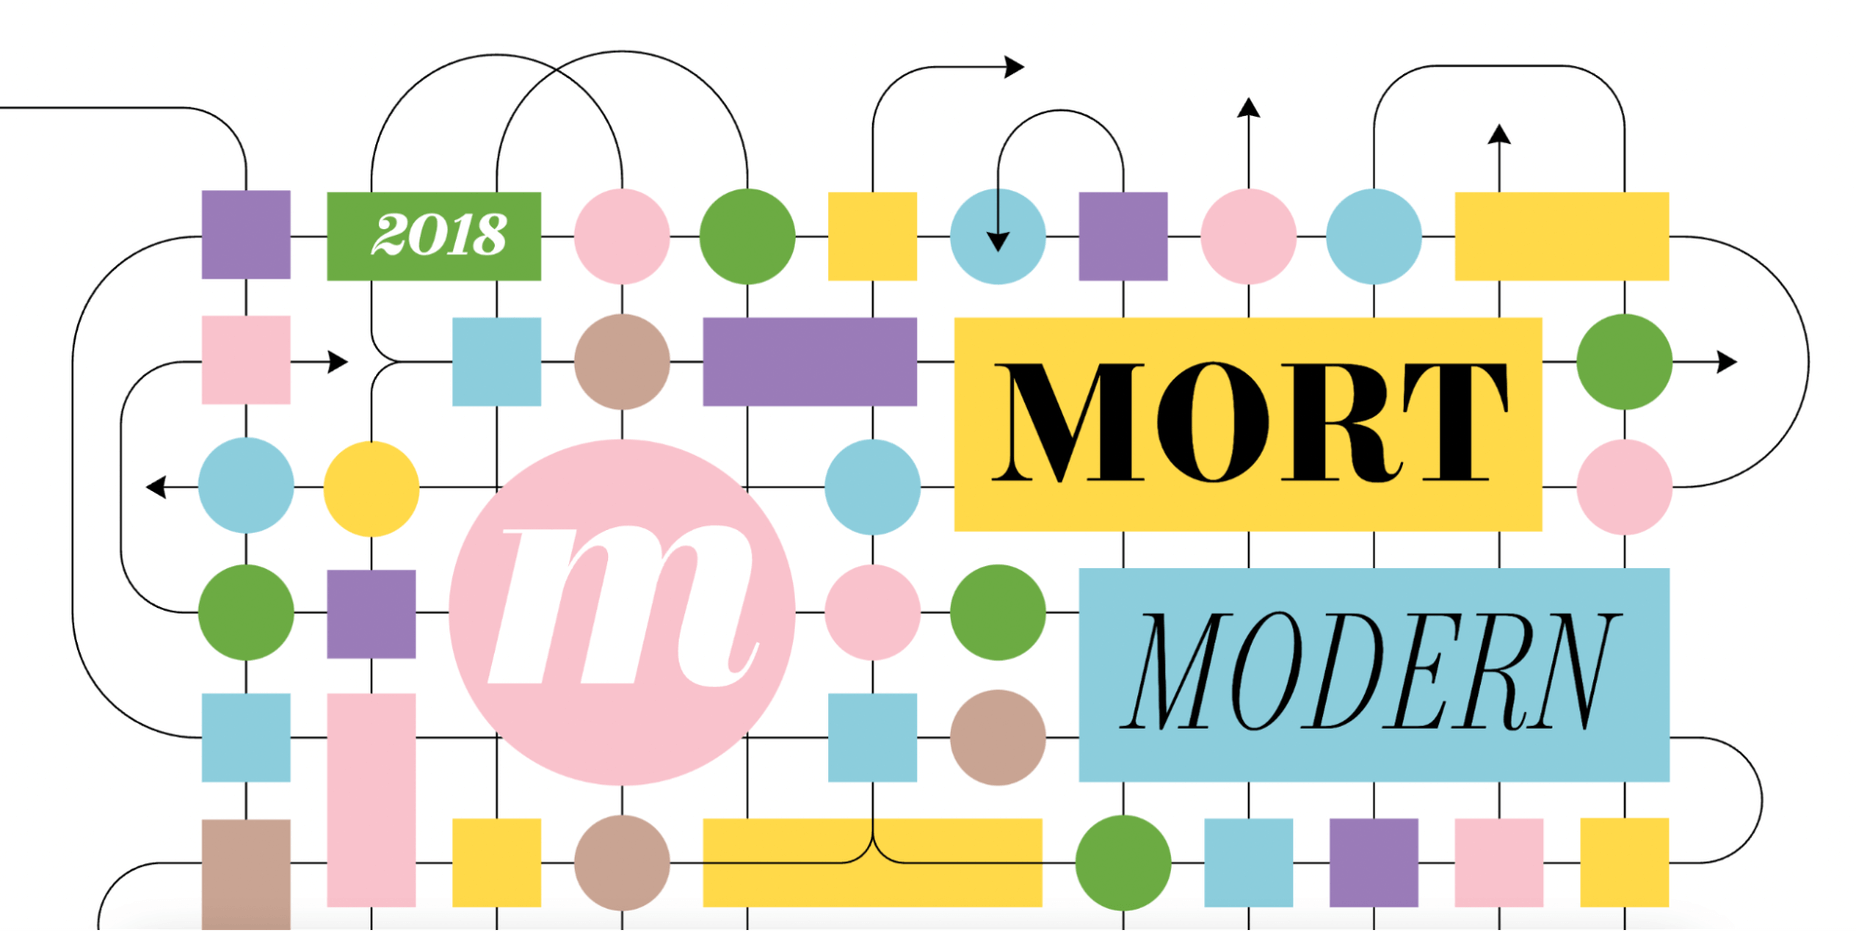
13. Mort Modern

Mort Modern is a unique serif typeface designed by Riley Cran in 2018. The mini-site provides information about the typeface in a creative, cartoon-like way. 

We really liked this responsive, one-page website because it is elegant and colorful at the same time. The font is available in 56 (!) styles and promises to beautifully frame any kind of modern design.

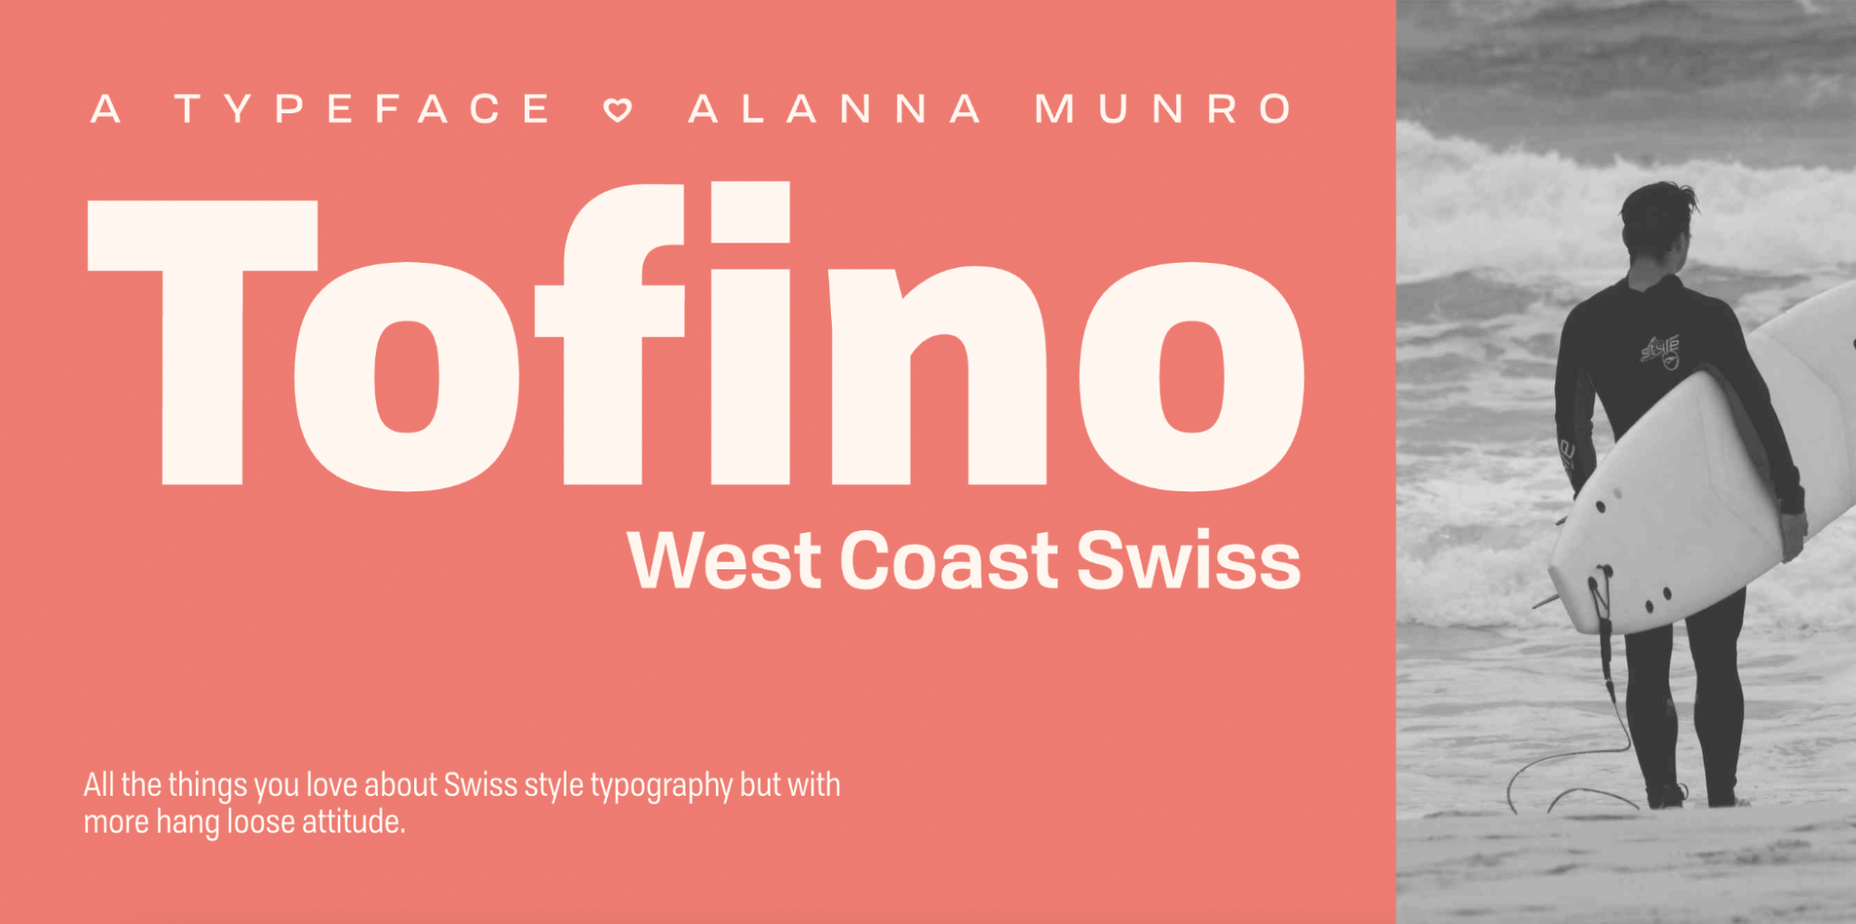
14. Tofino

The Tofino mini-site is a creative, one-page portal that allows us to discover one of the most adventurous Swiss-style fonts on the market. 

Tofino is a top choice for any travel-related project and comes in 75 unique styles. When it comes to creating a well-crafted report on a font, there’s nothing better than this.

15. Faction Typeface

We love websites that offer both a dark and light theme. And the Faction mini-site is one of them. 

In this mini-site, you’ll learn how the Faction typeface was created and why it’s one of the most popular display typefaces for modern designs.

16. Moriston

If you’re looking for a unique sans serif font with extended multilingual support, Moriston is the font for you. 

In this one-page mini-site, Riley Cran tells the story behind this typeface and explains why Moriston is the best choice for Risograph posters, monograms, and more. 

Source

The post 16 Best Typeface Micro-Sites first appeared on Webdesigner Depot.

Categories: Designing, Others Tags:

SVGcode for “Live Tracing” Raster Images

February 9th, 2022 No comments

Say you have a bitmap graphic — like a JPG, PNG, or GIF — and you wish it was vector, like SVG. What do you do? You could trace it yourself in some kind of design software. Or tools within design software can help.

(I don’t wanna delay the lede here, there is a free online tool for it now called SVGcode.)

I remember when Adobe Illustrator CS2 dropped in 2005 it had a feature called “Live Trace” and I totally made it my aesthetic. I used to make business cards for my folk band and they all had the look of a photograph-gone-vector. These days they apparently call it Image Trace.

SVGcode does exactly this, for free

Adobe software costs money though, so what other options are out there? I imagine they are out there, but now there is a wonderfully single-purpose web app called SVGcode for it by Thomas Steiner! He’s written about it in a couple of places:

I think it’s so cool both in what it does (super useful!) but also in the approach (so impressive what web apps can do these days!):

It uses the File System Access API, the Async Clipboard API, the File Handling API, and Window Controls Overlay customization. […]

Credit where credit is due: I didn’t invent this. With SVGcode, I just stand on the shoulders of a command line tool called Potrace by Peter Selinger that I have converted to Web Assembly, so it can be used in a Web app.

My just-out-of-college aesthetic is gonna live on people!

Showing the Image Trace effect previewed in SVGcode.

Thomas joined me and Dave over on ShopTalk episode #497 if you’re interested in hearing straight from Thomas about not just this, but the whole world of capable web apps. That episode was sort of designed as a follow-up to an article I wrote that asks: “Why would a business push a native app over a website?”


SVGcode for “Live Tracing” Raster Images originally published on CSS-Tricks. You should get the newsletter and become a supporter.

Categories: Designing, Others Tags:

For Digital Marketing Keep Focus on your Brand Logo – Make It Unique

February 9th, 2022 No comments

Digital marketing plays an extremely vital role in developing the reliability and trustworthiness of a brand.

You need to strategize your digital marketing plan for spreading brand awareness. 

One of the essential elements in developing a strong brand identity is the logo of your business. The logo is an ultimate face of a brand, and to get recognized by the targeted customers, you need to focus on the look and appeal of your logo. 

If anyone wants to create an impeccable and catchier logo of a brand, then they may use online tools like the logo maker. An online logo maker can help you in designing a perfect logo for your brand. Moreover, these tools provide some superb templates for building high-resolution logos that can enhance your brand identity.

Logo is Essential Part of Branding 

After laying down the foundation of a company, making a sturdy and precise brand logo for its presence must be your top priority. A brand logo always explains a brand thoroughly. A logo shows the audience a direct message about the personality of a brand. 

In general, the audience simply develops a strong vibe about the brand by just looking at the logo. The logo of a brand in the online market is so important in forming a reputation. So, making a brand worthwhile, make sure to make a unique logo for it. 

In digital marketing, multiple marketing campaigns are equally important to stand out as a top leading brand among others, but the unique brand logo always comes first in the list in giving a boost to the brand’s reliability in the online market. 

For digital marketing purposes, all of us need to recognize the power of conversion that a unique logo carries. If your brand has a great and unique logo according to the products and services you are offering, then you can grab your audience’s attention. 

All of the digital marketers believe that a perfect logo design expresses the brand’s identity suitably. Moreover, an alluring and striking logo is one of the necessities for all digital marketing campaigns. The perfect logo of a brand is one of the most vital and influential tools that influence the audience to get to know more about the brand’s specialty you are running. 

The right logo of your brand depicts the aspirations of the targeted audience. The logo also increases the trust of the audience in your brand. So the design of the logo must be attractive and good-looking because it states the direct message you want to deliver for building more confidence among the customers for the brand. 

The logo of a brand carries a strong responsibility, so it has to be relevant according to the services and goods that a brand is presenting. The perfect logo is a genuine asset and supports the real positive side of the business that is worthwhile for its audience. In simple terms, a perfect and unique logo enhances the value of the brand and sales too.

Digital Marketing is Important

For better digital marketing results, keep the focus on developing a distinct identity for your brand, and try to make it as unique and impeccable as it could be. 

The perfect logo of the brand improves the awareness and credibility among the customers. The term digital marketing is becoming more fruitful these days because it has opened up a bundle of great opportunities for its users. With the assistance of digital marketing and using all of its basic elements, the businesses outshine their competitors. 

In this modern-day, every business needs to become digitized to survive in the market. In recent times, a lot of business owners have observed that absolute digital marketing strategies can give a perfect high rise to their business sales and can build a brand’s conviction. 

By digital marketing techniques, a business or brand can grab the attention of the audience or customers. 

Tips to Make a Perfect Logo For Your Business

There are a couple of guidelines and tips you need to keep in mind while making a brand logo. Before making the logo, do your proper research about it. Go through the latest trends to get multiple ideas. Then pick out the one that expresses your business in the best way possible. Make sure to design a shape of the symbol that is unique and noticeable for the targeted audience. Use some graceful colors and gradients in giving the logo a perfect look. Moreover, while mentioning your brand name in the logo, you can use fancy and stylish texts to make the logo unique. In addition, you may put a slogan or a tagline in the logo that directly conveys the real message of your business. That slogan in the logo should be inspiring for the audience. A catchy tagline builds a strong vibe of the brand. So, it becomes memorable for the targeted audience.

Moreover, you may create a perfect logo for your business if you are just putting your major product’s shape in the logo. That looks more appealing and gives a strong vibe to the user to feel about your company. One more superb tip is the use of multi-language in the logo; it surely bestows the logo a unique sense of attraction. Even more, you are allowed to put symbols, additional marks, and shapes of objects in the logo to make them unique.

Take help of Online Tools!

If you want to create an enticing and stunning brand logo, you may take help using multiple online tools like the logo creator. Free online logo maker provides you with a great helping hand in making the best and most appealing logos of the brand. A perfect and tempting logo speaks the truth about your brand. 

Final Words

The usage of online logo creator bestows superb designs and shapes of ideas that you can use in creating the logo of a brand. 

Consequently, for digital marketing, you need to keep the focus on the logo of your business and make it unique as much as you can. Also, the elegant design and shape of the logo of a brand work as a trend-setter in the market and get a high appreciation by the audience.

The post For Digital Marketing Keep Focus on your Brand Logo – Make It Unique appeared first on noupe.

Categories: Others Tags:

How to Make CSS Slanted Containers

February 9th, 2022 No comments

I was updating my portfolio and wanted to use the forward slash (/) as a visual element for the site’s main layout. I hadn’t attempted to create a slanted container in CSS before, but it seemed like it would be easy at first glance. As I began digging into it more, however, there were actually a few very interesting challenges to get a working CSS slanted container that supports text and media.

Here’s what was going for and where I finally landed:

CodePen Embed Fallback

I started by looking around for examples of non-rectangular containers that allowed text to flow naturally inside of them. I assumed it’d be possible with CSS since programs like Adobe Illustrator and Microsoft Word have been doing it for years.

Step 1: Make a CSS slanted container with transforms

I found the CSS Shapes Module and that works very well for simple text content if we put the shape-outside property to use. It can even fully justify the text. But what it doesn’t do is allow content to scroll within the container. So, as the user scrolls down, the entire slanted container appears to move left, which isn’t the effect I wanted. Instead, I took a simpler approach by adding transform: skew() to the container.

.slant-container {
  transform: skew(14deg);
}

That was a good start! The container was definitely slanted and scrolling worked as expected while pure CSS handled the resizing for images. The obvious problem, however, is that the text and images became slanted as well, making the content more difficult to read and the images distorted.

Step 2: Reverse the font

I made a few attempts to solve the issues with slanted text and images with CSS but eventually came up with an even simpler solution: create a new font using FontForge to reverse the text’s slant.

FontForge is an open-source font editor. I’d chosen Roboto Condensed Light for the site’s main content, so I downloaded the .ttf file and opened it up in FontForge. From there, I selected all the glyphs and applied a skew of 14deg to compensate for the slanting caused by the CSS transform on the container. I saved the new font file as Roboto-Rev-Italic.ttf and called it from my stylesheet.

There we go. Now the font is slanted in the opposite direction by the same amount of the container’s slant, offsetting things so that the content appears like the normal Roboto font I was originally using.

Step 3: Refine images and videos

That worked great for the text! Selecting the text even functioned normally. From there, all I needed to do was reverse the slant for block-level image and video elements using a negative skew() value that offsets the value applied to the container:

img,
video {
  transform: skew(-14deg);
}

I did wind up wrapping images and videos in extra divs, though. That way, I could give them nice backgrounds that appear to square nicely with the container. What I did was hook into the ::after pseudo-element and position it with a background that extends beyond the slanted container’s left and right edges.

img::after,
video::after {
  content: '';
  display: block;
  background: rgba(0, 0, 0, 0.5);
  position: absolute;
  top: 0;
  left: 0;
  width: 200%;
  height: 100%;
}
It’s subtle, but notice that the top-right and bottom-left corners of the image are filled in by the background of its ::after pseudo-element, making things feel more balanced.

Final demo

Here’s that final demo again:

CodePen Embed Fallback

I’m using this effect right now on my personal website and love it so far. But have you done something similar with a different approach? Definitely let me know in the comments so we can compare notes!


How to Make CSS Slanted Containers originally published on CSS-Tricks. You should get the newsletter and become a supporter.

Categories: Designing, Others Tags:

No Motion Isn’t Always prefers-reduced-motion

February 8th, 2022 No comments
prefers-reduced-motion settings in MacOS.

There is a code snippet that I see all the time when the media query prefers-reduced-motion is talked about. Here it is:

@media (prefers-reduced-motion: reduce) {
  * {
    animation-duration: 0.01ms !important;
    animation-iteration-count: 1 !important;
    transition-duration: 0.01ms !important;
    scroll-behavior: auto !important;
  }
}

This is CSS that attempts to obliterate any motion on a website under the condition that the user has specified a preference for reduced motion in the accessibility preferences of their operating system.

Why prefers-reduced-motion matters

The reason this setting exists is that on-screen movement is an accessibility concern. Here’s Eric Bailey:

Vestibular disorders can cause your vestibular system to struggle to make sense of what is happening, resulting in loss of balance and vertigo, migraines, nausea, and hearing loss. Anyone who has spun around too quickly is familiar with a confused vestibular system.

Vestibular disorders can be caused by both genetic and environmental factors. It’s part of the larger spectrum of conditions that make up accessibility concerns and it affects more than 70 million people.

Here he is again in a follow-up article:

If you have a vestibular disorder or have certain kinds of migraine or seizure triggers, navigating the web can be a lot like walking through a minefield — you’re perpetually one click away from activating an unannounced animation. And that’s just for casual browsing.

Reduced motion vs. nuked motion

Knowing this, the temptation might be high to go nuclear on the motion and wipe it out entirely when a user has specified a reduced motion preference. The trouble with that is — to quote Eric again — “animation isn’t unnecessary.” Some of it might be, but animation can also help accessibility. For example, a “transitional interface” (e.g. a list that animates an opening for a new item to slide into it) can be very helpful:

Animation can be a great tool to help combat some forms of cognitive disability by using it to break down complicated concepts, or communicate the relationship between seemingly disparate objects. Val Head’s article on A List Apart highlights some other very well-researched benefits, including helping to increase problem-solving ability, recall, and skill acquisition, as well as reducing cognitive load and your susceptibility to change blindness.

In this case, you would lose the helpful contextual movement if you just nuked it all. You just might want to take a different approach when in a prefers-reduced-motion scenario. Perhaps less, slower, or removed motion while leaning harder on color and fading transitions.

Ban Nadel recently wrote “Applying Multiple Animation @keyframes To Support Prefers-Reduced-Motion In CSS” and covered a similar example. A modal entrance animation uses both a fade-in and scale-in effect by default. Then, in a prefers-reduced-motion scenario, it uses the fade-in but not the scaling. The scaling causes movement in a way the fading doesn’t.

/* 
  By default, we'll use the REDUCED MOTION version of the animation.
*/
@keyframes modal-enter {
  from {
    opacity: 0 ;
  }
  to {
    opacity: 1 ;
  }
}

/*
  Then, if the user has NO PREFERENCE for motion, we can OVERRIDE the
  animation definition to include both the motion and non-motion properties.
*/
@media ( prefers-reduced-motion: no-preference ) {
  @keyframes modal-enter {
    from {
      opacity: 0 ;
      transform: scale(0.7) ;
    }
    to {
      opacity: 1 ;
      transform: scale(1.0) ;
    }
  }
}

See the GIF demo on Ben’s site if you’d like to see a quick comparison.

I like how this style of approach is think about the problem and come up with a reduced motion solution, rather than screw it all, no movement period!!

But not all motion is driven by CSS

While we’re on the topic of that screw-all-motion CSS snippet, note that it’s only effective at doing what it sets out to do on sites where all the movement is entirely CSS-driven. If you’re using JavaScript-powered animations beware that this nuclear snippet might… well here’s Josh Comeau:

If your animations are entirely driven by CSS, this works great… But I’ve had weird issues when running animations in JS. Specifically, I’ve seen this reset have the opposite effect, and make animations super fast and dizzying.

That’s right: It might do quite literally the opposite of what you are trying to do.


No Motion Isn’t Always prefers-reduced-motion originally published on CSS-Tricks. You should get the newsletter and become a supporter.

Categories: Designing, Others Tags:

WordPress Website Analysis: Before & After ImageEngine

February 8th, 2022 No comments


WordPress is by far the world’s most popular CMS. Not only does it dominate the CMS market with a 64% market share, but it also powers 39.6% of all websites. It has taken the internet by storm by democratizing the web for all. Now, anyone can build, manage, and host a successful website without needing a college degree or coding expertise.

However, while WordPress is great at managing many technical aspects, it still can’t do everything for you. Built mostly on PHP, there are often concerns regarding how performant WordPress is. And, with performance impacting everything from bounce rates to SEO rankings to conversions, it’s something that should be on your radar too.

If you don’t know it yet, images are one of the main causes of slow-loading websites. In recent years, WordPress has stepped up its efforts to try and help users with image optimization out-of-the-box.

Still, as we’ll show, it’s not a total solution, and there is still plenty you can do to deliver better experiences on your WordPress website through image optimization.

What is WordPress Image Optimization? Why is it Important?

Simply put, image optimization is anything you do to make images load faster on your website pages. Almost all websites that use images can benefit from some form of image optimization, even those using WordPress.

Why?

Well, performance is a hugely significant factor when it comes to the competitiveness of your website today.

Google has also made performance an increasingly important factor when it comes to SEO rankings. In fact, performance is a direct ranking signal that carries significant weight.

Google’s Page Experience Update that went live in 2021 has been the biggest move in that direction yet. Soon, Google might even use visual indicators in SERP results to distinguish high-performing websites from the rest.

In Google’s own words, “These signals measure how users perceive the experience of interacting with a web page and contribute to our ongoing work to ensure people get the most helpful and enjoyable experiences from the web.”

So, Why Should We Target Images For Performance Optimization?

According to Google, images are the largest contributor to page weight. Google has also singled out image optimization specifically as the factor with the most untapped potential for performance optimization.

This problem isn’t going away soon. According to data by the HTTP Archive, there are roughly 967.5 KB bytes of image data on desktop web pages and 866.3 KB of image data on mobile pages. This is an increase of 16.1% and 38.8%, respectively, over the last five years.

Thanks to popular e-commerce tools like Woocommerce, it’s estimated that up to 28% of all online sales happen on WordPress websites.

And don’t forget, images are both a key part of conveying information to the user and integral to the design of your website. If they take significantly longer to load than your text, for example, it will negatively impact the user experience in a variety of ways.

In summary, optimized images help your WordPress website by:

  • Improving user satisfaction.
  • Improving various traffic metrics, like bounce rates, time-on-page, etc.
  • Boosting your SEO rankings.
  • Contributing to higher conversions (and sales).

How Does Image Optimization in WordPress Work?

WordPress is so popular because it’s a CMS (content management system) that allows anyone to build, design, and manage a website without any coding or advanced technical experience. Advanced features can be installed with just a few clicks, thanks to plugins, and you rarely have to touch the code behind your website unless you want to make some unique modifications.

In short, using a CMS like WordPress shields you from many of the day-to-day technicalities of running a website.

WordPress Image Optimization: What It Can Do

As we mentioned, one of the main reasons WordPress is so popular is because it takes care of many of the technical aspects of running a website. With that in mind, many think that WordPress should also automatically take care of image optimization without them having to get involved at all.

Unfortunately, that’s not really the case.

True, WordPress does offer some built-in image optimization. Whenever you upload an image to WordPress, it currently compresses the quality to about 82% of the original (since v4.5).

In v4.4, WordPress also introduced responsive image syntax using the srcset attribute. This creates four breakpoints for each image you upload according to the default WordPress image sizes:

  • 150px square for thumbnails
  • 300px width for medium images
  • 768px max-width for medium_large images
  • 1024px max-width for large images.

Here you can see an example of the actual responsive syntax code generated by WordPress:

<img loading="lazy" src="https://bleedingcosmos.com/wp-content/uploads/2021/12/33-1024x683.jpg" alt="" class="wp-image-9" width="610" height="406" srcset="https://bleedingcosmos.com/wp-content/uploads/2021/12/33-1024x683.jpg 1024w, https://bleedingcosmos.com/wp-content/uploads/2021/12/33-300x200.jpg 300w, https://bleedingcosmos.com/wp-content/uploads/2021/12/33-768x512.jpg 768w, https://bleedingcosmos.com/wp-content/uploads/2021/12/33-1536x1024.jpg 1536w" sizes="(max-width: 610px) 100vw, 610px">

Depending on the screen size of the device from which a user visits your webpage, WordPress will let the browser pick the most appropriately sized image. For example, the smallest version for mobile displays or the largest for 4K Retina screens, like those of a Mac.

While this may seem impressive, it’s only a fraction of what can be achieved using a proper image optimization solution, as we’ll show later.

Lastly, WordPress implemented HTML native default lazy loading for all images starting with version 5.5.

So, in short, WordPress offers the following image optimization capabilities baked-in:

  • Quality compression (limited)
  • Responsive syntax (up to 4 breakpoints)
  • Lazy loading

WordPress Image Optimization: What it Cannot Do

There are other issues many have with both the implementation of image compression and responsive syntax as it’s used by WordPress. This leads to some users even purposefully deactivating WordPress’ built-in image optimization so they can fully take control of it themselves.

Here are some of the reasons why:

  • WordPress uses a very basic form of quality compression. It does not use advanced technologies like AI and machine learning algorithms to compress images while maintaining maximum visual quality. It’s also lossy compression, so the quality is lost for good. You can clearly see the difference between an original HD image and the compressed version created by WordPress.
  • WordPress only compresses most images by up to 20%, while advanced image optimization tools can reduce all image sizes intelligently by up to 80%.
  • Responsive syntax can provide significant performance improvements over simply uploading a single HD image to be served on all devices and screens. However, it’s still only limited to a set number of breakpoints (typically 3 or 4). Since it’s not dynamic, a whole spectrum of possible image sizes is not created or used.
  • Responsive syntax code is not scalable and can quickly lead to code that’s bloated, messy, and hard to read.
  • WordPress doesn’t accelerate image delivery by automatically caching and serving them via a global CDN, although this can be done using other tools.

Another important optimization feature that WordPress does not have is auto-conversion to next-gen image file formats. Different image formats offer different performance benefits on different devices. Some formats also enable higher levels of compression while maintaining visual fidelity.

Next-gen formats like WebP, AVIF, and JPEG-2000 are considered to be the most optimal formats on compatible devices. For example, until recently, WebP would be the optimal choice on Chrome browsers, while JPEG-4000 would be optimal on Safari browsers.

However, WordPress will simply serve images in the same formats in which they were originally uploaded to all visitors.

How to Measure the Image Performance of a WordPress Website?

As the undisputed king of search engines, we’ll base most of our performance metrics on guidelines established by Google.

Along with its various performance updates, Google has released a number of guidelines for developers as well as the tools to test and improve their websites according to said guidelines.

Google introduced Core Web Vitals as the primary metrics for measuring a web page’s performance and its effect on the user experience. Thus, Core Web Vitals are referred to as “user-centric performance metrics.” They are an attempt to give developers a testable and quantifiable way to measure an elusive and abstract concept such as “user experience.”

Combined with a number of other factors, Core Web Vitals constitute a major part of the overall page experience signal:

You can find a complete introduction to Core Web Vitals here. However, they currently consist of three main metrics:

  • LCP (Largest Contentful Paint): The time it takes the largest above-the-fold element on your page to load. This is typically a full-sized image or hero section.
  • FID (First Input Delay): The delay from the moment a user first interacts with an element on the page until it becomes responsive.
  • CLS (Cumulative Layout Shift): The visual stability with which the elements on a page load.

Here is an illustration of how these metrics are scored:

While these are the three most important metrics to optimize, they are not the only ones. Google still measures other metrics like the FCP (First Contentful Paint), SI (Speed Index), as well as the TTFB (Time to First Byte), TBT (Total Blocking Time), and TTI (Time to Interactive).

A number of these metrics are directly affected by the images used on your web pages. For example, LCP, FCP, and SI are direct indicators of how fast the content of your web page loads and depends on the overall byte size of the page. However, it can also indirectly affect FID by keeping the main thread busy with rendering large amounts of image content or the perceived CLS by delaying the time it takes large images to load.

These metrics apply to all websites, whether they are custom-made or built using a CMS like WordPress.

When using tools like Lighthouse or PageSpeed Insights, you’ll also get scored based on other flags Google deems important. Some of them are specific to images, such as properly sizing images and serving images in next-gen formats.

If you only use built-in WordPress image optimization, you’ll get flagged for the following opportunities for improvement:

Some of the audits it will pass, however, are deferring offscreen images (lazy loading) and efficiently coding images (due to compression):

A Better Way to Optimize WordPress Images: ImageEngine

Billions of websites are all vying for prime real estate on Google SERPs, as well as the attention of an increasingly fussy internet-using public. Every inch matters when it comes to giving your website a competitive advantage.

So, how can you eliminate those remaining performance flags and deliver highly optimized images that will keep both your visitors and Google happy?

Sure, you could manually optimize images using software like PhotoShop or GIMP. However, that will take you hours for each new batch of images. Plus, you still won’t benefit from any automated adaptive optimization.

A more reasonable solution in today’s fast-paced climate is to use a tool developed specifically for maximum image optimization: an image CDN like ImageEngine.

ImageEngine is an automated, cloud-based image optimization service using device detection as well as intelligent image compression using the power of AI and machine learning. It can reduce image payloads by up to 80% while maintaining visual quality and accelerating delivery around the world thanks to its CDN with geographically dispersed PoPs.

Why is ImageEngine Image Optimization Better Than WordPress?

When making a head-to-head comparison, here are the reasons why ImageEngine can deliver better performance:

  • Device Detection: ImageEngine features built-in device detection. This means it picks up what device a visitor to your website is using and tailors its optimization strategy to what’s best for that specific device.
  • Client hints: By supporting client hints, ImageEngine has access to even more information regarding the device and browser to make better optimization decisions.
  • Next-gen formats: Based on optimal settings, ImageEngine automatically converts and serves images in next-gen formats like WebP, AVIF, JPEG2000, and MP4 (for GIFs).
  • Save data header: When a Chrome user has save-data mode enabled, ImageEngine will automatically compress images more aggressively to save on data transfer.
  • CDN with dedicated edge servers: ImageEngine will automatically cache and serve your optimized image assets using its global CDN. Each edge server has device awareness built-in to bring down latency and accelerate delivery. You can also choose to prioritize specific regions.

So, the key differentiator is that ImageEngine can tailor optimizing images for what’s optimal for each of your visitors. ImageEngine is particularly good at serving mobile visitors thanks to WURFL device detection, which can dynamically resize images according to most devices and screen sizes in use today. As of now, this is a completely unique capability that none of its competitors offer.

It allows for far better and more fine-tuned optimization than WordPress’ across-the-board approach to compression and responsive syntax.

If you want, you could turn off WordPress responsive syntax and compression, and you would still experience a performance increase using ImageEngine. However, ImageEngine also plays nice with responsive syntax, so it’s not completely necessary unless you want to serve the highest-fidelity/low-byte-size images possible.

How Does ImageEngine Work with WordPress?

The process ImageEngine uses to integrate with WordPress can be broken down into a few easy steps:

  • Sign up for an ImageEngine account: ImageEngine offers three pricing plans depending on the scale and features you need as well as a no-commitment 30-day free trial.
  • Specify your image origin: This tells ImageEngine where to find the original versions of your images. For a WordPress website, you can just use your domain, e.g., https://mywordpresswebsite.com. ImageEngine will then automatically pull the images you’ve uploaded to your WordPress website.

  • Copy the Delivery Address: After you create an account and specify your image origin, ImageEngine will provide you with a Delivery Address. A Delivery Address is your own unique address that will be used in your tags to point back to the ImageEngine service. Delivery Addresses may be on a shared domain (imgeng.in) or customized using a domain that you own. A Delivery Address typically looks something like {random_string}.cdn.imgeng.in. If your images are uploaded to the default WordPress folder /wp-content/uploads/, you can access your optimized images from ImageEngine simply by changing your website domain. For example, by typing {imageengine_domain}.cdn.imgeng.in/wp-content/uploads/myimage.jpg into your browser, you’ll see the optimized version of that image. Just press the copy button next to the Delivery Address and use it in the next step configuring the plugin.

  • Install the ImageEngine Optimizer CDN plugin: The plugin is completely free and can be installed just like any other plugin from the WordPress repository.
  • Configure and enable ImageEngine Plugin in WordPress: Just go to the plugin under “ImageEngine” in the main navigation menu. Then, copy and paste in your ImageEngine “Delivery Address,” tick the “Enabled” checkbox, and click “Save Changes” to enable ImageEngine:

Now, all ImageEngine basically does is replace your WordPress website domain in image URLs with your new ImageEngine Delivery Address. This makes it a simple, lightweight, and non-interfering plugin that works great with most other plugins and themes. It also doesn’t add unnecessary complexity or weight to your WordPress website pages.

ImageEngine vs Built-in WordPress Image Optimization

So, now let’s get down to business by testing the performance improvement you can expect from using ImageEngine to optimize your image assets.

To do this test, we set up a basic WordPress page containing a number of high-quality images. I then used PageSpeed Insights and the Lighthouse Performance Calculator to get the performance scores before and after using ImageEngine.

Importantly, we conducted this test from a mobile-first perspective. Not only has mobile internet traffic surpassed desktop traffic globally, but Google themselves have committed to mobile-first indexing as a result.

Here is a PageSpeed score using the Lighthouse calculator for WordPress with no image optimization:

As we can see, both Core Web Vitals and other important metrics were flagged as “needs improvement.” Specifically, the LCP, FCP, and TBT. In this case, both the LCP and FCP were a high-res featured image at the top of the page.

If we go to the opportunities for improvement highlighted by PageSpeed, we see where the issues come from. We could still save as much as 4.2s of loading time by properly resizing images and a further 2.7s by serving them in next-gen formats:

So, now let’s see how much ImageEngine can improve on that.

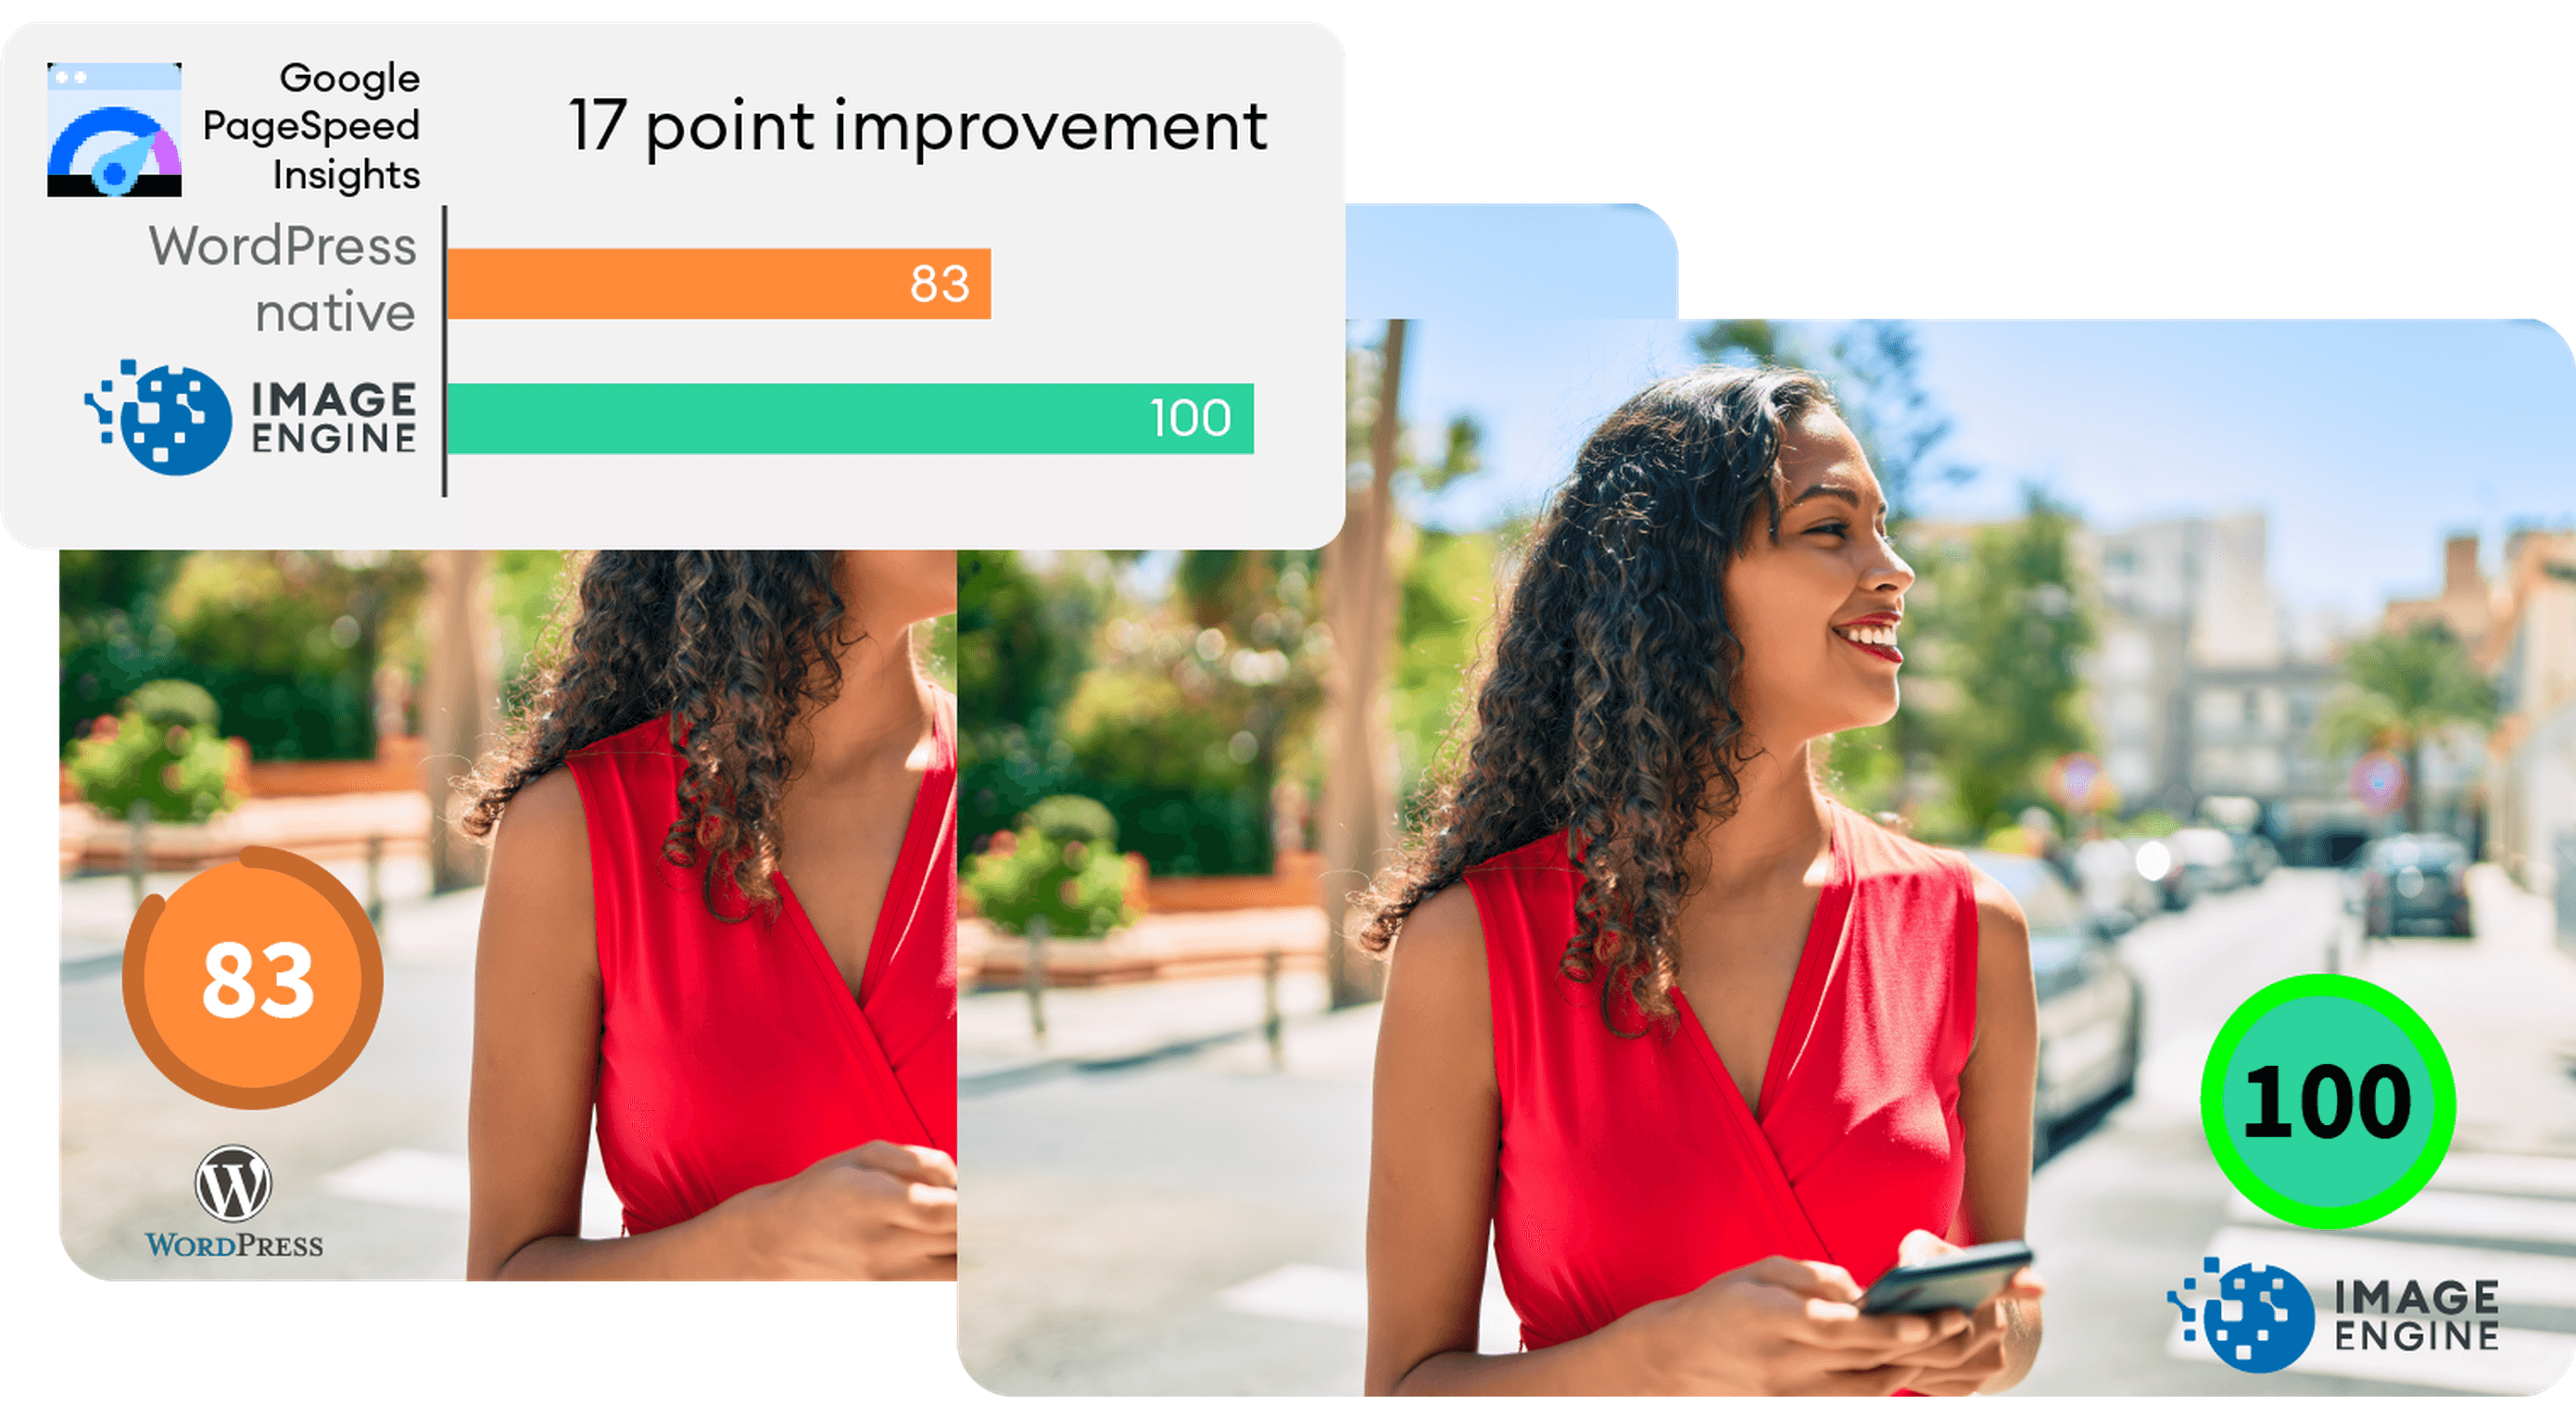
The same test run on my WordPress website using ImageEngine got the following results:

As you can see, we now have a 100 PageSpeed score. I saved roughly 2.5s on the SI (~86%) as well as roughly 1.7s on the LCP (~60%). There was also a slight improvement in the FCP.

Not only will you enjoy a stronger page experience signal from Google, but this represents a tangible difference to visitors regarding the speed with which your website loads. That difference will lead to lower bounce rates, increased user satisfaction, and more conversions.

There was also a 53% overall reduction in the total image payload. This is impressive, considering that it’s on top of WordPress’ built-in compression and responsive syntax.

Conclusion

So, as someone with a WordPress website, what can you take away from this?

Well, first of all, WordPress does feature some basic image optimization. And while not perfect, it should help you offer reasonable levels of performance, even if you use a lot of image content.

However, the caveat is that WordPress applies aggressive, across-the-board compression, which will lead to a noticeable reduction in visual quality. If you use WordPress for any type of website where premium quality images are important, this is a concern — for example, as a photography portfolio, exhibition, or image marketplace like Shutterstock.

By using ImageEngine, you can reduce image payloads and accelerate delivery even further without compromising too harshly on visual quality. What’s more, ImageEngine’s adaptive image optimization technology will provide greater improvements to more of your visitors, regardless of what device(s) they use to browse the web.

Whether or not you still want to use WordPress’ built-in optimizations, ImageEngine will deliver significant improvements to your user experience, traffic metrics, and even conversions.

Plus, true to the spirit of WordPress, it’s extremely simple to set up without any advanced configuration. Just sign up for ImageEngine in 3 easy steps, install the plugin, integrate ImageEngine by copy/pasting your image domain, and you’re good to go.


[ This is a sponsored post on behalf of ImageEngine ]

Source

The post WordPress Website Analysis: Before & After ImageEngine first appeared on Webdesigner Depot.

Categories: Designing, Others Tags: