Archive

Archive for March, 2022

Using Micro-Interactions to Drive UX

March 9th, 2022 No comments

Micro-interactions effectively communicate brand identity and ethos while strengthening ties with the customer. These habit-forming tools make for a fun and seamless user experience. Facebook’s ‘likes’ and Tinder’s ‘swipes’ are two classic examples. 

Micro-interactions originated with the need to guide customers who had hit a snag while using a service or a product. The goal was to ease customers into being more product-savvy via subtle reassurance and feedback. Micro-interactions are now employed by everything from washing machines, to coffee makers.

Along with feedback, prompts, and recommendations, they can also present customers with an appealing visual reward upon finishing a task. When used optimally, micro-interactions drastically enhance the navigation and simplify how users interact with sites and apps.

How Micro-Interactions Work

Here are the four structural elements to a simple micro-interaction: triggers, rules, feedback, and loops. Every micro-interaction has a significant component to organize the operational cycle. It lets you control feedback and runs, so the users understand the consequences of their performance and feel motivated to follow through.

Triggers

This feature begins micro-interactions of both the user-initiated (prompted by user) and system-initiated (driven by the system) kind. For example, a click, scroll, swipe, tap, and pull are common triggers that users carry out. So making a payment, booking a cab, and clicking or tapping on the hamburger menu all fall under this category. On the flip side, the user’s alert prompt upon entering a wrong password is a classic system-generated trigger. 

Rules

This element determines what happens after the user sets a prompt into motion via tapping, clicking, scrolling, or swiping. Rules refer to the fact that apps decide the triggers that users employ — Tinder’s ‘swipe’ feature illustrates this point. These rules gradually become a habit-forming action that users get accustomed to while regularly engaging with an app.

Feedback

During this process stage, the system informs the user via auditory, visual, or haptic cues. It engages the users and encourages them to proceed further in their process. For example, the progress bar of a download, the visual representation of steps cleared in a circle, or the visual, aural, and tactile indication upon the success or failure of payment are all a part of the feedback mechanism.

Loop/Modes

This final stage entails tiny meta-rules of the process and determines the frequency and duration. A classic example from an ecommerce app is the ‘Buy Now’ transformed to ‘Buy Another’ Before the user loses interest in the app, the app typically uses such a loop to get them to re-engage with the app. 

How to Use Micro-Interactions

We’ve established that micro-interactions are fabulous, but not every UX interaction on your app or site needs one throughout the wireframe. Overusing this tool could saturate the overall creative experience your design may want to offer. Worse, it might even end up confusing the information hierarchy. It undermines the design and unbalances the user experience of discomfort and irritability. So it’s crucial to know when exactly to use them.

Let’s find out how few quick tips on micro-interactions can elevate and humanize your mobile user experience:

  • Swipe right or left: A signature move made entirely on swiping micro-interaction featured in the famous Tinder app. Swiping is an easier action than clicking or tapping.
  • Call-to-action:  As part of the last step during payment or order, place a ‘Confirm Order’ or ‘Book Now’ prompt, which gives the task a sense of urgency. As a result, having acted on it feels like a minor achievement. 
  • System status: Your app user wants to know what’s happening. System status lets them know they are moving in the right direction and helps avoid confusion. Sometimes, users even run out of patience while uploading a picture, downloading a file, or filling up the registration form.
  • Classic notifications: Users need a quick reminder of products selected/wishlist in their abandoned cart with a reduced attention span. A simple notification can nudge them toward finalizing the purchase. 
  • Button animation: Animated buttons are not only cute, but they also help users navigate the mobile app swiftly. Try out attractive colors, fonts, sizes, shapes, and clipart elements corresponding to the animation and create that cool button to pop up when tapped or hovered on. 
  • Animated text inputs:  A simple process of a likable element like zooming in while entering data into a form or filling up card details for payment can enhance the user experience.
  • Reward an achievement:  Especially true for educational and health apps, micro-interactions celebrating big and small milestones with a badge or a compliment of encouragement can strengthen a user’s engagement with the app. 

Benefits of Micro-Interactions

  • Brand communication: A successful brand ensures that the transmission to the buyer is engaging, positive, and hassle-free. When micro-interactions show a process status clearly, it creates and reinforces a positive image for your brand.
  • Higher user engagement: Experts say micro-interactions engage users better. These tiny elements subconsciously create the urge to keep interacting with your app. For example, each push or nudge notification acts toward redirecting your customers back to your app.
  • Enhanced user experience: From shopping to banking to traveling to learning to staying healthy, there’s an app for everything. A wide range of activities elevates the overall user experience and stays ahead in the game. Micro-interactions can work that magic for your brand. 
  • Prompt feedback: It’s frustrating not to know what’s happening behind the blank screen, especially during a purchase. Instant feedback via visual, sound, or vibrating notifications makes for a pleasant user experience. 
  • Visual harmony: Micro-interactions initiated even with a tap, swipe, typing, or scrolling are all a part of the UX design’s overall appeal. The trick is to keep all the interface elements in perfect sync with the app’s visual features.

Micro-Interaction Best Practices

Here are a few basic principles you should follow when you introduce a micro-interaction to the user experience.

1. Keep it simple, stupid (KISS)

KISS is a famous design principle that becomes even more important in the case of micro-interactions. The goal is to make the user journey delightful and not be a distraction.

2. Keep it Short

It has ‘micro’ in the name itself. But, again, micro-interactions aren’t supposed to be show stars, and a lengthy micro-interaction only distracts the user. 

3. Pick the Right Place

You should always consider the options carefully before choosing the spot for any micro-interaction. The widely used user-interaction designs are popular for a reason. Many people have already approved them, so you can safely continue with them. The use of micro-interaction should also sit well with your brand image. 

See also if the placement of a micro-interaction is reaching your ideal customer or not. And even consider whether you need a micro-interaction to begin with. 

And That’s a Wrap!

As UX designers, we can profoundly impact the overall design of sites and apps, the user’s journey, their interactions with our product/service, their connection with the brand, and the ease of doing a transaction.

We want customers to connect to our brand, love our products, and experience our exceptional customer service. But most of all, we want to earn their trust and loyalty.


Featured image via Pexels.

Source

The post Using Micro-Interactions to Drive UX first appeared on Webdesigner Depot.

Categories: Designing, Others Tags:

How to Market your Mobile App to Get More Installs?

March 9th, 2022 No comments

There are millions of Apps available in the Apple store and google play store so are the multiple options available for the users. It is more important than ever to create marketing systematic plans for your mobile app.

Marketing a mobile app efficiently involves determining a target audience, learning how to reach them, how to communicate with them and analyzing their in-app behavior to make updates and improvements. The ultimate goal of the mobile app development is to market the app to engage repeated customers. Some of the marketing tips for the app owners are discussed below:

Contender Analysis:

Your app will have competition obviously so conducting competition or contender analysis is an important step of mobile app marketing if you want to be ahead of all the competition.Identifying and evaluating your current competition’s strengths and weaknesses relative to those of your own app or even some of its features.

Constructing website or landing page:

Creating your online presence via an SEO optimized website or a landing page is an important way to do app marketing. Mobile websites are the number one source of app installations.You can expand the reach of your app to potential customers by linking it to a website and blog. The web is usually the first place where people go for searching their relevant options.

Promo video creation:

Everyone is not interested to understand the app information from the app description or through one-two screenshots so it is important for you to make demo or promo videos for the marketing of the app. Make a simple 30-40 seconds fictive video illustrating your app.Creating a demo video for your app can be helpful to you if you have proven your app’s concept and you are sure you are in the winner race.

Social media advancement:

Social Media promotion is a great way to enhance the marketing of your app. 65-70% of online businesses are using social media to promote their app. You can create hashtags for social media campaigns to promote new and improved features of the app. You can use sponsored stories targeted to mobile news feeds via social media platforms like facebook. You can also use promoted tweets on twitter.You should explore prestigious marketing specially on instagram etc. Run amazing contests to attract the customer towards your app.

Ask users for feedback or suggestions:

You should encourage reviews and feedback from your customers. More positive user feedback can make your application trustworthy for other users.This will help you to pull many more customers.Once a potential user finds your app, they might need some convincing that your service is reliable and valuable enough to download.In this case reviews can be useful.

Don’t blank out about email marketing:

Email marketing is one of the valuable concepts that can be used to market your mobile application. It is also one of the efficient forms of digital marketing for your application. You can use a landing page to collect the email details of the customers. Also, you can use embedded sign-up forms to collect the emails of interested customers. You can share content from your blog to continue engaging those customers.

App store optimization:

Optimize your app store page using app store optimization to get higher rank in search results. Once your app is ranked higher in search for a certain keyword, it will continue to rank for a few months.The higher will be the rank, the higher will be the visibility to the user. Ultimately there will be more downloads. Good app store optimization depends on some of the factors like title and keyword choice. A great title attracts the customer to click on your app icon. Always include features and benefits of the app in the keywords. You can add screenshots and videos also. Localizing your app as per the required language will help you to get more installs.

Promote it in all your communications:

You can include links to your app websites, blogs and social media platforms in all your email signatures etc. You can also have current users help you market your app by using in-app messaging and push notifications that encourage them to share on social media.

Contact a PR firm:

You can hire a PR team if you can spend some handsome amount of money on the advertising of the app but this way is too effective for your marketing strategy.Mailbox app is one of the good example of having a good PR team.It had half a million waitlist subscribers before it even came out.

Spring up your subscriber list:

Keep collecting email addresses and grow your list and send the app updates on the bigger list now.You will be pleased to see the number of subscribers growing and send your updates to thousands instead of dozens. The bigger the subscriber list will be, the bigger your customers will be.

Well designed and attention-grabbing app icon: 

App icon design is the master thing that can be appealing to the customer to install your app. It should be very creative and unusual.Consumers are driven by visual effects.Your app icon is the first thing that a potential user sees in an app store, so make it very appealing.The icon you choose should be recognizable.It needs to be a clear representation of both your brand and functionality.

Boost customer ratings:

Ask your loyal and satisfied customers to leave a rating on the app store but don’t fake it. Fake ratings can harm you badly in the long run.Customer rating should be increased fairly and correctly. The key to increase performance of your app is to increase customer ratings.

Oversee your performance:

Your analytics should be checked via different tools to understand the use case of the customer. Take out new conclusions and make an action plan to implement that.Monitoring of the app is very important for growth of your app.You can use AppAnnie or Flurry to understand how your users interact with your app.

Engage your users again who have already installed your app:

A new initiative has been launched by google where you can run ads to drive users to open your app. Facebook also does the same thing now.You should engage existing users to use the app regularly to maintain web traffic and growth of your app.

Add an in-app “tell a friend” feature:

You can ask your users to promote your app by inserting an in-app feature “tell a friend”  so that the users can share your app with friends, family and co-workers etc. You can offer credits and incentives for the user who is promoting your application.

Propose free trials:

If you have a paid app, you can give free trials to the users to collect latent user information. Then enquire if they don’t use the app further and make a professional relationship with them and bring them in.Free trials attracts users to start using the app and it becomes part of their usage.

Influencer Marketing:

The key to this strategy is to find the influencers or celebrities who match with your user base. Social media platforms give influencers data on follower demographics. Leveraging the power of influencers can drive mass amounts of traffic to your application. You should choose a relevant list of influencers from various links of your mobile app space.

Get featured on mobile app review sites:

Your application should be good enough to pitch the mobile app review sites to consider your app to be listed there.To get featured you should have well-favoured graphics design in ample quality, primary and unique content and glitches free applications.

Public Relations: 

To make sure you have the best chance of getting your story published, you will make sure you will have everything that the journalist needs from you like- An app summary guide, your press release, screenshots, design collaterals, Videos, Founder Biog and pictures etc.

Conventional or In-store advertising:

In-store advertising is considered more effective than out of store advertising in raising product awareness and communicating product benefits. Conventional or traditional media includes all outlets that existed before the internet such as Newspapers, magazines, TV, Radio and Billboards.

Conclusion

These are strategic considerations that should influence your mobile app development greatly through the entire app marketing approach. Mobile app marketing doesn’t need to spend tons of money but strategic planning to grow the app.

The post How to Market your Mobile App to Get More Installs? appeared first on noupe.

Categories: Others Tags:

Best 13 Ways to Manage Time While Working Remotely

March 9th, 2022 No comments

Old English proverb “Time and tide wait for none” implies the enormous importance of time in our day-to-day life. If it comes down to our work activities, we all know and have experienced the significance of time. 

Remote working is the next future of the business working field. If you are a remote employee or working from home as a freelancer or in a BPO vendor, then you are doing absolutely a great job. However, as a remote worker, you are going through tough challenges regarding time management while working from home.

Challenges Faced by Remote Employees While Working from Home

While working from home saves additional traveling costs and provides sufficient time for your family members. But remote employees face a number of challenges during work time. Examples are distractions, loneliness and isolation, communication issues, mental and physical exhaustion, preserving trust, and many more. If you don’t address these issues, they might ruin your personal and professional life.

Let’s get straight to the strategies to manage time effectively for remote employees.

Top 13 Ways to Manage Time While Working Remotely

1. Determine when You are the Most Productive

Everyone is unique in their own way. Nobody can operate like a machine and be available 24 hours a day to the company. Also, no one is entirely productive throughout the working hour. For some employees, they work enthusiastically in the morning, but by the afternoon, their excitement has dwindled to 50% of what it was in the morning. Identifying your most productive hour will undoubtedly assist you in completing any task in the least time possible.

2. Use Asynchronous Communication

If you frequently find yourself caught up in meetings and discussions, it’s high time you should start prioritising stuff and attending the most important ones only. What about the rest? Well, turn to asynchronous communication. Use videos to streamline stand-ups, share feedback and discuss anything that doesn’t need everyone to be present at the same time. Not just that, even if you must attend meetings, you can set the context ahead of time so that you can stick to the point and have a productive conversation. 

3. Reduce Distractions

Not only is it simple to get distracted by the television in the background while working from home, but it’s also easy to be sidetracked by household work such as laundry and cleaning dishes. At times, your children will want your attention to do their homework. Browsing Social media is one of the major distractions for any remote employee. Set a complete barrier not to use any social media unless it is uber important during working hours.

4. Stop Multitasking

While some individuals are capable of performing many tasks at once, most of us are unable to. Multitasking really reduces productivity since it requires time to switch your brain frequently. Avoiding multitasking allows you to concentrate entirely on a single job. And believe me, paying total concentration to any task is the best way to complete it.

5. Use a Time Tracking Tool

Time management is much easier with the time tracking software. It records how much time you spend on each task and see your whole workday in-real time. You will be able to pinpoint precisely where you are getting diverted from your job. Some tools offer GPS facilities, locating URLs you are visiting and how much time you spend on those websites. 

6. Prioritize your Task

Based on the requirements of others or the proximity of the deadline, you can sort out your activities. By implementing prioritizing tactics, you can radically modify the arc of working hours while being a remote employee. Making a complete list of tasks and then highlighting the important works and completing it one by one is a great way to start the prioritization process.

7. Pomodoro Break

The goal behind the Pomodoro method is to increase productivity by splitting up your workday into highly focused periods separated by short breaks. The Pomodoro break allows you to assess the value of your time. This temporary break allows you to reclaim control of your life. When used effectively, the Pomodoro method significantly improves attention. The Pomodoro approach encourages us to concentrate while also reducing distractions.

8. Interact with Others and Socialize

From  Harvard Business Review, it is found that among remote employees, 52% of them responded that they feel their colleagues don’t treat them equally. That is primarily because of a lack of in-person contact. Like any other kind of peer networking, Remote socialization helps employees be more productive. Humankind is a social being, and socialization plays a vital role in building a great working environment inside any remote team. 

9. Distinguish your Work time and Home Time

Working from home allows remote employees to stay at home and finish their tasks. But very often, being an employee, you may amalgamate work time with free time. That causes a definite breakdown in my productivity level. So it is much more important to distinguish your free time from work time. 

10. Be Transparent with Your Manager.

Transparency is a talent that requires being an honest and forthright worker. Speak openly with your managers, provide facts, and get feedback. Transparency allows you to speak with coworkers about your job and duties. If you are a remote employee, you need to build trust and good communication with your manager. Transparency enables you to formulate a good relationship with your manager.

11. Get Mental Satisfaction

Maintaining good mental health, regardless of where you work, is considerably more essential, in my opinion. Getting healthy food, taking a brief break, getting enough sleep, and engaging in social activities can help you achieve mental satisfaction.

12. Make a Balance of Work and Personal Life.

Balancing work life and personal life means managing your time to spend outside of your work. One remote worker must not spend all his daylight and night hours working on getting more incentives from the company. This can damage personal life relationships, health, and overall happiness. You need to find out your source of happiness and spend time on that particular activity. One of my favorite quotes from American singer and songwriter

“Don’t Get So Busy Making A Living

That You Forget To Make A Living”

 – Dolly Parton

13. Exercise

While working from home, you may forget about your exercise. We all know that exercise helps to alleviate depression, anxiety, stress, and many other mental health challenges. While working remotely, you have some drawbacks when you work from home. It has many advantages. Remote employment causes you to move less, which can cause gaining weight, exhaustion, sleep disorders, social anxiety, loneliness, and other long-term health concerns. As a result, Remote workers need an exercise program to reduce mental and physical problems.

Conclusion

Management of time becomes more challenging when you are surrounded by lots of distractions from your surroundings, home, and family members. Certainly, these distractions take away your concentration from work. Maintaining proper strategies will prevent your time-wasting while you work from home. Set a boundary around you, maintain a good balance of work and personal life, and all other necessary steps you want to take for managing time will surely benefit you in your work-life.

The post Best 13 Ways to Manage Time While Working Remotely appeared first on noupe.

Categories: Others Tags:

Cloud Pentesting: What It Is, Why You Need It, and How to Do It Right

March 9th, 2022 No comments

Cloud pentesting is a term that is becoming more and more popular as businesses move their operations to the cloud. What is it, though? And why do you need it? Cloud pentesting is a necessary procedure for organizations that wish to guarantee the security of their data. Businesses can use cloud pentesting to detect and repair vulnerabilities before they become an issue.

In this blog post, we will discuss what cloud pentesting is, why it’s important, and how to do it right. We’ll also cover the pros and cons of cloud pentesting so you can make an informed decision about whether or not it’s right for your business.

What Is Cloud Pentesting?

Cloud pentesting is a type of testing that is done in the cloud. It involves using specialized tools to scan for vulnerabilities and make sure there are no security issues with your system.

The term “pentest” comes from the word penetration, which refers to how hackers gain access to systems by exploiting weaknesses or vulnerabilities within them.

A penetration test is an attempt at gaining unauthorized access through a breach or exploitation of security controls within the target system or network environment. In some cases, this will be done without any prior knowledge about how your organization works as well! 

Why Do You Need Cloud Pentesting?

If you’re running an organization in today’s world, then you probably want to keep your data secure at all times – especially if it’s sensitive information like financial records or health care files. With so many people relying on technology these days, having good cyber security practices has become essential for businesses that want their customers’ trust.

Why Is Cloud Pentesting Important?

Cloud pentesting is important because it helps businesses find vulnerabilities and fix them before they become a problem. By pentesting in the cloud, businesses can ensure that their data is safe and secure.

How To Do Cloud Pentesting Right

There are a few things to keep in mind when doing cloud pentesting:

  • Make sure you have the right tools for the job. There are several specialized software programs available to assist you in scanning for and exploiting security holes. Make sure you use the right ones for your specific needs.
  • Be careful with what information you disclose. When pentesting in the cloud, it’s important to be as discreet as possible so as not to give away any clues about your system’s weaknesses. 
  • Do not share any sensitive data with anyone else. Never give access to your system or network unless absolutely necessary, especially if there are other people involved in the process (such as employees). You can never know who might be able to use this information against you later on down the road!

Pros And Cons Of Cloud Pentesting?

There are many pros and cons of cloud pentesting, pros include security benefits, cost savings from having smaller teamwork on it instead of hiring outside contractors; while some disadvantages may include lack of control over data because it’s stored remotely and potentially weaker encryption methods used by third-party providers that could make it easier for hackers to break into systems using known vulnerabilities they’ve already exploited.

Tools For Cloud Pentesting

There are a number of tools that can help you do cloud pentesting. Here are some great tools that can help with automated cloud pentesting-

  • Pentest-as-a-Service from Astra uses artificial intelligence and machine learning to help you find vulnerabilities in your system. It is a subscription service that provides pentesters with access to an AI platform that can help them find and fix security issues quickly and easily.
  • Cloud Pentesting Tools from OWASP project provides a variety of tools that can help you scan for vulnerabilities in the cloud. These tools are open source and free to use, making them a great option for businesses on a budget.
  • Automated Security Testing Suite (AST) from Qualys is a commercial tool that can help you find vulnerabilities in your system quickly and easily. It offers a variety of features, including vulnerability scanning, patch management, and policy compliance.
  • Nessus is an automated tool that can perform a wide range of tests on your infrastructure, including testing for common vulnerabilities.
  • Burp Suite Enterprise Edition gives you access to data from other sources and helps with manual cloud pentesting tasks like analyzing responses or visualizing traffic flows between servers in real-time.  
  • GitHub has tools for both manual and automated tasks that are useful when doing cloud pentesting-including things like checking out source code repositories so they’re ready to go at any point during the process.

There are a number of specialized tools out there that can help scan for vulnerabilities in the cloud, as well as tips on how to pentest correctly in the cloud. Pentesting is critical since it allows firms to identify vulnerabilities before they become an issue. By pentesting in the cloud, businesses can ensure that their data is safe and secure. When doing cloud pentesting, it’s important to be discreet so as not to give away any clues about your system’s weaknesses. Never give access to your system or network unless absolutely necessary!

Conclusion

Cloud pentesting is a great way to ensure that your company has the best security measures in place. This will help keep hackers at bay and prevent them from getting access to sensitive information about you or your customers!

It also saves money by allowing small teams to work with less supervision than traditional methods require, which means better productivity overall as well as fewer mistakes being made during tests since there aren’t any distractions around like people talking loudly nearby or phone calls coming through constantly throughout the day.

The post Cloud Pentesting: What It Is, Why You Need It, and How to Do It Right appeared first on noupe.

Categories: Others Tags:

491

March 8th, 2022 No comments

491

The post 491 appeared first on noupe.

Categories: Others Tags:

3

March 8th, 2022 No comments

3

The post 3 appeared first on noupe.

Categories: Others Tags:

5 Must-Have Elements of a Successful Footer in 2022

March 7th, 2022 No comments

If you want to know how well-dressed someone is, look at their shoes. Shoes tell you a lot about a person’s style, activities, and choices. We often choose clothes to deceive people about who we are — we want to be brighter, more successful, more relaxed, more adventurous than we actually are. But, our shoes paint an honest picture and offer endless insights into who the wearer is.

Like shoes, website footers help us see the core of the entity behind the site. A footer is both functional and brand-specific, and it often sets the tone for the entire site.

I’ve heard it argued that there are two types of designer: those who start with the footer and those who don’t. Regardless of how true you hold that statement, it’s undeniable that the footer is one of the most undervalued elements on any site — if you’ve ever run an eye-tracking test, you’ll know how frequently customers scroll straight to the bottom of your page.

Perhaps because it is undervalued and therefore under-designed by designers, the footer has developed some established design patterns: It is a consistent, site-wide catch-all bar; it tends to contain utility links; visually, it acts as a closure to the page information.

The Anatomy of a Great Footer

Your footer should be consistent, predictable, and, above all, not so small that it’s illegible.

Footers vary depending on the target audience and the goals of the site. What suits one project may not suit another, but there are common elements that you need to have a good reason to exclude.

1. Add Your Logo

A logo in your footer is an excellent way to tie the page together and remind users of the site they’re browsing. In addition, it can be a helpful link back to your homepage (for when the user is lost and wants to start over).

If your design warrants it, the logo can be smaller or a variation. Find some way to fit it in, even if you already have your logo in a sticky header — it’s a good baseline for mobile experiences.

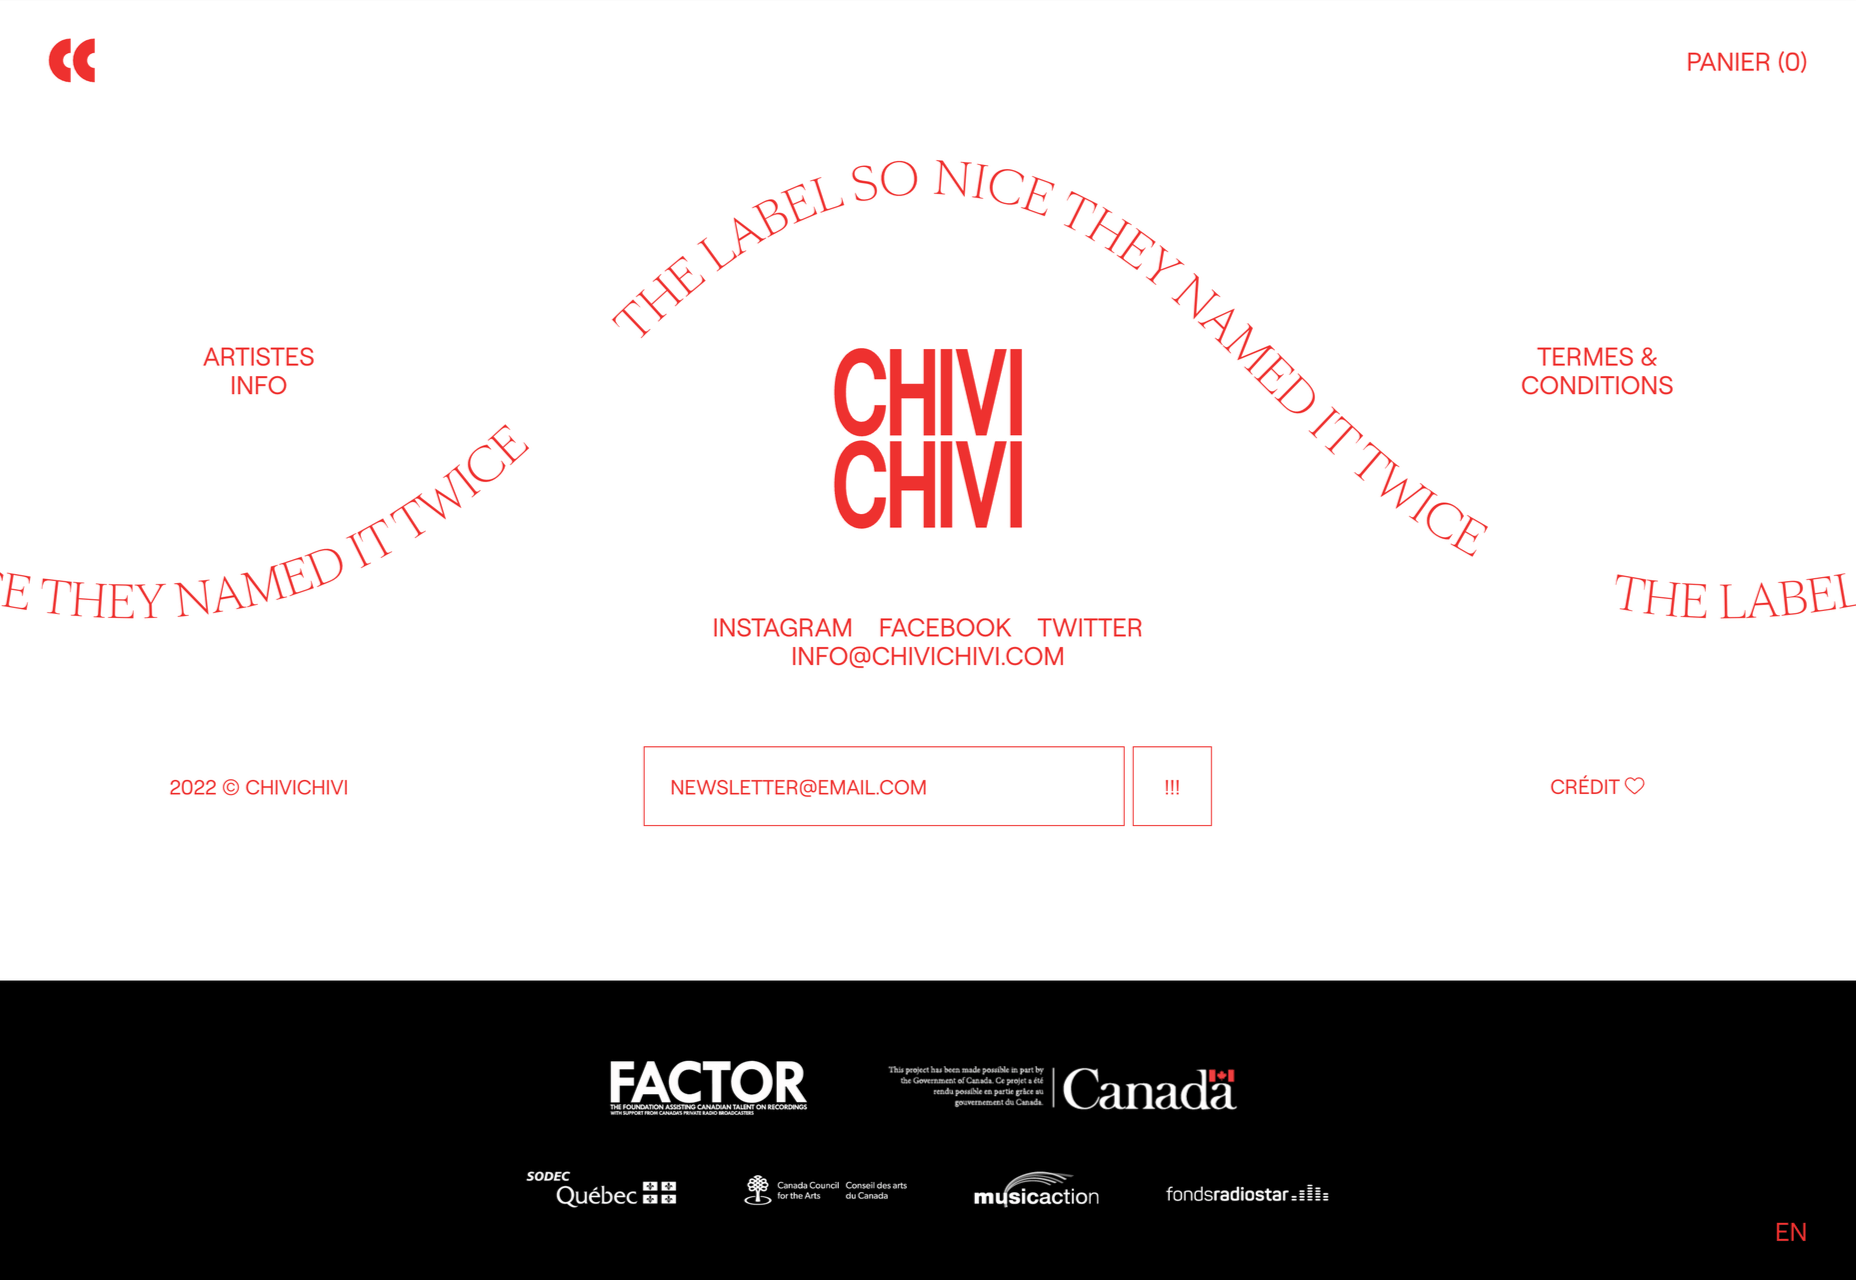
Chivi Chivi uses a monogram in place of its primary logo and reserves the main logotype for its footer.

Next Big Thing repeats its logo in the footer in a decorative and engaging way.

2. Include a CTA

Every page on your site should have some form of call to action (CTA) to guide the user through your site, preferably along your sales funnel. In addition to page-specific CTA, include a CTA in your footer.

Because your footer will be identical across multiple pages, the CTA needs to be an action that is relevant to every page (even the terms or privacy statement).

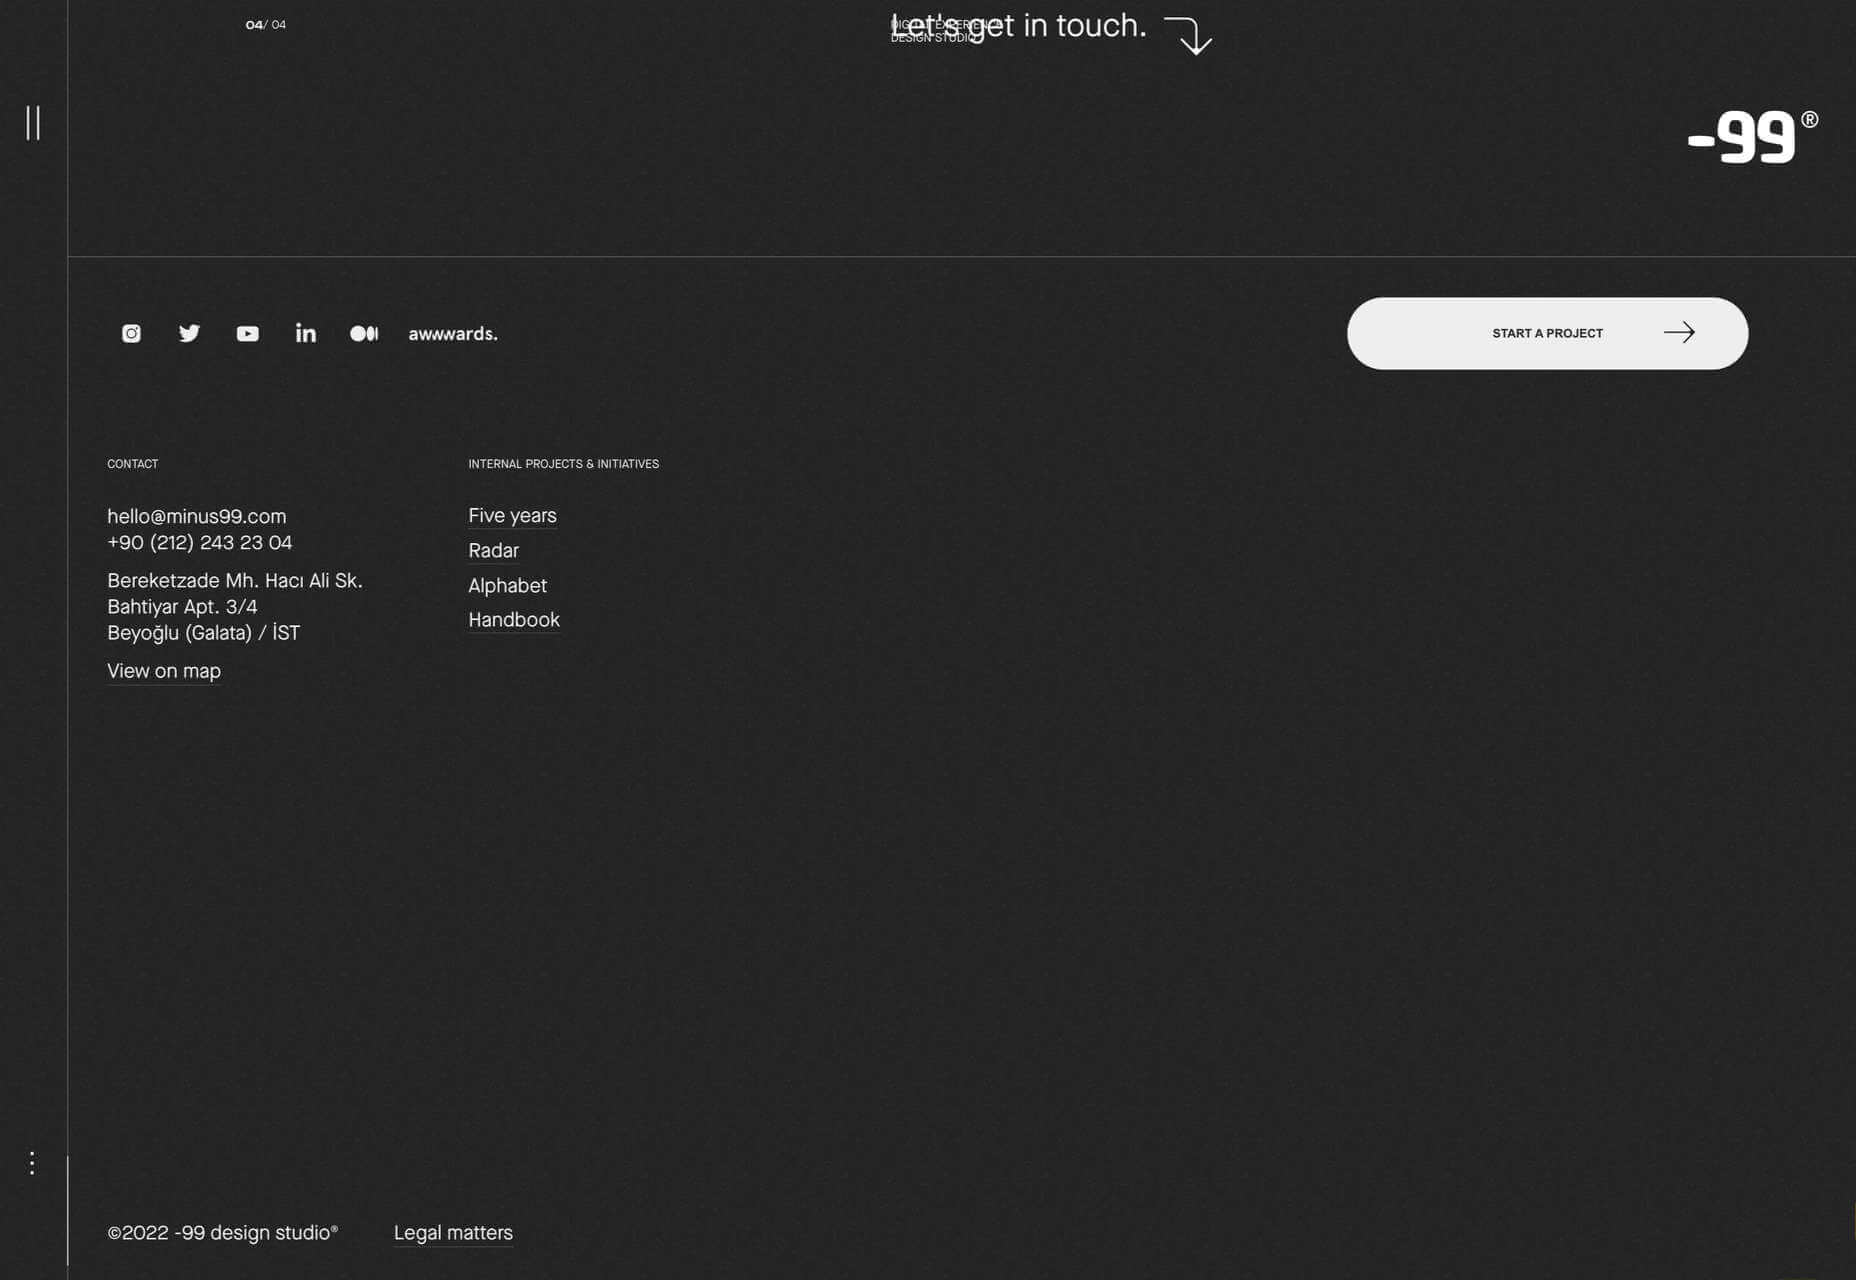
-99 has a nice big ‘Start a Project’ CTA to draw potential clients into a conversation.

The most common footer CTA is a newsletter sign-up, but if you’re running a site with a free trial or a subscription, adding a sign-up form for those services is also beneficial.

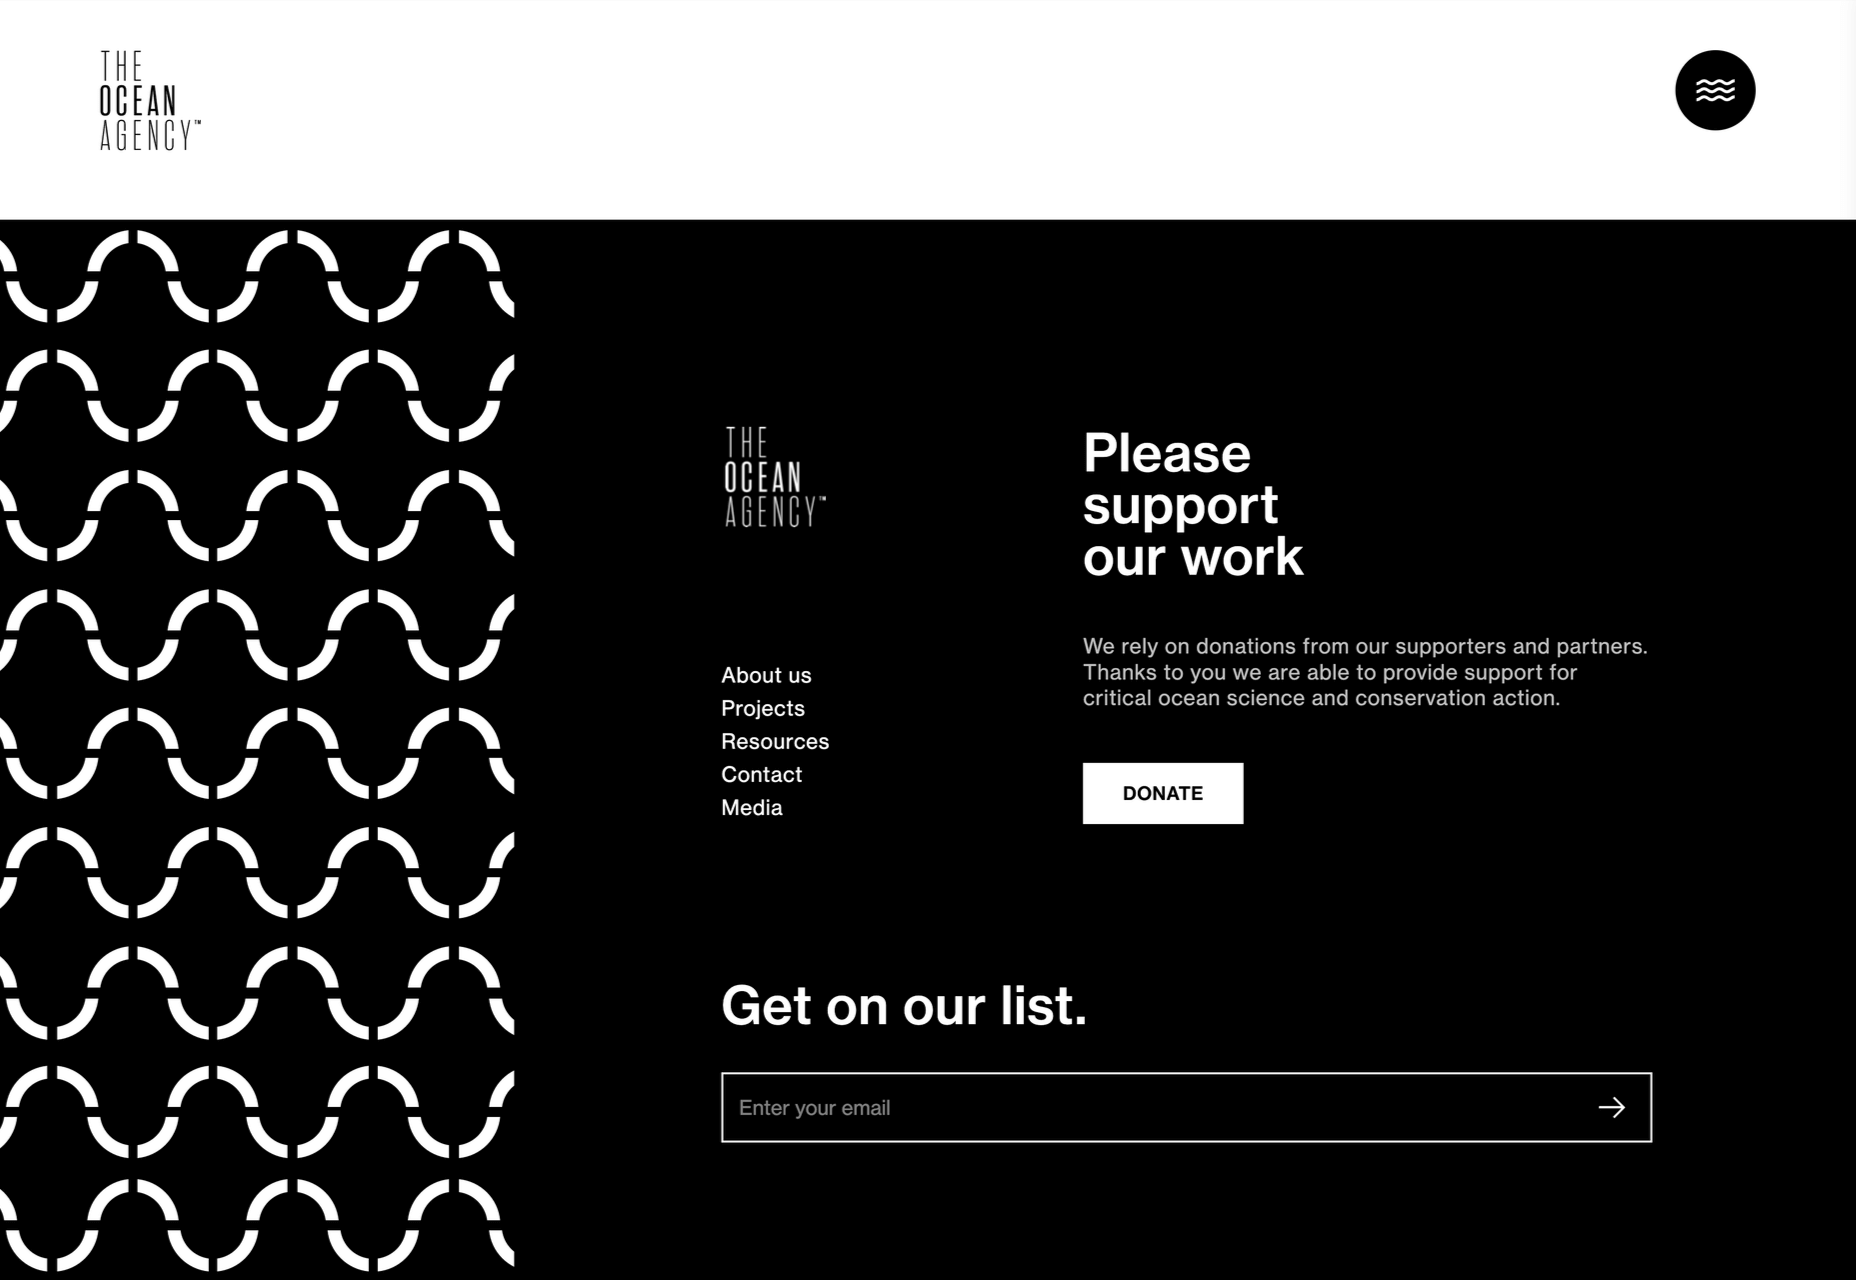
The Ocean Agency asks you to donate or sign up to its email list.

3. The Legal Bit

In many cases, you don’t need legal notices on your site; too often, published online terms just reiterate the statuary rights the law already grants a user. (The exception is if you’re operating internationally when statuary rights are variable.)

Fontsmith takes the opportunity to let us know its parent company.

If you’re collecting a user’s information, even via analytics, then you need a privacy policy, and the footer is a good catch-all place to link to it — just make sure you also link to it alongside any forms that gather information.

If you’re designing a site for a highly-regulated industry, like pharmaceuticals, or gambling, then a liability disclaimer may be advisable. If your client is certified or holds a professional membership, that should be included in the footer.

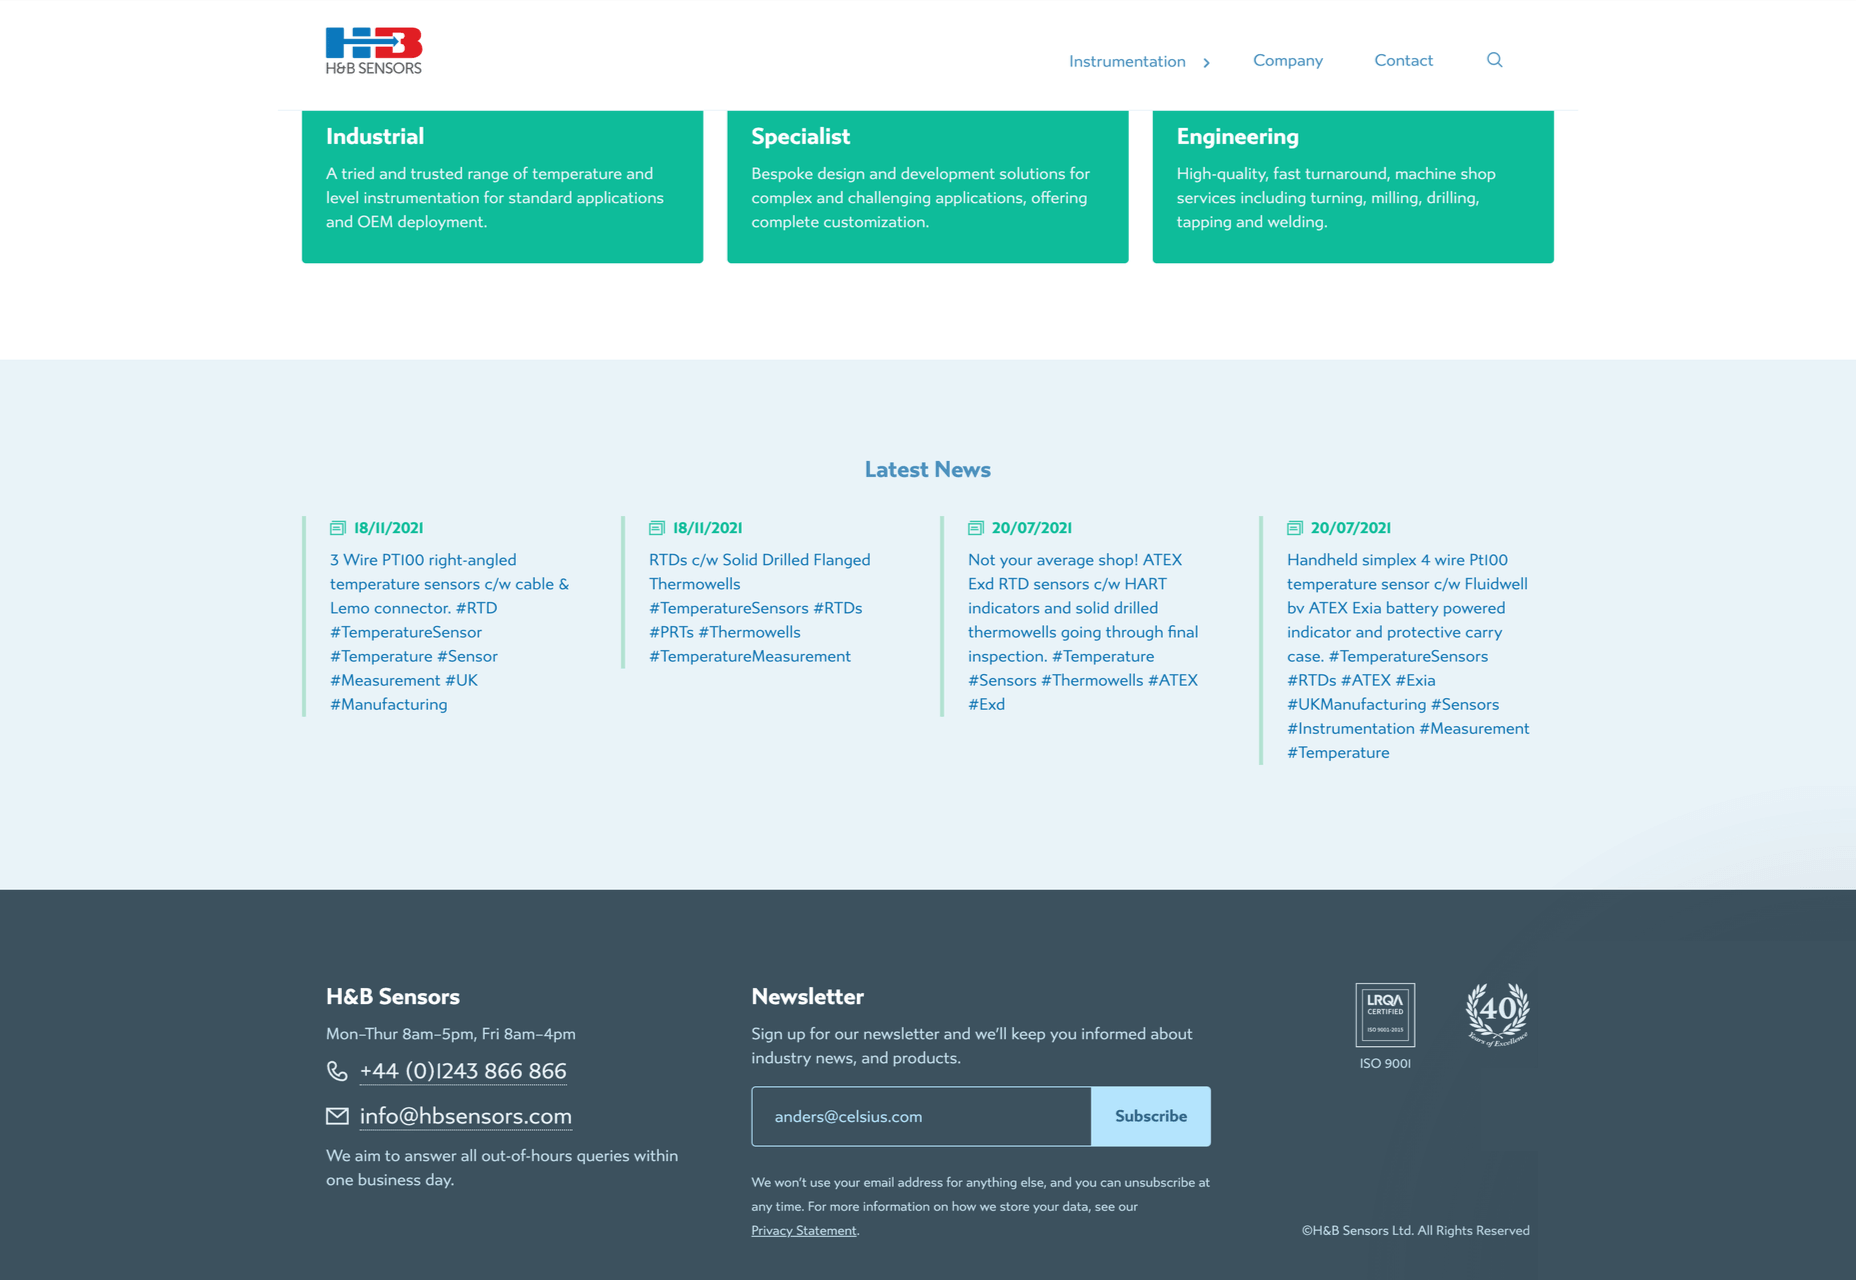
H&B Sensors includes an ISO certification in its footer.

Almost everyone includes a copyright notice in their footer, even though a website copyright notice is all but unenforceable.

The real value of these elements is to lend credibility to the company.

4. Useful Links Only

There is a tendency among some designers to treat the footer like a mega-menu and list every page on the site. If a user is confused enough by your main menu to need a footer link, dozens of links won’t clarify things for them, but a few carefully selected links can be beneficial.

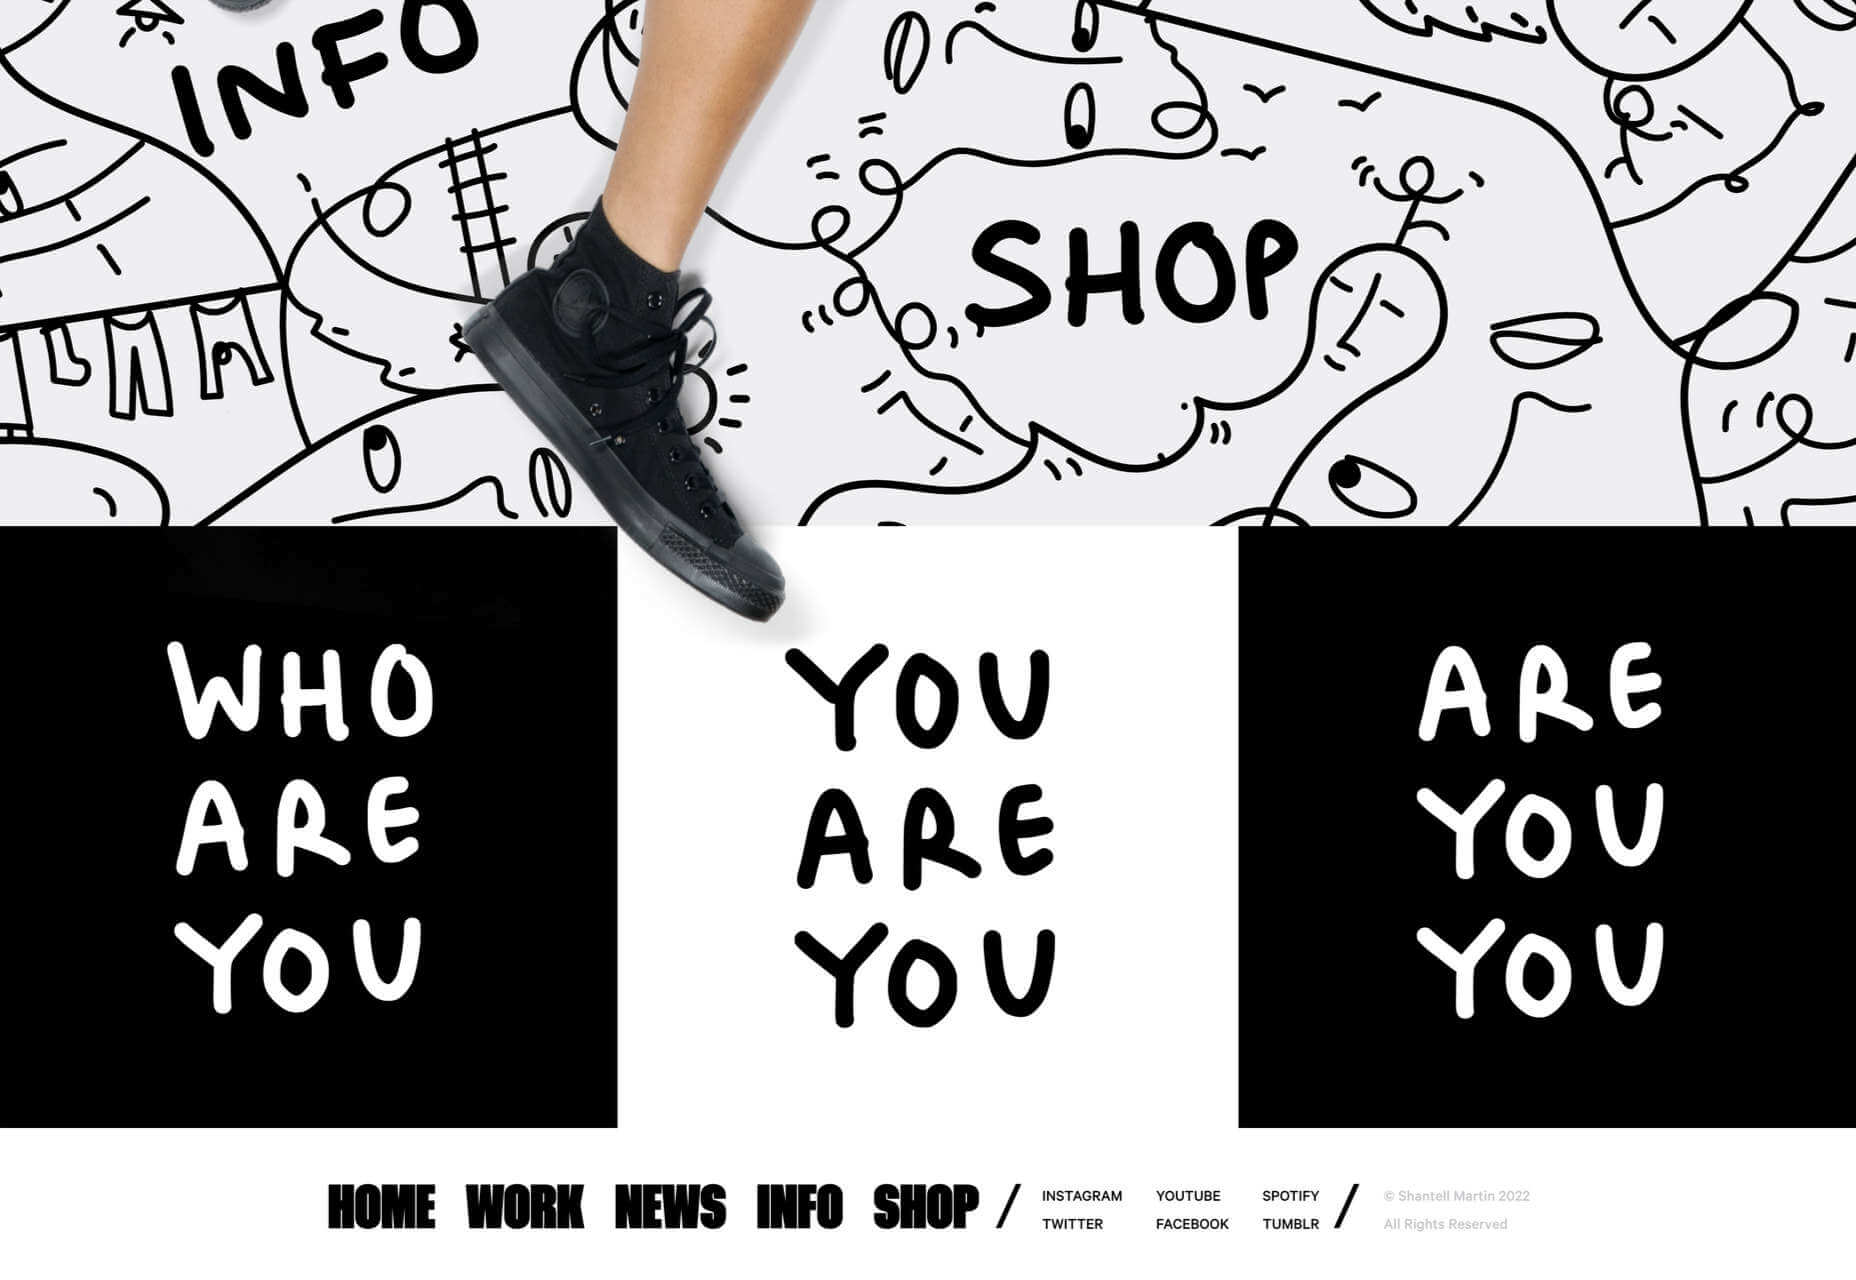
Shantell Martin uses doormat navigation to help anyone who missed the main navigation.

Generally, sites have two kinds of links: sales and utility. Sales links point at content with a brand voice, like product pages and blog posts. Utility links point at informational content that is fact-based, such as your returns policy or details of your graduate program. Typically, sales links suit primary navigation, and utility links fit footers.

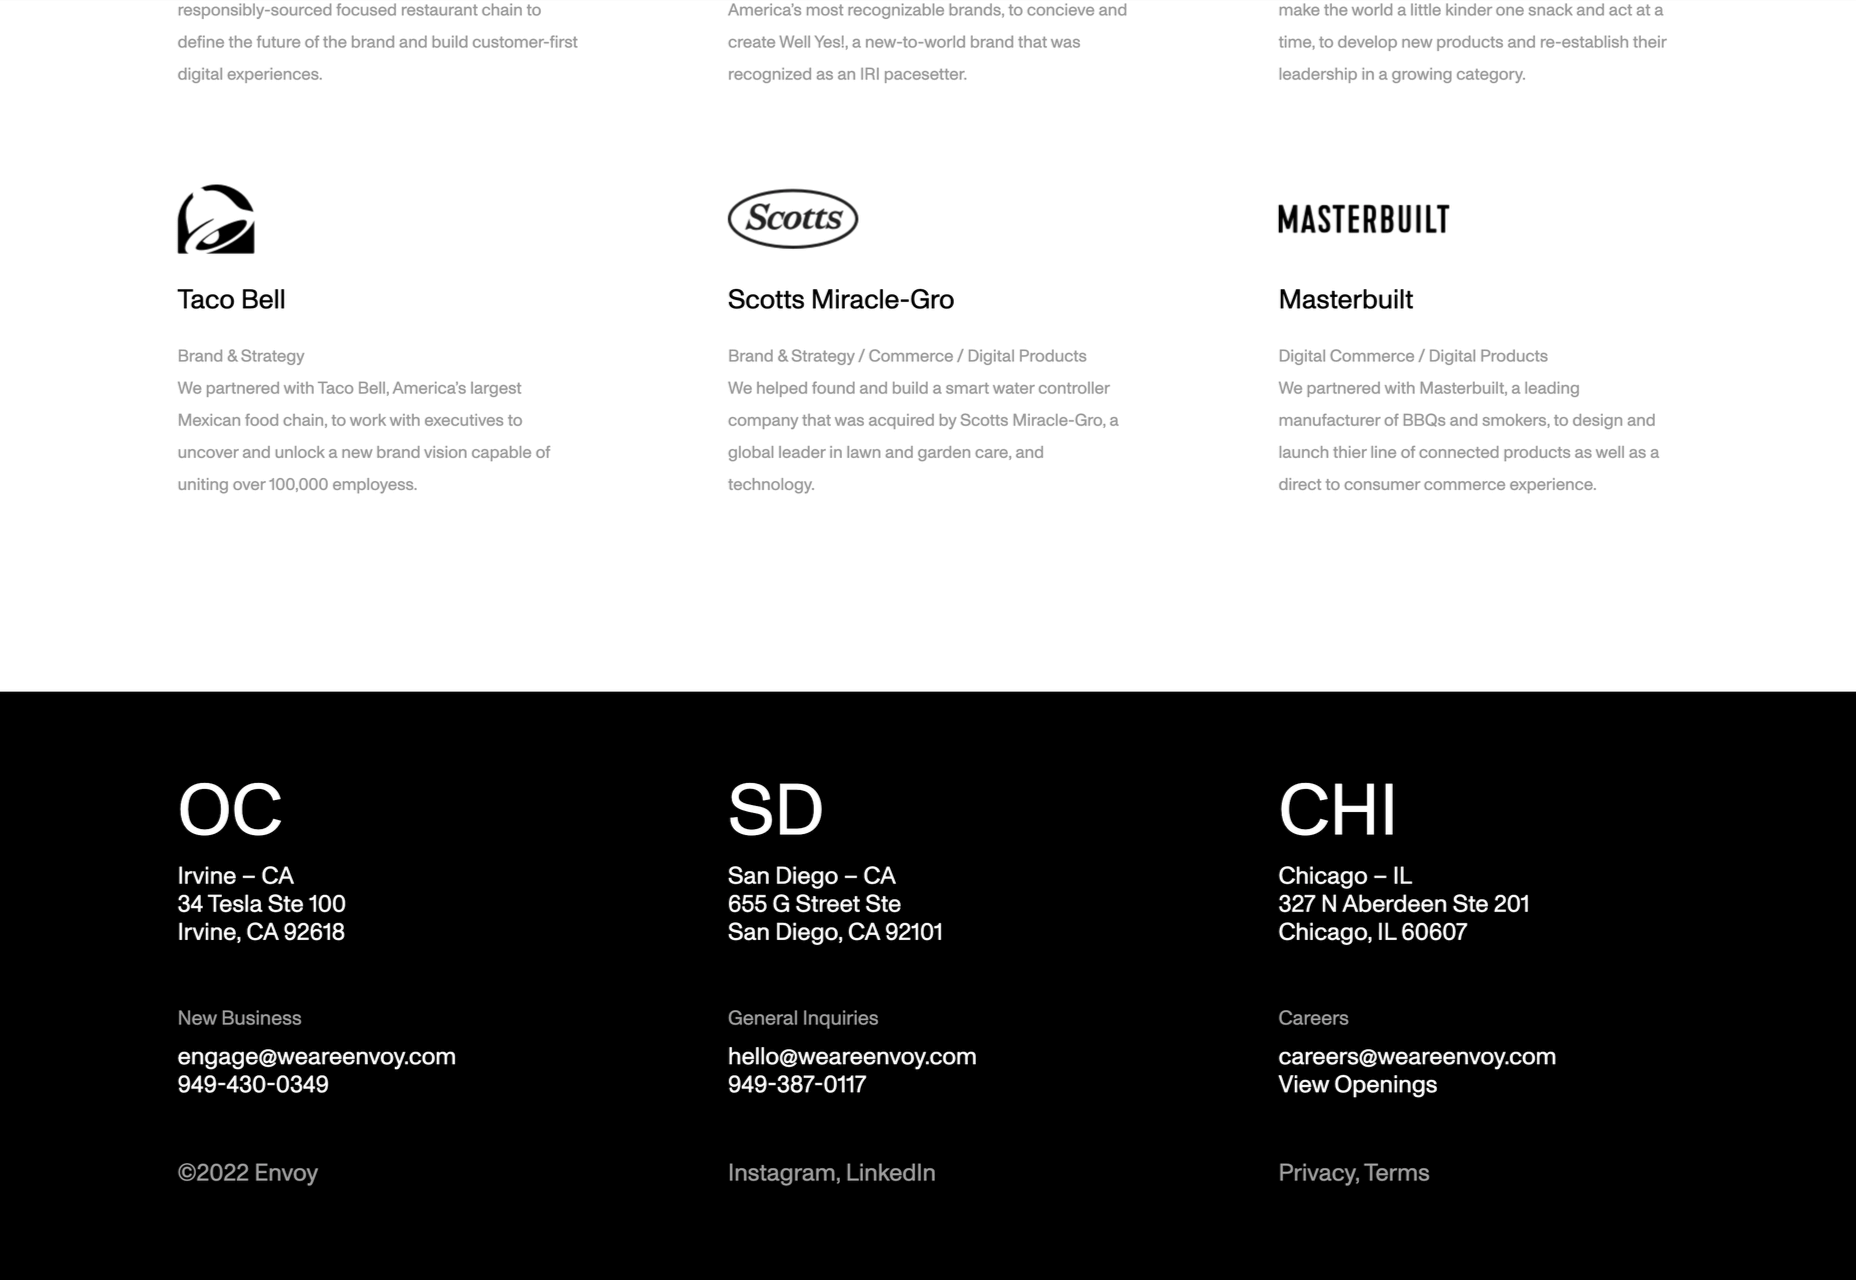
Envoy includes a link to current openings at the company.

5. Contact Information

Offering users a real-world point of contact has two benefits: your local SEO can be boosted; users feel an increased sense of trust.

Even if they never use them, customers like to see a phone number, opening hours, and even a map to a physical location. These things feel inherently more reliable because we assume that someone, somewhere, has vetted brick-and-mortar businesses.

Cahn Wilson includes a map to make it absolutely clear they have a physical location.

If possible, let users know how long it usually takes you to respond to queries — be honest, better to underpromise and over-deliver than the reverse.

If you’re maintaining social media accounts, then adding them to your footer is a great way to include them on your page without siphoning users off to other sites. (Only link to social media accounts you regularly update.)

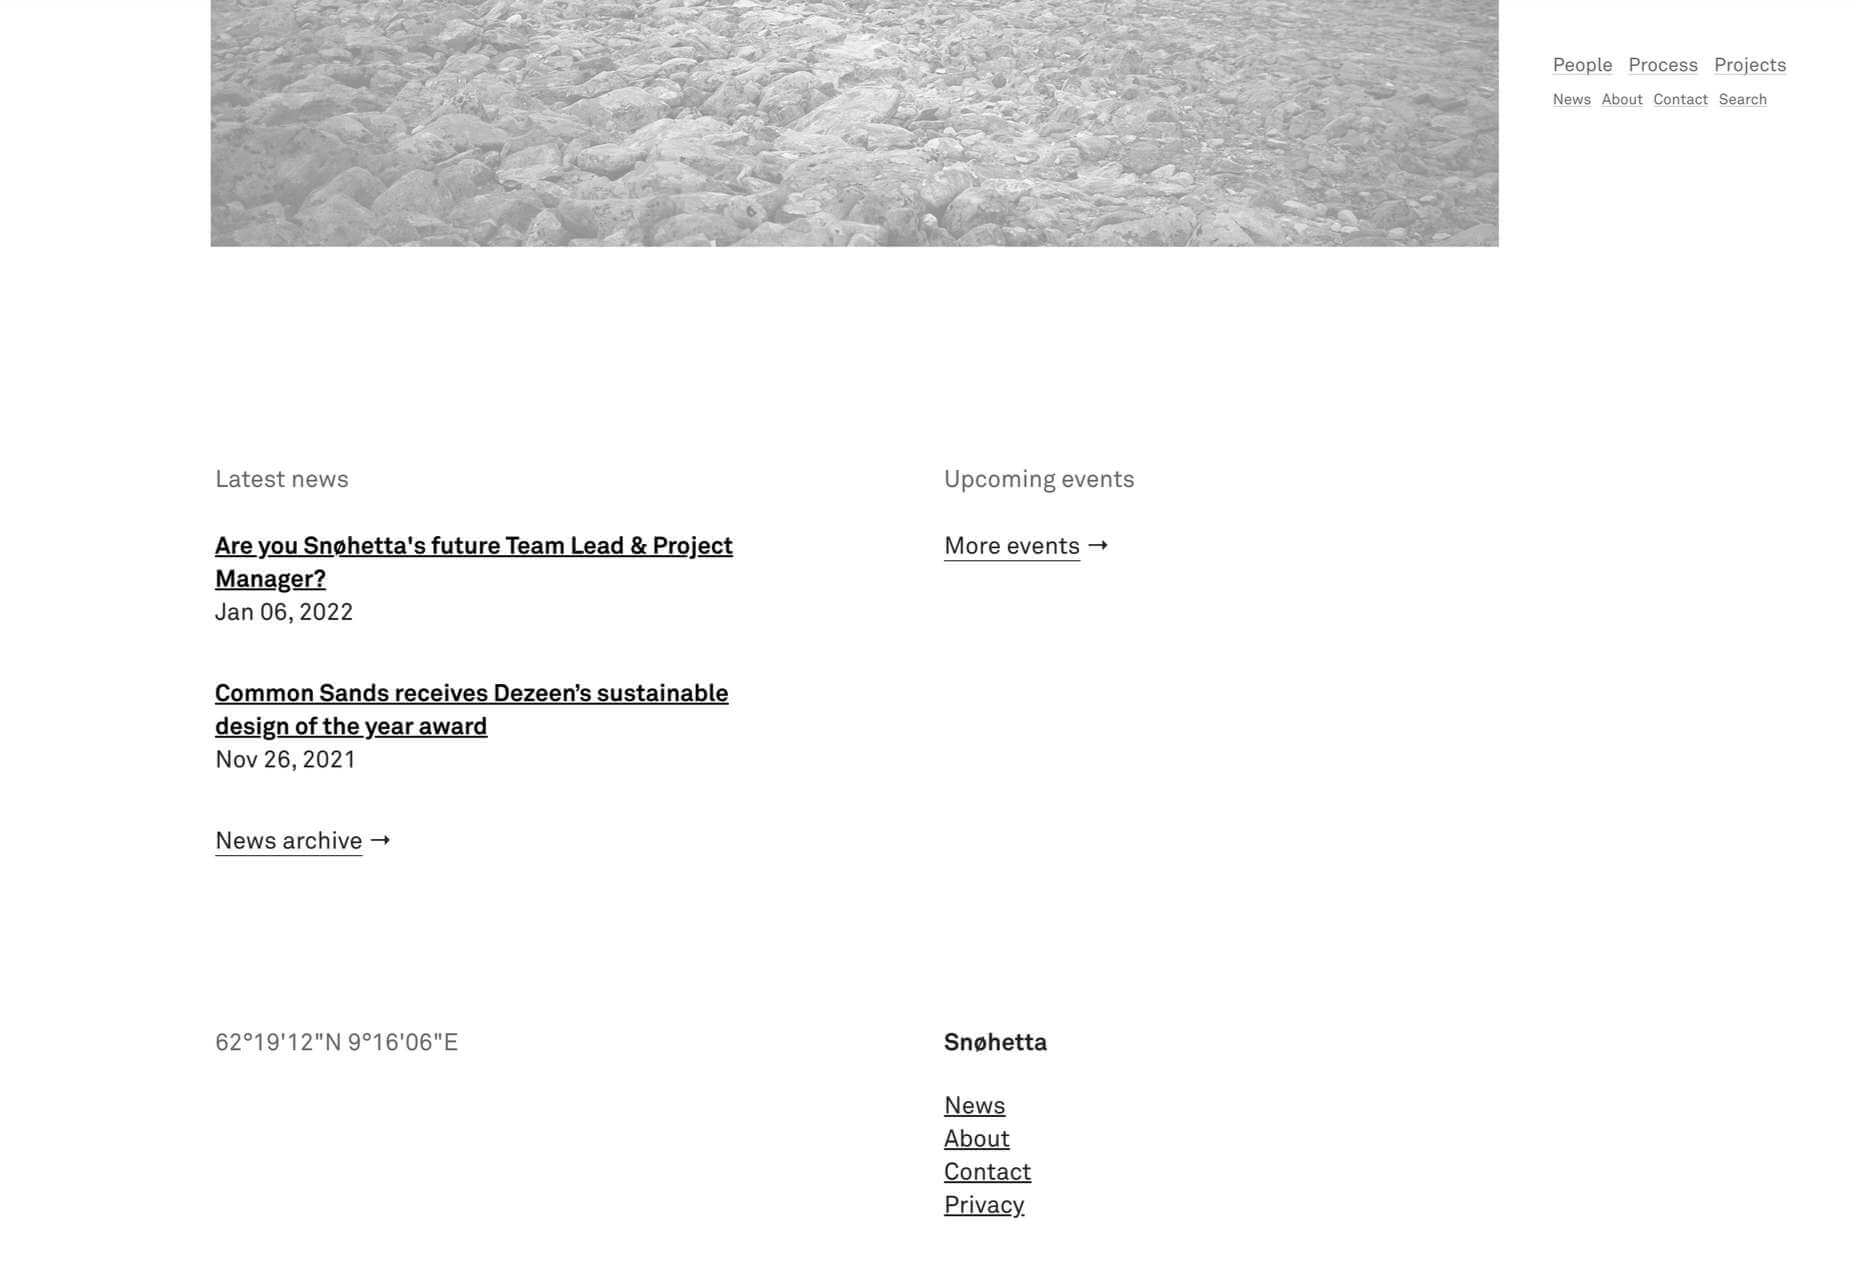
Snohetta takes the contact information to the extreme by providing longitude and latitude.

Source

The post 5 Must-Have Elements of a Successful Footer in 2022 first appeared on Webdesigner Depot.

Categories: Designing, Others Tags:

Popular Design News of the Week: February 28, 2022 – March 6, 2022

March 6th, 2022 No comments

Every day design fans submit incredible industry stories to our sister-site, Webdesigner News. Our colleagues sift through it, selecting the very best stories from the design, UX, tech, and development worlds and posting them live on the site.
The best way to keep up with the most important stories for web professionals is to subscribe to Webdesigner News or check out the site regularly. However, in case you missed a day this week, here’s a handy compilation of the top curated stories from the last seven days. Enjoy!”

HTML Tips & Tricks that You will Love to Know

15 Best New Fonts, March 2022

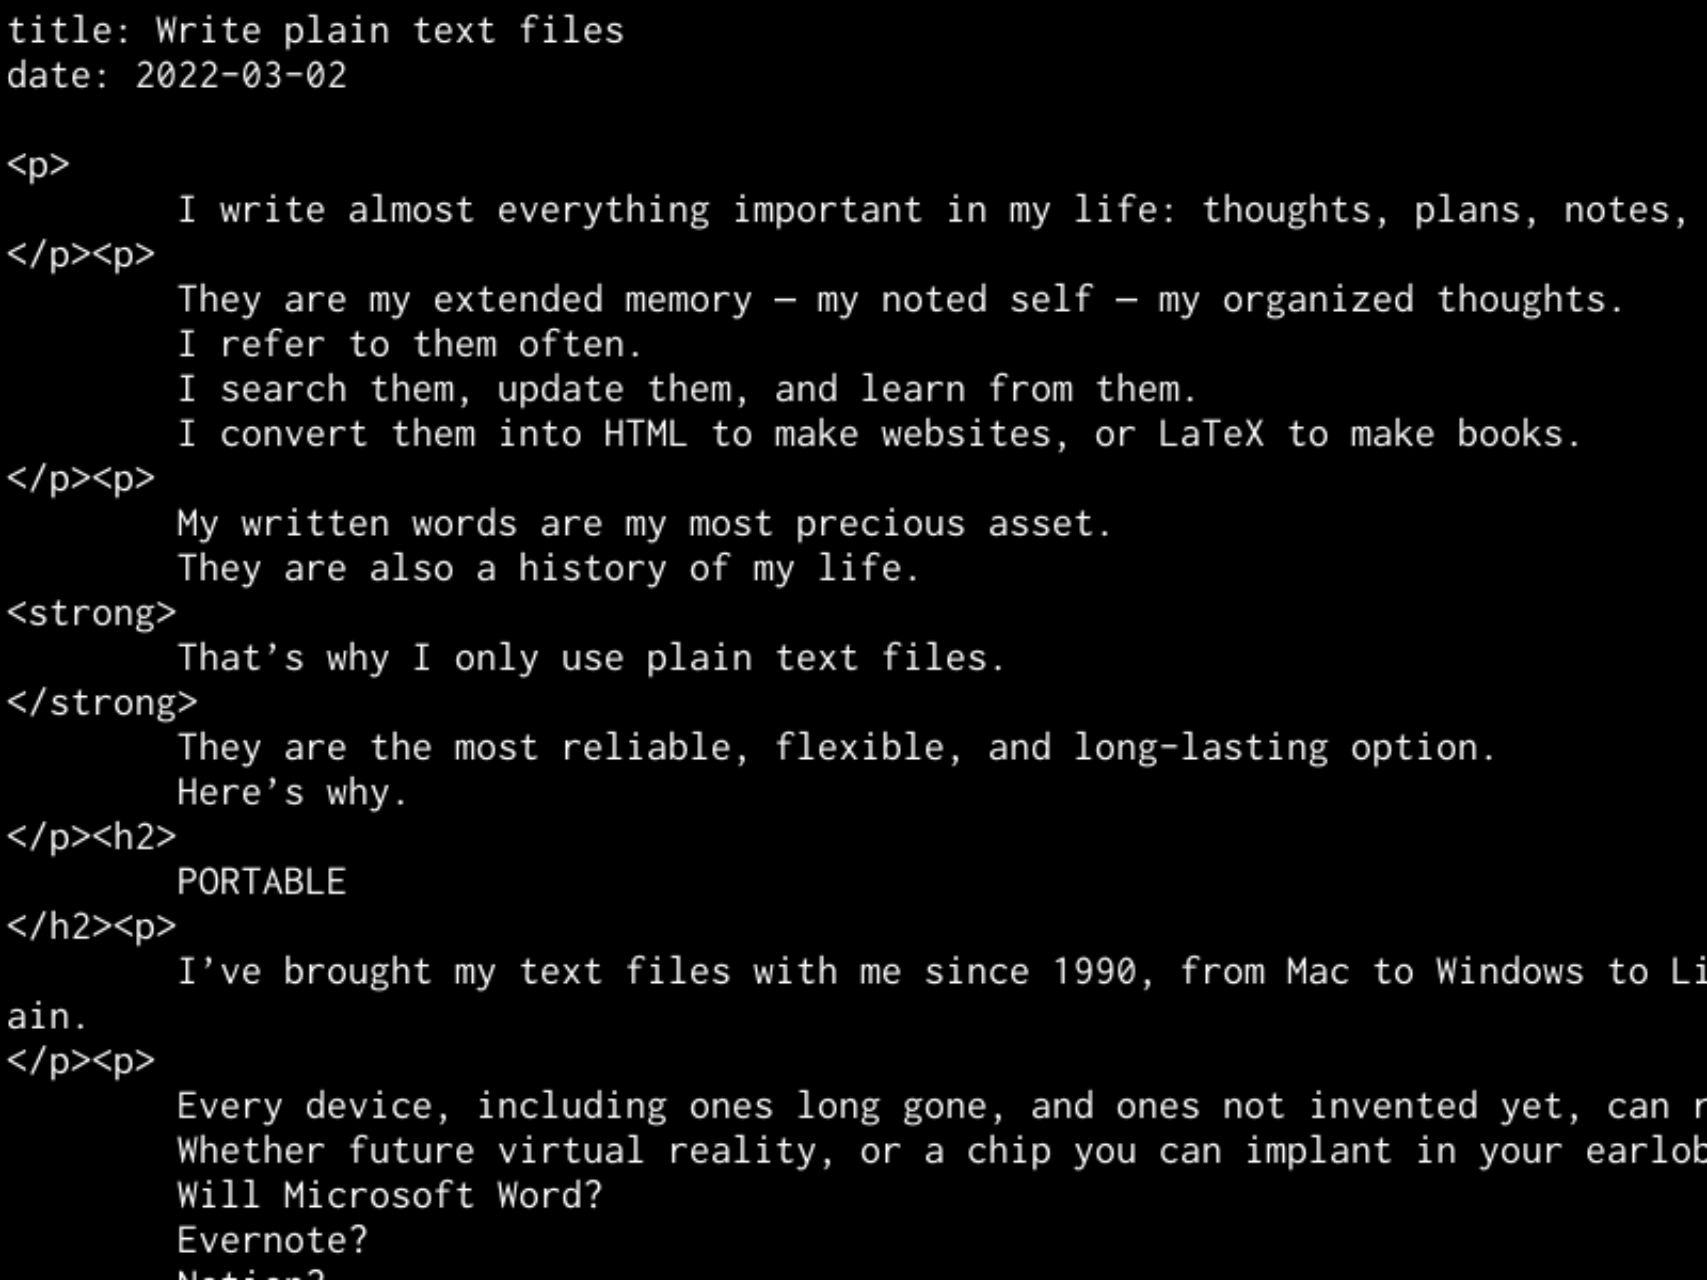
Write Plain Text Files

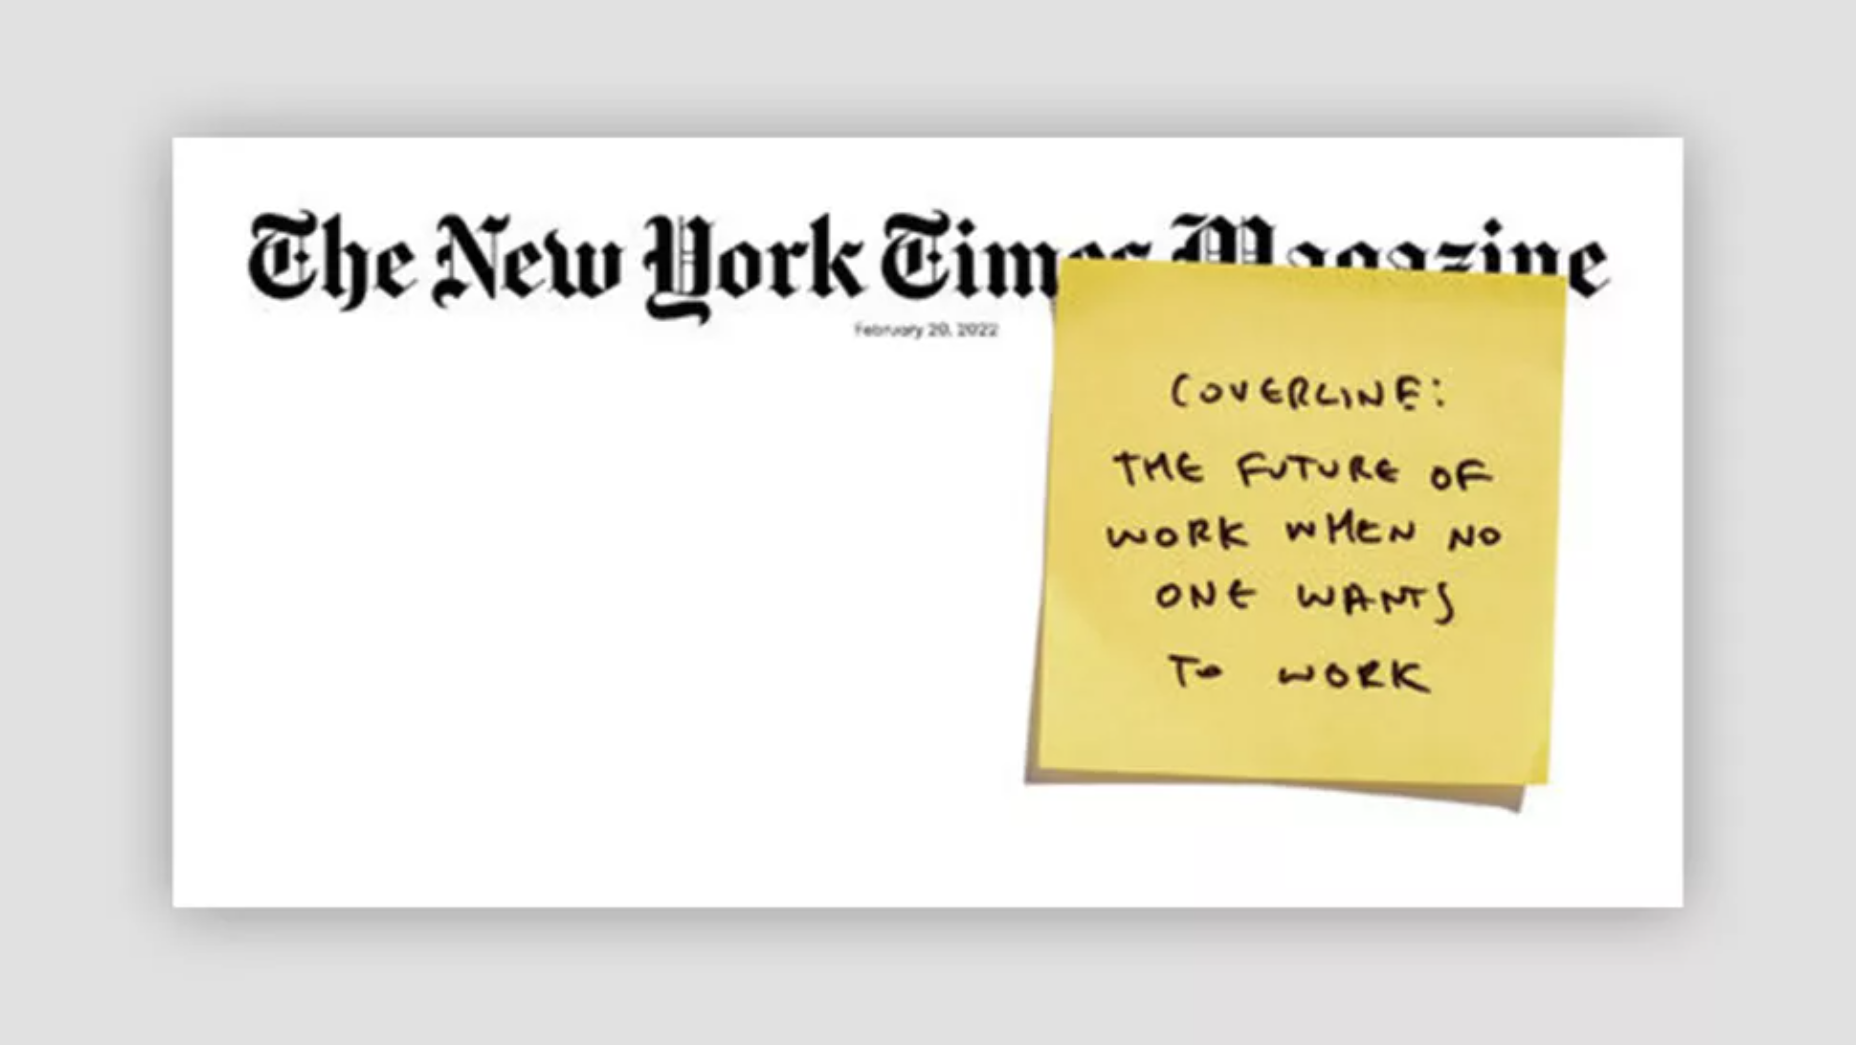
This Stunning Magazine Cover is An Inspired Design

Making your own Website from Scratch

Introducing ComiCSS

15 Google Drive Alternatives You Need to Consider

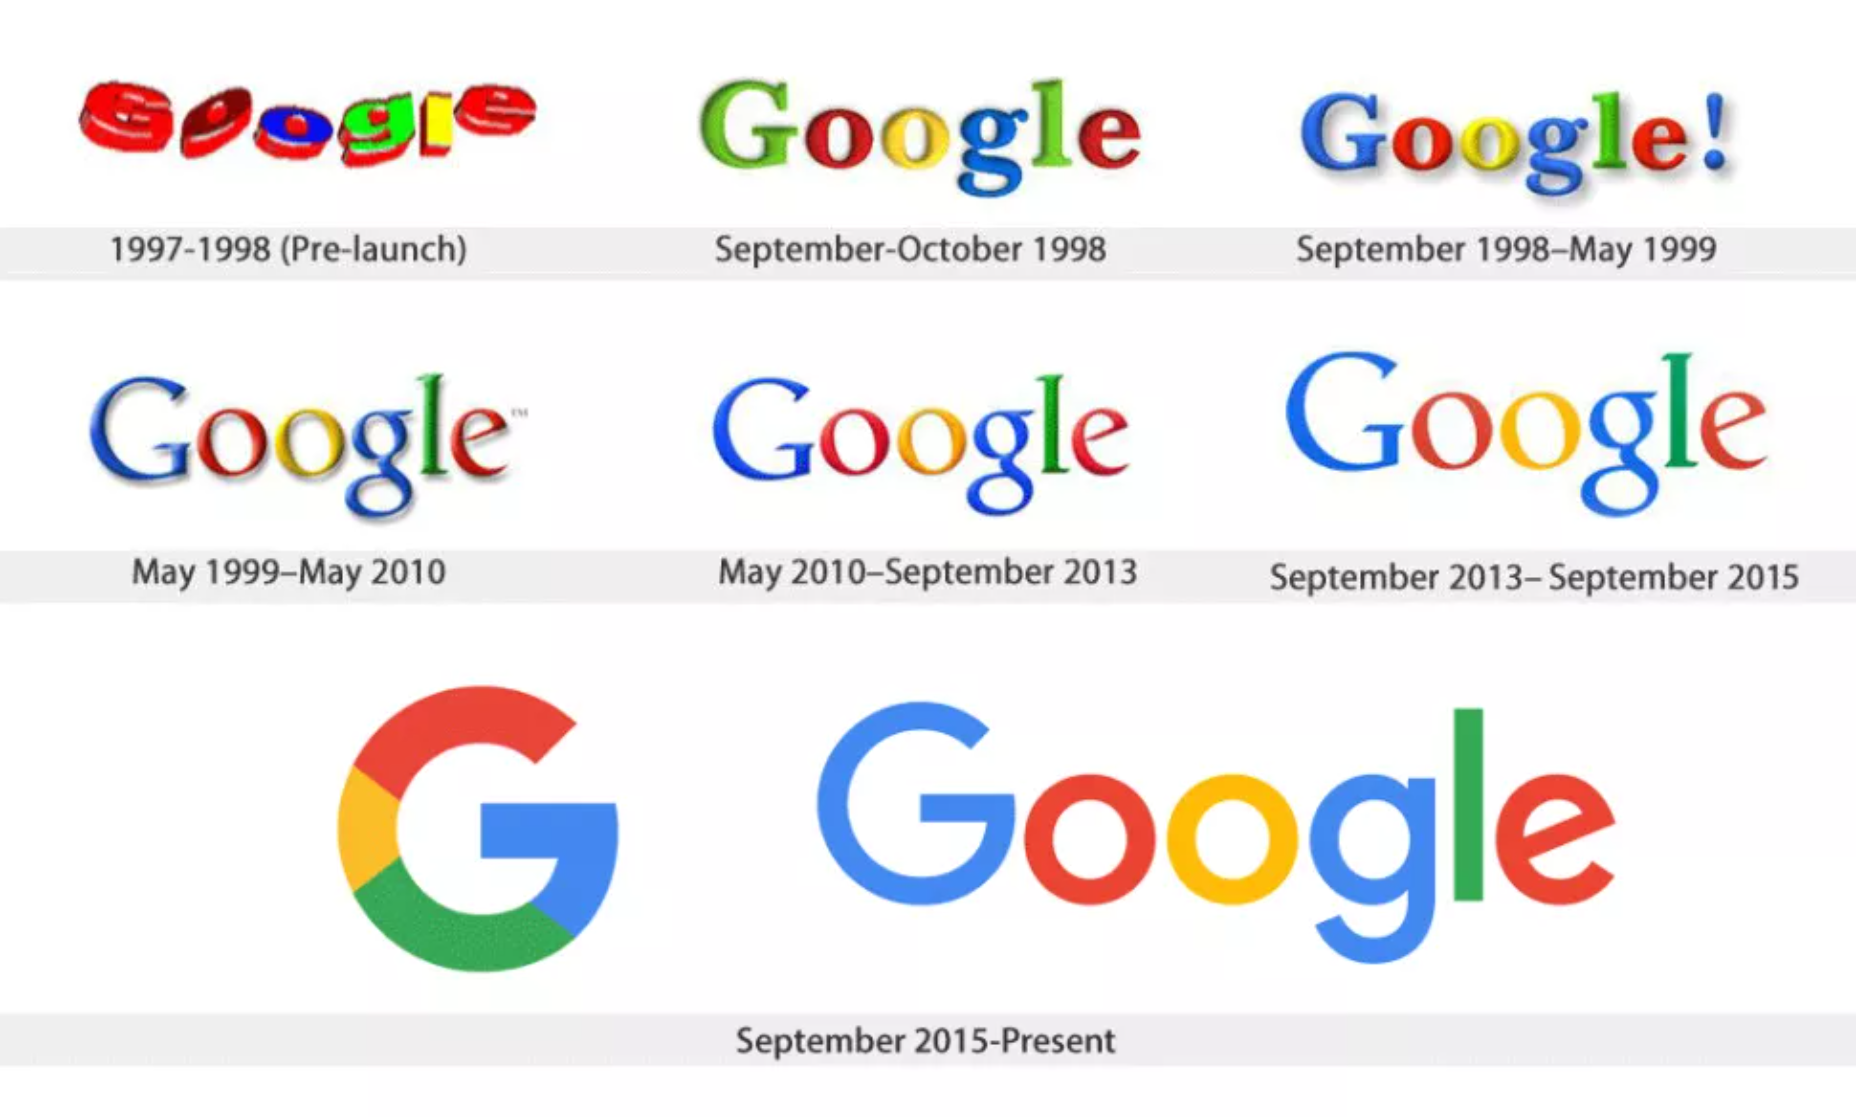
Turns Out Those Google Logo Colours Mean More than You Think

How to Create a Section Divider Using CSS

Human First, Designer Second

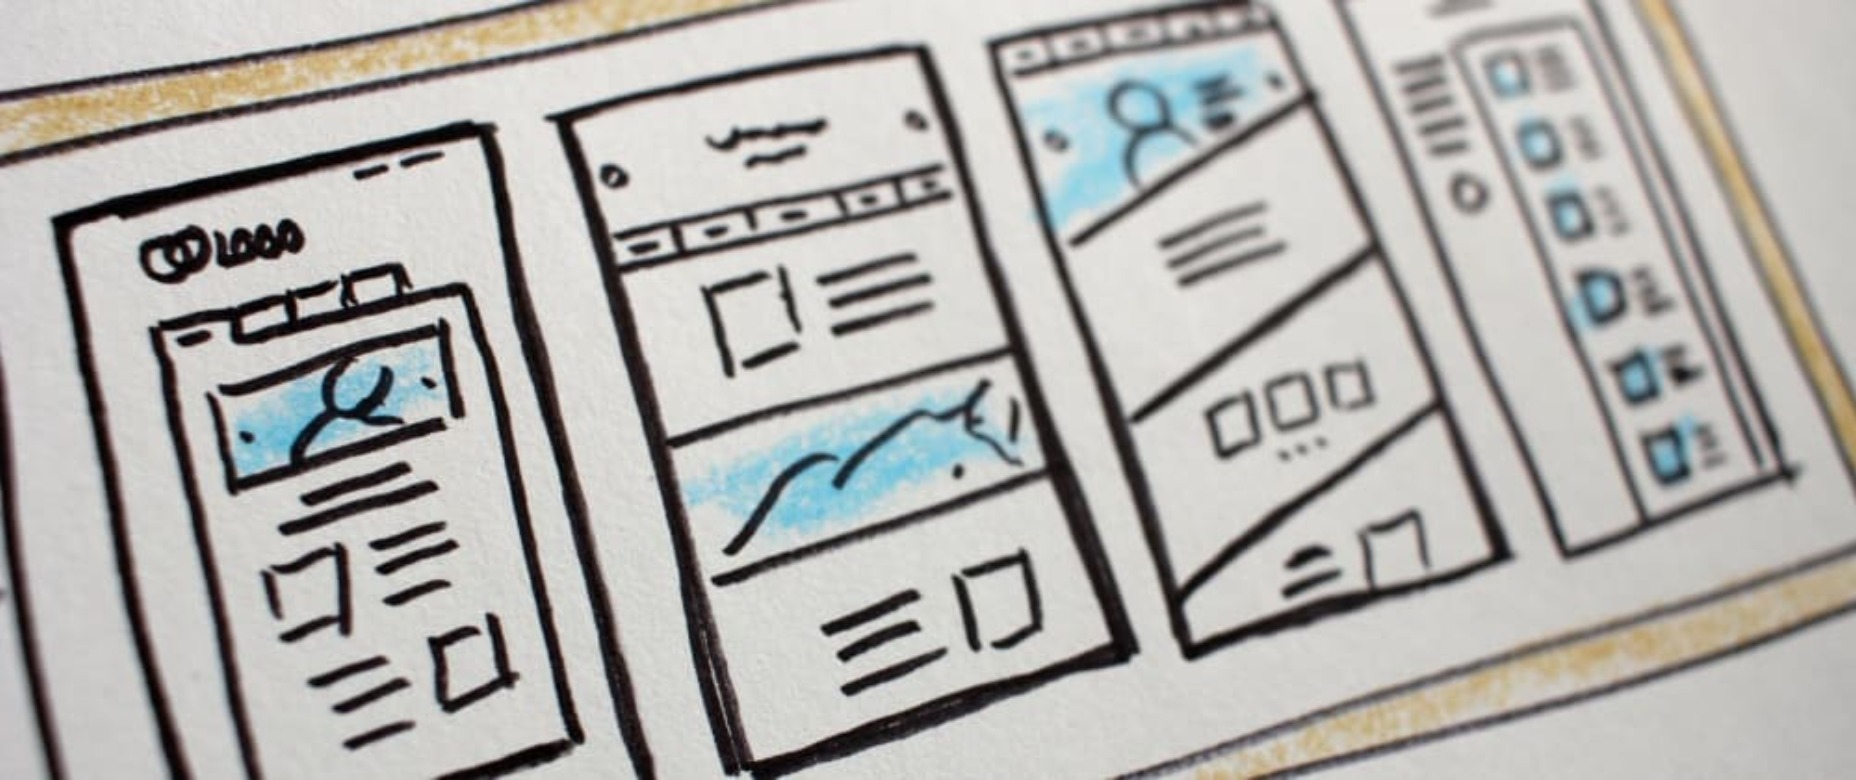
Landing Page UI – How to Ensure User Friendly Design

New CSS Features in 2022

The Imperfections of Gmail

Source

The post Popular Design News of the Week: February 28, 2022 – March 6, 2022 first appeared on Webdesigner Depot.

Categories: Designing, Others Tags:

Competition: Win One of Four Free Online Passes to MUXL

March 4th, 2022 No comments

The fourth edition of MUXL (Mobile UX London) conference kicks off on the 21st of March, and you could win one of four free passes to the five-day digital event.

Running from the 21st of March to 25th, MUXL is a digital festival of UX and design, entirely online, meaning you can attend remotely from anywhere in the world.

The digital festival is themed around design systems, human-centered design, service designing the future, and UX psychology. MUXL features talks and live panels Q&A Monday – Wednesday, interactive workshops taking place on Thursday and Friday, with global networking opportunities throughout.

Speakers include senior UX researchers, managers, design strategists, and designers at companies including Google, IBM, Microsoft, Disney, and more…

MUXL is an excellent opportunity for UX designers of all levels to improve their skillset, make connections, and find inspiration.

Tickets are available now, but we have four Festival Passes to give away, and all you have to do to be in with a chance of winning is make sure you’re signed up for our weekly newsletter before the 14th of March. And don’t worry if you’re already a subscriber, you’ll be automatically entered into the draw.

We’ll select four winners at random on the 14th of March. Good luck!


Featured image via Pexels.

Source

The post Competition: Win One of Four Free Online Passes to MUXL first appeared on Webdesigner Depot.

Categories: Designing, Others Tags:

Say Hello to selectmenu, a Fully Style-able select Element

March 3rd, 2022 No comments
Showing the boundaries of a selectmenu element.
  • is the root element that contains the button and listbox.
  • is the element that displays the value of the currently selection option (optional). Note that this part does not necessarily have to be placed inside the
  • is the wrapper that contains the s and s.
  • groups s together with an optional label.
  • represents the potential value that can be chosen by the user. There can be one or more.

Default behavior

The default behavior of the control mimics the behavior of the control. You can use it just like a native , with the following minimal markup.

<selectmenu>
  <option>Option 1</option>
  <option>Option 2</option>
  <option>Option 3</option>
</selectmenu>

When doing so, the default

I want to introduce you to a new, experimental form control called . We’ll get deep into it, including how much easier it is to style than a traditional element. But first, let’s fill in some context about why something like is needed in the first place, as it’s still evolving and in development.

Ask any web developer what they think is missing from the web platform today, chances are the ability to style form controls will be on their list. In fact, form styling was voted as one of the top-10 missing things in the State of CSS Survey in 2020. It was then further surveyed by Greg Whitworth who showed that was the control web developers were having the most problems styling with CSS.

While it’s relatively easy to style the appearance of the button part of a (the thing you see in the page when the popup is closed), it’s almost impossible to style the options (the thing you see when the popup is open), let alone add more content within the popup.

Showing the default UI of the select element in Safari.
The default UI for a  element in Safari

As a result, design systems and component libraries have been rolling out their own selects, made from scratch using custom HTML markup, CSS, and often a lot of JavaScript, in order to have something that integrates nicely with the other components.

Unfortunately, doing so correctly with the right accessibility semantics, keyboard support, and popup positioning is not easy. Web developers have poured hours and hours over the years, trying to solve the same problems over and over, and there are many inaccessible selects out there.

It’s about time we got a properly style-able built-in so we don’t have to write this code ever again!

The Open UI initiative

The Open UI logo, which is a green oval with a rounded fork-like shape with three prongs inside.

Open UI is a group of developers, designers, and browser implementers who set out to solve this exact problem, and while they’re at it, tackle other missing controls too.

The purpose of Open UI is to eventually make it possible for web developers to style and extend built-in UI controls (this includes , but dropdowns, checkboxes, radio buttons, and others too). To achieve this, they produce specifications for how these controls should be implemented in the web platform as well as the accessibility requirements they should address.

The project is still in its infancy, but things are moving fast and, as we’ll see below, exciting things are already happening.

You can join the group and participate in the meetings, research, and specification efforts.

The  control

Based on the Open UI’s  proposal, the implementation of a new  control has started in Chromium! The work is done by the Microsoft Edge team, in collaboration with the Google Chrome team. It’s even already available in Chromium-based browsers by enabling the “Experimental Web Platform features” flag in the about:flags page.

 is a new built-in control that provides an option selection user experience, just like , with a button showing the selected value label, a popup that appears when that button is clicked, and a list of options that get displayed.

Why a new name?

Why not just replace the existing control? The name “selectmenu” started as a working name, but it seems to have stuck so far, and no one has come up with anything better yet.

More importantly, the existing control has been used on the web for a very long time. As such, it can probably never be changed in any significant way without causing major compatibility issues.

So, the plan (and remember this is all still very experimental) is for to be a new control, independent from .

Try it out today

This isn’t ready for production use yet, but if you’re as excited as I am about using it, here’s how:

  1. Open a Canary version of a Chromium-based browser (Chrome, Edge).
  2. Switch the “Experimental Web Platform features” flag in the about:flags page and restart.
  3. Replace any by in a web page!

That’s it! It won’t do much by default, but as we’ll see later, you’ll be able to style and extend the control quite extensively with this one tag name change.

We love feedback!

Before we go into how to use the control, if you do use it, the Open UI group and people working on the implementation in Chromium would love to hear your feedback if you have any.

By being an early tester, you can actively help them make the control better for everyone. So, if you encounter bugs or limitations with the design of the control, please send your feedback by creating an issue on the Open UI GitHub repository!

And now, let’s talk about how the control works.

The anatomy of a control

Because the various parts of the selectmenu can be styled, it’s important to first understand its internal anatomy.

Showing the boundaries of a selectmenu element.
  • is the root element that contains the button and listbox.
  • is the element that displays the value of the currently selection option (optional). Note that this part does not necessarily have to be placed inside the
  • is the wrapper that contains the s and s.
  • groups s together with an optional label.
  • represents the potential value that can be chosen by the user. There can be one or more.

Default behavior

The default behavior of the control mimics the behavior of the control. You can use it just like a native , with the following minimal markup.

<selectmenu>
  <option>Option 1</option>
  <option>Option 2</option>
  <option>Option 3</option>
</selectmenu>

When doing so, the default

Categories: Designing, Others Tags: