Archive

Archive for May, 2022

Useful Tools for Creating AVIF Images

May 9th, 2022 No comments

AVIF (AV1 Image File Format) is a modern image file format specification for storing images that offer a much more significant file reduction when compared to other formats like JPG, JPEG, PNG, and WebP. Version 1.0.0 of the AVIF specification was finalized in February 2019 and released by Alliance for Open Media to the public.

In this article, you will learn about some browser-based tools and command line tools for creating AVIF images.

Why use AVIF over JPGs, PNGS, WebP, and GIF?

  • Lossless compression and lossy compression
  • JPEG suffers from awful banding
  • WebP is much better, but there’s still noticeable blockiness compared to the AVIF
  • Multiple color space
  • 8, 10, 12-bit color depth

Caveats

Jake Archibald, wrote an article a few years back on this new image format and also helped us to identify some disadvantages to compressing images, normally you should look out for these two when compressing to AVIF:

  1. If a user looks at the image in the context of the page, and it strikes them as ugly due to compression, then that level of compression is not acceptable. But, one tiny notch above that boundary is fine.
  2. It’s okay for the image to lose noticeable detail compared to the original unless that detail is significant to the context of the image.

See also: Addy Osmani at Smashing Magazine goes in-depth on using AVIF and WebP.

Browser Solutions

Squoosh

Screenshot of Squoosh.

Squoosh is a popular image compression web app that allows you to convert images in numerous formats to other widely used compressed formats, including AVIF.

Features
  • File-size limit: 4MB
  • Image optimization settings (located on the right side)
  • Download controls – this includes seeing the size of of the resulting file and the percentage reduction from the original image
  • Free to use

AVIF.io

Screenshot of AVIF.io.

AVIF.io is an image tool that doesn’t require any form of code. All you need to do is upload your selected images in PNG, JPG, GIF, etc. and it would return compressed versions of them.

Features
  • Conversion settings (located on the top-right of upload banner)
  • Free to use

You can find answers to your questions on the AVIF.io FAQ page.

Command Line Solutions

avif-cli

avif-cli by lovell lets you take AVIF images stored in a folder and converts them to AVIF images of your specified reduction size.

Here are the requirements and what you need to do:

  • Node.js 12.13.0+

Install the package:

npm install avif

Run the command in your terminal:

npx avif --input="./imgs/*" --output="./output/" --verbose
  • ./imgs/* – represents the location of all your image files
  • ./output/ – represents the location of your output folder
CodePen Embed Fallback
Features
  • Free to use
  • Speed of conversion can be set

You can find out about more commands via the avif-cli GitHub page.

sharp

sharp (also maintained by lovell) is another useful tool for converting large images in common formats to smaller, web-friendly AVIF images.

Here are the requirements and what you need to do:

  • Node.js 12.13.0+

Install the package:

npm install sharp

Create a JavaScript file named sharp-example.js and copy this code:

const sharp = require('sharp')

const convertToAVIF = () => {
    sharp('path_to_image')
    .toFormat('avif', {palette: true})
    .toFile(__dirname + 'path_to_output_image')
}

convertToAVIF()

Where path_to_image represents the path to your image with its name and extension, i.e.:

./imgs/example.jpg

And path_to_output_image represents the path you want your image to be stored with its name and new extension, i.e.:

/sharp-compressed/compressed-example.avif

Run the command in your terminal:

node sharp-example.js

And there! You should have a compressed AVIF file in your output location!

Features
  • Free to use
  • Images can be rotated, blurred, resized, cropped, scaled, and more using sharp

See also: Stanley Ulili’s article on How To Process Images in Node.js With Sharp.

Conclusion

AVIF is a technology that front-end developers should consider for their projects. These tools allow you to convert your existing JPEG and PNG images to AVIF format. But as with adopting any new tool in your workflow, the benefits and downsides will need to be properly evaluated in accordance with your particular use case.

I hope you enjoyed reading this article as much as I enjoyed writing it. Thank you so much for your time and I hope you have a great day ahead!


Useful Tools for Creating AVIF Images originally published on CSS-Tricks. You should get the newsletter.

Categories: Designing, Others Tags:

15 Best New Fonts, May 2022

May 9th, 2022 No comments

While we’ve featured a lot of script fonts in previous months, this newest batch of the best new fonts is going to extremes. If you’re looking to have a bit more fun with typography in the coming months — especially for modern tech brands — you’ll find something here worth trying out here.

1. Apice

Apice is an attractive script font that stands out amongst the more common flowing calligraphy structures. With a rigid, sharp, and upright character set, Apice is a script font that will be easy to read — for those familiar with cursive lettering (so perhaps don’t use this on websites targeted at Gen Z).

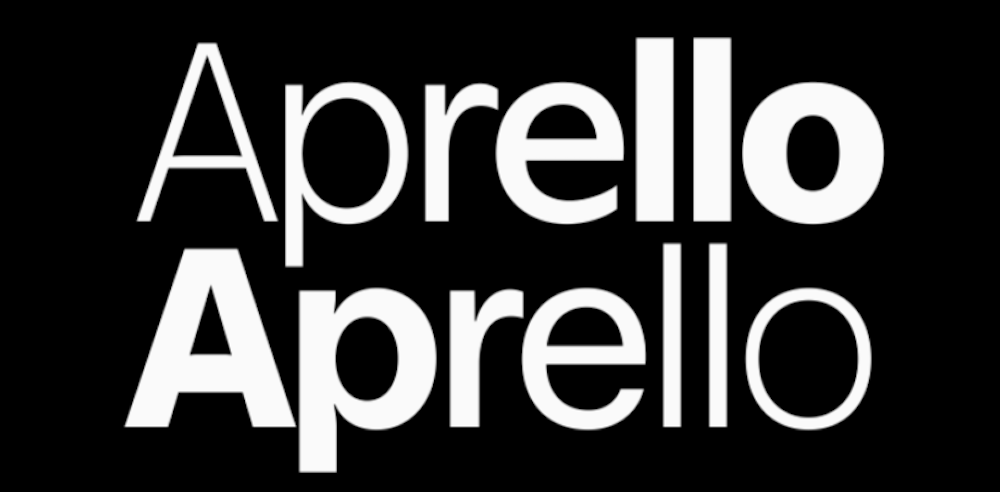
2. Aprello

Aprello is a flexible sans serif typeface that can easily adapt to different tones and styles. One reason for this is because it’s a variable font. Another is that it comes with more than 150 alternative glyphs and forms.

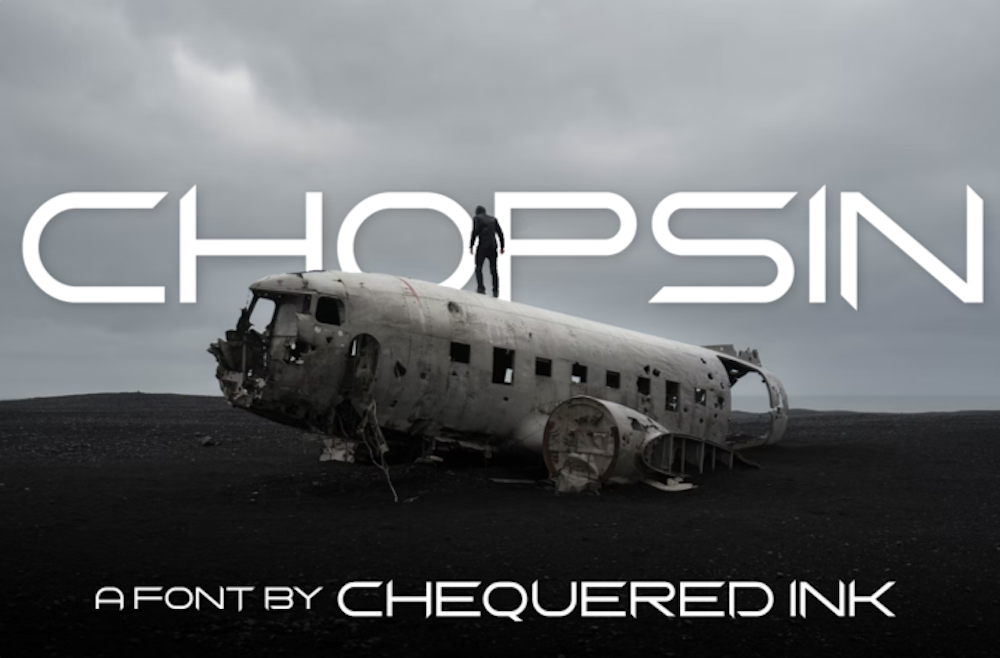
3. Chopsin

Chopsin is an edgy, futuristic font that would look great on hi-tech websites — think AI, robotics, space travel, etc. This sans serif typeface would work just as well in headers as it would in paragraph text.

4. Diurnal Mono

Diurnal Mono is a new addition to the Diurnal superfamily of sans serif fonts. This monospaced font was designed for technical and technological applications. That said, it adds a dash of humanism by merging the geometric structures with calligraphy.

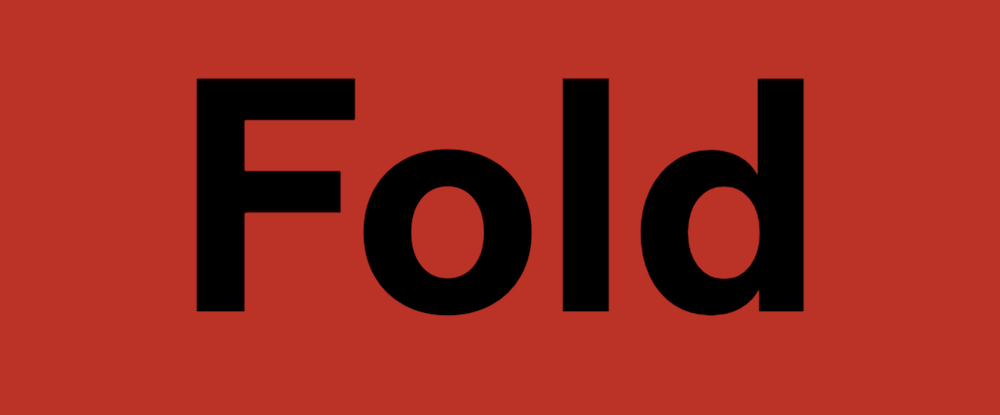
5. Fold

Fold is a neo-grotesque font that is as neutral as they get. If you’re looking for a simple, straightforward sans serif to offset perhaps a more elaborate web design, this font would be a smart choice.

6. Gardez

Gardez is a creative display font that performs best at larger sizes. It combines two contrasting font styles — garalde, an oldstyle serif typeface used in printing, and reverse-contrast, whereby the horizontal lines are thicker than the vertical ones.

7. Gate A1

Gate A1 is inspired by DIN, a sans serif typeface commonly used in business administrative and technical use cases. With its straightforward and legible structure, Gate A1 works just as well on web interfaces as it does signage and documentation in the real world.

8. Inbadge

Inbadge is a brush script that can be used in logo and packaging design as well as website hero images. Its lighthearted and casual design would work well for brands that want to be seen as fun, youthful, and creative.

9. Kosmos

Kosmos is an experimental font. Each character is designed using a series of parallel lines. The thickness of the weight and style used will determine how much or how little overlap there is between the lines. Going to extremes, either way can potentially render the characters unreadable, so keep that in mind when using this font.

10. Maax Unicase

Maax Unicase is an extension of the Maax family of fonts. This dense unicase display font isn’t like other unicase fonts you may have run into. While the characters are all the same height, some of them present with their lowercase characteristics.

11. Nilota

Nilota Typeface is a serif font that feels modern and carefree, which is kind of a strange thing for serifs which tend to be more on the conservative and traditional side. Regardless, the unique curves of this font are sure to get people to instantly notice any UI or logo you use it in.

12. Rainbow Chalk

Rainbow Chalk is a handwritten serif font. The font designer suggests using it in children-related projects, though I think it could be used anywhere that calls for a casual and youthful vibe.

13. Right Sans

Right Sans is a high-contrast serif font. The font family is huge and includes a variety of heights, weights, widths, and angles, so there are lots of different extremes you can take this font to.

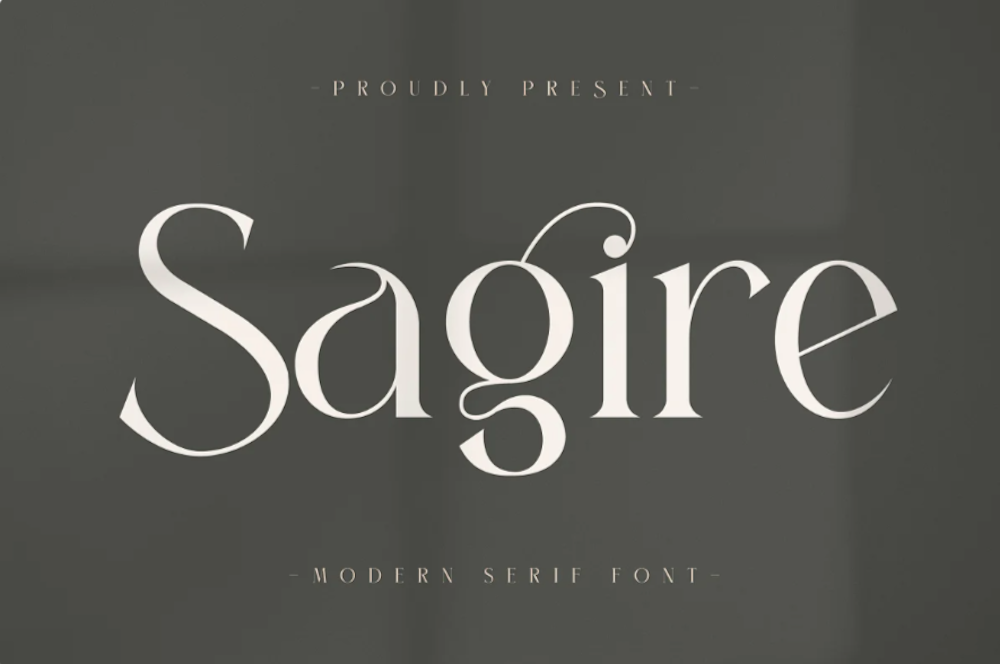
14. Sagire

Sagire is a unique serif font that looks like something you’d see on a black-and-white movie title screen. This font could be helpful if you’re working on a website or logo with an old-timey and elegant feel.

15. TT Norms Pro Mono

TT Norms Pro Mono is a monospaced typeface that’s just been added to the TT Norms Pro font family. Thanks to its attractive and highly legible design, you could use this font in everything from a technical website to a personal blog.

Source

The post 15 Best New Fonts, May 2022 first appeared on Webdesigner Depot.

Categories: Designing, Others Tags:

Popular Design News of the Week: May 2, 2022 – May 8, 2022

May 8th, 2022 No comments

Every day design fans submit incredible industry stories to our sister-site, Webdesigner News. Our colleagues sift through it, selecting the very best stories from the design, UX, tech, and development worlds and posting them live on the site.
The best way to keep up with the most important stories for web professionals is to subscribe to Webdesigner News or check out the site regularly. However, in case you missed a day this week, here’s a handy compilation of the top curated stories from the last seven days. Enjoy!

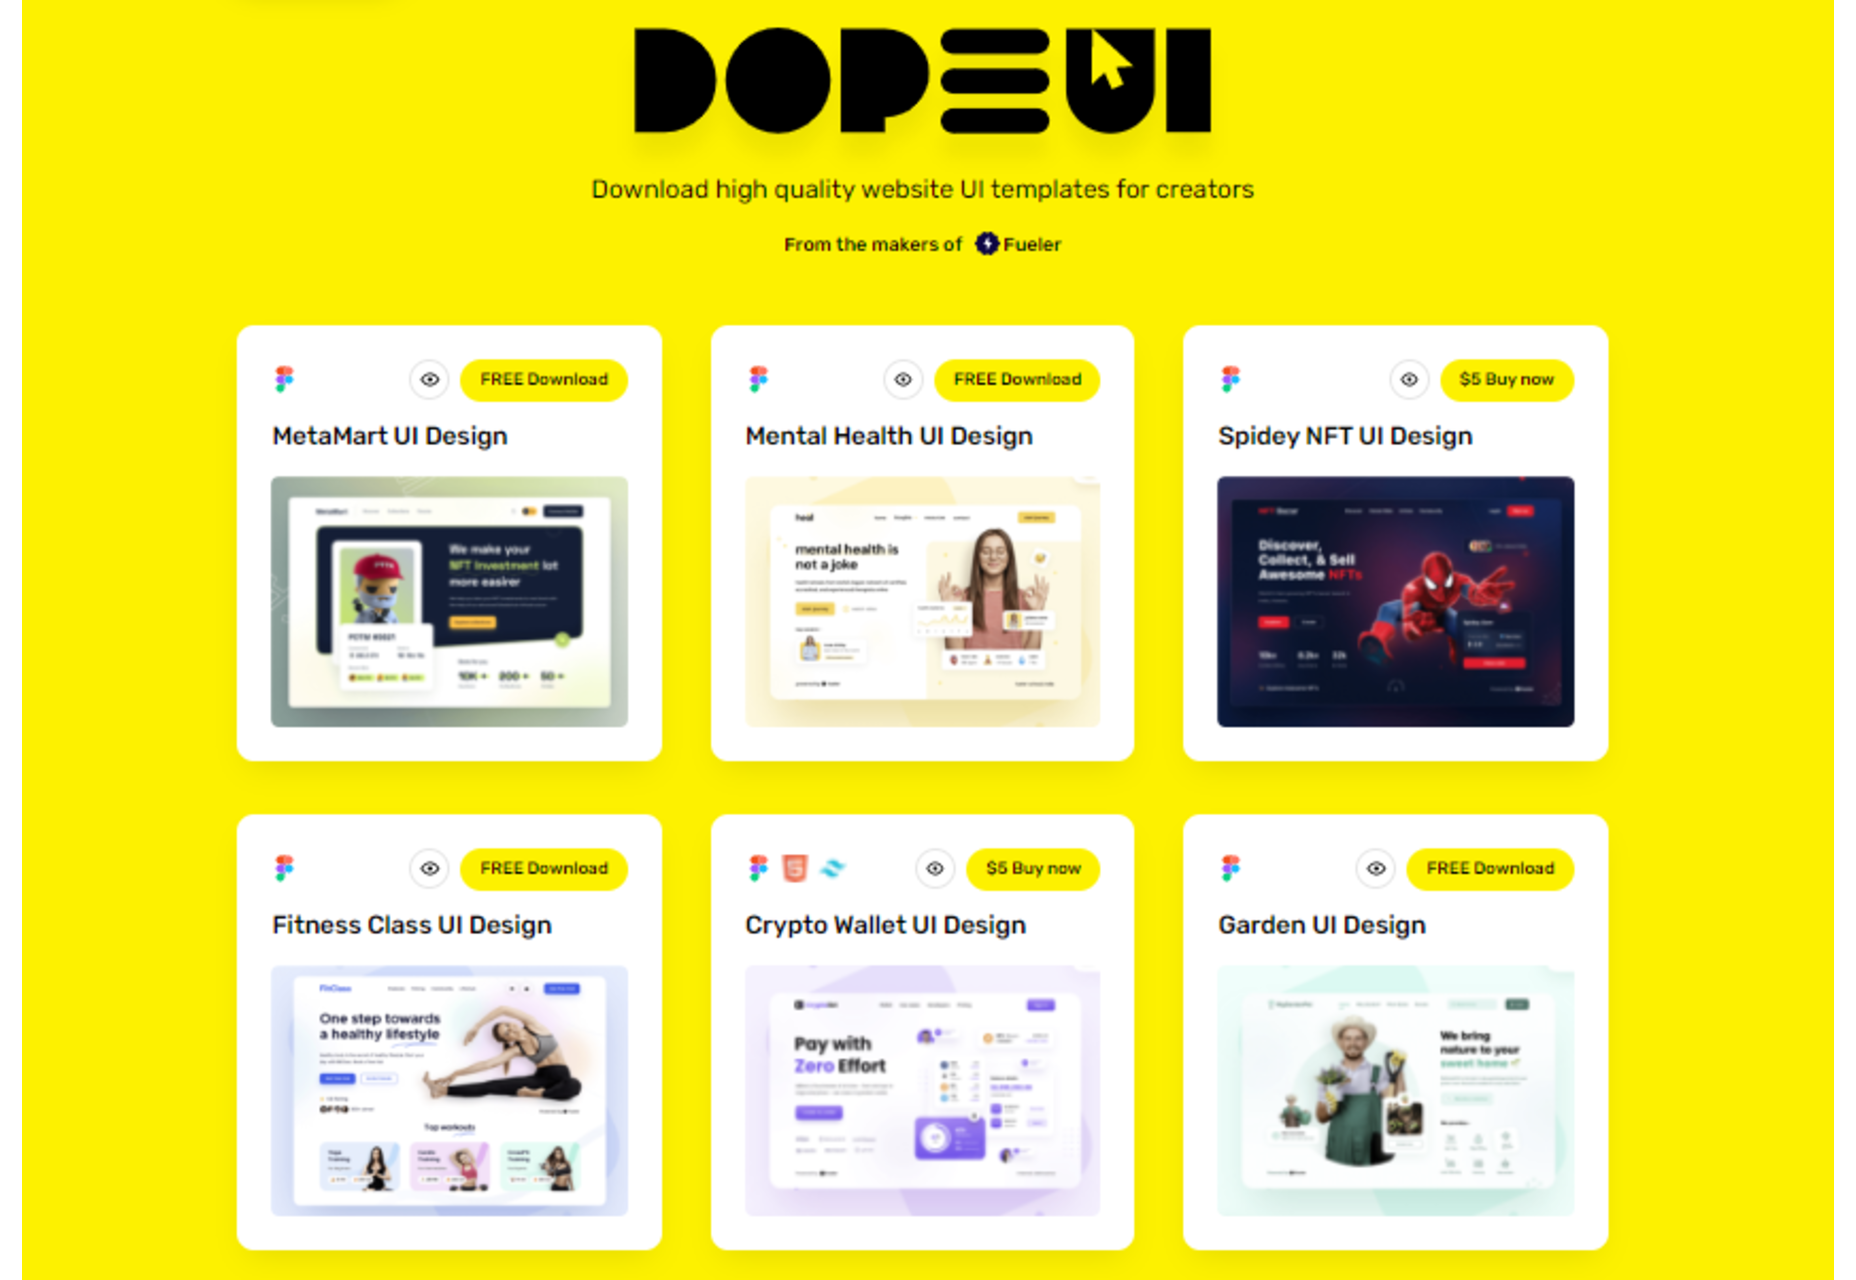
DopeUI – Free Modern UI Design Templates

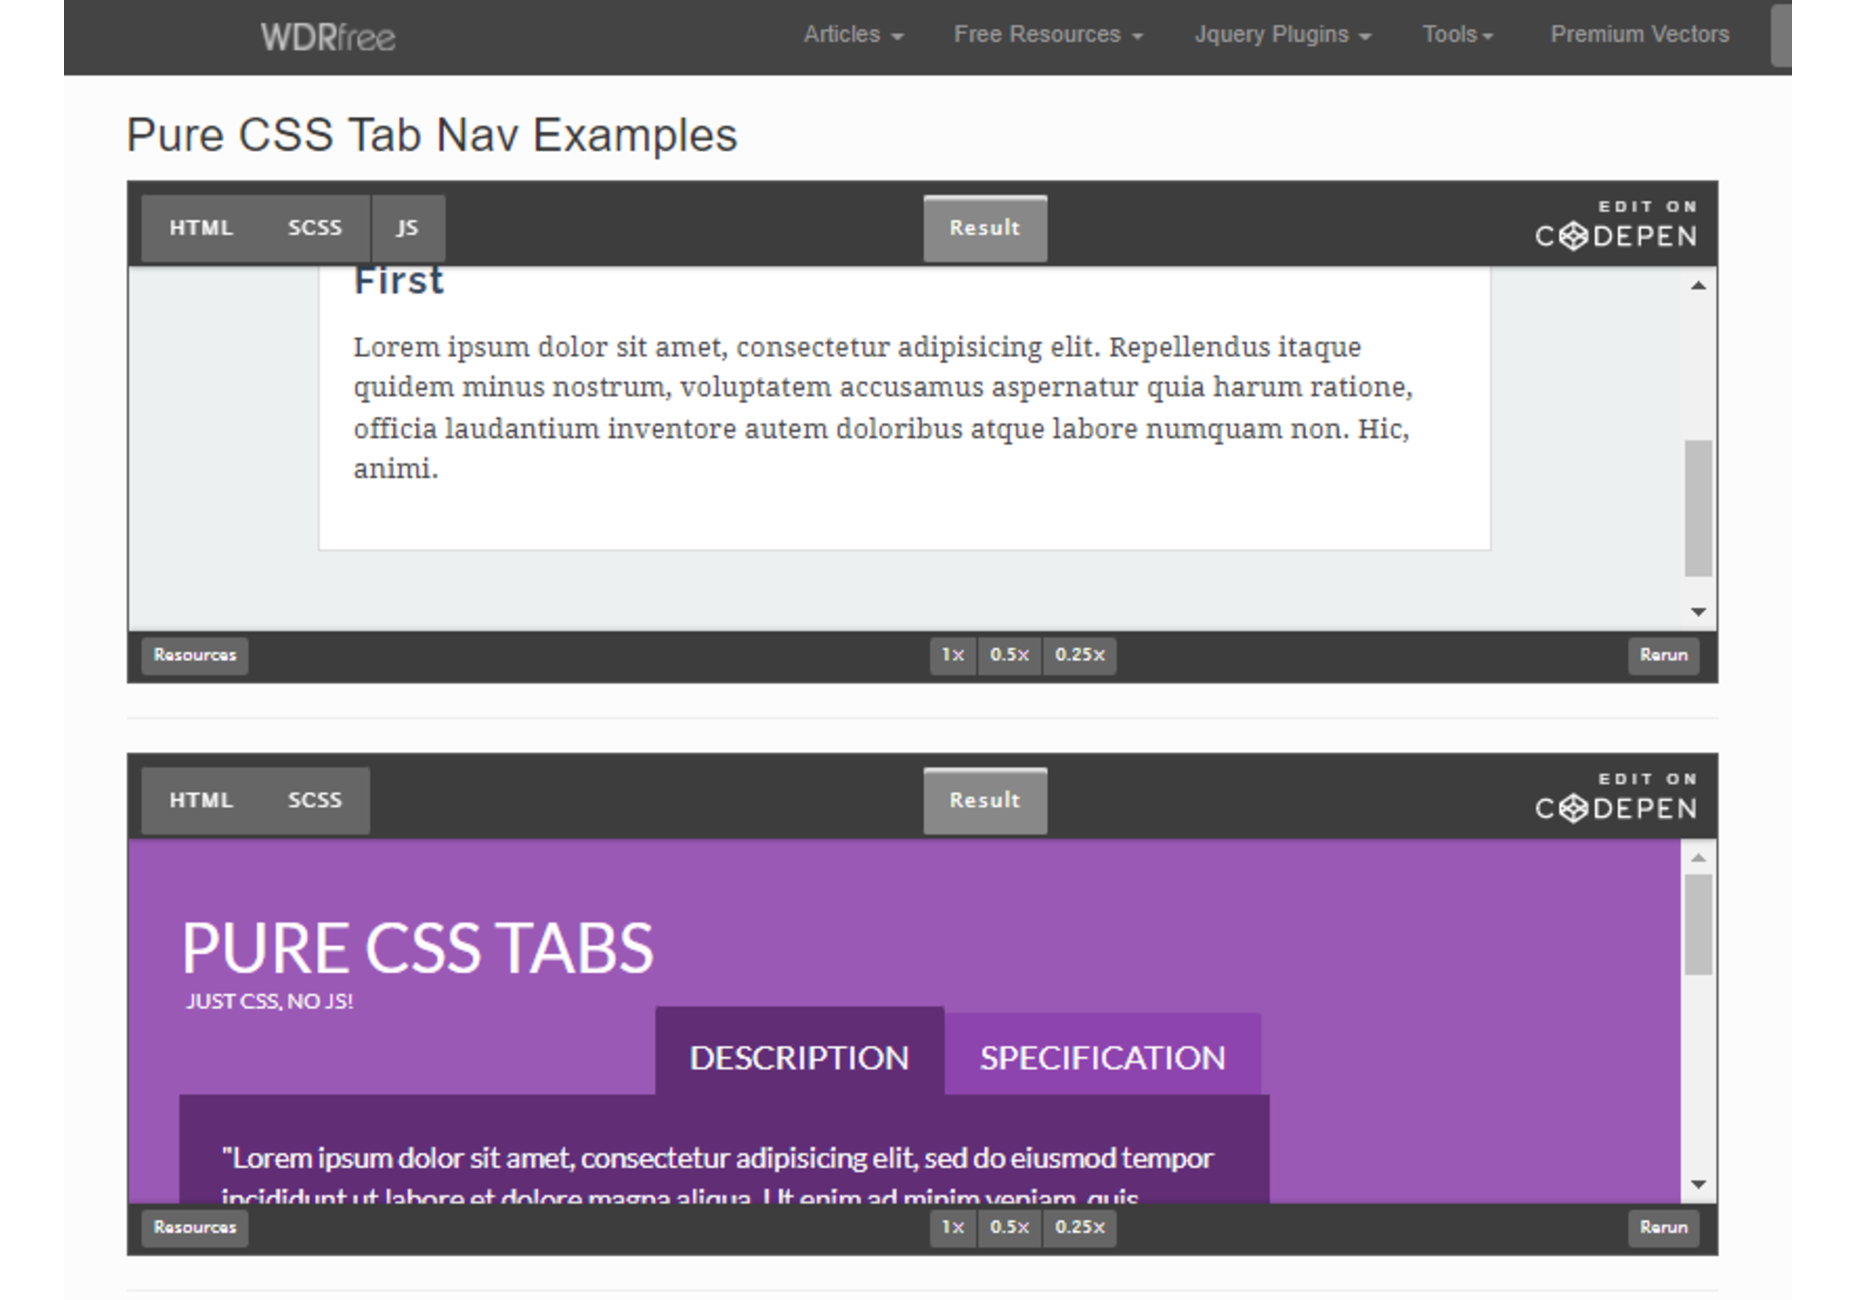
How to Create a PureCSS Tabs Navigation

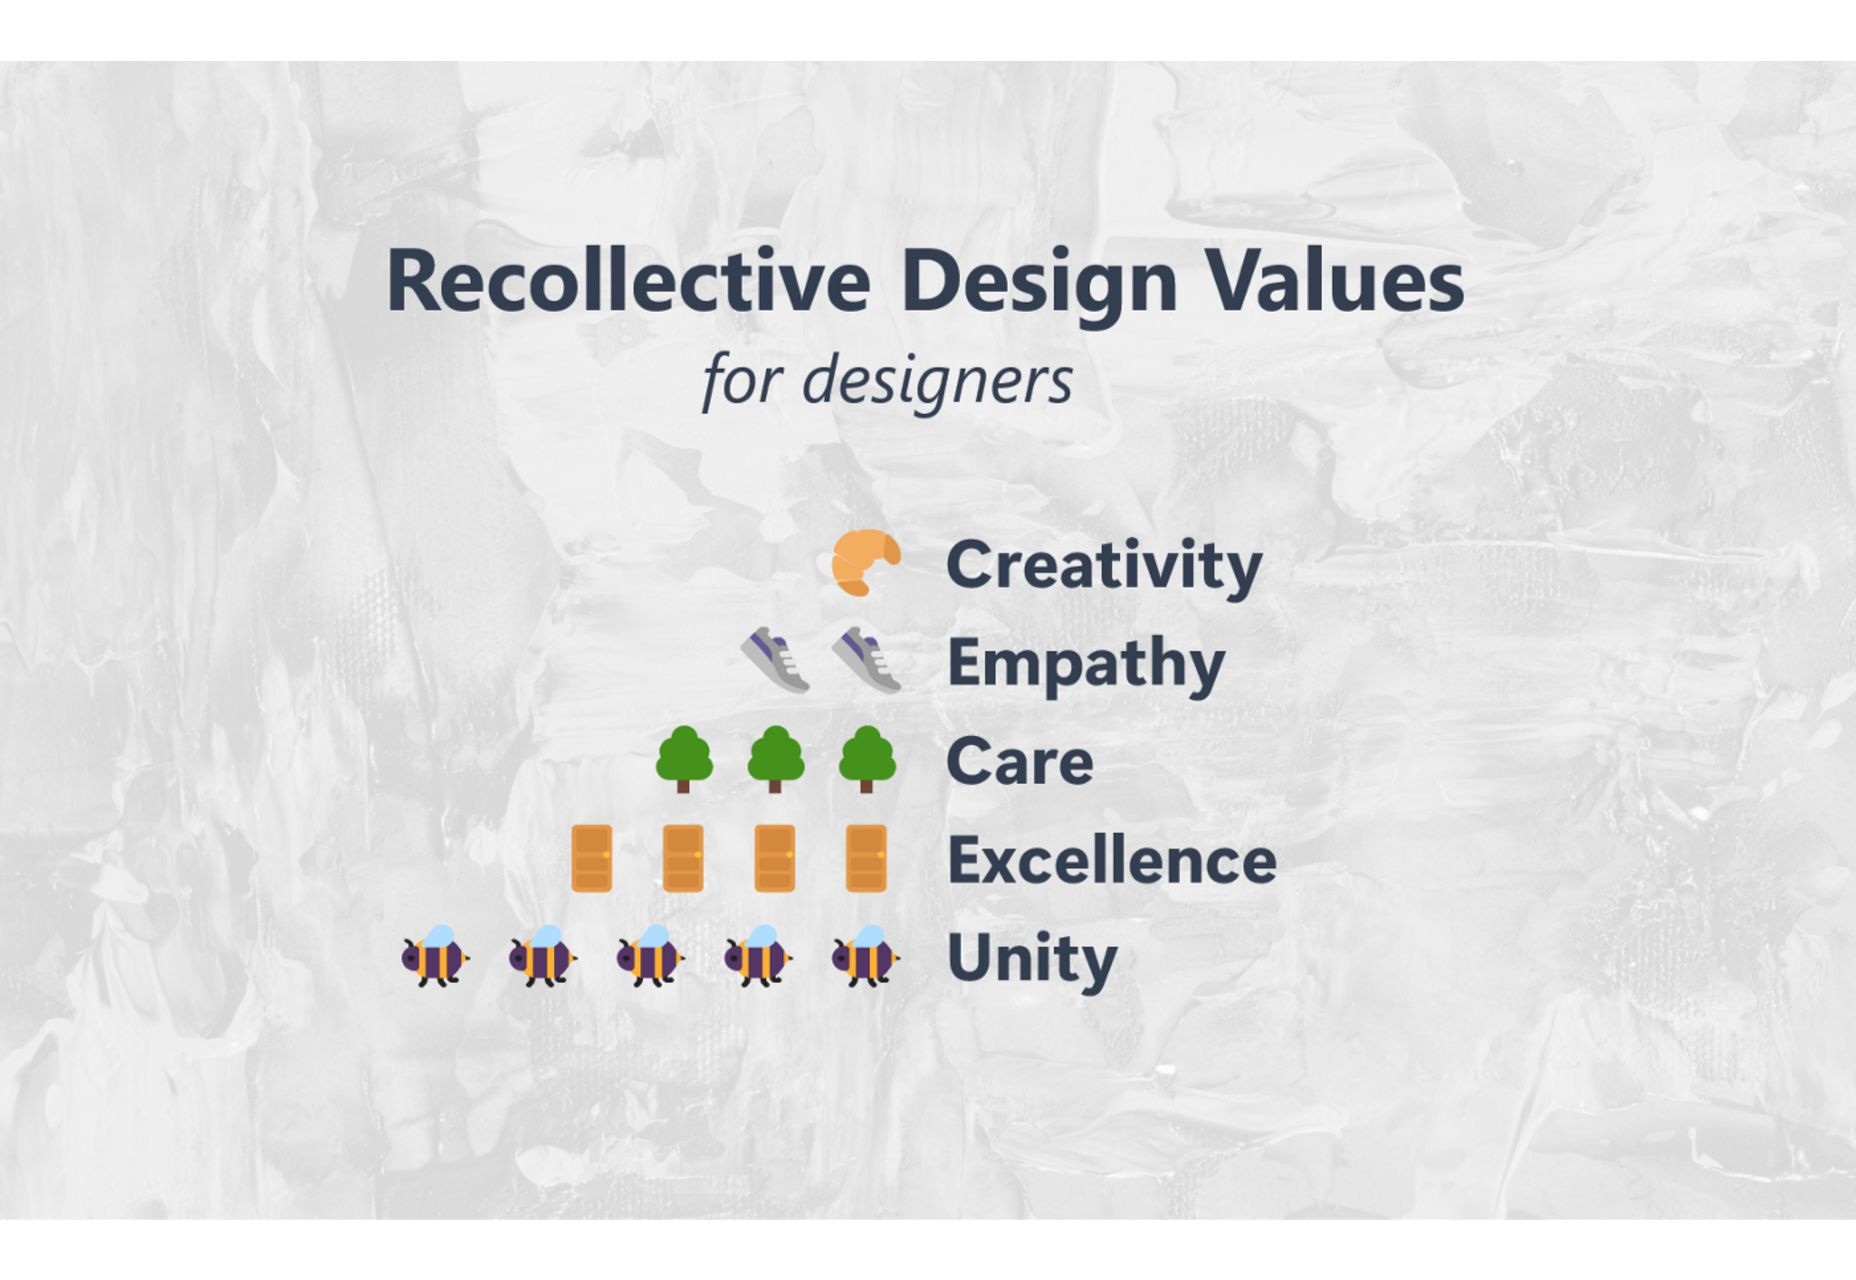
If Design Principles are for Designs, then Design Values are for Designers

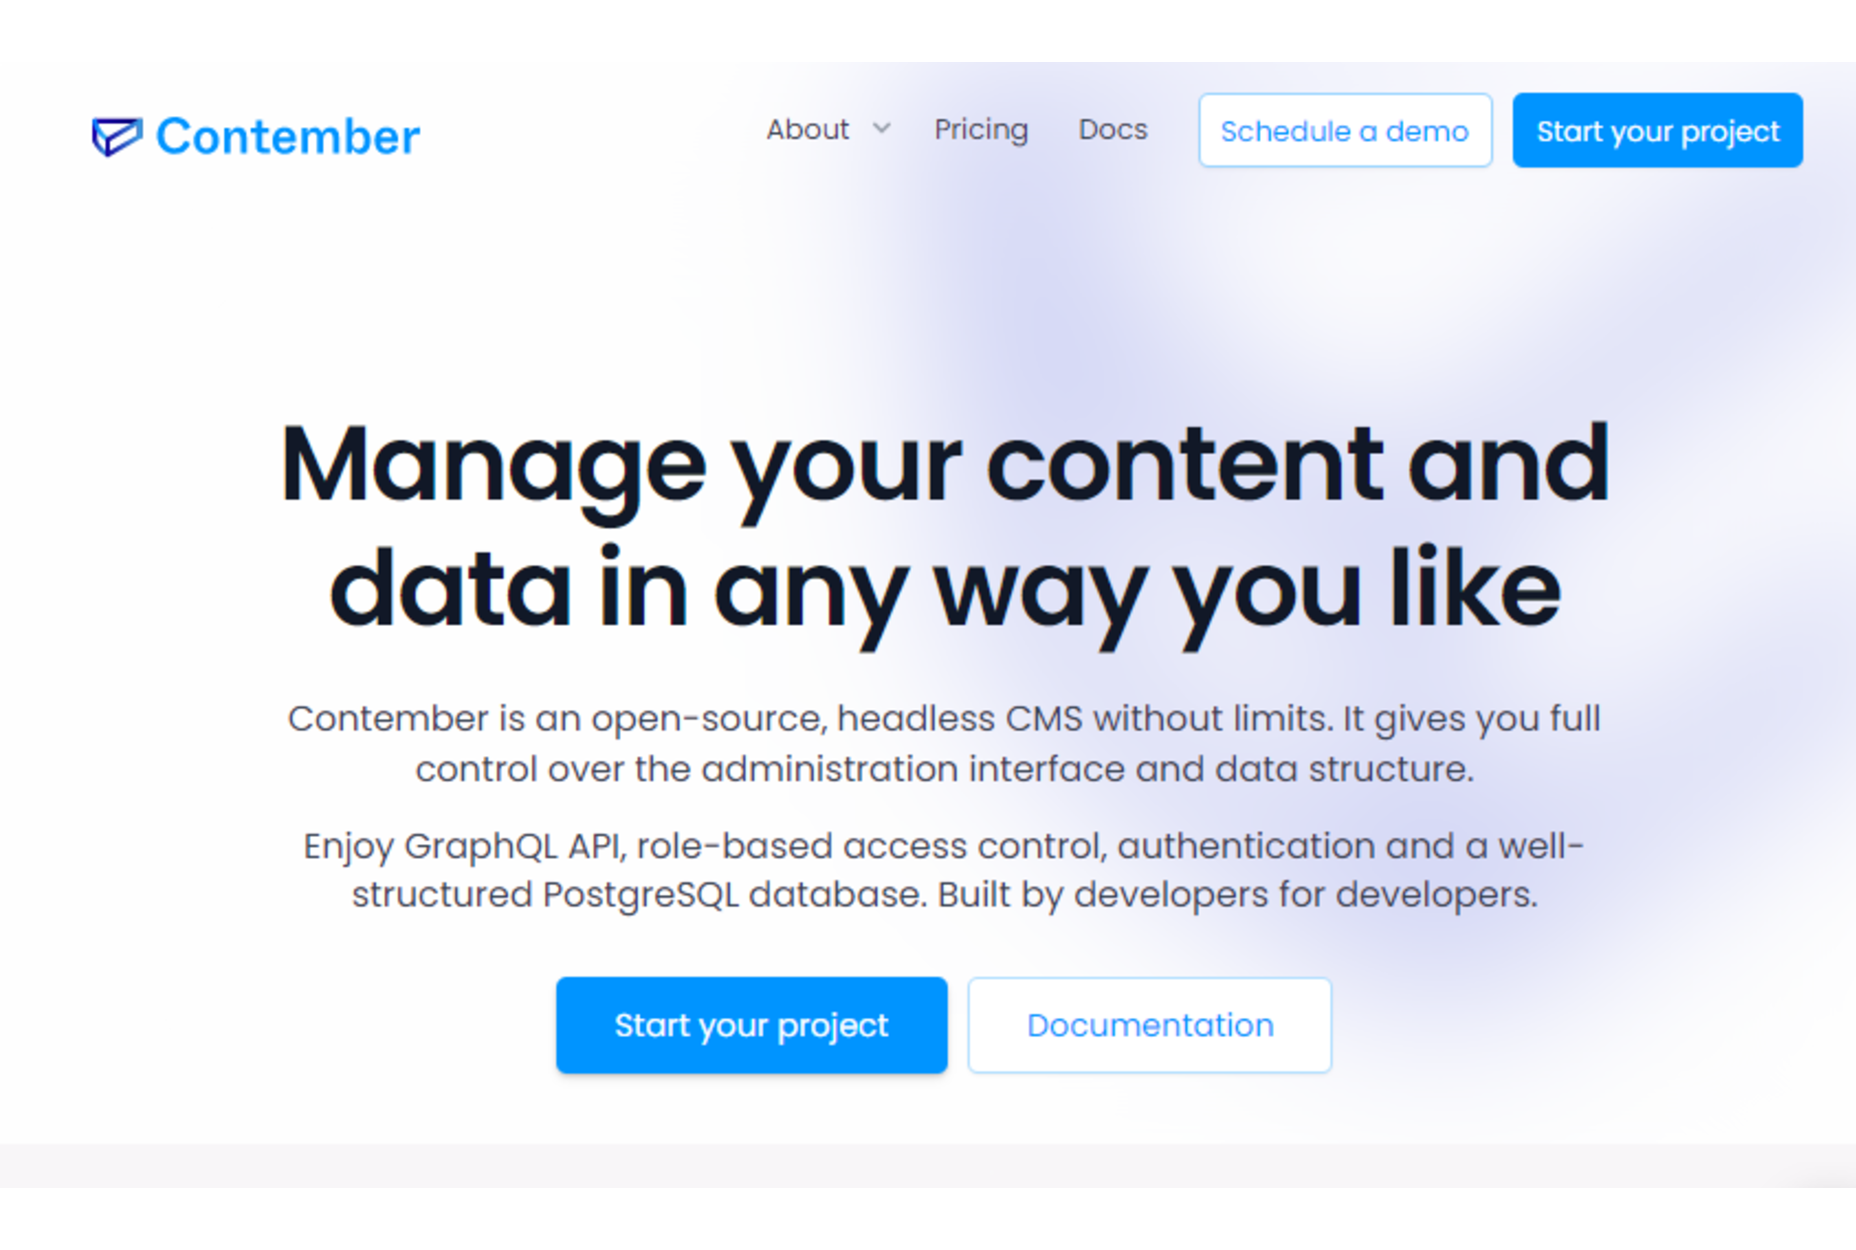
Contember – Open-source, Headless CMS Without Limits

Buckle Up! We’re Diving into the World of Travel Website Design

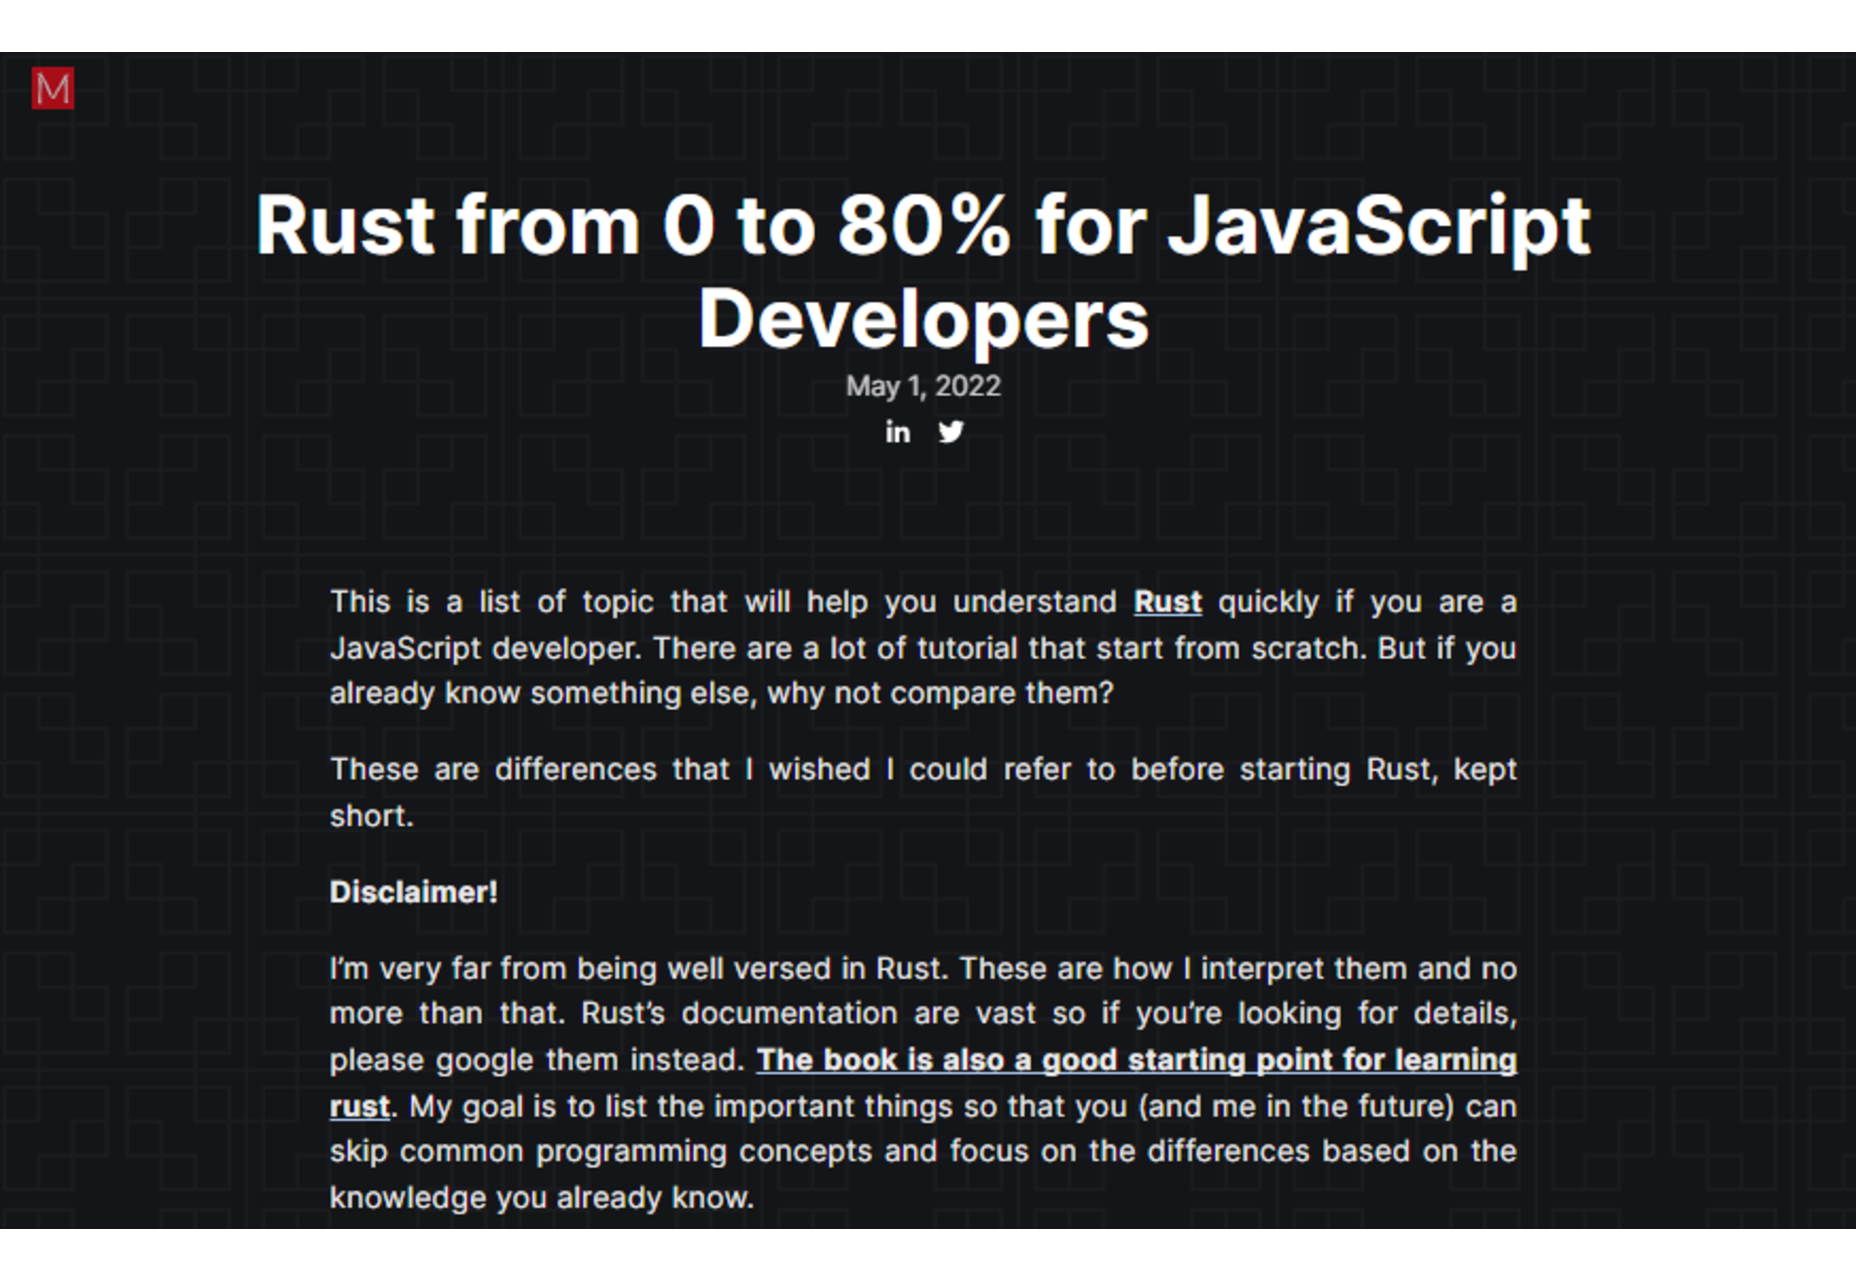
Rust from 0 to 80% for JavaScript Developers

Three Methods to Increase User Autonomy in UX Design

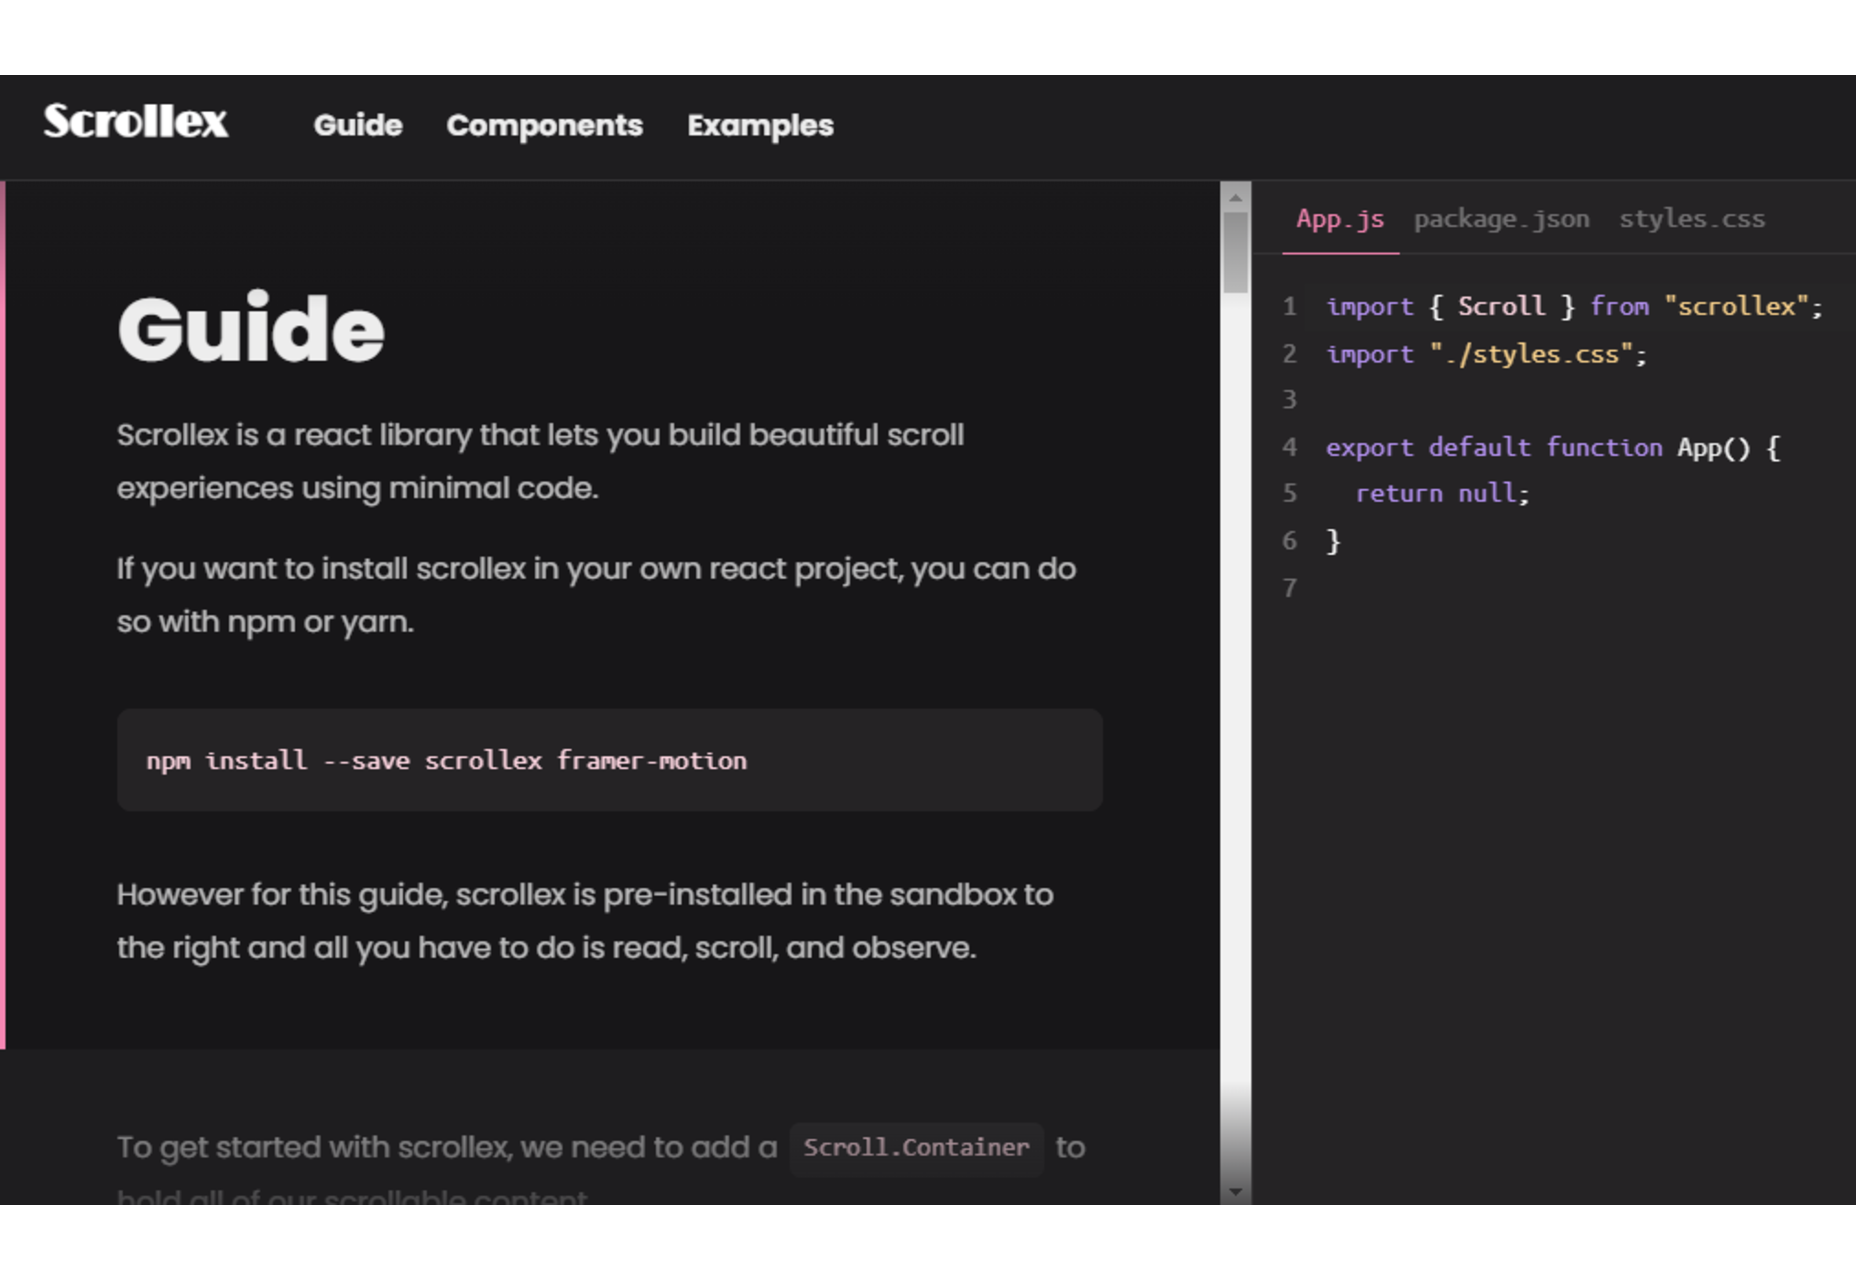
Scrollex – A React Library to Build Beautiful Scroll Experiences

3 Essential Design Trends, May 2022

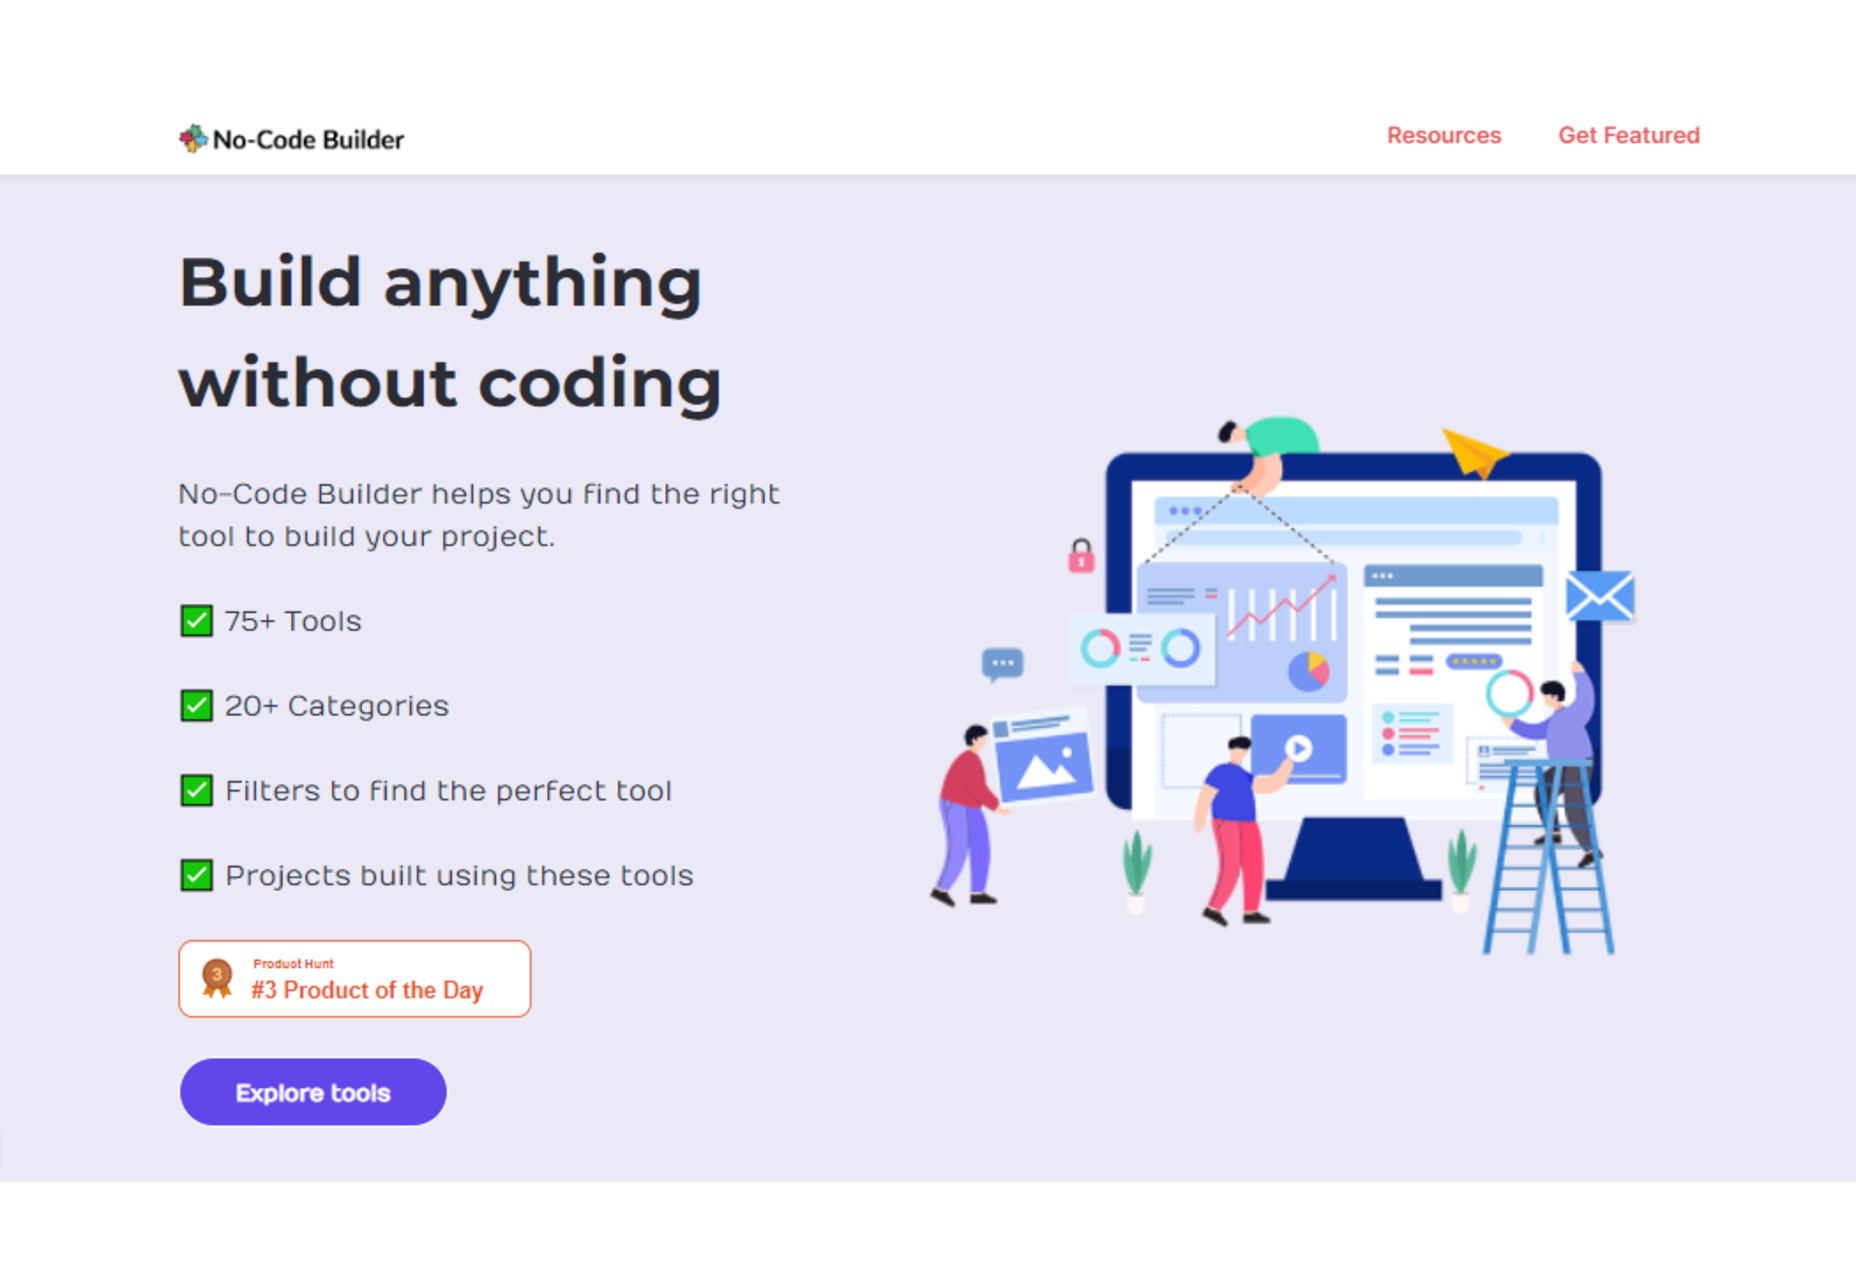
No-Code Builder – Place to Find the Right No-Code Tool to Build your Idea

Creating Realistic Reflections with CSS

Source

The post Popular Design News of the Week: May 2, 2022 – May 8, 2022 first appeared on Webdesigner Depot.

Categories: Designing, Others Tags:

How to Find Web Design Clients in 2022

May 6th, 2022 No comments

Do you find yourself stuck when finding new web design clients? Whether you own a web design company or work as a freelancer, expanding your audience and attracting clients can be challenging.

Talking from experience: there are times when I can not find people interested in my work. If that’s the case for you right now, let me tell you not to worry.

This guide will analyze the best practices I use to attract new web design clients and how you can easily customize them to fit your needs and preferences. First, we will explore why it’s essential to use more than one way to acquire clients in 2022.

Why Should You Seek Innovative Ways to Attract Clients?

Let’s start with a personal conviction: There are enough customers to cover our niche’s supply. A common mistake most web designers make is looking in the wrong place.

Do not get me wrong, the quality of your work is always the most important thing. The better your services are, the more clients you will eventually get. But if you want to prove your talent online, you need to expand your audience.

Remember that the market is highly competitive. And so you need to follow certain steps and choose the best platforms. 

7 Best Ways To Attract Web Design Clients in 2022

Although there are many ways to attract web design clients online, some prove to be more effective than others. Let us explore them one by one:

1. Use Marketplaces for Freelancers Such as Upwork, Indeed

Whether you own your web studio or are just getting acquainted with being a freelance web designer, marketplaces for freelancers are a great way to attract new clients. The same goes for well-known web design job boards like Dribbble, Twine, and WordPress Jobs

But in general, marketplaces for freelancers are more effective as these platforms attract thousands of buyers/clients every day. The best way to attract clients is to create and polish your profile and respond to relevant job offers.

However, it is equally important to choose a platform that is not exploitative but also has numerous clients in the web design niche. Although Upwork and Indeed are the two most popular, several other platforms meet these requirements, including Freelancer, 99 Designs, Guru, Upstack, TopTal, and PeoplePerHour.

2. Search on LinkedIn

Many would argue that social media platforms are the best way to attract web design clients these days. While this is true to a certain extent, not all social networks have the same impact on professionals. I have found that LinkedIn is the number one platform that a web designer should invest time and effort into.

The reason is simple; the platform’s goal is to bring professionals together. So, if you create a top-notch LinkedIn profile, you can quickly expand your audience and find people interested in buying services. The process is quite simple because all you need to do is:

  1. Create a professional bio: Mention what you do and who are the people you can help via your services.
  2. Optimize your profile’s About (personal info, website and portfolio info, etc.) and Experience (previous projects) sections.
  3. Use the LinkedIn filters to connect with individuals and companies. 
  4. Personalize your invitations and respond via DMs to people inviting you.

This may sound like a lot of work, and believe me, it is. Still, if you want to attract more clients via social media platforms, LinkedIn is the best way to go. 

3. Pay Attention to your Portfolio and Website

Regardless of how many connections you have on LinkedIn, clients need to trust that you are the best person for a project before hiring you. And there’s no better way to do that than to have a comprehensive portfolio and website.

Websites like Dribble and WordPress allow you to create portfolio websites quickly and efficiently. As a web designer, you can treat your website like a personal project and use your UI and UX knowledge to outshine your competitors.

4. Create Social Proof

In a few words, social proof is a way to prove to new clients that they should mimic the behavior of your existing clients by hiring you for their project.

To do this, you can create a page with Google reviews, collect testimonials/references, take screenshots of your conversations with clients and capture their feedback. Then all you need to do is present them on your portfolio website, in your social media posts/stories, etc.

5. Use Word of Mouth

Apart from asking your existing clients for referrals, you should try to build a deep professional relationship with them. This will automatically help them to recommend your services through word of mouth.

In many cases, word of mouth has proven to be much more reliable than traditional advertising methods (email marketing, SEO tactics).

6. Speak at Events and Podcasts

Say you are an experienced web designer, and all you need is to expand your target audience. In this case, speaking at events is a fantastic way to build authority. Of course, becoming a public speaker is not easy, especially if you’re a beginner.

This is where podcasts come in handy. By appearing as a guest on podcasts (or webinars), you can easily get your name out there, connect with people interested in web design, and eventually attract new clients.

Start by finding communities (e.g., Facebook groups for web design) and communicate with active (or just interested) people in the web design niche.

7. Offer Free Advice to your Audience

Don’t get me wrong, I know that offering something for free is not the best thing. Still, by creating free content and offering free advice, you can make people take notice of your talent.

Likewise, answering questions on social media platforms and creating valuable content is a great way to convert your website/social media visitors into customers.

Wrap Up

Remember that the most important thing in attracting new clients is the quality of your work. This may sound obvious, but believe me, it’s more than just a rookie mistake.

Let’s close with this; the tips listed above will allow you to work harder but smarter. After all, that’s all you need to build authority as a web designer and attract new clients.


Featured image via Pexels.

Source

The post How to Find Web Design Clients in 2022 first appeared on Webdesigner Depot.

Categories: Designing, Others Tags:

How to Serve a Subdomain as a Subdirectory

May 6th, 2022 No comments

Let’s say you have a website built on a platform that excels at design and it’s available at example.com. But that platform falls short at blogging. So you think to yourself, “What if I could use a different blogging platform and make it available at example.com/blog?”

Most people would tell you that goes against how DNS and websites are supposed to work and to use a subdomain instead. But there are benefits to keeping your content on the root domain that we just don’t get with subdomains.

There’s a way to serve two different platforms on the same URL. And I’m going to show you the secret sauce so that, by the end of this article, we’ll make blog.example.com serve as example.com/blog.

Why you’d want to do this

Because you’re here, you probably already know why this is a path to pursue. But I’d like to ensure you are here for the primary reason to do this: SEO. Check out these 14 case studies that show positive results when people move their subdomains over to subdirectories. You want your blog and your domain to share SEO value. Putting it on a subdomain would somewhat disconnect the two.

This was my reason, and wound up merging two platforms, where the main domain was on WordPress and the subdomain was on Drupal. But this tutorial is platform agnostic — it’ll work with just about any platform.

That said, the Cloudflare approach we’re covering in this tutorial is incompatible with Shopify unless you pay for Cloudflare’s Enterprise plan. That’s because Shopify also uses Cloudflare and does not allow us to proxy the traffic on their free pricing tier.

Step 0 (Preview)

Before I jump in, I want to explain the high level of what’s going to happen. In short, we’ll have two websites: our main one (example.com) and the subdomain (blog.example.com). I use “blog” as an example, but in my case, I needed to drop in Drupal with a different type of content. But a blog is the typical use case.

This approach relies on using Cloudflare for DNS and a little extra something that’ll provide the magic. We’re going to tell Cloudflare that when someone visits example.com/blog, it should:

  1. intercept that request (because example.com/blog doesn’t really exist),
  2. request a different domain (blog.example.com/blog) behind the scenes, and
  3. deliver the results from that last step to the visitor masked through example.com/blog.

Okay, let’s dive into it in more detail!

Step 1: Using Cloudflare

Again, we’re using Cloudflare for the DNS. Pointing your domain’s DNS there is the first step to getting started.

The reason for Cloudflare is that it allows us to create Workers that are capable of running a bit of code anytime somebody visits certain URLs (called Routes which we’ll create in step 3). This code will be responsible for switching the websites behind the scenes.

Cloudflare has an excellent guide to getting started. The goal is to point your domain’s — wherever it is registered — to Cloudflare’s nameservers and confirm that Cloudflare is connected in your Cloudflare account.

Step 2: Create the Worker

This code will be responsible for switching the websites behind the scenes. Head over to Workers and click Create a Service.

Note the median CPU time! This process added about .7ms to the request (so basically nothing).

Name your service, then select “HTTP handler”:

Click Create Service and then Quick Edit.

Paste in the following code and replace the domain names with your own on line 16:

// Listen for every request and respond with our function.
// Note, this will only run on the routes configured in Cloudflare.
addEventListener('fetch', function(event) {
  event.respondWith(handleRequest(event.request))
})

// Our function to handle the response.
async function handleRequest(request) {
  // Only GET requests work with this proxy.
  if (request.method !== 'GET')
  return MethodNotAllowed(request);
  // The URL that is being requested.
  const url = new URL(request.url);
  // Request "origin URL" aka the real blog instead of what was requested.
  // This switches out the absolute URL leaving the relative path unchanged. 
  const originUrl = url.toString().replace('https://example.com', 'https://blog.example.com');
  // The contents of the origin page.
  const originPage = await fetch(originUrl);
  // Give the response our origin page.
  const newResponse = new Response(originPage.body, originPage); return newResponse;
}

// Hey! GET requests only 
function MethodNotAllowed(request) {
  return new Response(`Method ${request.method} not allowed.`, {
    status: 405,
    headers: { 'Allow': 'GET' }
  })
}

Lastly, click Save and Deploy.

Step 3: Add Routes

Now let’s inform Cloudflare which URLs (aka Routes) to run this code on. Head over to the website in Cloudflare, then click Workers.

There is the Workers section on the main screen of Cloudflare, where you edit the code, and then there is the Workers section on each website where you add the routes. They are two different places, and it’s confusing.

First off, click Add Route:

Because we are adding a blog that has many child pages, we’ll use https://example.com/blog*. Note the asterisk acts as a wild card for matching. This code will run on the blog page and every page that begins with blog.

This can have unintended consequences. Say, for example, you have a page that starts with “blog” but isn’t a part of the actual blog, like https://example.com/blogging-services. That would get picked up with this rule.

Then, select the Worker in the Service dropdown.

We have a lot of the work done, but there are more routes we need to add — the CSS, JavaScript, and other file paths that the blog is dependent on (unless all the files are hosted on a different URL, such as on a CDN). A good way to find these is by testing your route and checking the console.

Head over to your https://example.com/blog and make sure something is loading. It’ll look messed up because it’s missing the theme files. That’s fine for now, just as long as it’s not producing a 404 error. The important thing is to open up your browser’s DevTools, fire up the console, and make note of all the red URLs it can’t find or load (usually a 404 or 403) that are a part of your domain.

The resources in the orange boxes are the ones we need to target.

You’ll want to add those as routes… but only do the parent paths. So, if your red URL is https://example.com/wp-content/themes/file1.css, then do https://example.com/wp-content* as your route. You can add a child path, too, if you want to be more specific, but the idea is to use one route to catch most of the files.

Once you add those routes, check out your URL and see if it looks like your subdomain. If it doesn’t, check the previous steps. (Chances are you will need to add more routes.)

It’s best to do a quality check by navigating to multiple pages and seeing if anything is missing. I also recommend opening up DevTools and searching for your subdomain (blog.example.com). If that’s showing up, you either need to add routes to target those resources or do something with your platform to stop outputting those URLs. For example, my platform was outputting a canonical tag with my subdomain, so I found a plugin to modify the canonical URL to be my root domain.

Step 4: The secretest of sauces (noindex)

You might see that we have a problem. Our URLs are available at two different URLs. Yeah, we can use the canonical attribute to inform Google which URL is our “main” one, but let’s not leave it up to Google to pick the right one.

First, set your entire subdomain as noindex (the way to do this will vary by platform). Then, in the Cloudflare Worker, we are going to add the following line of code, which basically says to remove noindex when the current URL is accessed through the proxy.

newResponse.headers.delete("x-robots-tag");

The full code solution is provided at the end of this article.

Step 5: Modify the sitemap

The last thing to do is to modify the subdomain’s sitemap so it doesn’t use the subdomain in it. The way to do this will vary by platform, but the goal is to modify the base/absolute/domain in your sitemap so that it prints example.com/mypost) instead of blog.exmaple.com/mypost. Some plugins and modules will allow this without custom code.

That’s that! The solution should be working!

Limitations

This Cloudflare magic isn’t without its downsides. For example, it only accepts GET requests, meaning we can only get things from the server. We are unable to POST which is what forms use. So, if you need to have your visitors log in or submit forms, there will be more work on top of what we’ve already done. I discussed several solutions for this in another article.

As noted earlier, another limitation is that using this approach on Shopify requires subscribing to Cloudflare’s Enterprise pricing tier. Again, that’s because Shopify also uses Cloudflare and restricts the ability to proxy traffic on their other plans.

You also might get some issues if you’re trying to merge two instances of the same platforms together (e.g. both your top-level domain and subdomain use WordPress). But in a case like that you should be able to consolidate and use one instance of the platform.

Full solution

Here’s the code in all its glory:

// Listen for every request and respond with our function.
// Note, this will only run on the routes configured in Cloudflare.
addEventListener('fetch', function(event) {
  event.respondWith(handleRequest(event.request))
})
// Our function to handle the response.
async function handleRequest(request) {
  // Only GET requests work with this proxy.
  if (request.method !== 'GET') return MethodNotAllowed(request);
  // The URL that is being requested.
  const url = new URL(request.url);
  // Request "origin URL" aka the real blog instead of what was requested.
  // This switches out the absolute URL leaving the relative path unchanged. 
  const originUrl = url.toString().replace('https://example.com', 'https://blog.example.com');
  // The contents of the origin page.
  const originPage = await fetch(originUrl);
  // Give the response our origin page.
  const newResponse = new Response(originPage.body, originPage);
  // Remove "noindex" from the origin domain.
  newResponse.headers.delete("x-robots-tag");
  // Remove Cloudflare cache as it's meant for WordPress.
  // If you are using Cloudflare APO and your blog isn't WordPress, (but
  // your main domain is), then stop APO from running on your origin URL.
  // newResponse.headers.set("cf-edge-cache", "no-cache"); return newResponse; 
}
// Hey! GET requests only 
function MethodNotAllowed(request) {
  return new Response(`Method ${request.method} not allowed.`, {
    status: 405,
    headers:
    { 'Allow': 'GET' }
  })
}

If you need help along the way, I welcome you to reach out to me through my website CreateToday.io or check out my YouTube for a video demonstration.


How to Serve a Subdomain as a Subdirectory originally published on CSS-Tricks. You should get the newsletter.

Categories: Designing, Others Tags:

Looking for outstanding Multipurpose WordPress Themes? Read this

May 5th, 2022 No comments

When it comes to building websites there is probably some truth to the saying that you are only as good as the tools you have. Design experience and an ability to write code can make up for some shortcomings. But what you really want is a WordPress theme that can not only enable you to do excellent work but enable you to build websites quickly and easily as well.

There are good multipurpose themes and not-so-good multipurpose themes. You certainly want to avoid selecting any of the latter.

How can you distinguish between the good and the not-so-good if you don’t have time to do extensive research? And what approach can you take if you have your mind set on investing in a theme that gives you all the flexibility you are ever likely to need. Theme that enables you to power yourself through the building process. The one that gives you an end result that is precisely what you expect, or your client demands – or better?

You can always check out a theme’s sales, ratings, and reviews. But a better approach is to leave things up to those who have the experience and expertise to identify a few top candidates to choose from.

That is where we come in. At least one of the following 8 top multipurpose WordPress themes for 2022 could be the gamechanger you’re looking for.

  1. BeTheme | Responsive Multipurpose WordPress & WooCommerce Theme

This popular multipurpose WordPress theme is the biggest one of them all. BeTheme’s customer-base is large enough (250,000+), but it’s the 40+ core features that give a true picture of how big BeTheme really is.

Be’s most popular features:

1. A Library of 650+ trendy pre-built websites that

  • are customizable and responsive
  • cover all industry sectors and website types and style
  • feature key UX functionalities

2. With BeBuilder, the fastest and most flexible page builder for WordPress you can:

  • import 3,000 pages from Be’s 650+ pre-built websites and customize them to fit your needs
  • drag, drop, and customize everything including 100+ pre-built blocks and 80+ elements
  • set page layout dimensions, positions, and margins and customize backgrounds as you wish

3. With the WooCommerce Builder – an absolute gem

  • you can create shop or single product layouts exactly as you want
  • a host of customer-friendly shopping features and product previews are at your disposal

BeTheme is Elementor ready and is frequently updated. Click on the banner and check out each of Be’s powerful core features.

  1. Total WordPress Theme

Building a website doesn’t have to be hard, and because of Total’s completeness it won’t be. This aptly named multipurpose theme has the tools and design flexibility necessary to make your website building adventures fast, easy, and successful.

48,000+ Total users will agree. They have enjoyed easy access to –

  • 50+ ready to use demos, 8 header styles, 95+ section templates and 75+ post entry cards when they want to get their website building effort off to a rapid start.
  • the WPBakery front-end drag and drop page builder and Total’s 100+ builder elements, 500+ live customizer settings, and built-in font manager when they want to start a page from scratch.
  • Premium plugins like Slider Revolution and Templatera

Total is optimized for speed and is fully compatible with WooCommerce, Gutenberg, and Elementor. Click on the banner; there’s much more to see.

  1. WoodMart

Because it is loaded with features that are not present in most of the other eCommerce oriented theme, WoodMart’s increasing popularity has made it ThemeForest’s most highly-regarded theme.

A quick look at the WoodMart website (click on the banner) should give you all the proof you need.

These features include –

  • highly customizable product page layouts
  • more than 75 premade single-click importable demo websites together with 15 special pages
  • a built-in megamenu that features an intuitive interface and a user-friendly canvas sidebar with shop page filters and widgets
  • an abundance of WooCommerce elements
  • 400+ templates than can also be used for prototyping
  • a full AJAX shop with filters and an AJAX quick shop pagination feature

WoodMart has logged more than 40,000 sales to date and enjoys a 4.95/5-star rating. 

  1. Avada Theme

Avada’s huge following (450,000+) of happy users has made it the #1 best selling theme of all time. Avada’s unique assemblage of powerful website building tools include –

  • 40+ single-click importable demos and 50+ design elements
  • Fusion Page and Theme options that provide virtually unlimited flexibility
  • The Fusion page builder, Fusion slider, and Shortcode Generator

Avada is WooCommerce-ready theme, 100% responsive, and speed optimized.

  1. Uncode – Creative & WooCommerce WordPress Theme

Uncode is a pixel-perfect theme that empowers its users to create pixel-perfect websites. This Envato best seller has logged more than 90.000 sales to date.

Powerful website-building features include –

  • a revved-up Frontend Page Builder that’s a joy to work with
  • a Single Product builder, a wealth of customer-centric design elements and options and other advanced WooCommerce capabilities
  • A Wireframes Plugin with 550+ section templates

Uncode is ideal for creating blog, magazine, and portfolio sites.

6. TheGem – Creative Multi-Purpose & WooCommerce WordPress Theme

TheGem is the best-selling theme on ThemeForest with 60,000 users, which says a lot.

A few examples of what you’ll find in the package:

  • 400+ beautiful pre-built websites and templates for any purpose and niche.
  • Elementor and WPBakery frontend page builders for easy editing & customizing
  • A rich collection of WooCommerce templates and features for creating exceptional online shops.

TheGem Blocks with its 300+ premium pre-designed section templates to speed up your workflow.

  1. Impeka – Creative Multipurpose WordPress Theme

Beginners and advanced users alike find this multipurpose theme an impeccable tool to work with.

With Impeka –

  • You have complete freedom to make your dream of an ideal website happen.
  • Your website will be fast, fully responsive, and professionally optimized for SEO.
  • Your website will be noticed by the right people, and they will get what they are looking for.

You have a choice of Elementor, Gutenberg, or enhanced WPBakery page builder. 

  1. Litho – Multipurpose Elementor WordPress Theme

The fact that Litho is an Elementor WordPress theme says a lot about what you can expect when working with it. With Litho at your fingertips, you can build any website you envision thanks to its Slider Revolution plugin and its host of home pages, creative elements, and templates

  • Litho-created websites are fast, responsive, and SEO friendly

You’ll find the online documentation is highly detailed and extremely helpful, as is Litho’s first-class customer support.

*********

You have your mind set on selecting a theme that gives you all the flexibility you need. Theme that enables you to sail through the website-building process. The one that gives you a product that is precisely what you or your client expects.

The best approach to satisfying that objective is right in front of your nose. Your search should end with the 8 top multipurpose WordPress themes presented here. Choose one that looks like a best bet, and it won’t let you down. It may even turn out to be a gamechanger.

Read More at Looking for outstanding Multipurpose WordPress Themes? Read this

Categories: Designing, Others Tags:

Design Patterns: How to Create Simple Interfaces

May 4th, 2022 No comments

There are long-standing patterns in design that help us understand what the user wants and which solution will work best. These are referred to as design patterns. This article will explain how patterns help us appropriately construct an interface. We’ll dissect features like buttons, navigation, accordions, and date selection with examples.

This article will be helpful to both new and experienced designers who want to learn more about how to use interactive features and when to use them. If you’ve been in the industry for more than a year, you’ll know that nothing is black and white and that multiple ways can address the same problem depending on the situation.

Buttons

First, consider the following question: which of the buttons depicted in the graphic is better?

The first button will appear to be the obvious choice for many people. Indeed, it is a well-known pattern that most people will recognize; it is the perfect solution for many projects. However, if customers understand the context, they are less concerned with the shape; therefore, there is no need for the designer to think in stereotypical terms. The context or states of a button can demonstrate that it is a button. When we place the cursor at an interactive feature on one website, it turns into a circle. “View” will be written inside the circle. The interface will be less cluttered as a result, and you will be able to clearly show the user that they are dealing with an interactive interface.

Next, which of these two Skip and Sign Up buttons, each with a distinct design accent, is better?

Many people would most likely vote for the first couple. That was something I used to do as well. However, put yourself in the shoes of a user and observe what this interface expects of you. They also want us to collect data at registration, which they emphasize. You can, however, skip this step. Is it up to par? Yes, because many users are hesitant to register on the site and provide personal information. We decide for the user which action is a priority when we show this hierarchy of buttons. But why not let them make their own decision? This is becoming a more prevalent strategy nowadays. For example, we see two identically filled buttons at Nike: Register and Learn more.

Apple uses the Learn More and Buy buttons the same way. The latter isn’t a large red button that screams, “Buy now! Buy now!” The user also can decide what is more important right now.

And here’s another question: if you had to choose between Cancel and Save, which would you put first?

It’s difficult to say whether Cancel should be displayed first or Save. Assume I issue a command. Which is more important: having a button in the interface for the desired action or seeing all of the answer alternatives and then deciding? Designers frequently choose the second choice, but it is unimportant.

According to Nielsen Norman Group research, both the first and second patterns are understandable for customers. Android and iOS are two examples of this, as they use both methods. They all have their own set of benefits.

I enjoy how Apple handles this in macOS. The emphasis is on canceling the action if you are assigned an irreversible task (such as deleting data from the recycle bin). The user must fully comprehend that they cannot retrievd anything they delete.

So, when working with buttons, do the following:

  • Determine your task, i.e., what action the constructed buttons should prompt the user to take.
  • See if you can demonstrate that the button is a button by looking at its uses in the interface or its states.
  • Check to see if the text on the buttons is legible.

Navigation

I’ll also begin the navigation section with an example question. Consider a site’s navigational block and a logo (a circle on the slide). Is it better to put the logo in the middle of the navigation or on the left side?

Both options appear to be equivalent. However, according to various research, the upper left corner is still preferable. There are numerous explanations for this. Because we read from left to right, the logo is the first thing we see. It’s also a marker that tells the user where they came from.

The NNG research center conducted an interesting experiment on this topic. Users were tasked with purchasing a specific item from an online store. At the same time, the list did not include any well-known stores, only local businesses. Some sites’ logos were on the left side of the navigation, while others were in the middle. Commodities were purchased, but the users had no idea what was being tested in the trial. After a while, they were asked for the company’s name from which they purchased the merchandise on the internet. People remembered both the brand and the company name better when the logo was on the left. As a result, having the logo on the left is likely to be significantly better—especially for well-known organizations. Of course, this doesn’t stop a lot of websites from putting their logo in the middle of the navigation box.

Consider a site that displays page links in a burger-style menu. Is it better to hide all navigation in the burger or remove part of the elements and display them to the user?

According to research, it is preferable to highlight a part of the navigation. If you know what sections users visit first, you might be able to show them those sections immediately. However, the user must click on the icon and search through a comprehensive database for specific information. Therefore, it makes sense to expedite this process and immediately provide them with what they require.

This is true not only for mobile interfaces but also for desktop interfaces. In the example below, a directory must be opened independently to be viewed. When the focus of a user’s attention shifts, it irritates them. If a drop-down list displays when you open a menu, users are not always comfortable. After that, it must proceed from left to right, and so on. Therefore, it’s preferable to display the complete menu if possible.

When it comes to navigation, the issue of the menu’s number of items cannot be overlooked. The fewer options a user has, the easier it is for them to decide. It is suggested that 7-9 things are ideal on the internet. However, when there are a lot of sections, subcategories, and sub-subcategories (as in a marketplace), fitting everything into a minimal number of items isn’t always feasible.

There are various options in this instance. There are multiple tiers of menus that can be created. The website of the New York Times is an example. There is horizontal navigation and another burger on the upper left of the home page. A wide menu appears when you click it, with more sections at the bottom and more sections at the top. The fact that the New York Times is a vast resource justifies this. That is why the website’s designers placed the essential items on the horizontal while also indicating that there are other components. The menu is accessed using a button in the upper left corner. If the user is dissatisfied with the primary navigation, this placement enhances the likelihood that they will see the menu and click.

According to the three-click rule, the user must reach the needed information in three clicks. There is, however, no data to back this up. Users today are willing to spend significantly more time looking for information. For example, if we’re looking for a product at an online store, we browse to the appropriate department and then dig further into many subcategories until we find it. Then there’s more filtering, sorting, adding to comparisons, adding to cart, checkout, shipping, etc. This does not appear to fit within three clicks. As a result, don’t limit yourself to this guideline. It’s preferable to keep the navigation simple and obvious so that the user may rapidly reach his objectives.

Perhaps you could divide the interface so that the user chooses from 7-9 categories first, then another 7-9, then another 7-9, and so on till they reach the end. Although you shouldn’t make it too complicated by creating a hierarchy with ten to twenty levels—this is scarcely practical. Five catalog segments, in my opinion, are quite acceptable.

But what if there are a lot of subcategories, and you can’t sensibly divide them into 7-9 items? Here are two basic strategies to assist you: The first is a list of names in alphabetical order. The second point to consider is terminology. This may be seen with Amazon. Take a look at their home decor area, which is organized alphabetically by subcategories. This makes finding things much easier for the user. The essential requirement is that the name be correct and recognizable to the user. You should not use jargon, slang, or professional vocabulary.

In some places, I genuinely admire Amazon’s approach. The creators placed a couple of the most popular subcategories at the top of the list, then let the rest of them go in alphabetical order. This is an excellent solution to the problem because it allows you to display the most popular things first.

Avic follows suit. Apple products account for the majority of the company’s revenue. As a result, breaking up or hiding such products makes no sense; instead, they are removed from the catalog and relocated to the top, increasing the number of categories on the main page. Again, it appears that the user will have difficulty making a decision. However, if Apple is the primary source of revenue, it seems logical to feature this section right away.

The examples considered are based on simple navigation. However, not every task is like this in practice. You might want to do something entirely out of the ordinary in some circumstances. For example, you may have seen a developer’s website in France where you have to use the arrow keys on the keyboard to drive a car that rides between menu items to traverse between sections. This is a rare occurrence, and even though it appears to me to tackle a slightly different problem, it succeeds—and in the process, it generates an environment around the project.

Here’s another example of an impressive menu from the Warsaw Puppet Theater’s website. All navigation is done using symbolic images that appear to be on strings and move as you point at them, much like puppets. As a result, the user becomes more engaged in the navigation game. In the tradition of puppet theater, this approach produces a delightful ambiance.

Go over the following items before beginning to work with navigation:

  • Is there anything you don’t want to be seen on the site? If the service is huge, consider how you might make the user’s life easier: alphabetical order, putting critical stuff first, constructing sophisticated breadcrumbs, etc.
  • Find a way to display to the user where they are now and where they can go. This is critical because you should always design states for all interactive elements: normal, on hover, active, unavailable, and in the process of loading.
  • Determine whether the menu will be anchored at the top and what it will contain. A language switcher, for example, will most likely be located in the top right corner of a bilingual site. Should you, however, remove the option to change the language if the visitor has already begun scrolling down the page?

Accordion

Let’s get to the accordion now. First, let’s look at two different versions of this interface element: one with the chevron pointing down and one with the plus symbol. Which version of the icon do you think is better? Then there’s the question of whether the icon should be placed to the right or left of the text, independent of its type.

According to studies, users recognize accordions and are more likely to click on the text. They click on the icon 25% of the time when it’s on the right and 75% of the time the text it’s on the left. Does this mean there’s no need for the icon to be on the right? No, it’s pretty acceptable to put it there. In truth, it doesn’t matter where we put it; the important thing is that we put it somewhere and make it big enough to click on.

The only difference is that the procedure takes a little longer when you click on the icon. This is because individuals aim and try to click on the icon accurately. As a result, it is vital to create such an element large enough to work with comfortably. I would even propose enlarging the clickable area rather than the icon itself. The project “Dia,” in which the icons are as large as the accordion itself, appeals to me. This site is, I believe, simple and convenient for all users. Each cell is clickable and takes up the entire screen width in this example.

When it comes to the arrow’s direction, you shouldn’t always aim it right. Many users have learned that pointing the arrow to the right indicates heading to another page. Only the tiny area, text, and icon in the example below are clickable, and there is a button at the bottom with an arrow that points in the same direction as the accordion’s equivalent. However, the acts are distinct. When you click the accordion, it will open block down, and when you click the button, you will be redirected to another page. People may be perplexed by this.

Giving the user an accordion with no identifying signs is likewise not good. A person must know which aspect of the interface they are interacting with. You must either use an icon or demonstrate that the element is clickable. The only thing that indicates clickability in the example above is the changing appearance of the cursor when hovering over the text. However, it is not visible; it must be larger, or a term such as “Read” should be used. Without that, the user won’t be able to tell the accordion apart from the bold text selection.

As I previously stated, you must think out all interactive features in terms of states. If there was a positive, for example, it should change—or at least become a minus. As a result, the user will realize that the drop-down box can be hidden.

It’s inconvenient when the icon vanishes after you click on it. The user anticipates being able to close the block at the exact location where they first opened it. After all, they may not like the response that appears and may want to delete it right away. He’ll have to re-aim now that the button has been repositioned. Here’s an unusual example of an accordion plus that isn’t clickable. This is only true for mobile navigation. If the user has previously dealt with the desktop version, they may not recognize what’s wrong and believe it’s a bug when switching to the mobile version.

Imagine you’re charged with deciding whether to keep the open items or conceal them when the user opens others. On the one hand, if the items don’t shut, the symbol will not move because no items are transferring. On the other hand, if there is too much text, the user may have trouble navigating to the following question. As a result, it may be preferable to close superfluous blocks automatically. However, consider the number of responses in a specific accordion.

The accordion is a multipurpose element. Not only may it be utilized for the FAQ area, but also the checkout page. According to Baymard, more than 30% of online retailers worldwide accept payments through accordion-style checkouts, with the percentage in the United States being considerably higher at 56%.

This solution has several benefits. The user can first view the following steps to complete (say, which payment systems are accepted). You don’t even have to click “Next” or navigate to another website to accomplish this. Second, the accordion makes it simple to navigate from block to block to check data without having to reload the page and risk losing it. After all, if the user made a mistake in the first area and discovered it in the second, it’s simple to correct it here. You’d have to return to the previous page in a typical checkout and risk losing the information you’d filled out but hadn’t sent to the server.

You can also use an accordion to create menus. However, you must exercise caution in this situation. The parent accordion category in the example below has no content. As a result, if you repeatedly click on the items to collapse the accordion, the entire content area remains empty. In this situation, it’s also a good idea to include some information in this page section.

The fantastic, beautiful accordion on hover is another example. It is quite adaptable. Although there is no accordion in the mobile version, it is essentially just banners that translate to other links.

Another more extreme example created by evident admirers of such a solution is an accordion within an accordion. The entire site can be navigated using these blocks. It’s amazing.

In mobile interfaces, accordions are also essential for website design. They make it simple to conceal information. All navigation on The Guardian’s website is done through these blocks. The only thing that bothers me is that the parent categories aren’t clickable. A user does not have the choice of seeing all of the sports news. Only the subcategories “Football,” “Cricket,” “Rugby,” and so on are available. On the other hand, The Guardian has moved the parent categories on the front page, which is a reasonable answer to such an issue.

The Wall Street Journal, on the other hand, took a very different approach. They didn’t post the categories on the main page and instead crammed everything into a single block. When a user visits a category, however, there is the Main section. This allows you to navigate to the main parent section or a specific subcategory.

Let’s summarize the accordion:

  • Always ask yourself from the start if you really need an accordion. After all, the user’s “fee” is the click. You can sometimes get away without it and supply all the information at once.
  • Consider which icon to use. It can be anything, but the most important thing is that it is simple to use.
  • Where should the symbol be placed? It is highly dependent on how everything adapts. For example, if you have a long line, it is preferable to set the symbol on the left. Then, you won’t have to worry about the icon vanishing when you collapse the accordion into a small block and shift the text to the following line.
  • Choose whether all blocks are closed by default or the initial block is left open. This is dependent on your task and the aims of the user.

Date

The choice of date is the next crucial factor to consider when discussing design patterns. I’ll begin with a comparison, as is customary. Users of iOS 14 who have set the alarm clock time will be familiar with this scenario. What is the better option?

I like the first choice since it is more attractive and does not distort the font as much as the second. However, the first variant has a potential issue: it is difficult to modify and twist. After all, the space is limited, and the user must fit precisely into the spot. It’s worth noting that Apple decided to leave both alternatives open.

Consider what you’ll use the Date Picker for a while you’re creating it: a date range for booking hotels or planning excursions, a date to set a birthday or reminder, a date to indicate the time for a movie session, or for ordering a cab. This will impact the rest of the process of envisioning and designing this feature.

It’s critical, in my opinion, to describe the many ways in which the user obtains information right now. The four options are a calendar, a drum (more of a mobile solution), a conventional input area, and a drop-down list. Let’s look at a few distinct solutions that all deal with airline tickets. Wizz Air, for example, utilizes a calendar, but it’s a double one so that the customer can see two months at once.

But, if so, which start date should be specified? It seems it should be the next day, and the website shows this. However, studies have shown that users are not always happy when a date has already been set. People rarely purchase next-day plane tickets. Therefore this “default” setting will almost certainly need to be modified.

Qatar Airlines went even further by announcing a start and end date. Today is the first day of the program. Is that choice required if the user logs in at 23:58? The second issue is that there is no differentiation between the start and end dates and all days in between. Everything is painted in the same hue. Users want to see anchors for dates if they plan a long trip that begins in one location and concludes in another. People are used to being told that we begin and end at specific places. As a result, the user can be certain that the dates are correct.

Today, UIA puts both the departure and return dates on the calendar. We’ve already established that this isn’t ideal. It’s also challenging to select a destination because you have to first click on the list, then go to the dropdown, search for the country, etc. It’s a long and winding road. But, it appears to me that the main blunder is something else. The search results output is blank. If I select two destinations and dates, I may be informed that that destination has no available flights. If I go on to the following date on the calendar, there are no flights available. Overbooking is the only method to find out when they will arrive. I’m likely to use a third-party aggregator that gathers data from numerous airlines straightforwardly and conveniently.

SkyUp’s calendar is one of my favorites. It includes large fields that open up a large calendar, and it’s simple to set the trip’s start and end dates. It indicates days when there are no flights for a specific location, and you can view the price for each ticket right away. This is quite useful because it allows you to choose a day and a flight even before you click confirm.

Let us now turn our attention to the drum. You can enter nearly any information into such an element, including time, date, and other lists. Users may easily navigate this tool and jump between values.

The input field follows. We must consider the format if we allow the user to enter a date using the keyboard. For example, in different regions of the world, “12.10.2021” may be interpreted differently: for some, it may be October 12, while for others, it may be December 10. This is especially significant in the case of the following example site for renting a car in another country. The user must be aware of the format they are dealing with. In this circumstance, several experts advise that the user writes in text. However, there is the issue of localization: would the system recognize that the language is not global English but rather a more non-standard language? After all, the user can use abbreviations when writing. You must either instruct the user on how to do it or use other solutions, such as placing a calendar icon next to it. In this method, the user controls how the data is entered.

If the drop-down list is modest, such as months, there is nothing wrong with it. However, you may accumulate an excessively long list over time. Consider the website Ukrzaliznytsia. The time limit is one hour, and there are 24 items on the list. Perhaps a mixed approach is best here, where the user enters a few digits and then selects from a list.

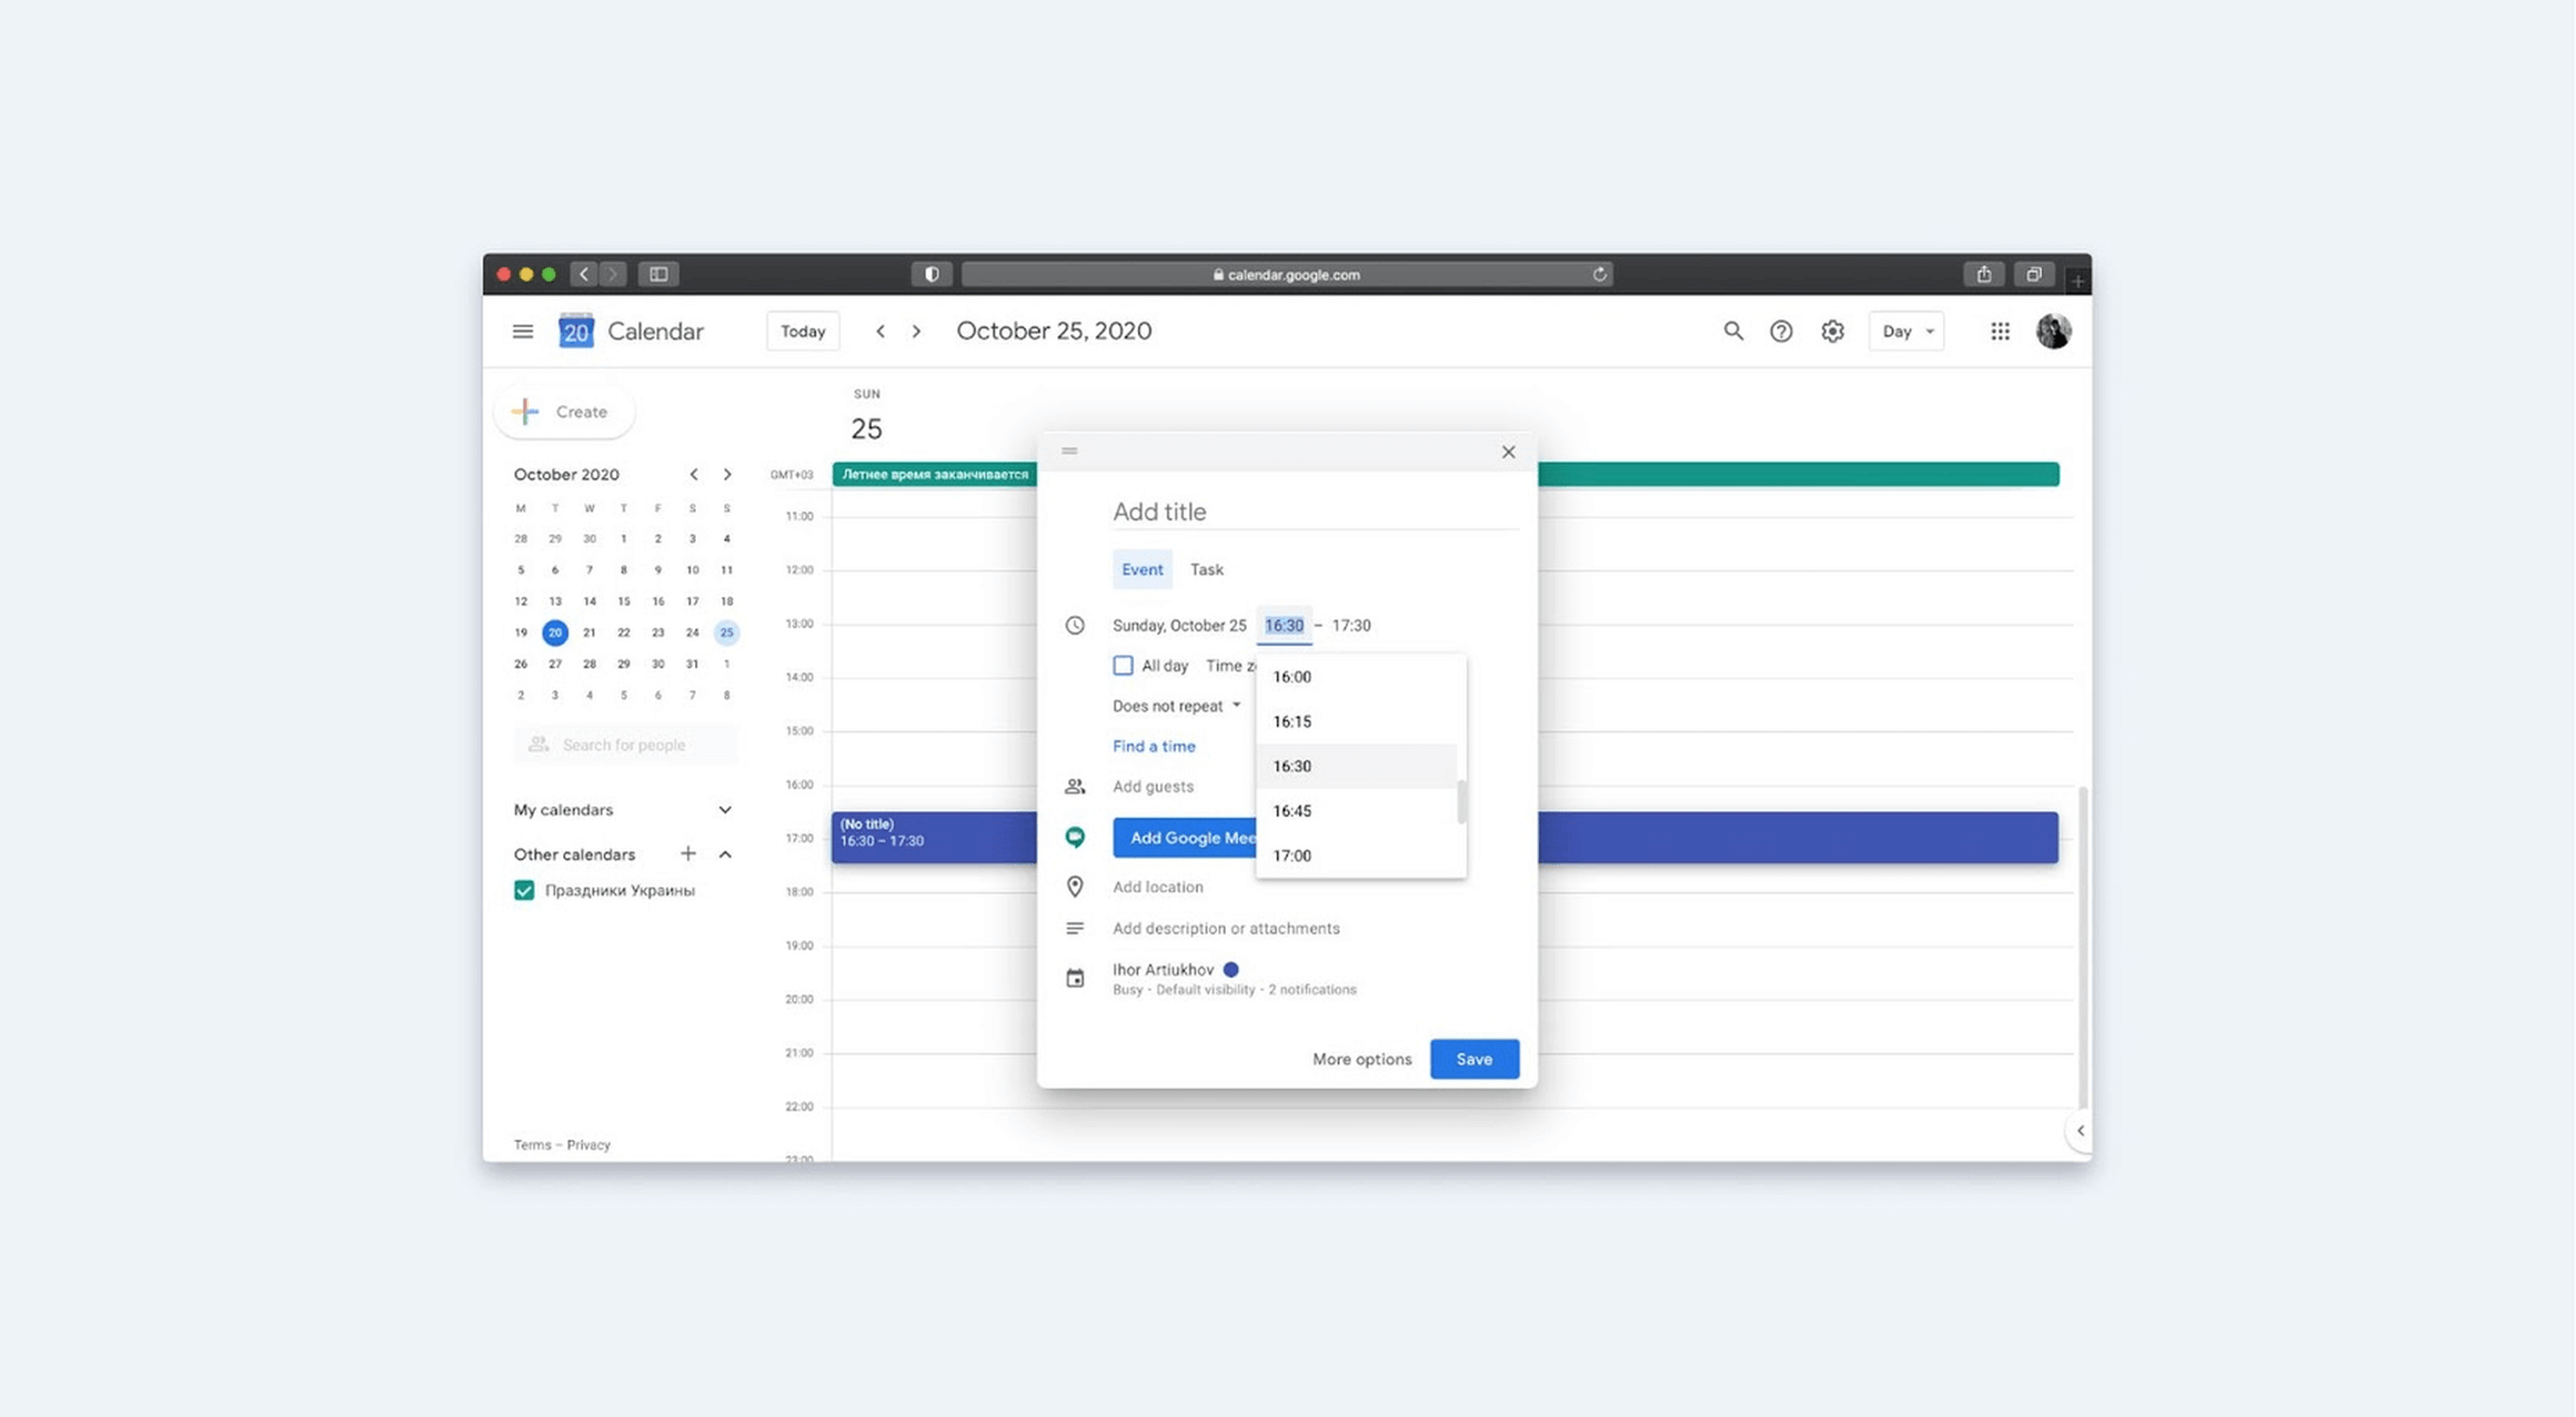
This is precisely the approach used in Google Calendar. If you start writing 16 in the input box, the sub-options appear at 16:00, 16:15, 16:30, and 16:45 (according to the system’s set step of 15 minutes).

Let’s summarize calendars:

  • When creating a calendar, remember to figure out what format the date will be in, as well as localization, language, and how to define where the day and month will be.
  • It’s worth noting that the start of the week varies by region and personal preference—in some cases, it’s Sunday rather than Monday.
  • Figure out whether the fields should have some default value if they are going to make sense to users or leave everything blank at the start.
  • Decide if unavailable days should and can be shown. In some cases, there may be technical limitations here. I’ll refer you to the examples mentioned above. SkyUp may not have many flights, and Qatar Airlines has an order of magnitude more. Because of this, it is not always possible to pull flight information to the calendar before the user sends a request to the server.
  • Determine whether the next entry step should be opened automatically. For example, for Wizz Air, after filling in the departure date, the field for the end date will open automatically, while for UIA, you need to click the field again for the second date.
  • What to give the user first: the date or the time? Let’s say you want to sign up for an English course. You have certain working hours, and you want to get to classes before or after them, any day suits you. What is the primary goal: to allow a person to enter the time and then show the available days for a given schedule, or do otherwise? That brings up another question: how do you show selected and unavailable days or other labels? For example, in Google calendar, everything is well separated by color tags: events, public holidays, invitations to events, etc. But in this scenario, you need to think about the possibility of creating a legend that describes all the tags you’ve created.

Remember: Design Patterns Must Solve the User’s Problems

If you summarize everything above, the main recommendation is simple: before applying any design patterns, make sure you know what tasks the user should complete and how to solve them. Based on this, you can build an interface with gorgeous and, more significantly, human-friendly buttons, navigation, accordions, dates, and other features.

Source

The post Design Patterns: How to Create Simple Interfaces first appeared on Webdesigner Depot.

Categories: Designing, Others Tags:

Syntax Highlighting (and More!) With Prism on a Static Site

May 4th, 2022 No comments

This will cause our

 element to be rendered with a data-line="3,8-10" attribute, where line 3 and lines 8-10 are highlighted in the code snippet. We can comma-separate line numbers, or provide ranges.

Let’s look at how we can parse that in JavaScript, and get highlighting working.

Reading the highlighted lines

Head over to components/post-body.tsx. If this file is JavaScript for you, feel free to either convert it to TypeScript (.tsx), or just ignore all my typings.

First, we’ll need some imports:

import { useEffect, useRef } from "react";

And we need to add a ref to this component:

const rootRef = useRef<HTMLDivElement>(null);

Then, we apply it to the root element:

<div ref={rootRef} className="max-w-2xl mx-auto">

The next piece of code is a little long, but it’s not doing anything crazy. I’ll show it, then walk through it.

useEffect(() => {
  const allPres = rootRef.current.querySelectorAll("pre");
  const cleanup: (() => void)[] = [];

  for (const pre of allPres) {
    const code = pre.firstElementChild;
    if (!code || !/code/i.test(code.tagName)) {
      continue;
    }

    const highlightRanges = pre.dataset.line;
    const lineNumbersContainer = pre.querySelector(".line-numbers-rows");

    if (!highlightRanges || !lineNumbersContainer) {
      continue;
    }

    const runHighlight = () =>
      highlightCode(pre, highlightRanges, lineNumbersContainer);
    runHighlight();

    const ro = new ResizeObserver(runHighlight);
    ro.observe(pre);

    cleanup.push(() => ro.disconnect());
  }

  return () => cleanup.forEach(f => f());
}, []);

We’re running an effect once, when the content has all been rendered to the screen. We’re using querySelectorAll to grab all the

 elements under this root element; in other words, whatever blog post the user is viewing.

For each one, we make sure there’s a element under it, and we check for both the line numbers container and the data-line attribute. That’s what dataset.line checks. See

So, you’ve decided to build a blog with Next.js. Like any dev blogger, you’d like to have code snippets in your posts that are formatted nicely with syntax highlighting. Perhaps you also want to display line numbers in the snippets, and maybe even have the ability to call out certain lines of code.

This post will show you how to get that set up, as well as some tips and tricks for getting these other features working. Some of it is tricker than you might expect.

Prerequisites

We’re using the Next.js blog starter as the base for our project, but the same principles should apply to other frameworks. That repo has clear (and simple) getting started instructions. Scaffold the blog, and let’s go!

Another thing we’re using here is Prism.js, a popular syntax highlighting library that’s even used right here on CSS-Tricks. The Next.js blog starter uses Remark to convert Markdown into markup, so we’ll use the remark-Prism.js plugin for formatting our code snippets.

Basic Prism.js integration

Let’s start by integrating Prism.js into our Next.js starter. Since we already know we’re using the remark-prism plugin, the first thing to do is install it with your favorite package manager:

npm i remark-prism

Now go into the markdownToHtml file, in the /lib folder, and switch on remark-prism:

import remarkPrism from "remark-prism";

// later ...

.use(remarkPrism, { plugins: ["line-numbers"] })

Depending on which version of the remark-html you’re using, you might also need to change its usage to .use(html, { sanitize: false }).

The whole module should now look like this:

import { remark } from "remark";
import html from "remark-html";
import remarkPrism from "remark-prism";

export default async function markdownToHtml(markdown) {
  const result = await remark()
    .use(html, { sanitize: false })
    .use(remarkPrism, { plugins: ["line-numbers"] })
    .process(markdown);

  return result.toString();
}

Adding Prism.js styles and theme

Now let’s import the CSS that Prism.js needs to style the code snippets. In the pages/_app.js file, import the main Prism.js stylesheet, and the stylesheet for whichever theme you’d like to use. I’m using Prism.js’s “Tomorrow Night” theme, so my imports look like this:

import "prismjs/themes/prism-tomorrow.css";
import "prismjs/plugins/line-numbers/prism-line-numbers.css";
import "../styles/prism-overrides.css";

Notice I’ve also started a prism-overrides.css stylesheet where we can tweak some defaults. This will become useful later. For now, it can remain empty.

And with that, we now have some basic styles. The following code in Markdown:

```js
class Shape {
  draw() {
    console.log("Uhhh maybe override me");
  }
}

class Circle {
  draw() {
    console.log("I'm a circle! :D");
  }
}
```

…should format nicely:

Adding line numbers

You might have noticed that the code snippet we generated does not display line numbers even though we imported the plugin that supports it when we imported remark-prism. The solution is hidden in plain sight in the remark-prism README:

Don’t forget to include the appropriate css in your stylesheets.

In other words, we need to force a .line-numbers CSS class onto the generated 

 tag, which we can do like this:

And with that, we now have line numbers!

Note that, based on the version of Prism.js I have and the “Tomorrow Night” theme I chose, I needed to add this to the prism-overrides.css file we started above:

.line-numbers span.line-numbers-rows {
  margin-top: -1px;
}

You may not need that, but there you have it. We have line numbers!

Highlighting lines

Our next feature will be a bit more work. This is where we want the ability to highlight, or call out certain lines of code in the snippet.

There’s a Prism.js line-highlight plugin; unfortunately, it is not integrated with remark-prism. The plugin works by analyzing the formatted code’s position in the DOM, and manually highlights lines based on that information. That’s impossible with the remark-prism plugin since there is no DOM at the time the plugin runs. This is, after all, static site generation. Next.js is running our Markdown through a build step and generating HTML to render the blog. All of this Prism.js code runs during this static site generation, when there is no DOM.

But fear not! There’s a fun workaround that fits right in with CSS-Tricks: we can use plain CSS (and a dash of JavaScript) to highlight lines of code.

Let me be clear that this is a non-trivial amount of work. If you don’t need line highlighting, then feel free to skip to the next section. But if nothing else, it can be a fun demonstration of what’s possible.

Our base CSS

Let’s start by adding the following CSS to our prism-overrides.css stylesheet:

:root {
  --highlight-background: rgb(0 0 0 / 0);
  --highlight-width: 0;
}

.line-numbers span.line-numbers-rows > span {
  position: relative;
}

.line-numbers span.line-numbers-rows > span::after {
  content: " ";
  background: var(--highlight-background);
  width: var(--highlight-width);
  position: absolute;
  top: 0;
}

We’re defining some CSS custom properties up front: a background color and a highlight width. We’re setting them to empty values for now. Later, though, we’ll set meaningful values in JavaScript for the lines we want highlighted.

We’re then setting the line number  to position: relative, so that we can add a ::after pseudo element with absolute positioning. It’s this pseudo element that we’ll use to highlight our lines.

Declaring the highlighted lines

Now, let’s manually add a data attribute to the 

 tag that’s generated, then read that in code, and use JavaScript to tweak the styles above to highlight specific lines of code. We can do this the same way that we added line numbers before:

This will cause our

 element to be rendered with a data-line="3,8-10" attribute, where line 3 and lines 8-10 are highlighted in the code snippet. We can comma-separate line numbers, or provide ranges.

Let’s look at how we can parse that in JavaScript, and get highlighting working.

Reading the highlighted lines

Head over to components/post-body.tsx. If this file is JavaScript for you, feel free to either convert it to TypeScript (.tsx), or just ignore all my typings.

First, we’ll need some imports:

import { useEffect, useRef } from "react";

And we need to add a ref to this component:

const rootRef = useRef<HTMLDivElement>(null);

Then, we apply it to the root element:

<div ref={rootRef} className="max-w-2xl mx-auto">

The next piece of code is a little long, but it’s not doing anything crazy. I’ll show it, then walk through it.

useEffect(() => {
  const allPres = rootRef.current.querySelectorAll("pre");
  const cleanup: (() => void)[] = [];

  for (const pre of allPres) {
    const code = pre.firstElementChild;
    if (!code || !/code/i.test(code.tagName)) {
      continue;
    }

    const highlightRanges = pre.dataset.line;
    const lineNumbersContainer = pre.querySelector(".line-numbers-rows");

    if (!highlightRanges || !lineNumbersContainer) {
      continue;
    }

    const runHighlight = () =>
      highlightCode(pre, highlightRanges, lineNumbersContainer);
    runHighlight();

    const ro = new ResizeObserver(runHighlight);
    ro.observe(pre);

    cleanup.push(() => ro.disconnect());
  }

  return () => cleanup.forEach(f => f());
}, []);

We’re running an effect once, when the content has all been rendered to the screen. We’re using querySelectorAll to grab all the

 elements under this root element; in other words, whatever blog post the user is viewing.

For each one, we make sure there’s a element under it, and we check for both the line numbers container and the data-line attribute. That’s what dataset.line checks. See the docs for more info.

If we make it past the second continue, then highlightRanges is the set of highlights we declared earlier which, in our case, is "3,8-10", where lineNumbersContainer is the container with the .line-numbers-rows CSS class.

Lastly, we declare a runHighlight function that calls a highlightCode function that I’m about to show you. Then, we set up a ResizeObserver to run that same function anytime our blog post changes size, i.e., if the user resizes the browser window.

The highlightCode function

Finally, let’s see our highlightCode function:

function highlightCode(pre, highlightRanges, lineNumberRowsContainer) {
  const ranges = highlightRanges.split(",").filter(val => val);
  const preWidth = pre.scrollWidth;

  for (const range of ranges) {
    let [start, end] = range.split("-");
    if (!start || !end) {
      start = range;
      end = range;
    }

    for (let i = +start; i <= +end; i++) {
      const lineNumberSpan: HTMLSpanElement = lineNumberRowsContainer.querySelector(
        `span:nth-child(${i})`
      );
      lineNumberSpan.style.setProperty(
        "--highlight-background",
        "rgb(100 100 100 / 0.5)"
      );
      lineNumberSpan.style.setProperty("--highlight-width", `${preWidth}px`);
    }
  }
}

We get each range and read the width of the

 element. Then we loop through each range, find the relevant line number , and set the CSS custom property values for them. We set whatever highlight color we want, and we set the width to the total scrollWidth value of the 
 element. I kept it simple and used "rgb(100 100 100 / 0.5)" but feel free to use whatever color you think looks best for your blog.

Here’s what it looks like:

Syntax highlighting for a block of Markdown code.

Line highlighting without line numbers

You may have noticed that all of this so far depends on line numbers being present. But what if we want to highlight lines, but without line numbers?

One way to implement this would be to keep everything the same and add a new option to simply hide those line numbers with CSS. First, we’ll add a new CSS class, .hide-numbers:

```js[class="line-numbers"][class="hide-numbers"][data-line="3,8-10"]
class Shape {
  draw() {
    console.log("Uhhh maybe override me");
  }
}

class Circle {
  draw() {
    console.log("I'm a circle! :D");
  }
}
```

Now let’s add CSS rules to hide the line numbers when the .hide-numbers class is applied:

.line-numbers.hide-numbers {
  padding: 1em !important;
}
.hide-numbers .line-numbers-rows {
  width: 0;
}
.hide-numbers .line-numbers-rows > span::before {
  content: " ";
}
.hide-numbers .line-numbers-rows > span {
  padding-left: 2.8em;
}

The first rule undoes the shift to the right from our base code in order to make room for the line numbers. By default, the padding of the Prism.js theme I chose is 1em. The line-numbers plugin increases it to 3.8em, then inserts the line numbers with absolute positioning. What we did reverts the padding back to the 1em default.

The second rule takes the container of line numbers, and squishes it to have no width. The third rule erases all of the line numbers themselves (they’re generated with ::before pseudo elements).

The last rule simply shifts the now-empty line number elements back to where they would have been so that the highlighting can be positioned how we want it. Again, for my theme, the line numbers normally adds 3.8em worth of left padding, which we reverted back to the default 1em. These new styles add the other 2.8em so things are back to where they should be, but with the line numbers hidden. If you’re using different plugins, you might need slightly different values.

Here’s what the result looks like:

Syntax highlighting for a block of Markdown code.

Copy-to-Clipboard feature

Before we wrap up, let’s add one finishing touch: a button allowing our dear reader to copy the code from our snippet. It’s a nice little enhancement that spares people from having to manually select and copy the code snippets.

It’s actually somewhat straightforward. There’s a navigator.clipboard.writeText API for this. We pass that method the text we’d like to copy, and that’s that. We can inject a button next to every one of our elements to send the code’s text to that API call to copy it. We’re already messing with those elements in order to highlight lines, so let’s integrate our copy-to-clipboard button in the same place.

First, from the useEffect code above, let’s add one line:

useEffect(() => {
  const allPres = rootRef.current.querySelectorAll("pre");
  const cleanup: (() => void)[] = [];

  for (const pre of allPres) {
    const code = pre.firstElementChild;
    if (!code || !/code/i.test(code.tagName)) {
      continue;
    }

    pre.appendChild(createCopyButton(code));

Note the last line. We’re going to append our button right into the DOM underneath our

 element, which is already position: relative, allowing us to position the button more easily.

Let’s see what the createCopyButton function looks like:

function createCopyButton(codeEl) {
  const button = document.createElement("button");
  button.classList.add("prism-copy-button");
  button.textContent = "Copy";

  button.addEventListener("click", () => {
    if (button.textContent === "Copied") {
      return;
    }
    navigator.clipboard.writeText(codeEl.textContent || "");
    button.textContent = "Copied";
    button.disabled = true;
    setTimeout(() => {
      button.textContent = "Copy";
      button.disabled = false;
    }, 3000);
  });

  return button;
}

Lots of code, but it’s mostly boilerplate. We create our button then give it a CSS class and some text. And then, of course, we create a click handler to do the copying. After the copy is done, we change the button’s text and disable it for a few seconds to help give the user feedback that it worked.

The real work is on this line:

navigator.clipboard.writeText(codeEl.textContent || "");

We’re passing codeEl.textContent rather than innerHTML since we want only the actual text that’s rendered, rather than all the markup Prism.js adds in order to format our code nicely.

Now let’s see how we might style this button. I’m no designer, but this is what I came up with:

.prism-copy-button {
  position: absolute;
  top: 5px;
  right: 5px;
  width: 10ch;
  background-color: rgb(100 100 100 / 0.5);
  border-width: 0;
  color: rgb(0, 0, 0);
  cursor: pointer;
}

.prism-copy-button[disabled] {
  cursor: default;
}

Which looks like this:

Syntax highlighting for a block of Markdown code.

And it works! It copies our code, and even preserves the formatting (i.e. new lines and indentation)!

Wrapping up

I hope this has been useful to you. Prism.js is a wonderful library, but it wasn’t originally written for static sites. This post walked you through some tips and tricks for bridging that gap, and getting it to work well with a Next.js site.


Syntax Highlighting (and More!) With Prism on a Static Site originally published on CSS-Tricks. You should get the newsletter.

Categories: Designing, Others Tags:

3 Essential Design Trends, May 2022

May 2nd, 2022 No comments

Do you ever look at a website and think, why did they do that? Sometimes with website design trends, that’s the exact thought that can come to mind. What about an element works (or doesn’t) and why did it get so popular so fast? That’s the theme of this month’s roundup.

Here’s what’s trending in design this month.

1. Light and Whimsical Design

Even for content that’s important or heavy, lighter more whimsical designs are trending. It’s a somewhat strange juxtaposition of design and content, and one that we don’t typically see that often.

Designs that have “weighty content” and information with a light aesthetic tend to have these elements:

  • Lighter color palettes
  • Atypical font selections that might be experimental
  • Movement and animation
  • Cartoon shapes or characters
  • Almost child-like feel to the overall design
  • No photos or videos that show people
  • Serious content once you start reading

That last item is the part of this design trend that’s most surprising. From the design alone, you’d expect light content or information design for kids. But in these examples, it is not at all.

OTR South is for mental health resources for youth. Note that the design does have a youthful feel, but the content and topic are quite heavy.

Wild Fox Squad is a prelaunch site that will ask you to buy NFTs.

Chia Studios is a website design agency.

The question this trend leaves you with is does the visual tone mesh enough with the content to create the right vibe or credibility to engage with the website, do business with the company, or even buy something online?

2. Long Scroll with Animation

At first glance, you might not think there’s a lot going on with any of these website design examples. But as you begin to engage with the sites, there’s an obvious trend – they all have long scrolls with animation from the top to bottom of the homepages.

Long scrolling is one of those website design topics – and trends – that people often feel strongly about. Some people love it. Others loathe it.

Here’s the challenge with long scrolling. If something seems long to scroll at desktop size, it takes forever to scroll on smaller screens unless you eliminate a lot of content. That begs the question: will users see and read everything you need them to on the homepage if it is exceptionally long?

Here’s how each of these examples uses long scrolling and animation together.

Match Artists opens with animation as the site loads and then flips to a static home screen. As you scroll, photos expand in the frame with a subtle animation. The more quickly you scroll, the more animated this website appears to be. There’s not a lot to read, which makes the image-scroll-animation combination easier to digest.

Myla Yeomans has an almost empty home scroll, that moves into a text-heavy scroll (shown below) with every scroll screen changing color with animation. The effects aren’t harsh but can give you a bit of motion sickness unless you scroll slowly because of the size and volume of text in the design.

Reyes Holdings might have the busiest animated scroll of this set of examples. There are slider animations that move left to right for content in the hero area as well as parallax and loading scroll animation down the page as elements seem to come in from almost every direction.

3. Pink

Pink is a color trend that has a lot of strong feelings attached to it. The color alone can create assumptions about the website design or content before a user even starts engaging with the site.

Whenever you design with a color like this, you have to consider the baggage that might come with it, whether you agree with it or not.

Pink is often associated with femininity, the pale pink in some of these examples is connected with babies, and it’s not often seen as a strong hue. Common meanings and associations with the color pink include sweetness, health, romanticism, and innocence. All of those concepts should be taken into consideration when this color is part of your design plan. With that in mind, each of these websites uses the pink color trend in quite different ways.

Thursday is a singles website/app. It has a modern vibe and the pink here is muted in a way that almost has a beige tone. The question for users is, does it have enough of a vibe to appeal to all types of people? Something that would seem important for a dating app.

Skin Clinics goes all-in with pink tones on the website and, it appears, in their offices. This is an instance when it is hard to quite figure out how I feel about the color. It’s nice that it doesn’t feel as clinical as all white, but all skin isn’t this color either. It can create an odd tug for how you feel about the design and facility as a whole.

Pixel Bakery uses a few shades of pink for its design that feels oddly childlike. Maybe it’s the yin and yang contrast combination with the almost baby blue. Then there’s this – nothing seems to “match” from a design perspective. Pale pink background, deeper pink logo and text, almost red pink calls to action. There’s a lot to visually digest here.


Conclusion

How do you feel about all of the trending designs featured this month? Do they seem like things that you might try? Web design trends are interesting in that way because they almost seem to catch fire – someone tries something new and then others keep using the design idea and iterations of it. Sometimes these ideas work brilliantly and sometimes they fall rather flat.

It’s a good exercise to think about trends without jumping to the conclusion that you need to use them; sometimes that can also be a lesson in what not to try with your own design.

Source

The post 3 Essential Design Trends, May 2022 first appeared on Webdesigner Depot.

Categories: Designing, Others Tags:

Creating Realistic Reflections With CSS

May 2nd, 2022 No comments
Old iPod Touch product image showing the front, back, and profile of the device with subtle reflections beneath each.

In design, reflections are stylized mirror images of objects. Even though they are not as popular as shadows, they have their moments — just think about the first time you explored the different font formats in MS Word or PowerPoint: I bet reflection was your second-most-used style, next to shadow, foregoing others like outline and glow. Or perhaps you remember when reflections were all the rage back when Apple used them on just about everything.

Reflections are still cool! And unlike years past, we can actually make reflections with CSS! Here’s what we’ll be making in this article:

CodePen Embed Fallback

There are two steps to a reflection design:

  1. Create a copy of the original design.
  2. Style that copy.

The most authentic and standardized way to get a mirror image in CSS now would be to use the element() property. But it’s still in its experimental phase and is only supported in Firefox, at the time of writing this article. If you’re curious, you can check out this article I wrote that experiments with it.
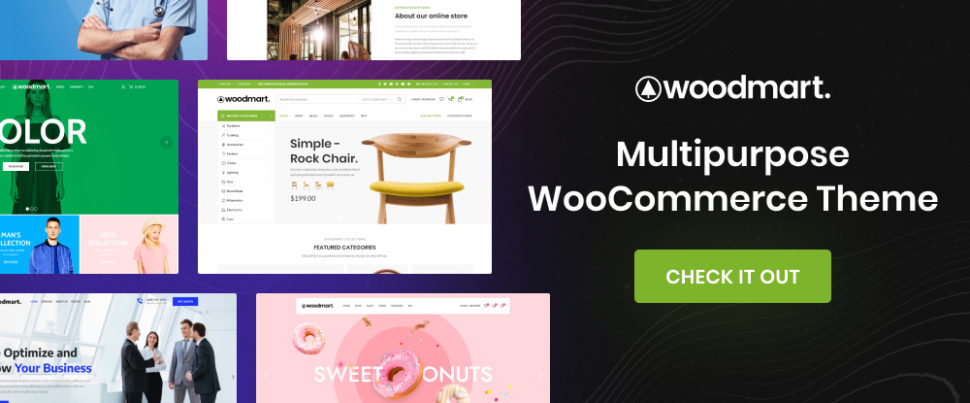
So, rather than element(), I’m going to add two of the same designs and use one as the reflection in my examples. You can code this part to be dynamic using JavaScript, or use pseudo-elements, but in my demos, I’m using a pair of identical elements per design.
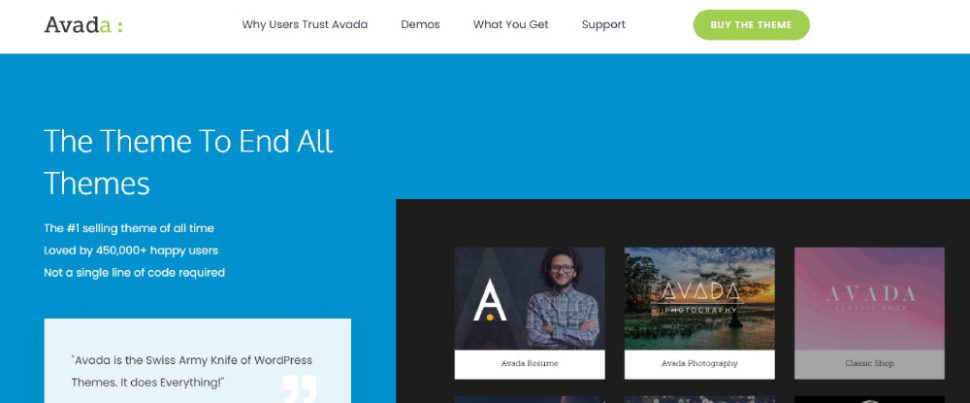
<div class="units">
  <div>trinket</div>
  <div>trinket</div>
</div>
.units > * {
  background-image: url('image.jpeg');
  background-clip: text;
  color: transparent;
  /* etc. */
}

The original design is a knock-out text graphic created from the combination of a background image, transparent text color, and the background-clip property with its text value.

The bottom element of the pair is then turned upside-down and moved closer to the original design using transform. This is the reflection:

.units > :last-child {
  transform: rotatex(180deg) translatey(15px); 
}

The now upturned bottom element will take on some styles to create fades and other graphic effects on the reflection. A gradual fading of reflection can be achieved with a linear gradient image used as a mask layer on the upturned element.
.units > :last-child {
  transform: rotatex(180deg) translatey(15px); 
  mask-image: linear-gradient(transparent 50%, white 90%);
}
CodePen Embed Fallback

By default, the mask-mode of the mask-image property is alpha. That means the transparent parts of an image, when the image is used as a mask layer for an element, turn their corresponding areas of the element transparent as well. That’s why a linear-gradient with transparent gradation at the top fades out the upside-down reflection at the end.
We can also try other gradient styles, with or without combining them. Take this one with stripes, for example. I added the pattern along with the fade effect from before.

.units > :last-child {
  /* ... */
  mask-image: 
    repeating-linear-gradient(transparent, transparent 3px, white 3px, white 4px),
    linear-gradient( transparent 50%, white 90%);
}
CodePen Embed Fallback

Or this one with radial-gradient:

.units > :last-child {
  /* ... */
  mask-image: radial-gradient(circle at center, white, transparent 50%);
}
CodePen Embed Fallback

Another idea is to morph the mirror image by adding skew() to the transform property. This gives some movement to the reflection.

.units > :last-child {
  /* ... */
  transform: rotatex(180deg) translatey(15px) skew(135deg) translatex(30px);
}
CodePen Embed Fallback

When you need the reflection to be subtle and more like a shadow, then blurring it out, brightening it, or reducing its opacity, can do the trick.

.units > :last-child {
  /* ... */
  filter: blur(4px) brightness(1.5);
}
CodePen Embed Fallback

Sometimes a reflection can also be shadowy itself, so, instead of using the background image (from the original design) or a block color for the text, I tried giving the reflection a series of translucent shadows of red, blue and green colors that go well with the original design.

.units > :last-child {
  /* ... */
  text-shadow: 
    0 0 8px rgb(255 0 0 / .4),
    -2px -2px 6px rgb(0 255 0 / .4),
    2px 2px 4px rgb(0 255 255 / .4);
}

Do those rgb()values look weird? That’s a new syntax that’s part of some exciting new CSS color features.

CodePen Embed Fallback

Let’s bring all of these approaches together in one big demo:

CodePen Embed Fallback

Wrapping up

The key to a good reflection is to go with effects that are subtler than the main object, but not so subtle that it’s difficult to notice. Then there are other considerations, including the reflection’s color, direction, and shape.

I hope you got some inspirations from this! Sure, all we looked at here was text, but reflections can work well for any striking element in a design that has a sensible enough space around it and can benefit from a reflection to elevate itself on the page.


Creating Realistic Reflections With CSS originally published on CSS-Tricks. You should get the newsletter.

Categories: Designing, Others Tags: