Archive

Archive for October, 2022

Best Travel Apps to Relish Travelling Experience

October 10th, 2022 No comments

When you travel, you want to be able to experience the culture and feel the local atmosphere. But you also want to relax and experience the freedom of going where you want, when you want. That’s only possible when you plan your trip well, but it also requires spontaneity. The best way to experience both is to plan your trip and go with the flow.

Whether you’re planning a trip abroad or just want to get out of the city for a day, the best travel apps can help you experience the best of what the destination offers without draining your wallet or breaking your routine. We’ve curated a list of the best travel apps to help you plan your trip, explore the best local hidden gems, navigate cities, and connect with people.

We’ve hand-picked the best apps to help you plan your trip and explore the world quickly, no matter where you are. Some are focused on helping you navigate your current location, while others are better suited for long-term travel planning. We’ve also included a variety of social and networking apps to help you connect with people while you’re on the road.

PackPoint

Once you’ve decided where you’d like to go, the next step is to figure out what you’ll need to bring. One of the best ways to plan for your trip is to use an app that customizes your packing list based on weather forecasts and a series of questions about your trip. The app developer of your choice will ask you where you’re going when you’ll be there, and what you plan to do while you’re there. You’ll also be asked questions about your trip, such as what kind of weather you like to travel in and what types of activities you prefer to do.

Hopper

The Hopper app is one of the most popular ways to find cheap flights. It uses complex algorithms to analyze billions of flight and hotel prices across the web daily. It draws on historical data to generate a color-coded calendar showing the cheapest dates and times for a given destination. The app is best used when you have a specific flight or hotel in mind, but it can also be used as a general travel planning tool. This information can be used to build a basic travel budget and generate a rough estimate of the cost of a trip, but it doesn’t offer the fine-tuned planning features of the apps above.

The app uses your location and the dates you’ve selected as part of the algorithm to generate a calendar of prices and color-codes it to help you assess the risk of making a purchase. You can also access the app’s “Hopper Research Library” to see what your friends have purchased and share it with them to help.

Wanderlog

Whether looking for flights, hotels, or a destination, Wanderlog makes it easy to find the best deals with travel app ideas. You can even search for flights, hotels, and destinations simultaneously to compare prices side by side. Whether you prefer to book your travel on the app or your phone, you can keep all your flight, hotel, and restaurant reservations in one place. That way, you can focus on the fun stuff — like planning your road trip route and coordinating with friends.

Wanderlog is a complete package for those looking to customize their trips, but it also includes handy travel guides from users worldwide so you can plan your trip in a pinch. Customization is at the core of Wanderlog, so you can make it your own by adding photos, text, and other graphics. You can even create your maps, showing you your location on the route, so you don’t get lost. This is a great way to add a personal touch to your travels, and it’s super easy to do.

Kayak

Kayak is best known as a travel search engine but also includes booking services. It is one of the best travel apps for researching and finding cheap flights since it allows you to search for flights, hotels, and car rentals. It also gives you a complete list of possible options, including reduced hacker fares where you book outgoing and returning flights with two separate airlines. You can also use Kayak to find and book accommodations for your trip. It connects to many different services, so you can book your reservations without manually tracking down reservations. The only downside is that Kayak can be a little overwhelming if you’re starting, and it can be challenging to get a sense of how much your trip will cost once you start searching for flights.

HotelTonight

If you’re a traveler who prefers to plan as little as possible and show up at the airport or hotel when your flight or accommodations are scheduled, then HotelTonight may not be the best app for you. But if you’re a seat-of-your-pants type traveler or one who likes to have a backup plan in case your reservations don’t work out, then HotelTonight is an easy way to find last-minute hotels and get rooms without having to call or make a reservation. It works like a traditional hotel booking system, where you can choose from various room types, pick your location, and confirm your booking. But instead of calling a hotel directly, you head to HotelTonight.

TrailWallet

Keep track of your spending and save money on the things you can’t be without; use Trail Wallet, the world’s first digital road map, to discover the best experiences, places, and things to do, wherever you go. Just head to the app store to download and use the built-in map to plan the best routes and get the most out of your travels. No more digging through maps and guides to find hidden gems and experiences, no more guessing where to go next, and no more overpaying for things you don’t need. The best part is that you never even have to carry cash when exploring.

GlobeTips

The best part about traveling is experiencing different cultures and norms regarding tipping. Many countries have a different tipping culture than the United States, which can be confusing and even frustrating if you don’t know what to expect. GlobeTips can help you navigate different tipping norms across countries so you can best understand and appreciate the service you’re getting. You can also use GlobeTips to help you decide if a tip is appropriate for the service you received, such as restaurant waiters or cab drivers.

GlobeTips can help you navigate different tipping norms across countries, so you never have to guess how much to give and never feel awkward not giving enough. Just head to the app to find the right amount for the situation, and you’re good to go. You can even pull up a custom tip calculator for any country to get a better estimate of how much to give, and if you want to leave a tip extra for the bartender, head to the built-in map and choose the “tip” option. The app will automatically calculate the right amount for you and show you where to leave it. 

EatWith

Eatwith takes the guesswork out of finding the best local experiences. The app connects you with hand-picked locals from more than 130 countries passionate about sharing their culture and showing you the best parts of their hometowns. You can use Eatwith to book food tours and cooking classes, but it can also be an excellent resource for finding things to do on your own, such as visiting museums or going for a drink at a local bar. The app will help you connect with suitable hosts for the experience you’re looking for and help you book it in minutes.

You can use the app to host dinner parties, food tours, and cooking classes with your host, or you can use it to book a private experience. Once you’ve been matched with a host, the app will connect you so you can start planning your adventure. You can also customize your host experience by choosing the language and cuisine you want to learn about and the cuisine you want to know about.

CultureTrip

The CultureTrip app lets you explore a city’s personality, culture, offerings, and intricacies through original video series, stories, and listicles. You’ll be able to dive into the personality of a city—from the people who live there to the things that make it unique—through in-depth video series and engrossing narrative stories. You’ll be able to tap into the experience of our award-winning writers and videographers. They will bring you close encounters with the people, places, and experiences that define the city.

The app will also connect you with the best local adventures, so you can discover new things to do and see in your destination. You can also connect with other culture lovers passionate about exploring their cities and share your experiences with them.

iTranslate

iTranslate is a new app that allows you to type or speak your sentence and get the translation in your chosen language. It’s a pretty handy tool for people who don’t have time to memorize every word in the language they want to speak or understand. The app uses a series of algorithms to translate your sentence into the chosen language, and then you can choose to either hear the translation read aloud to you or see it on the screen in your preferred language. You can also add your custom translations to sentences, which is pretty handy when you need to ask a question in a language you don’t know well.

Final Words

There are many great travel apps out there, and even more, are worth checking out. Whether you’re looking for a fun way to explore a new city or trying to find a last-minute flight to Paris, the right travel app can help you get where you want to go. Some of the best travel apps will help you plan your trip, find the best places to visit, and get you where you need to be on time. Some of the best travel apps will also help you make dinner reservations, find a great fitness class, find a cool bar or cafe, and more.

The post Best Travel Apps to Relish Travelling Experience appeared first on noupe.

Categories: Others Tags:

Delightful UI Animations With Shared Element Transitions API (Part 2)

October 10th, 2022 No comments

In the first part of this article, we covered Shared Element Transitions API (SET API) and how we can use it to effortlessly create complex transitions for various UI elements, which would usually require a lot of JavaScript code or an animation library to achieve.

But what about smooth and delightful transition animations between individual pages? This is probably one of the most often requested features in the past few years because even with all the frameworks like React and Svelte and animation libraries like GSAP and Framer Motion, transitions between pages are still really difficult to do.

In this article, we’re going to showcase same-document page transitions commonly found in Single Page Applications and talk about the future of the Shared Element Transitions API for cross-document (Multi Page Application) transitions. I’ll also showcase some awesome React, Astro, and Svelte implementation examples from the dev community.

Note: Shared Element Transitions API is currently supported only in Chrome version 104+ and Canary with the document-transition flag enabled. Examples will be accompanied by a video, so you can easily follow along with the article if you don’t have the required browser installed.

In case you haven’t checked out my previous article on the topic, here is a quick rundown of this exciting new API so you can follow along with the article.

Shared Element Transitions API

With Shared Element Transitions API, the browser does a lot of heavy lifting when it comes to animations allowing us to create complex UI animations in a more streamlined way. The main part of the API is a JavaScript function that takes screenshots of the UI state before and after the DOM update and apples a crossfade animation:

const moveTransition = document.createDocumentTransition();
await moveTransition.start(() => {
  /* Take screenshot of an outgoing state */
  /* Update the DOM - move item from one container to another */
  targetContainer.append(activeItem);
  /* Take screenshot of an incoming state and crossfade the states */
});

Just by calling the start function, we get a neat and simple crossfade animation between the outgoing and incoming states.

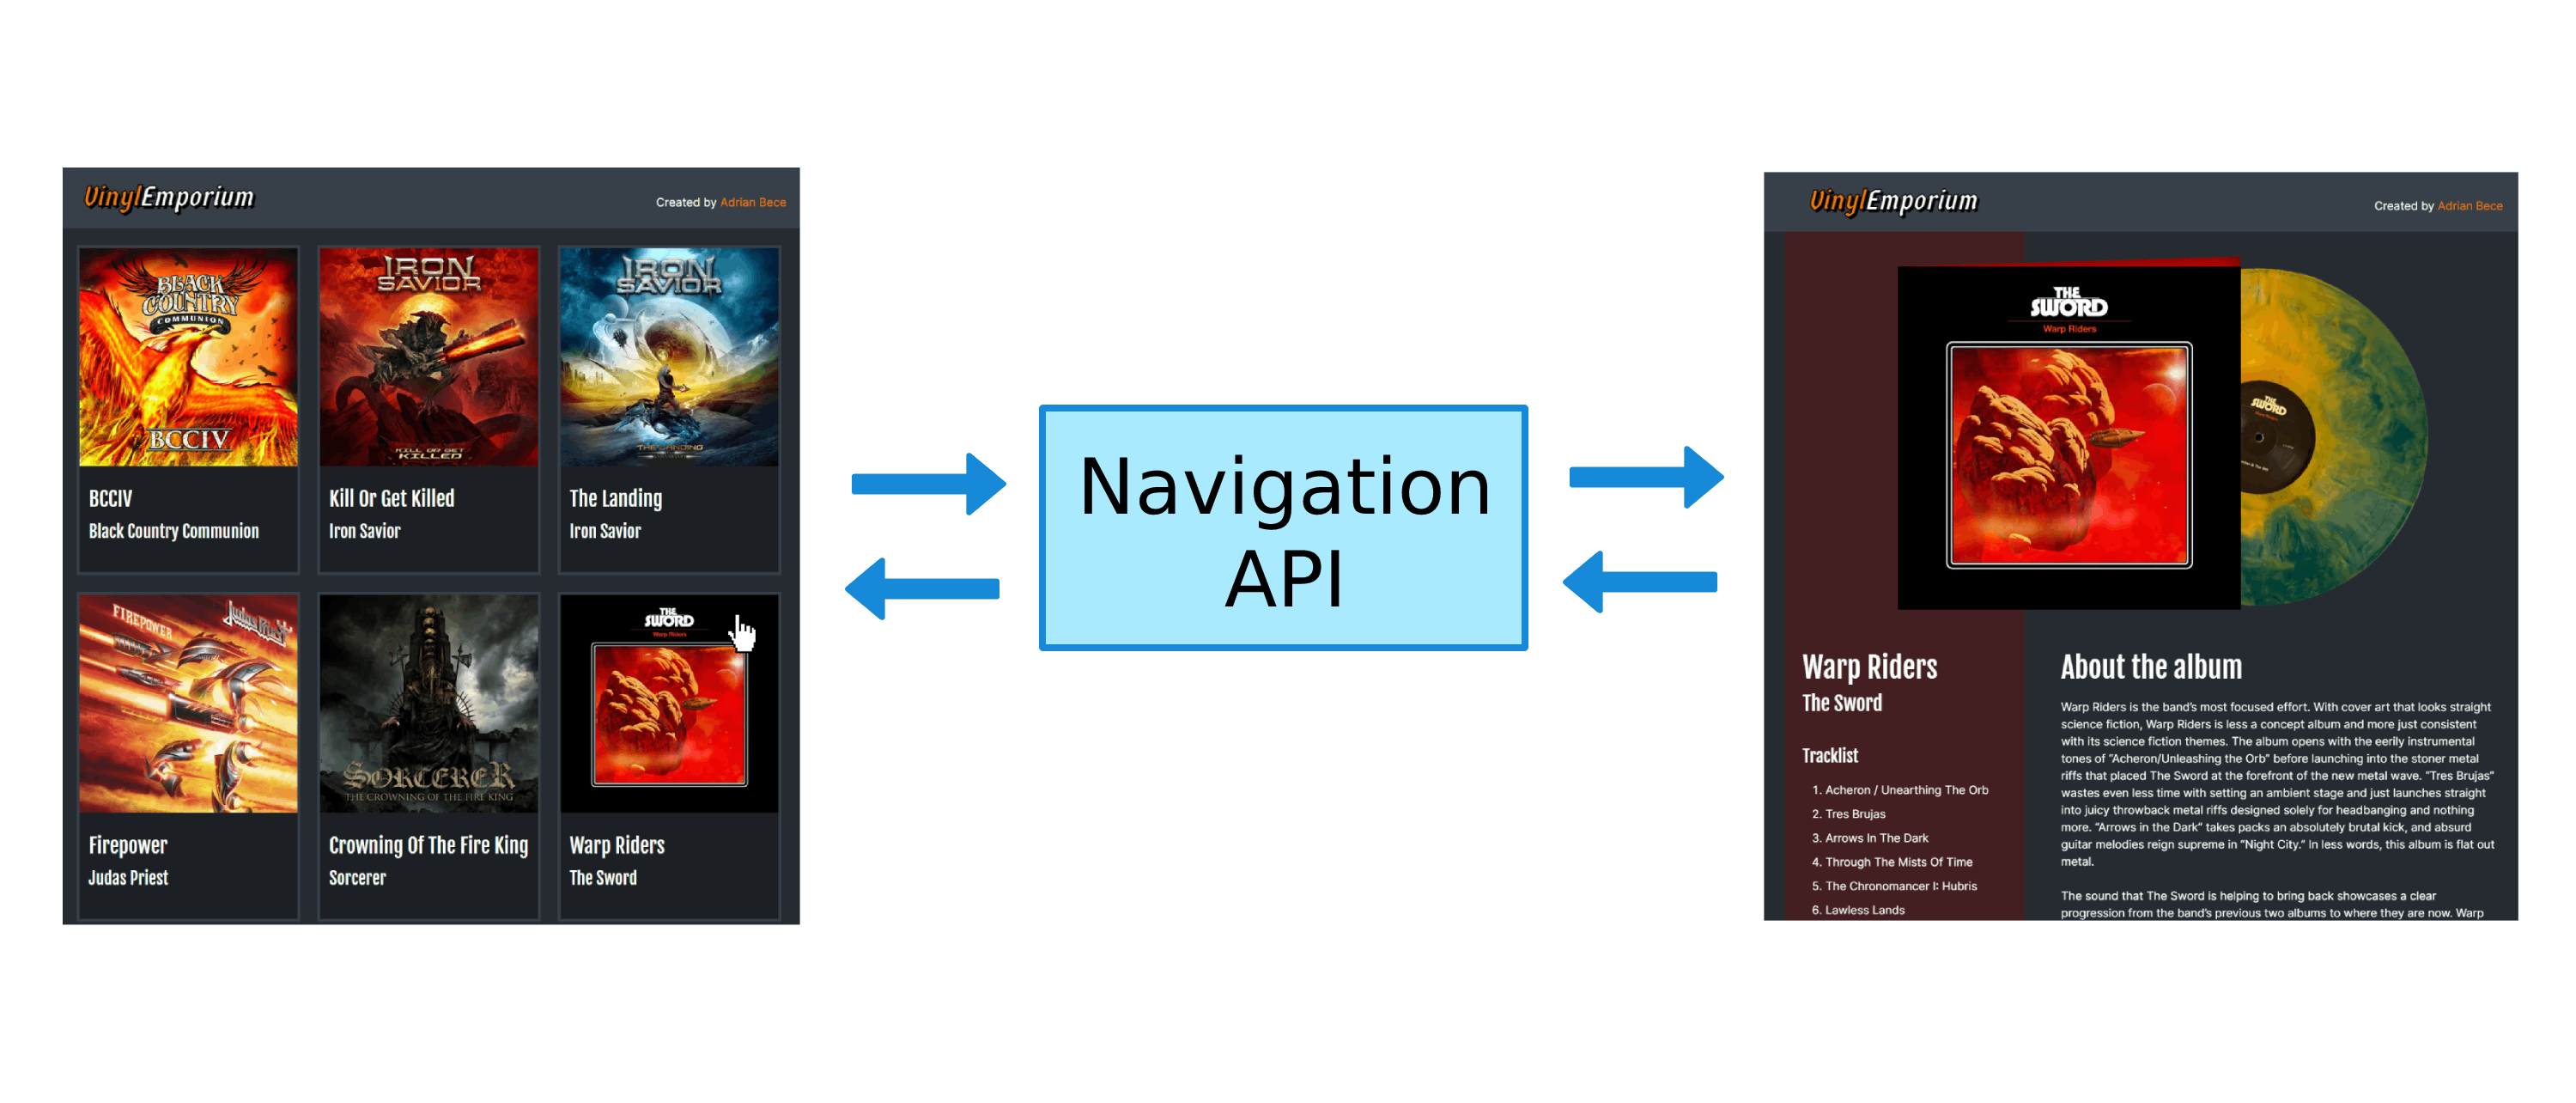
As you can see, we can still navigate between the pages; DOM is updated with the new content, and the URL in the browser changes. We are intercepting the browser’s default navigation behavior and handling the page loading and DOM updates all by ourselves while we remain on the same page.

By just passing the DOM update function as a callback to the SET API start function, we get a neat crossfade transition between pages right out of the box!

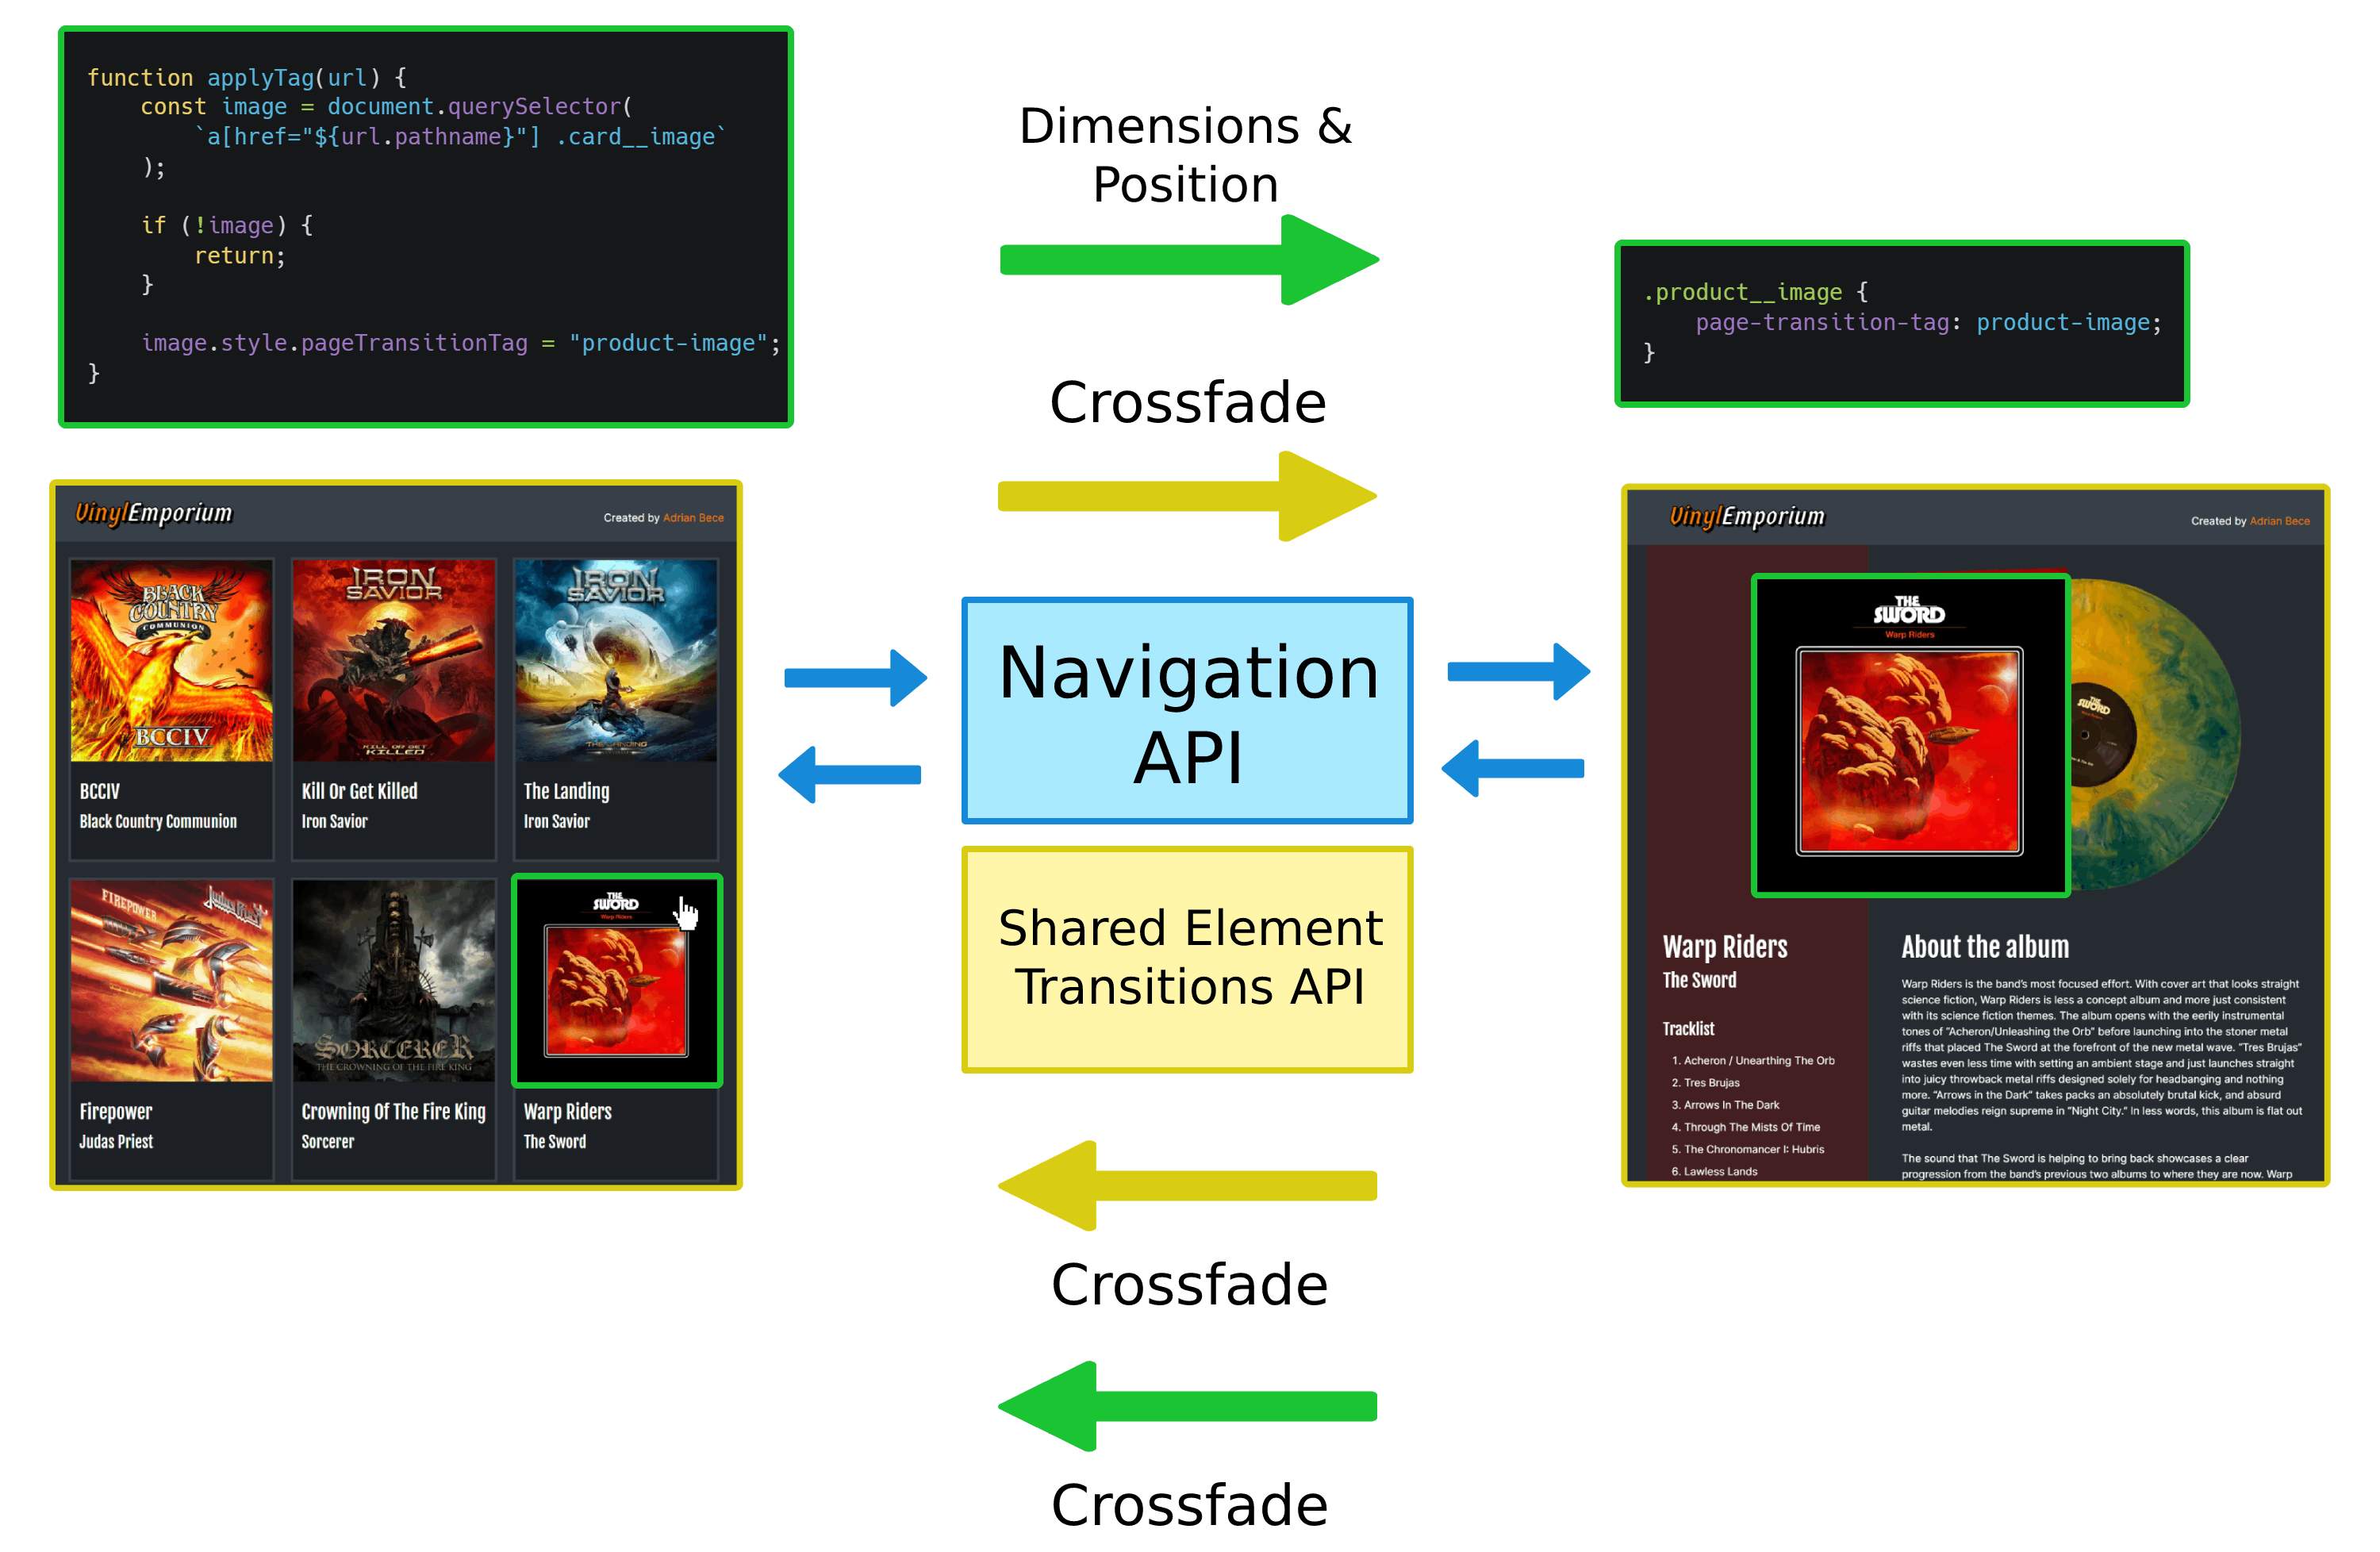
With just a few lines of CSS and JavaScript, we’ve created this beautiful transition animation. All we had to do was to identify the shared element (item image) on a clicked link using a page-transition-tag and signal the browser to keep track of its dimension and position.

We get a crossfade animation on a shared element on backward navigation for free because the selector we used document.querySelector(a[href="${url.pathname}"] .card__image) runs on the current page, so when we navigate back to items list page the tag doesn’t get applied and browser cannot match the shared element.

If we want to have the same animation on the shared element when navigating back to the item list page, we have to apply the tag to the correct image element in the grid after we fetch the contents of a target page.

Customizing Page-Transition Animation With CSS

Let’s use CSS animation properties to fine-tune the crossfade and item image animation. We want the crossfade animation to be quick and more subtle, and the more elaborate image animation to be more noticeable and have a nice custom easing function:

/* Speed up crossfade animations */
::page-transition-outgoing-image(*),
::page-transition-incoming-image(*) {
    animation-timing-function: ease-in-out;
    animation-duration: 0.25s;
}

/* Fine-tune shared element position and dimension animation */
::page-transition-container(product-image) {
    animation-timing-function: cubic-bezier(0.22, 1, 0.36, 1);
    animation-duration: 0.5s;
}

We also need to keep in mind that some users might prefer browsing the site without the complex animations with a lot of movement, so we want to either turn them off or provide more appropriate animation:

@media (prefers-reduced-motion) {
  ::page-transition-container(*),
  ::page-transition-outgoing-image(*),
  ::page-transition-incoming-image(*) {
    /* Or add appropriate animation alternatives */
    animation: none !important; 
  }
}

Crossfade animations now run faster, and the sizing and position animation runs a bit slower and with a different timing function.

In this example, I’ve only showcased code snippets relevant to creating page transition and SET API. If you are curious about the complete source code or want to check the demo in detail, feel free to check out the project repository and inspect the demo page.

Upcoming Cross-document Transitions

Proper Shared Element Transitions API support for MPAs is still a work in progress, but we can get a general idea of how it’s supposed to work from a rough draft by WICG.

In same-document transitions, we would use pageTransition.start(/* … */) function to let the browser keep track of the DOM updates. As for the cross-document transitions, we need to run the transition request function on the outgoing page before it’s unloaded and run the transition on the incoming page once it’s ready.

The following code snippets are copied from the WICG draft:

// In the outgoing page
document.addEventListener("pagehide", (event) => {
  if (!event.isSameOriginDocumentSwap) return;
  if (looksRight(event.nextPageURL)) {
    // This signals that the outgoing elements should be captured.
    event.pleaseLetTheNextPageDoATransitionPlease();
  }
});
// In the incoming page
document.addEventListener("beforepageshow", (event) => {
  if (
    event.previousPageWantsToDoATransition &&
    looksRight(event.previousPageURL)
  ) {
    const transitionReadyPromise = event.yeahLetsDoAPageTransition();
  }
});

Shared Element Transitions API for cross-document transitions would also need to be heavily restricted for security reasons.

Framework Implementation Examples

During the past few weeks, I saw some jaw-dropping examples of using Shared Element Transitions API for page navigation, added with progressive enhancement to various frameworks like React and Svelte.

Adding page transitions with SET API in frameworks can be tricky. In this example, we’ve had control over the DOM update functions, but this is not usually the case with front-end frameworks. Hopefully, as this API gets proper browser support and traction in the dev community, frameworks and router libraries will follow suit and provide better ways to integrate Shared Element Transitions API in navigation.

So, I would like to highlight some awesome examples of framework implementations from the community, especially those that provide reusable functions and hooks.

React / Preact

Jake Archibald created a great video playlist example using Preact, TypeScript, and a custom page transition hook. This example uses a custom router implementation to apply class names to the html element to customize the animation and toggle different types of animation depending on the navigation direction.

Astro

Maxi Ferreira implemented page transitions similarly as in our example with Navigation API but with Astro and explained the process in great detail on top of building a stunning movie database app.

He also worked with Ben Myers on this awesome guitar shop example with cool animations on both the guitar image and item background, which expands into a full description background container. This is also a good example of how to create elaborate but seamless and tasteful animations that add to the user experience.

Svelte

Moving onto Svelte, Geoff Rich built this neat fruit nutritional data app and explained the whole process in great detail in his article. SvelteKit has a built-in navigating store, and Geoff created a handy util function for intercepting page transitions and applying the Shared Element Transitions API depending on its browser support.

Conclusion

Shared Element Transitions API allows us not only to implement complex UI animations on a component level but also on a page level. Same-document transitions in Single Page Applications can be implemented today with progressive enhancement, and we can achieve impressive app-like page transitions with just a few lines of JavaScript and CSS. And all that without a JavaScript animation library! More popular and more complex cross-document transitions for Multi Page Applications are still a work in progress, and I can see it being a massive game-changer once it’s released and gains wider browser support.

Judging from the impressive examples we’ve seen online, some of which are featured in this article, we can safely say that the community is more than excited about this API. If you’ve built something awesome using Shared Element Transitions API, feel free to reach out on Twitter or LinkedIn and share your work.

Many thanks to Nikola Vranesic for reviewing the article for technical accuracy.

References

Categories: Others Tags:

Adding Fluid Typography Support to WordPress Block Themes

October 7th, 2022 No comments
Illustrated list of WordPress blocks that received font and spacing controls in the Gutenberg plugin. There are 31 total blocks.

Fluid typography is a fancy way of “describing font properties, such as size or line height, that scale fluidly according to the size of the viewport”. It’s also known by other names, like responsive typography, flexible type, fluid type, viewport sized typography, fluid typography, and even responsive display text.

Here is an example of fluid typography that you can play live (courtesy of MDN documentation). CSS-Tricks has covered fluid typography extensively as well. But the point here is not to introduce you to fluid typography, but how to use it. More specifically, I want to show you how to implement fluid typography in WordPress 6.1 which recently introduced a fluid type feature directly in the WordPress Block Editor.

Open up your style.css file, slap in a style rule with fancy clamp()-ing on the font-size property, and good to go, right? Sure, that’ll give you fluid text, but to get Block Editor controls that make it possible to apply fluid type anywhere on your WordPress site? That requires a different approach in these block-ified days.

Fluid typography support in Gutenberg

Some WordPress theme developers have been using the clamp() function to define a fluid font-size, in their WordPress themes, even in newer “block” themes such as Twenty Twenty-Two, Twenty Twenty-Three, and others.

But the Gutenberg plugin — the one that contains experimental development for WordPress Block and Site Editor features — introduced support for fluid typography starting in version 13.8. That opened the door for implementing at a theme level so that fluid type can be applied to specific elements and blocks directly in the Block Editor. CSS-Tricks was even given a shout-out in the Pull Request that merged the feature.

That work became part of WordPress Core in WordPress 6.1. Rich Tabor, one of the earlier advocates of fluid typography in the Block Editor says:

[Fluid typography] is also a part of making WordPress more powerful, while not more complicated (which we all know is quite the challenge). […] Fluid typography just works. Actually, I think it works great.

This Make WordPress post highlights the approach taken to support the feature at the block level so that a fluid font size is applied to blocks dynamically by default. There are some benefits to this, of course:

  • It provides a way for theme authors to activate fluid typography without worrying about implementing it in code.
  • It applies fluid typography to specific typographical entities, such as elements or blocks in a maintainable and reusable way.
  • It allows flexibility in terms of font size units (e.g. px, rem, em, and %).

Now that this new feature is available in the WordPress Block Editor by default, theme authors can apply uniform fluid typography without writing additional code.

Blocks that support typography and spacing settings

Gutenberg 14.1 released on September 16, 2022, and introduced typographic settings on a bunch of blocks. That means the text settings for those blocks were set in CSS before and had to be changed in CSS as well. But those blocks now provide font and spacing controls in the Block Editor interface.

That work is currently slated to be added to WordPress 6.1, as detailed in this Make WordPress blog post. And with it is an expanded number of blocks that with typography support.

Illustrated list of 60 WordPress blocks gaining typography and font size support in WordPress 6.1.
WordPress blocks that will support typography settings in the upcoming WordPress 6.1 release.

Declaring fluid type in a WordPress block theme

So, how do we put this new fluid typography to use in WordPress? The answer is in theme.json, a new-ish file specific to block themes that contains a bunch of theme configurations in key:value pairs.

Let’s look at a rule for a large font in theme.json where contentSize: 768px and we’re working with a widesize: 1600px layout. This is how we can specify a CSS font-size using the clamp() function:

"settings": {
  "appearanceTools": true,
  "layout": {
    "contentSize": "768px",
    "wideSize": "1600px"
  },
  "typography": {
    "fontSizes": [ 
      {
        "name": "Large",
        "size": "clamp(2.25rem, 6vw, 3rem)",
        "slug": "large"
      }
    ]
  }
}

As of WordPress 6.1, only rem, em and px units are supported.

That’s great and works, but with the new fluid type feature we would actually use a different approach. First, we opt into fluid typography on settings.typography, which has a new fluid property:

"settings": {
  "typography": {
    "fluid": true
  }
}

Then we specify our settings.fontSizes like before, but with a new fluidSize property where we can set the min and max size values for our fluid type range.

"settings": {
  "appearanceTools": true,
  "layout": {
    "contentSize": "768px",
    "wideSize": "1600px"
  },
  "typography": {
    "fontSizes": [ 
      {
        "size": "2.25rem",
        "fluidSize": {
          "min": "2.25rem",
          "max": "3rem"
        },
        "slug": "large",
        "name": "Large"
      }
    ]
  }
}

That’s really it. We just added fluid type to a font size called “Large” with a range that starts at 2.25rem and scales up to 3rem. Now, we can apply the “Large” font to any block with font settings.

How does this works under the hood? Rich Tabor offers a nice explanation, as does this Pull Request in GitHub. In short, WordPress converts the theme.json properties into the following CSS rule:

.has-large-font-size {
  font-size: clamp(36px, calc(2.25rem + ((1vw - 7.68px) * 1.4423)), 48px);
}

…which is applied to the element, say a Paragraph Block:

<p class="has-large-font-size">...</p>

Initially, I found it hard to understand and wrap around in my mind the concept of the CSS clamp() function without also learning about the min(), max(), and calc() functions. This calculator tool helped me quite a bit, especially for determining which values to use in my own theme projects.

For demonstration purposes, let’s use the calculator to define our font-size range so that the size is 36px at a 768px viewport width and 48px at a 1600px viewport width.

Entering values into the online calculator for fluid typography.

The calculator automatically generates the following CSS:

/* 36px @ 768px increasing to 48px @ 1600px */
font-size: clamp(36px, calc(2.25rem + ((1vw - 7.68px) * 1.4423)), 48px);

The calculator provide options to select input units as px, rem, and em. If we select rem unit, the calculator generates the following clamp() value:

/* 2.25rem @ 48rem increasing to 3rem @ 100rem */
font-size: clamp(2.25rem, calc(2.25rem + ((1vw - 0.48rem) * 1.4423)), 3rem);

So, those minimum and maximum values correspond to the the fluidSize.min and fluidSize.max values in theme.json. The min value is applied at viewports that are 768px wide and below. Then the font-size scales up as the viewport width grows. If the viewport is wider than 1600px, the max is applied and the font-size is capped there.

Examples

There are detailed testing instructions in the merged Pull Request that introduced the feature. There are even more testing instructions from Justin Tadlock’s pre-prelease post on Make WordPress.

Example 1: Setting a new fluid font setting

Let’s start with Justin’s set of instructions. I used in a modified version of the default Twenty Twenty-Three theme that is currently under development.

First, let’s make sure we’re running the Gutenberg plugin (13.8 and up) or WordPress 6.1, then opt into fluid type on the settings.typography.fluid property in the theme.json file:

{
  "version": 2,
  "settings": {
    "appearanceTools": true,
    "layout": {
      "contentSize": "768px",
      "wideSize": "1600px"
    },
    "typography": {
      "fluid": true
    }
  }
}

Now, let’s drop the settings.typography.fontSizes examples in there:

{
  "version": 2,
  "settings": {
    "appearanceTools": true,
    "layout": {
      "contentSize": "768px",
      "wideSize": "1600px"
    },
    "typography": {
      "fluid": true
      "fontSizes": [
        {
          "name": "Normal",
          "size": "1.125rem",
          "fluid": {
            "min": "1rem",
            "max": "1.5rem"
          },
          "slug": "normal"
        }
      ]
    }
  }
}

If everything is working correctly, we can now head into the WordPress Block Editor and apply the “Normal” font setting to our block:

The WordPress Block Editor interface showing a paragraph block and the fluid typography settings for it.

Nice! And if we save and inspect that element on the front end, this is the markup:

Inspecting the WordPress Paragraph block in DevTools.

Very good. Now let’s make sure the CSS is actually there:

DevTools showing the font-size custom property for the WordPress Paragraph block's fluid typography.

Good, good. Let’s expose that CSS custom property to see if it’s really clampin’ things:

Revealing the custom property value in DevTools, showing a CSS clamp function.

Looks like everything is working just as we want it! Let’s look at another example…

Example 2: Excluding a font setting from fluid type

This time, let’s follow the instructions from the merged Pull Request with a nod to this example by Carolina Nymark that shows how we can disable fluid type on a specific font setting.

I used the empty theme as advised in the instructions and opened up the theme.json file for testing. First, we opt into fluid type exactly as we did before:

{
  "version": 2,
  "settings": {
    "appearanceTools": true,
    "layout": {
      "contentSize": "768px",
      "wideSize": "1000px"
    },
    "typography": {
      "fluid": true
    }
  }
}

This time, we’re working with smaller wideSize value of 1000px instead of 1600px. This should allow us to see fluid type working in an exact range.

OK, on to defining some custom font sizes under settings.typography.fontSizes:

{
  "version": 2,
  "settings": {
    "typography": {
      "fluid": true,
      "fontSizes": [
        {
          "size": ".875rem",
          "fluid": {
            "min": "0.875rem",
            "max": "1rem"
        },
          "slug": "small",
          "name": "Small"
        },
        {
          "size": "1rem",
          "fluid": {
            "min": "1rem",
            "max": "1.5rem"
          },
          "slug": "normal",
          "name": "Normal"
        },
        {
          "size": "1.5rem",
          "fluid": {
            "min": "1.5rem",
            "max": "2rem"
          },
          "slug": "large",
          "name": "Large"
        },
        {
          "size": "2.25rem",
          "fluid": false,
          "slug": "x-large",
          "name": "Extra large"
        }
      ]
    }
  }
}

Notice that we’ve applied the fluid type feature only on the “Normal”, “Medium”, and “Large” font settings. “Extra Large” is the odd one out where the fluid object is set to false.

the WordPress Block Editor interface with four Paragraph blocks, each at a different font size setting.

What WordPress does from here — via the Gutenberg style engine — is apply the properties we set into CSS clamp() functions for each font size setting that has opted into fluid type and a single size value for the Extra Large setting:

--wp--preset--font-size--small: clamp(0.875rem, 0.875rem + ((1vw - 0.48rem) * 0.24), 1rem);
--wp--preset--font-size--medium: clamp(1rem, 1rem + ((1vw - 0.48rem) * 0.962), 1.5rem);
--wp--preset--font-size--large: clamp(1.5rem, 1.5rem + ((1vw - 0.48rem) * 0.962), 2rem);
--wp--preset--font-size--x-large: 2.25rem;

Let’s check the markup on the front end:

Inspecting the WordPress Paragraph blocks in DevTools.

Good start! Let’s confirm that the .has-x-large-font-size class is excluded from fluid type:

Showing the font-size custom property for the Extra Large font setting in DevTools.

If we expose the --wp--preset--font-size--x-large variable, we’ll see it’s set to 2.25rem.

Revealing the Extra Large font size custom property value, showing 2.25rem.

That’s exactly what we want!

Block themes that support fluid typography

Many WordPress themes already make use of the clamp() function for fluid type in both block and classic themes. A good example of fluid typography use is the recently released Twenty Twenty-Three default theme.

I’ve reviewed all the block themes from WordPress Block Theme directory, examining theme.json file of each theme and to see just how many block themes currently support fluid typography — not the new feature since it’s still in the Gutenberg plugin as of this writing — using the CSS clamp() function. Of the 146 themes I reviewed, the majority of them used a clamp() function to define spacing. A little more than half of them used clamp() to define font sizes. The Alara theme is the only one to use clamp() for defining the layout container sizes.

Understandably, only a few recently released themes contain the new fluid typography feature. But here are the ones I found that define it in theme.json:

And if you read my previous post here on CSS-Tricks, the TT2 Gopher Blocks theme I used for the demo has also been updated to support the fluid typography feature.

Selected reactions to the WordPress fluid typography features

Having fluid typography in WordPress at the settings level is super exciting! I thought I’d share some thoughts from folks in the WordPress developer community who have commented on it.

Matias Ventura, the lead architect of the Gutenberg project:

Rich Tabor:

As one of the bigger efforts towards making publishing beautifully rich pages in WordPress, fluid typography is a pretty big experience win for both the folks building with WordPress — and those consuming the content.

Automattic developer Ramon Dodd commented in the Pull Request:

Contrast that idea with font sizes that respond to specific viewport sizes, such as those defined by media queries, but do nothing in between those sizes. theme.json already allows authors to insert their own fluid font size values. This won’t change, but this PR offers it to folks who don’t want to worry about the implementation details.

Nick Croft, author of GenesisWP:

Brian Garner, designer and principal developer advocate at WPEngine:

A few developers think some features should be an opt-in. Jason Crist of Automattic says:

I love the power of fluid typography, however I also don’t believe that it should just be enabled by default. It’s usage (and the details of it) are important design decisions that should be made carefully.

You can also find a bunch more comments in the official testing instructions for the feature.

Wrapping up

The fluid typography feature in WordPress is still in active development at the time of this writing. So, right now, theme authors should proceed to use it, but with caution and expect some possible changes before it is officially released. Justin cautions theme authors using this feature and suggests to keep eye on the following two GitHub issues:

There is also still lots of ongoing work on typography and other design-related WordPress tools. If you’re interested, watch this typography tracking GitHub ticket and design tools related GitHub issues.

Resources

I used the following articles when researching fluid type and how WordPress is implementing it as a feature.

Tutorials and opinions

CSS-Tricks

calc() and related CSS functions


Adding Fluid Typography Support to WordPress Block Themes originally published on CSS-Tricks, which is part of the DigitalOcean family. You should get the newsletter.

Categories: Designing, Others Tags:

A Roadmap For Building A Business Chatbot

October 7th, 2022 No comments

The widespread adoption of chatbots was imminent with the stellar rise and consolidation of instant messaging. However, the accelerated pace at which chatbots have evolved from accepting scripted responses to holding natural-sounding conversations has been unprecedented. According to Google Trends, the interest in AI Chatbots has increased ten-fold over the last five years!

With chatbots getting smarter, value-driven, and user-friendly, it has fueled customer-led demand for chatbot-driven interaction at every touchpoint. As a result, businesses are scrambling to keep up with this requirement and investing aggressively in chatbot development; so much so that the market for chatbots is expected to reach a valuation of USD 10.2.29 in 2026 with an impressive CAGR of 34.75%.

On that note, it makes absolute sense to hop aboard this chatbot train. In fact, it is believed that about 80% of CEOs plan on revamping customer engagement with conversational chatbots. So, if you are looking for a way to get started, here is a step-by-step guide for chatbot creation!

What Is A Chatbot? And Why Does It Matter?

In its simplest sense, a “chatbot” is a portmanteau of human “chatter” as conducted by a “bot.” It is a software application or computer program that can simulate human conversations through speech or text.

Such a service can rake in the following advantages:

  • Unlike the unidirectional view of chatbots as customer service agents, they are highly versatile. Regardless of the industry, businesses can leverage chatbots for sales and marketing activities, HR and personnel management, IT service helpdesk, knowledge management, and more!
  • Chatbots can help with collecting and qualifying leads, booking product demos, and engaging audiences which can increase sales by a whopping 67%!
  • Almost 88% of consumers reported a positive or neutral experience with a chatbot, thereby paving the way for customer satisfaction and retention.
  • 69% of consumers attempt to resolve any issue by themselves, but only a third of companies offer this facility. Chatbot fills this gap by offering self-servicing options 24/7 and without depending on human resources!
  • About 67% of buyers expect an immediate response to their marketing, sales, or customer service inquiry — “immediate” being 10 minutes or less. With chatbots in the picture, businesses can set up live communication channels and cater to this need nearly 3x faster!
  • Apart from lending scalability to business operations, it can reduce costs by 30%. The banking, retail, and healthcare industries are expected to save 2.5 billion hours and USD 11 billion through the implementation of chatbots by 2023.
  • They will not only keep businesses relevant with the current times but also future-proof them by laying the foundation for conversational marketing, automation, and so on.
  • Speaking of automation, chatbots can singularly handle 68.9% of end-to-end customer interactions and 80% of standard, repetitive tasks, thereby reducing the personnel load by 65%. More importantly, they can deliver these results without any errors or bias.
  • In addition to increasing customer satisfaction levels through maximum engagement, omnichannel chatbots can reduce churn by plugging in leakage in a multi-touchpoint environment.
  • The personification of chatbots can humanize brands and help them foster emotional and meaningful customer relationships.

Given the whole suite of advantages listed above, the role of chatbots boils down to empowering businesses by making them human, accessible, responsive, and reliable. For some businesses, it can also function as a competitive differentiator that sets them apart from others. And as a culmination of these qualities, your organization can achieve the highest level of customer approval and satisfaction. Who doesn’t want that?

Roadmap For Building A Business Chatbot

Now that we’ve established that a chatbot can be a valuable addition to your business allow us to lead the way. We have formulated a detailed step-by-step guide on how to build a business chatbot — from identifying when it is the right fit, understanding the different types of chatbots, and defining goals, to launching and improving the chatbot. The following is your almanac to building a business chatbot:

Identifying Whether A Chatbot Is A Right Fit

While chatbots offer a plethora of advantages, it is not advisable for all businesses to hop on this trend. After all, the process of building a business chatbot from scratch is not easy on the pocket. Plus, it is a time-consuming and resource-intensive process.

Therefore, it would be wise for business leaders and C-suite executives to involve the crucial stakeholders and ask probing questions, such as those illustrated below, to audit the business processes and identify the need for a chatbot as a solution:

  • Is the workforce heavily engaged in routine, repetitive tasks?
  • Do customers often consult on similar topics?
  • Is the business looking to reduce the customer service load and corresponding costs?
  • Is the business a multilingual customer base spread across time zones?
  • Does the business want to streamline sales and marketing activities?
  • Is the business anticipating peak internal and/or external interactions during specific seasons?
  • Is the business looking for ways to delight customers and stand out from the competitors?

If the answer is a resounding yes to the above questions, then it is time to give it serious thought. Apart from the intangible and non-monetary benefits, a cost-to-benefit analysis and Return on Investment (ROI) calculation can be performed to justify the impending financial implications.

Understanding The Different Types Of Chatbots

As cliche as it may sound, not all chatbots are created alike. Depending on various factors (some of which we discussed in the previous section), businesses can settle for something as simple as a menus-based chatbot. Alternatively, businesses with resources and bandwidth could create something as elaborate as a conversational chatbot with sentiment analysis and Natural Language Processing (NLP) capabilities. Frankly, that’s your decision to make. However, to help you in this direction here’s a quick overview of some of the commonly available options:

  • Menu-Based Chatbots
    Being one of the simplest forms of chatbots, these are essentially decision tree hierarchies presented in a chatbot form. Users can select the appropriate options that will eventually lead to the answer. They are often employed to answer FAQs.
  • Rule-Based or Linguistic Chatbots
    These chatbots construct conversational flows along the if-then-else logic. Developers often embed business rules in the form of algorithms, and accordingly, the chatbots will navigate the conversation. However, do bear in mind that the research stage of this chatbot development would have to be exhaustive as one has to account for every permutation and combination of questions that may be asked.
  • Keyword Recognition-Based Chatbots
    Unlike menu-based chatbots that participate passively, keyword recognition-based chatbots seek customized trigger words to respond appropriately. These chatbots often employ NLP, a subset of Artificial Intelligence (AI), to hybridize menu-based chatbots with keyword recognition.
  • Contextual Chatbots
    These chatbots are a powerhouse of possibilities. They combine a blend of Machine Learning and Artificial Intelligence to understand context, learn from previous iterations, and improve with use and time. They also retain user preferences to make the experience more personalized and customer-centric.
  • Hybrid Chatbots
    Hybrid chatbots feature cherry-picked models, architectures, and frameworks from any or some of the chatbot types discussed above, to cater to specific business requirements.
  • Voice Bots
    As smart speakers gain more traction amongst end-users and digital assistants like Siri and Alexa become more popular, businesses are harnessing their capabilities to dive into voice bot development. The vernacular approach is found to be more in demand, as evident by a PwC survey.) that highlighted how 71% of consumers prefer voice searches over typing.

Knowing these basics will help one understand what is right for the business. Once that is out of the way, you can define the chatbot goals, as discussed in the subsequent section. (Or the following sections may shed light on how to make this decision. It works both ways!)

Defining The Chatbot Goals

Chatbots are as versatile as they are diverse. One could use them in lead generation activities, closing deals, upselling or cross-selling during sales, offering technical support, and more! As such, businesses must define their goal right at conception to stay focused on the outcomes.

To understand the primary objective of the chatbot, ask the beneficiary team or department the following questions:

  • What problem will the chatbot solve?
  • How will the chatbot solve the problem?

Outline the answer according to the SMART (Specific, Measurable, Achievable, Relevant, and Time-Bound) format, and one can stay laser-focused on the results and workflows during development. As an illustration, say that one wants to develop a chatbot to help with customer service requests. The SMART goal in this regard could be that the chatbot will automate 30% of customer queries regarding product details and specifications within the first three months of implementation.

Upon defining the roles and responsibilities of the chatbot, you can then move on to fleshing out additional details using the following steps.

Selecting The Chatbot Channels And Languages

Once the basics of the chatbot are outlined t, it is time to make a few strategic decisions, namely the channel and the language. Though chatbots are commonly found on websites and landing pages, they can also be implemented across instant messaging platforms like WhatsApp or Messenger. As such, businesses must identify the viable channels they wish to target.

One will have to gather user data to make a well-rounded decision in this regard. For instance, determine the following:

  • What channels do the employees or customers prefer while availing of chatbot services?
  • How do the Key Performance Indicators (KPIs), such as response rates, Net Promoter Score (NPS), and so on, reflect across these environments?

Based on these findings, shortlist about three to five media for a truly multichannel experience. Follow a similar approach while deciding on the language support offered by the chatbot. After determining the channels and languages, you can move on to assimilating such a solution within your business infrastructure.

Addressing The Integrations

Chatbots do not operate in a vacuum; they have to function in harmony with other tools and systems employed by your business. Making such provisions right at the design and development stage will lend immense flexibility and scalability to the chatbot and make it future-proof to some degree. Given this fact, one will have to work out integrations between the chatbot environment and disparate systems, such as the Customer Relationship Management (CRM) platform, calendar, cloud storage, maps, payment systems, and more. Again, one will have to take a call on the impact and importance of certain integrations and prioritize them over the others.

Hiring Talent

Businesses taking on the mammoth task of in-house chatbot development will have to put together a robust team that can lead the mission to success. Start by treating the process as any other digital transformation project. Prepare a requirement report containing all the features, specifications, and outcomes expected from the chatbot; one may have already done that by following the preceding steps.

After completing the homework, one will need to add the following members to the chatbot development team:

  • Project Manager: to oversee the chatbot development process, manage resources, budget, and timelines, and handle risks.
  • Flow Designer: to orchestrate the chatbot conversation flow.
  • User Researcher: to understand the needs and preferences of the target audience.
  • Copywriter: to work with the flow designer and create responses that are appropriate, branded, and consistent.
  • Developer: to carry out all the under-the-hood chatbot building by creating databases, building APIs, establishing protocols, and so on.
  • AI/ML trainer: to teach the AI/ML engine to understand user inputs better and make smarter decisions.
  • Data analyst: to extract meaningful, data-driven insights, whether related to chatbot performance or user.

Put together your A-team by handpicking experts from various fields, or we have another shortcut approach that you can try — outsourcing!

Outsourcing Chatbot Development

Building a chatbot development team and maintaining them can be costly, especially when complexities get involved. Not to mention, it is also a hassle to recruit and retain talent, sustain engagement and productivity, and keep everyone motivated towards the goal. In this scenario, outsourcing appears to be a viable alternative.

That being said, choosing the right chatbot development agency is key to the project’s success. Here’s how one can find the right fit:

  • Find an agency that can operate as the developer, strategist, partner, and tech enabler. In other words, they should have the business’s best interests in mind.
  • Explore their main services, target industries, typical clients, area of expertise, channels, languages, etc.
  • Seek recommendations from the networks or get in touch with agencies that may have developed chatbots for the business’s competition.
  • Make it a point to conduct thorough background research on the shortlisted agencies by checking out customer testimonials and feedback.
  • Request portfolios or past projects to establish credibility and have them vetted too.
  • Screen in agencies that understand business’s custom requirements and possess the skill and competencies to realize a unique chatbot.
  • Discuss the budget by comparing chatbot development packages. Account for any additional charges relating to integration, maintenance, post-development support, and so on.
  • Ask questions related to chatbot and source code ownership.

Sharing Project Requirements

Once a chatbot development team has been put together, or the expertise of an agency has been engaged, it is time to get down to business. Whatever chatbot-related details that one has collected, such as expectations, desired outcomes, and project deliverables, will have to be shared with the developer/development team. This information will act as a baseline for them and allow them to ideate and innovate without losing focus on the primary goal. At this point, the team might also refine the ideas or negotiate on certain terms so that your chatbot is realistically possible.

Upon discussing all these nitty-gritty, prepare a roadmap with well-defined Key Performance Indicators (KPIs), milestones, deliverables, timelines, and so on.

Now that you’ve laid down the complete foundation, you can start chatbot development!

Developing The Chatbot

Based on all the inputs, the development team will work on creating the chatbot as per the business requirements. One may be required to actively participate in the development process, so be prepared to step up!

The Dry Run

Rather than delivering a fresh, out-of-the-box chatbot solution, the development team will first deliver a Proof of Concept (POC) or a Minimum Viable Product (MVP). This prototype, of sorts, will help to test the chatbot’s performance in real-world conditions.

A prototype gives the opportunity to identify and fix issues before they turn catastrophic. As such, the typical chatbot performance assessment will evaluate across the following spheres:

  • Personality: Does the chatbot communicate per the brand’s voice and tone?
  • Onboarding: How do new users respond to the chatbot, and how fast do they adopt it?
  • Understanding: How effectively can the chatbot understand customer requests?
  • Answering: What are the elements of a typical response? Are they relevant and contextual?
  • Navigation: How easily can chatbots go through an end-to-end conversation? What is its impact on engagement?
  • Error management: What is the fallback rate? How efficient is the chatbot in handling the resulting errors and recovering from them?
  • Security: How secure is the conversation? Is the chatbot compliant with any data security and privacy regulations?
  • Intelligence: Can the chatbot retain any information, and does it use it to gain context about the user?
  • Response times: How quickly can the chatbot resolve queries?

Of course, this list is purely indicative, and you will have to modify it according to your industry, chatbot type, roles and responsibilities, and other variables.

Launch

After the beta testing is a success, the development team will start creating the full version of the chatbot. All the necessary changes will be implemented, additions will be incorporated, and integrations will be tested. Once the chatbot performs to expectations, it is time to launch it into the real world!

Bup bup bup! Hold your horses because that’s not all! You have one final consideration to make for the continuous improvement of your chatbot. We discuss that in the final section.

Testing, Measuring, Tracking

Simply launching a chatbot is not enough. After all, chatbots are not “build it and forget it” things.

Businesses need to vigilantly monitor their performance to pave the way for continuous growth. First, the business will have to define certain KPIs and corresponding parameters that serve as benchmarks to analyze the chatbot’s performance. Next, businesses will have to take note of every anomaly or discrepancy and find justification for the same. Then, perform corrections are required to get the performance back to optimal values. Finally, the business will have to detect any underlying patterns.

In the meantime, one will also find opportunities to scale and expand your chatbot capabilities based on market conditions, ongoing trends, customer feedback, and metrics like satisfaction rates. Such a holistic approach will allow your chatbot to improve at every iteration!

Tips And Tricks To Master Chatbot Development

Now that we have indulged in some heavyweight reading about chatbot development, let’s polish this knowledge with a few important tips and tricks to make the process fun:

  • For a cash-strapped startup or a small business looking for a DIY approach, they might find some chatbot builder platforms online.
  • Grant a unique name and personality to the chatbot and maintain it consistently on all fronts.
  • Humans want to connect with humans. So, put in the effort to humanize the chatbot and make it friendly and approachable.
  • Train the chatbot to communicate in simple language so that they are easily understood by various users.
  • Delegate complex and repetitive tasks to chatbots but also grant users the opportunity to switch to a human agent.
  • Evaluate and optimize the bot regularly, but avoid overwhelming audiences by unveiling all features at once. Follow a graded approach.

Closing Thoughts

Considering that nearly 3 out of 4 customers expect to encounter a chatbot while visiting a business website, chatbots have become more of a necessity than a “nice-to-have” feature. Fortunately, the business already has a head-start in meeting this expectation, given that it has reached the end of this manual.

As a treat for your perseverance, here’s a quick recap of the detailed 10-step process:

  1. Start by identifying whether or not a chatbot is a right fit for your business model.
  2. Understand the different types of chatbots and identify the ones you need.
  3. After settling on a type, give your chatbot a purpose by defining its goals.
  4. Once the end goal is in view, iron out the details surrounding the language, channels, and so on.
  5. Work out the different integrations that will be required and find out ways to accommodate them.
  6. Recruit a team of experienced professionals or outsource the entire job (you do you)!
  7. Regardless of your choice above, document and share defined project requirements so you can get a chatbot as per your expectations.
  8. Get started with the chatbot development, and once ready, send the prototype on a dry run.
  9. Finally, when you have worked out the kinks, gear up for D-day as you launch the chatbot.
  10. Round up the chatbot development process with continuous testing, measuring, and tracking its progress so that it continues delivering value to your business.

Sure, the process seems overwhelming, but it is well worth the effort. All it takes is a little initiative to get the ball rolling, and once such an ambitious project gains momentum, it would put your business on the fast track to customer-friendliness.

So, get started with building the business chatbot now!

Categories: Others Tags:

Tips for Optimizing Content to Gain Google’s Featured Snippet

October 6th, 2022 No comments

Gaining top-ranking positions in search results is the goal of anyone working in SEO. Unless you use paid ads, standing out in search results can be a continual battle, even with an effective SEO strategy. Fortunately, featured snippets provide an alternative to outranking your competitors. 

What is a Featured Snippet?

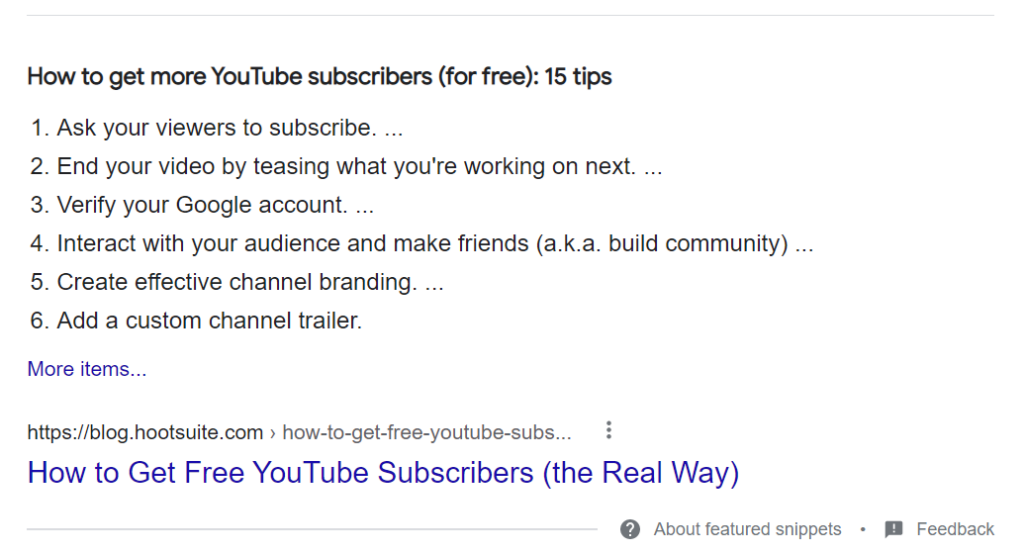
To answer the question ‘what is a featured snippet?’, we’ll use an example of a featured snippet:

Featured snippets (sometimes referred to as answer boxes) first appeared on Google back in 2014. Ever since the Hummingbird algorithm update, Google has been trying to understand the intent that goes into a search.

Featured snippets are one of the ways Google delivers helpful and useful answers to a search query. Featured snippets will typically appear in search results that ask a question (using the 5 Ws and how).

You may also be surprised to find that featured snippets play an important role in voice search. Optimizing for featured snippets can also help you optimize and appear in the voice search results. When nearly half of all searchers are performed through voice, you’ll be helping to further expand your reach.

The types of featured snippets

There are 3 main types of Google’s features snippets. These are paragraph snippets, list snippets, and table snippets. You can also get video snippets.

Paragraph snippets

Paragraph snippets (such as the definition example above) are the most popular form of featured snippet you’ll encounter. These featured snippets display small excerpts from a webpage that answers a particular search query, in the form of a tiny paragraph.

Paragraph snippets sometimes contain images that are relevant to the particular answer provided. Featured snippets will also contain a direct link to the page which the information has been extracted from. You will often find ‘People also ask’ displayed underneath a featured snippet.

The inclusion of a link helps to differentiate from other forms of ‘featured snippets’ that may appear in the search results. For example, a search query to convert a measurement is not a featured snippet and is instead termed a rich answer (or instant answer). These are provided by Google directly and don’t contain any source links:

Research carried out by Getstat found that paragraph snippets appear for around 82% of all featured snippets

List snippets

List snippets are the second most popular type of featured snippet you’ll encounter. Getstat estimates that around 11% of all featured snippets use the list format.

Unlike paragraph snippets, a list snippet displays information in a list, using either bullet point lists or numbered lists. List snippets can be both ordered, for steps and procedures, or unordered.

Table snippets

The other type of featured snippet available is the table snippet, where information is displayed in a table. Only around 7% of featured snippets will display a table snippet, according to Getstat, making it the least common.

Video snippets

Another type of featured snippet you may encounter is video snippets. Video snippets showcase a YouTube video that provides guides and tutorials. Sometimes a segment of a video is played that Google believes to be the most relevant to the search query, such as in this example: Graphical user interface, website

Description automatically generated

Why are Google’s Featured Snippets Important?

Featured snippets can provide lots of great benefits. The main advantage of featured snippets is that they appear right at the very top of the search results, including above the number 1 organic result. Optimizing for a feature is a great way to achieve high visibility without a top-ranking position.

Because of the high positioning, featured snippets are great for improving brand awareness and driving traffic to your site. EngineScout estimates that featured snippets receive around 31% of a results page click share. 

When around 28.5% click on the top organic search result, featured snippets can help you to improve clicks. It mainly comes down to 2 reasons; featured snippets provide a direct answer to a question, and they are much larger and more prominent (especially on mobile, as shown in the example below) than the top organic search result, leading to higher click-throughs:

Other great benefits of gaining a featured snippet include:

  • Higher perceived authority from searchers
  • More leads and conversions
  • Increase in keyword rankings

If you don’t currently have a top-ranking position in search engine results pages, featured snippets could well be worth considering to expand your reach.

The only downside to featured snippets is you cannot choose which part of your content is extracted to appear. That’s all done by Google. Featured snippets also appear underneath paid ads. While it is unlikely that you’ll come across both in a search query, it’s still worth bearing in mind.

Also, in 2020, the deduplication update removed duplicate listings on the first page of search results. That means if you gain a featured snippet, you won’t appear in the organic results. If you don’t have first-page rankings, the update could work well in your favor!

How can you Optimize Content to Gain Featured Snippets?

Before we outline some tips for optimizing your content to gain featured snippets, it’s important to note that you cannot directly tell Google to include certain content within a featured snippet. Featured snippets are always changing too which means optimizing is a continual process, not a one-off.

Target long-tail keywords

We already mentioned that most featured snippets will appear when a question is entered into Google using the 5Ws and how. The same is true with long-tail keywords. Long-tail keywords are specific phrases that are usually entered into search engines when a user is towards the point of purchase.

Targeting long-tail keywords is essential for gaining a featured snippet, particularly any keywords already targeted with existing featured snippet content. That’s because many featured snippets are triggered when a long-tail keyword is entered into Google.

Research by SEMrush found that keywords indicating user intent at any stage in the sales funnel are more likely to display in a featured snippet, including long-tail keywords. Conducting keyword research will allow you to find long-tail keywords to optimize for.

Using a keyword research tool, such as Ahrefs or KWFinder, will help you to identify long-tail keywords that are likely to display in a featured snippet.

Content length

Featured snippets are brief, so if you want to gain a featured snippet, you need to answer a question briefly. That’s not to say start developing very short pieces of content (because thin content doesn’t help your SEO).

Instead, you need to provide concise answers for the long-tail keywords you previously found. To optimize for a featured snippet, consider including the keyword in a heading with a concise answer underneath. Afterward, you can expand upon your answer in more detail.

To optimize content for a featured snippet, consider these average lengths:

  • Paragraph snippets – between 40-60 words with an average of 250 characters
  • List snippets – between 6-8 bullet points, with an average of 45 words
  • Table snippets – an average of 5 columns with 2 rows
  • Videos – short videos around 6 minutes or less

In the event your content does overrun the length of a featured snippet, a ‘More items…’ or ‘X more rows…’ will indicate the additional content. Clicking on the link will direct the user to the page where the content from the featured snippet is hosted, helping to boost your click-through rates.

Use schema markup

Schema markup is the language of search engines and so implementing schema into your content is another great way of optimizing for a featured snippet. Using schema markup helps search engines to better understand your content, leading to a higher probability of gaining a featured snippet.

Adding schema markup to content does involve accessing the code of a page. Even if you are not too familiar with HTML, you can still easily implement it into your content. Any schema that needs to be implemented can be found on the Schema website. The website also has a test feature to allow you to validate your schema markup.

Implement a content structure

An effective content structure will make use of a title and headings to split a piece of content, such as a blog article, into smaller sections. Not only does an effective content structure improve the readability of your audience, but it’s also essential for featured snippets.

Alongside adding schema to your content, you need to incorporate title and heading tags (or metadata). Headings and lists are fundamental for featured snippets. That’s why it’s important to implement a structure to your content with headings and lists. An efficient site structure can also help boost SEO rankings.

We also mentioned that featured snippets sometimes include an image. Including a relevant and high-quality image is also a good idea. Pages and content are more likely to be used as a featured snippet if there are:

  • 1,110 words or more
  • An average reading time of 5 minutes
  • Around 14 headings (including subheadings)
  • 8 images throughout the content

Also, content that stays objective and concise with a clear format is much more likely to be used for a featured snippet.

Conclusion

Gaining a featured snippet is not guaranteed, but following the tips outlined above should stand you in a better position. The great value and benefits that a featured snippet can provide make it a great companion to your existing SEO efforts. And don’t forget to keep publishing high-quality content too for a successful content strategy!

The post Tips for Optimizing Content to Gain Google’s Featured Snippet appeared first on noupe.

Categories: Others Tags:

How to Safely Share Your Email Address on a Website

October 6th, 2022 No comments
A large textarea to paste an email address with a series of options beneath it for how to encode the text.

Spammers are a huge deal nowadays. If you want to share your contact information without getting overwhelmed by spam email you need a solution. I run into this problem a few months ago. While I was researching how to solve it, I found different interesting solutions. Only one of them was perfect for my needs.

In this article, I am going to show you how to easily protect your email address from spam bots with multiple solutions. It’s up to you to decide what technique fits your needs.

The traditional case

Let’s say that you have a website. You want to share your contact details, and you don’t want to share only your social links. The email address must be there. Easy, right? You type something like this:

<a href="mailto:email@address.com">Send me an Email</a>

And then you style it according to your tastes.

Well, even if this solution works, it has a problem. It makes your email address available to literally everyone, including website crawlers and all sorts of spam bots. This means that your inbox can be flooded with tons of unwanted rubbish like promotional offers or even some phishing campaign.

We are looking for a compromise. We want to make it hard for bots to get our email addresses, but as simple as possible for normal users.

The solution is obfuscation.

Obfuscation is the practice of making something difficult to understand. This strategy is used with source code for multiple reasons. One of them is hiding the purpose of the source code to make tampering or reverse-engineering more difficult. We will first look at different solutions that are all based on the idea of obfuscation.

The HTML approach

We can think of bots as software that browse the web and crawl through web pages. Once a bot obtains an HTML document, it interprets the content in it and extracts information. This extraction process is called web scraping. If a bot is looking for a pattern that matches the email format, we can try to disguise it by using a different format. For example, we could use HTML comments:

<p>If you want to get in touch, please drop me an email at<!-- fhetydagzzzgjds --> email@<!-- sdfjsdhfkjypcs -->addr<!-- asjoxp -->ess.com</p>

It looks messy, but the user will see the email address like this:

If you want to get in touch, please drop me an email at email@address.com

Pros:

  • Easy to set up.
  • It works with JavaScript disabled.
  • It can be read by assistive technology.

Cons:

  • Spam bots can skip known sequences like comments.
  • It doesn’t work with a mailto: link.

The HTML & CSS approach

What if we use the styling power of CSS to remove some content placed only to fool spam bots? Let’s say that we have the same content as before, but this time we place a span element inside:

<p>If you want to get in touch, please drop me an email at <span class="blockspam" aria-hidden="true">PLEASE GO AWAY!</span> email@<!-- sdfjsdhfkjypcs -->address.com</p>.

Then, we use the following CSS style rule:

span.blockspam {
  display: none;
}

The final user will only see this:

If you want to get in touch, please drop me an email at email@address.com.

…which is the content we truly care about.

Pros:

  • It works with JavaScript disabled.
  • It’s more difficult for bots to get the email address.
  • It can be read by assistive technology.

Con:

  • It doesn’t work with a mailto: link.

The JavaScript approach

In this example, we use JavaScript to make our email address unreadable. Then, when the page is loaded, JavaScript makes the email address readable again. This way, our users can get the email address.

The easiest solution uses the Base64 encoding algorithm to decode the email address. First, we need to encode the email address in Base64. We can use some websites like Base64Encode.org to do this. Type in your email address like this:

Then, click the button to encode. With these few lines of JavaScript we decode the email address and set the href attribute in the HTML link:

var encEmail = "ZW1haWxAYWRkcmVzcy5jb20=";
const form = document.getElementById("contact");
form.setAttribute("href", "mailto:".concat(atob(encEmail)));

Then we have to make sure the email link includes id="contact" in the markup, like this:

<a id="contact" href="">Send me an Email</a>

We are using the atob method to decode a string of Base64-encoded data. An alternative is to use some basic encryption algorithm like the Caesar cipher, which is fairly straightforward to implement in JavaScript.

Pros:

  • It’s more complicated for bots to get the email address, especially if you use an encryption algorithm.
  • It works with a mailto: link.
  • It can be read by assistive technology.

Con:

  • JavaScript must be enabled on the browser, otherwise, the link will be empty.

The embedded form approach

Contact forms are everywhere. You certainly have used one of them at least once. If you want a way for people to directly contact you, one of the possible solutions is implementing a contact form service on your website.

Formspree is one example of service which provides you all the benefits of a contact form without worrying about server-side code. Wufoo is too. In fact, here is a bunch you can consider for handling contact form submissions for you.

The first step to using any form service is to sign up and create an account. Pricing varies, of course, as do the features offered between services. But one thing most of them do is provide you with an HTML snippet to embed a form you create into any website or app. Here’s an example I pulled straight from a form I created in my Formspring account

<form action="https://formspree.io/f/[my-key]" method="POST">
  <label> Your email:
    <input type="email" name="email" />
  </label>
  <label> Your message:
    <textarea name="message"></textarea>
  </label>
  <!-- honeypot spam filtering -->
  <input type="text" name="_gotcha" style="display:none" />
  <button type="submit">Send</button>
</form>

In the first line, you should customize action based on your endpoint. This form quite basic, but you can add as many fields as you wish.

Notice the hidden input tag on line 9. This input tag helps you filter the submissions made by regular users and bots. In fact, if Formspree’s back-end sees a submission with that input filled, it will discard it. A regular user wouldn’t do that, so it must be a bot.

Pros:

  • Your email address is safe since it is not public.
  • It works with Javascript disabled.

Con:

  • Relies on a third-party service (which may be a pro, depending on your needs)

There is one other disadvantage to this solution but I left it out of the list since it’s quite subjective and it depends on your use case. With this solution, you are not sharing your email address. You are giving people a way to contact you. What if people want to email you? What if people are looking for your email address, and they don’t want a contact form? A contact form may be a heavy-handed solution in that sort of situation.

Conclusion

We reached the end! In this tutorial, we talked about different solutions to the problem of online email sharing. We walked through different ideas, involving HTML code, JavaScript and even some online services like Formspree to build contact forms. At the end of this tutorial, you should be aware of all the pros and cons of the strategies shown. Now, it’s up to you to pick up the most suitable one for the your specific use case.


How to Safely Share Your Email Address on a Website originally published on CSS-Tricks, which is part of the DigitalOcean family. You should get the newsletter.

Categories: Designing, Others Tags:

Chatbox Mistakes that are Losing you Sales

October 6th, 2022 No comments

If you think chatbots are just nice-to-have features for your business, think again. In the last five years, chatboxes have proliferated at an unprecedented rate – a whopping 92% of brands use these as their customer communications channel.

Both businesses and consumers have embraced this tech talk of the decade. Chatbots have been known to significantly reduce customer support response time to a few seconds, which otherwise took hours or even days. 

While chatbots have proven to be a highly useful tool, there are growing instances of chatbot failures, leading to a dip in sales and customer retention. 

That said, is your chatbox programmed to carry out specific duties, ask and answer questions, make sales pitches, or resolve basic customer issues? Do they meet customer needs or simply offer them monotonous pre-recorded FAQ-based solutions without adding value? Or do they lead customers to products that are out of stock? 

Common Chatbot Mistakes to Avoid

To err is human, but when it comes to machines, the blame falls on.. well, humans. At the end of the day, people design these imperfect chatboxes. Problems may arise while developing chatboxes, so it’s best to set certain parameters and metrics during the development process. 

Thankfully, the most common chatbox problems are the easiest to avoid. 

1. Designing a chatbot without strategizing

Merely building a chatbot isn’t enough. Making a clear strategy, identifying its purpose, and organizing its function are vital steps before the actual development. 

There are over 300,000 chatbots on Facebook, and it takes an excellent strategy and execution for your chatbox to stand out among your competitors. 

Here are a number of things you should do to guarantee a smooth customer experience: 

  • Identify your objectives (e.g. increase sales or customer retention). Design it in such a way that it will achieve those objectives.
  • Engage with a chatbot developer to plan and strategize your deployment.
  • Remove all redundant or complicated actions.
  • Ensure that it adds significant value to your customers. All information must be new, and not something your customers already know or can easily discover.
  • Ensure that it engages your customers with ease. 
  • Test and experiment to find the best optimal strategy. Learn from mistakes. 
  • Identify potential blockers and dead-ends, then provide solutions that will address them. 

2. Offering irrelevant information

If your customers want to read the FAQ, provide them with one. Don’t make your chatbot an FAQ machine or an agent that replies, “I’m sorry, I don’t really understand that.”

Research shows that about 45% of customers feel disappointed when chatbots give irrelevant responses to their queries. Thus, they end up leaving the brand’s platform. 

In an era when customer trust is paramount, brands should improve their chatbot performance and functionalities using chat logs that are continuously being trained. The key is to not leave any loose ends. 

3. Requiring too many actions from the customers

Chatbots are meant to ease the customer journey, not make it more complicated. These need to get customers’ queries resolved without wasting their time by trying to figure out the complexities of your platform. One of the most common chatbot mistakes is to make the customers work hard just to get answers.

It’s critical to avoid dead-ends, an instance when the bot is unable to proceed further. Moreover, always predefine the next steps, and predict common actions and queries. Use buttons, options, and interactive plugins to help users navigate seamlessly to get their queries resolved or easily enable purchases. 

Another option is to simply give clear easy instructions so that users feel comfortable to engage further.

4. Making it seem like the chatbot is a real person

Nothing is more frustrating for a customer than realizing they’re talking to a bot instead of a customer service agent. This may actually lose your customers’ trust. Thus, make it clear from the very beginning that a customer is engaging with a chatbox. 

Give your chatbox a persona aligned with the brand’s tone, and create a welcome message that informs your customers that they are speaking to a bot. 

Though it’s possible to create chatbots that sound human-like nowadays with impressive AI advancements, it’s not advisable to risk building your market’s trust. These chatbots are still far from perfect, and it’s best to manage your users’ expectations on your customer service’s limitations. 

5. Entrusting your chatbot as an extra player in the team

There is no doubt that a chatbox is developed and implemented in a manner so it can handle tasks automatically without much intervention. However, it is critical to optimize and update it from time to time to enhance its efficacy. Even though it can be capable of performing desired tasks, it can still develop errors or become outdated.

Ensure you run A/B tests and perform analytics to see possible bottlenecks and common points of user abandonment.

If you have made any of these chatbox mistakes, it is always a good idea to get back to the drawing board and fix errors. Engage with a chat marketer to understand your users’ journey to identify their pain points and solutions. 

Is a Chatbot Really Necessary for Your Business? 

Chatbots are increasingly used by digital marketers as a personalized tool in a much more planned approach to generate leads and boost sales. Ride-hailing firm Lyft uses a chatbot that helps customers request a ride from their Facebook Messenger, Alexa smart home device, or even Slack in just two clicks. 

Industries like e-commerce, fashion, banking and finance, travel and hospitality, human resources, logistics, supply chain, and EdTech are the frontrunners in using chatbots. Advancements in artificial intelligence (AI), machine learning (ML), and associated novel technologies are making chatbots better, sharper, and faster than ever before.

Companies, on the one hand, use it to reduce customer acquisition costs, improve conversion rates by speeding up sales cycles and lead generation, and increase customer loyalty. Customers, on the other hand, use it for a faster response, better service, and a more personalized connection with the brands they interact with. 

According to an industry report, customer preference for AI chatbots is higher (69%) than that of organizations using them (23%).

Market estimates show that by 2024, customer spending from chatbots will cross $140 billion from $2.8 billion in 2019. According to another industry assessment, the use of chatbots in the retail, banking, and healthcare sectors would result in an annual cost savings of $11 billion by 2023, up from $6 billion in 2018. 

Conclusion

There is no doubt that the market for chatbots will continue to increase, with roughly 40% of internet users choosing to interact with them.

Therefore, it’s best to develop this function if you want your business to be highly competitive, up-to-date, and efficient. Creating your chatbox correctly builds customer loyalty and enables your business to generate more sales and leads.  

The post Chatbox Mistakes that are Losing you Sales appeared first on noupe.

Categories: Others Tags:

Salesforce Integration vs SAP: Which CRM Is Best for Your Business?

October 6th, 2022 No comments

CRM, or customer relationship management, is a technology used to coordinate and streamline a business’s interactions and connections with clients. It assists businesses in maintaining contact with clients and enhancing commercial ties, which boosts profitability and streamlines operational procedures. For an expanding firm, using a CRM solution might be really beneficial. However, the issue is how to identify the top CRM that effectively reduces your overwhelming task. Currently, SAP and Salesforce are the two CRM providers competing for market share. In order to help you choose the solution that will work best for you, here’s the distinction between Salesforce and SAP:

What is Salesforce?

With a 19.5% market share, salesforce integration services, which has long dominated the CRM sector, outperformed SAP by a wide margin. Salesforce is the CRM solution of choice for many firms. Users of other software are switching to salesforce solutions. This shift has a valid reason in it. There are so many features included in the list, and some of them are used frequently by most users. So, SMEs are thus switching from other CRMs or considering doing so. Also, the maximum user support and contract are working in their favor of salesforce.

What is the SAP?

The CX suite, a collection of customer-facing solutions from SAP, contains all of their CRM features and functionalities. Through the use of data insights and intelligence generated by AI, the solution assists users in connecting their customer support operations. Enterprise resource planning (ERP) and human capital management are just a few of the business software options provided by SAP. Centralizing business data can be accomplished by implementing the CRM solution in tandem with other tools.

Business Intelligence

Salesforce

Through their paid add-on QlikView, which is simple to use and relies on little IT, Salesforce offers its users near real-time analytics. Customers can use QlikView to measure trends in their pipelines and improve sales effectiveness and efficiency. Users can also use their customer and lead data to plan, track, and identify marketing initiatives for improvement.

SAP

Data can be analyzed in real-time by SAP’s users with the option of integrating SAP analytics cloud with the SAP CX suite. In the SAP Analytics Cloud, SAP Business Objects incorporates features like KPI reporting. There is no requirement for a distinct BI solution when using this Cloud with SAP CX. But in some circumstances, this can reduce its capacity.

Sales and Marketing

Salesforce

Salesforce’s Sales Cloud enables customers to view and manage their sales data via the platform or its mobile CRM app. The product offers capabilities for monitoring sales prospects, comprehending revenue growth, and forecasting sales. It also increases enhancing customer experiences and automates sales tasks using data analysis and insights.

SAP

SAP’s comprehensive CRM capabilities unite marketing and sales initiatives on a single platform. This is also true with SAP’s CX package. Users may identify which client experiences bring in money for their business with the help of the integrated Sales Cloud. They can do it by gaining a unified view of their customer interactions.

Contact and Opportunity management

Salesforce

The salesforce integration consulting shines as a solution for helping sales teams manage their contacts easily. To create a comprehensive profile of each customer, the platform keeps track of all activity, contact information, and client communications. It also has the ability to compile information from well-known social networking platforms. The platform also provides up-to-date opportunity management for precise quotation and negotiations.

SAP

Similar to Salesforce, SAP’s CRM solution provides a wide range of standard features to help automate and streamline contact management. It includes a customer database that keeps track of contact histories and facilitates call scheduling. Also, lead tracking tools are available to enhance the visibility of lead status as well as nurturing programs. Users are provided additionally with a clear view of the sales pipeline and lead progression.

Analytics and forecasting

Salesforce

Similar to its marketing tools, the Sales Cloud has some analytical tools that are integrated with the Wave Analytics platform. As a result, businesses wanting in-depth reporting must pay an additional charge to access that service. Forecasting, quota attainment tracking, overlays management, and custom categorizations are just a few of the sales-based evaluation features. Users may set up customized analytics dashboards, define new fields, and choose particular data for drill-down with the drag-and-drop builder.

SAP

Almost all SAP platforms feature fully integrable data capabilities. It makes it simple for users of different SAP solutions to import data from one application into another. You can also use advanced analytics, and data is where SAP excels. Additionally, users of SAP CRM can create custom graphs and charts, and sales reports. Additionally, the platform has tools for planning, forecasting, and monitoring sales success that can be used to produce in-depth reports.

Omni-channel experience

Salesforce

Salesforce Commerce Cloud provides an easier cloud-based method for Omni-Channels. Multiple features in salesforce integration services are being provided to retailers, all of which are incorporated into a single platform. It includes operations, order management, merchandise, marketing, and much more.

SAP

SAP’s approach is different for omnichannel. On a single platform, it effortlessly combines the customer’s physical and digital touchpoints. Customers will have a consistent experience using all of their devices with the help of it.

Final verdict

The competition between Salesforce and SAP CRM is, therefore, close, but which do you think is better suited for business? If you do not concentrate on their distinctions, Salesforce and SAP are sometimes used interchangeably. So it may be difficult to determine which one is best for your business. It is true that some capabilities in SAP and Salesforce are more beneficial than others. When it comes to providing a superior user experience and having the capacity to connect, salesforce integration solutions are in the lead. When using segmentation that is complicated for your transactions, SAP has the edge. Salesforce might be the best CRM for every company, and it is most important tool that keep your needs in mind. What you want from your CRM is the deciding factor in the end. Decide what you need, then continue learning about SAP or Salesforce, depending on your needs.

The post Salesforce Integration vs SAP: Which CRM Is Best for Your Business? appeared first on noupe.

Categories: Others Tags:

What Is a POS System and How Accomplishes It Perform?

October 6th, 2022 No comments

A factor of sale, or purchase, is where you ring up clients. When consumers check out online, walk up to your checkout counter, or pick out a thing from your stand or booth, they’re at the factor of sale.

Your point-of-sale system is the software and hardware that enable your service to make those sales.

How does a POS System Operate at a Small Company?

A POS system permits your company to accept client settlements and track sales. It sounds simple and sufficient, but the setup can operate in various means, depending upon whether you offer online, have a physical storefront, or both.

A point of sale software is utilized to describe the sales register at a shop. Today, modern-day POS systems are entirely digital, suggesting you can look into a client anywhere you are. You only require a POS app and an internet-enabled device, such as a tablet computer or phone.

  • A customer decides to acquire your product or service. They might ask for a sales link to sound them up if you have a physical store. That affiliate might use a bar code scanner to search for the item’s rate. Some POS systems, such as the Square Point of Sale, allow you to check things visually with the cam on your gadget. For internet shops, this action occurs when a client completes including products to their cart and clicks the checkout button.
  • Your POS system determines the item’s price, including any sales tax obligation. After that, the system updates the stock count to show that the thing is marketed.
  • Your customer pays. To complete their acquisition, your consumer must utilize their bank card, tap card, debit card, loyalty factor, present card, or cash to make the settlement. Depending on their repayment, your customer’s bank must license the purchase.
  • The point-of-sale deal is settled. It is the moment when you officially make a sale. The payment undergoes, an electronic or printed receipt is developed, and also you ship or hand your client the items they purchased.

Which types of hardware and software does a POS system generally include?

Every POS system utilizes a POS software program, yet not all businesses require POS equipment.

If you have an online shop, all your sales are on your website, so you don’t require POS equipment to aid you in approving settlements. 

But if you have a cafe, you might need a register and a bank card visitor. If you run a food vehicle, a phone or tablet computer could be all you require to process orders.

Below’s a run-through of the usual kinds of POS hardware and software, which can help you identify the overall expense of your POS system. Bear in mind that what you require relies on your business.

Usual kinds of POS equipment

POS equipment permits you to approve repayments. If you’re obtaining a new POS system, you must see that it accepts all forms of compensation, including cash, bank card (specifically chip cards), and mobile repayments. If it makes sense for your company, your POS system should publish invoices, store money in cash drawers, and scan the UPC.

This list of hardware can give you a place to start as you review your POS arrangement options.

Point-of-sale system arrangement

  • Register:

A register aids you to compute as well as processing a customer purchase.

The connected device, such as an iPad or various other tablet computers: A portable device can be an excellent option for a screen. Tablet computers can be propped up with a stand, allowing your team to appear as well as out.

  • Bank card visitor: 

A card viewer lets your consumers pay securely by credit card while in-store, via a contactless settlement like Apple Pay, a chip card, or a magnetic stripe (magstripe) card.

  • Cash drawer: 

Even if you accept contactless settlements, you might still need a safe area to maintain your cash. POS software linked to a cash drawer can minimize fraud by tracking when the drawer is opened.

  • Receipt printer:

 A paper invoice shows consumers precisely what they bought, when, and how much they paid.

  • UPC scanner:

A Universal Product Code scanner reviews an item’s product information so you can ring it up. It can also be a quick way to ascertain the rate, stock degree, and other details.

Typical POS software program functions

POS software program is like your command facility. At a basic level, it allows you to find products in your library and ring up sales.

More durable point-of-sale solutions include practical tools such as sales reporting, customer interaction software applications, stock administration, and more. POS systems additionally care for routing funds to your savings account after each sale.

Some POS services, such as Square, include the features listed below. Other systems may need you to use outdoors software to obtain your desired attributes. Find out more regarding how Square compares to other POS systems.

  1. Payment processing

Settlement processing is just one of the core features of a POS system. Each time a client acquires an item, your POS system processes the deal.

There are several various repayment types a POS system might approve:

  • Cash
  • Safe online settlements with your e-commerce site
  • Chip cards, which are credit cards with an ingrained chip
  • Contactless repayments might include a contactless card that clients touch or a mobile pocketbook (e.g., Google Pay or Apple Pay).
  • The card-not-present purchase happens when your consumer and their bank card aren’t actually in front of you, so you need to enter their credit card info by hand. It also occurs when a client enters their settlement information while looking online.
  • Inventory management.
  • The inventory administration software allows you to keep tabs on all your products. Some automated supply software applications can connect with your sales data and tell you when an item is running low.
  1. POS reports

POS records provide a glance into how much you’re offering and earning. You can sell even more with precise descriptions and make better business choices.

  1. Employee management

The group monitoring software program lets you understand when your staff members are working and how they are doing it. Your team can additionally use it to clock in and out, and some kinds of software can grant permissions so staff members can obtain access to specific tasks.

  1. Client relationship monitoring (CRM)

A CRM tool connected to the POS software application allows you to see what your clients purchased and when they bought it. This understanding aids you in personalizing your communications, advertising, and customer support.

  1. Receipts

Bills make processing refunds easier since the electronic proof is attached to the acquired item. They can likewise make your company look more polished.

  1. Tipping assistance

For restaurants and service specialists, tips can be a massive part of getting paid. POS remedies that permit clients to include a digital tip during the checkout procedure make it more likely that they’ll tip.

Now that you have a better understanding of POS systems, you’re ready to find the exemplary POS service for your company, whatever or where you market.

The post What Is a POS System and How Accomplishes It Perform? appeared first on noupe.

Categories: Others Tags: