Archive

Archive for December, 2022

How to Manage your Entire Marketing Budget

December 8th, 2022 No comments

Managing a marketing budget can be difficult, especially if it’s your first time doing it. There are many different things to consider, and it can be tough to know where to start.

Even worse, if you’re not careful, you could end up overspending or misallocating your budget. This can lead to missed opportunities and missed revenue.

This article will give tips on managing your marketing budget while helping you get the most out of your spending.

Steps To Manage Your Marketing Budget

Here are the steps you need to take to manage your marketing budget effectively.

1. Determine Your Marketing Budget

The first step in managing your marketing budget is determining your available money. Knowing the relative importance of each marketing activity is also crucial.

Let’s suppose you have a limited budget. Depending on the business type, it might make sense to invest more heavily in SEO and social media marketing, which have a longer-term payoff, rather than short-term activities like paid advertising.

The opposite might be true if you’re looking to drive quick sales. In that case, a larger budget for paid advertising might be necessary.

2. Choose The Proper Marketing Channels For Your Business

Once you know how much money you have available to spend, the next step is to decide which channels are best for your business. This will depend on various factors, such as your target audience and industry.

For example, social media might be the best option if you’re targeting young adults. You could even consider influencer marketing, as the potential ROI of successful campaigns with this channel can be pretty high.

However, if you’re targeting an older demographic, you might consider email marketing or direct mail. You could focus on delivering personalized, targeted messages to your customers.

3. Create A Plan And Timeline For Your Marketing Efforts

Once you know how much money you have to spend and which channels are best for your business, the next step is to create a plan. This should include a timeline of when each activity will be carried out first.

You should also set goals for each campaign, such as increasing website traffic or generating more leads by a specific percentage. This will help you measure the success of your campaigns and make any necessary adjustments.

Even if you have a marketing budget close to zero, there are still ways to land clients. A plan that factors in your available resources and marketing channels can help you succeed even on a tight budget.

4. Execute Your Marketing Plan

The next step is to stick to your plan and start implementing it. This is the most challenging part of managing a marketing budget, as you’ll have to stay focused and disciplined to get results.

At the same time, if the created plan is solid and well-thought-out, this step can be gratifying. You’ll see the results of your hard work and dedication in no time.

5. Monitor And Adjust As Needed

Finally, it’s essential to monitor your campaigns and constantly adjust as needed. As you track performance over time, look for areas where you can improve or optimize your efforts. This will help ensure you get the best possible results from your marketing budget.

Challenges You Might Face In Managing A Marketing Budget

While the above steps can help you effectively manage your marketing budget, there are still some challenges that you may face.

Let’s consider the top ones and how to overcome them.

Ensuring You Have The Correct Workflow

The key to successfully managing a marketing budget is ensuring that your activities are appropriately organized and integrated. This means having the proper workflow to quickly and efficiently complete tasks.

To do this, you’ll need to create a system for tracking progress on each project and setting up communication processes between team members. This will help ensure everyone is on the same page and knows when tasks need to be completed.

A workflow analysis of your current process can help identify inefficiencies or problems. You can then use this information to streamline and improve your processes, leading to better results.

Allocating Resources Efficiently And Effectively

You’ll need to ensure that you’re putting the right amount of money into each channel and that it’s being used efficiently.

To do this, you’ll need to research each channel and determine which will most likely generate results. You should also analyze your current budget and determine which channels need more money and resources.

For example, if you want to dominate content marketing with social media, you must ensure your content is of the highest quality, speaks to the right audience,  and is spread across multiple platforms. Allocating the right resources to each channel will help you get the most out of your budget.

Staying On Top Of Changing Technology And Trends

Technology is constantly evolving, and so are consumer preferences. You must be agile and adjust your strategies accordingly to keep up with the competition.

You’ll also want to leverage the right tools and channels to reach your target audience. For example, if there’s a new social media platform or advertising opportunity that has the potential to be a big hit, you should consider investing in it. Staying on top of changing technology and trends will help you get the most out of your marketing budget.

Establishing Metrics To Measure Success And Return On Investment

Many fail to meticulously measure their campaigns’ success and return on investment (ROI), but this is very important. Establishing metrics to track the performance of your campaigns will help you make adjustments as needed and ensure that you’re getting the best possible results from your marketing budget.

These metrics could include website traffic, lead generation, sales conversions, etc. Track these over time and adjust your strategy to maximize your ROI.

For example, consider that you’re doing high-ticket affiliate marketing. While the potential to make big profits is quite likely, this also requires a significant investment. To ensure you’re getting the most out of this strategy, track your metrics closely and adjust as needed.

Keeping Track Of All Budget Line Items

Finally, keep track of all budget line items to ensure you’re within your allocated budget. This may seem like a daunting task, but fortunately, there are tools and software solutions that can help make this process much more manageable.

These tools allow you to view your expenses and analyze them for potential savings quickly. This will ensure you don’t overspend.

Conclusion

Managing a marketing budget can be challenging, but it doesn’t have to be overwhelming. By following the steps outlined above, you should have no problem staying within your allocated budget and achieving success with your campaigns.

Over time, you’ll gain more experience and better manage your budget. With this, you might even be able to demand a higher budget from the company if needed.

The post How to Manage your Entire Marketing Budget appeared first on noupe.

Categories: Others Tags:

11 Best Video Editing Apps

December 7th, 2022 No comments

We’re living in a world where video content is everywhere. So if you’re not creating videos, you’re probably consuming them. It’s a massive part of our online lives.

Video is also more popular than ever before. According to statistics, 78% of people watch online video content weekly, while about 55% of internet users view videos daily. And that number is only increasing as time goes on.

That means that if you want to be successful, it’s essential that you learn how to use video editing software and create compelling visual content for your business or personal brand.

When you’re ready to start editing your videos, you’ll want to consider a platform that’s easy to use, has plenty of features, and makes it easy to share and collaborate with others.

There are many video editing programs, each with its strengths and weaknesses. Some are free, and others cost money, but they all have something to offer.

Here are some of the best video editing tools on the market today:

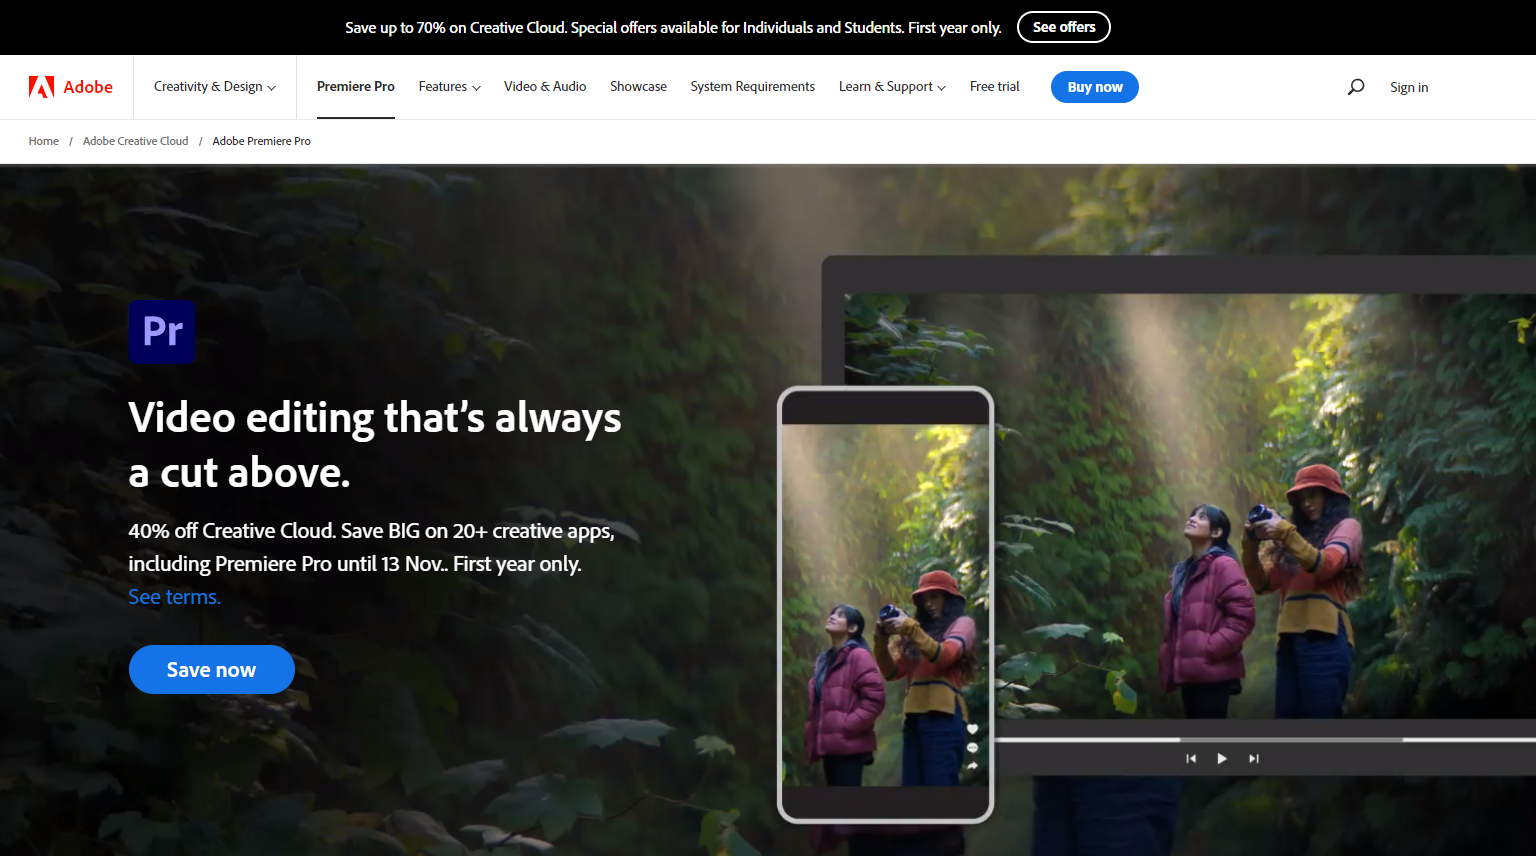
1. Adobe Premiere Pro

Adobe Premiere Pro is one of the most popular video editing software packages, and for a good reason. It’s an excellent tool for both beginners and professionals alike.

With Adobe Premiere Pro, you can create professional-quality videos, add motion graphics and effects, create titles, and much more. The software is easy to use, but there is a steep learning curve. If you’ve used Adobe Creative Cloud applications before, Premiere Pro will seem more familiar. That said, Creative Cloud Learning Center offers many materials for users at every level.

To start, open a project and import your video and audio files using the media browser. You can also use dynamic linking to bring in Illustrator, Photoshop, and After Effects files. Then create or edit the sequence, add titles to your video, and add transitions and effects. You can edit colors, mix audio, change speed, and export your video file.

The user interface isn’t too complex, considering it’s a video editing platform with many editing options. The UI consists of panels, a workspace, and a blue highlight. After using Photoshop and Illustrator for so long, the panels were easy to understand.

The best part? Premiere Pro’s customizable workspace!

You can arrange the panels however you want and save different setups for different projects or tasks. For example, you could have one workspace with your video and audio files open and another workspace with only your timeline open. 

As you resize one panel, the other gets resized to adjust automatically—this makes it a cinch to move around the interface to find what you’re looking for.

Here’s a quick breakdown of the workspace: 

  • On top, you will see a menu including assembly, editing, color, effects, audio, graphics, and library. 
  • Assembly is where you import your files. You cannot simply drag & drop your files here. 
  • Editing is where you can mix your audio and video and drag & drop them into your timeline. 
  • The color area will give you outstanding control over your video colors. 
  • On the right side, you will see color balance details; on the left, you will see the Lumetri Scopes of your video clip.

Key Features:

  • You can import single or multiple images from other Adobe applications such as Illustrator and Photoshop.
  • You can add animated graphics and edit them.
  • With Fram.io, you can get time-stamped feedback from the reviewers.
  • It offers stunning video and audio transition effects and lighting effects.
  • Version 23.0 offers the best titling toolsets, with the ability to bulk-edit your clip titles in the timeline and flexible alignment controls.

Pros:

  • It offers a 7-day trial period, where you can try out all of its features to see if it is the right fit for your business.
  • It has a flexible and customizable workspace.
  • The site’s learning center is packed with valuable resources.

Cons:

  • It takes some time to get used to it.
  • It doesn’t offer a freemium version.
  • The program has a lot of effects you may never use.

Pricing:

It starts at $20.99 for 100 GB of cloud storage.

2. Pinnacle Studio 26 Ultimate

Pinnacle Studio 26 Ultimate is one of Pinnacle’s more powerful video editing software. It lets you create stunning videos with accurate keyframing, high-level performance, and professional-level editing.

Pinnacle Studio’s interface looks like a mini version of Adobe Premiere Pro, but some crucial differences exist. For example, Pinnacle Studio doesn’t have as many effects or color correction tools as Premiere Pro. 

The first thing I noticed when I started using the editor was its color grading controls. The toolkit lets you adjust your clip’s tone, brightness, hue, and other color levels.

You can also create animated video overlays to direct viewers’ attention to a specific part of the screen. These overlays can contain any image, logo, graphic, or text with a transition. 

In addition to these features, you can also create video masks and edit YouTube videos, drone videos, 360 videos, and other types of videos.

Key Features: 

  • It lets you make targeted edits with motion tracking.
  • You can create two types of video masks: shape masks & panel masks. You can use them to add creative effects to your video, censor a part of the video, overlay some elements of the video, and even use it to hide objects.
  • Smart object tracking lets you create shape-aware masks in the video, and smart technology means you don’t have to recreate masks for each frame.
  • Have you seen those popular gaming videos on YouTube? You can make them with MultiCam Capture 2.0 Lite, which allows you to record your screen and add audio overlays. This product is also suitable for making tutorial videos.

Pros: 

  • It offers MultiCam editing.
  • Its UI is clean and easy to navigate.
  • In addition, they have plenty of helpful information and learning material on their website.

Cons: 

  • It’s costly.
  • With so many effects and detailed masking features, it can confuse some users.

Pricing: 

It starts at $129.99 for the complete version.

3. Apple Final Cut Pro

Apple Final Cut Pro is a powerful video editing tool for Mac users. It’s been around for years, but it’s still one of the most popular options for video editing. The software has many features, from basic video editing to advanced compositing.

From editing, mixing, audio, motion graphics, object tracking, and color grading to plugins, cinematic mode, and effects, it offers everything a professional video editor would want. 

There are many built-in effects and transitions which you can use to enhance your videos. For example, you can add titles and text to your footage by dragging the product onto your footage or clicking on it directly from the library window. This is much faster than using hundreds of effects individually, which takes much more time than this method!

In addition, the newest version of the Final Cut Pro 10.6.2 makes it easier to track down duplicate clips in the timeline and timeline index, as they’ll be highlighted automatically. It also improves speech clarity by using machine learning to minimize or adjust background noise levels. And it’s easier to move, rotate, and resize clips.

Final Cut Pro is also optimized for Apple Silicon, Mac Studio, and Macbook Pro, which means you can work with high frame rates with high performance. Let’s take a look at some of its key features.

Key Features: 

  • Apple Final Cut Pro lets you move and trim your clips seamlessly. It also enables you to pack multiple video and audio clips into one bundle with its compound clips feature.
  • You can add metadata tags to your clips, which will help you find them quickly. You can create custom column views and sort your clips by proxy or media types.
  • The Duplicate Detection feature highlights duplicate clips in the timeline.
  • With its Multicam editing feature, you can automatically sync up to 64 angles of videos with different frame sizes, frame rates, and formats.

Pros: 

  • UI is easy to understand and navigate.
  • It offers magnetic timelines.
  • It provides a free trial.

Cons: 

  • Available for Mac OS systems only.
  • Very expensive. If you need it for a shorter period, you cannot get a monthly or yearly subscription.

Pricing: 

It costs $299.99 for a one-time purchase. 

4. CyberLink PowerDirector
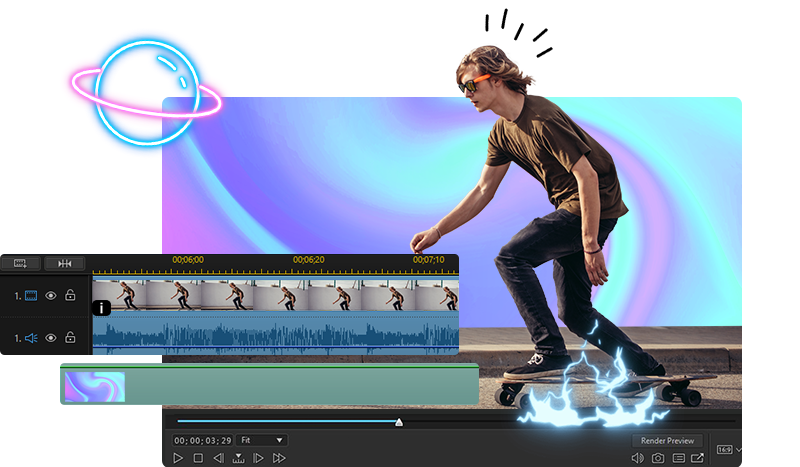
CyberLink PowerDirector 365 is a powerful video editing program that is especially easy for beginners. 

What’s appealing about it is that you don’t need to have any experience working with editing software—PowerDirector provides amazing customizable templates. The templates save plenty of time, as they are organized into proper categories such as Beauty, Business, Design, Education, and more.

Focused on making video editing easier for people without technical know-how, PowerDirector offers essential editing tools with advanced features – such as Mask Designer for creating images, text, and custom masks.

It also has a Title Designer that lets you add animated stickers, shapes, and call-outs to your video. Choose from a drag-and-drop menu for motion graphics, sound effects, and special effects. You can also add animated stickers, shapes, and call-outs to your video using its PIP Designer.

Key Features: 

  • It offers AI Motion Tracking, which means you can add text and graphics that will directly follow the object’s motion in your video.
  • It offers automatic AI Object Detection.
  • You can use its Chroma Key feature to use the green screen effect.
  • It lets you correct the colors in your video in one click.
  • You can also use its preset lens correction feature to remove distortion in your video and change video speed.

Pros: 

  • You can add multiple trackers and apply different effects to each for motion trackers.
  • A free trial is available.

Cons: 

  • If you apply reverse, it gets applied to the entire video.
  • Expensive monthly subscription.

Pricing: 

It starts at $99.99.

5. Apple iMovie

Apple iMovie is the best free video editing app that comes with all Macs and iOS devices. It’s also an excellent choice for beginners. 

You can use iMovie to edit videos, add music and effects, and create slideshows. It’s also great if you need to make simple edits, such as trimming clips or adding transitions.

It allows you to create/edit your videos in 4 simple steps: 

To start a trailer using iMovie, first select a theme from Apple’s pre-designed themes. Then add visual effects to your video. Next, add the music of your choice, choose one of Apple’s pre-designed templates, and your video is ready to export.

To make a movie, select a project and photos and videos to add from the library. You can record directly in iMovie before editing. Like other phone apps, you can add text, effects, and music to your video.

Next, trim and arrange your clips and images in the timeline. When you’re done with that, click the Add Media button to add a soundtrack to your project. Your track will be automatically placed in the beginning and will fit your clip length. You can also add sound effects by browsing and selecting from their built-in sound effects.

Next, add your titles and text. You can make title screens, end credits, or other text elements with this feature. In your timeline, click the clip and then click Titles in the toolbar and choose from the title styles to add your titles.

You can now add filters to your videos to give them a complete makeover. Click the Filter button and choose from the built-in filters, and then preview your video as you choose the effect.

Now, you’re ready to export your video file. To do so, click on the Share button in the project browser and then choose Email or Text Message.

Yes—it’s that simple. So simple that even a complete newbie can get started right away.

However, note that iMovie is suitable only if you want to create basic videos, such as slideshows, short clips, and home movies. If you’re looking for more advanced features like motion graphics or adding filters to your videos, then Adobe Premiere Pro or Apple Final Cut Pro might be better suited for you.

Key Features: 

  • The Magic Movie feature allows you to create videos with pre-styled templates and added titles, music, and transitions.
  • Storyboards: You can select from 20 storyboards with different genres, such as cooking or science experiment, and more.
  • Cinematic Mode: You can edit clips shooted in Cinematic Mode on iPhone 13.
  • Extra Special Effects: Add special effects such as slow-motion, speed it up, and use picture-in-picture and split-screen effects.
  • High-Fidelity Filters: It comes with 13 video filters to help you add a professional and cinematic look to your video.

Pros: 

  • It’s free! If you have an iPad, Macbook, (or iPhone), then you already have access to iMovie. 
  • The app lets you crop, trim, and adjust the brightness of your footage before you start editing it, making it easier to start creating a movie right away.
  • Lots of different templates are available for creating different types of videos (like slideshows with music)

Cons: 

  • Not available for Android, Windows, or Linux systems.
  • It’s a basic video editing software – with limited editing options for professional video editors.

Pricing: 

It’s free for all users.

6. Adobe Premiere Elements

Adobe Premiere Elements is a video editing program that offers the best of both worlds: it’s simple enough for beginners to use yet has enough advanced video editing features for professional editors to create stunning content. 

The software also uses artificial intelligence to help you add cinematic effects to your movies.

Starting with the specifications, Premiere Elements offers a range of tools to help you resize and trim clips, add effects or overlays, and much more. In addition, its 2023 version comes with Adobe Sensei, which means you can add effects to your videos with one click. You can also use its newly-added audio tracks and slideshow templates to change the look and feel of your entire video.

You can also arrange your photos and videos in any way you want in the element organizer. It brings together all the photos from different locations on your computer and saves them there, so you don’t have to find them separately in different folders. 

You can also import files from your camera or card reader by selecting the import option ‘From Camera or Card Reader.’ 

Adobe Premiere Elements offers a user-friendly workspace that groups its features into Quick, Guided, and Exper views. You can choose any of these depending on your level of expertise.

If you choose Quick, you can trim video clips, create a movie by putting photos and videos together, and also choose never to see this option again. 

In Guided view, you can get a step-by-step guide throughout the creation. 

Expert view offers more advanced tools and features – for example, an audio mixer or time-stretches abilities.

In addition, video tools let you mark and extract favorite moments, freeze a frame as an image, track moving objects, and smart-trim low-quality parts of the clip. You can adjust the audio balance with the audio mixer and narrate clips.

However, most of its features are designed for beginners rather than for professional videographers.

Key Features: 

  • AI & Automation: Premiere Elements uses Adobe Sensei AI technology to automate common video editing tasks. You can add effects used in some popular artworks, and the program will automatically adjust them to match the aspect ratio you choose.
  • Guided Edits: It offers 26 different guided edits that you can customize to suit your needs.
  • Templates: It offers plenty of slideshow templates, backgrounds, and patterns.
  • Organization: It automatically organizes your files according to date, subject, people, and places.

Pros: 

  • It offers three views based on complexity.
  • It provides in-depth guides for users.
  • Guided edits are available.
  • It offers a free trial.

Cons: 

  • It has limited features for professional filmmakers.

Pricing: 

7. Clipchamp

Clipchamp is another easy-to-use video software for beginners on this list – and it’s ideal for small businesses looking to create videos for marketing purposes. It’s a template-based video editing program, so each stage of the process is faster.

The app comes with pre-shot videos that you can use in your projects. These videos are in a 16:9 aspect ratio, and they are royalty-free. Click on the stock video tab to add these videos to your project. 

There will be multiple categories to choose from, and once you find your video, drag it and drop it into the timeline. Now you can start editing them!

You can also use its beginner-friendly video templates from the video editor homepage. Once you add a video to your timeline, it will automatically fit into the aspect ratio. But if you want to edit the video size, just click on the aspect ratio on the right side and choose from the options.

Now, you can make changes to the text and title. On the right side of your screen, click the text box and edit the text in the window that opens. You can also change other aspects of your project this way, such as the font, alignment, color, or transparency.

With its branding features, you can add logos or brand colors to your videos, which you can use in all of your videos.

Now, you can either use templates audio or add your own. If you want to upload your audio, upload it to the editor and drag and drop it into the timeline.

After that, you’re all set to export your video. Again, you can choose from three video resolutions: 480p, 720p, or 1080p.

Key Features: 

  • Video Editor: It comes with customizable templates, which you can trim, cut, rotate, crop, and add images and audio to. You can also balance color and do much more.
  • Stock Library: Its stock library has free stock videos and audio tracks – you just have to add your own titles and other minor changes. It also comes with a free camera recorder which lets you add filters, balance colors, and adjust contrast in your footage.
  • Text-to-speech: With its AI voice generator, you can choose from 170 voices to add a voiceover to your video.
  • Green Screen: Remove unwanted elements while shooting using the green screen, then remove them while editing with the background removal feature.
  • Video Overlay: You can spice up your videos with animated graphics, stock videos, transitions, and more using its built-in styles.

Pros: 

  • There Are so many templates to choose from.
  • It’s very affordable and also offers a free version.

Cons: 

  • It offers limited options for professional filmmakers.
  • Rendering takes more time than it should.

Pricing: 

It starts at $11.99 per month or $119.99/per year (if you pay yearly). 

8. Coral VideoStudio Ultimate

Coral VideoStudio Ultimate is one of the powerful video editors that starts you with basics and takes you through very advanced editing features.

To get started, you have to import your media into the library folders. Then, you can simply drag and drop your files or click on the import button and choose your file from the media browser.

Just like any other video editing software, you can drag and drop your media files to your timeline to start editing them. 

Choosing an instant project template will help you get the result quickly. Now you can trim your clips, adding transitions, effects, and more.

To add a title to the video, click the title button [T] and add text. In addition, you can add transitions between your clips by dragging the transition thumbnail to your timeline.

Once you have added your video, you can add filters, effects, and music. Just click the respective button and follow the instructions. Once everything is done, you can save it and share it on blogs or websites, email or social media channels, YouTube, and more.

Key Features: 

  • Drag and Drop: Drag and drop elements in your timelines, such as a text box, an effect, or a transition.
  • Color Grading: Using color grading, you can enhance your video by boosting the colors and correcting their balance.
  • Premium Effects: Use animated AR stickers, Face Effects, blend overlays, and more.
  • Advanced Tools: Make your videos stand out with cinema-grade effects using masking, facial recognition technology, dynamic split screen templates, and more.

Pros: 

  • Online reviews hint at its fast rendering speed.
  • Screen Recording is available.
  • One-time fee structure.

Cons: 

  • There aren’t enough effects and transitions available.

Pricing: 

It costs $99.99 / one-time payment. 

9. Movavi Video Editor
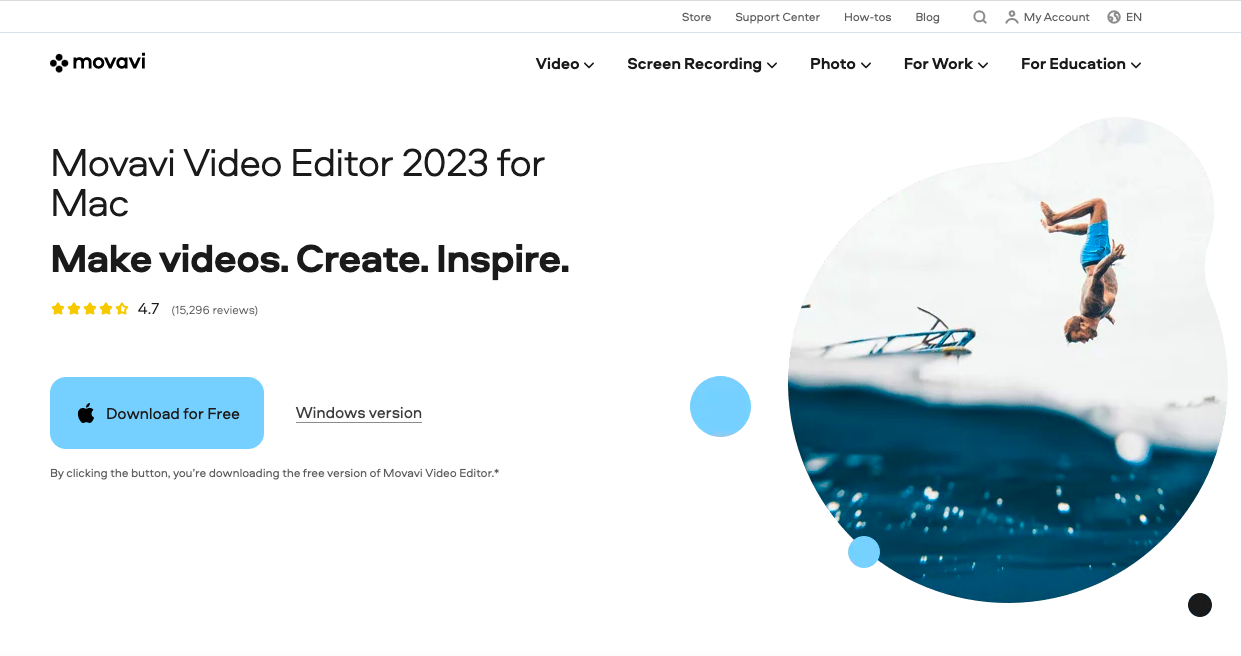
If you’ve been in the industry for a considerable time, you must have heard of Movavi Video Editor

It’s a powerful video editing software that allows you to edit videos, create slideshows and convert videos from one format to another. It is an award-winning video editor with readymade intros, keyframe animations, and many special effects.

Let’s see how to edit a 4K video in Movavi. As you see in the screenshot below, the user interface is spotless and straightforward. You just have to click on the “Add file” option to start importing your 4K video into the library and then add it to your timeline to begin editing it.

You’ll see icons for transitions, filters, and more on the left panel. From there, you can add different effects to your video. To cut your video into multiple parts, look above the timeline — you’ll see an icon for “Split Clip.” Select the clip and move the red marker to where you want to cut. Then click on the split icon.

You can also add titles to your video by clicking on the title tag in the left pan. Simply select the one that you want to use and drag it to the timeline. Now double-click on the title in the timeline and start editing the text.

After adding titles and special effects or transitions, save your file. Make sure you save in ultra-high definition. 

Key Features: 

  • AI background removal: Change your video background without using a green screen – with the power of AI.
  • AI noise removal: Its AI-based noise removal tool will help you remove car sounds, wind sounds, or other unwanted sounds.
  • Special effects for Youtube: It offers five frames and an exclusive pack of effects for YouTube.

Pros: 

  • You can directly upload your finished video on TikTok.
  • Clean user interface.
  • Free version available.
  • The video editing app has sound-accompanying transitions.

Cons: 

  • Slow rendering.
  • It does not offer more advanced features for filmmakers.

Pricing: 

It costs $74.95 for a one-time license. 

10. DaVinci Resolve
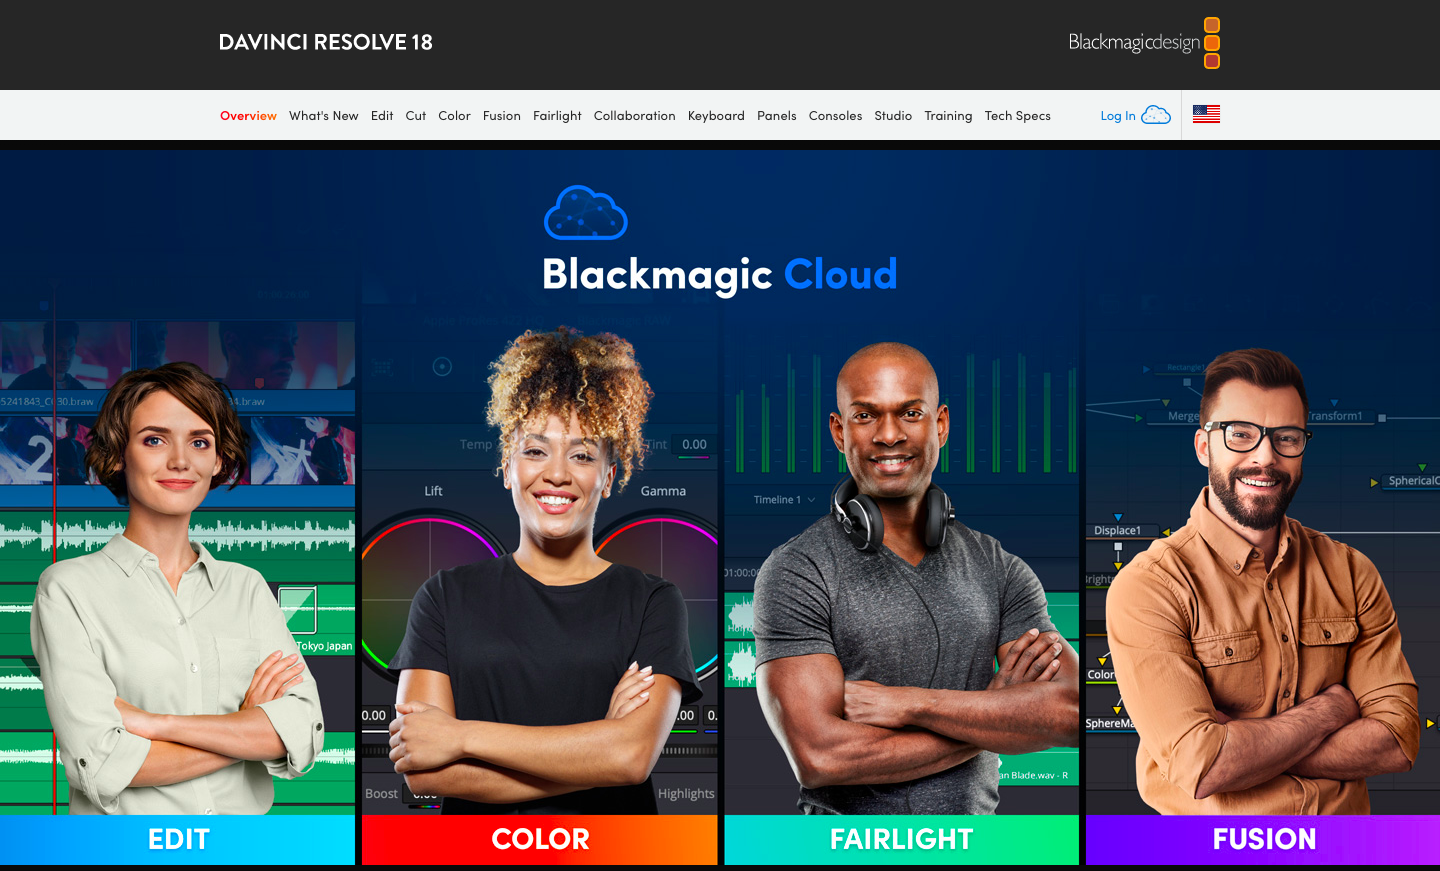
DaVinci Resolve is an excellent video editing program – with a free version with many high-level features that you would expect from a much more expensive product. DaVinci Resolve also makes other products specifically for editors, including keyboards, color grading panels, and more.

In its latest release, they have included support for Blackmagic Cloud and Blackmagic Proxy Generator. You can host your media library on this cloud and share your work with other collaborators and editors.

To start editing in DaVinci Resolve, you must import your video by dragging and dropping your videos from the hard drive to the media pool on the top of the screen.

Many professional video and audio file formats are supported, including H.264, H.265, DNX, Blackmagic RAW, and more. You can mark the part of the clip that you want to use by specifying a start and endpoint for it. 

Once you’re done adding clips to the timeline on the right side of the screen, you can edit them further using options from the editing overlay. This tool can replace, insert and overwrite clips in your movie project.

DaVinci Resolve has a library of 30 different transition effects, including wipes, dissolves, warps, flares, and more. All you have to do is select the effect you want and drag it into your timeline on top of a clip.

You can also add 2D and 3D titles to your project from the title library. Drag Fusion Titles from the library onto the timeline to add a title. You can then customize the text, font, color, etc.

You can do much more with videos, such as making animations, creating soundtracks, controlling the speed of your video, and adding picture-in-picture effects, dynamic zoom effects, and timeline curves. 

Key Features: 

  • Multi-User Collaboration: It’s possible to work with editors, visual effects artists, colorists, and sound engineers who are also online at the same time.
  • Fairlight: It features tools to produce audio. You can use up to 2K tracks at a  time.
  • Media and Delivery Page: It offers a fullscreen workspace to prepare clips, sync audio, and organize media files into bins.
  • Resolve FX: You can add advanced effects such as blur, noise, light effects, beauty enhancement, image restoration, and more.
  • Color Collector: DaVinci’s 32-bit image processing enhances your photos, making them look their best.

Pros: 

  • It offers a free version with various editing options.
  • The paid version is also affordable, considering the features you get.
  • Clean and easy-to-use UI.

Cons: 

  • Steep learning curve.

Pricing: 

It costs $295 for features like stereoscopic tools, Resolve FX filters, more Fairlight FX audio plugins, and advanced HDR grading.

11. Wondershare Filmora

Wondershare Filmora is an easy and simple video editing software that frequently updates with new features and advancements. 

Using the software is incredibly easy. You can create a new project for every video or start working on an existing project from the file menu.

Then you can import video, audio, or image by clicking on Import Media from the drop-down menu. You can either drag and drop your files in the library area, click on import media in the library, and select from the media browser.

Now add this video file from the library to your timeline to start editing. 

This can be done in two ways: drag and drop it to the timeline or right-click on the clip and choose the action from the insert, add to a new track, overwrite and append options.

This UI is straightforward, you don’t have to go back and forth, and mostly all options are on a single page. You can start adding titles, effects, animations, etc., by dropping them in the timeline. Then, select the option from the top of the window.

That’s it. Your first video in Wondershare Filmora is ready to be saved and exported. Click on the Export link on the topmost menu, choose the location, enter the video name, choose format, and click the Export button.

Filmora has the edge over other video editors, such as Adobe Creative Cloud, in its price point. Its rendering speed and performance are comparable to those of Creative Cloud products, but it lacks more advanced features, such as motion tracking and speed remapping. If you don’t require those features at all, though, it’s a good choice.

Key Features: 

  • Split Screen: It offers a split-screen template where you can add multiple videos in one to make it more fun. It has more than 30 split-screen templates.
  • Keyframing: Enlarge, narrow, or rotate your clips with its Keyframig feature and create many more visual animations.
  • Motion tracking: It automatically tracks the object movement and lets you pin the graphic or other elements to move in the same motion.
  • Screen Recorder: It allows you to record your screen with system and microphone audio.
  • Video effects: It offers over 900 video effects, including titles, filters, transitions, motion, and more.
  • Green Screen: You can change your video backgrounds or elements with the green screen.

Pros: 

  • Great selection of features
  • Easy-to-use interface
  • Fast rendering.
  • A free version is available.

Cons: 

  • So many features might be overwhelming for new users.
  • Users have reported that the software sometimes crashes.

Pricing: 

It starts at $19.99 per month. 

Frequently Asked Questions about Video Editing Platforms 

What is a video editing platform?

A video editing platform is a software platform that allows you to edit your videos, photos, and other media files.

How do I choose the right video editing platform?

The first thing you should do when choosing a video editing platform is to find out whether it supports the features you need for your project. Then check if it supports multiple file types and if it has tools for basic editing.

How much does a professional video editing platform cost?

You can find affordable professional-grade video editing software for less than $100 per year. The more advanced platforms with additional features cost more, but they also offer more capabilities than basic ones like iMovie or Windows Movie Maker that come free with your operating system.

How do I edit a video?

Editing a video can be done on any video editing platform. The process of editing varies from platform to platform, but the basic steps are the same:

  1. Import your media (photos and videos) into the program
  2. Arrange your media into a sequence for your video
  3. Add transitions between scenes or clips
  4. Add titles and other text elements to enhance visual storytelling
  5. Save the project file

What features do video editing platforms have?

Video editing platforms provide many features to help users create their own videos. Some of these features include:     

  • Video creation and editing tools
  • Audio mixing capabilities
  • The ability to add titles, images, and animations

Over to You!

The choice of a video editing platform can be one of the most important decisions you make when creating your video. First, you must choose a platform that will allow you to create high-quality videos suitable to your requirements. And if you’re looking for a basic and free video editor, there are options for that too. 

If you’re a professional, use advanced video editing software tools like Adobe Premiere Pro, Pinnacle Studio 26 Ultimate, and Apple Final Cut Pro. They will take time to get used to, and you’d have to shell out a considerable budget, but it will be well worth it.

If you’re an amateur or a beginner, I recommend using Movavi Video Editor Wondershare Filmora or Clipchamp. They are easy to use and the best bang for the buck.

And if your purpose is just to create personal videos for your family and acquaintances on social media, then you can use a free video editing software like Apple iMovie

Source

The post 11 Best Video Editing Apps first appeared on Webdesigner Depot.

Categories: Designing, Others Tags:

Adding Box Shadows to WordPress Blocks and Elements

December 7th, 2022 No comments

I stumbled across this tweet from Ana Segota looking for a way to add a CSS box-shadow to a button’s hover state in WordPress in the theme.json file.

She’s asking because theme.json is where WordPress wants us to start moving basic styles for block themes. Traditionally, we’d do any and all styling in style.css when working in a “classic” theme. But with the default Twenty Twenty-Three (TT3) theme that recently shipped with WordPress 6.1 moving all of its styles to theme.json, we’re getting closer and closer to being able to do the same with our own themes. I covered this in great detail in a recent article.

I say “closer and closer” because there are still plenty of CSS properties and selectors that are unsupported in theme.json. For example, if you’re hoping to style something with like perspective-origin in theme.json, it just won’t happen — at least as I’m writing this today.

Ana is looking at box-shadow and, luckily for her, that CSS property is supported by theme.json as of WordPress 6.1. Her tweet is dated Nov. 1, the same exact day that 6.1 released. It’s not like support for the property was a headline feature in the release. The bigger headlines were more related to spacing and layout techniques for blocks and block themes.

Here’s how we can apply a box-shadow to a specific block — say the Featured Image block — in theme.json:

{
  "version": 2,
  "settings": {},
  // etc.
  "styles": {
    "blocks" :{
      "core/post-featured-image": {
        "shadow": "10px 10px 5px 0px rgba(0, 0, 0, 0.66)"
      }
    }
  }
}

Wondering if the new color syntax works? Me too! But when I tried — rgb(0 0 0 / 0.66) — I got nothing. Perhaps that’s already in the works or could use a pull request.

Easy, right? Sure, it’s way different than writing vanilla CSS in style.css and takes some getting used to. But it is indeed possible as of the most recent WordPress release.

And, hey, we can do the same thing to individual “elements”, like a button. A button is a block in and of itself, but it can also be a nested block within another block. So, to apply a box-shadow globally to all buttons, we’d do something like this in theme.json:

{
  "version": 2,
  "settings": {},
  // etc.
  "styles": {
    "elements": {
      "button": {
        "shadow": "10px 10px 5px 0px rgba(0,0,0,0.66)"
      }
    }
  }
}

But Ana wants to add the shadow to the button’s :hover state. Thankfully, support for styling interactive states for certain elements, like buttons and links, using pseudo-classes — including :hover, :focus, :active, and :visited — also gained theme.json support in WordPress 6.1.

{
  "version": 2,
  "settings": {},
  // etc.
  "styles": {
    "elements": {
      "button": {
        ":hover": {
          "shadow": "10px 10px 5px 0px rgba(0,0,0,0.66)"
        }
      }
    }
  }
}

If you’re using a parent theme, you can certainly override a theme’s styles in a child theme. Here, I am completely overriding TT3’s button styles.

View full code
{
  "version": 2,
  "settings": {},
  // etc.
  "styles": {
    "elements": {
      "button": {
        "border": {
          "radius": "0"
        },
        "color": {
          "background": "var(--wp--preset--color--tertiary)",
          "text": "var(--wp--preset--color--contrast)"
        },
        "outline": {
          "offset": "3px",
          "width": "3px",
          "style": "dashed",
          "color": "red"
        },
        "typography": {
          "fontSize": "var(--wp--preset--font-size--medium)"
        },
        "shadow": "5px 5px 5px 0px rgba(9, 30, 66, 0.25), 5px 5px 5px 1px rgba(9, 30, 66, 0.08)",
        ":hover": {
          "color": {
            "background": "var(--wp--preset--color--contrast)",
            "text": "var(--wp--preset--color--base)"
          },
          "outline": {
            "offset": "3px",
            "width": "3px",
            "style": "solid",
            "color": "blue"
          }
        },
        ":focus": {
          "color": {
            "background": "var(--wp--preset--color--contrast)",
            "text": "var(--wp--preset--color--base)"
          }
        },
        ":active": {
          "color": {
            "background": "var(--wp--preset--color--secondary)",
            "text": "var(--wp--preset--color--base)"
          }
        }
      }
    }
  }
}

Here’s how that renders:

The button’s natural state (left) and it’s hovered state (right)

Another way to do it: custom styles

The recently released Pixl block theme provides another example of real-world usage of the box-shadow property in theme.json using an alternative method that defines custom values. In the theme, a custom box-shadow property is defined as .settings.custom.shadow:

{
  "version": 2,
  "settings": {
    // etc. 
    "custom": {
      // etc.
      "shadow": "5px 5px 0px -2px var(--wp--preset--color--background), 5px 5px var(--wp--preset--color--foreground)"
    },
    // etc.
  }
}

Then, later in the file, the custom shadow property is called on a button element:

{
  "version": 2,
  "settings": {
    // etc.
  },
  "styles": {
    "elements": {
      "button": {
        // etc.
        "shadow": "var(--wp--custom--shadow) !important",
        // etc.
        ":active": {
          // etc.
          "shadow": "2px 2px var(--wp--preset--color--primary) !important"
        }
      },
    // etc.
  }
}

I’m not totally sure about the use of !important in this context. My hunch is that it’s an attempt to prevent overriding those styles using the Global Styles UI in the Site Editor, which has high specificity than styles defined in theme.json. Here’s an anchored link to more information from my previous article on managing block theme styles.

Update: Turns out there was a whole discussion about this in Pull Request #34689, which notes that it was addressed in WordPress 5.9.

And there’s more…

In addition to shadows, the CSS outline property also gained theme.json support in WordPress 6.1 and can be applied to buttons and their interactive states. This GitHub PR shows a good example.

"elements": {
  "button": {
    "outline": {
      "offset": "3px",
      "width": "3px",
      "style": "dashed",
      "color": "red"
    },
    ":hover": {
      "outline": {
        "offset": "3px",
        "width": "3px",
        "style": "solid",
        "color": "blue"
      }
    }
  }
}

You can also find the real examples of how the outline property works in other themes, including Loudness, Block Canvas, and Blockbase.

Wrapping up

Who knew there was so much to talk about with a single CSS property when it comes to block theming in WordPress 6.1? We saw the officially supported methods for setting a box-shadow on blocks and individual elements, including the interactive states of a button element. We also checked out how we could override shadows in a child theme. And, finally, we cracked open a real-world example that defines and sets shadows in a custom property.

You can find more detailed in-depth discussions about the WordPress and it’s box-shadow implementation in this GitHub PR. There is also a GitHub proposal for adding UI directly in WordPress to set shadow values on blocks — you can jump directly to an animated GIF showing how that would work.

Speaking of which, Justin Tadlock recently developed a block that renders a progress bar and integrated box shadow controls into it. He shows it off in this video:

More information

If you’d like to dig deeper into the box-shadow and other CSS properties that are supported by the theme.json file in a block theme, here are a couple of resources you can use:


Adding Box Shadows to WordPress Blocks and Elements originally published on CSS-Tricks, which is part of the DigitalOcean family. You should get the newsletter.

Categories: Designing, Others Tags:

CSS is OK, I guess.

December 6th, 2022 No comments

Nothing but ear-to-ear smiles as I was watching this video from @quayjn on YouTube. (No actual name in the byline, though I think it’s Brian Katz if my paper trail is correct).

The best is this Pen you can use to sing along…

CodePen Embed Fallback

The little song Una did for memorizing for JavaScript’s map(), filter(), and reduce()methods at the end of this article comes to mind for sure.

To Shared LinkPermalink on CSS-Tricks


CSS is OK, I guess. originally published on CSS-Tricks, which is part of the DigitalOcean family. You should get the newsletter.

Categories: Designing, Others Tags:

Accessible Front-End Patterns For Responsive Tables (Part 1)

December 6th, 2022 No comments

Tables allow us to organize data into grid-like format of rows and columns. Scanning the table in one direction allows users to search and compare the data while scanning in the other direction lets users get all details for a single item by matching the data to their respective table header elements.

Tables often rely on having enough screen space to communicate these data relations effectively. This makes designing and developing more complex responsive tables somewhat of a challenge. There is no universal, silver-bullet solution for making the tables responsive as we often see with other elements like accordions, dropdowns, modals, and so on. It all depends on the main purpose of the table and how it’s being used.

If we fail to consider these factors and use the wrong approach, we can potentially make usability worse for some users.

In this article, we’re going to be strictly focused on various ways we can make tables on the web responsive, depending on the data type and table use-case, so we’re not going to cover table search, filtering, and other similar functionalities.

If you are interested in improving user experience (UX) for tables and other UI elements beyond just responsiveness, make sure to check out Smashing Magazine’s incredibly useful Smart Interface Design Patterns workshop, which covers best practices and guidelines for various UI components, tables included.

Short Primer On Accessible Tables

Before diving into specific responsive table patterns, let’s quickly go over some best practices regarding design and accessibility. We’ll cover some general points in this section and other, more specific ones in later examples.

Design And Visual Features

First, we need to ensure that users can easily scan the table and intuitively match the data to their respective table header elements. From the design perspective, we can ensure the following:

  • Use proper vertical and horizontal alignment (“A List Apart” covers this in their article).
  • Design a table with clear divisions and optimal spacing between rows and cells.
  • Table header elements should stand out and be styled differently from data cells.
  • Consider using alternate background color for rows or columns (“zebra stripes”) for easier scanning.

ARIA Roles

We want to include proper ARIA attributes to our table element and its descendants. Applying some CSS styles like display: block or display: flex (to create responsive stacked columns) may cause issues in some browsers. In those cases, screen readers interpret the table element differently, and we lose the useful table semantics. By adding ARIA labels, we can fix the issue and retain the table semantics.

Including these roles in HTML manually could become tedious and prone to error. If you are comfortable about using JavaScript for adding additional markup, and you aren’t using a framework that generates static HTML files, you can use this handy little JavaScript function made by Adrian Roselli to automatically add ARIA roles to table elements:

function AddTableARIA() {
  try {
    var allTables = document.querySelectorAll("table");
    for (var i = 0; i < allTables.length; i++) {
      allTables[i].setAttribute("role", "table");
    }
    var allRowGroups = document.querySelectorAll("thead, tbody, tfoot");
    for (var i = 0; i < allRowGroups.length; i++) {
      allRowGroups[i].setAttribute("role", "rowgroup");
    }
    var allRows = document.querySelectorAll("tr");
    for (var i = 0; i < allRows.length; i++) {
      allRows[i].setAttribute("role", "row");
    }
    var allCells = document.querySelectorAll("td");
    for (var i = 0; i < allCells.length; i++) {
      allCells[i].setAttribute("role", "cell");
    }
    var allHeaders = document.querySelectorAll("th");
    for (var i = 0; i < allHeaders.length; i++) {
      allHeaders[i].setAttribute("role", "columnheader");
    }
    // This accounts for scoped row headers
    var allRowHeaders = document.querySelectorAll("th[scope=row]");
    for (var i = 0; i < allRowHeaders.length; i++) {
      allRowHeaders[i].setAttribute("role", "rowheader");
    }
    // Caption role not needed as it is not a real role, and
    // browsers do not dump their own role with the display block.
  } catch (e) {
    console.log("AddTableARIA(): " + e);
  }
}

However, keep in mind the following potential drawbacks of using JavaScript here:

  • Users might choose to browse the website with JavaScript turned off.
  • The JavaScript file may not be downloaded or may be downloaded much later if the user is browsing the website on an unreliable or slow network.
  • If this is bundled alongside other JavaScript code in the same file, an error in other parts of the file might prevent this function from running in some cases.

Adding An a11y-Friendy Title

Adding a title next to the table helps both sighted users and users with assistive devices get a complete understanding of the content.

Ideally, we would include a caption element inside the table element as a first child. Notice how we can nest any HTML heading element as a child to maintain the title hierarchy.

<table>
  <caption>
    <h2>Top 10 best-selling albums of all time</h2>
  </caption>

   <!-- Table markup -->
</table>

If we are using a wrapper element to make the table scrollable or adding some other functionality that makes the caption element not ideal, we can include the table inside a figure element and use a figcaption to add a title. Make sure to include a proper ARIA label on either the table element or a wrapper element and link it to a figcaption element:

<figure>
  <figcaption id="caption">Top 10 best-selling albums of all time</figcaption>
  <table aria-labelledby="caption"><!-- Table markup --></table>
</figure>
<figure>
  <figcaption id="caption">
    <h2>Top 10 best-selling albums of all time</h2>
  </figcaption>
  <div class="table-wrapper" role="group" aria-labelledby="caption" tabindex="0">
    <table><!-- Table markup --></table>
  </div>
</figure>

There are other accessibility aspects to consider when designing and developing tables, like keyboard navigation, print styles, high contrast mode, and others. We’ll cover some of those in the following sections. For a more comprehensive guide on creating accessible table elements, make sure to check out Heydon Pickering’s guide and Adrian Roselli’s article which is being kept up to date with the latest features and best practices.

Bare-bones Responsive Approach

Sometimes we don’t have to make any major changes to our table to make it responsive. We just need to ensure the table width responds to the viewport width. That can be easily achieved with width: 100%, but we should also consider setting a dynamic max-width value, so our table doesn’t grow too wide on larger containers and becomes difficult to scan, like in the following example:

table {
  width: fit-content;
}

With the fit-content value, we ensure that the table doesn’t grow beyond the minimum width required to optimally display the table contents and that it remains responsive.

The table responds to viewport size, and it looks good on small screens, but on wider screens, it becomes difficult to scan due to the unnecessary space between the columns.

We can also ensure that the table max-width value always adapts to its content. We don’t have to rely on assigning a magic number for each table or wrap the table in a container that constrains the width to a fixed value.

This works well for simple tables that don’t require too much screen space to be effectively parsed and aren’t affected by word-break. We can even use fluid typography and fluid spacing to make sure these simple tables remain readable on smaller screens.

/* Values generated with Utopia https://utopia.fyi/type/calculator/ */

tbody {
  font-size: clamp(1.13rem, calc(0.35rem + 2.19vw), 1.75rem);
}

tbody td {
  padding-top: clamp(1.13rem, calc(0.35rem + 2.19vw), 1.75rem);
  padding-bottom:  clamp(2rem, calc(0.62rem + 3.9vw), 3.11rem);
}

This is important to know because on some devices, like smartphones and tablets, scrollbars aren’t visible right away, and users might get the impression that the table is not scrollable.

Lea Verou and Roman Komarov have suggested using “scrolling shadows” to subtly indicate the scrolling direction using gradient background and background-attachment property. Using this property, we can set background gradient behavior when scrolling. We also use linear gradients as edge covers for shadows, so we gradually hide the shadow when the user has reached an edge and cannot scroll in that direction anymore.

.table-wrapper {
  overflow: auto;
  background: 
    linear-gradient(90deg, var(--color-background) 20%, rgba(255, 255, 255, 0)),
    linear-gradient(90deg, rgba(255, 255, 255, 0), var(--color-background) 80%) 
                    100% 0,
    radial-gradient(farthest-side at 0 0%, var(--color-shadow), rgba(0, 0, 0, 0)),
    radial-gradient(farthest-side at 100% 0%, var(--color-shadow), rgba(0, 0, 0, 0))
                    100% 0;
  background-repeat: no-repeat;
  background-size: 20% 200%, 20% 200%, 8% 400%, 8% 400%;
  background-attachment: local, local, scroll, scroll;
}

Keep in mind that background-attachment property is not supported on iOS Safari and a few other browsers, so make sure to either provide a fallback or remove the background on unsupported browsers. We can also provide helpful text next to the table to make sure users understand that the table can be scrolled.

Forcing Table Cropping

We can also dynamically set the table column width to enforce table cropping mid-content, so the user gets a clear hint that the table is scrollable. I’ve created a simple function for this example. The last column will always get cropped to 85% of its size, and we’ll reduce the number of visible columns by one if we cannot show at least 5% of the column’s width.

function cropTable(visibleCols) {
  const table = document.querySelector("figure");
  const { width: tableWidth } = table.getBoundingClientRect();
  const cols = table.querySelectorAll("th, td");
  const newWidth = tableWidth / visibleCols;

  // Resize columns to fit a table.
  cols.forEach(function(col) {
    // Always make sure that col is cropped by at least 15%.
    col.style.minWidth = newWidth + (newWidth * 0.15) + "px";
  });

  // Return if we are about to fall below min column count.
  if (visibleCols <= MIN_COLS) {
    return;
  }

  // Measure a sample table column to check if resizing was successful.
  const { width: colWidth } = cols[0].getBoundingClientRect();

  // Check if we should crop to 1 column less (calculate new column width).
  if (colWidth * visibleCols > tableWidth + newWidth * 0.95) {
    cropTable(visibleCols - 1);
  }
}

This function might need to be adjusted to a more complex use case. Check the example below and see how the table column width responds to window resizing:

Stacking Approach (Rows To Blocks)

The stacking approach has been a very popular pattern for years. It involves converting each table row into a block of vertically stacked columns. This is a very useful approach for tables where data is not comparable or when we don’t need to highlight the hierarchy and order between items.

For example, cart items in a webshop or a simple contacts table with details — these items are independent, and users primarily scan them individually and search for a specific item.

As mentioned before, converting the table rows to blocks usually involves applying display: block on small screens. However, as Adrian Roselli has noted, applying a display property overrides native table semantics and makes the element less accessible on screen readers. This discovery was jarring to me, as I’ve spent years crafting responsive tables using this pattern without realizing I was making them less accessible in the process.

It’s not all bad news, as Adrian Roselli notes the following change for Chrome version 80:

Big progress. Chrome 80 no longer drops semantics for HTML tables when the display properties flex, grid, inline-block, or contents are used. The new Edge (ChromiEdge) follows suit. Firefox still dumps table semantics for only display: contents. Safari dumps table semantics for everything.

— Adrian Roselli

For this example, we’ll use display: flex instead of using display: block for our stacking pattern. This is not an ideal solution as other browsers might still drop table semantics, so make sure to test the accessibility on various browsers and devices.

/* Small screen width styles */
table, tbody, tbody tr, tbody td, caption {
  display: flex;
  flex-direction: column;
  width: 100%;
  word-break: break-all;
}

See the Pen Table – stacked [forked] by Adrian Bece.

Accordion

The stacking pattern might look nice initially and seems to be an elegant solution from a design perspective. However, depending on the table and data complexity, this pattern might significantly increase page height, and the user might have to scroll longer to reach the content below the table.

One improvement I found interesting was to show the primary data column (usually the first column) and hide the less important data (other columns) under an accordion. This makes sense for our example, as users would first look for a name by contact and then scan for their details in the row.

<tr>
  <td onclick="toggle()">
    <button aria-label="Expand contact details">
      <!-- Icon -->
    </button>
    <!-- Main content-->
  </td>
  <td><!-- Secondary content--></td>
  <td><!-- Secondary content--></td>
  <td><!-- Secondary content--></td>
</tr>

We’ll assume that the first table column contains primary data, and we’ll hide other columns unless a row-active class is applied:

/* Small screen width styles */

thead tr > *:not(:first-child) {
  display: none;
}

tbody,
tbody tr,
tbody td {
  display: flex;
  flex-direction: column;
  word-break: break-all;
}

tbody td:first-child {
  flex-direction: row;
  align-items: center;
}

tbody tr:not(.row-active) > *:not(:first-child) {
  max-width: 0;
  max-height: 0;
  overflow: hidden;
  padding: 0;
}

Now we have everything in place for showing and hiding table row details. We also need to keep in mind the screen reader support and toggle the aria-hidden property to hide secondary info from screen readers. We don’t need to toggle the ARIA property if we’re toggling the element visibility with the display property:

function toggle() {
  const row = this.window.event.target.closest("tr");
  row.classList.toggle("row-active");

  const isActive = row.classList.contains("row-active");

  if (isActive) {
    const activeColumns = row.querySelectorAll("td:not(:first-child)");
    activeColumns.forEach(function (col) {
      col.setAttribute("aria-hidden", "false");
    });
  } else {
    const activeColumns = row.querySelectorAll(`td[aria-hidden="false"]`);
    activeColumns.forEach(function (col) {
      col.setAttribute("aria-hidden", "true");
    });
}

We’ll assign this function to the onclick attribute on our main table column elements to make the whole column clickable. We also need to assign proper ARIA labels when initializing and resizing the window. We don’t want incorrect ARIA labels applied when we resize the screen between two modes.

function handleResize() {
  const isMobileMode = window.matchMedia("screen and (max-width: 880px)");
  const inactiveColumns = document.querySelectorAll(
    "tbody > tr > td:not(:first-child)"
  );

  inactiveColumns.forEach(function (col) {
    col.setAttribute("aria-hidden", isMobileMode.matches.toString());
  });
}

//On window resize
window.addEventListener("resize", handleResize);

// On document load
handleResize();

See the Pen Table – accordion [forked] by Adrian Bece.

This approach significantly reduces table height on smaller screens compared to the previous example. The content below the table would now easily be reachable by quickly scrolling past the table.

Toggleable Columns Approach

Going back to our scrollable table example, in some cases, we can give users an option to customize the table view by allowing them to show and hide individual columns, temporarily reducing table complexity in the process. This is useful for users that want to scan or compare data only by specific columns.

We’ll use a checkbox form and have them run a JavaScript function. We’ll only have to pass an index of the column that we want to toggle. We’ll have to hide both the columns in data rows in a table body and a table header element:

function toggleRow(index) {
  // Hide a data column for all rows in the table body.
  allBodyRows.forEach(function (row) {
    const cell = row.querySelector(`td:nth-child(${index + 1})`);
    cell.classList.toggle("hidden");
  });

  // Hide a table header element.
  allHeadCols[index].classList.toggle("hidden");
}

This is a neat solution if you want to avoid the stacking pattern and allow users to easily compare the data but give them options to reduce the table complexity by toggling individual columns. In this case, we’re using a display property to toggle the visibility, so we don’t have to handle toggling ARIA labels.

See the Pen Responsive table – column toggle [forked] by Adrian Bece.

Conclusion

Table complexity and design depend on the use case and the data they display. They generally rely on having enough screen space to display columns in a way user can easily scan them. There is no universal solution for making tables responsive and usable on smaller screens for all these possible use cases, so we have to rely on various patterns.

In this article, we’ve covered a handful of these patterns. We’ve focused primarily on simple design changes with a scrolling table pattern and a stacking pattern and began checking out more complex patterns that involve adding some JavaScript functionality.

In the next article, we’ll explore more specific and complex responsive table patterns and check out some responsive table libraries that add even more useful features (like filtering and pagination) to tables out of the box.

References

Categories: Others Tags:

Exciting New Tools for Designers, December 2022

December 5th, 2022 No comments

Designing a website or app can be a daunting task. But with the right design tools, it can be a lot easier. In this article, we’ll introduce you to some of the best tools, apps, and resources available right now. From client management to AI-powered design tools, there’s tons here to round out the year in style. Enjoy!

WelcomeSpaces

WelcomeSpaces is a collaborative tool for professional designers. Communicate with clients, share files, discuss revisions, and stay on track with an activity feed. Client collaboration has never been so simple.

html.to.design

html.to.design is an excellent plugin for Figma to help you quickly and easily create beautiful designs from existing websites. With just a few clicks, you can import the HTML code for any website and start designing your own version of it.

Squeaky

Squeaky is a privacy-friendly analytics suite that lets you capture up to 60% more data than legacy tools. With Squeaky, you can get insights into your customers’ behavior without compromising their privacy. Use Squeaky to make better decisions for your business.

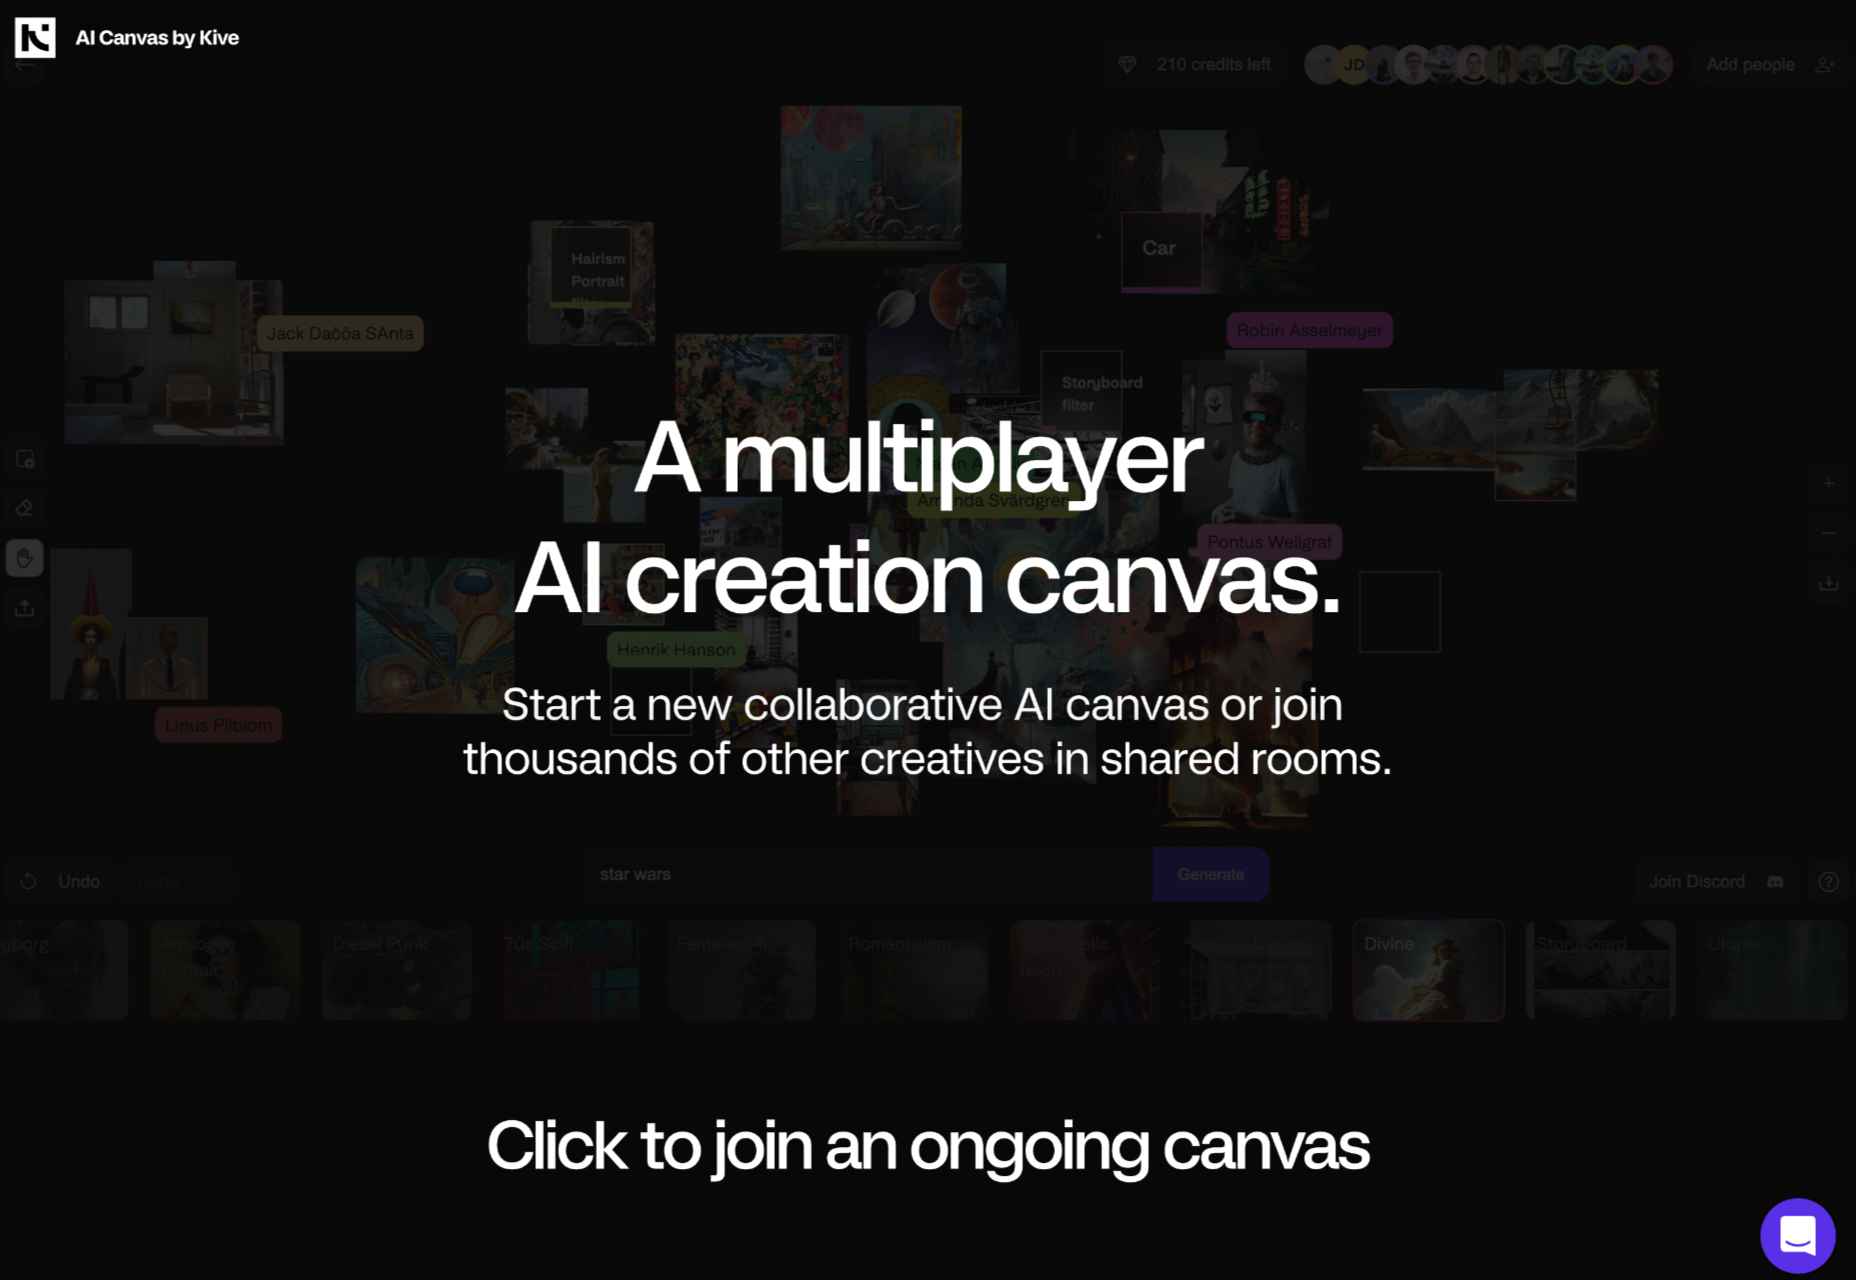
AI Canvas

AI Canvas is an online collaborative platform that allows users to create and share AI artwork with other community members. Start your artwork with text prompts and watch it grow.

Magician

Magician is an AI-powered plugin for Figma that can create icons, images, and web copy from text prompts. It’s the perfect tool for designers who want to quickly and easily create beautiful designs.

Doughnut

Doughnut is a supportive design and freelancing community designed to help you succeed as a freelance designer. From finding new clients to managing your time, Doughnut has everything you need to make the most of your freelance career.

Deckset

Deckset is a simple way to produce great-looking presentations. Just write your thoughts in your favorite text editor and watch Deckset transform them into beautiful, persuasive presentations.

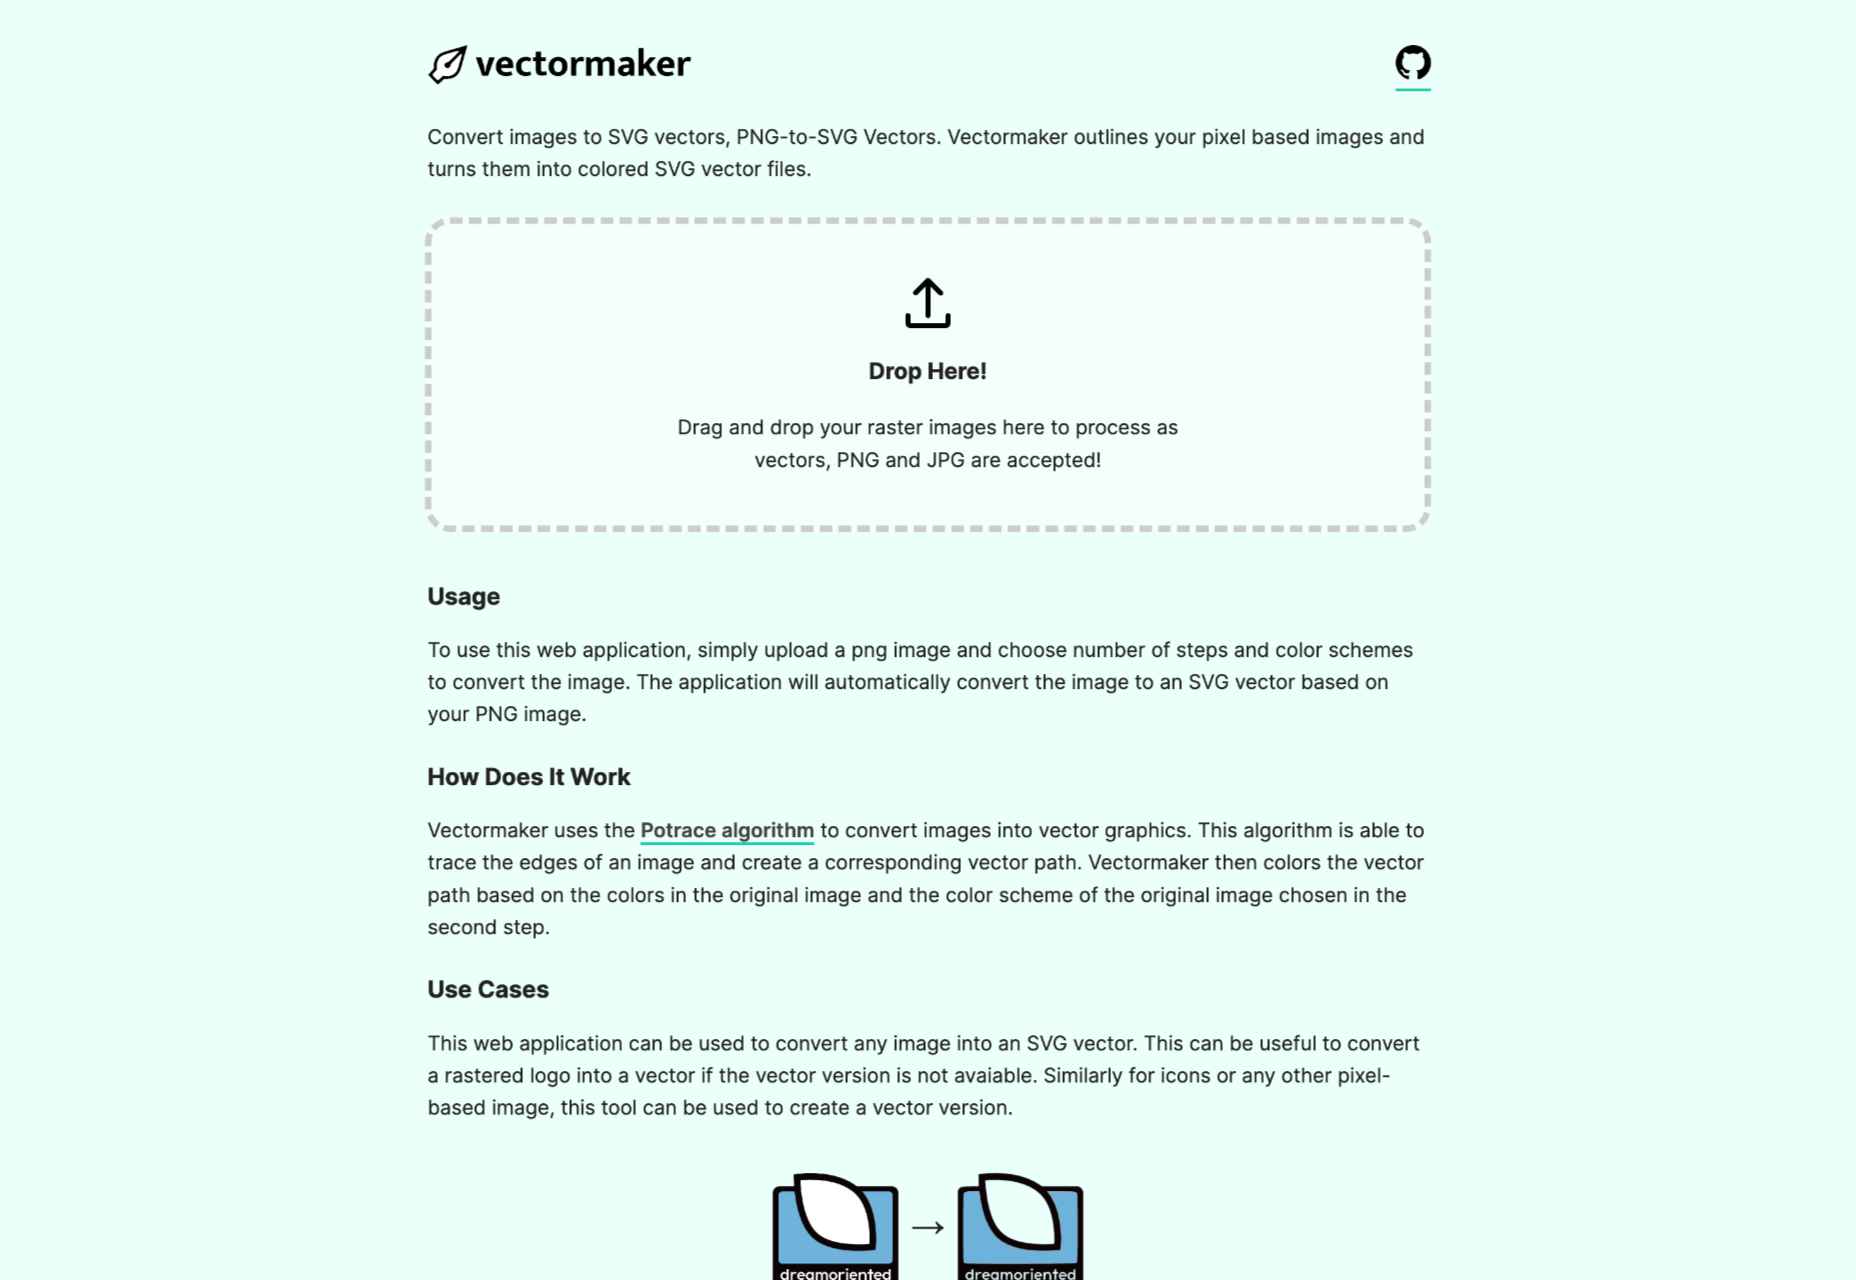
Vectormaker

With Vectormaker, you can easily convert pixel-based images into colorful vector graphics. Vectormaker uses the Potrace algorithm to trace the edges of your image. You can then choose the colors for your vector path based on the colors in the original.

Wrap

Wrap is a browser extension for capturing and editing product screenshots with ease. With a selection of carefully selected styles to choose from, you can create pixel-perfect designs in seconds—even if you’re not a designer.

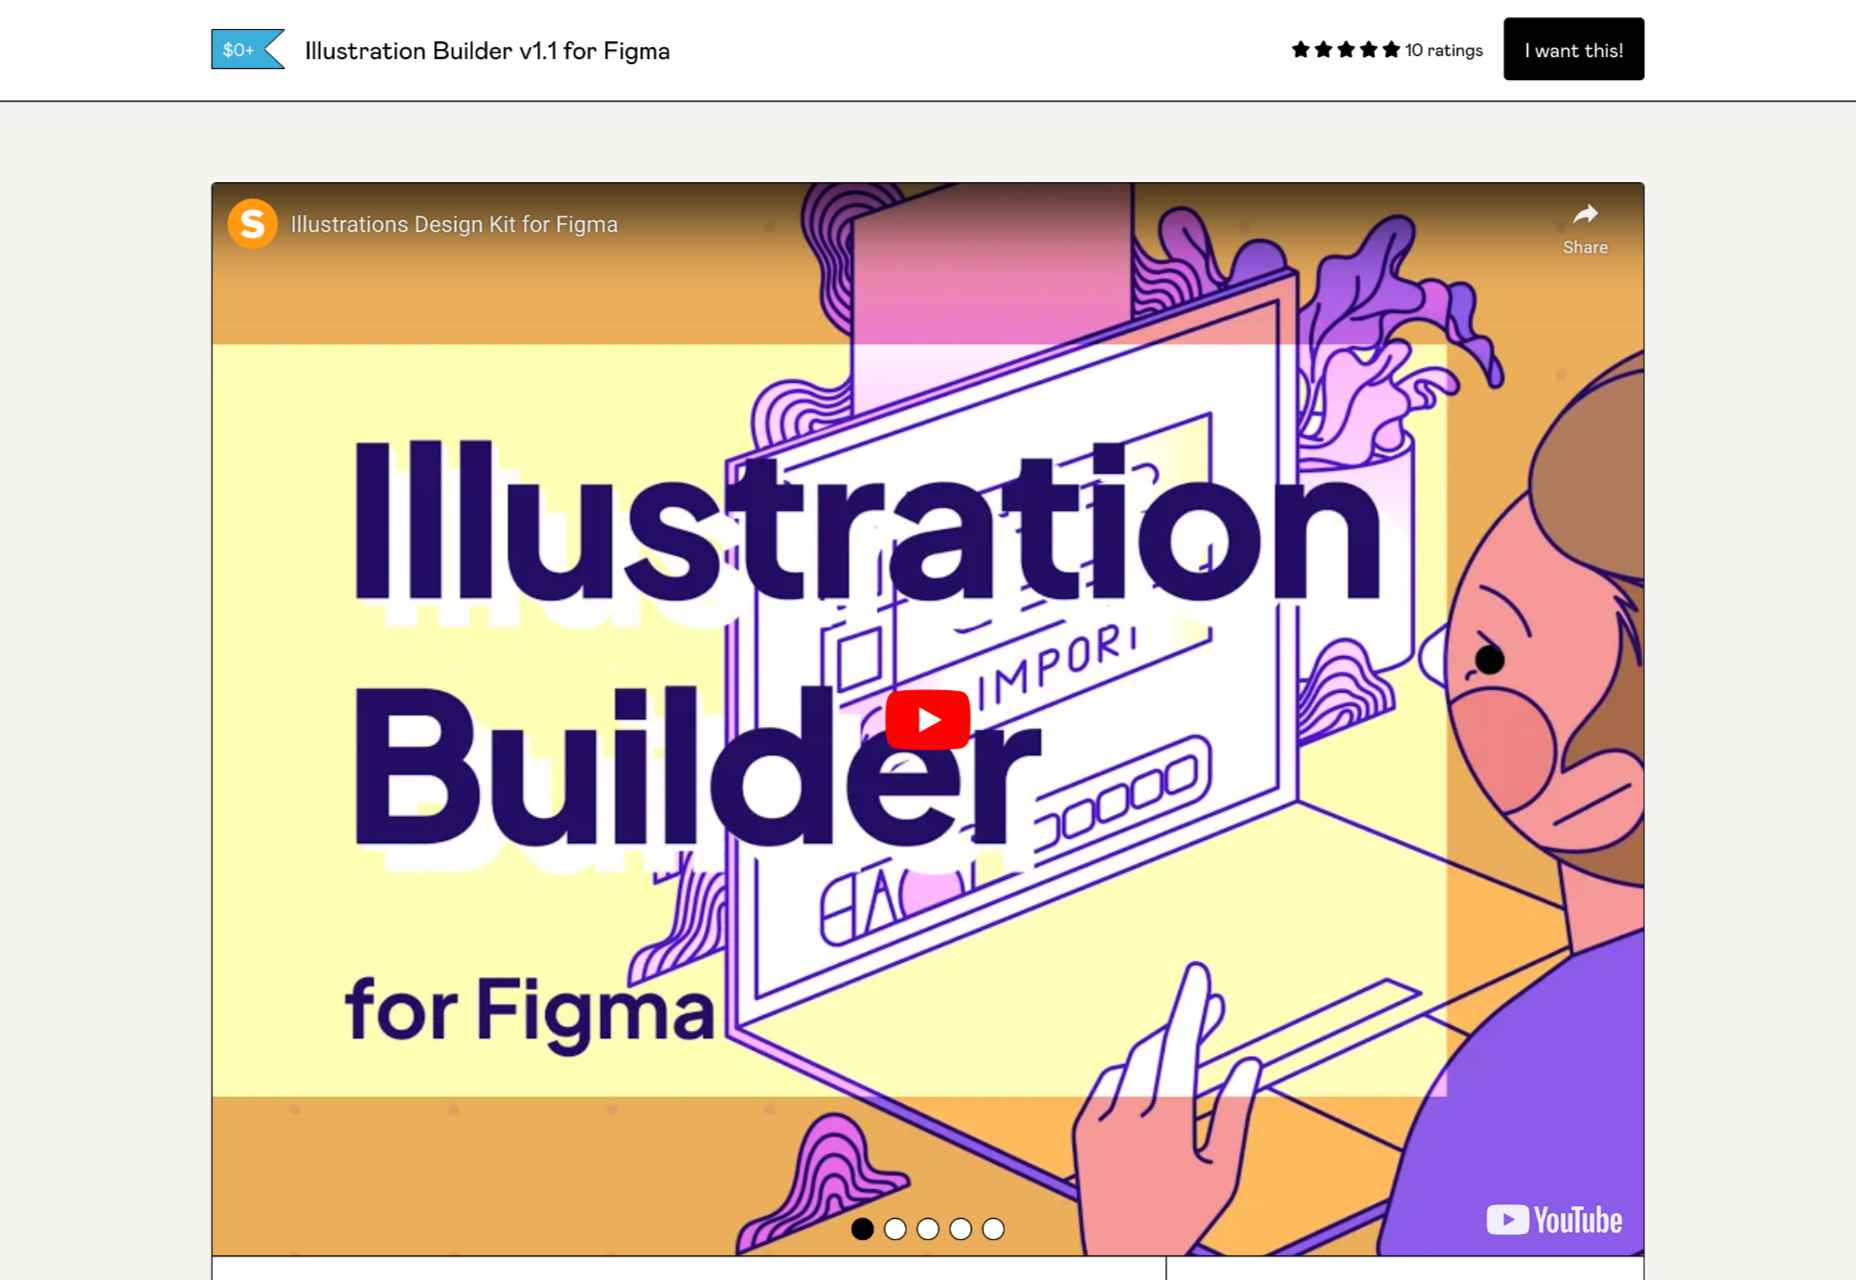
Illustration Builder

The Illustration Builder digital designer toolkit is a Figma plugin for creating beautiful illustrations for your business website. You can create any illustration with a wide range of objects, backgrounds, characters, abstractions, and more.

OptiMonk

With OptiMonk, you can create beautiful pop-ups for Shopify, WordPress, MailChimp, and more that will help you increase your marketing reach, increase customer engagement and boost your conversions.

Jot

Jot is a marketing tool that uses OpenAI’s GPT-3 to generate human-like ad copy based on a single product description. With Jot, you can create engaging adverts quickly and easily.

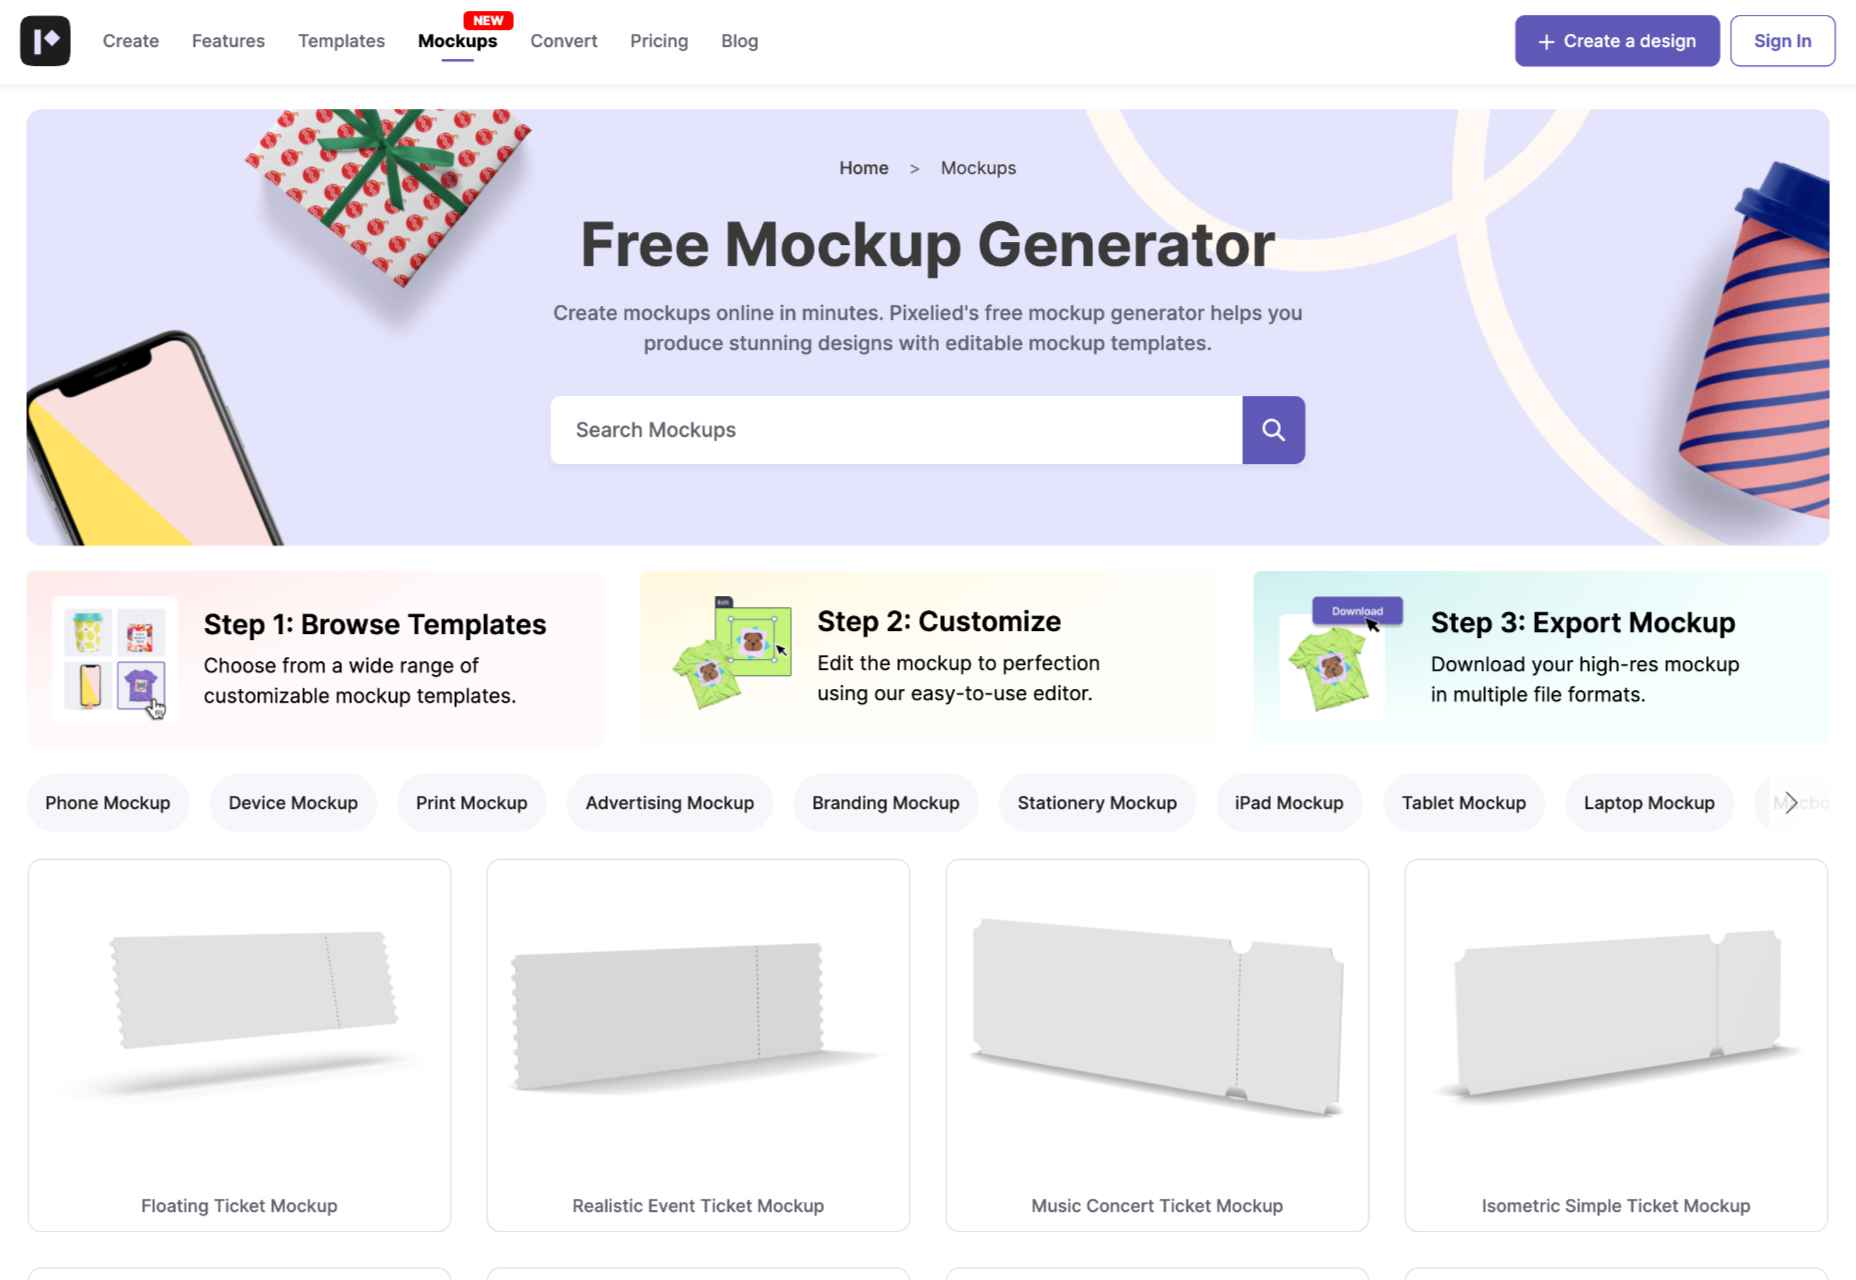
Free Mockup Generator

Pixelied’s free mockup generator allows you to create stunning designs with editable mockups in minutes. With a wide range of customizable templates to choose from, you can design the perfect mockup for your project.

Womp

Womp is a new way to create 3D images. Intuitive and easy to use. With Womp, you can create beautiful 3D designs. Everything you create in Womp is exportable for 3D printing, social media, or directly into a game. It’s a great way to produce 3D icons and illustrations for your website.

Tinkerwell

Tinkerwell is a must-have companion to your favorite IDE. Quickly iterate on PHP code within the context of your web application. There’s no need to waste time opening browsers, creating test URLs, and uploading apps to servers. Use Tinkerwell locally, via SSH, Docker, and even on Laravel Vapor.

Magical

Magical is a tool that helps you speed up the meeting scheduling process. With Magical, you can easily find time slots that work for everyone and create personalized links to those slots. With Magical’s Dynamic Availability feature, you and your attendees can always find the best meeting time.

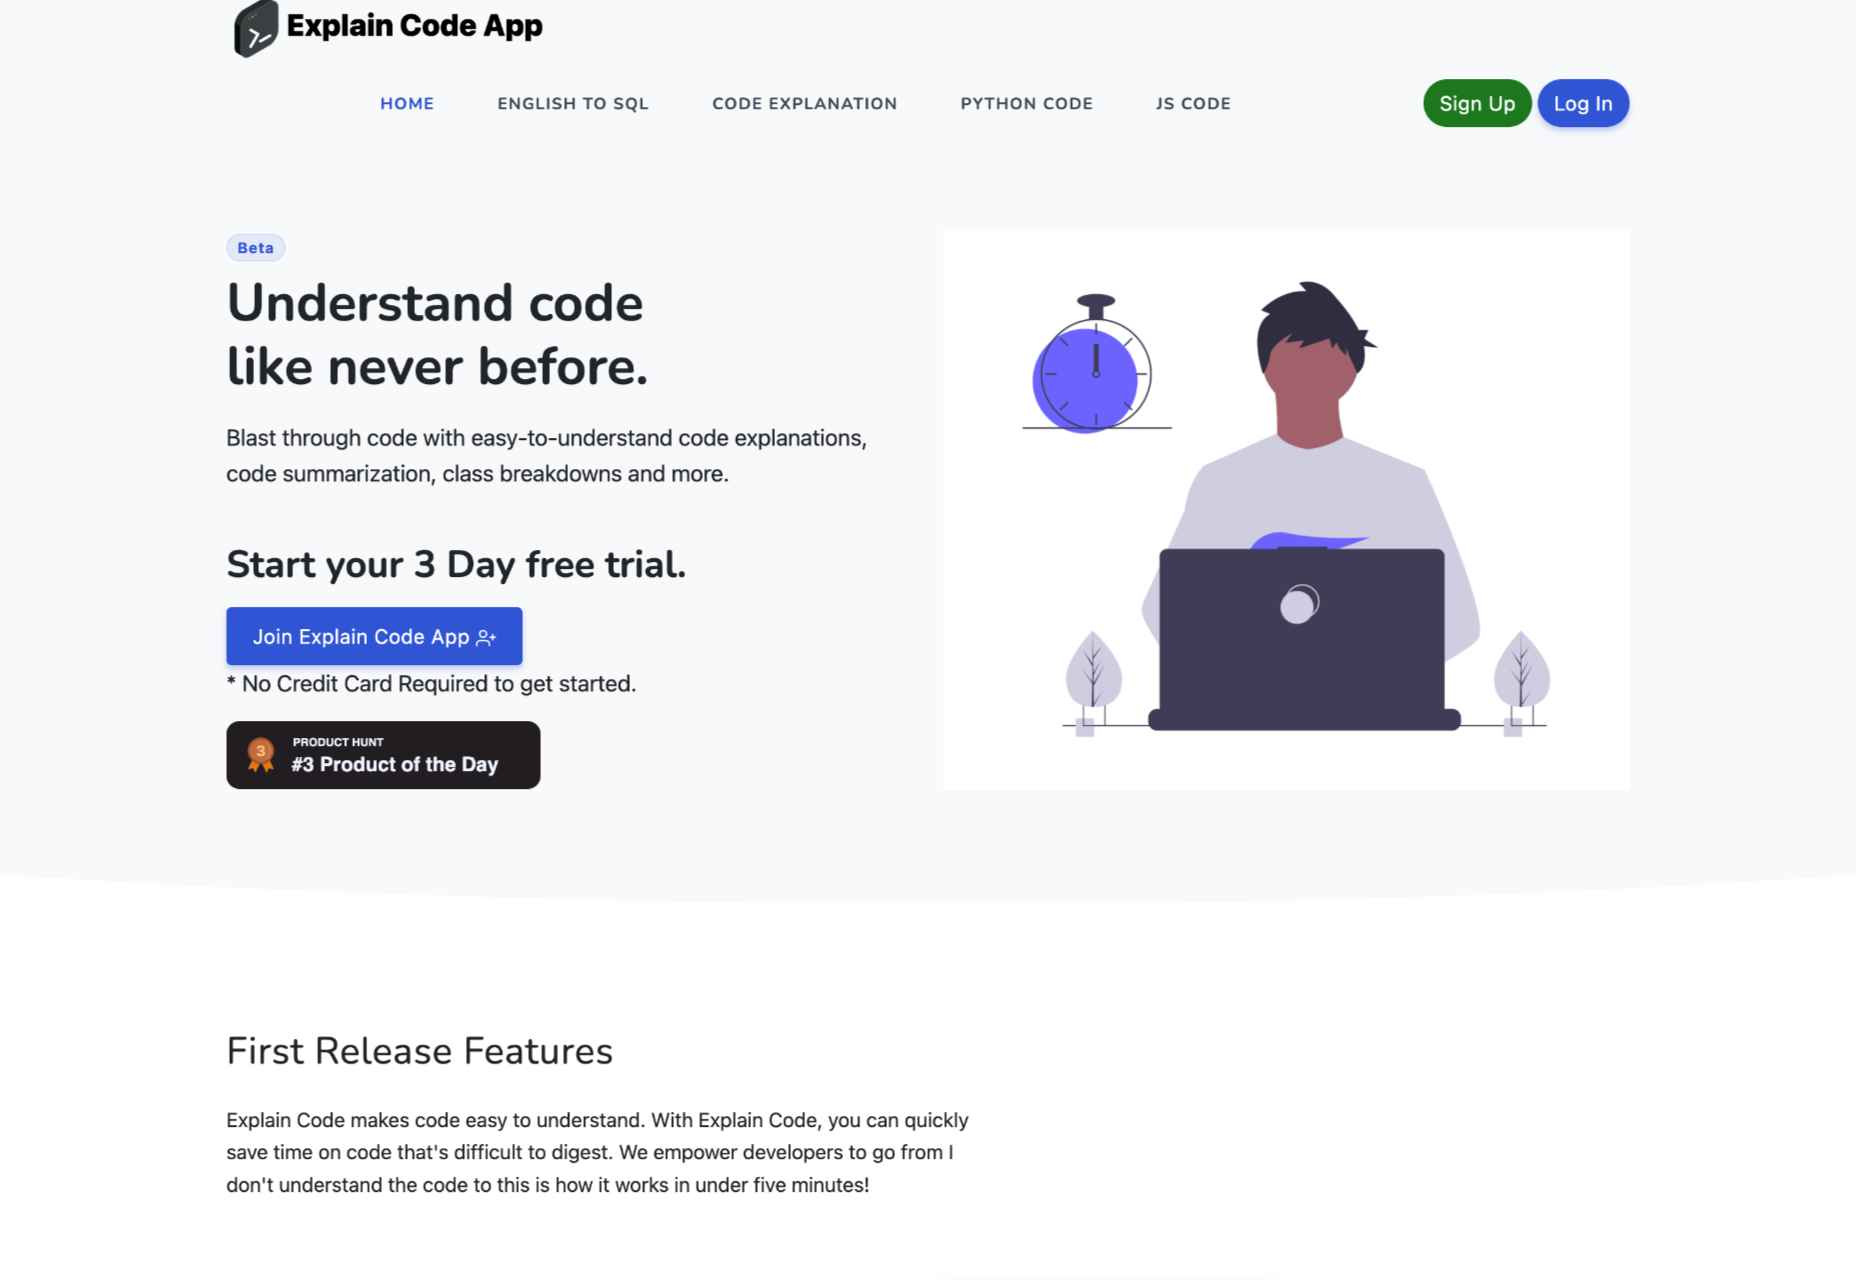
Explain Code

Explain Code is a great way to understand complicated code. You can see how the code works line by line and learn about programming concepts. Gain in-depth knowledge of how and why code is constructed and fast-track your learning process.

Shuffle Alternatives

Shuffle Alternatives allows you to create multiple site styles with a simple drag-and-drop builder. Create your core design and then choose from different design styles for a site that best fits your brand approach.

Idea Clarity

Get help honing your ideas, perfecting your pitch, and targeting the most profitable directions. Idea Clarity is an app that gives you direct access to experts in your chosen field who will help you revise your rough idea into a concrete plan.

Graphicsly

Graphicsly is an all-in-one graphics assets plugin for WordPress that lets you import directly into your installation. There are 1000+ 3D assets, 3000+ illustrations, and 9000+ icons ready to use today.

Source

The post Exciting New Tools for Designers, December 2022 first appeared on Webdesigner Depot.

Categories: Designing, Others Tags:

Free Analytic Tools to Boost Traffic to your Clinic Website

December 5th, 2022 No comments

Part of the quality care that you provide for your clients involves ongoing check-ups and reports to track their recovery from injury. Their day-to-day habits like eating and exercise, their consistency with taking medication, and their body’s response to their health regimen must be watched and adjusted accordingly, to produce the best possible outcomes.

The same is true for any hospital or clinic marketing plan designed to increase traffic to your website and practice. In this case, check-ups involve the careful consideration of accurate analytics data. Use the following tools to discern which data is most important for tracking your website’s reach, and improving its overall performance.

Google Analytics (GA)

Google Analytics is an arm of the number one search engine in the world, and the most popular tool for collecting data about your website traffic. With GA you can learn which content on your site is most enticing for visitors and how they engage with it.

Use GA to find out:

  • The amount of time visitors remain on your site
  • The amount of time they spend on specific site pages
  • What other websites or searches directed them to yours
  • Which links visitors engage with most on your site

Hubspot

With Hubspot, you can use inbound marketing to attract new patients to your hospital or clinic. Inbound Marketing is the deployment of consistent blogging, article and content creation, and social media posting. You’re bound to increase your clinic’s online visibility with a consistent posting schedule.

You can use the platform’s Customer Relationship Management (CRM) tool to make short work of organizing your client and prospect information. Plus, as a partner with Google, you can easily link Hubspot to your GA account for the creation of data reports.

Matomo

Matomo is very similar to GA, but it is open-source. So, anyone who uses it can tweak the software to customize the process of collecting, evaluating, and distributing data. If you have a WordPress website, you can use Matomo at no charge.

Matomo offers a level of security that you don’t get with GA as well. Use the DoNotTrack setting to prevent the collection of your website visitors’ personal data and protect them from potential fraud.

Google Optimize

If you’ve ever used A/B Testing to compare two versions of a business strategy or marketing plan, you know that the results can provide valuable information that helps you understand where to best invest your time and resources.

Google Optimize provides a ready-made platform for this kind of testing. For your most important marketing campaigns, use Optimize to:

  • Test new types of landing pages.
  • See how visitors respond to different website color schemes.
  • Try different content writing styles to find out which ones your audience responds to best.
  • Evaluate the results of each experiment

Choose the most effective methods according to your results, and develop long-term lead-generation strategies based on them.

Google Data Studio

Sometimes data can be difficult to understand without easy-to-view formatting. Google Data Studio lets you transform analytics information from your content platforms into reports. Use ready-made templates the program provides to save time and avoid having to create your own from scratch.

You can convert data into tables, geographical maps, graphs, and various kinds of charts. Include videos and links to reports and content to help clarify the results. Then, with one glance, you and your employees can see how your strategies are impacting your clinic and then brainstorm on ways to improve them.

Finteza

If you’ve ever wondered how much of your website’s traffic consists of real people versus bots, then Finteza is the free analytics tool for you. It uses a Bot Detector to scan your website and determine what percentage of your visitors are actual humans with whom you can build relationships.

Finteza also provides information about your visitors’ behavior when on your website. Weed through the spammers and find the most effective ways to reach out to your prospects.

Adjust the wording or format of a page or marketing tool if you find that it’s attracting too much attention from bots. In this way, you can become more efficient in the creation of web content and your marketing campaigns.

Similarweb

To hook your visitors and keep their attention for the longest time possible, you need to combine a compelling message with captivating visuals plus relevant content. However, you also need to monitor your competition, to understand which strategies work for them.

Similarweb is an analytics tool that allows you to compare your data with information collected about your competitor’s websites. You can increase your hospital or clinic search engine optimization (SEO) by employing the same techniques that have helped other practices grow by leaps and bounds.

Also, you can use this tool to evaluate who their primary affiliates are. Reach out to them, and establish relationships to grow your network and gain access to a wider audience.

Use Analytics to Develop Your Practice

You know how important it is to keep an eye on a recovering patients, to help them improve their health. Use that same logic when developing a marketing strategy for your practice, and you’ll see rapid growth in your clientele. Couple your efforts with an experienced hospital and clinic marketing service provider, and you could potentially see exponential growth in the near future.

The post Free Analytic Tools to Boost Traffic to your Clinic Website appeared first on noupe.

Categories: Others Tags:

Top 5G Security Considerations for Enterprises

December 5th, 2022 No comments

Over 7 trillion wireless devices are expected to be interconnected through the 5G network. As 5G adoption becomes more widespread, enterprises have started evaluating use cases for deploying 5G networks. 5G networks allow for industrial-scale IoT networks with ultra-low latency, mission-critical reliability, and a high degree of mobility. The network security of enterprises and that of their connected devices shouldn’t be considered only in hindsight. While 5G was designed from the ground up with safety at the forefront, it’s not entirely secure.

In ensuring the security of 5G networks, it is essential to consider the vulnerabilities and threats of the infrastructure. Also, the potential risks in protecting individuals’ personal data and their privacy should also be considered. Here are key areas for the enterprises to focus on to ensure a secure 5G deployment:

Cybersecurity and 5G Technology

5G networking technology is more reliant on software. Therefore, the chance of the network infrastructure getting exploited by cybercriminals is much higher. Currently, the 5G supply chains are limited. This means that the networking devices are purchased in haste without proper understanding. 

This increases the potential for faulty components. Any of these potential faults can lead to the long-term detriment of businesses. Regarding data and network characteristics, the enterprise may use the controls such as enhanced subscriber identity protection and new mutual authentication capabilities.

Adopt Zero Trust best practices

Zero Trust best practices are based on the principle of “never trust, always verify.” It assumes that IT networks are constantly under internal and external threats. No user should have access to an organization’s network, services, or IT systems until they authenticate and always verify themselves. This includes every device, user, and network flow. 

The Zero Trust Policies that an enterprise creates for itself must be dynamic and must be calculated from multiple data sources. They should also aim to make network security a simple process rather than a complex one. Enterprises adopting Zero Trust best practices is a chance for them to revamp their overall cybersecurity.

Network slicing feature

Network slicing is the division of networks at the software level. This new tool allows the 5G operators to offer more targeted services to the customers as per their needs. The needs of customers and devices connected to the Internet are becoming more and more specific. 

The transition to 5G has led to the clear separation of various network components. A network slice is a part of the network that is logically separated from the rest. It is independent and has specific security measures to protect it. It can be adapted to meet specific requirements. Furthermore, it can be dedicated to a single customer, or multiple users can share it.  

The operational management of the various slices according to the needs of the network, users, and traffic is largely automated, thanks to the orchestration functions. Network slicing is made possible by a profound architectural change that includes all the network components (core, RAN, transport, cloud). This factor allows allocating greater and/or specific resources to different customers or services. 

In particular, the core is used to control cloud-native technologies, which allows exploiting the same resources, including hardware. However, it is recommended to carry out divisions at a logical level to dedicate the calculation and transmission capacity of the devices to specific applications.

Considering Low Latency as a Threat

Low latency allows faster data analysis, data downloads, and communication. This, in turn, accelerates the speed at which cyber attacks are carried out. The enterprise can prevent this threat by adopting practices like active queue management and re-architecting congestion control.

Low latency is harmful and can lead to large-scale cybercrimes. If the business wants to protect its data from all types of threat actors, proper cybersecurity practices must be in place to ensure that there is no area for criminals to exploit. 

Core Services Security

Technology innovation security and virtualization infrastructure are the foundations of 5G core service security. Apart from these, enterprises must also consider cybersecurity issues in their day-to-day operations. Security considerations include integration with security operations centres (SOCs), zoning for communication controls, and realizing the proof of concept of the security functions.

RAN Security

Open RAN does not necessarily increase network security. This is mainly because of the design of the O-ran specification development process, which didn’t take the principles of multilateral security and privacy into account. There are also potential risks of unauthorized access to network component management interfaces that could easily cause a compromise.

Apart from the core functions, the RAN controller provides a platform on which further functions can be implemented with third-party applications. This is another security risk for enterprises. In the coming years, enterprises will need to work on a new type of 5G network architecture that will provide an alternative way of deploying the radio access part of 5G networks based on open interfaces. The other risks include an increased risk of network misconfiguration, a larger attack surface and more entry points for cybercriminals. With 5G implementation, there might be a potential impact on other network functions due to resource sharing.

Endpoint Security in Enterprises

To guarantee adequate enterprise protection against cyber attacks within their perimeter and range of action, endpoint security is crucial. From a technical point of view, endpoints consist of all devices capable of connecting to the corporate network. This definition immediately clarifies the importance of securing the entire network structure because endpoints represent potential entry points for IT threats. 

It is, therefore, essential to provide adequate protection for each link in the network chain, where endpoints are often the weakest. Endpoints include various sensors in factories, mostly present in drones and cranes. The main goal is endpoint security in 5G implementation is preventing and fighting forms of abuse of endpoints. Countermeasures should be devised against exploiting radio-connected endpoint devices that use new identifiers. In light of the GDPR, all the processing and flows of personal data of end users of 5G technologies must be operated in such a way as to guarantee maximum security.

Conclusion

5G implementation has numerous benefits for enterprises, including scalability and speed. The same qualities can amplify the damage caused by threats if precautions are not taken. Regarding 5G implementation, enterprises need to focus on preventing unauthorized access to personal data and connected devices. 

For optimum 5G Security, the enterprise must address five key end-to-end operations, including radio transport, telco cloud, IoT and devices, security operations, and slicing security. How the user is recognized by the enterprise network should be extremely solid and should guarantee that the user’s identity and data are not compromised.

The post Top 5G Security Considerations for Enterprises appeared first on noupe.

Categories: Others Tags:

A Guide To Social Commerce

December 2nd, 2022 No comments

When we talk about social commerce, the two terms – social media and e-commerce instantly strike our minds. And rightly so. Social commerce is the integration of e-commerce in social media platforms, and it is also the next big thing every business will prioritize. 

And we say you get started before everyone does. If you are an e-commerce brand and sell products online, then you probably know the functionality, hassles, and benefits of e-commerce. And now, there is a new way of marketing – social commerce.

In this blog, we will tell you all about social commerce, and why you should introduce social commerce strategy into your e-commerce business.

Why Introduce Social Commerce Into E-Commerce Marketing?

In today’s times, the shelf value of new inventions and discoveries is comparatively lower than what it used to be. People are looking for new things to explore and new technologies to rely on.

There used to be a time when shopping online used to seem impossible, but in the past years, we have seen not only a terrific boom and acceptance of e-commerce as a concept but also online shopping becoming extremely mainstream. People trust e-commerce stores, and that’s something you can use as a brand to your benefit. 

Here is why you should introduce social commerce into your e-commerce marketing strategy.

It Widens Your Customer Base

Setting up a social shop is a great way to widen your customer base. Social commerce helps brands to sell their products through social media. This means your audience can be as wide as you want, and you can effectively reach a much larger audience. You can run social media campaigns and contests and directly use the generated content in your social shop.

A Great Strategy To Build Trust

Gaining brand trust is the most important strategy in building any e-commerce brand. A social shop can gain the confidence of customers in a much better way than any other strategy. You can use user-generated reviews and visual content like images and videos as social proof and build a credible reputation for your brand. Brands can create an ecosystem of transparency and genuine customer feedback to keep customers coming back for more.

Makes The Shopping Process Easy

Social commerce has many amazing benefits, but the best one has to be the smooth shopping process it provides. It is the most convenient way to shop because social commerce makes the shopping process faster and smoother. Many platforms provide features such as the buy button and in-app checkout; social commerce removes any distractions and lengthy and unnecessary steps for the shoppers.

How To Introduce Social Commerce Into E-commerce Marketing?

Now that you know the benefits of integrating social commerce into your e-commerce marketing strategy, let us talk about how to introduce social commerce into your e-commerce marketing strategy.

Many social media platforms allow users to set up social shops on social media and let you sell products directly through social media. Other than that, many e-commerce tools out there help brands sell their products socially rather than through social media. 

Instagram

Being the top social media platform of the decade, people use Instagram avidly to explore and search for brands and products.

By setting up an Instagram shop for your brand, you can invite an unmatchable audience and eventually increase conversions. 

There are many ways you can you Instagram’s social commerce feature, such as the Shopping Tags enables businesses to tag their products in posts and stories. This is a more direct way. 

You can also sell products through the ‘Shop Tab.’ This is a separate space where shoppers can browse and buy products that are listed by the brand itself or collaborators. 

E-Commerce Tools

Another way to introduce social commerce into your e-commerce strategy is by relying on e-commerce tools like Taggshop. You can use this highly functional tool to create a shoppable feed of UGC or social content through a singular source like a hashtag or user handle and attach it to your e-commerce website. 

With this way of social commerce, you get to flaunt your social media presence and attract more customers to trust your brand. 

Over To You

E-Commerce is still a big thing in the market world, but as it is said, change is the only constant. It is important to keep constantly evolving and changing your brand’s implementation strategies. It is important to know where your e-commerce business is in terms of growth. 

Social commerce is that new big thing every industry is hopping upon because of its unmatchable benefits and scope in the future. 

By now, you are well aware of the functionalities of social commerce, and we hope this blog helps you implement it in your strategies.

The post A Guide To Social Commerce appeared first on noupe.

Categories: Others Tags:

CSS Infinite and Circular Rotating Image Slider

December 2nd, 2022 No comments

Image sliders (also called carousels) are everywhere. There are a lot of CSS tricks to create the common slider where the images slide from left to right (or the opposite). It’s the same deal with the many JavaScript libraries out there that create fancy sliders with complex animations. We are not going to do any of that in this post.

Through a little series of articles, we are going to explore some fancy and uncommon CSS-only sliders. If you are of tired seeing the same ol’ classic sliders, then you are in the right place!

CSS Sliders series

For this first article, we will start with something I call the “circular rotating image slider”:

CodePen Embed Fallback

Cool right? let’s dissect the code!

The HTML markup

If you followed my series of fancy image decorations or CSS grid and custom shapes, then you know that my first rule is to work with the smallest HTML possible. I always try hard to find CSS solutions before cluttering my code with a lot

s and other stuff.

The same rule applies here — our code is nothing but a list of images in a container.

Let’s say we’re working with four images:

<div class="gallery">
  <img src="" alt="">
  <img src="" alt="">
  <img src="" alt="">
  <img src="" alt="">
</div>

That’s it! Now let’s move to the interesting part of the code. But first, we’re going to dive into this to understand the logic of how our slider works.

How does it work?

Here is a video where I remove overflow: hidden from the CSS so we can better understand how the images are moving:

It’s like our four images are placed on a large circle that rotates counter-clockwise.

All the images have the same size (denoted by S in the figure). Note the blue circle which is the circle that intersects with the center of all the images and has a radius (R). We will need this value later for our animation. R is equal to 0.707 * S. (I’m going to skip the geometry that gives us that equation.)

Let’s write some CSS!

We will be using CSS Grid to place all the images in the same area above each other:

.gallery  {
  --s: 280px; /* control the size */

  display: grid;
  width: var(--s);
  aspect-ratio: 1;
  padding: calc(var(--s) / 20); /* we will see the utility of this later */
  border-radius: 50%;
}
.gallery > img {
  grid-area: 1 / 1;
  width: 100%;
  height: 100%;
  object-fit: cover;
  border-radius: inherit;
}

Nothing too complex so far. The tricky part is the animation.

We talked about rotating a big circle, but in reality, we will rotate each image individually creating the illusion of a big rotating circle. So, let’s define an animation, m, and apply it to the image elements:

.gallery > img {
  /* same as before */
  animation: m 8s infinite linear;
  transform-origin: 50% 120.7%;
}

@keyframes m {
  100% { transform: rotate(-360deg); }
}

The main trick relies on that highlighted line. By default, the CSS transform-origin property is equal to center (or 50% 50%) which makes the image rotate around its center, but we don’t need it to do that. We need the image to rotate around the center of the big circle that contains our images hence the new value for transform-origin.

Since R is equal to 0.707 * S, we can say that R is equal to 70.7% of the image size. Here’s a figure to illustrate how we got the 120.7% value:

Let’s run the animation and see what happens:

CodePen Embed Fallback

I know, I know. The result is far from what we want, but in reality we are very close. It may looks like there’s just one image there, but don’t forget that we have stacked all the images on top of each other. All of them are rotating at the same time and only the top image is visible. What we need is to delay the animation of each image to avoid this overlap.

.gallery > img:nth-child(2) { animation-delay: -2s; } /* -1 * 8s / 4 */
.gallery > img:nth-child(3) { animation-delay: -4s; } /* -2 * 8s / 4 */
.gallery > img:nth-child(4) { animation-delay: -6s; } /* -3 * 8s / 4 */

Things are already getting better!

CodePen Embed Fallback

If we hide the overflow on the container we can already see a slider, but we will update the animation a little so that each image remains visible for a short period before it moves along.

We’re going to update our animation keyframes to do just that:

@keyframes m {
  0%, 3% { transform: rotate(0); }
  22%, 27% { transform: rotate(-90deg); }
  47%, 52% { transform: rotate(-180deg); }
  72%, 77% { transform: rotate(-270deg); }
  98%, 100% { transform: rotate(-360deg); }
}

For each 90deg (360deg/4, where 4 is the number of images) we will add a small pause. Each image will remain visible for 5% of the overall duration before we slide to the next one (27%-22%, 52%-47%, etc.). I’m going to update the animation-timing-function using a cubic-bezier() function to make the animation a bit fancier:

CodePen Embed Fallback

Now our slider is perfect! Well, almost perfect because we are still missing the final touch: the colorful circular border that rotates around our images. We can use a pseudo-element on the .gallery wrapper to make it:

.gallery {
  padding: calc(var(--s) / 20); /* the padding is needed here */
  position: relative;
}
.gallery::after {
  content: "";
  position: absolute;
  inset: 0;
  padding: inherit; /* Inherits the same padding */
  border-radius: 50%;
  background: repeating-conic-gradient(#789048 0 30deg, #DFBA69 0 60deg);
  mask: 
    linear-gradient(#fff 0 0) content-box, 
    linear-gradient(#fff 0 0);
  mask-composite: exclude;
}
.gallery::after,
.gallery >img {
  animation: m 8s infinite cubic-bezier(.5, -0.2, .5, 1.2);
}

I have created a circle with a repeating conic gradient for the background while using a masking trick that only shows the padded area. Then I apply to it the same animation we defined for the images.

We are done! We have a cool circular slider:

CodePen Embed Fallback

Let’s add more images

Working with four images is good, but it would be better if we can scale it to any number of images. After all, this is the purpose of an image slider. We should be able to consider N images.

For this, we are going to make the code more generic by introducing Sass. First, we define a variable for the number of images ($n) and we will update every part where we hard-coded the number of images (4).

Let’s start with the delays:

.gallery > img:nth-child(2) { animation-delay: -2s; } /* -1 * 8s / 4 */
.gallery > img:nth-child(3) { animation-delay: -4s; } /* -2 * 8s / 4 */
.gallery > img:nth-child(4) { animation-delay: -6s; } /* -3 * 8s / 4 */

The formula for the delay is (1 - $i)*duration/$n, which gives us the following Sass loop:

@for $i from 2 to ($n + 1) {
  .gallery > img:nth-child(#{$i}) {
    animation-delay: calc(#{(1 - $i) / $n} * 8s);
  }
}

We can make the duration a variable as well if we really want to. But let’s move on to the animation:

@keyframes m {
  0%, 3% { transform: rotate(0); }
  22%, 27% { transform: rotate(-90deg); }
  47%, 52% { transform: rotate(-180deg); }
  72%, 77% { transform: rotate(-270deg); }
  98%, 100% {transform: rotate(-360deg); }
}

Let’s simplify it to get a better view of the pattern:

@keyframes m {
  0% { transform: rotate(0); }
  25% { transform: rotate(-90deg); }
  50% { transform: rotate(-180deg); }
  75% { transform: rotate(-270deg); }
  100% { transform: rotate(-360deg); }
}

The step between each state is equal to 25% — which is 100%/4 — and we add a -90deg angle — which is -360deg/4. That means we can write our loop like this instead:

@keyframes m {
  0% { transform: rotate(0); }
  @for $i from 1 to $n {
    #{($i / $n) * 100}% { transform: rotate(#{($i / $n) * -360}deg); }  
  }
  100% { transform: rotate(-360deg); }
}

Since each image takes 5% of the animation, we change this:

#{($i / $n) * 100}%

…with this:

#{($i / $n) * 100 - 2}%, #{($i / $n) * 100 + 3}%

It should be noted that 5% is an arbitrary value I choose for this example. We can also make it a variable to control how much time each image should stay visible. I am going to skip that for the sake of simplicity, but for homework, you can try to do it and share your implementation in the comments!

@keyframes m {
  0%,3% { transform: rotate(0); }
  @for $i from 1 to $n {
    #{($i / $n) * 100 - 2}%, #{($i / $n) * 100 + 3}% { transform: rotate(#{($i / $n) * -360}deg); }  
  }
  98%,100% { transform: rotate(-360deg); }
}

The last bit is to update transform-origin. We will need some geometry tricks. Whatever the number of images, the configuration is always the same. We have our images (small circles) placed inside a big circle and we need to find the value of the radius, R.

You probably don’t want a boring geometry explanation so here’s how we find R:

R = S / (2 * sin(180deg / N))

If we express that as a percentage, that gives us:

R = 100% / (2 * sin(180deg / N)) = 50% / sin(180deg / N)

…which means the transform-origin value is equal to:

transform-origin: 50% (50% / math.sin(180deg / $n) + 50%);

We’re done! We have a slider that works with any number images!

CodePen Embed Fallback

Let’s toss nine images in there:

CodePen Embed Fallback

Add as many images as you want and update the $n variable with the total number of images.

Wrapping up

With a few tricks using CSS transforms and standard geometry, we created a nice circular slider that doesn’t require a lot of code. What is cool about this slider is that we don’t need to bother duplicating the images to keep the infinite animation since we have a circle. After a full rotation, we will get back to the first image!


CSS Infinite and Circular Rotating Image Slider originally published on CSS-Tricks, which is part of the DigitalOcean family. You should get the newsletter.

Categories: Designing, Others Tags: