There’s no escaping it: the biggest obstacle writers face is that blank page. Sometimes that white rectangle seems like such a lonely place that we’d do almost anything to avoid it. When you’re a blogger, the number one form of procrastination is “working” on your site.
Are you wondering how to create a WooCommerce cart discount without breaking the bank? Great, you’ve reached the right place!
In this WooCommerce guide for beginners, we will explore what WooCommerce cart discounts are, how to set it up, and how it works on your WooCommerce checkout.
Before we move on, please note that WooCommerce provides 3 classes of discounts based on the stage of an order flow. These are product discounts, cart discounts, and checkout discounts/shipping discounts.
Unlike product discounts, which can happen on WooCommerce product page, cart discounts will be visible only when the cart requirements are met. The applied discount can be shown on mini-cart, cart drawer, and cart page. In cart stage, the price reduction can be set to affect the whole order amount or just specific category cart items.
In this tutorial, let’s explore how to set up Apply 20% off whole cart if the customer buys 5 or more items.
Install and activate YayPricing
As a free WooCommerce dynamic pricing plugin, YayPricing can be downloaded from the WordPress repository.
You can also install and activate it directly from your WordPress Plugins screen. Once activated, you don’t need to enter a license key. Just start creating the promotion campaigns you have in mind.
Create a rule for the promotion
Go to YayPricing > Cart Discount and click Add Rule.
Configure the rule to offer a percentage discount
The rule appears as a collapsible card. When expanded, it shows all built-in settings. Please open it and set it to Percentage Discount with value as 20%.
(Optional) Set up additional conditions
Next to Discount tab, you will see Conditions tab. If you don’t add any condition, it means the rule will be always applied as long as it’s active.
To add restrictions for the promotion, please go ahead and add a condition. In this condition, you can specify it as Cart quantity is greater than 4.
That’s how you can configure the rule to apply a 20% off cart total to the customer’s cart based on the product count in their cart.
By following the above mentioned steps, you can quickly create a promotion with an automatic discount that will apply to the customer’s cart automatically.
How to show discount in cart
On WooCommerce cart drawer or cart page, you can enable a message on cart subtotal message to help customers understand on which terms they are getting this discount.
This would be very helpful when you run multiple discounts at the same time, eg,. Black Friday store-wide sale, and a conditional WooCommerce cart discount.
By using this tooltip, you will add an icon next to the cart discount with a custom message.
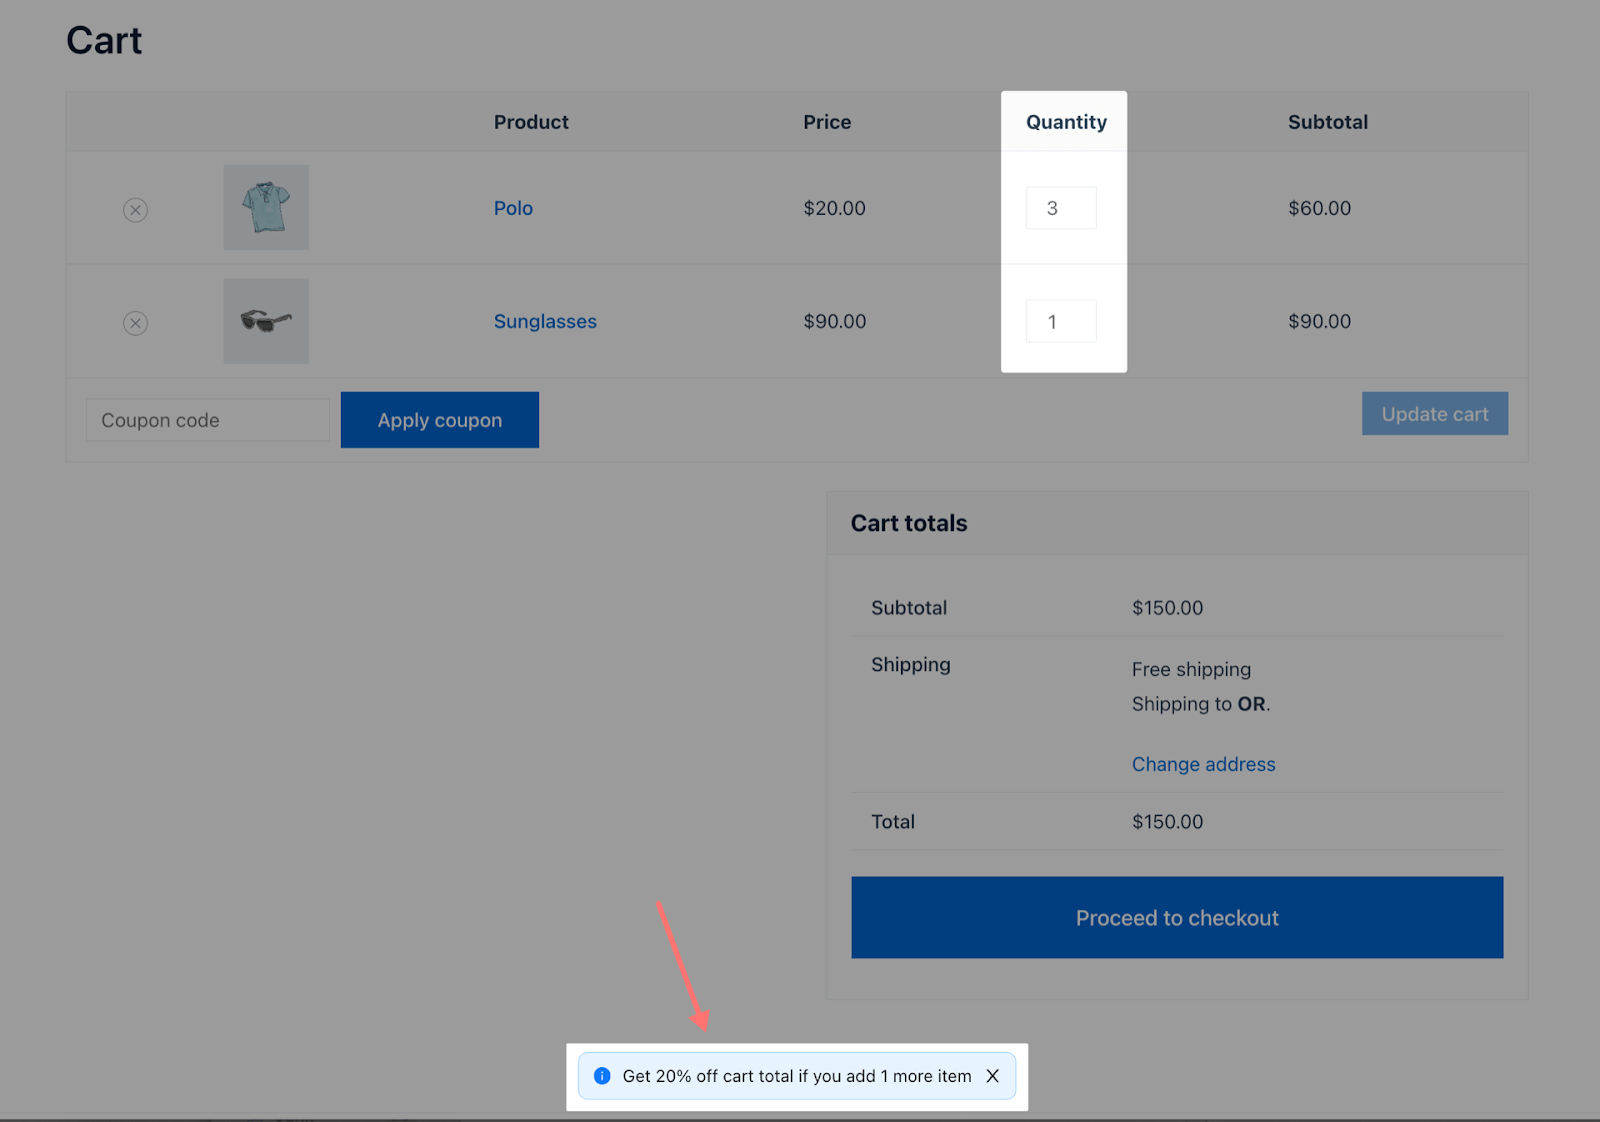
Show upselling notice on WooCommerce store
And how to let your customers know how many they need to buy in order to enjoy the discount?
YayPricing – WooCommerce Dynamic Pricing & Discounts provides this option, too! Just go to the settings and enable Upselling notice.
It will dynamically display a message at the bottom of product page or cart page. For example, if the cart contains only 4 items and it almost reaches your requirement, the notice will be displayed as Get 20% off cart total if you add 1 more item.
Pretty cool, isn’t it?
Please note that not every plugin will provide this dynamic function. By testing a variety of WooCommerce extensions, we have to say that YayPricing is by far one of the best solutions to encourage customers with these custom messages.
Best WooCommerce cart discount plugins
With all the features required for a successful promotional campaign, here are the best WooCommerce cart discount plugins that we have curated.
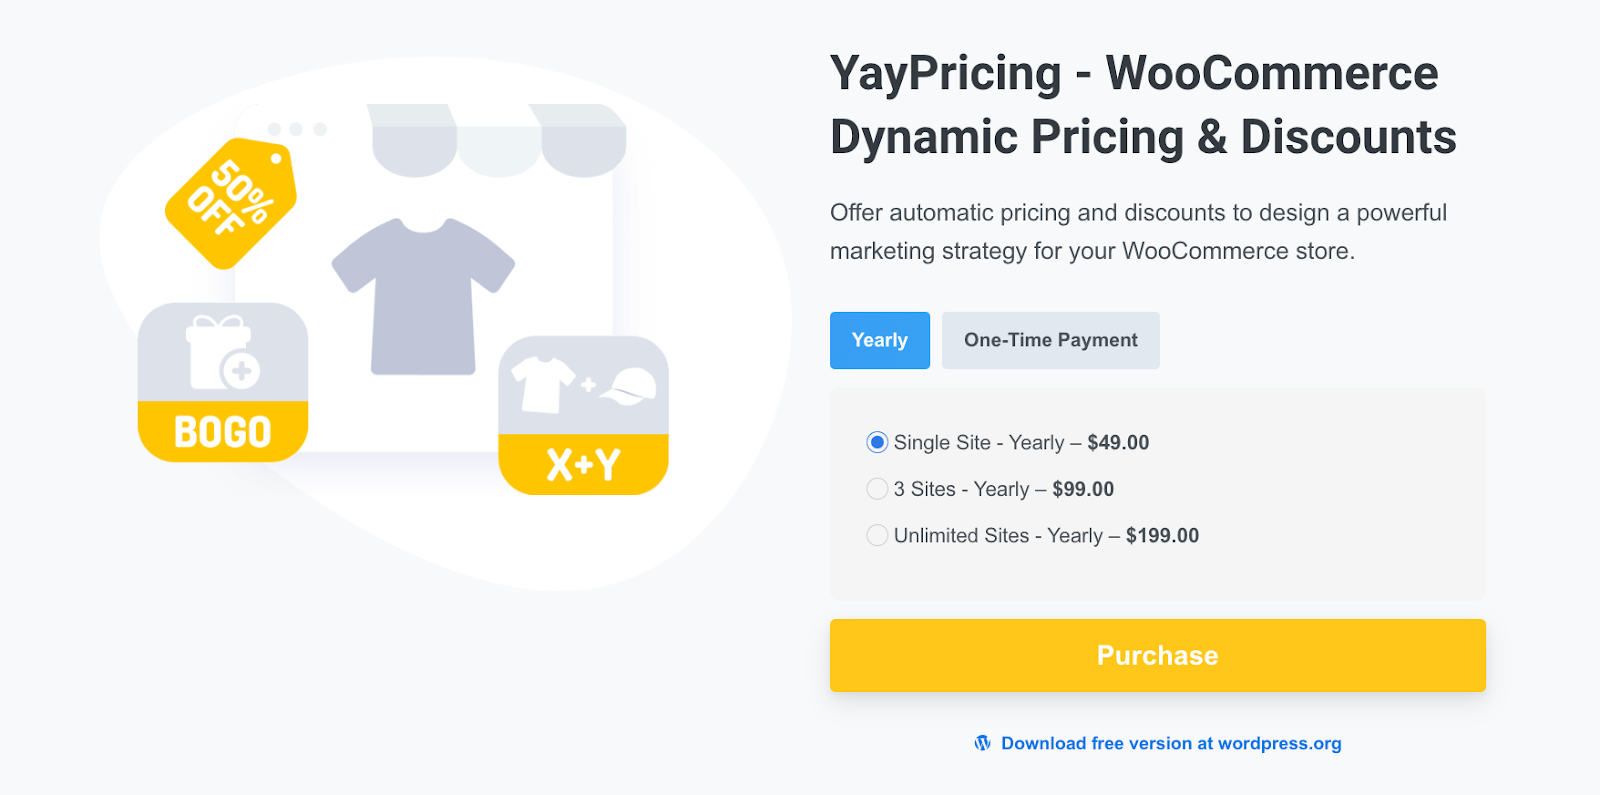
YayPricing comes with the most generous set of WooCommerce cart discount features that are available for free.
With the premium version of YayPricing, you can create unlimited WooCommerce pricing rules that apply to specific products, categories, cart subtotal, and shipping discounts. It allows you to add sophisticated conditions, allowing you to offer discounts based on quantity, user role, purchase history, shipping regions, and much more.
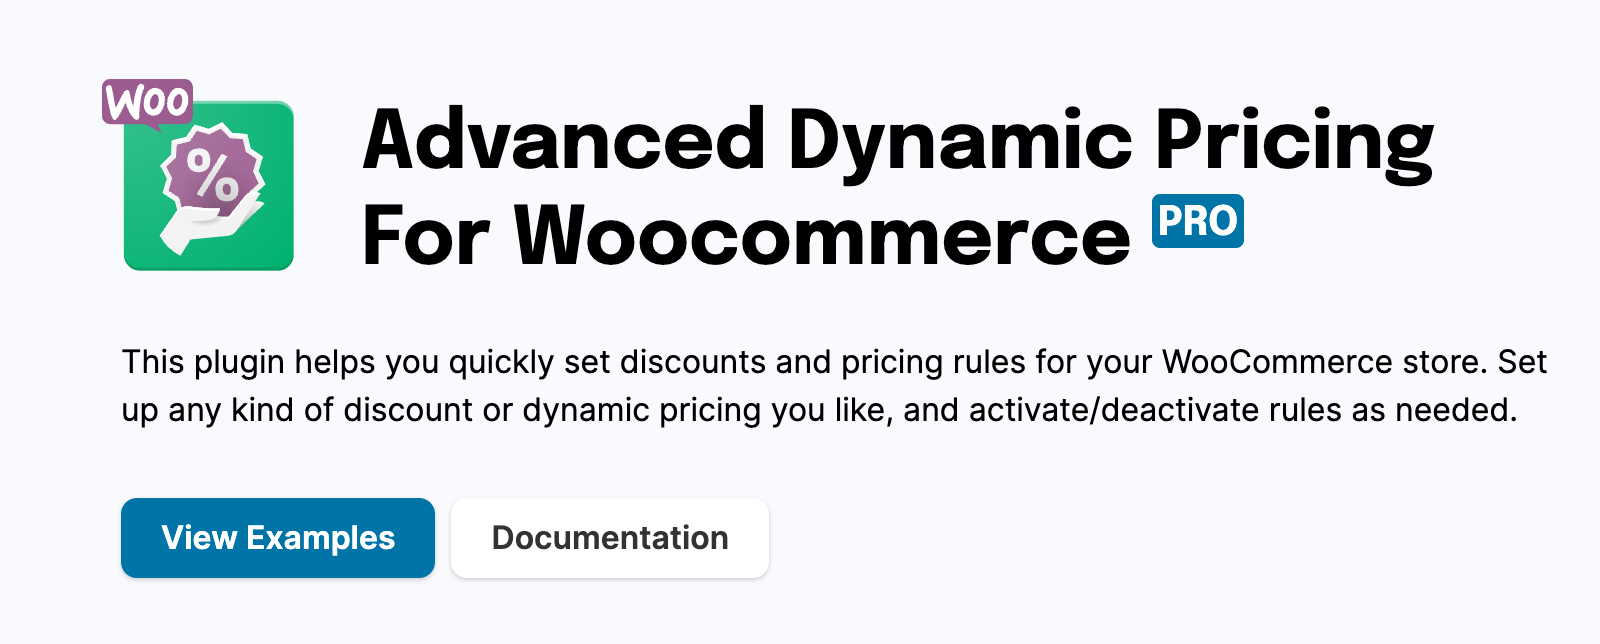
2. Advanced Dynamic Pricing for WooCommerce
This plugin allows you to create automatic discounts based on cart contents, allowing you to offer discounts based on the number of items in the cart or the total value of the cart.
3. Dynamic Pricing With Discount Rules for WooCommerce
This Dynamic Pricing With Discount Rules for WooCommerce plugin allows you to create advanced discounts and fees based on a wide range of conditions, including product attributes, user roles, and cart contents.
4. First Order Discount Woocommerce
QuanticEdge plugin allows you to create a variety of coupons and discounts, including free products, free shipping, and percentage off cart value deals to apply to new customers.
Conclusion
That’s it. Now you may already become a master in WooCommerce cart discounts!
In this article, we have discussed how to configure the rule to apply a discount to the customer’s cart based on the products in their cart.
With YayPricing, it’s easy to specify the amount of the discount as Fixed Cart Discount or Percentage Cart Discount.
Moreover, under the Conditions tab, you can specify additional conditions that need to be met before the automatic discount is applied. For example, you can set a required order amount, limit the discount to specific user roles, or exclude certain products from the promotion.
In today’s fast-paced and competitive business environment, maximizing productivity and profitability is crucial for any organization. To achieve these goals, businesses are constantly seeking innovative solutions that streamline operations, enhance efficiency, and drive growth. One such solution that has gained significant popularity is professional services automation (PSA) tools.
PSA refers to a category of software solutions designed to automate and streamline various aspects of professional services organizations, including project management, resource allocation, and more. These tools provide businesses with a comprehensive platform to manage their projects and resources efficiently, ultimately leading to increased productivity and profitability.
The Benefits of PSA Software for Professional Services Businesses
Improved Project Management
PSA software can support you to manage your projects more competently by providing a unified platform to plan, track, and manage your projects. You can create project plans, allot resources, and track improvement all in one place. This makes it easier to keep track of all the moving parts of your projects and confirms that everybody on your team is on the same page.
Optimal Resource Allocation
PSA software can support you in distributing your resources more effectively. With PSA software, you can see which team members are existing, what their skill sets are, and how much time they have to work on a piece project. This makes it easier to approve that you’re handing over the right persons to the right projects and that everybody is working at their full volume.
Increased Efficiency
PSA software can support your work more resourcefully by automating many of the managerial tasks that take up a lot of your time, like time tracking, invoicing, and reporting. This frees up more time for you and your team to focus on billable work, which can increase your overall productivity.
Enhanced Collaboration
PSA software can help you cooperate more successfully with your team. With PSA software, you can connect with your team members, share files and data, and get real-time updates on project progress. This makes it calmer to work together and lessens the risk of miscommunication.
Accurate and Timely Invoicing
PSA software can support you in sending invoices to your clients more accurately and rapidly. With PSA software, you can make invoices based on the period and resources you’ve spent on each project, and send them to your clients with just a limited click. This can help you get paid quicker and expand your cash flow.
Better Financial Management
PSA software can help you manage your assets more excellently by providing real-time discernibility in your financial presentation. You can monitor your productivity, identify possible issues before they become main difficulties, and make informed results about how to grow your business and expand your bottom line.
In addition to these benefits, PSA software can also help you:
Stay on top of project deadlines and milestones
Monitor team performance and productivity
Identify bottlenecks and other issues that could impact project delivery
Expand customer fulfillment by distributing projects on time and inside budget
Produce precise and complete reports to help you make well-versed choices
To get the greatest out of PSA software, it’s important to choose software that offers your exact needs and budget. You should also take the time to learn the factors to consider when choosing one. Let us discuss some of those factors below.
Factors to Consider When Choosing a PSA Software
Professional services automation (PSA) platforms have evolved significantly over the past years, expanding their capabilities and maturing in the process. The growing adoption of PSA applications has driven the need for more comprehensive and integrated solutions that can effectively manage the various activities of service organizations. To meet these requirements, organizations are looking to replace their outdated PSA systems with modern platforms that offer enhanced features and functionality in a unified package.
When selecting a professional services automation platform, it’s important to consider the following ten key requirements:
Project Management
Modern PSA applications now include robust project management functionality as a core component, providing real-time visibility and collaboration for all stakeholders involved in projects.
Platform Integrations
Integration with other business systems, such as CRM and accounting software, is crucial for seamless collaboration and accurate data exchange between teams.
Services CPQ (Configure, Price, Quote)
Integration of proposals, quoting, and contracts within the PSA platform allows for better management of service contracts, complex billing scenarios, and revenue recognition.
Resource Planning
Today’s PSA applications offer advanced resource planning capabilities, including target utilization, availability backlog, and task-level planning. The ability to search and compare resources based on skills, role, location, and rates is also important.
Utilization
PSA solutions should support detailed calculations of resource utilization. This includes target utilization thresholds, consideration of different types of time-off, and reporting on utilization by project, practice, region, and roles.
Project Billing
Modern PSA platforms can handle complex billing scenarios, such as retainers, managed services, and vendor payments, allowing for accurate and efficient billing processes.
Project Accounting
PSA solutions should provide comprehensive project financials, including bookings, billings, and revenue recognition. This can be integrated with the organization’s accounting system for real-time visibility and informed decision-making.
Extensibility
The ability to customize and tailor the PSA platform to the unique needs of different industries and verticals is crucial. Modern PSA applications offer extensibility features like custom fields, workflow notifications, user-defined reports, dashboards, and even custom applications.
Collaboration
Seamless integration with collaboration tools enables effective project collaboration, ensuring all stakeholders have access to critical project data and can resolve issues promptly.
User-Friendly Experience
PSA applications should provide an intuitive experience for all users across devices, encouraging widespread adoption and collaboration, ultimately leading to increased project profitability and customer success.
By considering these ten key requirements, organizations can choose a professional services automation platform that best suits their needs and empowers their service business with comprehensive and integrated functionality.
Conclusion
Professional services automation (PSA) software can provide frequent benefits to professional amenities businesses. By leveraging PSA software, businesses can expand project organization, distribute resources more excellently, automate managerial tasks, collaborate more efficiently with their team members, invoice clients more precisely and rapidly, and manage their funds more effectively.
PSA software can also support businesses to stay on top of project targets, monitor team presentations, classify bottlenecks and issues, expand customer satisfaction, and produce complete reports to help make informed results.
When choosing PSA software, it’s important to consider your exact needs and budget and take the time to study how to use it excellently. With the right PSA software and information, businesses can exploit efficiency and productivity, and take their businesses to new heights. Eventually, PSA software is a valuable asset for professional services businesses of all sizes, serving them to remain modest in their corresponding industries and grow their business.
By using the newest hardware and software your business can benefit from increased productivity, improved inventory management, increased efficiency, and greater security. The improvements can lead to faster delivery of your products and services.
As computer processing and storage increase, new capabilities are emerging. These technologies make operations easier and improve our effectiveness.
Key services for business
Some of the most important services for businesses are IT, cybersecurity, WiFI, and internet and point-of-sales systems. If you’re a software company there is also infrastructure support and maintenance. Problems can occur and it’s critical that you’re prepared.
Managing your IT will ensure systems are up and running allowing teams to work without interruptions. There are many services involved and can include, network solutions, email management, online storage, managed software, cybersecurity, data recovery and backup, software installation and updates, and more.
Cybersecurity can help prevent disruptions from malicious attacks, malware, ransomware, spyware, and viruses. We also have to consider network security with firewall management and monitoring. With the risk of losing private information or losing service, business owners can benefit from monitoring and having a response plan in the event of a security breach.
Internet access and WiFi is part of how we do business in the digital age. Having a secure end-to-end network keeps information private and allows easy access for employees and guests. Virtual private networks are becoming more common along with remote support. Hybrid solutions are helping businesses as we see more distributed teams.
Point-of-sales systems can speed up transactions and allow businesses to provide sales management and process transactions. As with any technology solution, it’s important to keep sales systems up-to-date and secure. Modern point-of-sales systems give you greater control and ease of management.
Better collaboration
Improvements in communication are possible because of the internet and devices. Laptops, smartphones, and video tools have become more sophisticated and can support businesses that need the ability to provide fast reliable conferencing and collaboration. Email is just one quick and effective communication strategy that improves with adequate support.
Affordable, multi-featured collaboration solutions are available and it’s worth exploring to find a proper solution for your business. Even free online communication and collaboration tools such as productivity apps increase business productivity at a lower cost than in-house messaging and collaboration tools.
Many businesses are finding better resources and collaboration by moving to the cloud. Employees can work from anywhere and contribute to a single project in real time. Medical professionals can have online visits and even use technology to oversee surgical operations while located in a different country.
DevOps teams can include developers and IT operations that speed the quality of service for software deployment. DevOps services consist of phases that represent the processes, capabilities, and tools you need for development operations. Each phase requires collaboration, communication, and alignment. Depending on the services you provide, it might be important to research and consider utilizing cloud hosting services.
Resource management has radically changed the way we work. A single support team can deploy resources around the globe from a centralized location. Very soon a central operator will be able to manage autonomous delivery vehicles at a lower cost and with higher reliability. Virtual deployment can help solve supply and demand issues along with other bottlenecks like technical support.
Saving money
One of the most significant advantages of technology in business operations is through automation. With the proper network infrastructure in place, fewer workers are needed to accomplish the same goals. A lot of work can be done using computers. Management, modification, and production can be watched with machines that are specifically designed to handle the production process. These machines communicate with each other and can alert you to any problems. The cost savings alone is worth considering if you’re thinking about a digital transformation. There are companies that can provide solutions that are flexible and affordable.
Greater security
One of the best benefits of technology is improved safety and security. With technology resources, we can run simulations, utilize encryption, design and build with better tools and see the results before production even begins.
Technology drives innovation and information technology plays a critical role in today’s digital world. Business management and operations are greatly improved by leveraging tools that are mobile and cloud-based. The internet-of-things, big data, and analytics have accelerated in growth creating a need for better integration and application of these services. Social media has become an important tool for marketing and communication with your audience and customers.
Staying competitive
New technologies allow a business to remain competitive and allow for rapid growth if properly implemented. The potential is unlimited and many challenges can be addressed and managed using the right technology tools.
Social media and marketing have become important tools for many businesses that rely on technology. We are able to launch better marketing campaigns and often see better results while using fewer people and resources.
Technology can provide better customer service outside of selling products and services. In today’s online experience, quality, and customer service are essential for customer experience. Help desks and support can handle customer issues, make appointments, create surveys, and gain valuable feedback from customers.
Making a digital transformation requires a strategic plan with growth and sustainability in mind. Technology will continue to improve and encompass every aspect of most businesses. Staying competitive means keeping up with technology and understanding the important role technology has in our business operations.
It’s hard to imagine a business without computers and technology. But not every business can afford the costs of on-site IT staffing and modern equipment. Sometimes the better option is to outsource or utilize a local service provider to manage your system and resources.
Conclusion
Business success relies on innovation. Rapid changes in the business environment have led to technological developments and improvements. IT operations, marketing, management, customer engagement, social media, video production, and sales can all be better managed using the right technology resources.
Taking advantage of these technologies offers clear advantages and helps smaller companies overcome limitations and disruption from larger organizations. Technology can help even the playing field if your resources are limited.
Are you an entrepreneur or just simply looking to create an outstanding logo for your business? Look no further – this guide has got you covered. In just a few minutes, you’ll have a high-quality, custom logo designed exactly the way you want it. And the best part? You don’t need any fancy design software or skills. All you need is a Canva account, and you’re all set.
Canva is a simple, user-friendly design tool with everything you need to make a logo on your own. Thousands of templates, fonts, icons, and images are at your fingertips. Just pick and choose the elements you like, swap colors and text, and you’ll have a unique logo tailored to your brand. So what are you waiting for? Let’s dive in and get started with designing your new logo in a flash using Canva.
What is Canva? How can it Help with a logo?
So what exactly is Canva, and how can it help you create a stunning logo for your brand? Canva is a free online design tool that makes it easy for anyone to create professional graphics, even with little to no design experience.
With Canva, you have access to thousands of professionally designed logo templates, icons, images, and fonts that you can customize in just a few clicks. You don’t need to be an expert in design software like Photoshop or Illustrator to make something that looks great. Canva’s drag-and-drop editor is extremely intuitive to use.
To get started, head to Canva.com and sign up for a free account. Next, select the “Logos” design type, and you’ll see hundreds of templates to choose from. Browse the options to find one that matches your brand style or industry.
You can change the colors, swap out icons, add your business name, and experiment with different fonts. Canva gives you recommendations to help your logo look cohesive, but you have full control over the creative process. Keep playing with the elements until you land on a design you like.
Once your logo is complete, download it to use on your website, business cards, social media profiles, and anywhere else you want to promote your brand. With Canva, creating a high-quality logo for your business doesn’t have to be complicated or expensive.
Select a Logo Style that Aligns with Your Brand
When designing your brand logo in Canva, selecting a logo style that aligns with your brand is key. The options are endless, but focus on the below-mentioned main styles:
Typographic: For a stylish, minimalist feel, choose a typographic logo. This focuses on your business name in a creative font. Play around with different fonts, sizes, and effects like drop shadows or texture overlays to make it unique. This style suits fashion, tech, and creative brands.
Abstract: An abstract logo uses shapes, lines, and non-literal elements to represent your brand in an artistic way. This style is bold, eye-catching, and fuels curiosity. It works well for innovative startups.
Illustrative: Use custom illustrations, hand-drawn elements, or quirky cartoons to give your brand a friendly, and personable vibe. An illustrative logo style is perfect for food and beverage, lifestyle, or pet brands. Even adding a simple illustration to a typographic logo can make it more memorable.
Symbolic: Incorporate universal symbols, meaningful metaphors, or cultural references to represent your brand cleverly and visually. A symbolic logo needs to be designed thoughtfully to connect the image and your brand values. When done right, it can be impactful and timeless. Think about symbols related to your niche, location, or name.
With the right style nailed down, you’ll be well on your way to crafting a logo that resonates with your target customers and builds brand recognition. Take your time exploring different styles and have fun with the process!
Choose a Template to Get Started
Sift Through the Template Options
Canva provides hundreds of free logo templates to choose from. Take your time browsing the options to find one that resonates with your brand. Some categories to consider include:
Minimalist: Clean, simple designs with negative space. Great for sophisticated brands.
Vintage: Retro-inspired logos with a handcrafted feel. Perfect for brands with a nostalgic style.
Monogram: Stylish logos featuring your business’ initials. An elegant choice for luxury brands.
Abstract: Creative, conceptual logos with an artistic vibe. Ideal for forward-thinking brands.
Once a template catches your eye, click to customize it. You’ll be able to change the colors, fonts, and sizes, and add graphics to make it your own. Don’t feel limited to the templates though, you can easily start from scratch if nothing stands out.
Mix and Match Elements
The beauty of Canva is that you can borrow elements from different templates to create a unique logo. You might take a monogram layout you like, but pair it with a minimalist font and color palette, or, start with an abstract shape but fill it in with a vintage pattern. Feel free to experiment by pairing unexpected elements together!
Canva’s drag-and-drop design makes mixing and matching easy. Simply click to select the elements you want to use, then drag them onto your logo. Rearrange and resize as needed to achieve the look you want. Change the colors and fonts by clicking the text or shapes. Play around with different options until you land on a combination you like.
Your brand logo represents your business, so take the time to explore all the options. With some patience and creativity, you can craft a high-quality, custom logo using Canva’s simple yet versatile tools. Before you know it, you’ll have a logo ready to put on your website, business cards, and more!
Add Your Company Name and Customize the Fonts
Once you have a logo template selected, it’s time to customize it and make it your own. The centerpiece of any logo is the company name, so let’s start there.
Add Your Company Name
Type your company name into the logo template. Play around with different fonts, sizes, and styles to see what you like best. For a professional look, stick to simple, clean fonts without too many decorative elements. Consider “Sans Serif” fonts like Arial, Helvetica, or Futura or “Serif” fonts like Times New Roman or Georgia.
Make your company name the focal point by using a font that is slightly larger in size than any additional text.
For a simple but stylish look, use the same font for your company name and any tagline or additional text.
Use all uppercase, all lowercase, or proper case letters depending on which style best suits your brand. A proper case with an initial capital is the most traditional.
Once you have your company name in place, take time to review it and ensure it looks balanced within your logo template. Make any final changes to the size, font, or layout before moving on. The name is the foundation of your logo, so it’s important to get it just right!
Customize Additional Elements
If your logo includes any additional text like a tagline or location, choose a complementary font and size and add it to your template. Place any extra text below or beside your company name, taking care to balance the overall look.
Use a similar or contrasting font for additional text to create harmony or visual interest, but don’t use more than 2 fonts for a professional logo.
Make extra text slightly smaller in size than your company name so it remains secondary.
Add a symbol like a leaf, flower, star, etc. if desired. Keep symbols simple and place them evenly with all text.
With your company name and any additional elements in place, review your logo as a whole. Make any final refinements to the layout, sizing, or fonts before moving on to the next steps. By following these tips, you’ll have a high-quality, customized logo for your brand in no time.
Experiment With Colors and Effects
Once you have the basics of your logo down, it’s time to experiment with different colors and add visual effects to make it pop. Colors and effects can significantly impact the look and feel of your logo, so take your time exploring the options.
Choose a Color Palette
Consider the mood and message you want to convey. Red tones signify passion or urgency, blues imply trustworthiness, and greens represent growth or nature. You can select complementary colors or a monochromatic palette.
Add Shadows or Dimension
Subtle drop shadows, outlines, or gradient effects can give your logo an illusion of dimension, making it appear less flat. They also help your logo stand out more on different backgrounds. Start with small, softly diffused shadows or outlines before moving on to more vivid effects.
Play Around With Opacity
Adjusting the opacity or transparency of elements in your logo is an easy way to make them visually more interesting. For example, a semi-transparent circle behind your logo name or a faded shadow. Opacity allows you to create layers and depth without compromising the simplicity of your design.
Consider Specialty Effects
Once you have the basics down, explore Canva’s filters and effects to create an eye-catching logo. Options like duotone, glitch, neon, or metallic can infuse your logo with a stylish and modern flair. But use special effects sparingly, as your logo should still be recognizable without them.
Take time experimenting with different color schemes, shadows, opacities, and effects. Get feedback from others and see how your logo looks on both light and dark backgrounds. Make adjustments as needed until you have a visually striking logo you’re proud to use to represent your brand. With Canva, creating a stunning logo is fast, fun, and easy!
Export Your Logo and Use it Everywhere
Once you’ve created your perfect logo in Canva, it’s time to export it. The following points can be taken into account while creating and exporting your logo.
Download Your Logo
In Canva, click the “Download” button at the top of the page. You’ll have the option to download your logo as a PNG, JPG, or PDF file. PNG is best for logos, since it’s a lossless format that preserves transparency. Select PNG and then choose if you want to download just the logo itself or the logo with a transparent background.
Add Your Logo to Your Website
Upload your new logo to your website and add it to your header or footer, so visitors instantly recognize your brand. You may need to adjust the size to best fit your particular theme and layout.
Update Your Social Media Profiles
Having a consistent brand image across all platforms is key. Update your profile photos on Facebook, Twitter, Instagram, and anywhere else with your new logo. This helps people connect your profiles together and builds brand recognition.
Print Your Logo
Want to see your logo in the real world? Use Canva to design business cards, letterhead, banners, t-shirts, and more featuring your logo. They offer affordable printing services to bring your designs to life. You can also download your logo and take it to your local print shop to have it added to any promotional items.
Your logo is the face of your brand, so now that you have a high-quality one created, use it wisely! Placing it on your website, social media profiles, business cards, apparel, product packaging, and anywhere else helps spread brand awareness and gives your business a professional and consistent image.
There you go! It’s that easy to create a stunning logo in a matter of minutes. If you’re not much of a reader and wish to go through the process in a visual format, check out the LearnWoo YouTube video on the same topic below.
And there you have it, your very own professional logo designed in Canva, ready to represent your brand. You’ve chosen a design style that suits your business, picked colors that match your vision, and crafted a logo you can put on your website and social media profiles.
With a little time and patience, you’ve created a logo on your own without needing to hire an expensive designer. Most of the process is free, apart from some of the premium elements offered by Canva.
We hope this post has helped you create a high-quality logo for your brand with ease!
A couple of years ago, my friend Maria asked me to build a website for her architecture firm. For projects like this, I would normally use a headless content management system (CMS) and build a custom front end, but this time I advised her to use a site builder like Squarespace or Wix.
Why a site builder? Because Maria is a highly visual and creative person and I knew she would want everything to look just right. She needed the visual feedback loop of a site builder and Squarespace and Wix are two of the most substantial offerings in the visual editing space.
In my experience, content creators like Maria are much more productive when they can see their edits reflected on their site in a live preview. The problem is that visual editing has traditionally been supported only by site-builders, and they are often of the “low” or “no” code varieties. Visual editing just hasn’t been the sort of thing you see on a more modern stack, like a headless CMS.
Fortunately, this visual editing experience is starting to make its way to headless CMSs! And that’s what I want to do in this brief article: introduce you to headless CMSs that currently offer visual editing features.
But first…
What Is Visual Editing, Again?
Visual editing has been around since the early days of the web. Anyone who has used Dreamweaver in the past probably experienced an early version of visual editing.
Visual editing is when you can see a live preview of your site while you’re editing content. It gives the content creator an instantaneous visual feedback loop and shows their changes in the context of their site.
There are two defining features of visual editing:
A live preview so content creators can see their changes reflected in the context of their site.
Clickable page elements in the preview so content creators can easily navigate to the right form fields.
Visual editing has been standard among no-code and low-code site-builders like Squarespace, Wix, and Webflow. But those tools are not typically used by developers who want control over their tech stack. Fortunately, now we’re seeing visual editing come to headless CMSs.
Visual Editing In A Headless CMS
A headless CMS treats your content more like a database that’s decoupled from the rendering of your site.
Until recently, headless CMSs came with a big tradeoff: content creators are disconnected from the front end, making it difficult to preview their site. They can’t see updates as they make them.
A typical headless CMS interface just provides form fields for editing content. This lacks the context of what content looks like on the page. This UX can feel archaic to people who are familiar with real-time editing experiences in tools like Google Docs, Wix, Webflow, or Notion.
Fortunately, a new wave of headless CMSs is offering visual editing in a way that makes sense to developers. This is great news for anyone who wants to empower their team with an editing experience similar to Wix or Squarespace but on top of their own open-source stack.
Let’s compare the CMS editing experience with and without visual editing on the homepage of Roev.com.
You can see that the instant feedback from the live preview combined with the ability to click elements on the page makes the visual editing experience much more intuitive. The improvements are even more dramatic when content is nested deep inside sections on the page, making it hard to locate without clicking on the page elements.
Headless CMSs That Support Visual Editing
Many popular headless CMS offerings currently support visual editing. Let’s look at a few of the more popular options.
TinaCMS was built from the ground up for visual editing but also offers a “basic editing” mode that’s similar to traditional CMSs. Tina has an open-source admin interface and headless content API that stays synced with files in your Git repository (such as Markdown and JSON).
Storyblok is a headless CMS that was an early pioneer in visual editing. Storyblok stores your content in its database and makes it available via REST and GraphQL APIs.
Sanity is a traditional headless CMS with an open-source admin interface. It supports visual editing through the use of its Iframe Pane plugin. Sanity stores your content in its database and makes it available via API.
Stackbit is a closed-source editing interface that’s designed to be complementary to other headless CMSs. With Stackbit, you can use another headless CMS to store your content and visually edit that content with Stackbit.
Although it’s not a CMS, Vercel’s Deploy Previews can show an edit button in the toolbar. This edit button overlays a UI that helps content creators quickly navigate to the correct location in the CMS.
Conclusion
Now that developers are adding visual editing to their sites, I’m seeing content creators like Maria become super productive on a developer-first stack. Teams that were slow to update content before switching to visual editing are now more active and efficient.
There are many great options to build visual editing experiences without compromising developer-control and extensibility. The promise of Dreamweaver is finally here!
Choosing the right font is essential not just because it conveys a tone of voice or a personality for your text but because some typefaces are more simply more readable than others. We write this roundup of the best new fonts we’ve found online each month, to give you a place to start.
Have you ever had a problem with your site being overloaded with visitors?
In the worst-case scenario, it can mean lost business as potential customers lose patience with slow loading times and abandon your page.
Luckily, there are things you can do to mitigate the risk of this happening. This article explores autoscaling, how it works, and why you need it.
Autoscaling: How Does it Work?
One of the most significant challenges of general business or e-commerce website design is ensuring your site can handle peaks and troughs of visitor traffic efficiently. One popular option for managing this problem is autoscaling.
Autoscaling automatically increases server capacities when traffic surges to a site. When the traffic level drops, it reduces it, saving on resource use.
Although related to load balancing, it’s not quite the same thing. A load balancer distributes incoming traffic across different targets, whereas autoscaling sets the policy for how this happens.
Let’s see an example of how this might work in practice. Autoscaling can be used with IP phone systems for small business that need to prioritize resource optimization. It can dynamically route incoming calls to available resources based on capacity.
When call volumes increase, additional resources – such as phone lines or SIP trunks – can be provisioned automatically to handle the increased load. Conversely, when call volumes decrease, excess resources can be released to optimize cost and efficiency.
There are several different approaches to autoscaling. Reactive, predictive, and scheduled autoscaling are defined by how servers are called into use. Let’s explore each in more depth.
Reactive
Also known as dynamic autoscaling, reactive autoscaling responds to changes in system load or demand in real-time.
This approach relies on monitoring the system’s metrics and triggering scaling actions based on predefined thresholds or rules. When those thresholds are exceeded, additional resources swing into action to handle the increased load. When the load decreases, unnecessary resources are removed.
In the context of our IP phone system example, reactive autoscaling could be used to monitor call volumes, system performance metrics such as CPU usage, memory utilization, or network bandwidth.
When the monitored metrics cross predetermined thresholds, the system automatically scales up or down by adding or removing phone lines, SIP trunks, virtual instances, or other resources as required. This is a common autoscaling option for IP communications systems like Microsoft Teams phone applications.
Predictive
Predictive scaling, as the name suggests, goes beyond real-time monitoring. It incorporates predictive algorithms and historical data to forecast future demand.
For example, let’s say an e-commerce website has always experienced significant spikes during previous Black Friday sales. It could use predictive autoscaling to anticipate a similar surge and proactively scale up resources ahead of time to handle the increased load.
In other words, it’s a great choice when you know events are coming down the pipeline that will significantly impact your traffic. By integrating with event calendars or marketing systems, predictive autoscaling can anticipate traffic surges associated with these events and scale resources accordingly.
If you’ve scheduled a product launch, for example, the automatic scaling system can prepare additional server instances in advance to handle the expected influx of visitors.
Finally, we have scheduled autoscaling. This is similar to predictive autoscaling in that it’s all about preparing in advance. The critical difference is that it follows a predefined schedule based on known patterns or business requirements.
For example, suppose a business expects an increased traffic load to its site every Monday morning due to a regular newsletter distribution timeslot. In this case, your team can configure scheduled autoscaling to add resources a few minutes before the newsletter is sent out. It can then scale them down once the traffic subsides.
This can be page-specific too. For instance, let’s say you schedule an email to go out with a teaser explanation of how to send a fax from mobile devices. You include a “Read More” link to the page on your site featuring the full article.
Since you can predict the exact timing of the traffic surge, you can create a customized autoscaling schedule for that page. Once the surge period ends, the resources can be scaled down according to the predefined schedule.
Why You Need Autoscaling: The Benefits
There’s a lot to think about when you’re setting up a website for your business or redeveloping an existing one. Should you use the domain name io to get some startup credibility? How much is too much to pay a graphic designer? How will you implement effective SEO?
It’s nice to know that regulating your website traffic is something that has a manageable solution. But there are other benefits to implementing autoscaling on your site.
Saves energy
The fact that unneeded resources are powered down during periods of low traffic makes automatic scaling an easy energy-saving win. Lowering power consumption like this is great for burnishing your business’s eco-friendly credentials too.
Delivers reliable performance
Autoscaling also plays a vital role in maintaining reliable performance for applications and services. Since it automatically scales resources in response to increased traffic, it makes sure the system can handle the load without experiencing pesky performance bottlenecks. Overall, this reduces the risk of service degradation and leads to great results.
Best of all, autoscaling is extremely cost-effective. By dynamically adjusting the number of active resources based on demand, it helps prevent wasteful overprovisioning or underuse of resources.
This allows businesses to pay only for the resources they need at any given time, leaving you free to focus on getting the full bang for your buck from your great-looking website and delivering for your clients.
Provide top Performance With Autoscaling
If you’re not already using autoscaling, it’s time to consider implementing it. It’s a very flexible solution for managing your website server resources and can have a significant impact on the user experience – and that’s vital for a growing business.
After all, your website is your virtual shop window. Autoscaling will help make sure it’s reliable and easy to use, keeping your customers happy, which is great news for your bottom line.
In today’s digital world, privacy is a hot topic, and businesses are rethinking how they collect and use customer information. That’s where zero party data comes in. It’s a powerful tool that allows businesses to gather valuable insights from customers who willingly share their preferences and information.
In this blog post, we’ll explain what zero party data is and why it’s essential for generating qualified leads. We’ll also explore seven effective tools that can help you collect zero party data and provide real-world examples and tips along the way. Let’s get started!
What Is Zero Party Data?
As privacy became a growing concern across the globe, zero party data emerged as a valuable asset for businesses seeking to generate qualified leads. Zero party data refers to information that customers willingly and intentionally provide to businesses.
This data is voluntarily shared through quizzes, surveys, assessments, and other interactive experiences. By actively participating, customers provide insights into their preferences, needs, and interests, giving businesses a better understanding of their target audience.
What Is Third-Party Data?
On the other hand, third-party data is obtained from external sources without the explicit consent of users. It often comes from various websites, apps, and data brokers, making it less reliable and raising privacy concerns.
With the rise of data regulations like the General Data Protection Regulation (GDPR) and the California Consumer Privacy Act (CCPA), businesses are shifting away from third-party data and turning to more transparent and privacy-friendly alternatives.
Why Should You Ditch 3rd Party for Zero-Party Data?
There are several compelling reasons to embrace zero party data for lead generation:
Enhanced Personalization
Zero party data provides deeper insights into customer preferences, allowing businesses to personalize their marketing efforts and deliver targeted content that resonates with their audience. By understanding customer needs and preferences, businesses can create more relevant and engaging experiences, increasing the likelihood of capturing qualified leads.
Improved Trust and Transparency
By collecting data directly from customers, you establish a transparent relationship based on consent, which builds trust and strengthens your brand reputation. When customers willingly share their information with you, they are more likely to perceive your business as trustworthy and value-driven.
Compliance with Data Regulations
Zero party data collection aligns with the evolving privacy regulations, such as the General Data Protection Regulation (GDPR) and the California Consumer Privacy Act (CCPA). By leveraging zero party data, businesses can ensure they are compliant with these regulations, avoiding potential legal consequences and safeguarding customer trust.
Higher Quality Leads
Since zero party data is voluntarily shared by customers, it tends to be more accurate, relevant, and valuable for generating qualified leads. By leveraging the insights gained from zero party data, businesses can focus their marketing efforts on individuals who have expressed genuine interest in their products or services, increasing the chances of conversion.
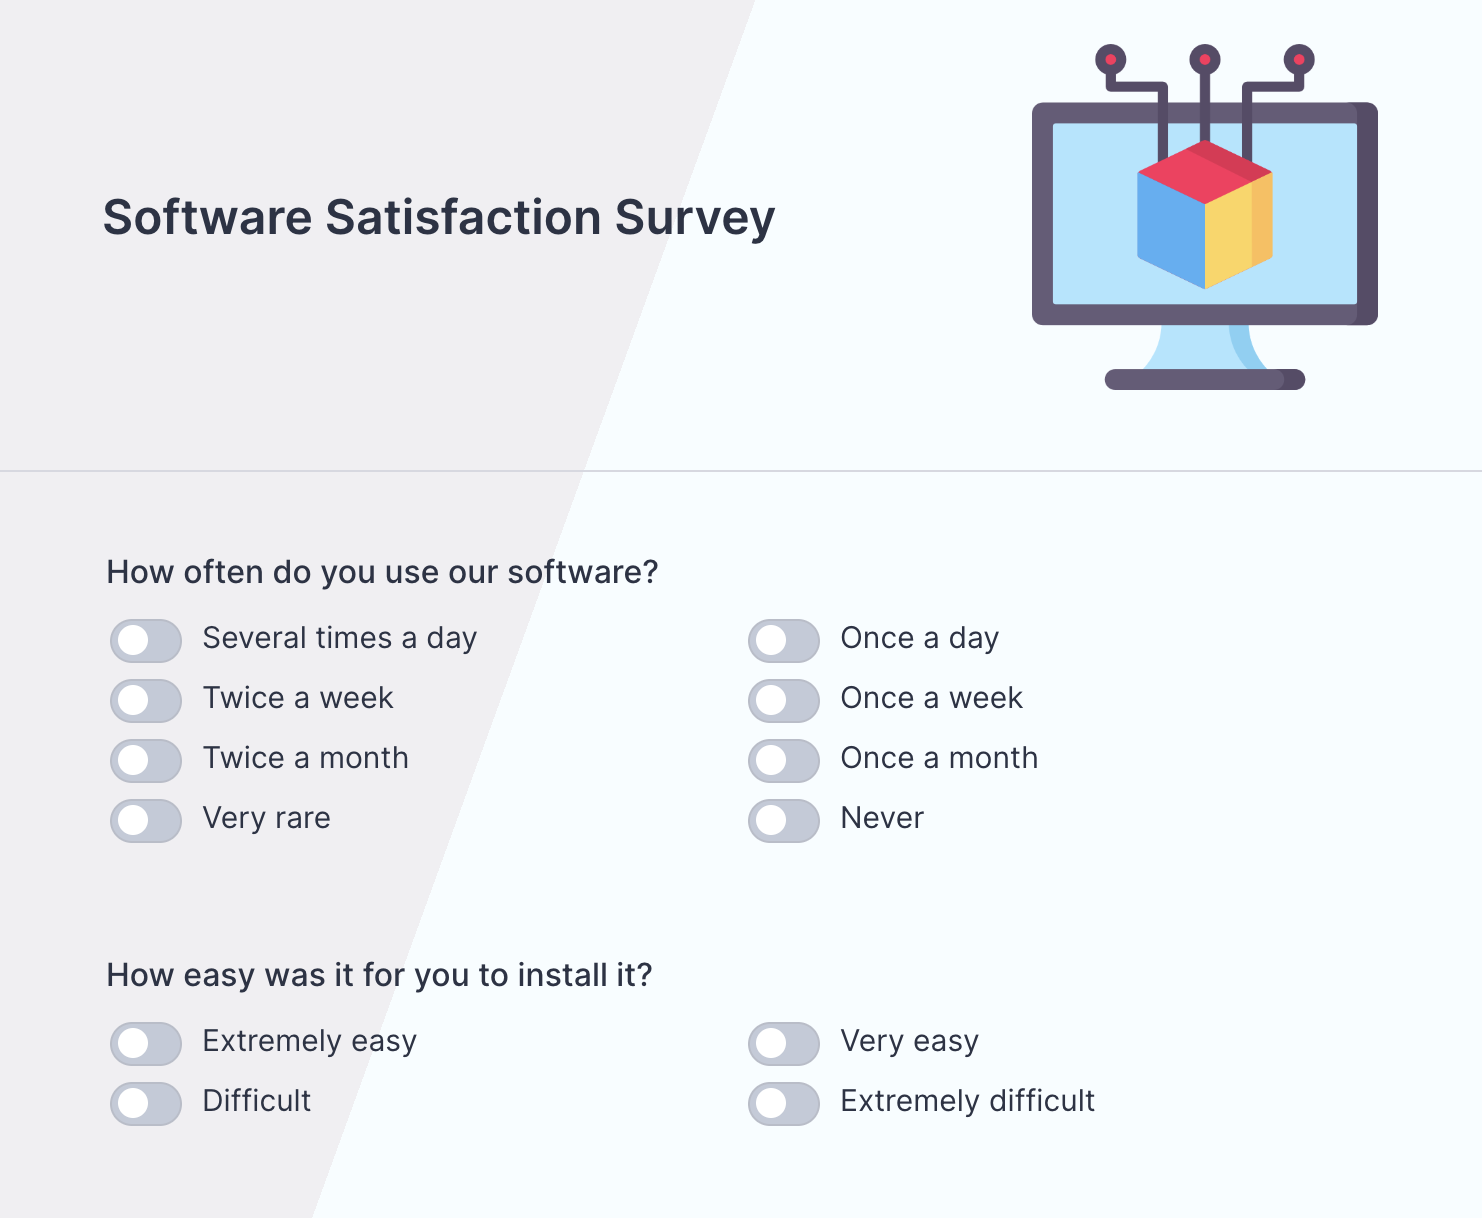
7 Tools to Collect Zero-Party Data & Leads
To effectively collect zero party data and engage your audience, consider utilizing the following interactive tools:
Engage and Educate With Quizzes & Assessments
Interactive content types like quizzes and assessments allow you to capture valuable data while providing an engaging and educational experience for your audience. These interactive experiences prompt users to actively participate and share their preferences or opinions, resulting in valuable zero party data and qualified leads. To get started, choose no-code tools that allow you to make a quiz effortlessly within minutes. Look for platforms that offer powerful analytics, automation, and integration features too.
For example, a fitness brand can create a quiz that helps users discover their ideal workout routine based on their goals and fitness level. This type of content attracts users as they provide outcomes tailored to their needs in exchange for a few questions.
Tip: Make the quizzes look fun to encourage participation and information sharing. Design an appealing welcome page to catch attention. Moreover, the results page is very important and should offer fun and custom outcomes for increasing shareability.
Provide Value With Calculators
Next up is an interactive calculator to provide personalized insights and help your audience make informed decisions. It may seem overwhelming, but creating a website calculator is not a complex task. With no code tools, it’s easy to create dynamic calculators to capture zero party data.
For example, a financial institution can create a mortgage calculator that gathers data on a user’s desired loan amount, interest rate preferences, and repayment period and offer tailored mortgage solutions to their users.
Another set of potent tools to generate zero party data is surveys and forms. These interactive content types collect feedback from your users on your products, services, or overall customer experience. This data can provide valuable insights and help you refine your marketing strategies.
For example, a software company can use a survey to gather feedback on user experience and identify areas for improvement.
Tip: Offer incentives such as discounts or exclusive content to increase survey completion rates.
Personalize With Product Recommendations
Leverage machine learning algorithms to offer personalized product recommendations based on customer preferences and behavior. This is especially very helpful for all ecommerce companies to help your users in decision-making. By asking them a few questions about their choices, needs, budgets, etc., you can provide customized product recommendations that suit them the best. This tool not just generates ecommerce leads but also enhances the customer experience and drives conversions.
For example, a skincare brand website can create a recommendation tool like “Which Skin Cream Suits You the Best”. It can have questions related to the user’s skin type, issues, budget, etc. to suggest an apt skin cream for them. This would generate qualified leads and key customer insights the zero party way.
Tip: On the results page, add item descriptions, prices, and buying links along with your recommended products to improve the chances of purchase.
Get First-Hand Opinion With Polls
Conduct polls and surveys to gather real-time opinions and preferences from your audience. These are quick, usually single-click content types, that help collect public votes and predict trends. It’s super easy to create polls for your website or social media to gain valuable insights into customer preferences and market trends.
For example, Dunkin’ Donuts created an Instagram poll that asked their community to vote for their favorite classic snacks.
Tip: Keep polls short and focused to maximize participation and gather specific insights.
Create Excitement With Giveaways & Contests
Who doesn’t like free stuff? Utilize this opportunity by creating contests or giveaways that require participants to provide their information willingly. This approach not only encourages data collection but also generates excitement and fosters brand loyalty. By designing interactive experiences like these, you can capture leads and zero party data while creating buzz around your brand.
For example, a travel agency can organize a contest where participants share their dream destinations and travel preferences for a chance to win a vacation package.
Tip: Leverage social media platforms to promote giveaways and contests, increasing reach and participation.
Provide Support With Chatbots
Chatbots are not a new thing! But AI chatbots have taken over the world by storm! So leverage the power of technologies like ChatGPT and create chatbots that engage with customers in human language. By offering personalized assistance, you can collect zero party data while enhancing customer satisfaction.
For example, an e-commerce website like H&M uses chatbots efficiently to provide personalized product recommendations and assistance during the shopping process.
Now that you have the tools, here are five effective methods for collecting leads using zero party data:
Embed on Website
One of the best ways to showcase your tools is on your website. So start by embedding interactive quizzes, calculators, or surveys directly into your website to capture leads from engaged visitors. By strategically placing these interactive elements on your website, you can prompt visitors to provide their information willingly and generate qualified leads.
Share on Social Media
The second best place for promoting your tools could be your social media platforms. So showcase your interactive content on social media platforms to attract a wider audience and drive lead generation. Encourage social media followers to participate in quizzes, surveys, or contests, creating an opportunity to collect zero party data while expanding your brand’s reach.
Display on Ad Landing Pages
Another effective way for promotions is running ads. So use interactive content as the centerpiece of your ad landing pages to capture leads while providing value and engaging experiences. By creating compelling and interactive landing pages with tools like Unbounce or Instapage, you can encourage ad click-throughs and gather valuable zero party data.
Send in Email Newsletters
Don’t underestimate the power of your newsletters, especially when they can be made interactive! Embed interactive elements such as quizzes or surveys directly in your email newsletters to encourage user participation and collect valuable zero party data. Make interaction easier for your users by allowing them to take the survey or quiz with one click within their inbox.
Personalize in Live Chat
Utilize live chat functionality on your website to engage with visitors in real time. By personalizing the chat experience with useful quizzes and surveys, you can collect zero party data while assisting potential leads. Requesting relevant information during chat interactions can help you tailor your messaging and offer customized solutions to drive lead conversion.
Are You Ready to Try Zero Party Tools?
In the era of data privacy and consent-driven marketing, zero party data emerges as a reliable and effective method for generating qualified leads.
By utilizing interactive tools like quizzes, calculators, and surveys, powered by no-code platforms such as Outgrow, businesses can collect valuable data. And this could be done while providing personalized experiences and enhancing customer engagement.
Embrace the power of zero party data and leverage the recommended tools and strategies to drive meaningful results for your business. Start building trust, delivering value, and obtaining high-quality leads today!
Personally, I get tired of the antics at the start of any new project. I’m a contractor, too, so there’s always some new dependency I need to adopt, config files to force me to write the way a certain team likes, and deployment process I need to plug into. It’s never a fire-up-and-go sort of thing, and it often takes the better part of a working day to get it all right.
There are a lot of moving pieces to a project, right? Everything — from integrating a framework and establishing a component library to collaboration and deployments — is a separate but equally important part of your IDE. If you’re like me, jumping between apps and systems is something you get used to. But honestly, it’s an act of Sisyphus rolling the stone up the mountain each time, only to do it again on the next project.
That’s the setup for what I think is a pretty darn good approach to streamline this convoluted process in a way that supports any common project structure and is capable of enhancing it with visual editing capabilities. It’s called Codux, and if you stick with me for a moment, I think you’ll agree that Codux could be the one-stop shop for everything you need to build production-ready React apps.
Codux is More “Your-Code” Than “Low-Code”
I know, I know. “Yay, another visual editor!” says no one, ever. The planet is already full of those, and they’re really designed to give folks developer superpowers without actually doing any development.
That’s so not the case with Codux. There are indeed a lot of “low-code” affordances that could empower non-developers, but that’s not the headlining feature of Codux or really who or what it caters to. Instead, Codux is a fully-integrated IDE that provides the bones of your project while improving the developer experience instead of abstracting it away.
Do you use CodePen? What makes it so popular (and great to use) is that it “just” works. It combines frameworks, preprocessors, a live rendering environment, and modern build tools into a single interface that does all the work on “Save”. But I still get to write code in a single place, the way I like it.
I see Codux a lot like that. But bigger. Not bigger in the sense of more complicated, but bigger in that it is more integrated than frameworks and build tools. It _is_ your framework. It _is_ your component library. It _is_ your build process. And it just so happens to have incredibly powerful visual editing controls that are fully integrated with your code editor.
That’s why it makes more sense to call Codux “your code” instead of the typical low-code or no-code visual editing tools. Those are designed for non-developers. Codux, on the other hand, is made for developers.
In fact, here’s a pretty fun thing to do. Open a component file from your project in VS Code and put the editor window next to the Codux window open to the same component. Make a small CSS change or something and watch both the preview rendering and code update instantly in Codux.
That’s just one of those affordances that really polish up the developer experience. Anyone else might overlook something like this, but as a developer, you know how much saved time can add up with something like this.
Code, Inspect And Debug Together At Last
There are a few other affordances available when selecting an element on the interactive stage on Codux:
A style panel for editing CSS and trying different layouts. And, again, changes are made in real-time, both in the rendered preview and in your code, which is visible to you all the time — whether directly in Codux or in your IDE.
A property panel that provides easy access to all the selected properties of a component with visual controllers to modify them (and see the changes reflected directly in the code)
An environment panel that provides you with control over the rendering environment of the component, such as the screen or canvas size, as well as the styling for it.
Maybe Give Codux A Spin
It’s pretty rad that I can fire up a single app to access my component library, code, documentation, live previews, DOM inspector, and version control. If you would’ve tried explaining this to me before seeing Codux, I would’ve said that’s too much for one app to handle; it’d be a messy UI that’s more aspiration than it is a liberating center of development productivity.
No lying. That’s exactly what I thought when the Wix team told me about it. I didn’t even think it was a good idea to pack all that in one place.
But they did, and I was dead wrong. Codux is pretty awesome. And apparently, it will be even more awesome because the FAQ talks about a bunch of new features in the works, things like supporting full frameworks. The big one is an online version that will completely remove the need to set up development environments every time someone joins the team, or a stakeholder wants access to a working version of the app. Again, this is all in the works, but it goes to show how Codux is all about improving the developer experience.
And it’s not like you’re building a Wix site with it. Codux is its own thing — something that Wix built to get rid of their own pain points in the development process. It just so happens that their frustrations are the same that many of us in the community share, which makes Codux a legit consideration for any developer or team.
Oh, and it’s free. You can download it right now, and it supports Windows, Mac, and Linux. In other words, you can give it a spin without buying into anything.