Step-by-step Guide: How to Become a Photographer
“My life is shaped by the urgent need to wander and observe — and my camera is my passport,” says famous American photographer Steve McCurry. Whether you’re a professional photojournalist snapping pictures on the front lines or a novice photographer just starting out, there is something inside that drives people to dedicate their time to photography.
People become photographers for different reasons — a passion for aesthetics, an eagerness to tell stories, a desire to better understand the world around them, or maybe just a simple but unexplainable passion for capturing moments on film.
How do you become a professional photographer?
- Know yourself. Decide if photography is right for you.
- Build your skills. Practice. Take photography classes or get a photography degree. Learn how to edit photos. Practice some more.
- Find the right equipment and tools. Choose a camera, tripod, lights, and lenses. Invest in a good laptop and photo-editing software.
- Set up your photography business. Decide on a type of photography to pursue. Develop a business plan. Create and implement a marketing strategy. Network with other photographers.
- Optimize your business. Simplify and automate business processes, such as scheduling appointments, obtaining session agreements and release forms, gathering customer feedback, and more with JotForm.
Before starting, we would like to remind that you can also download the PDF version of this photography business guide for free!
How to know if photography is right for you
Before embarking on photography as a career, you’ll want to make sure this is absolutely the right field for you. That’s because, at the end of the day, photography demands passion and sacrifice — of course, those sacrifices can yield rewarding outcomes. You will have to spend time, energy, and probably some money to get really good at it. So before you dive in, it’s worth taking the time to evaluate whether or not you have the right personality for the world of photography.
Are you ready for the long hours and possible frustrations that come with photography? Are you passionate enough to withstand the ups and downs a beginning photographer faces? Answer those questions, and you’ll have a better understanding of whether or not photography is right for you.
Knowing yourself
Who are you? OK, that’s a pretty big question. To make things easier, here are three slightly more specific questions:
- What gets you excited to wake up in the morning?
- Which three adjectives would you use to describe your personality?
- What kind of work brings you satisfaction?
Together these questions get at what motivates you and how you behave in certain situations. Your answers may be broad — and some of them might be only vaguely related to photography or not related at all. For instance, maybe your answer to the first question is “your family.” Although this answer isn’t directly related to photography, it might hint at what motivates you to start a photography business. You may want extra funds so that you can better support your family financially — and maybe you’re passionate about capturing other families’ memories with your camera.

None of your answers to these questions specifically qualify or disqualify you from becoming a photographer. Instead, answering these questions prepares you for what’s ahead. They make you aware of the strengths and weaknesses that you bring to photography. If, for instance, you said you’re “impatient,” you’ll want to keep that in mind as you learn photography. Are you a procrastinator? Again, good to know.
Your working habits and how you relate to your work are also helpful to understand. For instance, maybe you’re someone who thrives on outside validation. You need someone beside you to keep you going and remind you why the work you’re doing matters. Unfortunately, photography can be a bit lonely — spending late nights in the darkroom or hours alone on your laptop editing. You’ll need to go out of your way to get feedback from others and set up a support system both inside and outside of the photography world. These topics — getting feedback and creating a network — we’ll discuss later.
“Knowing yourself is the beginning of all wisdom,” said Aristotle. It’s a wisdom that will come in handy as you embark on your budding photography career. Get ready to work hard — and reap lasting rewards.
Choose photography because you love it
Many people come to photography as a way to make some money. It’s no wonder why: Many people around the world support themselves with photography, turning it into a lasting and fulfilling career. Countless advertising agencies and publications need photographers to provide them with content — and they pay handsomely. It’s also a perfect “side hustle,” allowing you the freedom to make your own hours and earn sizable hourly income on a freelance basis. To top it off, photography engages your creativity in a world where creative careers are harder and harder to come by.

Unfortunately, becoming a photographer merely because of the money likely isn’t enough of a motivator. You also need to you love photography. Getting those paychecks and turning photography into a lucrative career is only possible if it’s guided by a real passion for the art. You’ll only be able to put in the time and energy needed for photography if you’re motivated by respect for your craft.
Feeling passionate? Ready to turn photography into a life-changing creative career? Then let’s get to it — because there’s quite a bit to learn about how to become a photographer.
Becoming a professional photographer
A tourist on 57th Street sees a musician getting out of a cab. He goes over and asks, “How do you get to Carnegie Hall?” Without pause, the musician replies wearily, “Practice.”
Everyone can take pictures. Who hasn’t snapped a pretty picture of a sunset during a hike? Or taken a particularly cute picture of their dog? And almost everyone in the world has taken a selfie at this point. When you take a picture like this, you are technically a photographer. But being a professional photographer — someone who gets paid for their work and sees photography as more than just a pleasant pastime — is entirely different. Take a real-world use case as an example and learn how famous photographer, Jeremy Cowart, made it big.

What sets professional photographers apart is practice. Pros have honed their craft. They’ve labored over photographs, becoming masters (or near masters) of every step in the photographic process. And still, they’re always looking to improve, researching the latest photographic technology, updating their equipment, and taking on new projects that will stretch their skills and take their mastery further.
In this section we’ll stress the importance of practice and explain why it’s such a crucial element of becoming a professional photographer. We’ll also explain how to practice — and how to find time to practice.
Practice makes perfect
Photography is a craft — just like metallurgy or shoe cobbling or any other old-timey occupation you can think of. Crafts require practice. It’s no wonder there are so many photography apprenticeships. These apprenticeships pair a seasoned professional with a novice so that the master’s wisdom can pass on to the student.

People often confuse “practice” with “learning.” Learning is obviously useful. Reading a how-to book about photography is immensely valuable, as is looking through a book of photographs and evaluating them on a formal level. But practice involves doing. It means going out into the world with your camera and taking lots of pictures — then developing them, editing them, and engaging with every part of the photographic process.
Along the way you’ll make mistakes; that’s good! Mistakes help you learn. Pushing yourself and solving new problems is the best way to develop crucial skills and become a more well-rounded photographer. In fact, going out of your comfort zone and setting yourself up to face challenges is perhaps the most useful means of acquiring new skills.
Create goals for yourself. What skills do you want to improve? How are you going to track your progress in terms of developing this skill? And on what timeline are you planning to improve? Laying out your goals clearly is important, and tracking your progress is just as vital. Keeping a journal or a personal blog where you can chart your progress privately or publicly can be useful. Then it’s a matter of determining how you’re going to meet these goals. As we said, the best way to learn is by doing, and the best way to do is by tackling lots of projects.
Create projects for yourself. Tell a friend you’re taking them to the park and photographing them. They’ll probably be flattered. Sure, this might be something you’ve never done before. But now you’ll have the chance to practice composition, getting the lighting right, and working face-to-face with a client. Not to mention the practice you’ll get editing after the fact. Sitting down and saying, “I’m going to practice landscape photography” can feel too abstract. Creating a project for yourself forces you to tackle real-world problems and engages lots of different skills all at once. The goal is clear, and it’s up to you to meet it.
Mastering photography requires sacrifice
As we’ve discussed, becoming a professional photographer doesn’t happen overnight. You’re going to have to make some sacrifices along the way. Here are three that stand out:
Time: From idea to finished product, taking a photograph can be quite labor intensive. Great photographers are often detail oriented. They might spend hours trying to perfect a single element of a photograph. So as you tackle projects and dedicate yourself to improving your craft, you might find that you’re dedicating quite a chunk of time to photography. That’s just a reality of photography: You sacrifice lots of time along the way. If you love what you’re doing, the time will fly by. You might look up from your laptop after an epic editing session and realize it’s 3 a.m. It’s up to you to determine if the time you’re spending is worthwhile and to create an environment where you can improve as a photographer while keeping up with your other responsibilities.
Energy: Between traveling to gigs, networking, and running a business — not to mention the actual act of taking photographs — photography will take some energy out of you. Don’t burden yourself too much early on, or you might end up getting burnt out. Pace yourself, and realize it’s OK to ask for help.
Money: Photography is a pretty expensive endeavor in the early going. Getting the right camera — not to mention lenses, lighting equipment, etc. — can make a dent in your paycheck. There’s no real way around this, though you can start out slow. Maybe wait to invest in a top-of-the-line camera. Technology has come a long way, and you can find an affordable camera that meets almost all of your needs. You can even learn a lot from taking photos on your smartphone camera. There are also some very cheap and even free versions of editing software online. So while there is a financial sacrifice involved in becoming a photographer, you have some control over just how much money you spend early on. And ultimately, the money you spend is a worthwhile investment in terms of advancing your career.
Education can take you to the next level
Having a solid photography education tends to separate hobbyists from professionals. Sure, there have been plenty of successful photographers with only a minimal educational background. But for most, taking classes and working with an instructor enable you to hone your technique and gain valuable experience.
How much can you self-teach? You often hear about “self-taught masters” — people who ignored the classic paths laid out by academic programs and forged their own way to photographic mastery. And self-teaching could very well be the first step you take. There are countless instructional articles and videos online that can give you a basic understanding of the techniques professional photographers use every day. The downside of this approach is the mentorship you lack from not working with an instructor and the inability to give and receive feedback, which having classmates allows you to do.

How do you know you’re ready for more education? Maybe you’ve been working as a hobbyist photographer but have decided to take your skills to the next level. But are you even good enough to take a beginner class? You should never be afraid of taking the next step and educating yourself about photography if you have a passion for it. There are classes out there designed for complete beginners. Even many photography programs consist of students who have only cursory knowledge of photography.
What’s your budget? Of course, there are logistical concerns. After all, education requires time and money. Though we’ll discuss this more, you’ll want to be aware of how much money you’re willing to spend on your photography education. There are a wide range of options, from pricey graduate programs to more affordable online courses. You simply need to assess your goals and decide what provides the best value for you.
Formal photography education
Now that you’ve decided to embark on a formal photography education, it’s time to explore your options. The types of photography instruction available are diverse. Here are the three worth focusing on:
- Online photography courses: The benefits of an online course are obvious — you don’t have to leave your house. Working online allows you to follow an instructor’s lead without having to worry about going to a physical classroom. This also means you can work on the class on your own time, which is great for busy people seeking flexibility. At the same time, online courses don’t allow for as immersive an experience because you aren’t interacting with other students and a teacher in person. Most of these classes offer a certificate upon completion.
- Single photography courses:Instead of a long academic series of courses, you can also just take a single course at a learning annex or community center. It may meet once a week or so and function as a workshop where students can bring in work and get feedback from a classroom of other students at a similar skill level. You can find beginner, intermediate, and advanced classes that touch on a variety of different photography types. If you’re in a major city, you probably have more options. Again, many of these classes offer a certificate, typically if you complete a certain sequence of classes.
- College photography degrees: The vast majority of colleges have photography programs, and there are many great graduate photography programs around the world. Art schools and photography colleges can offer rich, interdisciplinary exposure to the subject. Undergraduate courses can help beginners get acquainted with photography. But a graduate program is for the most serious photographers and usually touches on more than just technique — such as photographic history and critical analysis of famous photography. Those who complete a graduate photography degree typically earn a Master of Fine Arts (MFA), which can be a helpful degree to have when seeking out photography jobs.
Fundamentals come first
What exactly do photography classes teach you? At the heart of every photography class is an exploration of the fundamentals of photography. Beginner courses will cover

- How a camera works: You can’t take pictures without a camera, so most beginner courses will take a deep dive into what sets different cameras apart. Courses will explore how lenses work, how exposure works, and then outline different shutter systems and how shutter speed impacts the photos you take. You’ll ideally come away understanding how to adjust your camera — and its lenses, exposure, and shutter speed — given certain situations. To get an idea of the impact of these fundamentals, here are some stunning examples of long exposure.
- Composition: At its heart, photography is about composing photos for a desired effect. Learning the basics of composition is fundamental to a photographer’s education. Where do you place objects in the frame of the shot? How can you adjust the composition of your shot to highlight the subject in a particular way? Perspective, background, and layers all play a role as you bring the three-dimensional world to life in your photographs.
- Depth of field: Understanding how the aperture on your camera works can help you solve compositional problems and unleash memorable visual effects. Knowing your way around the aperture is fundamental to good photography and, once mastered, can take your work to the next level.
- Lighting: Add dimension and mood to your photographs with lighting. Most instructors will tell you that lighting is often misunderstood and misused. Aiming for subtlety with the color and intensity of your lighting can have a profound effect on your work’s quality. Most classes will also typically cover ambient light, hard and soft light, and introduced light — and explain how to introduce these elements into your photography in a way that’s effective.
- Editing: Although many beginner classes will focus on the most basic tenets of photography and prioritize familiarizing students with their cameras, lots of classes will wade into the important task of editing. Photo editing has evolved over the years as new digital tools make it easier than ever to tweak shots after the fact. You rarely can edit a bad shot into something that works — hence the importance of fundamentals — but editing can take a good shot to a whole other level.
Rule of thirds
One fundamental principle of photography that you’ll learn is the rule of thirds. This rule helps you carefully compose photographs and can be applied to many different types of photography. It’s one of the first things you’ll learn in a beginner photography class — and something you’ll keep in mind throughout your career.
Getting feedback makes you better
Just about the best part of working with other students in a classroom is getting regular feedback. This feedback comes from your classmates as well as the instructor — and both provide valuable criticism that you can use to make your photographs better. Here are a few things to keep in mind when receiving feedback:
Listen first. When you receive feedback, you’re learning. You’re seeing your work through someone else’s eyes, cutting away your personal connection to the work so that you can understand it from a new perspective. That’s why you need to sit back and listen. In fact, most workshops will wisely have multiple students chime in with feedback before letting the photographer respond. This places the focus on those who are looking at the work rather than the creator of the work.
Ask the right questions. Once you’ve listened to what your classmates and instructor have to say, it’s time to respond with questions that will help you improve. For instance, if any feedback felt vague (e.g., “This photo didn’t really have an impact on me.”), ask for clarification. What about the photo failed to strike a chord? Ask tactical questions. See if any of your classmates have favorite photos that might have come to mind when they were assessing your photos, and then take a look at those photos.
Let your instructor’s feedback motivate you. In an ideal setting, your instructor will become something of a mentor for you. So you will naturally look forward to their feedback the most. In fact, you’ll probably earn a letter or number grade from them. While grades can be stressful, they’re a great way to motivate you and enhance your work. If you got a lower grade than expected, let this be an inspiration to improve. If you got a high grade, you’ve raised expectations — now it’s up to you to follow up on these expectations.
Don’t take it personal. Receiving feedback isn’t easy, especially if it’s negative. You’re bound to feel vulnerable. Suddenly the spotlight’s on you, and people aren’t afraid to call out the flaws of your work. It’s stressful — and takes a thick skin. The most important thing to remember is that you can’t take criticism personally. See honest criticism as a gift. When someone tells you exactly how they feel about your work, you’re getting a valuable glimpse into the way the world responds to your work. You can use this information to adjust and optimize. After all, this criticism is focused on your work — and says nothing about you as a person.
Enter photo contests. Want to guarantee some feedback outside of the classroom? A photo contest is a great option. It puts your work in front of a panel of judges who will not only tell you what they think of your work, but also potentially reward it, often in the form of money (not a bad deal, eh?).
If you aren’t in a class, find ways to actively seek out feedback. Turn to friends, family, and anyone else whose opinion you respect to hear how they feel about your work. Doing this consistently will teach you and help you become more aware of the impact of your work.
Learn how to self-edit — and self-criticize
You won’t always have access to a roomful of classmates willing to give you feedback. When you’re going over your photos alone in the darkroom or editing them on your laptop, you’ll find it’s time for some self-editing. This tends to be more difficult than getting feedback from an outside source. You often have personal feelings wrapped up in your work. So how do you go about effectively self-editing so that you can improve your work?
Remove your personal attachments. You spent hours getting a photo just right. The labor that went into this photo might make you more protective of its quality — and keep you from being honest with yourself about it. Or you might come down too hard on this photo if you’re disappointed in the final product. Regardless, self-criticism is all about removing your personal feelings and looking at your work objectively. Depersonalize so that you view your work in the same way a classmate would. This takes practice.

Focus objectively on the fundamentals. Where should you focus your criticism? On the fundamentals. Recall what you learned in class (if you are taking or have taken a class). Go through the basics of exposure, composition, and lighting. What works well, and what could be improved? What do you think your instructor would say about your handling of the fundamentals? What fundamental of photography do you think you need to focus on improving when taking your next photo? Keying in on the fundamentals will keep your self-editing objective and turn the process into a powerful learning experience.
Be your own worst critic — but be kind to yourself. Don’t be afraid to be ruthless with your self-criticism. For many artists, this is natural. Being your own worst critic can be a valuable tactic. It can help you to strive to improve and never feel complacent about your skills or the work you’re producing. But if you are going to be hard on your work, make sure you cut yourself some slack. If you’re a new photographer, remember that you’re still improving. Some work you make will be disappointing. All that matters is that you don’t lose motivation and you move onto the next project with enthusiasm and confidence.
Enter workshop mode. Sometimes looking at a photo and assessing your response to it isn’t enough. Many people find it helpful to reflect on their photo out loud, as though they’re speaking in workshop. You get out of your own way a bit when you do this and have the chance to speak objectively. Alternatively, writing a few sentences about your response to your photo is a good way to organize your thoughts. Saving this written feedback can be valuable, as you can look back on your work with some distance and see how your reaction to it changes over time.
Deciding on your educational path
As we’ve discussed, you have plenty of options when it comes to your formal photography education. And as we’ve seen, most classes tend to focus on similar fundamental concepts. As you decide on your educational path, you need to ask yourself a few questions:
What are your goals? Where do you want photography to take you? Do you want it to be a full-time job? An especially rewarding hobby? A fun and lucrative side hustle? Knowing your goals and scaling your educational path alongside your goals is a good way to decide on the right kind of program.
Who are your idols? There’s probably someone out there in the photography world who has a body of work or career that you admire. See what they did in terms of education. You don’t have to copy them. But knowing who you look up to and understanding how they got where they are is a good way to decide on the right educational path.
What is your current life situation? Maybe you’re at a point where entering a graduate program is out of the question. That’s OK. You need to be realistic. Maybe you take an online course, earn an online photography degree, and make some money as a photographer for a few years before you have the earnings and confidence to pursue a more advanced photography degree at a college. It’s not always a straight line from “beginner photographer” to “professional photographer.” Embrace the detours while keeping your overall plan in mind.
What kind of photography do you enjoy the most? Different classes and programs focus on different things. Are you looking to do commercial photography? More artistic photography? What kind of earning potential are you looking for? Do you want a class that touches on photographic history and art criticism? These are all things to consider when choosing a class.
Before signing up for or applying to a class, reach out to any valuable resources. These could be admissions officers, former students, or instructors. Explain your goals and see if the class content matches up with those goals. Go on a tour of a photography school and do plenty of online research. You’re making a big, exciting decision when you decide on an education path. Take it seriously and weigh your options carefully.
Finding the right equipment and tools
In many ways, mastery in photography is about mastery of tools. It’s a craft that forces you to understand machinery on a deep level: How does a different lens alter the way a photograph looks? What lighting equipment do you need to evoke a specific mood?

Having the right equipment makes everything easier. But finding the right equipment isn’t simple. Different types of photography call for different tools. There are certain cameras that transcend type and work in a variety of settings. And when you’re starting out, it’s probably best to go with equipment that is fairly general. After all, you’re still exploring and learning your way around a camera. So it’s best to choose a camera that helps you explore as widely as possible.
Another complicating factor is the evolution of different technologies. It feels like there’s a new cutting-edge camera released every day, but it’s best not to get caught up in the latest technological advancements. Always looking for the “next best thing” in photographic equipment is usually a waste of time and can put a real dent in your bank account. Instead, find the camera that’s right for you and learn how to use it inside and out.
As your photography skills grow, you’ll find that you aren’t just buying a camera. You’re instead buying a collection of photographic equipment that works together to help you produce your best work. You want a camera, photo editing software, and a laptop that all work for you, as well as a host of other tools that help take your photos to the next level. In this section we’ll explore this equipment and outline which tools work best in which contexts.
Choosing a camera
Choosing a camera is one of the biggest decisions a new photographer makes. And as you grow, you’ll likely need to seek out new cameras. That’s why learning how to choose a camera can become a skill unto itself. While this might feel like a high-pressure decision, choose which camera to buy the same way you’d weigh any other purchase — by carefully weighing your needs against your options.
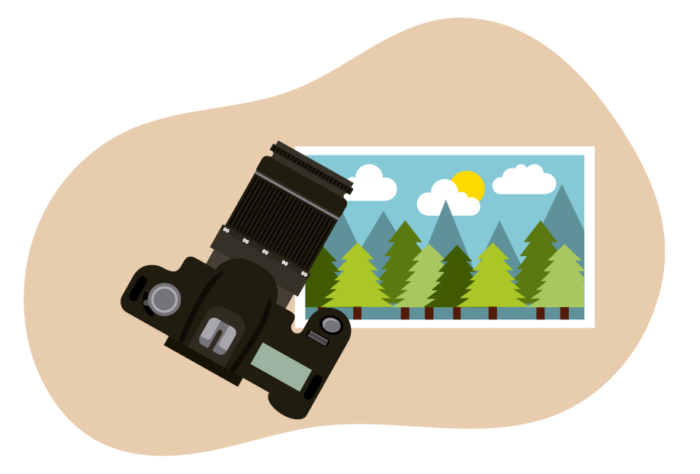
For instance, when you buy a mattress, you probably consider what type of sleeper you are. Do you sleep on your side? Do you tend to toss and turn? Do you run hot or cold during the night? These are all questions that tease out what kind of sleeper you are. Once you know the answers — and have a budget in mind — you’re ready to search for a mattress. When buying a camera, you’ll similarly want to ask yourself what type of photographer you are and conduct your search accordingly.
What are your needs? You’re likely just starting out. In that case, you probably want something that allows for versatility. You also don’t want to make too dramatic an investment off the bat, so consider aiming for something in a medium price range. If you think you’ll need to change lenses frequently, you’ll probably want to go for a larger camera like a DSLR instead of a compact camera. Do you need high shutter speed? Powerful autofocus? Do you want something lightweight, or are you OK with something bulkier? These are the questions you need to answer.
What are your options? Compact cameras, DSLRs, and mirrorless cameras are the three main types worth investigating. They each have different pros and cons in terms of features and price. Luckily there’s flexibility within these categories — you can find some expensive and advanced compact cameras and cheaper, more basic DSLRs.
Do your research. The most important thing is comprehensively researching your options. Read reviews online. Familiarize yourself with different brands. Go into a photography store and see if they’ll let you test out a camera yourself — many will. Watch plenty of YouTube videos and collect as much information as possible. All the resources you need are out there, ready to help you find the best possible camera for your needs.
Which camera type is the best for you?
Once you know your needs, it’s time to assess your camera options. As a beginner, you probably don’t want to break the bank right away. But you still want a camera that allows you to explore, make mistakes, and grow as a photographer.
Use some of these popular online photography tools
Not every photography purchase involves going to a store. There are also plenty of tools for photographers online. These include photo-editing tools, useful instructional resources, and more that will help you advance your skills.
Finding the right laptop
When you think of photography, you probably imagine holding a camera to your face and composing beautiful images. But that’s only one part of the process. You also have to edit tons of photos. Luckily, advances in technology mean most laptops are able to give photographers everything they need to succeed. But some laptops offer features that are more aligned with the needs and lifestyle of a photographer. What should you look for when seeking the best laptop for photography?

- Top-of-the-line display: You’re going to be looking at photos closely on your laptop; you need an absolutely top of-the-line display so that you can see every nook and cranny of your photos. If you’re looking at photos on a laptop with so-so display, you likely won’t be able to make edits with confidence. The Apple Macbook with Retina display is a popular choice for this reason. Retina display offers detail, brightness, contrast, and saturation. If you want a larger screen that still has powerful display, the Dell XPS 15 is 15 inches (making it larger than the 13-inch Macbook), which means it’s a great option.
- The ability to handle the software you need: You’re going to be installing lots of software for editing — most likely the Adobe Photoshop suite. While Adobe works with just about every major laptop brand, you still want a computer that can handle this software while performing quickly and without crashes. The Lenovo Thinkpad X1 Yoga is a popular choice for that reason, offering a powerful processor that’ll allow you to edit photos without any delays disrupting your workflow.
- A touchscreen: More and more laptops are offering touchscreen capabilities, making a mouse or touchpad obsolete. While this might not be a requirement for all photographers, the ability to take a hands-on approach to editing (literally!) can help some photographers. You can easily zoom in or make minute changes. And using a stylus can help you get even more tactical with your edits. The Surface Pro from Microsoft is an especially popular touchscreen option.
- Long battery life: You may have to edit on the go — and you might not always want to drag around a charger on top of the other equipment you’ll have. A laptop with long battery life gives you peace of mind and allows you to edit for long stretches of time without interruption. Lucky for you, most major brands are making advances in battery life, so you should be able to find an option that lasts you a while.
It’s easier than ever to find a laptop that works for a photographer. Advances in technology mean that most brands offer pretty vivid display. You also no longer need to worry about storage, as external hard drives and the cloud have made it easy to store tons of image data. So do your research, weigh your options, and seek out a laptop that works for you.
Lenses, tripods, and lights — oh my!
It’s not just about your camera. You also need plenty of other equipment if you’re looking to create professional photos. Fortunately there are plenty of options out there that can work for just about any type of photographer. Here are the other pieces of equipment you’ll need and the things to consider when purchasing them:
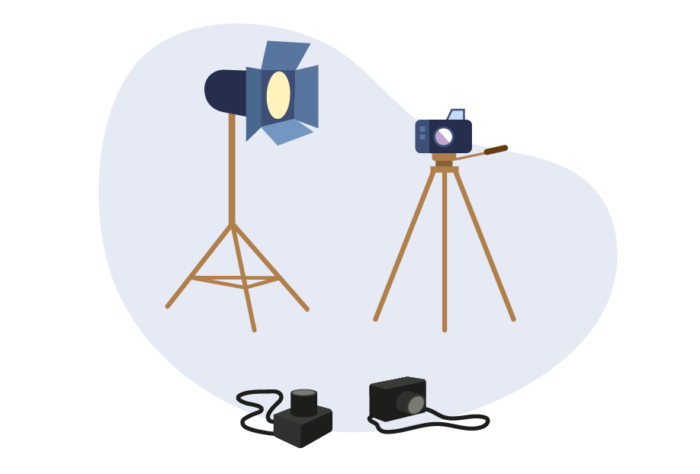
- Lenses: Earlier we mentioned DSLRs and mirrorless cameras that enable you to change lenses on a dime. Of course you’ll need a solid selection of lenses in order to make the most of this capability. Lenses can have a massive impact on how your images look. For instance, macro lenses help you photograph small images up close. You can imagine they’re useful for nature photographers taking photos of small insects. If you’re buying a camera that enables you to change lenses, it will come with a few lenses to use, known as “kit lenses.” But you might want to supplement your lens collection with a telephoto zoom lens for taking photos from a long distance as well as a wide-angle prime lens for shooting with wide apertures.
- Tripods: If lenses seem a bit overwhelming, don’t worry — tripods are much simpler. Tripods are a basic stabilizing tool, and as a beginner, you likely won’t need anything too complex or expensive. You want something versatile, lightweight, and stable. Sizeable height and a strong swivel system are differentiators. Monopods, which you can hold in your hand and take on the go, are useful for active photographers who may be photographing nature or sports events.
- Lights: As a beginner, you likely will not need too dramatic a lighting setup. But as you become a professional, you’ll want lighting that imbues mood in your photographs and allows you to offset the effect of exterior conditions. Do you need lighting that’s portable, or do you have a studio space where you can put more permanent lighting? Once you know what you need, you’ll want to research monolights, flashes, and strobes to get an idea of the lighting tools that fit your budget. You can also rent lighting equipment if you only need lighting for a certain shoot.
Mastering photo editing
Taking photos is only half the battle — editing is the other half. And becoming a master of photo editing can take your skill set to a whole new level. You know the tools you need for editing (Adobe Elements and Lightroom primarily), so now it’s time to find the educational resources out there to help you master photo editing.

- Editing classes: Most intermediate and advanced photo classes will delve into editing (and even some beginner classes touch on it). College programs will often have entire classes dedicated to photo editing. If you’re looking to really master this skill, look no further than a class where you can work alongside a teacher and get frequent feedback.
- Online tutorials: Although classes about photographic composition are a bit difficult to take online, editing is somewhat easier. That’s because many online photo classes and tutorials are project based. You may be given a collection of photos and told to edit them based on the skills you’ve acquired. Projects are the best way to learn photo editing. Most “master photo editors” will tell you that many of their skills were self-taught, learned through trial and error while working on projects. If you don’t want to take a full class, smaller general Photoshop tutorials and Illustrator-specific tutorialsare all over the internet, available to help you grow your skills. Here are a few more to check out:
- Feedback: When learning photo editing, feedback is crucial. A classroom of other students who chime in with feedback is definitely helpful. But if you aren’t in a class, you can get feedback from everyday people who aren’t photographers. That’s because the final results you’re looking for have a level of quality that is easily recognizable. People can usually tell right away if a photo is edited poorly. So don’t be overly discerning when looking for feedback — ask friends and family whose opinions you trust.
Tools: While you’re growing as a photo editor, always make sure you’re using the right tools. For instance, maybe in the beginning you’ll use a free online photo editor like GIMP. While several free editing programs are powerful and offer plenty of features, they do have limits. So as you progress, know when it’s time to graduate to a new program. And be aware that changing tools and learning a new set of controls can be tough. So attempt to make your first editing program your “forever program.”
Setting up your photography business: Where to start
Once you’ve leveled up your photography skills, the natural next question is how do you monetize these skills? Don’t worry. Even as Instagram leads everyone to believe they’re a photographer, there’s still massive demand for actual professionals who can take stunning photos.
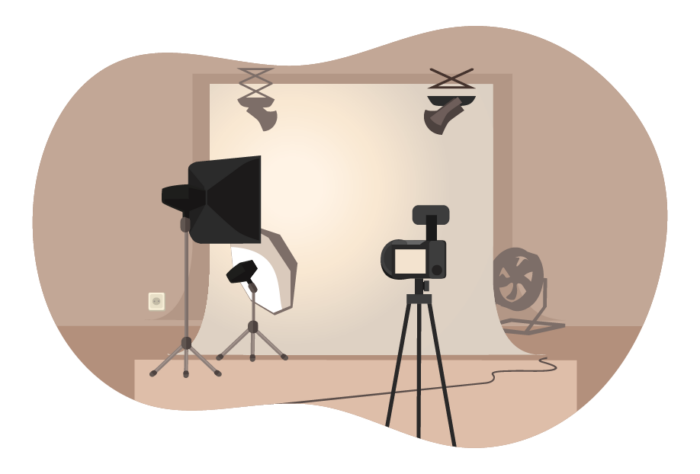
The options for starting a photography business are varied — and there are plenty of paths to success. In this section we’ll explore the different types of photography businesses, outline the different ways of building a loyal following, and explore the ins and outs of how to start a photography business.
Popular types of photography
At their heart, photos are about capturing memories. So when an important event happens, a photographer is usually there. And it’s not just events — photographers create art, capture nature’s beauty (such as flower photography, tree photography, waterfall photography or silhouette photography), and convey important information. There are many types of photography you can pursue.
How to make money with photography
It’s time to turn these photography skills into a business, but how? Luckily it’s not as difficult to get started as you may think. Here are the steps you should take.
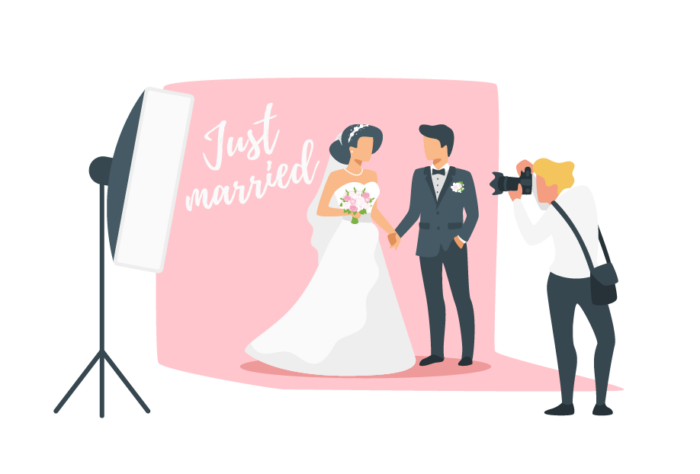
Identify the most monetizable types of photography. Some types of photography make more money more consistently than others. A few that stand out as particularly lucrative are wedding photography, family photography, maternity photography, real estate photography, commercial/stock photography, pet photography, product photography, and boudoir photography. Again, this list isn’t comprehensive, and money can be made in just about any subcategory of photography. One area that’s trending is aerial photography, which uses drones to snap pictures from a bird’s-eye view. Keep in mind your own interests. For instance, the best wedding photographers are able to tap into the palpable excitement of a wedding — and that passion comes through in the photographs. If you find weddings silly, you probably won’t be very successful in that field.
Assess the market around you. When one suburban mom realized her children were constantly having their photos taken — for graduation, sports, prom, etc. — she realized her town had a major market for youth-based portrait photography. The best business plans often come from organic market needs. For instance, if you’re in an area with lots of real estate turnover, there’s probably a need for real estate photographers. And someone looking to get into fashion photography will likely have more luck finding clients in Milan than they would in, say, rural Kentucky. So before you dive in and commit to a type of photography, ensure that your community has a need for that kind of photography.
Focus on one or a few types — and practice. Now that you know the types of photography that make money and have a better idea of the market around you, it’s time to decide on a path — and start practicing. There are lots of ways to practice before diving head first into a business. If you’ve decided on portrait photography, for instance, you don’t need a bunch of human subjects to practice the fundamentals.
Learn from the best. Who are the best wedding photographers out there? Who is absolutely nailing it in the world of pet photography? Gather as many role models as possible and learn from them. Set your sights high with some of the industry’s greatest and see how they manage to produce such great work. Then try to find more humble businesses that are in the early stages but finding success. Ideally study photographers who are working in a market similar to your own. Focus not just on their work, but also on their business model. Keep these resources at the ready as your business launches.
Develop a marketing strategy. Getting the word out about your photography business is crucial. Clients can’t find you if they don’t know about your business. So start drafting a marketing plan. It doesn’t have to be anything elaborate off the bat. Just know the channels you’re going to invest in. For instance, some photography businesses get off the ground with a stunning Instagram. It’s free and just takes a small investment of time. As you get closer to really launching your business, you can start to home in on a detailed marketing strategy — which we’ll discuss later.
What’s the best drone for photography?
Drones are becoming a bigger and bigger part of photography. As technology advances, drones are being used for beautiful aerial photography. Want to know the best drone for photography? Or the features to consider when selecting a drone?
Promoting your photography
Once you’re serious about your photography business, it’s time to get your name out there. This is where developing an effective marketing strategy enters the frame. In short, there’s no “correct” way to promote your photography. People use all sorts of different tools and methods to get their work out there and show prospective clients what they’re capable of. All that matters is getting people’s attention.
Build a portfolio. What’s your best work, the work that really shows off all you’re capable of as a photographer? That’s the work you’ll want to include in your portfolio. Of course, your portfolio can be as big as you want it to be. But the best portfolios are discerning, showing just the work that’s necessary without wasting the viewer’s time or including photography that is subpar or insignificant. Furthermore, you should make sure your portfolio isn’t full of duplicates. Literal duplicates are obviously unnecessary. But even having multiple portrait shots from the same angle and with the same lighting and composition can be unnecessary. Pick the best one and let that photo do the talking!
The internet is your friend. It can be hard to imagine how photographers promoted their businesses before the internet. And as computer displays improve, there’s no reason the web shouldn’t be your own personal showroom. Between a personal website and social media feeds, you have so many opportunities to show off your work in an easily accessible way. And while many photography businesses grow via word of mouth, don’t be afraid to invest in some social media advertising. Facebook ads are an affordable way to draw people to your work and find clients.
Make your work sing. But don’t just put your work online — put it online in a way that makes it look as good as possible. Too many photography websites have clunky templates that detract from the portfolio on display. Opt for a minimal template. Web hosting platforms like WordPress usually offer templates that are specifically designed to showcase photography. There are also widgets you can add to your site that allow visitors to zoom in on pictures and view them in an easy and illuminating manner.
Build relationships. Having an online presence will definitely get your name heard. Posting about your business on social feeds and getting your own domain puts your work out into a rich ecosystem of potential clients. Still, word of mouth can be effective. Work on face-to-face interactions where you can build relationships. One client can turn into three clients down the road if you deliver great photographs, great service, and encourage referrals. For instance, offer a free photo shoot to anyone who refers a friend. You’ll quickly find your client list growing.
It takes creativity and curation to promote your work. Find what you do best, display it, and find creative ways to turn the viewers of your work into loyal customers. At the end of the day, the best way to grow your business is to consistently deliver fantastic work to your clients while being a joy to work with.
Self-promote with some business cards
Sure, business cards may seem old-fashioned. But entrepreneurs have been relying on them for self-promotion for centuries. In fact, they’re thought to have originated in 15th-century China. Even today, 600 years later, business cards stand the test of time as a great initial way to promote your brand.
Setting up a portfolio and website
Setting up a portfolio is one of the most crucial steps in promoting your photography business. A portfolio puts your skills and style on display. Here are a few easy things to consider when creating your portfolio:
- Make sure your portfolio shows everything you can do and nothing more. Avoid duplication and redundancy.
- Make the portfolio easy to navigate, both in person in a binder and online in your website’s gallery.
- Think of this portfolio as your first impression — and realize it can make or break your chances of securing a client.
- Get many outside opinions. Ask friends, family, and people in your photography network to give feedback on your portfolio.
Once you’ve learned how to set up a photography portfolio and are ready to show it off, it’s time to set up a website. You can get started easily with one of these HTML templates. Here are some things to keep in mind:
Pick a simple domain name. Don’t overthink your domain name. Plenty of photographers just use their first and last name then tack on a .com. If you’re working to brand your business around a certain name (such as your last name followed by “Photos”), that can also work as a domain name and should figure prominently on your website.
Have an about page and a contact page. When people get to your website, they want to learn a bit about you. What are your credentials? Where did you study photography? Who have you worked with in the past, if applicable? What are your specialties? What is your general workflow (e.g., scheduling, quotes, etc.)? Include all of this on a concise but informative about page, which can be accessed easily from your website’s homepage. In fact, many websites just include this information tastefully on the homepage. Then include all of your contact information. This means your phone number, email, and social media profiles. Give your potential clients many diverse ways of reaching you.
Let your photos do the talking. Now that you’ve explained who you are and how to get in contact with you, it’s time to let your photos do the talking. Your photos should figure very prominently on your website, either on the homepage or on a separate “gallery page” that you can get to very easily from the homepage. The page where you place your portfolio should be very minimal — think a white background that is free of text. This way, people can focus on the photos and not be distracted by a busy background.
Categorize your photos if necessary. Within your portfolio, you should divide your photos by type. For instance, if you have both still life photos and portrait photos on your website, sort them accordingly instead of mixing everything together. You can include a dropdown menu that allows you to easily navigate between photos or tag each of your photos by type so that your portfolio is organized and easy to navigate.
Add some character. Sure, your website should be pretty straightforward — some quick personal info combined with your portfolio. But don’t be afraid to include some character here and there. After all, you want to brand your business and enable it to stand out from the pack.
Spread the word on social media
Social media thrives on photo sharing. Instagram and Snapchat are all about pictures — and pictures figure prominently on Facebook, Twitter, Tumblr, and Pinterest too. Plan on making social media one of the cornerstones of your marketing strategy. Here are a few things to consider as you use social media to promote your photography business:

Carefully curate Instagram. Instagram is the central hub for many photographers. It’s an especially good place for fashion photography, travel photography, and food photography — though just about anything works. Think of Instagram as your personal portfolio that’s ever-evolving and growing. You might just find that some prospective clients show up in your comments and direct messages.
Be interactive. Instagram, Facebook, and Snapchat all allow you to have stories. These are a great way to interact with customers on the go. See a pretty sunrise on your morning commute? Snap a photo of it and upload it to your story. This is a great way to keep your brand chugging along — and it shows prospective clients that photography is your passion at any hour of the day. When you aren’t making stories, be sure to respond to comments and messages when people interact with you on social media. It’s a great chance to connect and show some personality.
Be aware that social media skews younger. This is one of the great bonuses of social media. You have a large audience of generally younger people who love to share content and interact. So always be sure to share content that is fresh and in step with internet culture. Don’t try too hard — and no, don’t share memes! — but do try to create a space online that is fun while still maintaining a level of professionalism.
Periodically post your business information. Don’t spam friends and family with your contact information every day. But every few months, post a story or photo that reminds people of the services you offer. It doesn’t have to be intrusive — it can just be a friendly reminder to connect with you and spread the word.
Advertise on social media. The world of social media advertising can also pay off big-time if you do it right. Buying ads on Facebook, for instance, is a great way to push your brand in front of a wider audience. Of course this costs money, so be sure this is a worthwhile investment and within your budget.
Social media is a hub of photographic content. And because you’re a skilled photographer, it’s somewhere you can stand out and draw lots of attention. Post good content consistently and you can be pretty confident that people will find it and want to work with you.
Network in the photography world
Connecting with other photographers is a great way to grow your client list. Yes, you are technically in competition with other photographers for clients. But there is still a nice level of solidarity within the community. Other photographers care about their craft — so they always like to see other photographers producing great work.

Join photography communities. There are all sorts of online message boards and social media groups specially designed to connect photographers with others in their profession. These are a great way to get feedback, learn about the newest technology, and potentially find collaborators.
Go to festivals and expos. In-person networking events are naturally a great way to meet people in your industry. Going to a photography festival can also introduce you to new cameras and equipment that might benefit your business. These events are also a great chance to hand out your business card and find people to work with down the road.
Volunteer. Sometimes organizations need photographers for events but don’t have the funds to pay for photography. This is where you come in. Not only does volunteering feel great — capturing memories for people on a pro bono basis — but it’s also a chance to meet other photographers or simply get your name out there in the community.
Connect on social media. Follow other photographers on Instagram, Twitter, and any other platform they use. And don’t just follow — interact. Cheer them on with positive comments or chime in with an intelligent question about the camera or equipment they used for a certain photo. This is a great chance to build relationships with others in your field.
Optimizing your business — and making more profit
Let’s face the facts: Photography isn’t a cheap profession. Cameras and equipment cost a great deal of money. So photographers are always looking for tools that can save them money while making their jobs easier.

That’s where JotForm comes in. JotForm boasts plenty of features that can make photographers’ lives easier. JotForm’s wide array of data collection tools can make booking and scheduling clients a snap. Many photographers have used JotForm to ease their workflow — and it’s enabled them to affordably provide great service for their clients.
How can JotForm help you optimize?
A lot of information needs to be exchanged before a photo can be taken. Client information, schedule information, payment information, and, potentially, release forms. And that’s just before the photo. Afterward you might send proofs so your client can let you know which photographs they like.
If you aren’t organized, this entire process can become a huge headache for the client and a time suck for you. If data collection becomes a pesky bottleneck in your workflow, you could potentially alienate the customer and lose time that could be spent working with other clients.

Online forms can prevent that from happening. Over the years, JotForm has found that photographers rely heavily on forms to exchange information. JotForm has the tools to help photographers optimize their workflow. Here’s how:
- Make scheduling a breeze. Scheduling can get out of control, devolving into a head-spinning back and forth as photographer and client try to settle on a time. With the JotForm appointment slots widget, you can show clients which times are available and which aren’t. That way your schedule is clearly laid out for anyone who visits your scheduling form.
- Collect all contracts and payment info. Gone are the days of sorting through hard copies of session agreements. JotForm’s session agreement form helps you gather a client’s information and signature, then displays it on your JotForm dashboard. And you can easily collect payment information on top of these contracts — and have all of it in one place. Payment processing in JotForm is suited to your clients’ needs thanks to over 20 different payment integrations, such as Square, PayPal, and Stripe.
- Arm yourself with model release forms. Model release forms are a crucial document for professional photographers. They give you the signatures you need to ensure that you can use photos containing people for commercial use. JotForm’s model release forms make the process easier for photographers because they can access these forms on their phone. You can easily link this form with Google Sheets so that your signatures appear in one organized spreadsheet.
It’s no wonder big-time photographers have a fleet of assistants — being a photographer calls for plenty of paperwork. Luckily, JotForm makes the entire process easier, digitizing the collection and sorting of online forms so that all of the information you need is in one easy-to-navigate place.
Saving time and money with JotForm
There are plenty of expensive photography tools out there. And when running your business, you can easily run up your costs by investing in workflow software that doesn’t do a whole lot to make your job easier. If that isn’t enough, you may need to hire an assistant to keep track of all of your administrative materials.
Luckily it doesn’t have to be this way. Online forms can help you save money and time, cutting out the need for expensive software and added staff. Here are the different ways JotForm can save photographers time and money:
- Easy setup: Getting started with JotForm is fast and simple. All you have to do is build a form.
- High customizable: Your business is unique. And you want a form that caters to your business’s specific tasks and goals. That’s why the customizations available in JotForm have been such a hit among photographers, enabling them to create online forms that help them grow their business.
- Time-saver: The time it takes to pass forms back and forth can add up fast. This can slow down your business operations, which increases the cost per client and makes it harder for you to take on more clients.
- Digital: Payment integrations and e-signatures are especially helpful for photographers. In a profession where a great deal of work is done on the computer, it’s convenient to handle payment processing and signature collection on the computer as well.
- Seamless scheduling: One of the top use cases for photographers is JotForm’s scheduling forms. Photographers have busy schedules, so sending a client a form with all of your available times expedites the scheduling process and saves you from time-intensive back and forth as you try to settle on a time.
- Convenient client info collection: It’s great to go into a photo shoot knowing exactly what the client wants to get out of the session. By collecting this information ahead of time with JotForm, you can hit the ground running once your photo shoot begins.
Time really is money when you’re running a business. Saving time with JotForm will help you handle more clients, conduct business efficiently, and provide service that keeps clients coming back over and over.
Common photography forms
Photographers use online forms for all sorts of tasks. Here are a few JotForm forms that are particularly popular among our clients who run photography businesses:
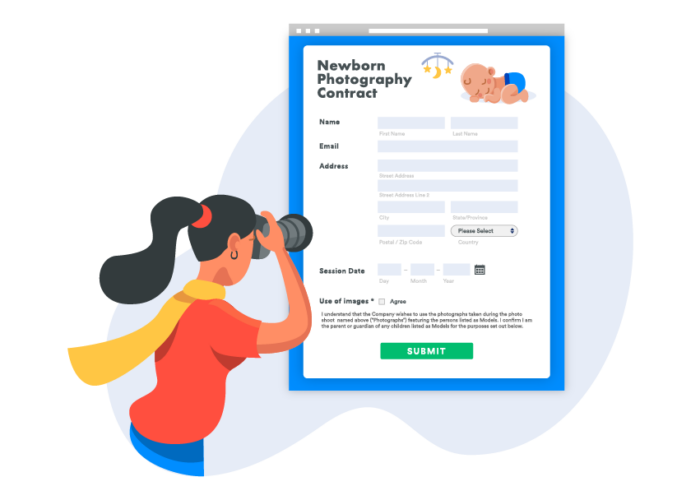
- Photo release form: Photographers need to get consent before taking photos of people. JotForm’s extensive array of photo release forms allow you to seamlessly gather the signatures you need — and enables you to have this information on hand in your JotForm account whenever you might need it. You can even collect information and link it to Google Sheets so that all of your signatures are in one place.
- Session agreement forms: What have you and your client agreed on for your session? Session agreement forms put this information in writing to ensure that you and the client are on the same page. And JotForm makes it easy to collect this information with a variety of different session agreement forms. For instance, check out this form specifically designed for taking photos of families.
- Photographer applicant forms: Maybe you’re growing your business and hiring a few other photographers to help you out. If you’ve gotten to this point, congrats! And if you want to keep all of your applicants’ information carefully organized and easy to sift through, online forms will certainly come in handy.
- Event photography forms: Taking a photo of a big event? You’re probably going to need a contract for that kind of thing. A basic event photography contract should do the job — but JotForm also offers more specific contracts for weddings, new additions to the family, and more!
- Equipment rental forms: Renting out some of your equipment? Or renting from someone else? Getting all of the details of this transaction down in writing is vital and seamless with an online form.
- Feedback forms: Getting client feedback is important. JotForm has a wide array of feedback form templates that you can customize to your business.
If you need to collect information, there’s a pretty good chance JotForm has a form for the job. Throughout the entire transaction — from booking, signing, paying, and leaving feedback — JotForm is there to make the process easy so that you can focus on taking great photographs.
Customer feedback can go a long way
You always want to make sure you’re offering your clients the best possible service. But it’s not always easy to get their feedback. For photography, there isn’t a ready-made way for clients to leave reviews the way they do for other businesses. So how do you get an idea of what went well in a given photo shoot and what needs improvement?
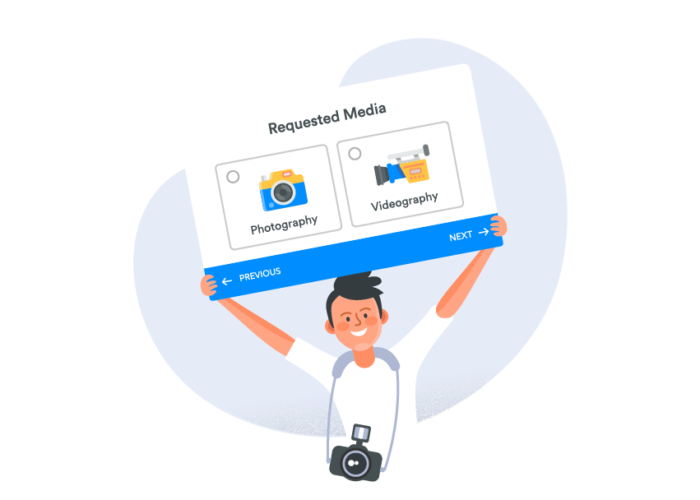
It all comes down to customer feedback outreach. You can easily ask for feedback with JotForm’s extensive array of feedback forms. These forms enable customers to give their thoughts — and then send that feedback straight to your JotForm dashboard and email.
How do you get started? Getting started with JotForm feedback forms is simple. Just explore the library of templates and find the form that best suits your needs. You probably want to include a mix of number rating (on a scale of 1-10) alongside text fields for qualitative feedback.
Get ready to customize. You’re able to get under the hood and customize our forms to your liking. In short, you want to make sure you’re getting a detailed evaluation from the customer filling out the form. At the same time, you don’t want to make the form too lengthy. Otherwise the customer might feel like you’re wasting their time. Keep it concise but in a way that will still be useful for you.
Make the most of your feedback. After you’ve gotten plenty of feedback through your online form, use this input to improve your business. Do customers like the finished product but feel the actual photo shoots could be more organized and run more smoothly? Internalize that feedback and apply it to future clients. And if you get your client’s permission, don’t be afraid to use some positive feedback as testimonials in marketing materials, such as your website.
Remember in photography class when you would get feedback from your instructor and classmates? Well you’re now a professional photographer with clients — and you’re getting feedback in the real world. This feedback serves the same function as it did in school: to give you the tools to improve. Because, after all, you care about your craft, you always want to get better at what you do, and you’re absolutely determined to become a master of the photographic arts.
