Archive

Archive for the ‘’ Category

20 Key Influencer Marketing Statistics to Help You Shape Your Strategy in 2023

May 12th, 2023 No comments

For many marketers, an influencer marketing strategy is a no-brainer. The others are still deciding on the worth of influencer marketing. 

Both are perfectly right in their own way: After all, the importance of influencer marketing “depends” on the type of industry you’re in and the kind of work you do. 

However, if you’ve never dipped your toe in the world of influencer marketing but are eager to learn more, we’ve got some jaw-dropping statistics that’ll help you shape your strategy in 2023.  

Please note: We’ve only noted the statistics acquired from studies conducted between 2021–2023 to ensure relevancy.

Let’s dive in.  

Key statistics to shape up your influencer strategy 

1. When asked to share a budget, 23% of marketers planned to spend 40% of their marketing budget on influencer marketing, whereas the average majority (25%), planned to dedicate 10–20% of their budget. (Source)

Some marketers leverage AI to cut down costs. There are tools that help to find potential candidates in a short period of time, plus writing tools can help develop guidelines and brand books to make the partnership seamless. 

Tools like Klear, Chat GPT, and specialized writing tools for marketing and sales content, for instance, are some valuable resources marketing teams can leverage to save time and money. However, it is crucial to check for features and specifications in advance to choose the right toolset. For those looking in for tools in the content space, online reviews like this one on Jasper.ai vs. Copy.ai are helpful. 

2. 43% of brands spend less than $10k/year (US Dollars) on influencer marketing. However, there are a few who spend more than $500k. (Source)

Image Source

3. Instagram is the most popular channel for influencer marketing, with 87% of marketers and 90% of creators planning to increase their presence there. (Source)

4. According to a 2022 survey (whose respondents were mainly brands and PR and marketing agencies), 54% of the organizations said they worked with up to 10 influencers, and 3% said they worked with 1000+ influencers. (Source)

5. In 2023, brands plan to decrease their spending on the following platforms: Snapchat (73%), Twitter (58%), Pinterest (43%), etc. (Source)

Image Source

6. Zara, Shein, and Instagram are the most talked-about brands on Instagram. (Source

This indicates the audiences there place importance on fashion, which means if you’re in the fashion business and you sell products like leather jackets and linen suits, partnerships with creators on Instagram may be an exceptionally good strategy for you. You can get a lot of valuable data for earned media and social media mentions and utilize this data for your HubSpot lead scoring, which will help you get more conversions in the end. 

7. In 2022, brands placed importance on the following metrics when partnering with influencers: engagement rates (32%), social media traffic (19%), and brand mentions (11%). (Source

However, in 2023, the following metrics have the highest level of importance: views, reach, and impressions (49.6%), engagement (25.5%), and conversions/sales (24.9%). (Source)

Image Source

8. 61% of brands prefer to work with the same influencers, whereas the remaining 39% prefer working with new influencers. (Source)

9. An average majority (77%) of influencers are female, and 23% of them are male. (Source) You’ll find a breakdown of this statistic by each platform below. 

Image Source

10. In 2021 and 2022

  • Mega-influencers charged at least $1,200 (US dollars) per Instagram post, whereas macro-influencers charged anywhere between $185-$2500. (Source)
  • On TikTok, mega-influencers charged an average minimum of $1,034, and macro-influencers charged anywhere between $151-$793. (Source)
  • On YouTube, the former (mega-influencers) charged an average minimum of $2,500, and the latter (macro-influencers) charged between $1105-$16,234, thus making YouTube the platform that requires the highest amount of investment for influencer partnerships. (Source)

If your budget doesn’t allow you to partner with mega or macro influencers, you can try getting your foot in the door with organic posts instead of paid ones. 

For example, if you’re in the pet industry and want to work with a cat influencer, you can offer them free products, such as toys, food, accessories, furniture, and even cat insurance. That might get you noticed (and if your luck has it, you might get a free post out of it too). 

This barter strategy worked so well for Awful Cloth, it got them noticed by influencers Jason Derulo, Bryce Hall, and Charli D’Amelio. 

Image Source

If you get a free post or promotion, make sure to highlight it in you social media and website to use it as social proof. Create eye-catching captions to boost sales by leveraging AI writing tools, photo editors and upscale API to ensure high-quality.

11. A 2021 survey said that 53% of respondents believe influencers are the most skilled at promoting beauty products, and 45% of them said they are the most skilled at promoting clothing/accessories. (Source

12. More than 61% of the brands plan to use artificial intelligence or machine learning to identify which influencers to work with. (Source). 

Image Source

13. 39% of brands prefer to work with nano-influencers, whereas 30% of them prefer to work with micro-influencers. (Source

14. An influencer collaboration takes approximately 16 days to complete its full lifecycle. (Source)

15. Price per post for any influencer partnership is usually determined by the following formula, “Average engagement x Engagement Rate Price.” 

The average engagement rate cost on YouTube is $0.04, on TikTok is $0.21, on Instagram is $0.56, on Facebook is $2.63, on Pinterest is $5.51, and on Twitter is $37.82. (Source)

Side note: Prices are in US dollars. 

16. Lifestyle, fitness, entertainment, etc., are some of the most profitable niches for influencers. (Source

When you take an average of how much 500,000 influencers charge across various niches on a variety of platforms, these are the figures you’ll get:

Image Source

17. In 2022, these were the accounted engagement rates of influencers: Nano-influencers (2.53%), micro-influencers (1.06%), mid-tier influencers (0.91%), macro-influencers (0.86%), and mega-influencers (0.92%). (Source)

18. Between 2022 and 2023, 70% of influencers have increased their rates, 2% have decreased them, and around 28% are keeping them just the same. (Source

19. Men prefer to follow influencers who operate in the gaming, fitness, and food niches. While women prefer to follow influencers who operate in the skincare, fashion, and food niches. (Source)

20. A study that focused on Gen Z and millennials said that these audiences prefer to follow someone who’s authentic, funny, or knowledgeable, as opposed to someone with a large following. (Source)

Learn more about influencer marketing 

Since we’ve only seen the rise of influencer marketing in the past few years, there’s still a lot to learn about the industry’s future and how effective it could be in the long run. 

To keep up with all the trends in influencer marketing, you can regularly follow places like Influencer Marketing Hub, Adweek, and Noupe (as we regularly post advice on improving your brand presence and marketing strategies).

So are you ready to take the leap and invest in influencer marketing? Join the thousands of brands already tapping into this lucrative marketing strategy. You won’t regret it and neither will your bottom line. 

Happy influencing! 

Featured Image by rawpixel.com on Freepik

The post 20 Key Influencer Marketing Statistics to Help You Shape Your Strategy in 2023 appeared first on noupe.

Categories: Others Tags:

How to Cut Costs and Make More Profit in a Small Manufacturing Business

May 11th, 2023 No comments

Small-scale manufacturing is often the most fraught place to be from a cash flow perspective. You might have achieved some success, but be faced with the prospect of struggling to invest to expand your operations because your profit margins are tight, to put it lightly.

With that in mind, there are a few ways to overcome this conundrum, keeping your outgoings to a minimum, boosting your profitability, and still keeping customers happy. Here’s how.

Identifying Areas of Potential Savings

Since every penny counts, you must first take the time to identify areas of potential savings and pinpoint where changes can be implemented without compromising quality or customer service.

As part of this, consider reviewing overhead costs such as rent, utilities, and payroll expenses. Each area offers an opportunity for savings if managed carefully and strategically. Perhaps you’ll find that it’s possible to renegotiate rates with your commercial landlord, switch to a better deal with a new energy supplier, or streamline your staffing. If handled on a case-by-case basis, you’ll surely find a more cost-efficient way forward.

Additionally, look into ways to reduce energy consumption, perhaps by investing in efficient lighting solutions or updating older equipment that’s less power-hungry, and will lead to long-term savings. You can even claw back some cash when replacing outgoing hardware if you’re savvy, as you can easily sell used plastic machinery and other manufacturing equipment through online marketplaces.

Streamlining Operations to Increase Efficiency

One of the best ways for a small manufacturing business to cut costs and make more profit is by streamlining operations. This involves analyzing current processes, identifying weaknesses or areas that could be improved upon, establishing clear goals, and developing strategies toward achieving them. It’s an approach that can be applied to any organization, of course, but has manufacturing-specific elements to keep in mind.

For instance, it’s a good idea to invest in software solutions or automation tools that can help you reduce manual labor with tasks such as inventory tracking or order processing. These are often time-consuming to deal with by hand but can be easily accelerated with the right platforms.

Also, look into opportunities to outsource elements of your operations. This could include complex yet necessary aspects like warehousing, which a third party might be able to handle far more affordably than you could manage in-house.

You can even outsource things like accounting, payroll management, workforce management, marketing, and whatever else you need to. The leaner your small manufacturing firm is, the more adaptable, agile, and profitable it will be.

Making Smart Purchasing Decisions With Suppliers

In order to remain competitive and profitable, your purchasing decisions have to be on point. This means taking the time to research suppliers, compare prices, and weigh up the terms and conditions of sales contracts. This will help you identify the best possible deals for materials or products that your business needs.

Taking advantage of bulk ordering discounts also makes sense for businesses involved in mass production on any scale, as this can save money on essentials over time, while also preparing you to accommodate spikes in demand without being overwhelmed.

Finally, take into account quality considerations before making any final decision. It’s better to prioritize value for money over pure price because the cheapest option is a false economy if the goods you’re getting aren’t up to your usual standards. There’s no point saving a small amount if it only ends up creating consternation among your customers.

Implementing a Culture of Continuous Improvement

For any small manufacturing business that seeks to make more profit, establishing and maintaining a culture of continuous improvement is key. This involves creating an environment where employees are encouraged to think outside the box and suggest new strategies for reducing costs, while still delivering on the overarching mission statement of your firm.

This won’t just happen organically, as you need to be active in developing this culture, and giving your team members the tools and the motivation to live up to its promise. For instance, providing training programs for your staff on how best to identify potential savings opportunities will help build their skillset, as well as catalyze collaboration between departments.

It also makes sense to reward ideas or initiatives that have been successful in cutting costs, as this will motivate everyone involved while reinforcing positive behaviors.

Final Thoughts

Profitability is within reach for any manufacturer, and it doesn’t have to be achieved by cutting corners. Hopefully, you’ve now got a basic framework for finding cost-cutting measures that won’t jeopardize your position in the market.

Featured image by cottonbro studio

The post How to Cut Costs and Make More Profit in a Small Manufacturing Business appeared first on noupe.

Categories: Others Tags:

How To Boost Your Design Workflow With Setapp

May 11th, 2023 No comments

This article is a sponsored by MacPaw Inc.

As someone who wears multiple hats, it is challenging to balance a full-time job, freelance projects, and all sorts of creative endeavors.

This is how I started off: By day, I’m a full-time product designer. By night, I juggle all sorts of freelance work and creative projects.

I am currently self-employed. However, there are challenges that come with being my own boss: Working with clients, sales and negotiation, invoicing, building a personal brand, crafting a content strategy, time tracking, project management… The list goes on.

Trying to keep up with everything used to be tough. No matter how hard I tried, my to-do list always seemed never-ending. I was constantly feeling overwhelmed.

I thought to myself, “There’s got to be a better way.”

After analyzing my workflow, I realized that many tasks could be simplified or automated so that I could save time, focus on high-value tasks, and work fewer hours.

After years of trial and error, I discovered a range of tools and strategies that helped me save time and stay organized to focus on what really matters.

The apps mentioned in this guide are available on Setapp. Whether you’re a Mac user or not, these hacks will help you get more done in less time and improve your quality of life. I hope you find value in this guide.

Streamline Your Workflow With the Best Apps

You can use Setapp to access 240+ apps on your Mac and iPhone under a single monthly subscription.

Personally, I use Setapp to do three things:

  1. Try out apps that could help save time. Some of these apps cost more than Setapp’s subscription, so it’s a relief that I do not need to pay for each one individually.
  2. For apps that I only need to use occasionally, I can quickly install and uninstall them as needed, with no extra cost. This saves me precious space on my Mac and ensures that I’m not cluttering up my system with unnecessary apps.
  3. Since Setapp’s library is updated regularly, I always get to try out new apps to further enhance my workflow.

Track Time & Eliminate Distractions

As a freelance designer, I need to track how much time I spend on each project to calculate my billable hours. I used to manually create events on my calendar and calculate the hours spent on each project. It’s a waste of time, and sadly, it is inaccurate.

To solve this problem, you can use Timemator to track your time accurately and minimize distractions.

With Timemator, you can set up auto time-tracking rules for specific apps, files, or websites. For example, you can set rules so that the timer starts tracking when you work on a specific project on Figma or Adobe Photoshop.

The timer runs quietly in the background so that you can stay focused without any interruptions. You no longer need to manually start or pause the timer.

Pro tip: Use it to reduce distractions! Set up auto-tracking to track how much time you spend on meetings, talking to teammates or clients on Slack, or watching Netflix.

To help you identify where you’ve spent your time, Timemator gives detailed reports and analytics so you can reduce or eliminate time-wasting activities and get more done in less time.

The Only Font Manager You Need

As designers, we all know that font selection can make or break a creative project.

I was frustrated with Font Book (the default font manager on MacOS). It wasn’t user-friendly. Searching and comparing fonts was a chore.

I found Typeface to be useful — especially when you need to quickly browse through your font collection, customize the preview text and size in real-time, and compare to see how different fonts look side-by-side.

Over the years, I have saved up a huge font library. Typeface is able to load all my fonts quickly and remove duplicate fonts that bloat up my computer. It supports variable fonts and OpenType font features and has robust features for the busy designer.

For fonts you don’t use often, you can choose to activate them only when necessary. This way, your computer stays clean and fast.

As a bonus, you can also easily organize fonts into custom collections or tags.

Fastest Way To Create Device Mockups

When designing, we often need to create high-quality, professional-looking phone, tablet, and computer mockups to showcase our designs.

I used to spend hours searching for device mockup templates and launch Adobe Photoshop in order to use those templates. The whole process was time-consuming, so I switched to a tool called Mockuuups Studio.

All you need to do is drag and drop a screenshot of your website or app into it, pick a scene, and it will generate thousands of mockups. It’s pretty neat.

You can filter through scenes, models, and devices to find the perfect mockup for your digital product. Then, add hands, overlays, realistic shadows, or backgrounds to your device mockups. In the example above, I have filtered ‘iPhone’ mockups only.

Since it’s cloud-based, you can access it anywhere and collaborate with your teammates in real time too.

To further speed up your workflow, you can use their Figma, Sketch, or Adobe XD plugin. This is their Figma plugin:

Create Screenshots & Screen Recordings, Fast

When presenting designs (especially when working remotely), I take screenshots and screen recordings for my clients every day.

But instead of using the default Mac screenshot tool, CleanShot X is a better solution. This is an essential tool for every Mac user.

To quickly take a screenshot, use this shortcut key on your Mac: Command + Shift + 4.

This tool gives you the convenience to record MP4 or GIF with your desktop icons hidden, capture scrollable content, and annotate, highlight, or blur screenshots to hide sensitive personal information.

An example of how I annotate my screenshots:

I’ve used this tool for years with zero complaints. This tool will make your life easier when sharing screenshots with clients or on social media.

A cool feature you’ll also love: You can capture and copy any text, so you’ll never have to manually retype it again!

Your workflow will become much more streamlined and efficient since you no longer get bogged down in the technical details.

Never Waste Time Searching For Meeting Links Again

It’s challenging to keep track of various meetings, their details, and attendees, especially when switching between Google Meet, Zoom, your email inbox, and calendars.

To solve this problem, you can use Meeter to schedule or join meetings with one click right from the menu bar on your Mac.

It supports Google Meet, Zoom, and Microsoft Teams. When you want to join a meeting, you no longer have to waste time searching for meeting links, then copy and paste the link into the browser. Instead, you can now focus on being present in every meeting.

The tool allows you to directly call your FaceTime contacts and phone numbers and jump into recurring calls from the menu bar too. Pretty simple!

Save Time With Spotlight On Mac

When working with multiple files and apps on your Mac, you need to be able to quickly find and access them instead of navigating through different folders.

With Spotlight, you can do these things quickly. While this is not an app, it’s one of the most powerful features on Mac that can save you plenty of time.

To open Spotlight, simply hit Command + Spacebar on your keyboard and start typing.

Then, try these on Spotlight:

  • Perform quick calculations.
    No need to open a calculator app. Simply type in your calculation in Spotlight and hit enter. It’s that easy.
  • Search for apps.
    Quickly find any app on your Mac.
  • Search the internet.
    Type your search term, and it will launch your default browser with the search results. You’ve just saved a few clicks.
  • Find files or folders.
    Type in the name of the file or folder, and you have it.

  • Check the weather.
    Type “weather” followed by your location, and it will give you up-to-date information on the current weather conditions and forecast.

Cool, right? Learning how to use Spotlight effectively is a game-changer. Give it a try, and see how much time you can save.

Design Accessible Interfaces

As a product designer who also builds websites for clients, it’s a challenge to find and create the perfect color palettes while working on multiple projects at once. In the past, I’ve had to rely on a combination of tools like swatch libraries and notes to keep track of my palettes.

If you’re a designer or a developer, you’ll love Sip — a powerful color picker that can help you design beautiful and accessible interfaces easily.

With Sip, you can quickly grab colors right from the Mac menu bar and drop them into any design or development tool, including Adobe Photoshop, Figma, and Sketch. This makes it easy to create custom color palettes that match the client’s brand.

You can create and save custom color palettes, and the quick access menu that floats on the side of your desktop gives you quick access to your color palettes.

Currently, it supports 24 of the most popular color formats in the industry, like Android XML, CSS hex, RGB, and CMYK.

Now, my favorite feature is Sip’s Contrast Checker. In the example below, you can use the color picker to check the contrast between the gray text and white background, ensuring that it meets accessibility standards and is legible for all users.

Tip: Always make sure the contrast between the text and background is greater than or equal to 4.5:1 for small text and 3:1 for large text. If the color contrast fails, click on the ‘FIX’ button to improve it!

Declutter Your Mac’s Menu Bar

If you have a bunch of apps running on your Mac, your menu bar may be cluttered with all sorts of icons and notifications.

Just like physical clutter, digital clutter takes up mental space and affects your focus, too! To solve this problem, you can use Bartender.

Bartender allows you to organize your menu bar icons into neat and tidy groups or hide them completely — as simple as that. You can collapse your menu bar icons into a customizable dropdown menu so it remains clutter-free.

In the above example, most of my menu icons are hidden, except Figma and the battery level indicator.

After using it for over a month, I am able to focus better. It’s one of those subtle quality-of-life improvements that can have a big impact on your productivity and mindset.

Wrapping Up

I wish I had discovered these tools sooner!

The apps I’ve shared above are available on Setapp. With a single monthly subscription, you get access to 240+ Mac and iPhone apps. They offer a free 7-day trial, so you can try it out and decide if it’s right for you.

These tools have completely transformed my workflow and helped me become more productive and less stressed. I hope that these tools will do the same for you so you can make the most of your time. After all, time is a limited resource, and it’s up to us to use it wisely.

Thank you for reading. Have a productive day!

Further Reading On SmashingMag

Categories: Others Tags:

How to Find the Right White Label Website Builder for Your Agency

May 10th, 2023 No comments
How to Find the Right White Label Website Builder for Your Agency
Categories: Designing, Others Tags:

A Guide To Redux Toolkit With TypeScript

May 10th, 2023 No comments

If you are a React developer working on a complex application, you will need to use global state management for your app at some point. React Redux is one of the most popular libraries for state management used by many developers. However, React Redux has a complex setup process that I’ve found inefficient, not to mention it requires a lot of boilerplate code. The official developer of Redux developed the Redux Toolkit to simplify the process.

This article is for those with enough knowledge of React and TypeScript to work with Redux.

About Redux

Redux is the global state management library for React applications. If you have used useState() hooks for managing your app state, you will find it hard to access the state when you need it in the other parts of the application. With useState() hooks, the state can be passed from the parent component to the child, and you will be stuck with the problem of prop drilling if you need to pass it to multiple children. That’s where Redux comes in to manage the application state.

Introducing Redux Toolkit

Redux Toolkit is a set of opinionated and standardised tools that simplify application development using the Redux state management library.

The primary benefit of using Redux Toolkit is that it removes the overhead of writing a lot of boilerplates like you’d have to do with plain Redux.

It eliminates the need to write standard Redux setup code, such as defining actions, reducers, and store configuration, which can be a significant amount of code to write and maintain.

Jerry Navi has a great tutorial that shows the full Redux setup process.

Why I Prefer Redux Toolkit Over Redux

The Redux Toolkit has several key features which make me use this library over plain Redux:

  1. Defining reducers
    With Redux Toolkit, you can specify a slice with a few lines of code to define a reducer instead of defining actions and reducers separately, like Redux.
  2. Immutability helpers
    Redux Toolkit includes a set of utility functions that make it easy to update objects and arrays in an immutable way. This makes writing code that follows the Redux principles of immutability simpler.
  3. Built-in middleware
    Redux Toolkit includes built-in middleware that can handle asynchronous request tasks.
  4. DevTools integration
    Redux Toolkit includes integration with the Redux DevTools browser extension, which makes it easier to debug and analyse Redux code.

Using Redux Toolkit To Build A Project Issue Tracker

I think the best way to explain the value and benefits of using Redux Toolkit is simply to show them to you in a real-world context. So, let’s develop an app with it that is designed to create and track GitHub issues.

You can follow along with the code examples as we go and reference the full code anytime by grabbing it from GitHub. There is also a live deployment of this example that you can check out.

Start creating a new React app with the following command:

yarn create react-app project_issue_tracker --template typescript

This generates a folder for our project with the basic files we need for development. The –template typescript part of the command is used to add TypeScript to the stack.

Now, let’s install the dependencies packages required for our project and build the primary UI for the application before we implement Redux Toolkit. First, navigate to the project_issue_tracker project folder we just created:

cd project_issue_tracker

Then run the following command to install Material UI and Emotion, where the former is a design library we can use to style components, and the latter enables writing CSS in JavaScript files.

yarn add @mui/material @emotion/react @emotion/styled

Now we can install Redix Toolkit and Redux itself:

yarn add @reduxjs/toolkit react-redux

We have everything we need to start developing! We can start by building the user interface.

Developing The User Interface

In this section, we will be developing the UI of the app. Open the main project folder and create a new components subfolder directly in the root. Inside this new folder, create a new file called ProjectCard.tsx. This is where we will write the code for a ProjectCard component that contains information about an open issue in the project issue tracker.

Let’s import some design elements from the Material UI package we installed to the new /components/ProjectCard.tsx file to get us started:

import React from "react";
import { Typography, Grid, Stack, Paper} from "@mui/material";
interface IProps {
    issueTitle: string
}
const ProjectCard : React.FC<IProps> = ({ issueTitle }) => {
    return(
        <div className="project_card">
            <Paper elevation={1} sx={{p: '10px', m:'1rem'}}>
                <Grid container spacing={2}>
                    <Grid item xs={12} md={6}>
                        <Stack spacing={2}>
                            <Typography variant="h6" sx={{fontWeight: 'bold'}}>
                                Issue Title: {issueTitle}
                            </Typography>
                            <Stack direction='row' spacing={2}>
                                <Typography variant="body1">
                                    Opened: yesterday
                                </Typography>
                                <Typography variant="body1">
                                    Priority: medium
                                </Typography>
                            </Stack>
                        </Stack>
                    </Grid>
                </Grid>
            </Paper>
        </div>
    )
}
export default ProjectCard;

This creates the project card that displays an issue title, issue priority level, and the time the issue was “opened.” Notice that we are using an issueTitle prop that will be passed to the ProjectCard component to render the issue with a provided title.

Now, let’s create the component for the app’s HomePage to display all the issues. We’ll add a small form to the page for submitting new issues that contain a text field for entering the issue name and a button to submit the form. We can do that by opening up the src/HomePage.tsx file in the project folder and importing React’s useState hook, a few more styled elements from Material UI, and the ProjectCard component we set up earlier:

import React, { useState } from "react";
import { Box, Typography, TextField, Stack, Button } from "@mui/material";
import ProjectCard from "./components/ProjectCard";
const HomePage = () => {
    const [textInput, setTextInput] = useState('');
    const handleTextInputChange = (e:any) => {
        setTextInput(e.target.value);
    };
    return(
        <div className="home_page">
            <Box sx={{ml: '5rem', mr: '5rem'}}>
                <Typography variant="h4" sx={{textAlign: 'center'}}>
                    Project Issue Tracker
                </Typography>
                <Box sx={{display: 'flex'}}>
                    <Stack spacing={2}>
                        <Typography variant="h5">
                            Add new issue
                        </Typography>
                        <TextField 
                        id="outlined-basic" 
                        label="Title" 
                        variant="outlined" 
                        onChange={handleTextInputChange}
                        value={textInput}
                        />
                        <Button variant="contained">Submit</Button>
                    </Stack>
                </Box>
                <Box sx={{ml: '1rem', mt: '3rem'}}>
                    <Typography variant="h5" >
                        Opened issue
                    </Typography>
                        <ProjectCard issueTitle="Bug: Issue 1" />
                        <ProjectCard issueTitle="Bug: Issue 2" />
                </Box>
            </Box>
        </div>
    )
}
export default HomePage;

This results in a new HomePage component that a user can interact with to add new issues by entering an issue name in a form text input. When the issue is submitted, a new ProjectCard component is added to the HomePage, which acts as an index for viewing all open issues.

The only thing left for the interface is to render the HomePage, which we can do by adding it to the App.tsx file. The full code is available here on GitHub.

Using Redux Toolkit

Now that our UI is finalised, we can move on to implementing Redux Toolkit to manage the state of this app. We will use Redux Toolkit to manage the state of the ProjectCard list by storing all the issues in a store that can be accessed from anywhere in the application.

Before we move to the actual implementation, let’s understand a few Redux Toolkit concepts to help understand what we’re implementing:

  1. createSlice
    This function makes it easy to define the reducer, actions, and the initialState under one object. Unlike the plain redux, you don’t need to use a switch for actions and need to define the actions separately. This function accepts an object as a name (i.e., the name of the slice) and the initial state of the store and the reducer, where you define all the reducers along with their action types.
  2. configureStore
    This function is an abstraction for the Redux createStore() function. It removes the dependency of defining reducers separately and creating a store again. This way, the store is configured automatically and can be passed to the Provider.
  3. createAsyncThunk
    This function simplifies making asynchronous calls. It automatically dispatches many different actions for managing the state of the calls and provides a standardised way to handle errors.

Let’s implement all of this! We will create the issueReducer with an addIssue() action that adds any new submitted issue to the projectIssues store. This can be done by creating a new file in src/redux/ called IssueReducer.ts with this code:

// Part 1
import { createSlice, PayloadAction } from "@reduxjs/toolkit"

// Part 2
export interface IssueInitialState {
    projectIssues: string[]
}
const initialState: IssueInitialState = {
    projectIssues: []
}

// Part 3
export const issueSlice = createSlice({
    name: 'issue',
    initialState,
    reducers: {
        addIssue: (state, action: PayloadAction<string>) => {
            state.projectIssues = [...state.projectIssues, action.payload]
        }
    }
})

// Part 4
export const { addIssue } = issueSlice.actions
export default issueSlice.reducer

Let’s understand each part of the code. First, we are importing the necessary functions from the Redux @reduxjs/toolkit package.

Then, we create the type definition of our initial state and initialise the initialState for the issueReducer. The initialState has a projectIssues[] list that will be used to store all the submitted issues. We can have as many properties defined in the initialState as we need for the application.

Thirdly, we are defining the issueSlice using Redux Toolkit’s createSlice function, which has the logic of the issueReducer as well as the different actions associated with it. createSlice accepts an object with a few properties, including:

  • name: the name of the slice,
  • initialState: the initial state of the reducer function,
  • reducers: an object that accepts different actions we want to define for our reducer.

The slice name for the issueReducer is issueSlice. The initalState of it is defined, and a single adIssue action is associated with it. The addIssue action is dispatched whenever a new issue is submitted. We can have other actions defined, too, if the app requires it, but this is all we need for this example.

Finally, in the last part of the code, we export the actions associated with our reducer and the issueSlice reducer. We have fully implemented our issueReducer, which stores all the submitted issues by dispatching the addIssue action.

Now let’s configure the issueReducer in our store so we can use it in the app. Create a new file in src/redux/ called index.ts, and add the following code:

import { configureStore } from "@reduxjs/toolkit";
import IssueReducer from "./IssueReducer";
export const store = configureStore({
    reducer: {
        issue: IssueReducer
    }
})
export type RootState = ReturnType<typeof store.getState>
export type AppDispatch = typeof store.dispatch

This code configures and creates the store using the configureStore() function that accepts a reducer where we can pass all of the different reducers.

We are done adding the reducer and configuring the store with Redux Toolkit. Let’s do the final step of passing the store to our app. Start by updating the App.tsx file to pass the store using the Provider:

import React from 'react';
import { Provider } from "react-redux"
import { store } from './redux';
import HomePage from './HomePage';
function App() {
    return (
        <div className="App">
            <Provider store={store}>
                <HomePage />
            </Provider>
        </div>
     );
}
export default App;

Here, you can see that we are importing the store and directly passing through the Provider. We don’t need to write anything extra to create a store or configure DevTools like we would using plain Redux. This is definitely one of the ways Redux Toolkit streamlines things.

OK, we have successfully set up a store and a reducer for our app with Redux Toolkit. Let’s use our app now and see if it works. To quickly sum things up, the dispatch() function is used to dispatch any actions to the store, and useSelector() is used for accessing any state properties.

We will dispatch the addIssue action when the form button is clicked:

const handleClick = () => {
    dispatch(addIssue(textInput))
}

To access the projectIssue list stored in our reducer store, we can make use of useSelector() like this:

const issueList = useSelector((state: RootState) => state.issue.projectIssues)

Finally, we can render all the issues by map()-ping the issueList to the ProjectCard component:

{
    issueList.map((issue) => {
        return(
            <ProjectCard issueTitle={issue} />
        )
    })
}

The final code for HomePage.tsx looks like this:

import React, { useState } from "react";
import { useDispatch, useSelector } from "react-redux";
import { RootState } from "./redux/index"
import { Box, Typography, TextField, Stack, Button } from "@mui/material";
import ProjectCard from "./components/ProjectCard";
import { addIssue } from "./redux/IssueReducer";
const HomePage = () => {
    const dispatch = useDispatch();
    const issueList = useSelector((state: RootState) => state.issue.projectIssues)
    const [textInput, setTextInput] = useState('');
    const handleTextInputChange = (e:any) => {
        setTextInput(e.target.value);
    };
    const handleClick = () => {
        dispatch(addIssue(textInput))
    }
    return(
        <div className="home_page">
            <Box sx={{ml: '5rem', mr: '5rem'}}>
                <Typography variant="h4" sx={{textAlign: 'center'}}>
                    Project Issue Tracker
                </Typography>
                <Box sx={{display: 'flex'}}>
                    <Stack spacing={2}>
                        <Typography variant="h5">
                            Add new issue
                        </Typography>
                        <TextField 
                        id="outlined-basic" 
                        label="Title" 
                        variant="outlined" 
                        onChange={handleTextInputChange}
                        value={textInput}
                        />
                        <Button variant="contained" onClick={handleClick}>Submit</Button>
                    </Stack>
                </Box>
                <Box sx={{ml: '1rem', mt: '3rem'}}>
                    <Typography variant="h5" >
                        Opened issue
                    </Typography>
                    {
                        issueList.map((issue) => {
                            return(
                                <ProjectCard issueTitle={issue} />
                            )
                        })
                    }
                </Box>
            </Box>
        </div>
    )
}
export default HomePage;

Now, when we add and submit an issue using the form, that issue will be rendered on the homepage.

This section covered how to define any reducer and how they’re used in the app. The following section will cover how Redux Toolkit makes asynchronous calls a relatively simple task.

Making Asynchronous Calls With Redux Toolkit

We implemented our store to save and render any newly added issue to our app. What if we want to call GitHub API for any repository and list all the issues of it in our app? In this section, we will see how to use the createAsyncThunk() API with the slice to get data and render all the repository issues using an API call.

I always prefer to use the createAsyncThunk() API of the redux toolkit because it standardises the way different states are handled, such as loading, error, and fulfilled. Another reason is that we don’t need to add extra configurations for the middleware.

Let’s add the code for creating a GithubIssue reducer first before we break it down to understand what’s happening. Add a new GithubIssueReducer.ts file in the /redux folder and add this code:

import { createAsyncThunk, createSlice } from '@reduxjs/toolkit';
export const fetchIssues = createAsyncThunk<string[], void, { rejectValue: string }>(
  "githubIssue/fetchIssues",
  async (_, thunkAPI) => {
    try {
      const response = await fetch("https://api.github.com/repos/github/hub/issues");
      const data = await response.json();
      const issues = data.map((issue: { title: string }) => issue.title);
      return issues;
    } catch (error) {
      return thunkAPI.rejectWithValue("Failed to fetch issues.");
    }
  }
);
interface IssuesState {
  issues: string[];
  loading: boolean;
  error: string | null;
}
const initialState: IssuesState = {
  issues: [],
  loading: false,
  error: null,
};
export const issuesSliceGithub = createSlice({
  name: 'github_issues',
  initialState,
  reducers: {},
  extraReducers: (builder) => {
    builder
      .addCase(fetchIssues.pending, (state) => {
        state.loading = true;
        state.error = null;
      })
      .addCase(fetchIssues.fulfilled, (state, action) => {
        state.loading = false;
        state.issues = action.payload;
      })
      .addCase(fetchIssues.rejected, (state, action) => {
        state.loading = false;
        state.error = action.error.message || 'Something went wrong';
      });
  },
});
export default issuesSliceGithub.reducer;

Let’s understand the fetchIssues part first:

  1. We are using the createAsyncThunk() API provided by the Redux Toolkit. It helps create asynchronous actions and handles the app’s loading and error states.
  2. The action type name is the first argument passed to createAsyncThunk(). The specific action type name we have defined is githubIssue/fetchIssues.
  3. The second argument is a function that returns a Promise, which resolves to the value that dispatches the action. This is when the asynchronous function fetches data from a GitHub API endpoint and maps the response data to a list of issue titles.
  4. The third argument is an object that contains configuration options for the async thunk. In this case, we have specified that the async thunk will not be dispatched with any arguments (hence the void type) and that if the Promise returned by the async function is rejected, the async thunk will return an action with a rejected status along with a rejectValue property that contains the string “Failed to fetch issues.”

When this action is dispatched, the API calls will be made, and the githubIssuesList data will be stored. We can follow this exact same sequence of steps to make any API calls we need.

The second section of the code is similar to what we used when we created the issueSlice, but with three differences:

  1. extraReducers
    This object contains the reducers logic for the reducers not defined in the createSlice reducers object. It takes a builder object where different cases can be added using addCase for specific action types.
  2. addCase
    This method on the builder object creates a new case for the reducer function.
  3. API call states
    The callback function passed to the addCase method is dispatched by createAsyncThunk(), which updates the different store objects based on the API call states (pending, fulfilled, and error).

We can now use the GithubIssue reducer actions and the store in our app. Let’s add the GithubIssueReducer to our store first. Update the /redux/index.ts file with this code:


import { configureStore } from "@reduxjs/toolkit";
import { useDispatch } from "react-redux";
import IssueReducer from "./IssueReducer";
import GithubIssueReducer from "./GithubIssueReducer";
export const store = configureStore({
    reducer: {
        issue: IssueReducer,
        githubIssue: GithubIssueReducer
    }
})
export type RootState = ReturnType<typeof store.getState>
export type AppDispatch = typeof store.dispatch
export const useAppDispatch = () => useDispatch<AppDispatch>()

We just added the GithubIssueReducer to our store with the name mapped to githubIssue. We can now use this reducer in our HomePage component to dispatch the fetchIssues() and populate our page with all the issues received from the GitHub API repo.

import React, { useState, useEffect } from "react";
import { useSelector } from "react-redux";
import { useAppDispatch, RootState, AppDispatch } from "./redux/index";
import { Box, Typography, TextField, Stack, Button } from "@mui/material";
import ProjectCard from "./components/ProjectCard";
import { addIssue } from "./redux/IssueReducer";
import { fetchIssues } from "./redux/GithubIssueReducer";
const HomePage = () => {
    const dispatch: AppDispatch = useAppDispatch();
    const [textInput, setTextInput] = useState('');
    const githubIssueList = useSelector((state: RootState) => state.githubIssue.issues)
    const loading = useSelector((state: RootState) => state.githubIssue.loading);
    const error = useSelector((state: RootState) => state.githubIssue.error);
    useEffect(() => {
        dispatch(fetchIssues())
      }, [dispatch]);

    if (loading) {
      return <div>Loading...</div>;
    }

    if (error) {
      return <div>Error: {error}</div>;
    }
    const handleTextInputChange = (e:any) => {
        setTextInput(e.target.value);
    };
    const handleClick = () => {
        console.log(textInput)
        dispatch(addIssue(textInput))
    }
    return(
        <div className="home_page">
            <Box sx={{ml: '5rem', mr: '5rem'}}>
                <Typography variant="h4" sx={{textAlign: 'center'}}>
                    Project Issue Tracker
                </Typography>
                <Box sx={{display: 'flex'}}>
                    <Stack spacing={2}>
                        <Typography variant="h5">
                            Add new issue
                        </Typography>
                        <TextField 
                        id="outlined-basic" 
                        label="Title" 
                        variant="outlined" 
                        onChange={handleTextInputChange}
                        value={textInput}
                        />
                        <Button variant="contained" onClick={handleClick}>Submit</Button>
                    </Stack>
                </Box>
                <Box sx={{ml: '1rem', mt: '3rem'}}>
                    <Typography variant="h5" >
                        Opened issue
                    </Typography>
                    {
                        githubIssueList?.map((issue : string) => {
                            return(
                                <ProjectCard issueTitle={issue} />
                            )
                        })
                    }
                </Box>
            </Box>
        </div>
    )
}
export default HomePage;

This updates the code in HomePage.tsx with two minor changes:

  1. We dispatch fetchIssue and use the createAsync() action to make the API calls under the useEffect hook.
  2. We use the loading and error states when the component renders.

Now, when loading the app, you will first see the “Loading” text rendered, and once the API call is fulfilled, the issuesList will be populated with all the titles of GitHub issues fetched from the repo.

Once again, the complete code for this project can be found on GitHub. You can also check out a live deployment of the app, which displays all the issues fetched from GitHub.

Conclusion

There we have it! We used Redux Toolkit in a React TypeScript application to build a fully functional project issue tracker that syncs with GitHub and allows us to create new issues directly from the app.

We learned many of the foundational concepts of Redux Toolkit, such as defining reducers, immutability helpers, built-in middleware, and DevTools integration. I hope you feel powered to use Redux Toolkit effectively in your projects. With Redux Toolkit, you can improve the performance and scalability of your React applications by effectively managing the global state.

Further Reading on Smashing Magazine

Categories: Others Tags:

How To Use AI Tools To Skyrocket Your Programming Productivity

May 9th, 2023 No comments

Programming is fun. At least, that’s the relationship I would love to have with programming. However, we all know that with the thrills and joys of programming, there comes a multitude of struggles, unforeseen problems, and long hours of coding. Not to mention — too much coffee.

If only there were a way to cut out all of the menial struggles programmers face daily and bring them straight to the things they should be spending their energy on thinking and doing, such as critical problem-solving, creating better designs, and testing their creations.

Well, in recent times, we’ve been introduced to exactly that.

The start of this year marked the dawn of a huge shift towards Artificial Intelligence (AI) as a means of completing tasks, saving time, and improving our systems. There is a whole new realm of use cases with the rise of AI and its potential to seriously impact our lives in a positive manner.

While many have concerns swirling about AI taking over jobs (and yes, programmers have been raised up), I take an entirely different perspective. I believe that AI has the ability to skyrocket your productivity in programming like nothing before, and over the last couple of months, I have been able to reap the benefits of this growing wave.

Today, I want to share this knowledge with you and the ways that I have been using AI to supersize my programming output and productivity so that you’ll be able to do the same.

Case Study: ChatGPT

If you have missed much of the recent news, let me get you up to speed and share with you the main inspiration for this guide. In late November 2022, OpenAI announced its latest chatbot — ChatGPT, which took the world by storm with over a million sign-ups in its first week.

It was an extremely powerful tool that had never been seen before, blowing people away with its capabilities and responses. Want a 30-word summary of a 1000-word article? Throw it in, and in a few seconds, you’ve just saved yourself a long read. Need an email sales copy for a programming book that teaches you how to code in O(1) speed, written in the style of Kent Beck? Again, it will be back to you in a few seconds. The list of ChatGPT use cases goes on.

However, as a programmer, what really got me excited was ChatGPT’s ability to understand and write code. GPT-3, the model that ChatGPT runs on, has been trained on a wide range of text, including programming languages and code excerpts. As a result, it can generate code snippets and explanations within a matter of seconds.

While there are many AI tools other than ChatGPT that can help programmers boost their productivity, such as Youchat and Cogram, I will be looking at ChatGPT as the main tool for this guide, due to the fact that it is publicly available for free at OpenAI’s website and that it has a very gentle learning curve for a wide range of applications.

And again, before we continue, I would like to re-emphasize that

AI tools such as ChatGPT are meant to streamline your workflow, not take over and replace your thinking and problem-solving.

That being said, let’s see how I used ChatGPT to skyrocket my programming productivity.

Common Problems And How ChatGPT Can Help

To help shine a light on this topic, I have compiled five of the most common ways that I have used ChatGPT to overcome problems that any programmer would experience daily. Those five problems are the following:

  1. Programmer’s block,
  2. Long hours of debugging,
  3. Understanding long documentation,
  4. Developer testing,
  5. Code optimization.

It’s a lot to cover, but I’ll give you real-life examples so that you will be able to take the knowledge from this guide and use it to your own advantage. Let’s jump straight in.

Programmer’s Block

Programmer’s block is the programmer’s equivalent of writer’s block and is one of the most common problems that many programmers, myself included, face regularly. When tasked with a significant programming job, such as getting started with building a multiple-page website in HTML, CSS, and JavaScript, it’s easy to get caught in the weeds of not knowing where to start.

Or you could be knee-deep in a coding project and hit a roadblock in finding a solution for a problem. It’s often a frustrating scenario to be in.

ChatGPT has been an excellent solution for that. Let’s look at the example above in having programmer’s block before embarking on a large programming task. Suppose I’m looking to start a new project. After surfing for software company ideas, I decided to develop a sleek and modern online store in HTML, CSS, and JavaScript to sell my latest programming book.

While ChatGPT won’t be able to hit the mark in producing the entire project, a great way to use it is to generate the skeleton for you to begin. Throwing in a detailed prompt for the task, this is what you get:

Prompt: Can you provide a basic structure for a sleek and modern single online store landing page, with red as the main color, for my new programming book in HTML and CSS?

index.html

<!DOCTYPE html>
<html>
<head>
  <meta charset="UTF-8">
  <meta name="viewport" content="width=device-width, initial-scale=1.0">
  <meta http-equiv="X-UA-Compatible" content="ie=edge">
  <title>Your Book Title</title>
  <link rel="stylesheet" href="style.css">
</head>
<body>
  <header>
    <nav>
      <ul>
        <li><a href="#">Home</a></li>
        <li><a href="#">About</a></li>
        <li><a href="#">Contact</a></li>
      </ul>
    </nav>
  </header>
  <main>
    <section>
      <h1>Programming book title</h1>
      <p>A comprehensive guide to becoming a proficient programmer</p>
      <button>Learn More</button>
    </section>
    <section>
      <h2>Features of the Book:</h2>
      <ul>
        <li>Step-by-step tutorials for learning core programming concepts</li>
        <li>In-depth explanations of commonly used programming languages</li>
        <li>Hands-on exercises and real-world projects to reinforce learning</li>
        <li>Case studies to illustrate the application of programming in various industries</li>
        <li>Tips and tricks for efficient and effective programming practices</li>
      </ul>
    </section>
  </main>
  <footer>
    <p>Copyright 2023</p>
  </footer>
</body>

style.css

body {
  font-family: Arial, sans-serif;
  display: flex;
  flex-direction: column;
  align-items: center;
  margin: 0;
  padding: 0;
}

header, footer {
  background-color: red;
  color: white;
  display: flex;
  justify-content: center;
  align-items: center;
  width: 100%;
  height: 50px;
  box-shadow: 0px 4px 10px rgba(0, 0, 0, 0.25);
}

nav ul {
  display: flex;
  list-style: none;
  margin: 0;
  padding: 0;
}

nav a {
  color: white;
  display: block;
  padding: 10px 20px;
  text-decoration: none;
}

main {
  display: flex;
  flex-direction: column;
  align-items: center;
  width: 100%;
  height: calc(100vh - 100px);
}

section {
  max-width: 800px;
  padding: 40px;
  margin-top: 100px;
  text-align: center;
  background-color: white;
  box-shadow: 0px 4px 10px rgba(0, 0, 0, 0.25);
  border-radius: 10px;
  margin-bottom: 20px;
  margin-left: auto;
  margin-right: auto;
}

h2 {
  margin-top: 40px;
}

ul {
  list-style: none;
  margin-top: 20px;
  padding-left: 0;
}

li {
  margin-bottom: 10px;
}

That gives us the following template to start our work with:

Nothing impressive, but it does provide a great starting point as opposed to a blank HTML file.

Now, of course, I would highly recommend that the most you create with this is the barebones structure. We are using these tools to abstract away menial tasks like creating the HTML structure so that you can focus on more important things like implementing your own CSS styles and HTML features.

HTML and CSS templates are already widely-used concepts. However, with AI, we can now create more personalized templates and basic code structures, getting us from staring at a blank HTML file to a workable skeleton in a matter of minutes.

Use it to create a starting platform for you to get over your programmer’s block, but for the fine details and exact features, your programming knowledge will still be irreplaceable.

Nevertheless, I have been using it to get numerous programming projects up and running. I had this sentence-length counter made from scratch easily within an hour by creating the base template and adding on what I wanted after. I find that being able to jump-start that process makes my programming workflow much more streamlined and enjoyable.

Long Hours Of Debugging

Another common frustration every programmer knows is debugging. Debugging is an extremely time-intensive aspect of programming that can often be very draining and leave programmers at roadblocks, which is detrimental to a productive programming session.

Fortunately, AI is able to cut out a lot of the frustration of debugging, while at the same time, it does not replace the job of programmers in having strong fundamentals in knowing how to debug. At the current time, most AI tools are not able to spot every single flaw in your code and suggest the correct changes to make; hence, it is still essential that you are capable of debugging code.

However, AI is a great supplementary tool to your debugging skills in two main ways:

  1. Understanding runtime errors;
  2. Providing context-aware suggestions.

Understanding Runtime Errors

When faced with errors that you have never seen before in your code, a common reaction would be to hit Google and spend the next chunk of your time surfing through forums and guides to try and find a specific answer for something like the following:

Uncaught TypeError: Cannot read property 'value' of undefined.

Rather than spending your time frantically searching the web, a simple prompt can provide everything you would need for the most part.

Providing Context-Aware Suggestions

The other way in which I’ve been able to get help from ChatGPT for debugging is through its context-aware suggestions for errors. Traditionally, even though we may find the answers for what our program’s bugs are online, it is oftentimes difficult to put the errors and solutions into context.

Here is how ChatGPT handles both of these scenarios with a simple prompt.

Prompt: I found the error “Uncaught TypeError: Cannot read property value of undefined.” in my Python code. How do I resolve it?

With this, I have been able to cut out a lot of time that I would have been spending surfing for answers and turn that time into producing error-free code. While you still have to have good knowledge in knowing how to implement these fixes, using AI as a supplementary tool in your debugging arsenal can provide a huge boost in your programming productivity.

Understanding Long Documentation

Another fantastic way to use AI tools to your advantage is by streamlining long documentation into digestible information that comes when having to use APIs or libraries. As a Natural Language Processing model, this is where ChatGPT excels.

Imagine you’re working on a new web development project, but want to use Flask for the first time. Traditionally, you might spend hours scrolling through pages of dense documentation from Flask, trying to find the precise information you need.

With a tool like ChatGPT, you’ll be able to streamline this problem and save an immense amount of time in the following ways:

  • Generate concise summaries
    You’ll be able to automatically summarize long code documentation, making it easier to quickly understand the key points without having to read through the entire document.
  • Answer specific questions
    ChatGPT can answer specific questions about the code documentation, allowing you to quickly find the information you need without having to search through the entire document.
  • Explain technical terms
    If you are having trouble understanding some terms in the documentation, rather than navigating back to extensive forum threads, ChatGPT can explain technical terms in simple language, making it easier for non-technical team members to understand the code documentation.
  • Provide examples
    Similarly to debugging, you can get relatable examples for each code concept in the documentation, making it easier for you to understand how the code works and how you can apply it to your own projects.
  • Generate code snippets
    ChatGPT can generate code snippets based on the code documentation, allowing you to experiment with use cases and tailor the examples to your specific needs.

It’s like having a search engine that can understand the context of your query and provide the most relevant information. You’ll no longer be bogged down by pages of text, and you can focus on writing and testing your code. Personally, I have been able to blast through numerous libraries, understand and apply them for my own needs in a fraction of the time I normally would.

Developer Testing

Developer testing is one of the cornerstone skills that a programmer or developer must have in order to create bulletproof programs and applications. However, even for experienced programmers, a common problem in developer testing is that you won’t know what you don’t know.

What that means is that in your created test cases, you might miss certain aspects of your program or application that could go unnoticed until it reaches a larger audience. Oftentimes, to avoid that scenario, we could spend hours on end trying to bulletproof our code to ensure that it covers all its bases.

However, this is a great way that I’ve been able to incorporate AI into my workflow as well.

Having AI suggest tests that cover all edge cases is a great way to provide an objective and well-rounded testing phase for your projects.

It also does so in a fraction of the time you would spend.

For example, you are working on the same product landing page for your programming book from earlier. Now, I’ve created a proper product page that involves a form with the following fields for you to process:
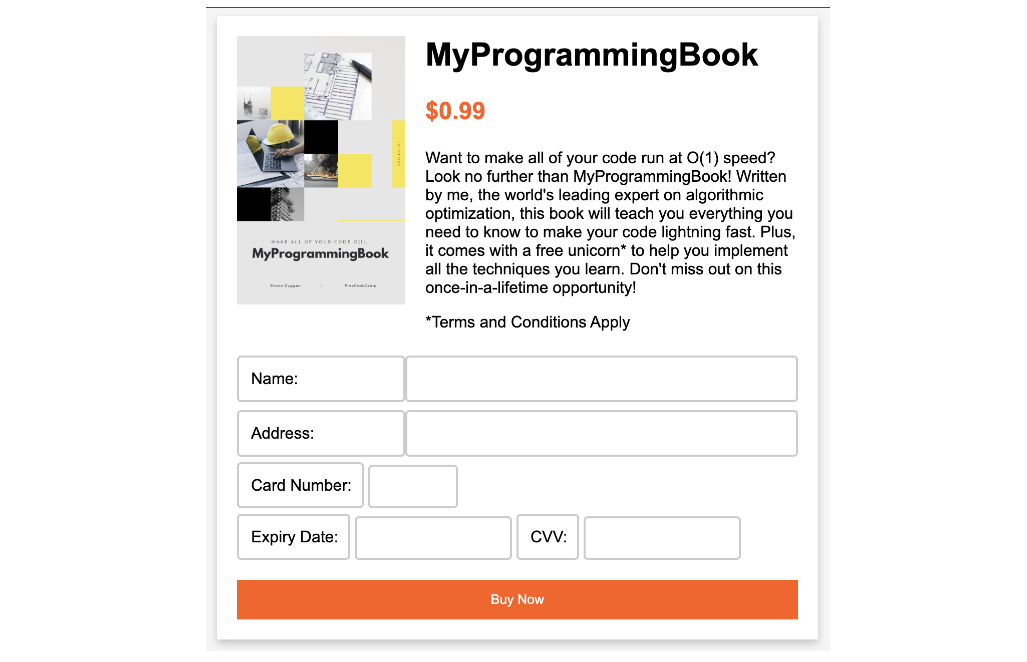
script.js

// Get references to the form elements.
const form = document.getElementById("payment-form");
const cardNumber = document.getElementById("card-number");
const expiryDate = document.getElementById("expiry-date");
const cvv = document.getElementById("cvv");
const submitButton = document.getElementById("submit-button");

// Handle form submission.
form.addEventListener("submit", (event) => {
  event.preventDefault();

  // Disable the submit button to prevent multiple submissions.
  submitButton.disabled = true;

  // Create an object to hold the form data.
  const formData = {
    cardNumber: cardNumber.value,
    expiryDate: expiryDate.value,
    cvv: cvv.value,
  };

  // Perform client-side validation on the form data
  if (!validateFormData(formData)) {
    // If the data is invalid, re-enable the submit button and return
    submitButton.disabled = false;
    return;
  }

  // Send the form data to the server.
  // The following is just an example and should not be used in a real-world scenario
  // as it lacks security measures and proper payment gateway integration.
  fetch("/charge", {
    method: "POST",
    body: JSON.stringify(formData),
    headers: {
      "Content-Type": "application/json",
    },
  })
    .then((response) => response.json())
    .then((data) => {
      // Handle the server response.
      if (data.success) {
        // Payment was successful.
        alert("Payment successful!");
      } else {
        // Payment failed.
        alert("Payment failed. Please try again.");
        submitButton.disabled = false;
      }
    })
    .catch((error) => {
      console.error(error);
      alert("An error occurred. Please try again.");
      submitButton.disabled = false;
    });
});

// Perform client-side validation on the form data.
function validateFormData(data) {
  // Example validation checks.
  if (!data.cardNumber || data.cardNumber.length !== 16) {
    alert("Please enter a valid card number.");
    return false;
  }
  if (!data.expiryDate || data.expiryDate.length !== 5) {
    alert("Please enter a valid expiry date in the format MM/YY.");
    return false;
  }
  if (!data.cvv || data.cvv.length !== 3) {
    alert("Please enter a valid CVV.");
    return false;
  }
  return true;
}

Knowing that there are many invalid inputs that customers might use, you want to create some test cases to validate your form’s functionalities. Rather than spending copious amounts of time coming up with numerous test cases, let’s let AI identify any edge cases we missed to bulletproof our tests.

Prompt: Can you help to come up with some edge cases to ensure that the form does not accept any invalid inputs in collecting payment details?

test.js

// Test Case 1: Check if form doesn't submit when fields are empty.
document.querySelector("form").addEventListener("submit", function(e) {
  e.preventDefault();
  var name = document.querySelector("input[name='name']").value;
  var address = document.querySelector("input[name='address']").value;
  var cardNumber = document.querySelector("input[name='card-number']").value;
  var expiryDate = document.querySelector("input[name='expiry-date']").value;
  var cvv = document.querySelector("input[name='cvv']").value;

  if (!name || !address || !cardNumber || !expiryDate || !cvv) {
    alert("All fields are required");
    return;
  }

  // Check if all the fields contain valid inputs.
  if (!validateName(name) || !validateAddress(address) || !validateCardNumber(cardNumber) || !validateExpiryDate(expiryDate) || !validateCVV(cvv)) {
    return;
  }

  // Continue with payment processing.
});

// Test Case 2: Check if name input is valid.
function validateName(name) {
  var nameRegEx = /^[a-zA-Z ]+$/;
  if (!nameRegEx.test(name)) {
    alert("Invalid name. Please enter a valid name");
    return false;
  }
  return true;
}

// Test Case 3: Check if address input is valid.
function validateAddress(address) {
  var addressRegEx = /^[a-zA-Z0-9s,'-]*$/;
  if (!addressRegEx.test(address)) {
    alert("Invalid address. Please enter a valid address");
    return false;
  }
  return true;
}

// Test Case 4: Check if card number input is valid.
function validateCardNumber(cardNumber) {
  var cardNumberRegEx = /^d{16}$/;
  if (!cardNumberRegEx.test(cardNumber)) {
    alert("Invalid card number. Please enter a valid card number");
    return false;
  }
  return true;
}

The need to create all sorts of test cases, which is usually a daunting and repetitive task, after a while of working on the same project, can make programming feel very menial. However, with the assistance of AI, this process can be streamlined and, at the same time, improved to cover more bases in your developer testing.

Code Optimization

As it stands, AI still has a long way to go in helping to optimize code and can’t actually do the optimization itself. However, it can still help to provide some useful insights and give some pointers to improving your programming. Here are the most common ways that I have used ChatGPT in optimizing my code for performance:

  • Code Suggestions
    Most simply, it can suggest code snippets or alternative solutions to improve the performance of your existing code.
  • Best Practices
    Having been trained on a wide range of code patterns, ChatGPT can help you follow best practices for coding and software design, leading to more efficient and optimized code.
  • Refactoring
    It helps to reorganize existing code to improve its efficiency and maintainability without affecting its functionality.
  • Knowledge Sharing
    There are many scenarios where your code can be implemented simply through a single import or with other programming languages, libraries, and frameworks. ChatGPT’s suggestions help ensure you are making informed decisions on the best implementations for your needs.

Of course, the bulk of these still requires you to optimize your code manually. However, using AI to gain insights and suggestions for this can be a great way to improve your productivity and produce higher-quality code.

AI Is Amazing, But It Does Have Its Limitations

Now that we have seen what AI can do for you and your programming productivity, I would imagine you are bubbling with ideas on how you are going to start implementing these in your programming workflows.

However, it is essential to keep in mind that these models are fairly new and still have a long way to go regarding reliability and accuracy. These are just some of the limitations that AI, specifically, ChatGPT, has:

  • Limited Understanding
    AI algorithms like ChatGPT have a limited understanding of code and may not fully understand the implications and trade-offs of certain programming decisions.
  • Training Data Limitations
    The quality and relevance of AI algorithms’ output depend on the quality and scope of the training data. For example, ChatGPT was only trained on data dating to 2021. Any updates in programming languages since then may not be reflected.
  • Bias
    AI algorithms can be biased towards specific patterns or solutions based on the data they were trained on, leading to suboptimal or incorrect code suggestions.
  • Lack of Context
    AI algorithms may struggle to understand the context and the desired outcome of a specific coding task, leading to generic or irrelevant advice. While this can be minimized with specific prompts, it is still difficult to generate solutions to more complicated problems.

Nevertheless, these limitations are a small price for the multitude of benefits that AI tools provide. While I am an advocate of using AI to boost your programming productivity, keeping in mind these limitations are crucial when using AI in your workflows as it is important to ensure that the information or code you are producing is reliable, especially if you are using it in a professional setting.

With the current limitations, AI should only be used as a means to assist your current skills, not to replace them. Hence, with that in mind, use it tactfully and sparingly to achieve a good balance in boosting your productivity but not detracting from your skills as a programmer.

How Else Will AI Improve Programmers’ Lives?

While I have mainly talked about the technical aspects of programming that AI can help in, there are many other areas where AI can help to make your life as a programmer much easier.

We are just at the tip of the iceberg in this incoming wave of AI. Many new use cases for AI appear every day with the potential to improve programmers’ lives even further. In the future, we are likely to see many new integrations of AI in many of our daily software uses as programmers.

There already exists general writing software, which could be useful for programmers in creating code and API documentation. These have been around for a while and have become widely accepted as a tool that helps, not replaces.

General productivity and notetaking tools that use AI have also been a big hit, especially for programming students who have to plow through large amounts of information every day. All in all, where there is a labor-intensive task that can be resolved, AI will likely be making headway in those areas.

Wrapping Up

To wrap things up, I will end with a reminder from the opening of this guide. I believe that there is massive potential in becoming well-versed with AI, not as a means to replace our work, but as a means to improve it.

With the right knowledge of what you can and, more importantly, cannot do, AI can be an extremely valuable skill to have in your programming arsenal and will undoubtedly save you copious amounts of time if used correctly.

Hence, rather than fearing the incoming wave of new AI technology, I encourage you to embrace it. Take the knowledge you have learned from the guide and tailor it to your own needs and uses. Every programmer’s workflows are different, but with the right principles and a good knowledge of the limitations of AI, the benefits are equally available to everyone.

So all that’s left for you to do is to reap the supersized benefits that come with integrating AI into your current workflows and see your programming productivity skyrocket as it has for me. And if there’s one thing to remember, it’s to use AI as your assistant, not your replacement.

Categories: Others Tags:

10 Ways to Improve Your Data Visualization Design

May 8th, 2023 No comments

Tons of data are exchanged every second, so- What is your opinion that businesses can have deeper insights into their vast data?

The best solution is- Data Visualization Design. It helps recognize patterns, errors, and red flags, identify weak points, and extract valuable insights. Data visualization’s sole objective is to help businesses make informed decisions to take business a step ahead. 

Here visualization refers to the pictorial representation of the data that gives a clear view. For a business, data is everything. The visualization is beneficial for:

  • Data analysis 
  • Faster decision making 
  • Simplifying complex data and more. 

A business can leverage the data visualization design by improving it. If you want to know how to improve your data visualization design, then continue with this blog. 

Let’s start with some basic information!

What Is Data Visualization Design?

Data visualization stands for graphical representation of data, where the process turns raw data into forms of maps, graphs, and infographics. The design that represents it is called data visualization design. Visualization’s sole advantage is offering a seamless way to visualize the trends and data patterns via extraction from the data chunks. 

The prime objective of data visualization techniques is to represent the data to end users in an easy format. You will be surprised to know that the human brain responds to visuals instead of text. Some tools are available that help with better data visualization, such as Power BI, Tableau, Zoho Reports etc.  

These tools can help derive insights to take customer experience to the next level. Additionally, data visualization is considered a key part of the strategy to unleash the hidden qualities of data. 

The Process of Data Visualization

A question might arise in the reader’s mind: what is the data visualization process? So, the process works like this: 

  • Goal of research

Here you need to identify the research goal, what kind of data is needed and what kind of visualization you need to communicate your research. 

  • Fetch the data 

Get access to the large data set. Manually it will be a daunting task, so you can take the help of APIs, scrape data from the internet, or use tools to collect the data, such as Power BI Dashboard. 

  • Data Cleaning

It helps in the easy visualization of data because clean data remains free from error and makes the process easy. It saves time instead of fixing the issue while visualizing the data. 

  • Choose A Chart

Data charts are the best options for data visualization and effectively convey the message. Here you need to pick the chart that matches your needs carefully. 

  • The Tools

Multiple tools are available for processing the data, and some of the legendary tools available are Tableau and Power BI. Suppose you have less budget. You can start with free tools like Power BI Desktop.  

  • Prepare Your Data

Data preparation includes multiple steps such as formatting columns, value conversion, filtering, grouping, and combining variables. 

  • Create Chart

The final step is chart creation which also holds key steps such as data import into the software, selecting chart type, and more. 

Until this section of the blog, we have gone through crucial information about data visualization design. So, it’s time to look at the top ways or tips to improve data visualization design. 

Top-10 Tips to Improve Your Data Visualization Design?

The tips mentioned in this section also represent the data visualization best practices that can help you a lot. So, let’s start. 

#1. Choose A Suitable Chart

The first best practice for storytelling via visualizing the data is choosing a suitable chart as per needs, as a universal size can fit all. You can also combine the related charts for the best effects. Some popular formats are bullet charts, bar charts, line graphs, maps, and pie charts. 

#2. Colors for Data Representation

Colors play a crucial role in making data visualization design more appealing, so choose it with some intention. If you want to show data growth, then using warm colors is the best, or you can use light colors to represent the less growth to represent less growth. The only condition is that colors must match the intended message you want to deliver. 

#3. Data Labels & Annotations

Using data labels and annotations to improve the data visualization designs is crucial. It helps in creating an easy understanding among the end users. The labels help in recognizing the data points, and on the other side, annotations provide additional information. 

#4. Predictable Patterns  

Unpredictable patterns can destroy the whole visualization. The reason is if patterns are complex or random, then users will find it difficult to understand and fail to get what they want from the data. So, one of the data visualization techniques is to use a predictable pattern. 

#5. Alignment

Align data elements in an appropriate format to create the best effect of data visualization design. The correct alignment will help the users navigate from one section to another easily. Here you can use the basic technique, such as aligning the data on X and Y axis, but all must be relevant to each other. 

#6. Use of Appropriate White Space   

The appropriate white space will assist you in making visualization smooth. It helps in balancing the information showcasing, including the other colors. You can show the crucial data in colors and put other data in whitespace for clear visibility. 

#7. Reduced Chart Junks

If you plan to create a data visualization design for the best experience, limiting chart junk is one of the best ways. It works by removing the unnecessary or distracting elements that do not relate to the message you want to convey. 

#8. Visual Hierarchy 

The only objective of data visualization design is to represent the data in an understandable format and to engage the customers. One of the best ways to do it is to represent the data in a visual hierarchy so readers can move from top to bottom or vice versa effortlessly to view the desired data. Here BI tools work fantastic for example, one of the best benefits of Power BI is to represent the data in a visual hierarchy. 

#9. Highlight Patterns 

Using shapes is the best method to highlight the data patterns and relationships. The shapes can be anything such as a circle, square, triangle, cube or any shape else. With the help of shapes, you can showcase data overlapping or increasing or decreasing. 

#10. Consistent Size 

Whatever charts, graphs, or shapes you are using for data visualization design, its size must be consistent. It will create clarity instead of confusing the readers’ eyes. For better visualization, clarity is a must. 

The Final Thoughts

There is tough competition in the market where multiple brands are competing. Here data visualization can help a lot to identify the weak points you can work on to have a strong presence. By improving the data visualization design, you can create a better effect. The tips mentioned above can help you with it. For better effect, you can consult with the experts or take the help of professionals from top Power BI development companies or companies with vast experience. So, without any delay, take the right decision at the right time to add value to your business with the help of data processing and visualization.  

Featured image by rawpixel.com on Freepik

The post 10 Ways to Improve Your Data Visualization Design appeared first on noupe.

Categories: Others Tags:

The Safest Way To Hide Your API Keys When Using React

May 8th, 2023 No comments

Back in the day, developers had to write all sorts of custom code to get different applications to communicate with each other. But, these days, Application Programming Interfaces (APIs) make it so much easier. APIs provide you with everything you need to interact with different applications smoothly and efficiently, most commonly where one application requests data from the other application.

While APIs offer numerous benefits, they also present a significant risk to your application security. That is why it is essential to learn about their vulnerabilities and how to protect them. In this article, we’ll delve into the wonderful world of API keys, discuss why you should protect your API keys, and look at the best ways to do so when using React.

What Are API Keys?

If you recently signed up for an API, you will get an API key. Think of API keys as secret passwords that prove to the provider that it is you or your app that’s attempting to access the API. While some APIs are free, others charge a cost for access, and because most API keys have zero expiration date, it is frightening not to be concerned about the safety of your keys.

Why Do API Keys Need To Be Protected?

Protecting your API keys is crucial for guaranteeing the security and integrity of your application. Here are some reasons why you ought to guard your API keys:

  • To prevent unauthorized API requests.
    If someone obtains your API key, they can use it to make unauthorized requests, which could have serious ramifications, especially if your API contains sensitive data.
  • Financial insecurity.
    Some APIs come with a financial cost. And if someone gains access to your API key and exceeds your budget requests, you may be stuck with a hefty bill which could cost you a ton and jeopardize your financial stability.
  • Data theft, manipulation, or deletion.
    If a malicious person obtains access to your API key, they may steal, manipulate, delete, or use your data for their purposes.

Best Practices For Hiding API Keys In A React Application

Now that you understand why API keys must be protected, let’s take a look at some methods for hiding API keys and how to integrate them into your React application.

Environment Variables

Environment variables (env) are used to store information about the environment in which a program is running. It enables you to hide sensitive data from your application code, such as API keys, tokens, passwords, and just any other data you’d like to keep hidden from the public.

One of the most popular env packages you can use in your React application to hide sensitive data is the dotenv package. To get started:

  1. Navigate to your react application directory and run the command below.
    npm install dotenv --save
    
  2. Outside of the src folder in your project root directory, create a new file called .env.
  3. In your .env file, add the API key and its corresponding value in the following format:
    // for CRA applications
    REACT_APP_API_KEY = A1234567890B0987654321C ------ correct
    
    // for Vite applications
    VITE_SOME_KEY = 12345GATGAT34562CDRSCEEG3T  ------ correct
    
  4. Save the .env file and avoid sharing it publicly or committing it to version control.
  5. You can now use the env object to access your environment variables in your React application.
    // for CRA applications
    'X-RapidAPI-Key':process.env.REACT_APP_API_KEY
    // for Vite  applications
    'X-RapidAPI-Key':import.meta.env.VITE_SOME_KEY
    
  6. Restart your application for the changes to take effect.

However, running your project on your local computer is only the beginning. At some point, you may need to upload your code to GitHub, which could potentially expose your .env file. So what to do then? You can consider using the .gitignore file to hide it.

The .gitignore File

The .gitignore file is a text file that instructs Git to ignore files that have not yet been added to the repository when it’s pushed to the repo. To do this, add the .env to the .gitignore file before moving forward to staging your commits and pushing your code to GitHub.

// .gitignore
# dependencies
/node_modules
/.pnp
.pnp.js

# api keys
.env

Keep in mind that at any time you decide to host your projects using any hosting platforms, like Vercel or Netlify, you are to provide your environment variables in your project settings and, soon after, redeploy your app to view the changes.

Back-end Proxy Server

While environment variables can be an excellent way to protect your API keys, remember that they can still be compromised. Your keys can still be stolen if an attacker inspects your bundled code in the browser. So, what then can you do? Use a back-end proxy server.

A back-end proxy server acts as an intermediary between your client application and your server application. Instead of directly accessing the API from the front end, the front end sends a request to the back-end proxy server; the proxy server then retrieves the API key and makes the request to the API. Once the response is received, it removes the API key before returning the response to the front end. This way, your API key will never appear in your front-end code, and no one will be able to steal your API key by inspecting your code. Great! Now let’s take a look at how we can go about this:

  1. Install necessary packages.
    To get started, you need to install some packages such as Express, CORS, Axios, and Nodemon. To do this, navigate to the directory containing your React project and execute the following command:

    npm install express cors axios nodemon
    
  2. Create a back-end server file.
    In your project root directory, outside your src folder, create a JavaScript file that will contain all of your requests to the API.

  3. Initialize dependencies and set up an endpoint.
    In your backend server file, initialize the installed dependencies and set up an endpoint that will make a GET request to the third-party API and return the response data on the listened port. Here is an example code snippet:

    // defining the server port
    const port = 5000
    
    // initializing installed dependencies
    const express = require('express')
    require('dotenv').config()
    const axios = require('axios')
    const app = express()
    const cors = require('cors')
    app.use(cors())
    
    // listening for port 5000
    app.listen(5000, ()=> console.log(Server is running on ${port} ))
    
    // API request
    app.get('/', (req,res)=>{
    const options = { method: 'GET', url: 'https://wft-geo-db.p.rapidapi.com/v1/geo/adminDivisions', headers: { 'X-RapidAPI-Key':process.env.REACT_APP_API_KEY, 'X-RapidAPI-Host': 'wft-geo-db.p.rapidapi.com' } }; axios.request(options).then(function (response) { res.json(response.data); }).catch(function (error) { console.error(error); }); }
  4. Add a script tag in your package.json file that will run the back-end proxy server.

  5. Kickstart the back-end server by running the command below and then, in this case, navigate to localhost:5000.
    npm run start:backend
    
  6. Make a request to the backend server (http://localhost:5000/) from the front end instead of directly to the API endpoint. Here’s an illustration:
    import axios from "axios";
    import {useState, useEffect} from "react"
    
    function App() {
    
      const [data, setData] = useState(null)
    
      useEffect(()=>{
        const options = {
          method: 'GET',
          url: "http://localhost:5000",
        }
        axios.request(options)
        .then(function (response) {
            setData(response.data.data)
        })
        .catch(function (error) {
            console.error(error);
        })
    }, []) console.log(data) return ( <main className="App"> <h1>How to Create a Backend Proxy Server for Your API Keys</h1> {data && data.map((result)=>( <section key ={result.id}> <h4>Name:{result.name}</h4> <p>Population:{result.population}</p> <p>Region:{result.region}</p> <p>Latitude:{result.latitude}</p> <p>Longitude:{result.longitude}</p> </section> ))} </main> ) } export default App;

Okay, there you have it! By following these steps, you’ll be able to hide your API keys using a back-end proxy server in your React application.

Key Management Service

Even though environment variables and the back-end proxy server allow you to safely hide your API keys online, you are still not completely safe. You may have friends or foes around you who can access your computer and steal your API key. That is why data encryption is essential.

With a key management service provider, you can encrypt, use, and manage your API keys. There are tons of key management services that you can integrate into your React application, but to keep things simple, I will only mention a few:

  • AWS Secrets Manager
    The AWS Secrets Manager is a secret management service provided by Amazon Web Services. It enables you to store and retrieve secrets such as database credentials, API keys, and other sensitive information programmatically via API calls to the AWS Secret Manager service. There are a ton of resources that can get you started in no time.
  • Google Cloud Secret Manager
    The Google Cloud Secret Manager is a key management service provided and fully managed by the Google Cloud Platform. It is capable of storing, managing, and accessing sensitive data such as API keys, passwords, and certificates. The best part is that it seamlessly integrates with Google’s back-end-as-a-service features, making it an excellent choice for any developer looking for an easy solution.
  • Azure Key Vault
    The Azure Key Vault is a cloud-based service provided by Microsoft Azure that allows you to seamlessly store and manage a variety of secrets, including passwords, API keys, database connection strings, and other sensitive data that you don’t want to expose directly in your application code.

There are more key management services available, and you can choose to go with any of the ones mentioned above. But if you want to go with a service that wasn’t mentioned, that’s perfectly fine as well.

Tips For Ensuring Security For Your API Keys

You have everything you need to keep your API keys and data secure. So, if you have existing projects in which you have accidentally exposed your API keys, don’t worry; I’ve put together some handy tips to help you identify and fix flaws in your React application codebase:

  1. Review your existing codebase and identify any hardcoded API key that needs to be hidden.
  2. Use environment variables with .gitignore to securely store your API keys. This will help to prevent accidental exposure of your keys and enable easier management across different environments.
  3. To add an extra layer of security, consider using a back-end proxy server to protect your API keys, and, for advanced security needs, a key management tool would do the job.

Conclusion

Awesome! You can now protect your API keys in React like a pro and be confident that your application data is safe and secure. Whether you use environment variables, a back-end proxy server, or a key management tool, they will keep your API keys safe from prying eyes.

Further Reading On SmashingMag

Categories: Others Tags:

Exciting New Tools For Designers, May 2023

May 8th, 2023 No comments
Exciting New Tools For Designers, May 2023

There are hundreds of new tools for designers and developers released each month. We sift through them all to bring you the best.

In this month’s edition, productivity and AI combine to help you do more faster for more reward. Sounds great, right? Enjoy!

Termageddon

Privacy laws change every few months as more and more states add their regulations to the already hefty set of obligations. It’s almost impossible to keep up. Termageddon is an excellent service that keeps up for you, updating your policies when required.

Pangea

Pangea is a new way to find work on the top product design teams. Register your profile and make yourself available to 1,000+ startups ready to hire through the service. It’s free to join, create your page, and pitch to top startups. Once you’ve been hired, set your own rate and terms, and bill through the platform.

Mailmaker

Designing emails is a headache — who wants to layout pages with tables or stick to system fonts? Mailmaker is an excellent app that solves the problem by letting you design emails in a simple drag-and-drop interface.

Digital Brain

If you’re one of those people that sees their work and life as a holistic whole, then you need to check out Digital Brain, a productivity system built on Notion that allows you to track, manage, and improve the performance of every aspect of your life from personal goals to product launches.

WunderUI

WunderUI is an excellent UI kit for designing dashboards in Figma, Sketch, and Xd. It features 200+ templates, more UI components than most designers will ever need, and a consistent set of styles. Flexible layouts, smart assets, and a dark mode variation make it fully responsive.

AppSpector

AppSpector is a remote debugging tool for iOS and Android apps. You can use it to conduct real-time monitoring, review historical bugs, and track down problems from anywhere in the world without needing direct access to the device.

Mage

There are many AI image generators, but Mage is one of the best. It uses multiple AI models to return the most inventive, realistic, and original AI-generated imagery possible.

Hyperfocused

If you lose too much time obsessing over the crypto market or doom-scrolling social media, then you need Hyperfocused. It’s a neat little menubar app for macOS that restricts the files, apps, and websites you can open (until you toggle it off).

InsightBase

InsightBase is an exceptionally helpful AI-powered app that lets you ask natural language questions of your database and get answers back fast. You don’t need SQL or any knowledge of database structure. Just ask anything you need to know.

Breveto

Breveto is a beautiful writing app for macOS that lets you write long and short-form text, from essays to shopping lists. It’s super-easy to organize your content, which makes it ideal for writing web copy. Plus, it has AI built-in to help you polish your text.

Bookipi

There isn’t much as important as getting paid for freelancers, so a good invoicing app is a must. If you’re looking for a no-nonsense solution to keep your professional finances in good order, then check out Bookipi, an invoicing and document solution ideal for freelancers and small businesses.

Rangeen

Rangeen is an excellent color palette generator that can help you find the perfect colors for your next project. You can generate colors from ColorGPT, pull them from album art, or grab them randomly. You can save and export palettes and even check them for accessibility.

Fixel

Fixel is a free font from MacPaw. It uses variable font technology to make it flexible and useful in various scenarios. It is designed to work well with large volumes of text but also has some interesting details to make it visually interesting at larger sizes.

Oppflow

Oppflow is an all-in-one content marketing app that uses AI to deliver the best content for your target audience, just set once and generate over and over. It remembers everything you’ve approved to boost its performance next time and uses innovative tasks to streamline workflows for different team members.

Dart

Dart is a project management solution that uses AI to schedule the work needed so that you can focus on building. It saves time and avoids the endless grind of product dev by efficiently getting you over the line. It works across all departments, from design to development, sales, and management.

Categories: Designing, Others Tags:

How to Develop a Google Ads Strategy that Sells: 10 Tips & Tactics

May 8th, 2023 No comments

Follow this guide to learn how to create a powerful Google Ads strategy. This is a fast and easy way to increase your sales.

Google Ads are one of the most cost-effective ways to advertise your business online. Whether you’re a small business owner or a marketer working for a larger organization, Google Ads allows you to target customers precisely. 

The best part of running Google Ads? They let you achieve instant results. Instead of relying on SEO and organic traffic, you can get your brand in front of the right people straight away. 

The only problem is you have to pay for ads, which means you need to run a Google Ads campaign that works. Otherwise, your ROI won’t benefit your business.

And when you start exploring paid ads, there are various types of Google Ads campaigns you can use. 

With options for Google search ads, display, video, and text ads; new features for mobile apps and voice search; and access to real-time data about your ad performance, there’s a lot to consider when launching a paid search campaign.

In this guide, we’ll explore the Google Ads platform a bit deeper and reveal some of the best Google Ads tips and tactics you can use.

What is Google Ads?

Google Ads is a digital advertising platform developed by Google. It allows businesses to display ads to people who are searching for specific products or services on Google Search and other Google-affiliated websites. 

Advertisers bid on keywords that they think people searching for their products or services will use, and their ads are displayed alongside search results. When someone clicks on an ad, the advertiser is charged a fee called a “cost-per-click.”

The Google Ads platform allows businesses to create an account, set up their campaigns and ad groups, and choose from different targeting options and bidding strategies.

The platform is very powerful, but it can also be a bit overwhelming for those who aren’t familiar with PPC. We’ll share some tactics to help you get started. 

Using Google Ads to Grow Your Business

Google Ads is an excellent way to grow your business. It’s one of the most powerful marketing tools available that lets you get results fast.

When you run search ads on Google, you can reach new customers searching for products or services like yours and help increase sales by showing them exactly what they want to see. You can also use Google Ads as a way of increasing brand awareness and reaching potential customers, and driving traffic to their websites.

The great thing about Google Ads is that you can be extremely specific about who you target. This means only the right people see your ads – which helps you achieve a better ROI.

It’s important that your business creates ads that are highly targeted and relevant. The more specific your ad is to its target audience, the better it will perform. 

Here are some tips and tricks to help you use Google Ads to your advantage.

1. Use Google Sheet’s Built-in Ad Planner to Find High-Value Sites and Audiences

Google’s Ad Planner is a valuable tool for discovering high-value sites and audiences. Use it to optimize your Google Ads campaigns by finding new opportunities for audience targeting, including sites with high site traffic and/or profitable audiences.

  • Open Google Ads and click “Start Now”
  • Click “Find Audiences”
  • Select “Places” under “Location,” then type in the location you want to target (e.g., “Los Angeles”). Click “Search”
  • Now you’ll see a list of all places within Los Angeles – you can filter these results by category if necessary.

The built-in planner tool can help you with audience targeting. It’s a free tool that lets you view and compare audience data for your existing ads, keywords, and placements. You can also use it to find new audiences based on demographics like age, gender, parental status, or interests.

2. Keyword Tools

Use the latest keyword tools to build a well-researched list of keywords for your bid requests. 

The first step in optimizing your Google Ads campaigns is creating a well-researched keyword list for each ad group. You can do this by using the following keyword tools:

  • Google Keyword Planner – The GKP allows advertisers to enter multiple keywords alongside each other into a single column to compare them side by side—and then choose which ones they want their ads displayed next to! This makes it easy for anyone who doesn’t know enough about SEO strategies yet still wants quick results without much hassle involved.
  • Google Trends – This tool will show you trending queries so you know what people are most interested in at any time. It’s also helpful for finding related terms that aren’t necessarily synonyms but might be useful for targeting.

Keyword tools can help your business achieve its goals by providing the data necessary to make informed decisions about your marketing campaigns. By using these tools, you can better understand how people search online and what they’re looking for—making it easier for you to reach them with relevant marketing content.

3. Negative Keywords

Negative keywords are words or phrases you can add to your pay-per-click advertising campaigns to exclude certain search terms from triggering your ads. For example, if you sell red shoes but not blue shoes, you might add “blue” as a negative keyword. 

This will prevent your ad from appearing when someone searches for “blue shoes” but will still allow your ad to show up when someone searches for “red shoes.” 

By using negative keywords, you can help to ensure that your ads are more relevant to the people who see them and that you are only paying for clicks from people who are more likely to be interested in your products or services.

4. Remarketing

Remarketing is a way to reconnect with people who have previously visited your website. It involves adding a snippet of code to your website, called a remarketing tag, which adds visitors to a list. 

You can then create a campaign that targets this list with personalized ads as they visit other websites within the Google Display Network. Remarketing aims to bring these previous visitors back to your website and potentially convert them into customers.

You can create a remarketing list in Google Ads by using the “Audiences” section. When you create an audience, it will appear in the left navigation of your account. You can then use that audience when creating a campaign or ad group.

5. Conversion Optimizer

Check Conversion Optimizer to get a better CPA. This feature automatically optimizes your campaigns to help you get the best return on investment from your ads. If you don’t have Conversion Optimizer enabled, we recommend doing so when setting up your campaigns.

Conversion Optimizer can help you get more conversions for your budget by using machine learning to optimize your bids instead of relying on historical data. 

You’ll see an estimated cost per click (CPC) for every keyword in Google Ads, and it will also show CPC estimates next to each keyword when viewed through Google Ads or Search Partners Manager interfaces. The system will automatically optimize for conversions over time and learn how much each keyword bid increases or decreases the conversion rate.

6. Use Google’s Free Tools

To get the most out of your ad campaigns, it’s essential to have a good understanding of how they perform. Google provides free tools that can help you do this.

For example, Campaign Experiments allows you to run A/B tests on your ads to determine which ones perform better and why. You can also try different ad images or copy variations with A/B Testing to see what works best for your audience.

Google Optimize allows advertisers to test landing pages and conversion rates of specific site pages. This tool allows businesses with limited resources to perform large-scale multivariate tests without access to expensive software or human resources needed for manual testing.

7. Start Simple

Several approaches work when creating ads. If you’re starting, try basic text ads because they give you more flexibility, are easier to track, and take less time to make than image ads. They also tend to be cheaper than image ads.

Image ads are more engaging but require more effort to create and manage. You’ll need to upload images that are high quality and use keywords in the right way. Images can also be expensive since they take up more space on Google’s ad network, which means a higher cost per click (CPC) for your business.

8. Google Adwords Express

Get started with Google Ads by using AdWords Express or Smart Campaigns. They require little management, but that also means you have less control over your account settings and performance than you would with other types of campaigns. For example, AdWords Express lets Google automatically set your budget by choosing a daily budget range for your campaign.

Google Ads Express is a simple way to get started with Google Ads. With AdWords Express, you can create a campaign with just one click and then set the budget for your ads (or let Google automatically do it). You don’t have to worry about setting up your ads or budgets, making this option perfect for those new to online advertising.

9. Split Testing

Split-test your landing pages to find the best-converting pages for each campaign. Split testing is a powerful way to increase your conversion rates. It can test landing pages, ads, and even keywords.

The best way to use split testing is by starting with one of your existing campaigns—you don’t want to waste time creating new campaigns for each experimental campaign. Then pick a few variations of the same ad or landing page and split them evenly across your target audience.

It’s okay if you only have enough traffic for two tests; make sure there’s a significant difference between the variations to tell which works best! The more people you have in each test group (the “sample size”), the more accurate results will be.

10. Keep Up to Date

Stay informed about all the changes happening in the PPC landscape! Google is constantly changing the way it displays search results. They’ve been doing this for years and have made hundreds of changes to their algorithm since 2000. 

In addition to changing how they display search results and ads, they also change their landing pages—the pages that appear when you click an ad on Google. These changes can have a significant impact on your PPC strategy!

Conclusion

There’s a lot that goes into developing an effective Google Ads strategy. It’s important that you’re open to trying new things, experimenting, and monitoring the results. The more you test and optimize, the more effective your Google Ad campaigns will be. This means delivering a better ROI from each ad campaign you run and driving more revenue for your business.

Photo by Myriam Jessier on Unsplash

The post How to Develop a Google Ads Strategy that Sells: 10 Tips & Tactics appeared first on noupe.

Categories: Others Tags: