Archive

Archive for the ‘’ Category

The 20 Most Controversial Logos of All Time (Ranked)

September 15th, 2023 No comments

When you hire graphic designers to create your company’s logo, what do you expect? Professional designs, culturally sensitive icons, creativity, and originality don’t sound like too big an ask. Unfortunately, these brands got more than they bargained for.

Categories: Designing, Others Tags:

Why Editing Video is Crucial to Get Better SEO Results

September 15th, 2023 No comments

Video has become a crucial component of many brand marketing strategies. In fact, according to Wyzowl’s report, 91% of businesses now use video as a marketing tool.

Image via Wyzowl

One effective strategy to drive organic traffic and boost visibility for your content and brand is Search Engine Optimization (SEO). 

In this guide, I’ll cover everything you need to know about video editing for SEO. With this knowledge, you can create video content that reaches more people organically and provides added value.

But first, let’s define the term “Video SEO.”

What is Video SEO?

The term video SEO or video Search Engine Optimization, is widely used in the context of modern digital marketing. It involves optimizing video content for improved visibility on search engine results pages (SERPs).

Search engines like Google continually update their algorithms for relevance, making video SEO crucial. It ensures your videos are shown on SERP when people search for related topics.

Search engines prominently feature videos in both organic and dedicated video searches, offering multiple opportunities for discovery and engagement.

For example, when searching for “how to repair a broken vent pipe,” top search results often include videos, underscoring video SEO’s significance.

Image via Google

Video editing for SEO is not only about reaching a broader audience, but it also presents several other benefits that can complement your marketing efforts. Let’s explore these advantages.

Benefits of Video Editing for SEO

Video editing isn’t just about making your videos look polished. It’s a pivotal step in achieving better SEO results, allowing you to reach more global audiences with your videos

Let’s break down some of the key benefits of video editing for SEO.

1. Improved Viewer Engagement

Well-edited videos are more likely to captivate your audience. They keep viewers watching longer, sending positive signals to search engines about your content’s quality and relevance.

2. Enhanced User Experience

A well-edited video provides a smoother and more enjoyable viewing experience, reducing bounce rates and encouraging visitors to explore your website further. 

Additionally, if you conduct regular website optimization experiments, featuring well-edited videos can streamline your UX research by increasing visitor engagement and providing more opportunities to track their activities.

3. Better Click-Through Rates (CTR)

A compelling video thumbnail, coupled with well-edited content, can significantly enhance CTR when your video is displayed in search results. This improved CTR ultimately translates to a significant increase in organic traffic to your videos.

4. Reduced Bounce Rates

Engaging videos help reduce bounce rates, improving site SEO by signaling valuable content. 

For example, Backlinko often embeds videos within blog posts to enhance engagement and reduce bounce rates.

Image via Backlinko

Having discovered some of its advantages, let’s now delve into the specifics of video editing for SEO.

Actionable Video Editing Strategies for SEO Success

When it comes to video optimization for SEO, it’s all about strategic editing. In this section, I’ll list some actionable video editing strategies that can enhance your SEO performance. 

Let’s get started.

1. Choose the Right Video Length and Format

When editing, keep your videos concise and purposeful. Start with a compelling hook to grab viewers’ attention and ensure that the content directly addresses the viewer’s query or problem.

Longer videos should provide in-depth insights or step-by-step guides. Also, use clear and concise language throughout, avoiding unnecessary fillers.

2. Ensure High Quality and Resolution

Invest in high-quality recording and editing equipment to ensure excellent visuals and audio quality. If you’re on a low budget, take advantage of a free (but effective) editing tool like Movavi Video Editor and Animoto.

When editing videos online, pay attention to lighting, sound, and camera stability. Edit out any distracting background noise or visuals, and enhance color and contrast to make your videos visually appealing.

3. Optimize Thumbnails

Create custom thumbnails that capture your audience’s attention and provide context about your videos’ content. 

You can use vibrant images or screenshots from the video and include text that hints at the topic without revealing everything. A well-optimized thumbnail can significantly enhance click-through rates.

Need inspiration? Pilfer thumbnail ideas from Ahrefs’ YouTube channel.

Image via YouTube

By implementing these video editing strategies, you can enhance the quality and relevance of your videos for both viewers and search engines, ultimately improving their SEO performance.

Strategies for Supercharging Your Video SEO Strategy

To supercharge your videos’ SEO performance, you need more than just editing skills. You need strategic techniques that maximize your video’s visibility in search results. 

Here are the key strategies you can implement.

1. Focus on Keyword Research and Optimization

Identify relevant keywords and seamlessly integrate them into your video’s title, description, and tags. This helps search engines understand your video’s content and context.

To execute this strategy, start by investing in a keyword research tool, such as Semrush or Ahrefs SEO tool. Here’s a snapshot of Semrush’s keyword research dashboard:

Image via Semrush

Once you’ve conducted keyword research, integrate the keywords into your video’s title, description, and tags naturally.

2. Create Compelling Descriptions and Tags

Craft compelling descriptions that encourage viewers to click on your videos. Also, use relevant tags for better discoverability.

Find inspiration from Backlinko’s YouTube page. The image below shows their detailed description and keyword-rich tags—an effective strategy you can adopt.

Image via YouTube

3. Harness the Power of Social Media

Boost your video’s reach by sharing it on multiple social media platforms. This can significantly increase your blog traffic and engagement, positively impacting your video SEO.

Ahrefs, for instance, regularly shares video walkthroughs on social media, garnering thousands of views.

Image via Twitter

Beyond sharing your videos, aim to foster engagement for a wider reach. One effective approach is to prompt viewers to add comments with thought-provoking questions. 

Additionally, you can create a quiz and share it alongside your videos to boost engagement.

4. Leverage Video Sitemaps

Sitemaps provide valuable information about your videos to search engines, helping them index your content and rank it for relevant queries. 

For better reach, create and submit video sitemaps to multiple search engines, not just to Google.

However, note that you should submit XML sitemaps, not HTML sitemaps. Here’s the difference between the two to avoid any confusion:

Image via Semrush

Conclusion

Video editing for SEO is the bridge that connects your content to a wider audience. It’s the key to climbing the search engine rankings and captivating your viewers. 

By implementing these strategies, you’ll not just improve your videos, but strengthen your online presence. 

What’s next? Go forth and create exceptional videos. Keep optimizing them regularly and watch your online influence expand.

Featured image by Mark Cruz on Unsplash

The post Why Editing Video is Crucial to Get Better SEO Results appeared first on noupe.

Categories: Others Tags:

Revealing Images With CSS Mask Animations

September 15th, 2023 No comments

In a previous article, we explored fancy hover effects for images that involve shines, rotations, and 3D perspectives. We are going to continue playing with images, but this time, we are making animations that reveal images on hover. Specifically, we will learn about CSS masks and how they can be used to cover portions of an image that are revealed when the cursor hovers over the image.

Here is the HTML we will use for our work:

<img src="" alt="">

Yes, that’s right, only one image tag. The challenge I like to take on with each new CSS project is: Let CSS do all of the work without extra markup.

As we go, you may notice minor differences between the code I share in the article and what is used inside the demos. The code throughout the article reflects the CSS specification. But since browser support is inconsistent with some of the features we’re using, I include prefixed properties for broader support.

Example 1: Circle Reveal

In this first one, an image sits in a square container that is wiped away on hover to reveal the image.

So, we have two images, each with a gradient background that is revealed with a touch of padding. We could have added a

— or perhaps even a

— to the markup to create a true container, but that goes against the challenge of letting CSS do all of the work.

While we were able to work around the need for extra markup, we now have to ask ourselves: How do we hide the image without affecting the gradient background? What we need is to hide the image but continue to show the padded area around it. Enter CSS masks.

It’s not terribly complicated to apply a mask to an element, but it’s a little trickier in this context. The “trick” is to chain two mask layers together and be more explicit about where the masks are applied:

img {
  /* etc. */
  mask:
    linear-gradient(#000 0 0) padding-box,
    linear-gradient(#000 0 0) content-box;
}

Now we have two masks “sources”:

  1. content-box: one that is restricted to the image’s content,
  2. padding-box: one that covers the whole image area, including the padded area.

We need two layers because then we can combine them with the CSS mask-composite property. We have different ways to combine mask layers with mask-composite, one of which is to “exclude” the area where the two masks overlap each other.

img {
  /* etc. */
  mask:
    linear-gradient(#000 0 0) padding-box,
    linear-gradient(#000 0 0) content-box;
  mask-composite: exclude;
}

This will make only the gradient visible (the padded area), as you can see below.

See the Pen Overview of the exclude composition by Temani Afif.

Notice that we can remove the padding-box from the code since, by default, a gradient covers the whole area, and this is what we need.

Are there other ways we could do this without mask-composite? There are many ways to hide the content box while showing only the padded area. Here is one approach using a conic-gradient as the mask:

mask:
  conic-gradient(from 90deg at 10px 10px, #0000 25%, #000 0)
  0 0 / calc(100% - 10px) calc(100% - 10px);
  /* 10px is the value of padding */

See the Pen Border-only using conic-gradient by Temani Afif.

There are others, of course, but I think you get the idea. The approach you choose is totally up to you. I personally think that using mask-composite is best since it doesn’t require us to know the padding value in advance or change it in more than one place. Plus, it’s a good chance to practice using mask-composite.

Now, let’s replace the second gradient (the one covering only the content area) with a radial-gradient. We want a circle swipe for the hover transition, after all.

img {
  mask:
    linear-gradient(#000 0 0),
    radial-gradient(#000 70%,#0000 71%) content-box;
  mask-composite: exclude;
}

See the Pen Adding the radial-gradient by Temani Afif.

See that? The exclude mask composite creates a hole in the image. Let’s play with the size and position of that cutout and see what is happening. Specifically, I’m going to cut the size in half and position the circle in the center of the image:

mask:
  linear-gradient(#000 0 0),
  radial-gradient(#000 70%,#0000 71%) content-box
    center / 50% 50% no-repeat;
  mask-composite: exclude;

See the Pen Updating the radial-gradient size and position by Temani Afif.

I bet you can already see where this is going. We adjust the size of the radial-gradient to either hide the image (increase) or reveal the image (decrease). To fully hide the image, we need to scale the mask up to such an extent that the circle covers up the image. That means we need something greater than 100%. I did some boring math and found that 141% is the precise amount, but you could wing it with a round number if you’d like.

That gives us our final CSS for the effect:

img {
  padding: 10px; /* control the thickness of the gradient "border" */
  background: repeating-linear-gradient(45deg, #FF6B6B 0 10px, #4ECDC4 0 20px);
  mask:
    linear-gradient(#000 0 0),
    radial-gradient(#000 70%, #0000 71%) content-box
      50% / var(--_s, 150% 150%) no-repeat;
  mask-composite: exclude;
  transition: .5s;
}
img:hover {
  --_s: 0% 0%;
}

A few minor details:

  • We start with a size equal to 150% 150% to initially hide the image. I am taking the additional step of applying the size as a CSS variable (--_s) with the full size (150% 150%) as a fallback value. This way, all we need to do is update the variable on hover.
  • Add a hover state that decreases the size to zero so that the image is fully revealed.
  • Apply a slight transition of .5s to smooth out the hover effect.

Here’s the final demo one more time:

See the Pen Hover reveal animation using mask by Temani Afif.

We just created a nice reveal animation with only a few lines of CSS — and no additional markup! We didn’t even need to resort to pseudo-elements. And this is merely one way to configure things. For example, we could play with the mask’s position to create a slick variation of the effect:

See the Pen Another variation of the circular reveal animation by Temani Afif.

I’m a big fan of putting an idea out there and pushing it forward with more experiments. Fork the demo and let me know what interesting things you can make out of it!

Example 2: Diagonal Reveal

Let’s increase the difficulty and try to create a hover effect that needs three gradients instead of two.

See the Pen Hover reveal animation using mask II by Temani Afif.

Don’t look at the code just yet. Let’s try to create it step-by-step, starting with a simpler effect that follows the same pattern we created in the first example. The difference is that we’re swapping the radial-gradient with a linear-gradient:

img {
  padding: 10px; /* control the thickness of the gradient "border" */
  background: repeating-linear-gradient(45deg, #FF6B6B 0 10px, #4ECDC4 0 20px);
  mask:
    linear-gradient(#000 0 0),
    linear-gradient(135deg, #000 50%, #0000 0) content-box 
      0% 0% / 200% 200% no-repeat;
  mask-composite: exclude;
  transition: .5s;
}
img:hover {
  mask-position: 100% 100%;
    }

You’ll notice that the other minor difference between this CSS and the first example is that the size of the mask is equal to 200% 200%. Also, this time, the mask’s position is updated on hover instead of its size, going from 0% 0% (top-left) to 100% 100% (bottom-right) to create a swiping effect.

See the Pen Diagonal reveal animation using mask by Temani Afif.

We can change the swipe direction merely by reversing the linear gradient angle from 135deg to -45deg, then updating the position to 0% 0% on hover instead of 100% 100%:

img {
  padding: 10px; /* control the thickness of the gradient "border" */
  background: repeating-linear-gradient(45deg, #FF6B6B 0 10px, #4ECDC4 0 20px);
  mask:
    linear-gradient(#000 0 0),
    linear-gradient(-45deg, #000 50%, #0000 0) content-box 
      100% 100% / 200% 200% no-repeat;
  mask-composite: exclude;
  transition: .5s;
}
img:hover {
  mask-position: 0% 0%;
}

See the Pen Diagonal reveal animation using mask by Temani Afif.

One more thing: I defined only one mask-position value on hover, but we have two gradients. If you’re wondering how that works, the mask’s position applies to the first gradient, but since a gradient occupies the full area it is applied to, it cannot be moved with percentage values. That means we can safely define only one value for both gradients, and it will affect only the second gradient. I explain this idea much more thoroughly in this Stack Overflow answer. The answer discusses background-position, but the same logic applies to mask-position.

Next, I’d like to try to combine the last two effects we created. Check the demo below to understand how I want the combination to work:

See the Pen Combination of two diagonal reveal by Temani Afif.

This time, both gradients start at the center (50% 50%). The first gradient hides the top-left part of the image, while the second gradient hides the bottom-right part of it. On hover, both gradients slide in the opposite direction to reveal the full image.

If you’re like me, you’re probably thinking: Add all the gradients together, and we’re done. Yes, that is the most intuitive solution, and it would look like this:

img {
  padding: 10px; /* control the thickness of the gradient "border" */
  background: repeating-linear-gradient(45deg, #FF6B6B 0 10px, #4ECDC4 0 20px);
  mask:
    linear-gradient(#000 0 0),
    linear-gradient(135deg, #000 50%, #0000 0) content-box 
      50% 50% / 200% 200% no-repeat,
    linear-gradient(-45deg, #000 50%, #0000 0) content-box 
      50% 50 / 200% 200% no-repeat;
  mask-composite: exclude;
  transition: .5s;
  cursor: pointer;
}
img:hover {
  mask-position: 0% 0%, 100% 100%;
}

See the Pen Combining both effects by Temani Afif.

This approach kind of works, but we have a small visual glitch. Notice how a strange diagonal line is visible due to the nature of gradients and issues with anti-aliasing. We can try to fix this by increasing the percentage slightly to 50.5% instead of 50%:

See the Pen Trying to fix the anti-aliasing issue by Temani Afif.

Yikes, that makes it even worse. You are probably wondering if I should decrease the percentage instead of increasing it. Try it, and the same thing happens.

The fix is to update the mask-composite property. If you recall, we are already using the exclude value. Instead of declaring exclude alone, we need to also apply the add value to make sure the bottom layers (the swiping gradients) aren’t excluded from each other but are instead added together:

img {
  mask:
    /* 1st layer */
    linear-gradient(#000 0 0),

    /* 2nd layer */
    linear-gradient(135deg, #000 50.5%, #0000 0) content-box 
      50% 50% / 200% 200% no-repeat,

    /* 3rd layer */
    linear-gradient(-45deg, #000 50.5%, #0000 0) content-box 
      50% 50% / 200% 200% no-repeat;

  mask-composite: exclude, add;
}

Now, the second and third layers will use the add composition to create an intermediate layer that will be excluded from the first one. In other words, we must exclude all the layers from the first one.

I know mask-composite is a convoluted concept. I highly recommend you read Ana Tudor’s crash course on mask composition for a deeper and more thorough explanation of how the mask-composite property works with multiple layers.

This fixes the line issue in our hover effect:

See the Pen Diagonal reveal animation using mask by Temani Afif.

One more small detail you may have spotted: we have defined three gradients in the code but only two mask-position values on the hover state:

img:hover {
  mask-position: 0% 0%, 100% 100%;
}

The first value (0% 0%) is applied to the first gradient layer; it won’t move as it did before. The second value (100% 100%) is applied to the second gradient layer. Meanwhile, the third gradient layer uses the first value! When fewer values are declared on mask-position than the number of mask layers, the series of comma-separated values repeats until all of the mask layers are accounted for.

In this case, the series repeats circles back to the first value (0% 0%) to ensure the third mask layer takes a value. So, really, the code above is a more succinct equivalent to writing this:

img:hover {
  mask-position: 0% 0%, 100% 100%, 0% 0%;
}

Here is the final demo again with both variations. You will see that the second example uses the same code with minor updates.

See the Pen Hover reveal animation using mask II by Temani Afif.

Example 3: Zig-Zag Reveal

I have one more example for you, this time revealing the image with zig-zag edges sliding apart, sort of like teeth chomping on the image.

See the Pen Hover reveal animation using mask III by Temani Afif.

While this may look like a more complex hover effect than the last two we covered, it still uses the same underlying CSS pattern we’ve used all along. In fact, I’m not even going to dive into the code as I want you to reverse-engineer it using what you now know about using CSS gradients as masks and combining mask layers with mask-composite.

I won’t give you the answer, but I will share an article I wrote that demonstrates how I created the zig-zag shape. And since I’m feeling generous, I’ll link up this online border generator as another resource.

Wrapping Up

I hope you enjoyed this little experiment with CSS masks and gradients! Gradients can be confusing, but mixing them with masks is nothing short of complicated. But after spending the time it takes to look at three examples in pieces, we can clearly see how gradients can be used as masks as well as how we can combine them to “draw” visible areas.

Once we have an idea of how that works, it’s amazing that all we need to do to get the effect is update either the mask’s position or size on the element’s hover state. And the fact that we can accomplish all of this with a single HTML element shows just how powerful CSS is.

We saw how the same general CSS pattern can be tweaked to generate countless variations of the same effect. I thought I’d end this article with a few more examples for you to play with.

See the Pen Hover reveal animation using mask IV by Temani Afif.

See the Pen Hover reveal animation using mask V by Temani Afif.

See the Pen Hover reveal animation using mask VI by Temani Afif.

Further Reading on Smashing Magazine

Categories: Others Tags:

Facilitating Inclusive Online Workshops (Part 1)

September 13th, 2023 No comments

Have you ever found yourself trapped in an hour-long meeting, listening to someone’s endless talk without understanding their main point? Or sat through a discussion where everyone speaks, but no actions are decided upon in the end? Or perhaps felt like the meeting you’re participating in is simply a waste of time?

If you have, you’re not alone.

According to a survey conducted by Clarizen and Harris Poll (2017), three in five employed adults reported that preparing for a meeting “takes longer than the meeting itself,” and 35% of those who attend status meetings called them a waste of time. In fact, 46% of employed Americans would rather engage in any unpleasant activity than sit in a meeting.

Meetings, when organized well, can serve as an effective way to share information and make decisions. The harsh reality, however, is that many meetings are poorly structured, ending up as a drain of resources.

One of the possible ways to replace meetings with something better and more effective is the implementation of workshops. But while workshops can be a highly effective way to foster collaboration and generate innovative solutions, they often require active participation from everyone involved. Yet, not everyone feels comfortable voicing their thoughts or taking the lead in a group setting, even though these quieter voices can be just as valuable and insightful. This is what led to the concept of an “inclusive” workshop — a workshop that ensures everyone feels heard, connected, and comfortable expressing their ideas.

What’s Inclusivity, And What’s Its Impact?

Before we dive into the concept of an inclusive workshop, let’s first talk about the foundation. At its core, inclusivity means recognizing, appreciating, and respecting the diverse tapestry of human individuality. It’s about valuing the uniqueness everyone brings to the table, from attributes like ethnicity, gender, age, and religion to less apparent characteristics such as cognitive style or socioeconomic background.

Inclusivity is deeply rooted in the social identity theory, introduced by Tajfel & Turner in 1979. This theory suggests that our identities — who we think we are — are partly defined by the social groups we feel part of. It’s human nature to seek acceptance and to want to belong to a group that appreciates us for who we are. This need for social acceptance influences how we view ourselves and how we interact with others.

An inclusive environment embraces this diversity and uses this as an advantage to create a collaborative environment. Think of an orchestra, for example. Every instrument, whether it’s a violin, a trumpet, a cello, or a drum, brings with it its unique sound. Some may play a melody, others a harmony, and some keep the rhythm. Each of these sounds is different, but when combined, they create a harmonious symphony. In an inclusive setting, each person, with their distinct qualities, comes together with others to form a symphony of collaboration and understanding.

However, people are beautifully complex, and although this complexity is what often breathes life into a workshop, it can also introduce an element of unpredictability, which, if not managed well, can potentially lead to discord among the participants.

The only thing we can do is acknowledge the fact that not everyone will be comfortable speaking up, particularly in group settings. There could be various reasons for this, including individual personality traits, cultural backgrounds, past experiences, or simply the fear of judgment. As a facilitator, it is your responsibility to ensure that every individual in the room feels comfortable expressing their opinions and ideas. In the remainder of this article, I will be introducing some practical principles and techniques that could guide you in facilitating an inclusive workshop.

Preparing For An Inclusive Workshop

If you are familiar with design thinking and design in general, you’ll find similarities between the design process and structuring an inclusive workshop. In design, we start by trying to understand our users, identifying their goals, and then crafting an effective user experience to guide them from start to finish. The same principles apply to designing an inclusive workshop:

  1. Understand the participants,
  2. Recognize their goals,
  3. Plan an engaging experience to achieve these goals.

Here are some “pre-works” you can do to better prepare for your workshop.

Step 1. Make Sure You Include The Right People

The most important thing in any meeting or workshop is including the right participants. Failing to do so could prevent you from guiding the team in order to reach the goals of the workshop.

If you are facilitating a workshop for your own team (or within your company, which you know well), ask yourself the following questions so as to decide if a person should be included:

  • Is the meeting relevant to this person’s work and core responsibilities?
  • Can this person provide critical information, aid in the decision-making, or contribute meaningfully to the conversation?
  • Is this person’s presence necessary to achieve the meeting’s goals?

On the other hand, if you’re facilitating a workshop with an external team, provide a list of criteria that outlines what the ideal participant looks like and ask your client to include all the relevant individuals.

At this stage, bear in mind that adding a new participant not only means that you are bringing in a new viewpoint but you’re also increasing the number of necessary agreements among the members of the group. This could potentially lead to more disagreements and conflicts among different parties. Have a look at the points of agreement graph (below) to better understand how this mechanism works.

Step 2. Know Your Participants Well

Once your participant wish list is set, it’s important to invite all the participants to the workshop in a manner that is welcoming and inclusive — for example, not just sending a calendar invite and expecting them to show up. If it’s feasible, try to arrange a pre-workshop call or meeting with each participant to gain a better understanding of them. Building these personal connections before the workshop is important in ensuring your workshop activities are inclusive and productive.

Here are some more detailed steps to consider.

Personalize The Invitation

Instead of a generic invite, personalize your invitations. Clearly outline the workshop’s purpose and activities and why you think they would be a valuable addition. Be open to participant’s opinions and concerns about attendance. If there’s uncertainty about their availability or relevance to the workshop, offer them an option to contribute asynchronously if they can’t participate in real-time.

An example message could be crafted along these lines:

“Hey Lewis, I am reaching out as I am planning to run a workshop with Max to brainstorm around how we can build the AI dashboard (which is the next initiative on our roadmap), and I would love to invite you to the workshop as I believe your front-end knowledge will help us a lot to understand the tech limitations. How does that sound to you? The workshop will be approximately two hours long and is scheduled for next week. Here’s the high-level agenda…”

A message like this — where you can explain what the workshop will be about, who will be involved, and how they can contribute to the workshop — will help the participant decide whether their involvement will be useful or not.

Schedule Pre-Workshop Conversations

If possible, have a brief, informal chat with the participants, especially if you’re unfamiliar with them. This could be as simple as a quick coffee chat where you just talk about your hobbies and favorite movies. Such interactions can help build rapport before the workshop and provide insights into the participant’s goals and expectations.

Identify Personality Types And Preferences

The personality traits of your workshop participants can be grouped along two main axes: their preference for group work (individualistic vs. collaborative) and their communication style (introverted vs. extroverted). By understanding and accommodating these preferences, you can create a workshop environment that truly values and harnesses the benefits of diversity.

  • Individualistic participants
    They may prefer tasks they can work on independently and discussions in smaller groups. Designing certain portions of the workshop that allow for individual thinking and ideation can help engage these participants.
  • Collaborative participants
    They enjoy large group discussions and team activities. Incorporating collaborative tasks where everyone can contribute can keep these participants involved and motivated.
  • Introverted participants
    They might feel more comfortable with structured turn-taking or with written contributions. They might not voice their thoughts as readily in a group setting, but that doesn’t make their ideas any less valuable. Establishing clear turn-taking rules or offering opportunities for written input can help ensure their voices are heard, too.
  • Extroverted participants
    They might be more engaged in free-flowing discussions or roles that involve presenting to the group. Ensuring that the workshop format has room for open discussions can cater to their preference.

Step 3. Plan The Workshop Steps

Once you have defined your participant list and understand the participants well, the next step is to plan the workshop accordingly to meet their needs.

In the next section, I will share some high-level tips relevant in particular to inclusivity.

The specifics of planning an entire workshop is another topic altogether — I recommend reading a few books on this topic, such as Gamestorming by Dave Gray, Sunni Brown, and James Macanufo and Facilitator’s Guide to Participatory Decision-Making by Sam Kaner, as well as Smashing Magazine articles that will help you dive deeper into the specifics of crafting a workshop. You might also want to look at the 4C framework developed by AJ & Smart, which can guide you in structuring your workshop logically.

Start By Defining The Break Time

No matter the nature of your workshop, it’s important to plan regular breaks which will promote an inclusive environment.

Catering to individuals’ unique needs, be they physical or cognitive, is very important. Breaks help counter the “Zoom fatigue” prevalent in virtual workshops and respect cultural sensitivities by allowing time for personal and cultural practices.

Numerous studies indicate that people can generally focus effectively for about 45 to 50 minutes at a time. Hence, consider scheduling a 5–10 minute break every hour. These intervals offer participants time to relax, regroup, and reset their mental focus, thereby maintaining engagement and productivity throughout the session.

“Excessive focus exhausts the focus circuits in your brain. It can drain your energy and make you lose self-control. This energy drain can also make you more impulsive and less helpful. As a result, decisions are poorly thought out, and you become less collaborative. So what do we do then? Focus or unfocus? In keeping with recent research, both focus and unfocus are vital. The brain operates optimally when it toggles between focus and unfocus, allowing you to develop resilience, enhance creativity, and make better decisions too.”

— Srini Pillay, “Your Brain Can Only Take So Much Focus” (Harvard Business Review)

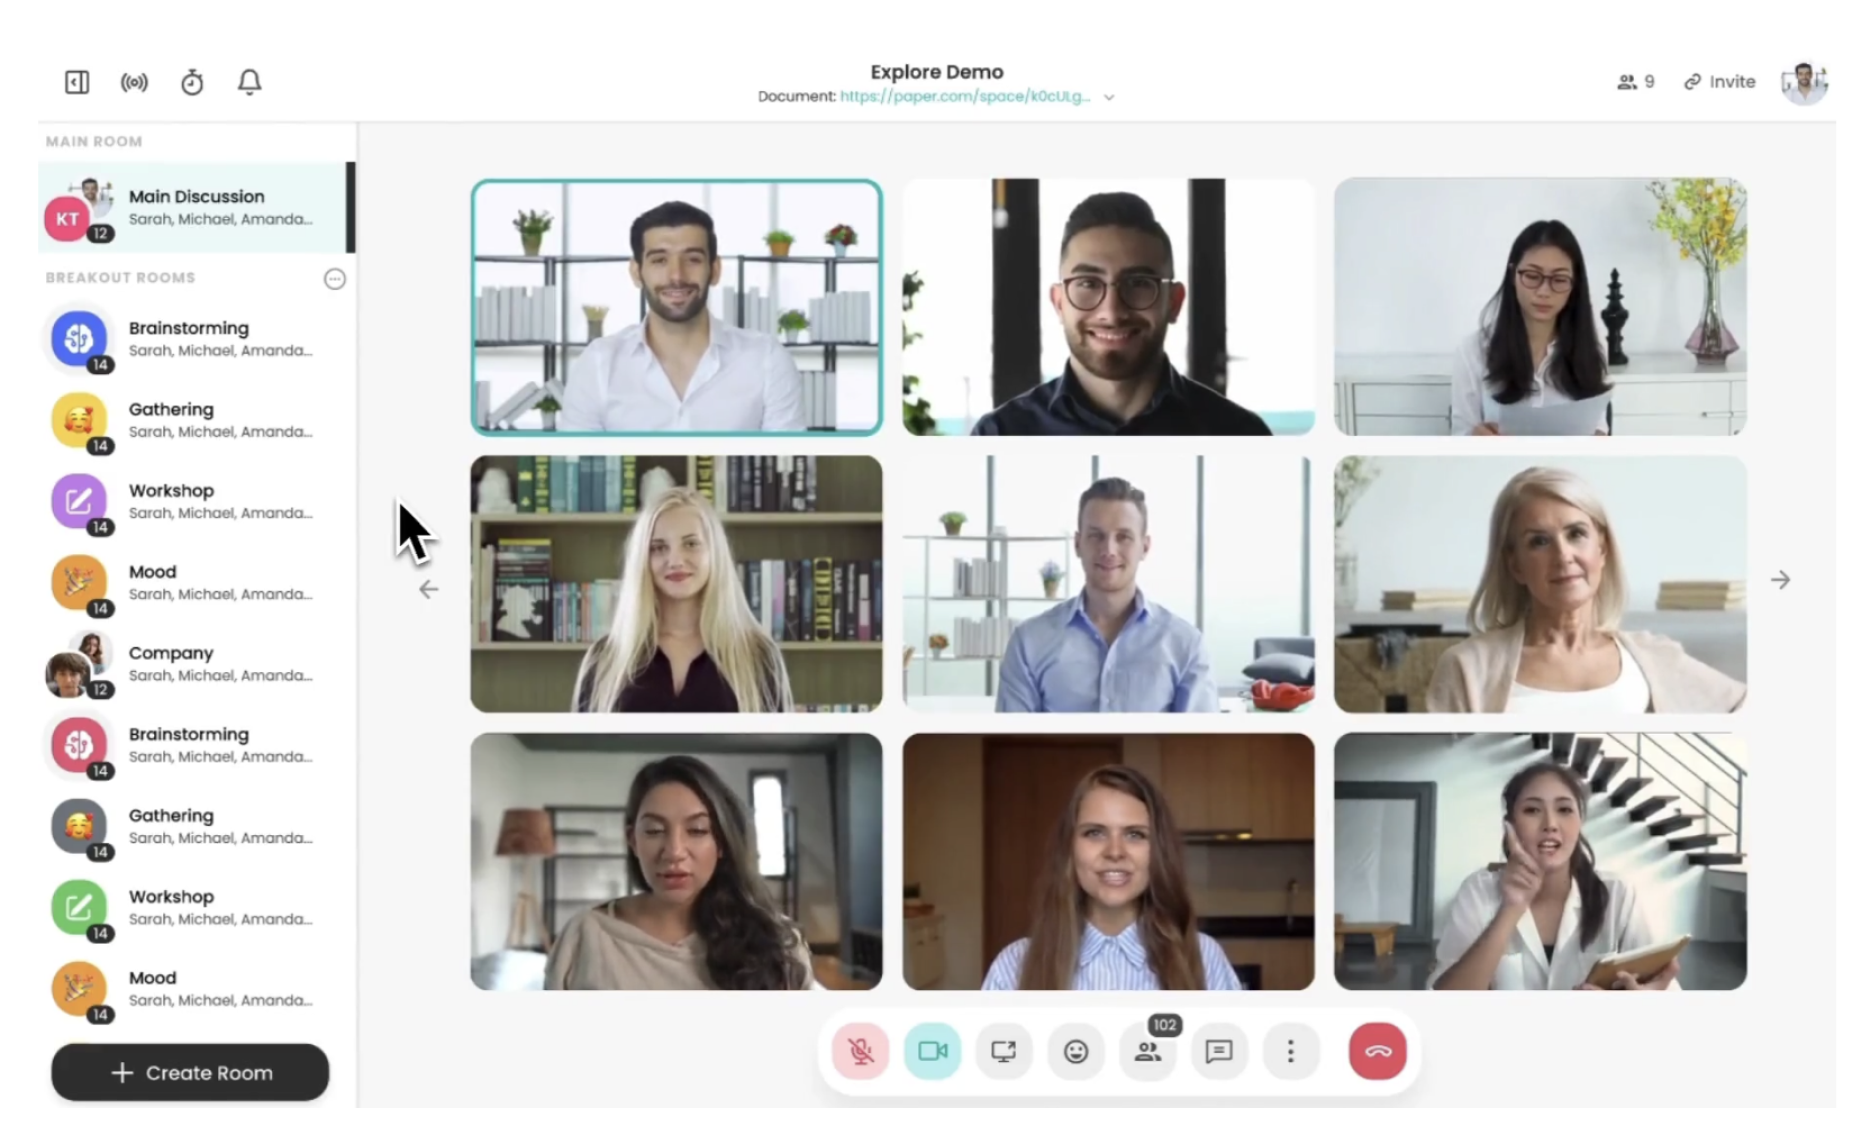
Choose The Right Tools

The selection of tools in a remote environment can substantially influence participants’ experience. Complex or unfamiliar tools can affect the effectiveness of even the most well-planned workshop. Thus, it’s important to select tools that can help with collaboration, address diverse participants’ needs, and are accessible and straightforward to use.

Below, you’ll find a list of some popular tools for facilitating workshops, including their advantages, disadvantages, and best-suited participant types.

Whiteboard Tools

  • Miro
    Miro is a popular and user-friendly digital whiteboard tool known for its intuitive interface and collaborative features. It’s great for visual learners and those who thrive on a free-form canvas. Additionally, for facilitators, a wide range of workshop templates is provided so that you don’t need to start from scratch. However, this tool can be overwhelming for those who prefer more structured interfaces. In addition, in Miroverse, there are more than 1000+ templates for you to get inspired by and to better plan your workshop.
  • Mural
    Another alternative digital whiteboard platform, Mural, is known for its ability to onboard new users easily. People can join and edit your Mural board without the need to create an account, which reduces friction. However, for facilitators who wish to have more powerful features such as AI, tables, charts, and integrations, Mural might not completely satisfy their needs.
  • FigJam
    FigJam is a top choice for designers and those familiar with Figma. It combines the flexibility of a digital whiteboard and design-focused features. This tool suits visually oriented and design-minded participants alike but may feel less intuitive to those unfamiliar with design software in general.

Video Conferencing Tools

  • Microsoft Teams, Zoom, and Google Meet
    These are the “traditional” tools that almost everyone knows how to use. While their interfaces may lack extensive interactive features (which leads to a somewhat basic look and feel), their key strength lies in their consistent performance and accessibility. Their familiarity among users ensures a low learning curve, contributing to smooth and efficient workshop sessions.
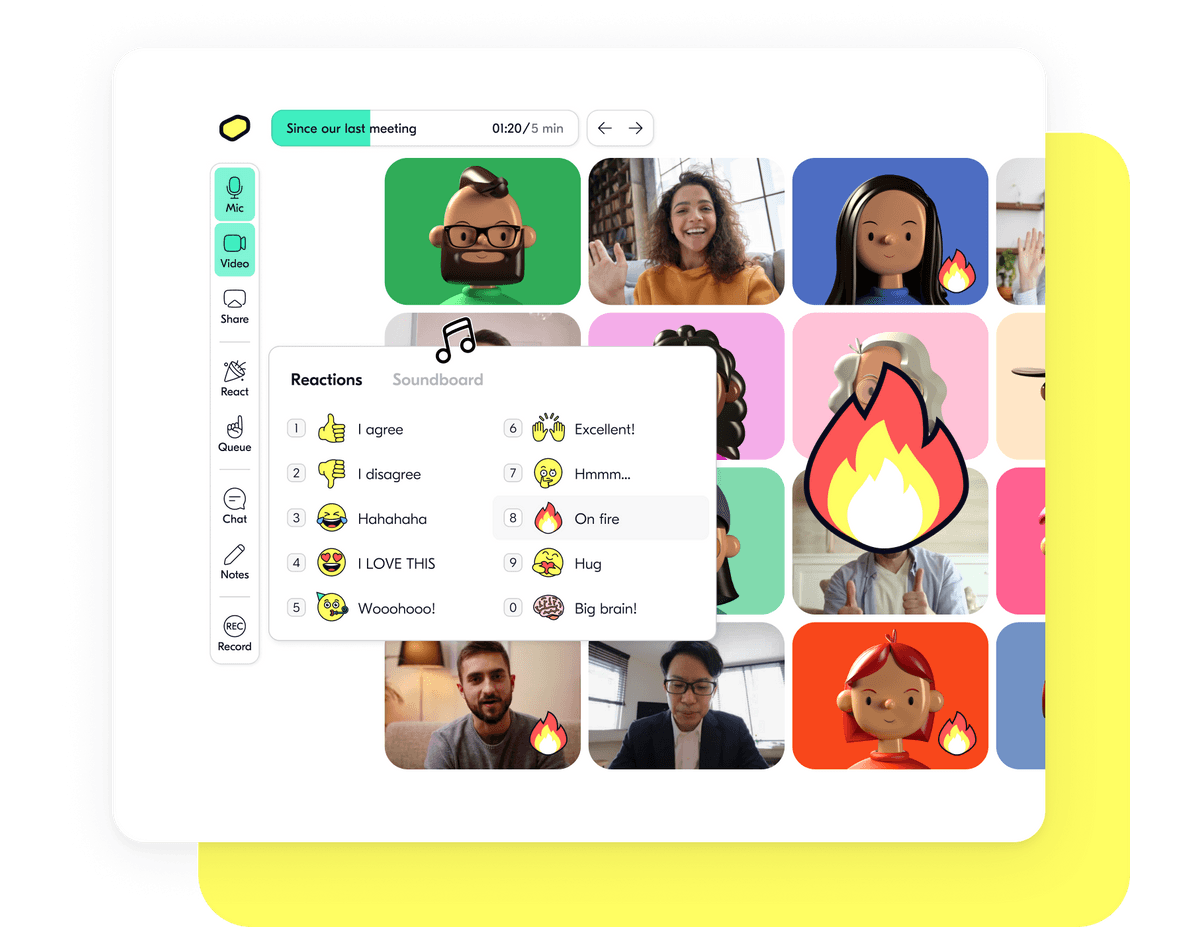
  • Butter
    This tool is purpose-built for running interactive workshops, offering creative features specifically focused on workshops and collaborative meetings. Butter can cater to a broad range of personality types. For extroverted participants, it enables easy active engagement in discussions, while it also allows more introverted participants to express themselves using reactions, emojis, or GIFs in a less confrontational manner.

Group Discussion Tools

  • Mixerchat
    This platform facilitates interactive group discussions. Participants can freely navigate different breakout rooms, engaging in breakout sessions or world café-style activities.

Choose The Activities And Communication Methods

The next and perhaps most critical step is to carefully choose activities that cater to the diversity of your participants. Use the personality types and goals you identified in Step 2 to guide your decisions. Here are some suggestions to help you get started.

If most of your participants are Introverted & Individualistic.
These participants prefer to think through ideas independently before sharing them, and they may be more comfortable in a quieter setting. A few activities for this group of people could be:

  • Silent Brainstorming: Each participant works individually to generate ideas and write them down. After a set period, everyone shares their ideas one by one. This approach gives introverted participants time to think and formulate their ideas before sharing them.
  • Silent Dot-Voting: These tools allow participants to share their views or vote on ideas anonymously, which can be less intimidating than speaking up in a group.

If most of your participants are Introverted & Collaborative.
These participants may enjoy working in groups, but they prefer quieter, more thoughtful discussions. A few activities for this group of people could be:

  • Small Group Discussions: Divide participants into smaller groups of 3-4 people to discuss a topic or question. This setup can feel less overwhelming than large group discussions.

  • Think-Pair-Share: In this activity, participants first consider a question or problem individually, then they pair up to discuss their thoughts, and finally, they share their ideas with the larger group.
  • Fishbowl Conversation: A small group sits in a circle (the fishbowl) to discuss a topic while the rest of the participants observe. After a while, allow participants to switch places, ensuring everyone gets a chance to contribute.

If most of your participants are Extroverted & Individualistic.
These participants enjoy expressing their ideas and might prefer to work independently. A few activities for this group of people could be:

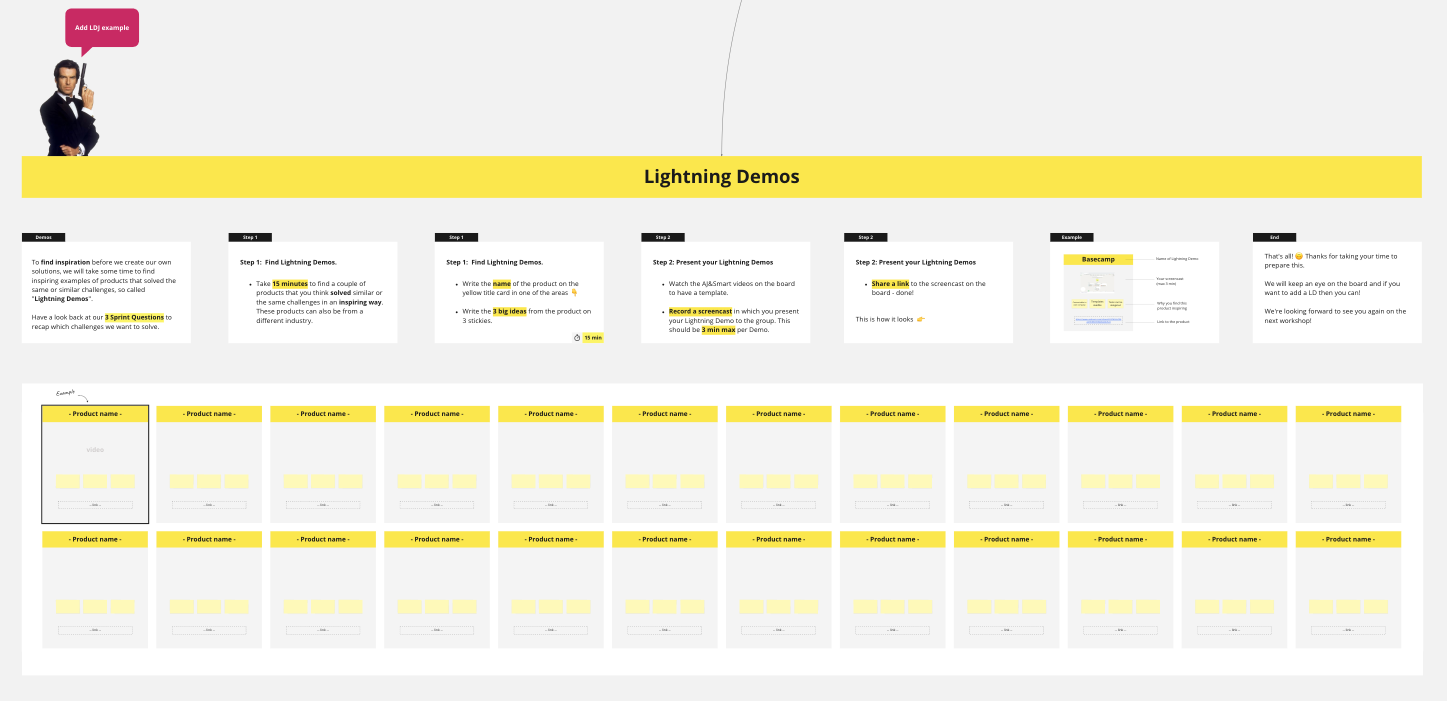
  • Lightning Talks: Each participant prepares a short presentation on a topic related to the workshop’s theme. This activity allows participants to express their ideas and share their expertise.
  • Idea Gallery/Lightning Demo: Participants work individually to create a visual or written representation of their ideas (like a poster), then everyone walks around to view the “gallery” and discuss the ideas.
    Note: The idea is not new and is also known as a “Poster Session.” The goal of a poster session is to create a set of compelling images that summarize a challenge or topic for further discussion. Creating this set might be an “opening act,” which then sets the stage for choosing an idea to pursue, or it might be a way to get indexed on a large topic. The act of creating a poster forces experts and otherwise passionate people to stop and think about the best way to communicate the core concepts of their material.

  • Jigsaw Activity: In this exercise, each participant becomes an “expert” in a specific aspect of a larger topic. They then share their knowledge with the group, allowing for individual exploration and public speaking.

If most of your participants are Extroverted & Collaborative.
These participants enjoy the energy of group discussions and collaborative work. A few activities suitable for this group of people could be:

  • Open Discussions: Provide a topic or question and allow the conversation to flow naturally. Extroverted participants typically thrive in this open format.
  • Group Projects: Split participants into teams and assign a project related to the workshop’s theme. This could be anything from creating a mock-up for a new product to brainstorming strategies for overcoming a business challenge.
  • Role-play: This group activity allows participants to act out different scenarios or perspectives related to the workshop theme, encouraging dynamic discussion and cooperative problem-solving.

Step 4. Estimate The Right Time And Allocate An Extra “Buffer”

Once you have completed planning the workshop activities, if possible, try to conduct a pilot run so that you can decide the appropriate duration for each activity.

Time management is critical for inclusivity since participants may have other engagements, and if time management is out of control, both the facilitator and the participants may feel uncomfortable as they may need to shift focus to other commitments. Therefore, it is crucial to estimate the appropriate time and allocate extra “buffer” time to avoid rushing participants during engaging discussions.

I usually like to add a 20% buffer to each activity to ensure there is always some time to spare in case some people are slower. For instance, if you have set a 10-minute brainstorming session, schedule it to be 12 minutes so that you can have some extra buffer.

Step 5. Send A Pre-note Out

Inclusion often starts before the workshop even begins. A pre-workshop note can make a significant difference in setting the stage for inclusivity. It allows all participants, regardless of their background or understanding of the key topic, to start from a common ground.

For example, if you’re conducting a workshop on project management, your pre-note could include an outline of the topics to be covered, such as agile methodology, risk management, or team leadership. You could also include a brief case study for participants to review before the workshop.

The pre-note can also include logistical details such as the workshop date, time, location (or virtual meeting link), any software they need to install (like Zoom or Microsoft Teams), and what they should bring with them (like a laptop or a notebook). By sending a pre-note, you ensure that all participants come prepared and are aligned with the workshop’s objectives right from the start.

Step 6. Bonus Tip: Personalize The Experience

Once you’ve established the framework of your workshop, it’s time to season it with some personal flair. This “secret sauce” could be a unique icebreaker or an element of surprise that sparks laughter and lightens up the atmosphere.

For instance, I’ve often incorporated the pets of my colleagues into the Miro board during my workshops. The sight of familiar furry friends not only brings a smile but also fosters a sense of community and connection within the team.

Conclusion

This was the first half of our journey exploring inclusive remote workshops where we’ve “peeled back” the layers of their essence and highlighted some critical techniques and approaches to lay out the groundwork. Remember, the key to running a successful inclusive workshop is to know your participants well and to create a space where they feel at ease. Take the time to understand them and shape the workshop activities in such a way that they match participant’s personal preferences. The most important bit, perhaps, is that every attendee should feel valued and heard.

In the second part of this two-part series, I will dive deeper into what you can do during and after the workshop in order to better tailor the experience to the workshop attendees, and I will also introduce you to the P.A.R.T.S. principle, which stands for Promote, Acknowledge, Respect, Transparency, and Share.

Categories: Others Tags:

14 Effective Ways to Generate Positive Online Reviews for Your Business

September 12th, 2023 No comments

If you’ve looked for any business or service online, chances are you’ve noticed the stars (or lack thereof) next to their name. Whether posted on Yelp, uploaded as a quick live video on Instagram, or etched on the eternal stone wall of a company’s Facebook page, reviews are proof that people are excited about your service or product and want to spread the news. But they don’t pop up all by themselves — you’ll need a strategy to generate and respond to them. Here are 14 effective ways to do just that.

1. It all starts with service

People who have a negative experience are more likely to leave a review than those who are satisfied. And that matters because 86% of people read online reviews (and need to see ten positive reviews) before they trust a local business. 

So before you do anything, make sure even your home-based business delivers impeccable service. You might be setting your own hours and calling the shots, but providing exceptional service and products is still critical.

2. Don’t be shy

Many people don’t review a business simply because they were not asked. Ask customers directly if they could take a minute to leave a review. Most people understand that they can influence a business’s success (or failure). They won’t be annoyed by your request.

3. Make it easy 

If you ask for a review and a customer enthusiastically agrees, make it easy on them. Set up profiles on multiple general review sites (i.e., Google, Yelp, and Facebook), and be sure to create a separate profile if your industry has a specialized review platform. Provide direct links to the page, with clear instructions on how to leave a review.

4. Follow up

Sometimes, customers want to leave a review but continue with their day and forget about it. Following up on a lead is key. Wait a few days, then email a reminder and all the links.

5. Automate the ask

Better yet, automate the entire process of asking for reviews. Utilize review generation sites or apps to send a series of emails, starting with one thanking the customer for their business and another a few days later, asking for a review. This removes an administrative task that you might forget to follow up on otherwise.

6. Get your timing right

The best time to ask for a review is when customer satisfaction is at its highest. This might be when the deal closes or when you solve a previously unsolvable problem.

And the worst time? After conflict or when something happens that a customer or client wasn’t expecting. If you can’t solve the issue, it’s best not to ask for a review until you can.

7. Post across social media platforms

The majority of people are on social media, and the biggest swath of potential customers these days — millennials and boomers — turn to a variety of platforms to get reviews and recommendations from friends and their “For You” pages. 

When you’re clear on your customer base, you can tailor posts encouraging them to leave reviews on the social media they use most often. If you don’t serve just one demographic, share these posts widely for more traction and exposure.

8. Incentivize ethically

The Federal Trade Commission (FTC) has stated explicitly that buying reviews violates consumer protection policies, but that doesn’t stop some unscrupulous folks from doing it anyway. Don’t be that person. Buying reviews can be punishable by fines or removal from the platform on which the fake reviews are posted. 

But that doesn’t mean you cannot incentivize people to leave a review. You might offer a discount on future services or hold a drawing for a prize. This encourages participation, is open about the incentive, and doesn’t specifically reward a good review. It’s an ethical move that can help build up goodwill.

9. Accentuate the positive

Just because you can’t pay for positive reviews doesn’t mean you shouldn’t celebrate them when they come in — show off the most glowing praise on your website or social media. 

And don’t just post the written words. Consider reading the review on a video to attract more attention (and garner more reviews).

10. Don’t ignore the negative

It happens. Everyone has an off day or comes across a client who isn’t happy with the service or product. So, what do you do when a negative review comes in?

First, what not to do: Don’t ignore it. Nearly 90% of people read how a company responds to negative reviews and makes decisions about how (or if) a company addresses any issues. Take the time to respond, but don’t argue. Offer your regret about their experience, and provide contact information to discuss the issue offline. The unhappy customer may not respond, but others can see that you reached out.

11. Make sure everyone is on board

When stress levels rise, staff may forget to ask for reviews. Train all staff to ask for reviews during their regular customer interaction. 

But it happens: people forget. If you’ve implemented automated review requests, you’re covered.  

12. Get involved

For new businesses, the main issue with reviews is that your community might not know about you yet. If your advertising budget is low (or non-existent), consider getting more involved in your local community by hosting events, sponsoring teams, and volunteering to set up a table at local fairs and events. This can spread the word about what you offer and get the ball rolling on reviews.

13. Take a survey

Another strategy for gathering reviews as a new business is designing a survey to deliver to current and potential customers. This could cover products or services you already offer, with space to include suggestions for more in the future. People appreciate the opportunity to be heard, but there’s another plus: You can use these surveys to ask for reviews from those who offer the most positive feedback. You could even ask the customer to use their survey comments on your website and social media. That is another way to build positive relationships and trust in your community.

14. Be diligent

Even if you have automated the review request process and are confident reviews are coming in, you must continue to monitor and analyze what people are saying. This feedback doesn’t just affect your bottom line — it can also be instructive about how you can better meet your community’s needs — now and into the future.

Featured Image by Afif Ramdhasuma on Unsplash

The post 14 Effective Ways to Generate Positive Online Reviews for Your Business appeared first on noupe.

Categories: Others Tags:

LimeWire AI Studio Generative Art App

September 12th, 2023 No comments

If you’re looking for the most exciting way to launch a career in AI-generated art, then you’re in the right place.

Categories: Designing, Others Tags:

From Planning to Post-Event: The Attendee Journey with an Event App

September 12th, 2023 No comments

In an era defined by technology and connectivity, event apps have emerged as indispensable tools for enhancing the attendee experience. These versatile digital companions have revolutionized the way individuals engage with events, providing a seamless transition through various stages of the event journey. In this article, we will delve deeper into the ways event apps are transforming the attendee experience and explore their impact on the events landscape.

Also, see a list of the top 25 event apps in 2023.

Pre-Event Excitement

Before attendees even set foot in the event venue, they embark on their journey of anticipation and preparation through event apps. These apps act as digital brochures, offering a tantalizing preview of what awaits them. The agenda section provides a comprehensive overview of sessions, workshops, and keynotes, allowing attendees to curate a personalized schedule that aligns with their interests. Gone are the days of fumbling with physical pamphlets and schedules; the app centralizes all essential information in the palm of attendees’ hands.

But the excitement doesn’t stop there. Event apps often include features such as countdown timers, teaser videos, and social media integration, creating a buzz that resonates with attendees long before the event begins. These elements contribute to building excitement and fostering a sense of community among participants.

Seamless Registration and Networking

Event apps simplify the often cumbersome registration process, eliminating the need for long queues and paperwork. Attendees can seamlessly register and check-in electronically, receiving digital badges that streamline entry into the event. Moreover, these apps promote networking by allowing attendees to create profiles, connect with fellow participants, and even arrange meetings in advance. The integrated chat feature encourages conversations and collaboration, breaking down barriers and enabling meaningful interactions. Attendees arrive at the event already feeling connected and engaged, thanks to the app’s networking capabilities.

Navigating the Event

Once the event is in full swing, the event app seamlessly transforms into a reliable navigation tool. Interactive maps guide attendees through the sprawling venue, ensuring they never miss a session due to confusion. Push notifications offer real-time updates about changes in the schedule or room assignments, ensuring attendees are always informed and on track. Are you feeling a bit lost in the crowd? No problem – the app’s “Find My Friends” feature allows attendees to easily locate their connections, further enhancing the sense of community and camaraderie.

Enhanced Learning Experience

With event apps, attendees bid farewell to the era of scribbling notes on paper. These apps offer comprehensive note-taking features, allowing attendees to capture key insights directly on their devices. Some apps even sync these notes with cloud services, ensuring they are never lost and can be accessed from anywhere. Additionally, interactive polls and surveys embedded within the app encourage audience participation, transforming sessions into dynamic two-way dialogues rather than one-sided presentations. Attendees become active contributors to the event’s content, enhancing their overall learning experience.

Engaging with Exhibitors

Event apps extend their utility beyond sessions and workshops by providing an avenue for attendees to engage with exhibitors and sponsors. Virtual booths within the app showcase products and services, allowing attendees to gather information, brochures, and videos without the need for physical handouts. What’s more, the app facilitates direct communication with exhibitors, enabling attendees to inquire, discuss, and even set up appointments for further discussions. This seamless interaction between attendees and exhibitors fosters meaningful connections and adds depth to the event experience.

Post-Event Reflections

The event doesn’t conclude when attendees leave the venue. Thanks to event apps, the experience continues as participants reflect on what they’ve learned and the connections they’ve made. The app’s content repository stores session recordings, presentation materials, and other valuable resources, allowing attendees to revisit and reinforce their knowledge at their convenience. Moreover, participants can stay connected with newfound contacts and continue discussions through the app’s networking features, ensuring that the connections forged during the event endure beyond its duration.

Providing Valuable Insights

Event organizers stand to benefit significantly from these apps as well. The data collected from user interactions can provide valuable insights into attendee preferences, engagement levels, and the popularity of specific sessions or features. This wealth of information helps organizers tailor future events to better meet attendee needs, ensuring that each successive event surpasses the last in terms of attendee satisfaction and engagement. The data-driven approach to event planning enhances the overall quality of events and ensures that they remain relevant and engaging.

In conclusion, event apps have fundamentally transformed the traditional attendee journey, evolving it from a linear experience into an interconnected and holistic process. From the earliest stages of planning and registration to the immersive event experience and post-event phases of reflection and connection, event apps are integral tools that not only enhance attendee experiences but also provide valuable data for event organizers. As technology continues to evolve, the attendee journey is poised to become even more seamless and enriching, further enhancing the overall events landscape. The impact of event apps on the modern attendee experience is undeniable, and their potential for innovation and improvement is boundless.

In 2023, event organizers and attendees have access to a plethora of event apps, each offering unique features and capabilities to enhance the event experience.

Below is a list of the top 25 event apps in 2023:

EventMaster: A comprehensive event management app that covers everything from registration to networking and post-event analytics.

EventHub: Known for its intuitive interface and powerful networking tools, EventHub makes connecting with fellow attendees a breeze.

EventPlanner Pro: A robust planning and scheduling app that helps attendees create personalized agendas and navigate events seamlessly.

ConnectX: Focused on enhancing networking, ConnectX offers advanced matchmaking algorithms and AI-driven recommendations for connecting with like-minded participants.

ExpoExplore: Specializing in exhibitor engagement, ExpoExplore facilitates in-depth interactions with sponsors and exhibitors through virtual booths and chat functionalities.

EventConnect: An all-in-one app that simplifies event registration, networking, and post-event content access.

MeetingPoint: Designed for business events, MeetingPoint offers advanced appointment scheduling and B2B networking capabilities.

EventGuru: Known for its gamification features, EventGuru adds an element of fun and engagement to events through interactive challenges and rewards.

NetworkNow: A dedicated networking app that uses location-based services to help attendees discover and connect with others nearby.

Schedulix: A scheduling powerhouse that optimizes attendees’ event experiences by eliminating conflicts and ensuring they never miss a session.

ExhibitPro: Focusing on exhibitor interactions, ExhibitPro offers a seamless platform for exploring products and services and connecting with vendors.

EventIQ: This app combines AI-driven recommendations with attendee feedback to help users discover relevant sessions and network effectively.

EventMingle: Known for its user-friendly interface and chatbot assistance, EventMingle makes navigating events effortless.

ConnectPro: A professional networking app that fosters connections among attendees, speakers, and exhibitors through its powerful algorithms.

EventNotes: Ideal for note-taking enthusiasts, EventNotes offers advanced features for organizing and sharing session notes.

EventPlus: A versatile event app that covers all aspects, from registration and networking to personalized schedules and exhibitor interactions.

ExpoSync: Specializing in exhibitor engagement, ExpoSync offers an immersive virtual booth experience and facilitates direct communication with sponsors.

EventCircle: Focused on enhancing the sense of community, EventCircle offers features for creating and joining event-related discussion groups.

InteractHub: A feature-rich app that encourages interaction through live polls, Q&A sessions, and audience engagement activities.

MeetMeIn: A location-based networking app that helps attendees discover and connect with others based on their physical proximity.

EventFocus: A user-centric app that tailors event recommendations based on attendee preferences and past interactions.

EventNavigator: Known for its intuitive maps and navigation features, EventNavigator ensures attendees can easily find their way around event venues.

EventEcho: A content-centric app that stores and organizes session recordings, presentation materials, and other valuable event resources.

EngageRight: Focusing on exhibitor interactions, EngageRight offers advanced lead generation tools and real-time chat with sponsors.

EventDataPro: A data-driven app that provides event organizers with in-depth analytics and insights into attendee behavior and preferences, enabling data-informed decision-making.

These event apps represent the cutting edge of technology and are continuously evolving to meet the changing needs and expectations of event attendees and organizers. Whether you’re an event participant looking to enhance your experience or an event planner seeking to optimize engagement and satisfaction, these apps offer a wide array of features and capabilities to make your event journey seamless and enriching. As the events landscape continues to evolve, these apps will remain at the forefront of innovation, shaping the future of event experiences.

Featured image by Fliplet

The post From Planning to Post-Event: The Attendee Journey with an Event App appeared first on noupe.

Categories: Others Tags:

Instagram Reels: How the Short-Form Video Feature is Changing the Game For Influencers and Brands

September 12th, 2023 No comments

These days, Reels is very popular among Instagram users because it’s short, fun, and engaging.

Are you a fan of Instagram Reels? Do you want to know how it can help you as an influencer? Ready to learn about how to use Reels for your brand?

Today, we’re going to cover all about Instagram reels for influencers and brands. We’ll show you how you can get creative with this feature and let your marketing improve overnight!

Want a spoiler? This thing is a game-changer! You don’t even have to be a pro! Just a bit of taste will do. We’re sure you want to know it all now.

So, let’s get on it!

Understanding Instagram Reels

Reels are used as the newest Instagram-based marketing tool. These short videos let you attract attention while promoting your services, products, and content easily.

With Instagram Reels, you can easily record a series of clips and add your original audio or voiceover to it. You can also choose something from hundreds of tracks from the Instagram music library.

This way, you’ll shine in the Explore feed!

The Basics of Instagram Reels

The first thing is to understand the Reels tab. You should know how every option on it works.

The Reels camera is useful for recording and editing short video clips. There are also options like adding captions, audio, and stickers to your video.

There, you can see another feature named the countdown timer. It allows transitions between clips and layouts. Its job is to add variety to your content.

Reels are a great way to engage with your audience. It’s the ultimate captivative content you’ve been looking for!

How to use Instagram Reels for Business

Many brands have promoted themselves by using Reels as an Instagram marketing strategy. But how to make everyone pay attention to your brands and reels?

One effective tactic is to use trending hashtags and increase visibility on the Explore page.

Another way is creating a sense of royalty by engaging with your followers. You can ask their comments in the reels, or encourage them to make you some Reels! You can turn it into a challenge that comes with rewards!

Collaborating with other influencers or brands is another smart move. This one can attract new audiences in no time.

The Ultimate Cheat Sheet for Instagram Reels

One way to maximize engagement is to schedule your Reel posts strategically. 

First, check your target audience’s activity patterns. You must see an algorithm that shows an optimal time. At this time, your users are mostly online and engaging with Instagram.

This is the golden hour! You should seize the opportunity and post your reels right at this time of the day.

You can also automate your Reels, so they get uploaded when you schedule them. 

Scheduling Your Reels for Maximum Engagement

You can use some scheduling tools to plan and organize your Reels content in advance. 

Try to post 2-3 times a day.  Don’t forget the global time zones so you can reach more audiences.

Use relevant hashtags and try collaborating with other influencers and brands. You can gain a lot of audience by co-promoting your content. 

Choose the right brands and influencers to collaborate with, since you need to attract an audience who likes what you offer.

What’s the Ideal Dimensions for Instagram Reels?

You can create the perfect Reel if you don’t know about the ideal dimensions.

The best aspect ratio for Reels is 9:16. It ensures that the content fills the screen and maximizes visual impact.

Be brave and experiment with different dimensions! This way you can create unique and engaging Reels.

Understanding the Length of Instagram Reels

How long should my Reel be?

Many people ask us this!

The maximum duration of a Reel is 30 seconds, and you must do something that leaves its effect in this short time! Something that engages the users from the beginning to the end!

We usually advise people to use cutting so they can make the most of the limited time. If you need more time to cover all you want to say, you can always make a series of clips!

Also, don’t forget about storytelling techniques. The best ones are the shortest, yet the most creative!

How are Brands and Influencers Leveraging Instagram Reels?

So, how do exactly influencers do the magic? Why do they get so many views on their Reels?

Well, you can get those views if you try one of these content techniques that the most successful brands and Instagram figures do!

Creating educational content

Source: freepik

Everyone loves short educational content nowadays. What’s better than learning something in 30 seconds while getting entertained? Perfect for the modern human, isn’t it?

So, for the first strategy, try teaching something on your Reels! You can share tips, industry knowledge, and informative content. You can teach them how to use your product to solve a problem, or you can just teach them something historical about your product!

You can also be an influencer, on how to wear college makeup or how to choose clothes for a hiking day with friends!

For creating an educational Reel, you could use voiceovers and captions. These tools help your audience understand what you are talking about better. If you need more time, simply create a set of 30-second reels and you’re good to go!

Showcasing products and services

Instagram Reels is one of the best platforms for showcasing your products. You can’t find a successful business or brand that’s not making Reels!

Reaching a wider audience, increasing brand awareness, and driving sales are only a part of how Reels can help you!

It also gives you the opportunity to collaborate with other brands and influencers. Their followers and users see you this way, and you can also collaborate on a new product together!

With features like tagging people, using original audio, and talking about popular trends, you can increase your chance of going viral. 

So, if you’re after brand awareness from Reels, you got it!

Engaging with audiences through challenges and contests

One of the best ways to market your brand with Reels is through challenges and contests! It’s a classic, but it’s easier now and the Instagram algorithm pushes it through everyone’s Explore page!

You can sponsor the awards yourself, or find a sponsor for your challenge. This is the first step!

Then, go on and create a fun and interactive challenge. Encourage your audience to participate and let them show you what they got!

These contests allow you to reward fans for their loyalty, strengthening the bond between you.

Producing interesting things like comic strips, music videos, and more

You can even do other creative things! Are you into comics? Have you ever dreamed about creating a cool music video for your favorite rap song?

From hilarious jokes to music videos and fish cutouts, you can go all creative!

Using the record button at the bottom of the screen, you can easily select a series of clips and switch between them.

The Instagram algorithm helps your content reach a wider audience.

The best part is that even if you’re new to Reels, the app provides templates and a 3-2-1 countdown to guide you! It’s amazing, isn’t it?

You don’t have to be a pro to create the best short video on Instagram! Just open it and try mixing a beautiful photo or video with good music, and see the magic happen!

Incorporating influencers into Reel campaigns

Source: freepik

Incorporating influencers into Reel campaigns has become a popular strategy for brands and marketers! They say it does magic! 

By collaborating with influencers, their followers and fame help you to promote your products or services.

This helps is the most visible you can get on Instagram!

Is Instagram Reels a Game-changer for Brands and Influencers?

Yes! Instagram Reels has become an important marketing tool for both brands and influencers!

It has changed the way you used to communicate with your followers, and has even made holding challenges and contests easier!

Potential monetization opportunities for creators

Did you know you have many opportunities for making money at your fingertips?

One way to monetize your content on Instagram is to collaborate with other brands. It can even be a side boost! Influencers could cooperate with you on this!

You can import sponsored content into your Reels. That’s a gold mine for influencers!

You can earn money through affiliate marketing, promoting products, and earning a commission for every sale made by your audiences! 

The impact of Instagram Reels on user engagement and content consumption patterns

Instagram Reels has greatly impacted user engagement. It has changed the interaction patterns and how users interact with content. 

You can’t be a successful marketer without knowing all about this feature!

The possibilities are endless with Reels!

The potential future of Instagram Reels and its implications for marketers

Well, Instagram Reels continue to be popular!

You should know that this could hold exciting possibilities for your brand and marketing future!

The Reels feature means going somewhere else to showcase products, raise brand awareness, and do more exciting things in the future! 

Conclusion

Instagram Reels is the ultimate marketing tool for your brand, whether you’re a business owner or an influencer!

It’s more than a funny tool to show your creativity! You can use it to make interactions easier with your audience!

You can do affiliate marketing or bundles with other brands and influencers on your Reels to get more viewers. You can also easily manage your contests and challenges with this feature!

Also, don’t forget that you can make money with Reels! By getting sponsored content in them and working with other brands, you have a good chance of monetization!

So, if you’re looking for a great way to get an audience in no time, you should try Instagram Reels today. You don’t need to be a professional video creator. There are many tools for you so you can easily create the 30-second video clip you like, with the music and colors you want!

Why are you still here then? Go on and create your very first reel and make your brand big!

Featured image by freepik

The post Instagram Reels: How the Short-Form Video Feature is Changing the Game For Influencers and Brands appeared first on noupe.

Categories: Others Tags:

Gradients, Blend Modes, And A Really Cool Hover Effect

September 11th, 2023 No comments

Do you know how box-shadow is sometimes used as a hover effect? It adds depth to something, like a button, and can create the impression that it is being pressed into the page.

Let’s pull it all together:

See the Pen Gradient Hover [forked] by Preethi Sam.

Have fun with this! Try different colors and different gradations. Here’s another example where the gradient is applied to text elements:

See the Pen Gradient Hover 2 [forked] by Preethi Sam.

Aesthetics aside, remember to use designs, layouts, and colors that make it clear to users that they are interacting with the element and what that interaction does.

Further Reading On SmashingMag

Categories: Others Tags:

20 Best New Websites, September 2023

September 11th, 2023 No comments

Are you in need of design inspiration? Are you looking for the best websites designed in 2023 to pull ideas, techniques, and trends from? Do you just love web design and enjoy seeing what’s out there? Whatever your reason for being here, welcome!

Categories: Designing, Others Tags: