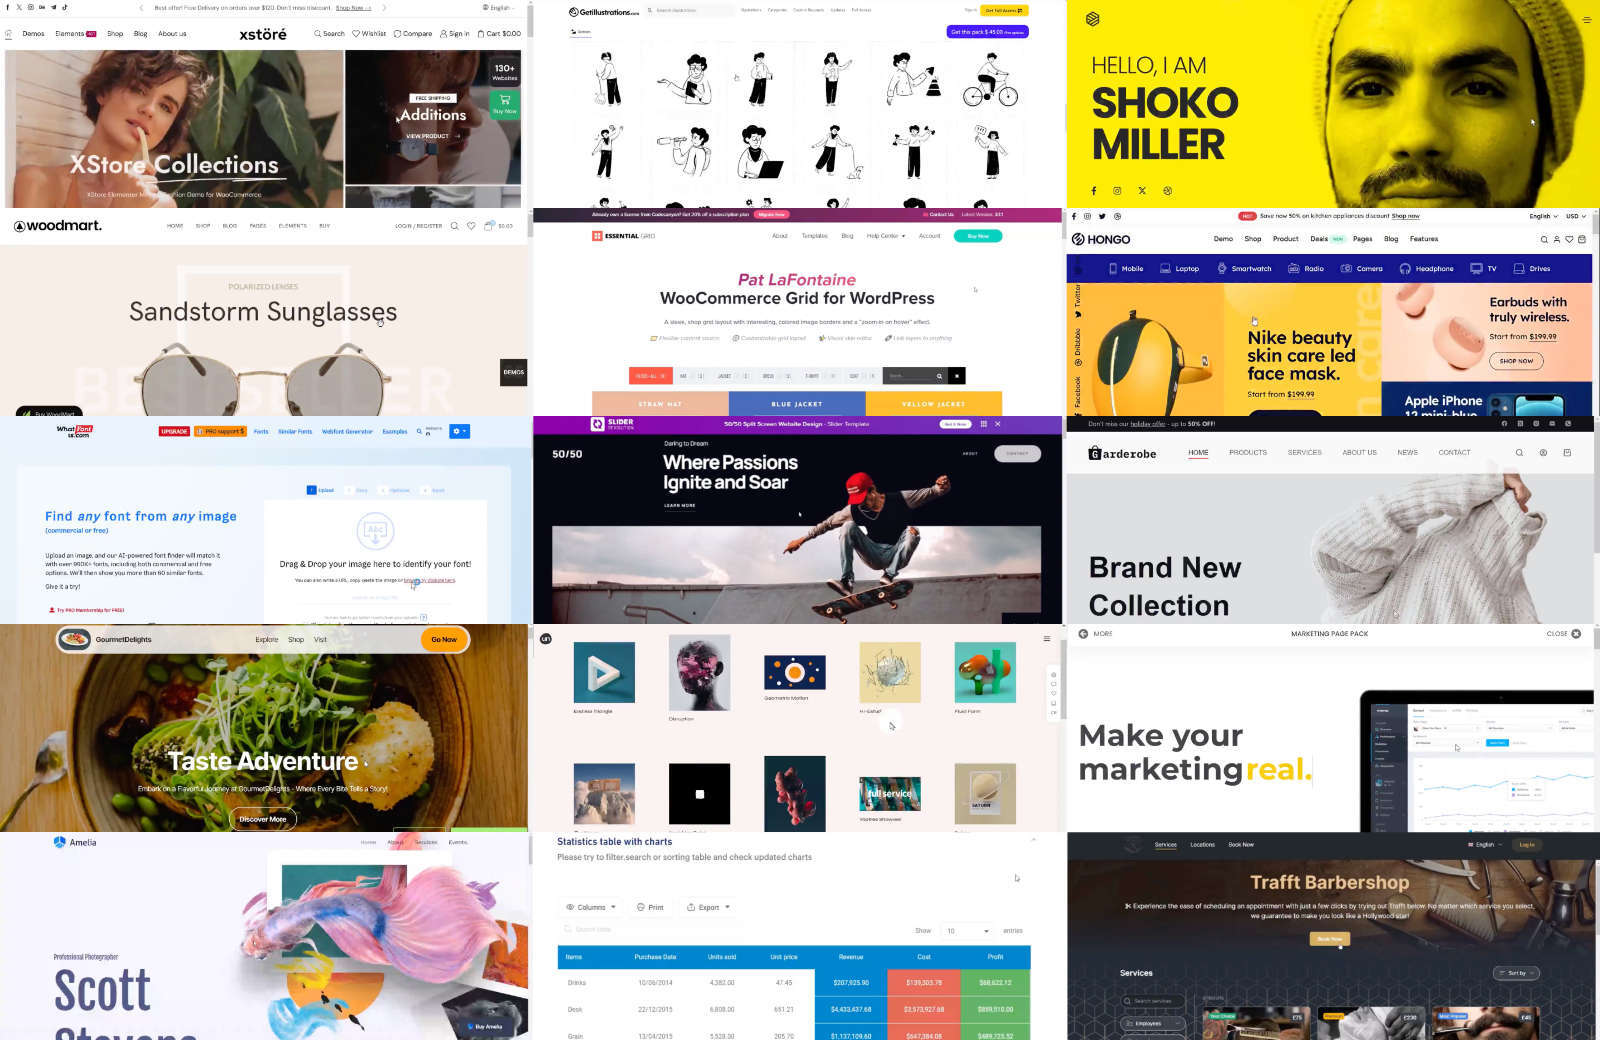
Is searching for the best web design tools to suit your needs akin to having a recurring bad dream? Does each “promising ad” look like any other, and you find yourself reading them over and over again?
We published this list to give you some temporary, and hopefully permanent, relief.
How do product teams conduct user research today? How do they leverage user insights to make confident decisions and drive business growth? And what role does AI play? To learn more about the current state of user research and uncover the trends that will shape the user research landscape in 2024 and beyond, Maze surveyed over 1,200 product professionals between December 2023 and January 2024.
The Future of User Research Report summarized the data into three key trends that provide precious insights into an industry undergoing significant changes. Let’s take a closer look at the main findings from the report.
Trend 1: The Demand For User Research Is Growing
62% of respondents who took the Future of User Research survey said the demand for user research has increased in the past 12 months. Industry trends like continuous product discovery and research democratization could be contributing to this growth, along with recent layoffs and reorganizations in the tech industry.
Emma Craig, Head of UX Research at Miro, sees one reason for this increase in the uncertain times we’re living in. Under pressure to beat the competition, she sensed a “shift towards more risk-averse attitudes, where organizations feel they need to ‘get it right’ the first time.” By conducting user research, organizations can mitigate risk and clarify the strategy of their business or product.
Research Is About Learning
As the Future of User Research report found out, organizations are leveraging research to make decisions across the entire product development lifecycle. The main consumers of research are design (86%) and product (83%) teams, but it’s also marketing, executive teams, engineering, data, customer support, and sales who rely on the results from user research to inform their decision-making.
As Roberta Dombrowski, Research Partner at Maze, points out:
“At its core, research is about learning. We learn to ensure that we’re building products and services that meet the needs of our customers. The more we invest in growing our research practices and team, the higher our likelihood of meeting these needs.”
Benefits And Challenges Of Conducting User Research
As it turns out, the effort of conducting user research on a regular basis pays off. 85% of respondents said that user research improved their product’s usability, 58% saw an increase in customer satisfaction, and 44% in customer engagement.
Connecting research insights to business outcomes remains a key challenge, though. While awareness for measuring research impact is growing (73% of respondents track the impact of their research), 41% reported they find it challenging to translate research insights into measurable business outcomes. Other significant challenges teams face are time and bandwidth constraints (62%) and recruiting the right participants (60%).
Growing A Research Mindset
With the demand for user research growing, product teams need to find ways to expand their research initiatives. 75% of the respondents in the Maze survey are planning to scale research in the next year by increasing the number of research studies, leveraging AI tools, and providing training to promote research democratization.
Janelle Ward, Founder of Janelle Ward Insights, sees great potential in growing research practices, as an organization will grow a research mindset in tandem. She shares:
“Not only will external benefits like competitive advantage come into play, but employees inside the organization will also better understand how and why important business decisions are made, resulting in more transparency from leadership and a happier and more thriving work culture for everyone.”
Trend 2: Research Democratization Empowers Stronger Decision-Making
Research democratization involves empowering different teams to run research and get access to the insights they need to make confident decisions. The Future of User Research Report shows that in addition to researchers, product designers (61%), product managers (38%), and marketers (17%) conduct user research at their companies to inform their decision-making.
Teams with a democratized research culture reported a greater impact on decision-making. They are 2× more likely to report that user research influences strategic decisions, 1.8× more likely to state that it impacts product decisions, and 1.5× more likely to express that it inspires new product opportunities.
The User Researcher’s New Role
Now, if more people are conducting user research in an organization, does this mark the end of the user researcher role? Not at all. Scaling research through democratization doesn’t mean anyone can do any type of research. You’ll need the proper checks and balances to allow everyone to participate in research responsibly and effectively. The role is shifting from a purely technical to an educational role where user researchers become responsible for guiding the organization in its learning and curiosity.
To guarantee data quality and accuracy, user researchers can train partners on research methods and best practices and give them hands-on experience before they start their own research projects. This can involve having them shadow a researcher during a project, holding mock interviews, or leading collaborative analysis workshops.
Democratizing user research also means that UX researchers can open up time to focus on more complex research initiatives. While tactical research, such as usability testing, can be delegated to designers and product managers, UX researchers can conduct foundational studies to inform the product and business strategy.
User Research Tools And Techniques
It’s also interesting to see which tools and techniques product teams use to gather user insights. Maze (46%), Hotjar (26%), and UserTesting (24%) are the most widely used user research tools. When it comes to user research methods, product teams mostly turn to user interviews (89%), usability testing (85%), surveys (82%), and concept testing (56%).
According to Morgan Mullen, Lead UX Researcher at User Interviews, a factor to consider is the type of projects teams conduct. Most teams don’t change their information architecture regularly, which requires tree testing or card sorting. But they’re likely launching new features often, making usability testing a more popular research method.
Trend 3: New Technology Allows Product Teams To Significantly Scale Research
AI is reshaping how we work in countless ways, and user research is no exception. According to the Future of User Research Report, 44% of product teams are already using AI tools to run research and an additional 41% say they would like to adopt AI tools in the future.
ChatGPT is the most widely-used AI tool for conducting research (82%), followed by Miro AI (20%), Notion AI (18%), and Gemini (15%). The most commonly used research tools with AI features are Maze AI (15%), UserTesting AI (9%), and Hotjar AI (5%).
The Strengths Of AI
The tactical aspect of research is where AI truly shines. More than 60% of respondents use AI to analyze user research data, 54% for transcription, 48% for generating research questions, and 45% for synthesis and reporting. By outsourcing these tasks to artificial intelligence, respondents reported that their team efficiency improved (56%) and turnaround time for research projects decreased (50%) — freeing up more time to focus on the human and strategic side of research (35%).
The Irreplaceable Value Of Research
While AI is great at tackling time-consuming, tactical tasks, it is not a replacement for a skilled researcher. As Kate Pazoles, Head of Flex User Research at Twilio, points out, we can think of AI as an assistant. The value lies in connecting the dots and uncovering insights with a level of nuance that only UX researchers possess.
Jonathan Widawski, co-founder and CEO at Maze, sums up the growing role that AI plays in user research as follows:
“AI will be able to support the entire research process, from data collection to analysis. With automation powering most of the tactical aspects, a company’s ability to build products fast is no longer a differentiating factor. The key now lies in a company’s ability to build the right product — and research is the power behind all of this.”
Looking Ahead
With teams adopting a democratized user research culture and AI tools on the rise, the user researcher’s role is shifting towards that of a strategic partner for the organization.
Instead of gatekeeping their knowledge, user researchers can become facilitators and educate different teams on how to engage with customers and use those insights to make better decisions. By doing so, they help ensure research quality and accuracy conducted by non-researchers, while opening up time to focus on more complex, strategic research. Adopting a research mindset also helps teams value user research more and foster a happier, thriving work culture. A win-win for the organization, its employees, and customers.
Not every type of content should follow the same strategy. A blog has to be different from an academic write-up. Likewise, e-commerce content has to be written effectively if you want to generate engagement, leads, and conversions.
If you search for ways to optimize e-commerce content on the internet, you are likely to see tons of advice.
But not all of these instructions are worth following. You have to be choosy and follow on those that help you achieve e-commerce goals in the long run.
Being a copywriter, I have written content for a variety of e-commerce stores, and luckily, it proved to be pretty useful in helping them get traffic, engagement, and sales.
So today, I will share my five secret recipes to assist you in writing well-optimized content for e-commerce stores.
If you want to write worthy on-site content, these five suggestions can help you beat competitors and even big-box retailers.
Tip 1: Optimize for Keywords
You are not supposed to optimize your copy for keywords without understanding how customers are searching for your products.
That means first, you have to perceive how people are looking for stuff that you sell on the internet.
Identify potential keywords through top-rated keyword research tools such as Google Keyword Planner, Google Trends, SEMrush, and Ahrefs.
You just have to enter a couple of words related to your products/services, and the tool will provide you with a complete list of potentially well-performing keywords.
After you have a good keyword resource, use them in page titles, permalinks (URL), headers, and throughout the text body.
However, make sure the keyword is not used forcefully. Instead, make it look naturally used in the content to avoid stuffing impressions.
Tip 2: Create Useful and Engaging Content
You cannot expect visitors to engage with your content if it’s not created to engage them. You have to put yourself in customers’ shoes to understand their requirements.
While you write content for e-commerce, make sure to include all the important elements, such as comprehensive product descriptions, original customer reviews, specifications, and all possible images.
Imagine yourself as a customer and think of the questions that you may have in mind while looking to purchase something online. Try answering all those possible queries beforehand.
Do not just keep adding information without following a specific pattern. Instead, use proper formatting and give breaks to divide long textual information into chunks.
One more thing that you should not overlook at all is being warm and friendly. Readers do not like reading info that does not connect with them personally.
So, make sure to maintain a conversational tone till the end.
Don’t use complex terminologies unless they are extremely important. If you are into the habit of using those fancy words, try running your copy through an online paraphraser and this will help you make your content sound human. It also takes complicated texts and converts them into easy-to-read information within a few seconds. Using it is a piece of cake as no technicalities are involved in the paraphrasing process.
Tip 3: Focus on User Intent
Understanding user intent is one of the best tricks you can use to craft more engaging and compelling e-commerce content.
Anticipate why people are searching for you on the internet. Do they want to buy something? Are they intending to learn? Do they want to compare two options?
These are some of the questions that you should ask yourself before creating a copy. If you think that a visitor comes to your site with different intents, then consider creating a clear structure addressing each intent in detail.
Create appropriate headings and subheadings to provide clarity on all aspects.
Tip 4: Publish Updated and Fresh Content
Visitors and search engines like sites that keep adding new products, articles, guides, and deals.
If you want to gain returning visitors, then you have to keep posting new content regularly. Create a content calendar and make sure you never miss out on your schedules.
Sometimes, it is necessary to update old information with the latest stats, facts, and figures. Run an audit of your previous posts and replace outdated information with the latest data to maintain relevancy and accuracy.
Never miss the opportunity to publish seasonal content such as holiday-related posts. This strategy works well to engage with your audience on an individual level.
For instance, you can create deals for Christmas, Boxing Day, Easter, Cyber Monday, and other prominent events taking place throughout the year.
Tip 5: Optimize Content for Mobile Users
Approximately 4.88 billion people have smartphones as of 2024. They are likely to reach 6 billion by the end of 2027. These statistics show the increasing number of smartphone users across the globe.
If you really wish to optimize your e-commerce content, you have to take mobile users into account. Focus on designing sites that are responsive.
Mobile users should not have any problem reading your articles and taking recommended actions from a small screen.
Generate short and easily scannable snippets of texts so that users can go through the details while being on the go.
Optimize images for mobile to avoid visitors from confusion. Run mobile-friendliness tests to identify and fix weak points.
Remember, you are not likely to achieve better results without having content that is well-optimized for handheld devices.
Conclusion
A perfectly optimized e-commerce copy is crucial to your online success. Although it may take some time to learn and implement the techniques discussed above, yet they will benefit you in the long run.
Looking for the right keywords and using them naturally throughout content can make a real difference in terms of organic traffic. Useful content can give rise to engagement levels.
Likewise, considering user intent, keeping your prose updated with the latest information, and optimizing content for mobile users can help achieve short and long-term e-commerce goals.
So, feel free to follow these suggestions and see the difference in your metrics.
In today’s tech world, keeping design consistency intact can be quite the challenge—especially with multiple teams collaborating on the same digital product. That’s where UX design audits come in. They’re like your product’s health check-up, helping designers spot issues in continuity, accessibility, and usability. So, why do these audits matter?
Let’s understand this in a better way,
What is the UX audit?
A UX audit is conducted by UX professionals to make sure users have the best experience possible. They look at everything from how easy it is to use to how it looks visually. They also check if all the links are working and if the design is consistent throughout. Plus, they make sure the content is up-to-date and relevant.
By analyzing all these aspects, they can pinpoint any issues that might be getting in the way of a smooth user experience. Then, they provide actionable recommendations to fix them and make the product even better.
Why do you need a UX audit?
A UX audit plays a crucial role in enhancing your product’s customer experience. It provides insights into areas like refining the user interface or streamlining hardware setup. These improvements can directly impact conversion rates and user retention. At every stage of your product’s journey, customer interaction is key.
Whether in development or already on the market, integrating a UX audit is essential. It’s not just about spotting issues; it’s about implementing actionable solutions to create a smoother user experience and foster loyalty.
How UX audits benefit businesses?
UX audits offer businesses numerous benefits. They enhance conversion rates by improving user experience and boost brand reputation through positive interactions. Moreover, it increases customer retention by personalizing experiences, improving SEO performance, and saving costs by identifying and fixing issues early. Here are few more benefits UX audit comes with,
Happier users
UX audits help identify and fix problems that make it difficult for people to use the website or app. This makes users happier because they can get things done easily and avoid frustration.
More conversions
A smoother experience often leads to more users taking desired actions, like making a purchase or signing up for a service. UX audits help optimize things like navigation and content to guide users towards these actions.
Better brand image
When people have a positive experience, they’re more likely to tell others and think favorably of the brand. UX audits can help build a strong brand reputation by ensuring positive user experiences.
Loyal customers
If users enjoy using the website, they’re more likely to come back. Create a smooth user journey with user audit that keeps people engaged and coming back for more.
Higher search ranking
Search engines consider how easy it is to use a website when ranking it in search results. UX audits can improve factors like loading speed and user engagement, which can lead to a higher search ranking and more website traffic.
Saving money
Fixing usability problems early on is cheaper than fixing them later. UX audits can help identify and address these issues before they cause problems and cost the business money.
When is the right time for UX auditing?
Basically, there are two main ways to approach UX audits including,
1. Proactive audits
These are planned checkups done at regular intervals, even if you aren’t experiencing any specific problems. This is a good way to catch small issues before they become big problems and to make sure your website is keeping up with user trends.
2. Reactive audits
These are done in response to a specific issue, such as a drop in user engagement or a high number of customer complaints. If you’re noticing signs that your UX might be suffering, a reactive audit can help you identify the root cause of the problem.
Here are a few instances where a UX audit could prove beneficial:
Before launching a new website or application: A UX audit helps identify and fix usability issues before product release, ensuring a smoother user experience.
After launching a new feature or major update: It’s important to make sure that new features don’t negatively impact the overall user experience. A UX audit can help you identify any areas where the update might be causing problems.
When you’re experiencing a decline in user engagement or conversion rates: This could be a sign that there are usability problems with your website. A UX audit helps identify problems and implement improvements to enhance the situation.
You’re considering a redesign of your website: A UX audit can be a valuable tool for informing your redesign process. It can help you identify the areas that need the most improvement and ensure that your redesign is user-centered.
You’re not sure how your website compares to the competition: A UX audit can help you benchmark your user experience against your competitors and identify areas where you can improve.
Why do you need to hire a professional UX team for the UX audit process?
Hiring a UX expert is vital for conducting UX audits to ensure digital products or services meet user needs effectively. UX auditing involves evaluating various aspects of a product’s usability, accessibility, and overall user experience.
Expertise and experience: The experts possess specialized knowledge and experience in assessing user interactions with digital interfaces. They are trained to identify usability issues, understand user behavior patterns, and recommend improvements based on best practices and industry standards.
Objectivity: A professional team provides an objective perspective on the usability of a product. Their evaluations are based on user-centered design principles rather than personal preferences or biases, ensuring that the audit findings are impartial and actionable.
Comprehensive evaluation: UX auditing involves examining multiple facets of a product, including navigation, layout, content organization, visual design, and accessibility. The experts conduct thorough evaluations across these areas for enhancement.
User-centric approach: The experts prioritize the needs and preferences of the target audience throughout the auditing process. They understand the user goals, behaviors, and pain points, to identify opportunities and optimize the user experience.
Strategic insights: Beyond identifying usability issues, UX professionals offer strategic insights to drive product improvement initiatives. They can provide actionable recommendations to increase task efficiency, and achieve business goals through improved UX design.
Conclusion
In conclusion, conduct regular UX design audits to ensure products meet user requirements with ease. While, detailed UX designs help auditors compare against criteria, targets, and KPIs during the first audit and beyond. This process allows organizations to continuously improve digital experiences, staying aligned with user expectations and strategic goals.
Thanks to advanced e-signature tools, there has been a shift away from traditional paper-based signatures. These tools and platforms streamline the signature collection process, from contracts to agreements, ensuring swift and secure transactions with digital solutions. Selecting the most suitable e-signature solution is important for ensuring smooth document signing experiences in business settings, guaranteeing efficiency and security throughout the procedure.
Excited to see what’s out there in the e-signature market? Check out our breakdown of 7 e-signature solutions, where we’ve considered factors like security, user-friendliness, integrations, and pricing flexibility.
Jotform Sign simplifies the creation of automated approval processes for e-signature documents, making secure document sharing and signing a breeze across all devices. With its intuitive drag-and-drop builder and extensive library of customizable templates, users can effortlessly create legally binding documents, including contracts and approvals. Jotform Sign offers real-time report generation, secure online document embedding, and seamless integration with Jotform Tables for efficient data management and insights. As an all-in-one electronic signature and document solution, Jotform Sign streamlines document processes and data management, featuring automated approval flows and versatile integrations with various external platforms.
Image source: www.jotform.com
With hundreds of templates and an intuitive design interface, users can easily customize documents without any coding knowledge, making it ideal for small businesses seeking efficiency. Documents are easily shared via a link or QR code and accessible from any smart device, ensuring full legal compliance with CCPA, GDPR, and PCI standards, with optional HIPAA compliance features available.
Features
Drag-and-drop builder
Easy sharing options
Strong security and compliance capabilities
Embeddable into websites
Document delegation
Live reports
Automated approval flows
A wide range of integrations
Easy data analysis
Pricing
Jotform’s pricing model is based on the level of form usage, granting access to all features across all plans except for those related to HIPAA compliance. Moreover, Jotform provides a 20% discount for annual subscriptions, which encompass four distinct plans.
Starter Plan: No charge fee with 10 sign limit
Bronze Plan: Monthly payment of $34 on a yearly subscription with 100 sign limit
Silver Plan: Monthly payment of $39 on a yearly subscription with 250 sign limit
Gold Plan: Monthly payment of $99 on a yearly subscription with 1000 sign limit
Jotform also offers an Enterprise Plan with exclusive features and terms. It’s worth noting that Jotform provides a 50% discount for educational institutions and non-profit organizations.
Signaturely provides a cloud-based e-signature platform to streamline document approvals for businesses. Key features include alerts, bulk sending, team oversight, version management, customizable branding, audit trail, and data import functionalities.
Users can either upload files or use premade templates to prepare documents, incorporating necessary fields to guide signers through the process. Signers conveniently receive documents via email and can access them remotely from any device. Managers can set up automatic reminders to keep track of documents that are waiting to be signed, already signed, or not signed yet. These documents can be kept together in one central place.
Image source: www.signaturely.com
Signaturely records digital imprints of signees’ interactions, including IP addresses, locations, names, and email addresses. Additionally, managers can monitor document views, signings, and transmissions. Integration with various third-party applications such as Dropbox, OneDrive, Google Drive, and Box is seamlessly offered.
Features
Legally binding e-signatures
Multiple document recipients
Custom signing order
Automated reminders
Guided signing
Bulk contact import
Pricing
Subscription options are available on both an annual and monthly basis.
Personal Plan: Yearly $240 payment with 5 per month signature requests.
Business Plan: Yearly $480 payment with unlimited signature requests.
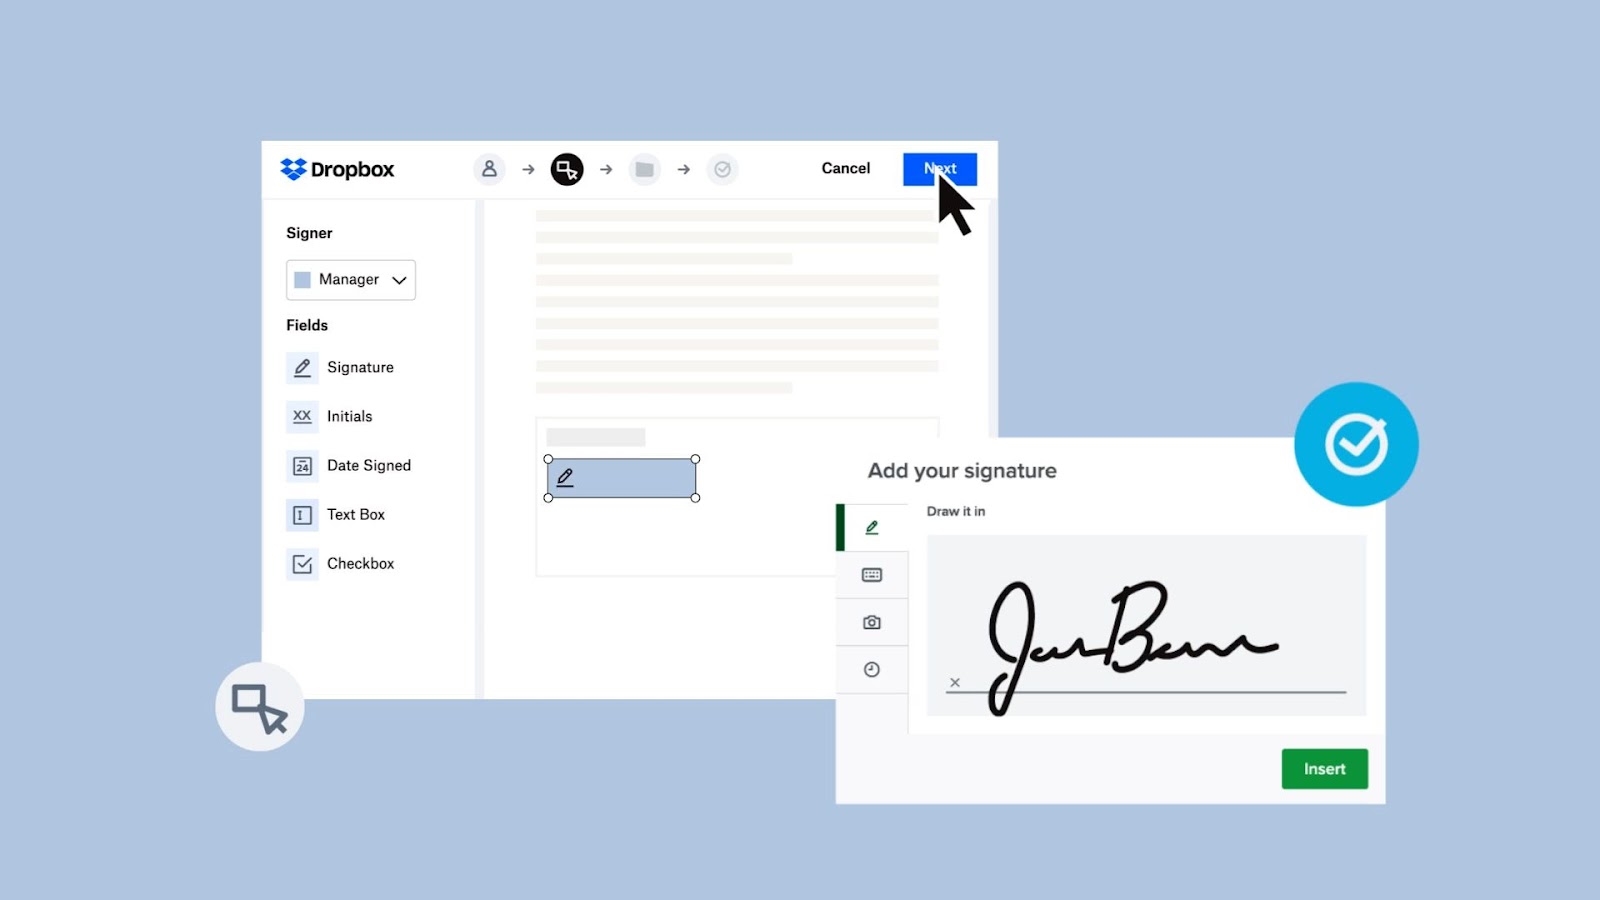
Dropbox Sign makes it easy to sign documents with its easy-to-use design and simple features. You can send, track, and get notifications for signed documents easily. It works well with Dropbox, so you can manage your files easily.
It offers features to help manage documents easily. You don’t need to print or scan documents and can send documents directly from your Dropbox account. You can also add more than one person to sign a document easily. It keeps your documents safe with encryption and lets you set when people can access them.
Image source: www.dropbox.com
Users can also work together easily with Dropbox Sign. Users can share and manage signed documents with colleagues, clients, or partners easily. You get updates in real-time about your documents, so you know when they are viewed, signed, or completed.
Features
Reusable templates
Mobile-friendly forms
No-code integrations
Customizable experiences
Pricing
Basic: Free trial plan
Plus: Monthly payment of $9.99 on a yearly subscription with 1 user limit
Essentials: Monthly payment of $18 on a yearly subscription with 1 user limit and unlimited sign requests
Business: Monthly payment of $20 on a yearly subscription with 3+ user limit recommended for teams
Business Plus: Monthly payment of $26 on a yearly subscription with 3+ user limit recommended for companies
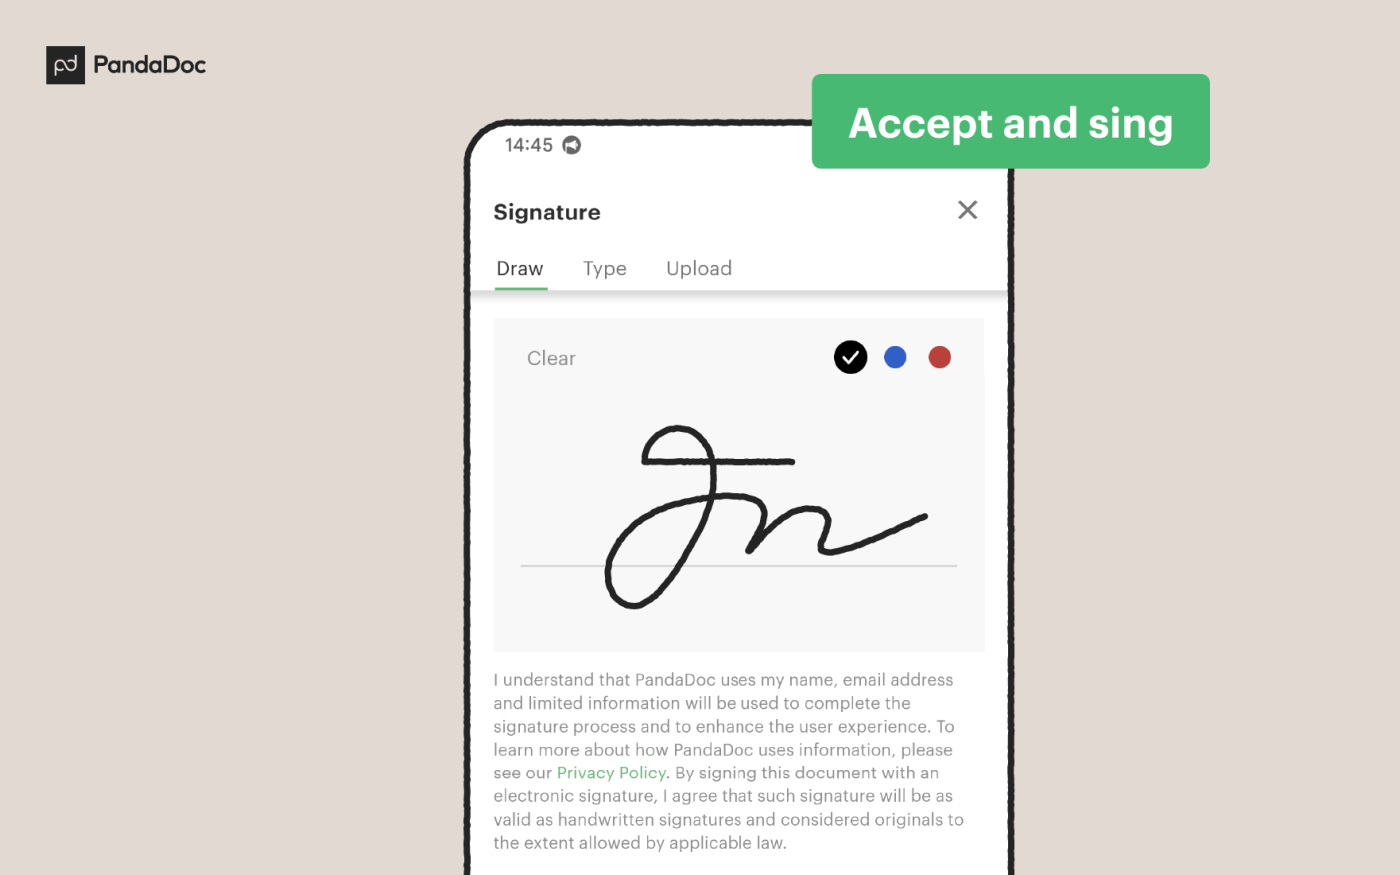
PandaDoc helps you get agreements faster with fewer delays. Its easy-to-use approval workflows reduce mistakes, so you can send agreements out quickly. With a clear signing order, you can get the signatures you need in no time.
Image source: www.pandadoc.com
Managing documents is also easy with PandaDoc. Instead of using multiple tools for electronic signatures, you can consolidate your workflow into one platform and upload, send, and eSign PDFs, DocX, and other files quickly. You can sign documents knowing they’re secure as PandaDoc provides a certificate of authenticity for each completed document. It offers recipient verification via passcode and SMS for added protection. Plus, your data is protected as PandaDoc is compliant with ESIGN, UETA, HIPAA, and SOC 2 Type II standards.
Features
Template options
Multiple languages
Real-time notifications
Custom branding
Pricing
Free: No fee charge with 14-day trial period Essentials: Monthly payment of $19 on yearly subscription with unlimited document uploads and e-signatures
Business: Monthly payment of $49 on yearly subscription with unlimited document uploads and e-signatures
Enterprise: Custom pricing with unlimited document uploads, single sign-on (SSO) and team workspaces
PandaDoc also offers a per-document pricing package with unlimited seats and you pay only for the documents you create.
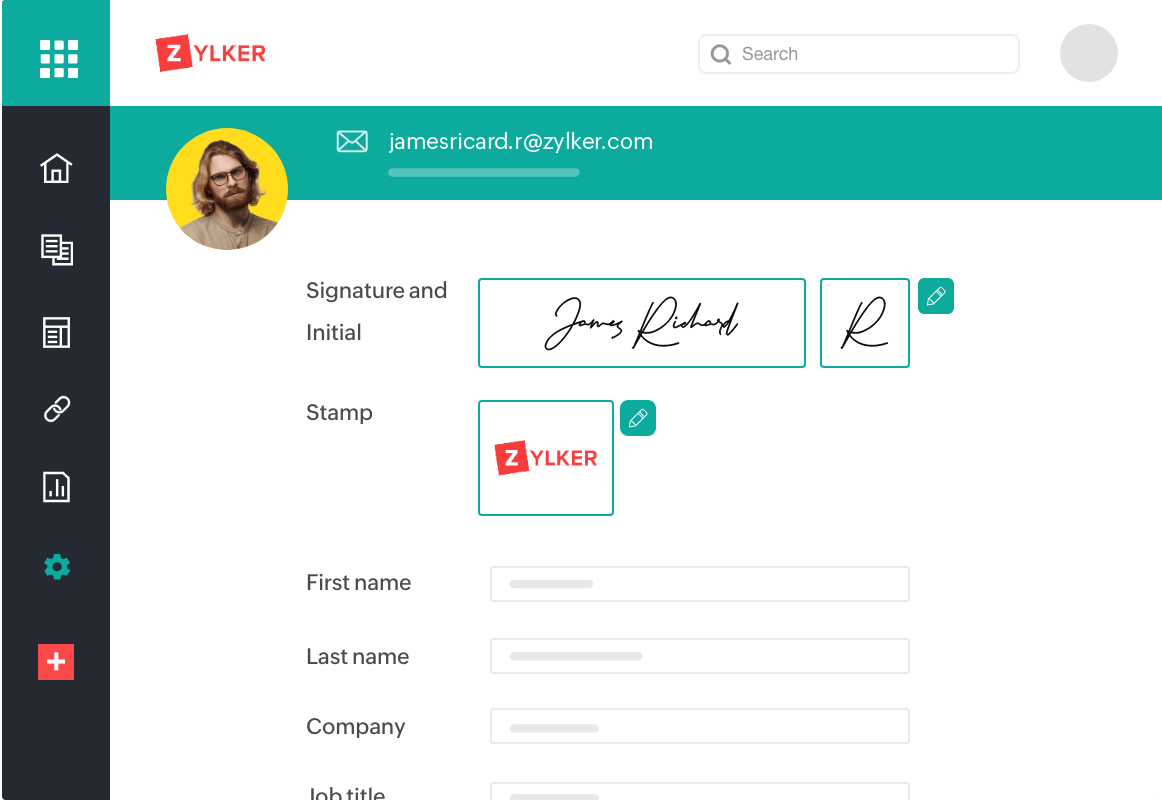
Zoho Sign is another valuable tool for businesses seeking efficient document signing solutions. Its user-friendly interface simplifies document uploads, signer additions, and signature requests, making the process easy for users and clients alike. With strong security measures like encryption and compliance with industry standards, such as SOC 2 Type II and GDPR, Zoho Sign ensures data integrity and confidentiality. Integrations with popular business applications like Zoho Suite and Microsoft Office streamline workflows, while multi-party signing capabilities enable smooth handling of complex document processes.
Image source: www.zohosign.com
Zoho Sign’s mobile app allows users to sign documents anywhere as well.
Features
Mobile accessibility
Easy-to-use interface
Handles complex processes easily
Multi-party signing capabilities
Advanced security measures
Pricing
Free: No fee charged for a single user and a 5 envelopes per month limit
Standard: Monthly payment of €10 on a yearly subscription with 25 envelopes per user per month
Professional: Monthly payment of €16 on a yearly subscription with unlimited envelopes per user per month
Enterprise: Monthly payment of €22 on a yearly subscription with the features of professional plus special features like payment collection and bulk send & bulk sign.
Acrobat Sign simplifies document signing with essential e-signature tools. Its user-friendly features like mobile accessibility streamline document management. Real-time notifications and mobile app support allow for efficient handling of signings wherever you are. Its integration with Microsoft 365 enhances workflow efficiency, allowing seamless document processing from familiar applications.
Additionally, Acrobat Sign’s automatic record-keeping guarantees secure storage of signed documents and audit trails. With features like agreement templates, mega sign for bulk sending, and branded experiences, Acrobat Sign offers a comprehensive solution for businesses seeking efficient and secure document signing processes.
Image source: www.adobe.com
Acrobat Sign prioritizes security and compliance with global regulations. Its authentication methods verify signer identities, ensuring secure transactions. Customizable workflow templates reduce errors and streamline the signing process. Moreover, Acrobat Sign’s extensive APIs enable easy integration with various applications, expanding its functionality. By simplifying compliance and offering secure e-signatures, Acrobat Sign empowers businesses to boost document signing processes with confidence.
Features
Tracking and management
Microsoft Office integration
Access and control reminders
Audit trail
Advanced security measures
Pricing
Adobe Acrobat Sign has 2 different pricing models for teams and individuals.
For Individuals
Adobe Standard: $12.99 monthly payment on an annual subscription
Acrobat Pro: $19.99 monthly payment on an annual subscription
For Teams
Adobe Standard: $14.99 monthly payment on an annual subscription
Acrobat Pro: $23.99 monthly payment on an annual subscription
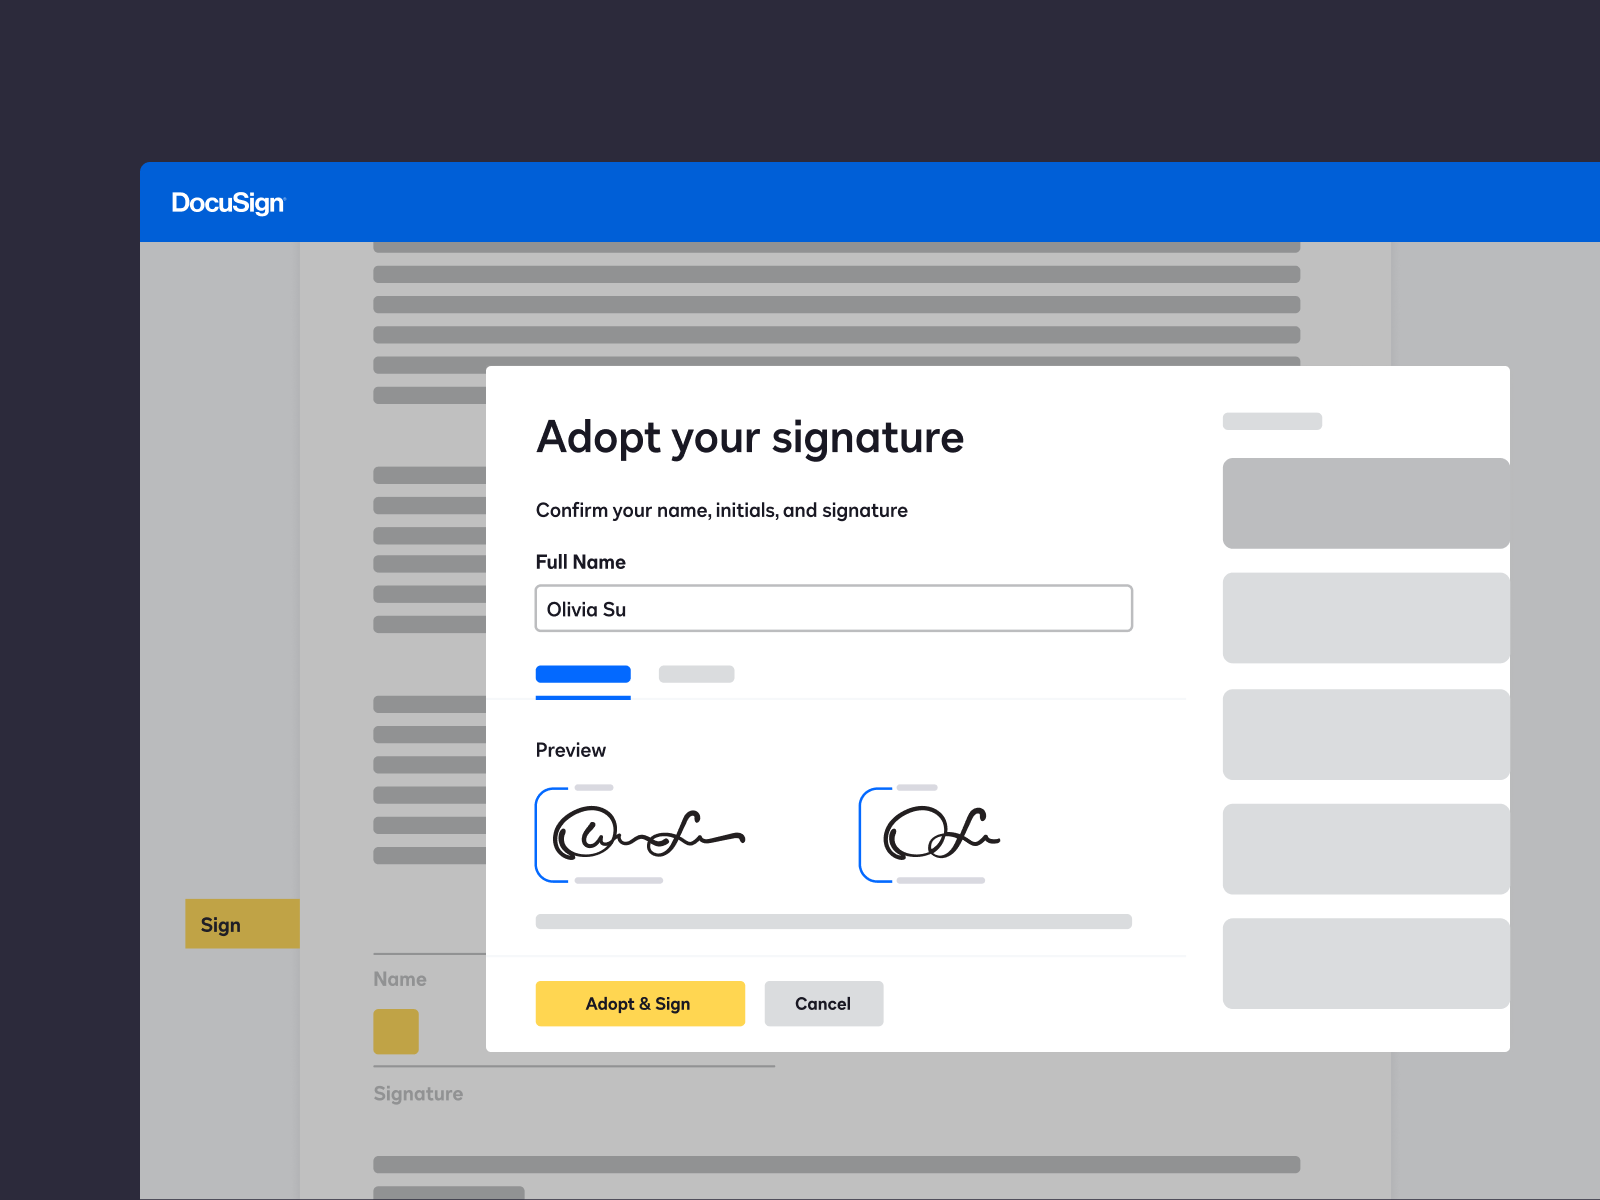
DocuSign efficiently oversees all signing transaction phases, from document preparation to signing and organization, delivering efficient results. Businesses benefit from time and cost savings with streamlined procedures. Emphasizing security, all transactions remain legally valid and traceable, supported by thorough audit trails.
The Individual Edition simplifies document handling for personal use, while the Business Edition automates workflows for SMBs, ensuring secure transactions from any location. Enterprises find value in DocuSign for the Enterprise, meeting rigorous IT standards while enhancing customer interactions.
Image source: www.docusign.com
The DocuSign mobile app facilitates document operations from any device, offering a comprehensive set of features including document assembly, data security, and signer authentication. Professional Services ensure a smooth transition to digital transactions, guaranteeing seamless implementation across departments or enterprise levels.
Features:
Multi-party signing
Document storage
Mobile signature capture
Authentication
Customizable templates
Pricing
Free: No charge trial
Personal: Monthly payment of $10 on a yearly subscription with 5 envelopes per month
Standard: Monthly payment of $25 on yearly subscription with additional features to a personal plan
Business Pro: Monthly payment of $40 on a yearly subscription with additional features like bulk send, payments, and signer attachments
Enhanced Solutions: Customize a pricing plan that scales to your special needs
Conclusion
E-signature tools offer improved efficiency and security for businesses. Notably, solutions like Jotform Sign have emerged with user-friendly interfaces and seamless integration capabilities. Whether for individuals or large enterprises, e-signature solutions are a vital piece of technology to streamline document management and ensure compliance. With features such as mobile access, multiple-party signing, and strong security, e-signature tools guarantee smooth transactions and contribute to business success today.
Many modern websites give users the power to set a site-specific color scheme preference. A basic implementation is straightforward with JavaScript: listen for when a user changes a checkbox or clicks a button, toggle a class (or attribute) on the element in response, and write the styles for that class to override design with a different color scheme.
CSS’s new :has() pseudo-class, supported by major browsers since December 2023, opens many doors for front-end developers. I’m especially excited about leveraging it to modify UI in response to user interaction without JavaScript. Where previously we have used JavaScript to toggle classes or attributes (or to set styles directly), we can now pair :has() selectors with HTML’s native interactive elements.
Supporting a color scheme preference, like “Dark Mode,” is a great use case. We can use a element anywhere that toggles color schemes based on the selected — no JavaScript needed, save for a sprinkle to save the user’s choice, which we’ll get to further in.
Respecting System Preferences
First, we’ll support a user’s system-wide color scheme preferences by adopting a “Light Mode”-first approach. In other words, we start with a light color scheme by default and swap it out for a dark color scheme for users who prefer it.
The prefers-color-scheme media feature detects the user’s system preference. Wrap “dark” styles in a prefers-color-scheme: dark media query.
Next, set the color-scheme property to match the preferred color scheme. Setting color-scheme: dark switches the browser into its built-in dark mode, which includes a black default background, white default text, “dark” styles for scrollbars, and other elements that are difficult to target with CSS, and more. I’m using CSS variables to hint that the value is dynamic — and because I like the browser developer tools experience — but plain color-scheme: light and color-scheme: dark would work fine.
:root {
  /* light styles here */
  color-scheme: var(--color-scheme, light);

  /* system preference is "dark" */
  @media (prefers-color-scheme: dark) {
    --color-scheme: dark;
    /* any additional dark styles here */
  }
}
Giving Users Control
Now, to support overriding the system preference, let users choose between light (default) and dark color schemes at the page level.
HTML has native elements for handling user interactions. Using one of those controls, rather than, say, a
nest, improves the chances that assistive tech users will have a good experience. I’ll use a menu with options for “system,” “light,” and “dark.” A group of would work, too, if you wanted the options right on the surface instead of a dropdown menu.
Before CSS gained :has(), responding to the user’s selected required JavaScript, for example, setting an event listener on the to toggle a class or attribute on or .
But now that we have :has(), we can now do this with CSS alone! You’ll save spending any of your performance budget on a dark mode script, plus the control will work even for users who have disabled JavaScript. And any “no-JS” folks on the project will be satisfied.
What we need is a selector that applies to the page when it :has() a select menu with a particular [value]:checked. Let’s translate that into CSS:
:root:has(select option[value="dark"]:checked)
We’re defaulting to a light color scheme, so it’s enough to account for two possible dark color scheme scenarios:
The page-level color preference is “system,” and the system-level preference is “dark.”
The page-level color preference is “dark”.
The first one is a page-preference-aware iteration of our prefers-color-scheme: dark case. A “dark” system-level preference is no longer enough to warrant dark styles; we need a “dark” system-level preference and a “follow the system-level preference” at the page-level preference. We’ll wrap the prefers-color-scheme media query dark scheme styles with the :has() selector we just wrote:
:root {
  /* light styles here */
  color-scheme: var(--color-scheme, light);

  /* page preference is "system", and system preference is "dark" */
  @media (prefers-color-scheme: dark) {
    &:has(#color-scheme option[value="system"]:checked) {
      --color-scheme: dark;
      /* any additional dark styles, again */
    }
  }
}
Notice that I’m using CSS Nesting in that last snippet. Baseline 2023 has it pegged as “Newly available across major browsers” which means support is good, but at the time of writing, support on Android browsers not included in Baseline’s core browser set is limited. You can get the same result without nesting.
:root {
  /* light styles */
  color-scheme: var(--color-scheme, light);

  /* page preference is "dark" */
  &:has(#color-scheme option[value="dark"]:checked) {
    --color-scheme: dark;
    /* any additional dark styles */
  }
}
For the second dark mode scenario, we’ll use nearly the exact same :has() selector as we did for the first scenario, this time checking whether the “dark” option — rather than the “system” option — is selected:
:root {
  /* light styles */
  color-scheme: var(--color-scheme, light);

  /* page preference is "dark" */
  &:has(#color-scheme option[value="dark"]:checked) {
    --color-scheme: dark;
    /* any additional dark styles */
  }

  /* page preference is "system", and system preference is "dark" */
  @media (prefers-color-scheme: dark) {
    &:has(#color-scheme option[value="system"]:checked) {
      --color-scheme: dark;
      /* any additional dark styles, again */
    }
  }
}
Now the page’s styles respond to both changes in users’ system settings and user interaction with the page’s color preference UI — all with CSS!
But the colors change instantly. Let’s smooth the transition.
Respecting Motion Preferences
Instantaneous style changes can feel inelegant in some cases, and this is one of them. So, let’s apply a CSS transition on the :root to “ease” the switch between color schemes. (Transition styles at the :root will cascade down to the rest of the page, which may necessitate adding transition: none or other transition overrides.)
Note that the CSS color-scheme property does not support transitions.
:root {
  transition-duration: 200ms;
  transition-property: /* properties changed by your light/dark styles */;
}
Not all users will consider the addition of a transition a welcome improvement. Querying the prefers-reduced-motion media feature allows us to account for a user’s motion preferences. If the value is set to reduce, then we remove the transition-duration to eliminate unwanted motion.
:root {
  transition-duration: 200ms;
  transition-property: /* properties changed by your light/dark styles */;

  @media screen and (prefers-reduced-motion: reduce) {
    transition-duration: none;
  }
}
Transitions can also produce poor user experiences on devices that render changes slowly, for example, ones with e-ink screens. We can extend our “no motion condition” media query to account for that with the update media feature. If its value is slow, then we remove the transition-duration.
:root {
  transition-duration: 200ms;
  transition-property: /* properties changed by your light/dark styles */;

  @media screen and (prefers-reduced-motion: reduce), (update: slow) {
    transition-duration: 0s;
  }
}
Let’s try out what we have so far in the following demo. Notice that, to work around color-scheme’s lack of transition support, I’ve explicitly styled the properties that should transition during theme changes.
Not bad! But what happens if the user refreshes the pages or navigates to another page? The reload effectively wipes out the user’s form selection, forcing the user to re-make the selection. That may be acceptable in some contexts, but it’s likely to go against user expectations. Let’s bring in JavaScript for a touch of progressive enhancement in the form of…
Persistence
Here’s a vanilla JavaScript implementation. It’s a naive starting point — the functions and variables aren’t encapsulated but are instead properties on window. You’ll want to adapt this in a way that fits your site’s conventions, framework, library, and so on.
When the user changes the color scheme from the menu, we’ll store the selected value in a new localStorage item called "preferredColorScheme". On subsequent page loads, we’ll check localStorage for the "preferredColorScheme" item. If it exists, and if its value corresponds to one of the form control options, we restore the user’s preference by programmatically updating the menu selection.
/*
 * If a color scheme preference was previously stored,
 * select the corresponding option in the color scheme preference UI
 * unless it is already selected.
 */
function restoreColorSchemePreference() {
  const colorScheme = localStorage.getItem(colorSchemeStorageItemName);

  if (!colorScheme) {
    // There is no stored preference to restore
    return;
  }

  const option = colorSchemeSelectorEl.querySelector([value=${colorScheme}]);

  if (!option) {
    // The stored preference has no corresponding option in the UI.
    localStorage.removeItem(colorSchemeStorageItemName);
    return;
  }

  if (option.selected) {
    // The stored preference's corresponding menu option is already selected
    return;
  }

  option.selected = true;
}

/*
 * Store an event target's value in localStorage under colorSchemeStorageItemName
 */
function storeColorSchemePreference({ target }) {
  const colorScheme = target.querySelector(":checked").value;
  localStorage.setItem(colorSchemeStorageItemName, colorScheme);
}

// The name under which the user's color scheme preference will be stored.
const colorSchemeStorageItemName = "preferredColorScheme";

// The color scheme preference front-end UI.
const colorSchemeSelectorEl = document.querySelector("#color-scheme");

if (colorSchemeSelectorEl) {
  restoreColorSchemePreference();

  // When the user changes their color scheme preference via the UI,
  // store the new preference.
  colorSchemeSelectorEl.addEventListener("input", storeColorSchemePreference);
}
Let’s try that out. Open this demo (perhaps in a new window), use the menu to change the color scheme, and then refresh the page to see your preference persist:
If your system color scheme preference is “light” and you set the demo’s color scheme to “dark,” you may get the light mode styles for a moment immediately after reloading the page before the dark mode styles kick in. That’s because CodePen loads its own JavaScript before the demo’s scripts. That is out of my control, but you can take care to improve this persistence on your projects.
Persistence Performance Considerations
Where things can get tricky is restoring the user’s preference immediately after the page loads. If the color scheme preference in localStorage is different from the user’s system-level color scheme preference, it’s possible the user will see the system preference color scheme before the page-level preference is restored. (Users who have selected the “System” option will never get that flash; neither will those whose system settings match their selected option in the form control.)
If your implementation is showing a “flash of inaccurate color theme”, where is the problem happening? Generally speaking, the earlier the scripts appear on the page, the lower the risk. The “best option” for you will depend on your specific stack, of course.
What About Browsers That Don’t Support :has()?
All major browsers support :has() today Lean into modern platforms if you can. But if you do need to consider legacy browsers, like Internet Explorer, there are two directions you can go: either hide or remove the color scheme picker for those browsers or make heavier use of JavaScript.
If you consider color scheme support itself a progressive enhancement, you can entirely hide the selection UI in browsers that don’t support :has():
@supports not selector(:has(body)) {
  @media (prefers-color-scheme: dark) {
    :root {
      /* dark styles here */
    }
  }

  #color-scheme {
    display: none;
  }
}
Otherwise, you’ll need to rely on a JavaScript solution not only for persistence but for the core functionality. Go back to that traditional event listener toggling a class or attribute.
The CSS-Tricks “Complete Guide to Dark Mode” details several alternative approaches that you might consider as well when working on the legacy side of things.
Do you struggle to track employees’ work hours effectively? Do you often face inefficiencies and errors associated with billing and payroll processing? Do you lack insight into employee productivity because of a lack of proper visibility into employees’ time?
Then, it’s time to shift to timesheets to capture employee work hours and associated activities.
This blog will uncover the basic use of timesheets and shed light on eight reasons organizations should invest in timesheets for maximum profitability.
What Is a Timesheet?
A timesheet is a tool that keeps track of employees’ work time data at the workplace.
Many organizations use traditional timesheets, such as paper-based timesheets, punch cards, spreadsheets, andeven Excel timesheet templates which are available online to track how employees spend their time and in which activities. However, these legacy systems require manual time entry of employees’ start and end times. These are also prone to errors that can lead to payroll discrepancies, inaccurate client billing, and even non-compliance issues.
“According to an EY report, each payroll error costs an organization around $291 on average to redeem directly or indirectly, and if a company regularly deals with such errors, they could? lose up to thousands of dollars each year.”
But, with the advent of technology, digital timesheets have become more popular options among digitally matured organizations that can capture employees’ work hours automatically without much human intervention and can also generate detailed reports to give a 360-degree view of where employees spend their time in which activities, and for how long.
This data can help employers ascertain employees’ productivity levels, calculate employees’ payroll, and generate client invoices. Thus, a digital timesheet can be a game changer for organizations by helping them with advantages, as mentioned below.
Why Timesheets are Essential to Your Organization
Task Prioritization With Work Time Data
Timesheets serve as a record of employees’ work hours and the time they spend on each task/project. Armed with the timesheet data, employers can ascertain how their resources’ time is being used across various tasks/projects.
With such analytics, employers can find out which projects consume more employee bandwidth and assess whether these projects are profitable. Among other things, this can help them make informed decisions regarding projects they need to prioritize and decide which ones can be done away with, considering they aren’t serving much value and consuming a lot of resource bandwidth.
Also, by analyzing the timesheet data, employers can deprioritize the tasks that take longer and are less significant than necessary.
In addition, managers can use timesheet data while assigning tasks, i.e., they can check the timesheets to see who is working on what tasks and who is available to take on some work. Thus, timesheets help in better task allocation and work distribution.
Prevent Cost Overruns
The data retrieved from timesheets serves as the cornerstone for future projects.
For instance, if you embark on a new project, you’ll need to estimate the approximate time, cost, and other variables, as an inaccurate estimation can lead to cost overrun, missed deadlines, and delays in project delivery.
However, organizations that use timesheets to record work time data can also leverage it for forecasting. For example, they can check the data of those projects with a similar nature that they’ve worked on previously to get estimates for future projects.
Simply put, you can leverage the work time data from previous project timesheets to estimate the approximate resources, time, and cost for future projects.
Thus, timesheet data serves as a reference for future projects and helps cut down unnecessary costs and labor.
Facilitate Client Billing
Clients that charge based on the number of hours can be billed accurately with a timesheet. The timesheet serves as proof for clients to show how much time was spent on their project.
By accurately tracking billable hours, employers can generate invoices based on the hours spent by resources on these client-specific projects to ensure accurate billing.
In the absence of such systems, erroneous data tracking can lead to under or over-billing, cost overruns, and damaged reputation, which eventually impacts relationships with clients.
With time-tracking software in place, employers can also generate detailed reports and share these with clients to help them understand how time was spent on different parts of the project and how their money was put to good use. This way, timesheets prevent billing errors, foster transparency, and build trust between employers and their clients.
Share Insights Into Employee Productivity
Timesheets help managers and employers ascertain productivity trends and performance levels.
Organizations often aim for 100% employee productivity levels; however, this goal doesn’t seem realistic. Administrative tasks, training courses, personal leaves, and long meetings often consume a lot of employee bandwidth and thus contribute to lowering their productivity.
Timesheets flag such areas of lower productivity so employers can discern the reasons behind the low productivity trends, areas of time wastage, and more.
For example, they can check which tasks are taking longer to complete, which ones they are able to do in a brief period, and which ones are insignificant or unproductive. This visibility helps them optimize and prioritize the tasks for better efficiency. For example, if some tasks are insignificant and consume a lot of employee time, they can consider deprioritizing such tasks to utilize employee time and bandwidth in a better way.
In addition, with the help of timesheets, managers can identify those resources who perform excellently in certain types of projects and use them where their skills are required.
On the other hand, employers can also identify those resources that are less skilled and usually take more time to complete certain tasks and can provide them with the necessary training to improve their performance.
Ensure Uniform Distribution of Workload
Timesheets provide a holistic view of the employee’s time, bandwidth, workload, and tasks allocated. Thus, employers can use this data for uniform work distribution.
In addition, if managers ascertain that the bandwidth of all resources has been used to its full potential, they can seek other ways to manage the workload, such as recruiting additional resources or hiring temporary freelancers.
Thus, a timesheet helps in fair workload distribution and addresses the organization’s staffing requirements.
Provide Visibility Into Absenteeism Pattern
Timesheets also show ‘time off data’, i.e., the number of days employees didn’t appear at work in a planned or unplanned way. Equipped with timesheet data, managers can try to identify the absenteeism patterns in employees by assessing if unscheduled absences have started becoming a trend.
There can be several reasons behind the absenteeism pattern, such as burnout, disengagement, poor health, lack of flexibility, difficulty in finding daycare for children, etc. Thus, management can have a session with employees who are showing signs of absenteeism, understand and vet their issues, and take necessary measures to reduce absenteeism and improve engagement.
Provide Analytical Data on Project Progress.
A timesheet gives visibility into the time and resources invested in a particular project and managers can compare it with the planned timeline to understand the project’s progress.
With the timesheet data, project managers can analyze if some of the tasks are taking too long or if there’s any bottleneck that is causing a delay in the project delivery. Thus, they can assist in addressing the potential roadblocks, optimizing the resources, and adjusting the workflow to ensure timely project delivery.
Facilitate Payroll Processing
Many organizations pay employees based on the number of hours they work, especially consultants and freelancers, who are paid on an hourly basis.
So, timesheet data serves as a record of how many hours employees worked in a day/week/month. This way, the administration can process an accurate payroll based on the employees’ work hours retrieved from the timesheets.
Also, timesheet data helps calculate how much employers should pay to contractors on a weekly or monthly basis based on the hours they worked for the organization. With timesheet software, employers can also meet payroll-related regulations around overtime, shift-based pay, and more, which helps them with compliance.
Bottom Line
Timesheets benefit employers in several ways, including payroll processing, accurate client billing, analyzing productivity trends, tracking project progress, etc. Many organizations have been using legacy timesheet systems, such as paper timesheets, spreadsheets, etc., to capture employees’ work hours. However, these timesheet systems are time-consuming and are prone to errors and even time theft.
Thus, many organizations are pivoting to time-tracking software that can accurately capture time spent by employees across several tasks/projects with minimum manual intervention. You can also leverage this software to avoid discrepancies in time tracking, billing, and payroll processing and make data-driven decisions to optimize workflows and enhance efficacy.
Hey all you wonderful developers out there! In this post, I am going to take you through creating a simple contact form using semantic HTML and an awesome CSS pseudo class known as :focus-within. The :focus-within class allows for great control over focus and letting your user know this is exactly where they are in the experience. Before we jump in, let’s get to the core of what web accessibility is.
Form Accessibility?
You have most likely heard the term “accessibility” everywhere or the numeronym, a11y. What does it mean? That is a great question with so many answers. When we look at the physical world, accessibility means things like having sharps containers in your bathrooms at your business, making sure there are ramps for wheel assisted people, and having peripherals like large print keyboards on hand for anyone that needs it.
The gamut of accessibility doesn’t stop there, we have digital accessibility that we need to be cognizant of as well, not just for external users, but internal colleagues as well. Color contrast is a low hanging fruit that we should be able to nip in the bud. At our workplaces, making sure that if any employee needs assistive tech like a screen reader, we have that installed and available. There are a lot of things that need to be kept into consideration. This article will focus on web accessibility by keeping the WCAG (web content accessibility guidelines) in mind.
The :focus-within CSS pseudo-class matches an element if the element or any of its descendants are focused. In other words, it represents an element that is itself matched by the :focus pseudo-class or has a descendant that is matched by :focus. (This includes descendants in shadow trees.)
This pseudo class is really great when you want to emphasize that the user is in fact interacting with the element. You can change the background color of the whole form, for example. Or, if focus is moved into an input, you can make the label bold and larger of an input element when focus is moved into that input. What is happening below in the code snippets and examples is what is making the form accessible. :focus-within is just one way we can use CSS to our advantage.
How To Focus
Focus, in regards to accessibility and the web experience, is the visual indicator that something is being interacted with on the page, in the UI, or within a component. CSS can tell when an interactive element is focused.
“The :focus CSS pseudo-class represents an element (such as a form input) that has received focus. It is generally triggered when the user clicks or taps on an element or selects it with the keyboard’s Tab key.”
Always make sure that the focus indicator or the ring around focusable elements maintains the proper color contrast through the experience.
Focus is written like this and can be styled to match your branding if you choose to style it.
:focus {
  * / INSERT STYLES HERE /*
}
Whatever you do, never set your outline to 0 or none. Doing so will remove a visible focus indicator for everyone across the whole experience. If you need to remove focus, you can, but make sure to add that back in later. When you remove focus from your CSS or set the outline to 0 or none, it removes the focus ring for all your users. This is seen a lot when using a CSS reset. A CSS reset will reset the styles to a blank canvas. This way you are in charge of the empty canvas to style as you wish. If you wish to use a CSS reset, check out Josh Comeau’s reset.
*DO NOT DO what is below!
:focus {
  outline: 0;
}

:focus {
  outline: none;
}
Look Within!
One of the coolest ways to style focus using CSS is what this article is all about. If you haven’t checked out the :focus-within pseudo class, definitely give that a look! There are a lot of hidden gems when it comes to using semantic markup and CSS, and this is one of them. A lot of things that are overlooked are accessible by default, for instance, semantic markup is by default accessible and should be used over div’s at all times.
<header>
  <h1>Semantic Markup</h1>
  <nav>
    <ul>
      <li><a href="/">Home</a></li>
      <li><a href="/about">About</a></li>
    </ul>
  </nav>
</header>

<section><!-- Code goes here --></section>

<section><!-- Code goes here --></section>

<aside><!-- Code goes here --></aside>

<footer><!-- Code goes here --></footer>
The header, nav, main, section, aside, and footer are all semantic elements. The h1 and ul are also semantic and accessible.
Unless there is a custom component that needs to be created, then a div is fine to use, paired with ARIA (Accessible Rich Internet Applications). We can do a deep dive into ARIA in a later post. For now let’s focus…see what I did there…on this CSS pseudo class.
The :focus-within pseudo class allows you to select an element when any descendent element it contains has focus.
The example code above will add a background color of orange, add some padding, and change the color of the labels to black.
The final product looks something like below. Of course the possibilities are endless to change up the styling, but this should get you on a good track to make the web more accessible for everyone!
Another use case for using :focus-within would be turning the labels bold, a different color, or enlarging them for users with low vision. The example code for that would look something like below.
:focus-within also has great browser support across the board according to Can I use.
Conclusion
Creating amazing, accessible user experience should always be a top priority when shipping software, not just externally but internally as well. We as developers, all the way up to senior leadership need to be cognizant of the challenges others face and how we can be ambassadors for the web platform to make it a better place.
Using technology like semantic markup and CSS to create inclusive spaces is a crucial part in making the web a better place, let’s continue moving forward and changing lives.
Writing is by far at the heart of everything. In school, at work, or in business, being able to deliver your ideas clearly and effectively in written form is crucial for success and growth. No wonder people say that writing is the most transferable creative skill.
Still, despite its importance, many people have a love-hate relationship with writing. Professionals tend to procrastinate on tasks that involve writing in the workplace. Students are constantly seeking professional essay writer services to avoid such tasks, too, and so on.
But what if you could master this art without a hassle?
Without a doubt, it would help you achieve more in school and at work. But how do you do this? – We believe that reliable writing tools can help!
What Are Online Writing Tools?
This is a generalized term used to describe all kinds of apps, software, and tools that provide writing aid. These can include grammar checkers, editors, writing services, and many others.
Although the types and purposes of such writing tools can vary significantly, their core aims remain the same. These tools are there to help you write faster, easier, and better.
Who Needs Online Writing Tools?
If you are wondering whether you should actually seek cutting-edge tools to assist you with your writing, in most cases, the answer is yes. In today’s digitized world, written communication plays an enormous role. Thus, whenever you are texting a friend, writing a business email, making a resume, or crafting an academic paper, you want to ensure that your writing is error-free. After all, mistakes and typos can create a poor impression of you and harm your reputation.
Given it all, we can confidently state that online writing tools can come in handy for everyone. Yet, they are must-haves, in particular, for:
Professional writers;
School and college students;
Business people;
Professionals who deal with lots of written communications, etc.
If you fall into any of these categories, a solid writing tool can improve the quality and efficiency of your writing. At the same time, it can automate repetitive tasks and, hence, boost your productivity.
Online Writing Tools: Top 5 Picks for 2024
Now that you know what they are and why you need online writing tools in your life, work, and studies, you must be wondering how to find tools that will actually help. Unfortunately, making a well-informed choice is quite hard due to a large pool of available options. But we have you covered!
We have carefully analyzed the most trending tools to pick the top five you can count on in 2024. Read on to learn more about each of our top-rated solutions.
Grammarly is a product offered by a Ukrainian company that went viral all across the globe. The app was launched in 2009, aiming to help people of all ages and statuses to communicate effectively and simplify writing.
Today, the app is used by over 30 million users. It seamlessly integrates with web browsers and various tools, including Gmail, Microsoft Word, LinkedIn, X, and many others.
The app enables you to detect and correct mistakes as you write, proofread, and edit ready-made texts. It boasts a wide variety of features, such as grammar check, punctuation check, style analysis, and many others.
Grammarly Features
Instant, in-depth text analysis
Grammar, punctuation, and spelling check
Style and tone of voice suggestions
Plagiarism detection
Generative AI
Integration with popular sites, apps, and software
Prices
Free – Can be used forever with some functionality limitations.
Premium – $30/mo or $12/mo if billed annually.
Business – $25/mo per member or $15/member/month if billed annually.
Pros and Cons
Pros:
Intuitive and easy-to-use interface
The possibility to use the app for free
Fast and efficient editing
Handy additional features
Over 500,000 available integrations
Cons:
Limited functionality in the free version
Not all detected mistakes are accurate
No 24/7 customer support chat
Customer Reviews
Grammarly boasts thousands of customer reviews and fairly high ratings across trusted review sites – 4.5/5.0 on Sitejabber and 4.6/5.0 on Trustpilot. Overall, more than 70% of users rate the app with 4.0 stars and higher. This indicates a solid reputation and customer satisfaction.
The Hemingway Editor or Hemingway App was launched in 2013. Initially, it was designed as a free online writing editor that helps users make their texts clear, bold, and easy to read. Today, the tool is also available in a desktop version, which you can purchase with a one-time payment.
Unlike our previous suggestion, Hemingway doesn’t check the grammar, punctuation, and other mistakes in your text. Instead, it analyzes your text for readability. The app highlights weak writing, including excessive use of passive voice or adverbs, overly complicated constructions, etc.
Hemingway Editor Features
Distraction-free writing and editing
Readability score assessment
Suggestions on complex phrases, passive voice use, hard-to-read sentences, and adverbs
AI rewriting tool
Basic formatting features
Prices
Web version – Completely free.
Desktop version (Mac or Windows) – A $19.99 one-time payment.
Extra note: If you want to use AI-powered Hemingway Editor Pro, the cost varies from $10 (5K sentences) to $15 (10K sentences) per month. The price decreases if you pay annually. The team plan costs $15 per month per user.
Pros and Cons
Pros:
Simple and distraction-free writing space
No monthly subscriptions or extra charges
Customized settings
If you want a Pro plan, there is a free trial
Great for improving readability
Cons:
AI assistance requires a subscription plan
No grammar, punctuation, or style suggestions
Customer Reviews
For some reason, the Hemingway App doesn’t have too many reviews on the web. It has a 3.1/5.0 rating on Trustpilot based on 2 reviews and 4.4/5.0 on Getapp based on 11 reviews. Based on customer testimonials, we could see that many users just don’t get Hemingway. Nevertheless, those who have mastered the tool give it quite positive reviews.
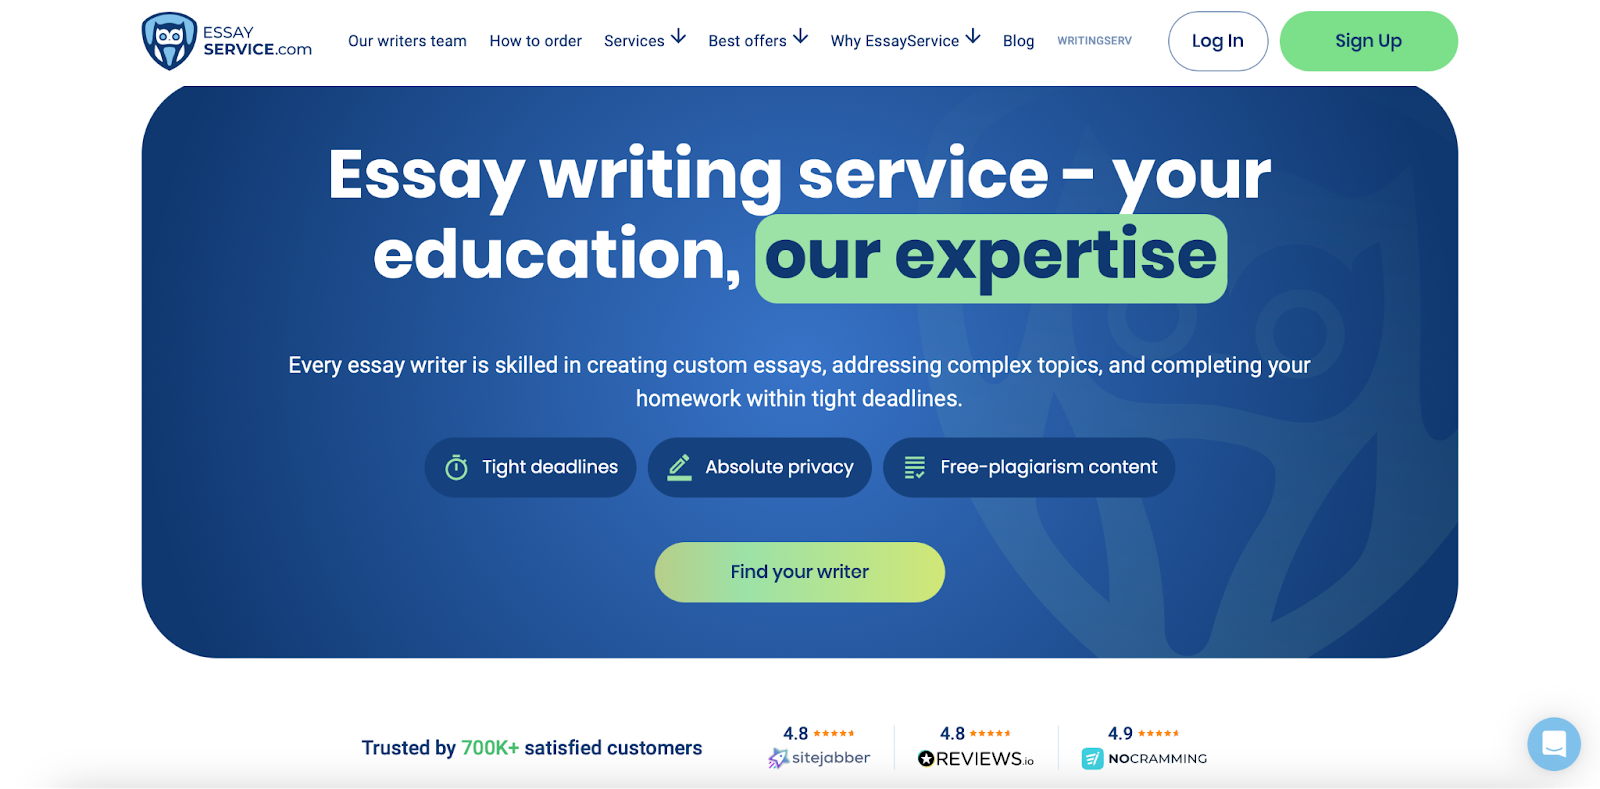
Our next pick, EssayService, is not like the previous tools on this list. The company was founded in 2012 and has been helping students nail their academic papers and homework tasks for over ten years already.
As you can see, EssayService is a professional academic writing service. The company provides writing, rewriting, and editing assistance with different types of papers and tasks, including essays, dissertations, lab reports, multiple-answer questions, and many others. It covers all academic levels and nearly all disciplines. All these perks make it a perfect choice for students, in particular.
Nevertheless, though EssaysService specializes in helping students, its services can come in handy for other customers, too. For example, the company can help you write a business plan or proposal, marketing plan, letter, speech, etc. The site can also help you prepare a PowerPoint presentation or handle any other creative writing task.
EssayService Features
Help with writing from top-rated writers
Professional rewriting and editing assistance
Time-bound task completion and a guarantee of timely delivery
Prices
The cost of EssayService depends on multiple factors, including the type of help you request, the type of paper/task you need to handle, the selected deadlines, and the number of pages. The company has a convenient online calculator that will let you estimate the cost of your order. But here are some starting rates for you to understand EssayService better:
Writing – From $11.4 per page;
Rewriting – From $7.98/page;
Editing – From $5.7/page.
Extra note: The service offers bulk discounts on all orders. So the more pages you include in your order, the bigger the discount (up to 40%) you will get.
Pros and Cons
Pros:
A versatile tool for different academic and professional needs
A large pool of expert writers with advanced degrees and years of experience
Fast delivery
The possibility of choosing a suitable writer
Around-the-clock support
Flexible deadlines that start from only 3 hours
Cons:
Using EssayService, you will get many bids from writers, which can challenge the choice of a suitable expert
Sometimes, you may want to change something in your order; luckily, the company offers free and unlimited revisions
Customer Reviews
EssayService boasts an incredible reputation. The company receives high ratings on trusted review sites – 4.8/5.0 on Sitejabber, 4.8/5.0 on Reviews io, and 4.9/5.0 on NoCramming. The site is trusted by over 700K customers, the majority of which give it positive feedback, emphasizing the company’s professionalism, affordability, and reliability.
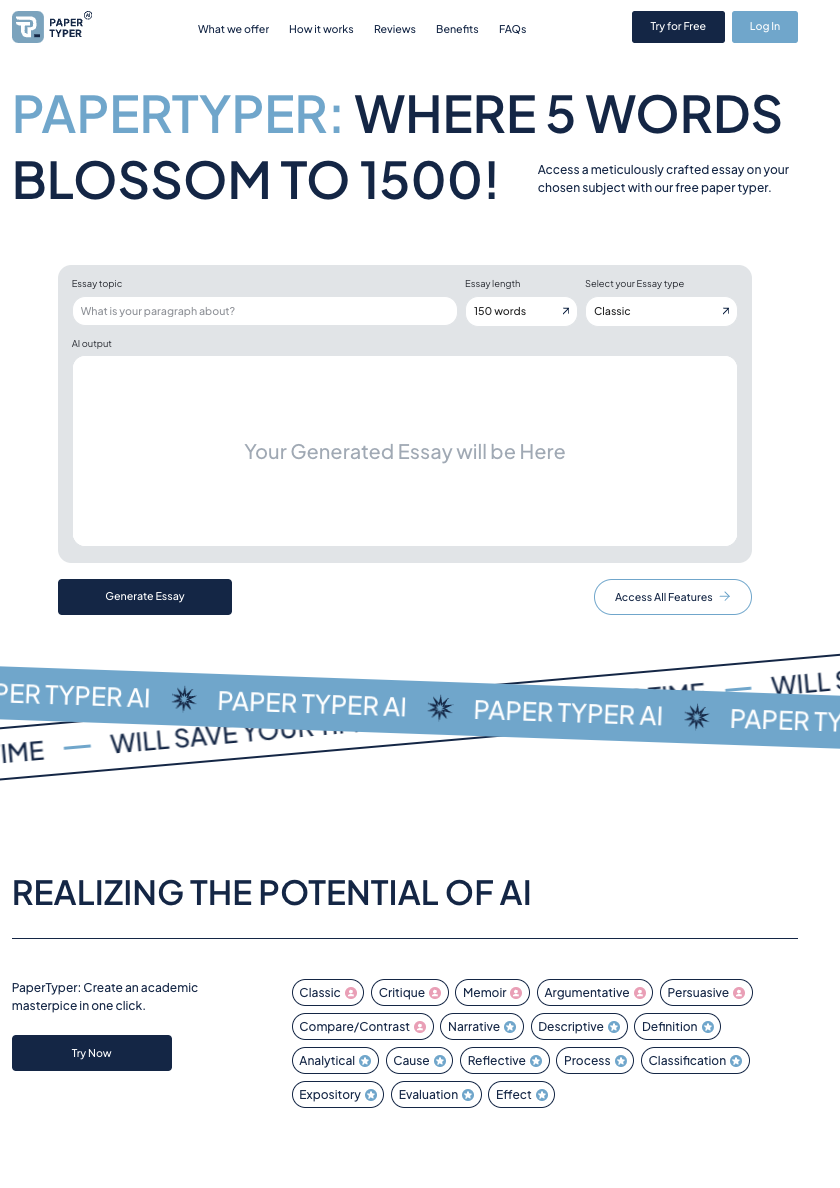
Our next top choice for 2024 is PaperTyper.Ai. The entire site is more academic-focused, which makes it a great choice for students. It contains a full set of AI-powered tools aimed at helping you write better and easier. Namely, the available tools include a grammar checker, AI essay writer, plagiarism checker, etc. All tools can be used free of charge.
On top of free tools, PaperTyper. offers users custom help with writing, proofreading/editing, and calculations. The site also has examples of how to avoid plagiarism if you use text-generation services for essays.
Extra note: Although the site is primarily academic-focused, we believe that its tools and features can also be used for other purposes.
PaperTyper.Ai Features
AI paper generator
Advanced plagiarism checker
Grammar checker
Citation generator
Custom academic writing from qualified writers
Prices
All writing tools are free of charge.
Pros and Cons
Pros:
An all-in-one set of writing, editing, and citing tools
Academic-focused tools perfect for students
The possibility to request custom help from professional writers
Affordable rates
A special discount for new users
Cons:
The company doesn’t showcase its writers and their backgrounds
Support is only available via email and is not 24/7
Customer Reviews
PaperTyper.Ai boasts 100K active monthly users with over 30K customers who come back for custom writing services. The company has a fairly good reputation on the web. On Sitejabber, it has a rating of 3.8/5.0 stars based on 68 reviews, whereas Trustpilot rates it with 4.6 stars based on 29 reviews.
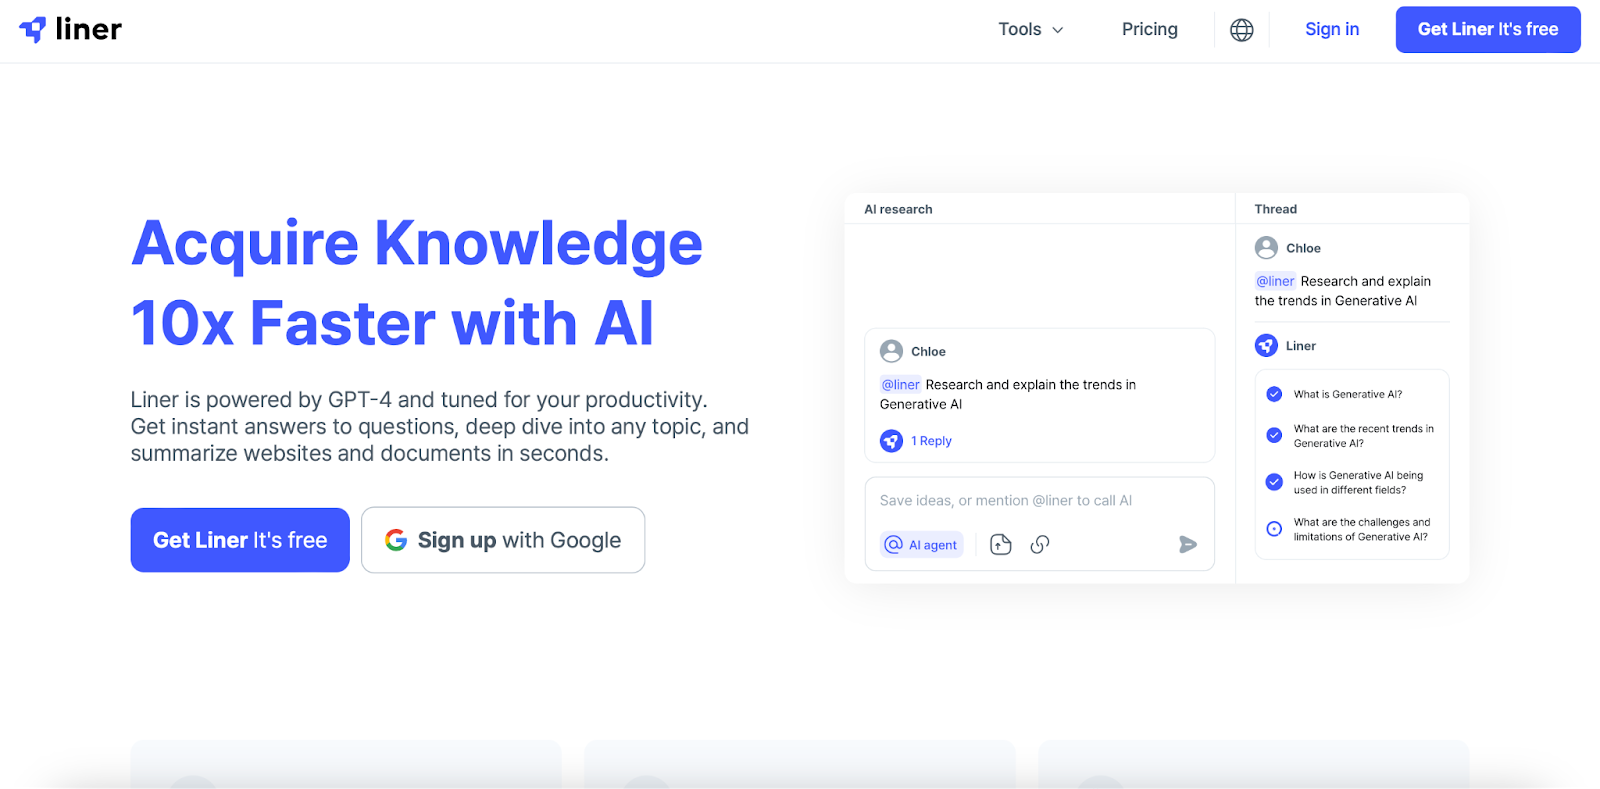
Finally, the last recommendation on our list is Liner. This tool is much different from the others we shared with you here. Liner is a full-fledged AI-powered agent. The tool was founded back in 2012. It was designed to help users streamline their everyday tasks and boost productivity.
Featuring the latest version of GPT-4, Liner can perform a variety of things, including answering your questions, conducting research on your behalf, making compelling summaries for articles or documents in seconds, and much more.
The tool can be used online or as an extension. Speaking about writing, the tool can come in handy for generating ideas, proofreading and editing your texts, and even creating new pieces of content with no effort.
Liner Features
AI summarizer (for videos, articles, PDFs, and documents)
PDF assistant that helps summarize PDF files and extract key insights in no time
YouTube video summarizer
AI chatbot
AI image reader
AI writing assistant that provides suggestions on grammar, tone, and delivery
Prices
Basic – Free
Essential – $25.99 per month or $19.58 if billed annually
Professional – $35.99/month or $27.08 if billed annually
Workspace – Custom price
Extra note: If you choose to switch to a Professional plan, you can test it with a 14-day free trial. Unfortunately, the trial period is not available for other paid plans.
Pros and Cons
Pros:
Versatile AI-powered tool
Wide selection of features for all users and purposes
The possibility to use the tool free of charge
Free trial for the Professional plan
A convenient mobile app and browser extension
Cons:
High prices for paid plans compared to other tools on our list
No free trial for the Essential plan
Customer Reviews
Liner isn’t quite as famous as Grammarly, EssayService, and other tools on our list. Nevertheless, it boasts a whopping 10M+ users across 200+ countries. The service has a fairly high rating of 4.6 stars out of 5 on ProductHunt and good reviews across other trusted platforms.
The Bottom Line
Writing is a crucial art that comes in handy in studies, work, and many everyday situations. Nevertheless, the majority of people tend to struggle with it throughout their entire lives. But we believe that it doesn’t have to be like that.
In today’s digital era, writing is made simple with the help of cutting-edge writing software and apps. Now, you have a list of our favorite online writing tools for 2024. Be sure to give them all a try and finally take your writing to the next level while also saving your time and boosting productivity!